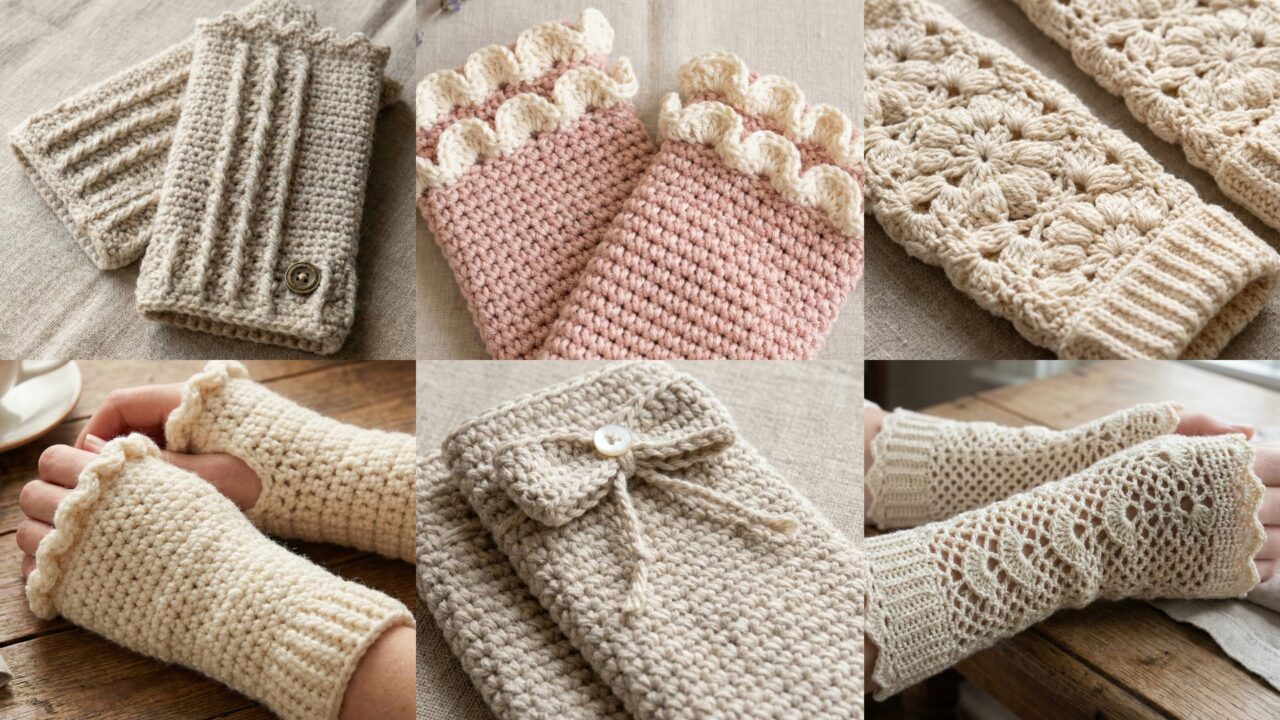
Wrist warmers are a lovely little accessory: cozy, quick to make, and endlessly customizable. They’re great layered under jackets, perfect for typing in chilly cafés, and make wonderful handmade gifts. Below you’ll find a full blog-ready post with a practical introduction (tools, sizing, gauge, common constructions), then six long, detailed wrist-warmer patterns — Victorian Lace, Clotted Cream Cuffs, Ruffles, Floral, Bow, and Vintage — each with materials, a worked example (Medium), step-by-step instructions, finishing tips, and variations. The language is clear and human — written so your readers can follow and adapt easily.
Introduction — tools, yarn, gauge, fit & common abbreviations
Tools & notions
- Crochet hooks: commonly 3.0–4.5 mm for wrist warmers (choose hook to achieve the fabric you want).
- Yarn: cotton blends and wool blends both work; for cozy winter wear choose DK / light worsted (category 3–4) or hold two strands of fingering for a denser fabric. For delicate lace look use fingering or sport weight.
- Notions: tapestry needle, stitch markers, measuring tape, small elastic (optional, for a hidden band), and blocking pins/mat.
Sizing & fit basics
- Measure the wrist circumference where the wrist warmer will sit (often at the narrow point just above the wrist bone). Also measure lower palm circumference if you want a snug fit and the distance from wrist to where you want the warmer to end (length). Example Medium wrist measurement used for worked examples below: 6.5 inches (16.5 cm) circumference and length ~6 inches from wrist to mid-forearm. Always swatch and measure your own wrist when making as a gift.
Gauge & how to compute a foundation
- Always swatch in the stitch you plan to use (the fabric choice — sc vs lace — affects stretch and therefore fit). Example gauge used in several sample calculations below: 18 sc = 4 inches (so 4.5 sc per inch). To compute stitches for a wrist circumference: multiply stitches-per-inch × wrist circumference.
- Example: 4.5 sc/in × 6.5 in = 29.25 → round to 29 stitches as a starting point. If the pattern stitch requires a repeat (for example a multiple of 8), adjust up/down to the nearest multiple and re-measure fit on a test tube.
Common constructions & thumb options
- Tube (no thumb hole): work a tight tube and leave the top open — quickest, often worn pushed up.
- Thumb opening (slit): work a seam or leave a small opening (e.g., skip X stitches and rejoin) then finish edges to form a thumb hole.
- Buttoned cuff / flap: decorative cuff that buttons over thumb area.
- Folded cuff or casing: a row worked in back loop only and folded creates a tidy cuff; you can insert narrow elastic if you want a super-secure fit.
Abbreviations (US)
- ch = chain
- sl st = slip stitch
- sc = single crochet
- hdc = half double crochet
- dc = double crochet
- tr = treble crochet
- st(s) = stitch(es)
- rep = repeat
- sp = space
- inc = increase (work 2 sts in same st)
- dec = decrease (work two together)
- BLO / FLO = back loop only / front loop only
- RS / WS = right side / wrong side
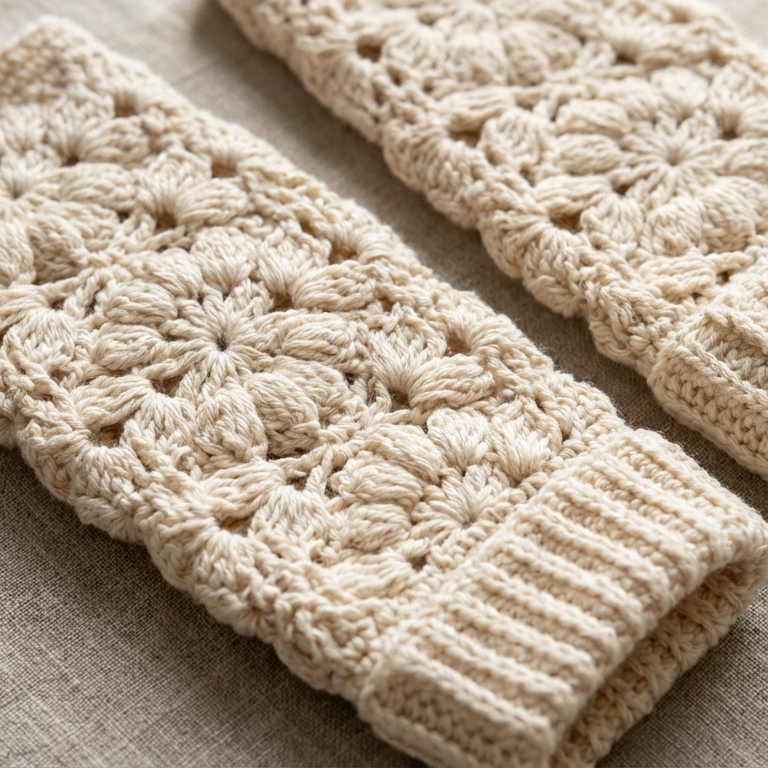
1. Crochet Victorian Lace Wrist Warmers Pattern
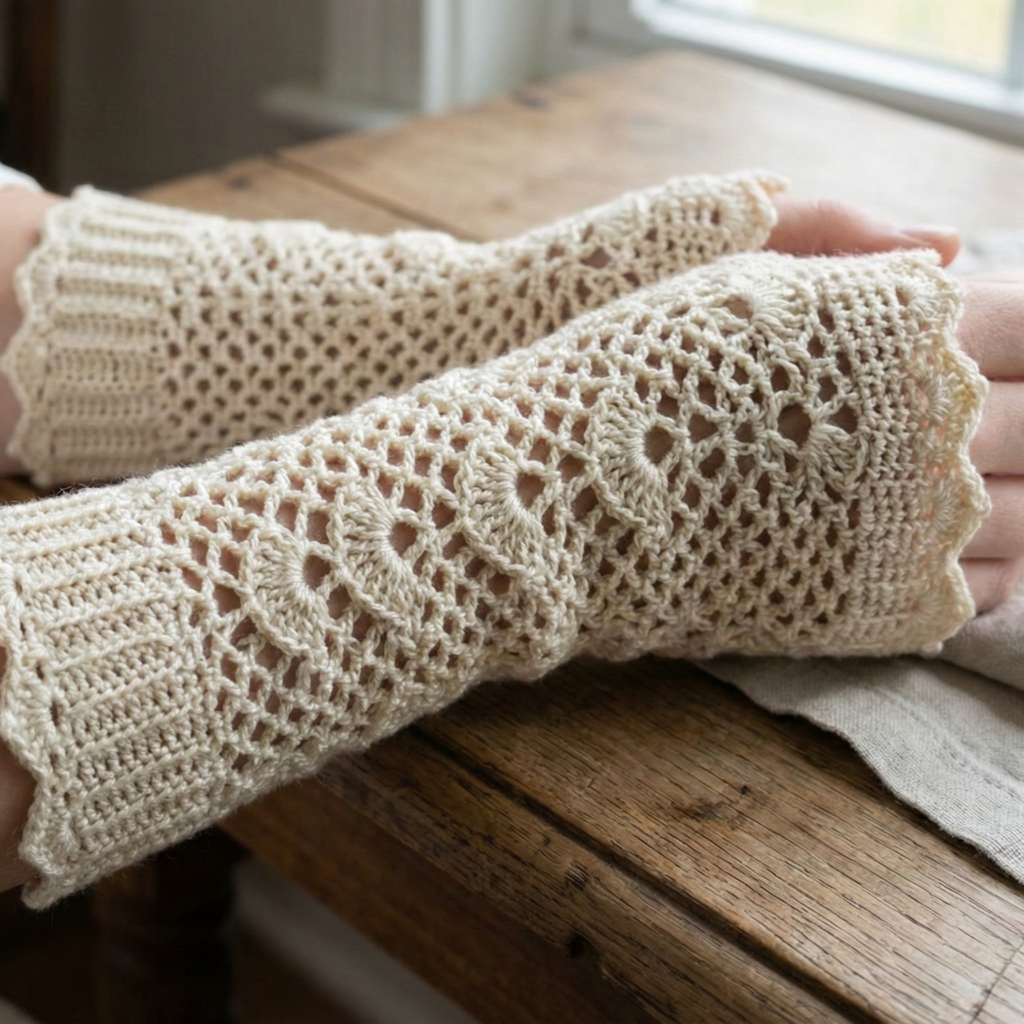
Lacy, romantic, and lightweight — perfect for layering over long-sleeve blouses or for a touch of vintage elegance.
Skill level: intermediate (lace stitch + neat finishing)
Materials (Medium example)
- Fingering or sport-weight cotton/wool blend — ~100–150 yd per pair.
- Hook: 3.5 mm (adjust to your gauge).
- Tapestry needle, blocking pins.
Sample gauge used (for example math)
- 18 sc = 4 in → 4.5 sc per inch. For a 6.5 in wrist: 4.5 × 6.5 = 29.25 → round to 29 stitches (adjust to nearest pattern repeat as needed).
Finished (Medium)
- Circumference (unstretched): ~6.5 in; Length: 6 in (wrist → mid-forearm); Lace is airy, so it will have some stretch.
Stitch notes (pattern concept
- Band: narrow rib (BLO hdc) for a tidy cuff.
- Body: a repeating lace motif (mesh + small shell clusters).
- Thumb opening: created by leaving a 2–3 stitch gap and working a small turned band.
Step-by-step
1) Foundation chain / join
- Make a chain that matches your computed stitch count. Using the example: ch 29, join carefully to form a loop (avoid twist). Place marker at join. (If your pattern repeat needs a different multiple, adjust chain to nearest compatible count and check circumference.)
2) Ribbed cuff (BLO hdc band — 8 rows)
- R1: ch 1, BLO hdc in each ch around (29 BLO hdc). Join.
- R2–R8: repeat BLO hdc. This creates a foldable, tidy cuff you can fold up or down. Optionally fold and whipstitch the inner edge to make a casing for narrow elastic.
3) Transition round
- Switch to main lace yarn (or continue same color) and work one round in sc to anchor the lace pattern: ch 3 (counts as dc), dc around evenly, join.
4) Lace chart (repeat)
The Victorian lace motif used here is a 6-round repeat; written description (no chart) — repeat across round:
- R1 (establish): ch 3, skip 2, (dc 3) in next st, ch 3, sl st in top of next dc — this sets a spaced motif of petals.
- R2: dc in the chain spaces, ch 2, sc at small anchor points (this closes petals).
- R3: work small shells (5 dc) in designated spaces separated by sc to create a scalloped row.
- R4: simple mesh row of (dc, ch 1, skip 1) to open fabric.
- Repeat R1–R4 until desired length is reached (about 4–5 in measured from top of cuff).
Practical alternative: use a simple repeating (ch 3, sc) mesh: Round: sc 1, ch 3, sk 1 — easier for beginners.
5) Thumb opening (optional)
When piece is about 0.5–1 in from desired height, set marker where you want the thumb (usually inner wrist). On that round, work to thumb marker, ch 3 (or ch equal to number of sts you want the gap), skip same number of sts, continue pattern — on next round work back into the ch loop to make a reinforced thumb edge, or work short rows around the gap to form a small thumb tube.
6) Top edge & scallop
Finish with a delicate scallop round: sc, picot, sc or shell edging: sc, skip 2, 5 dc in next st, skip 2, sc — one round creates a Victorian scallop.
7) Weave & block
Weave in ends thoroughly and wet block to open the lace and set shape. Pin onto a flat block or a cylindrical form to maintain diameter while blocking.
Variations & tips
- Hold a lace mohair strand with fingering yarn for ethereal halo.
- Make shorter gauntlets by reducing lace rounds by 2–3.
- For more warmth, use worsted and a denser lace repeat.
2. Crochet Clotted Cream Cuffs Wrist Warmers Pattern
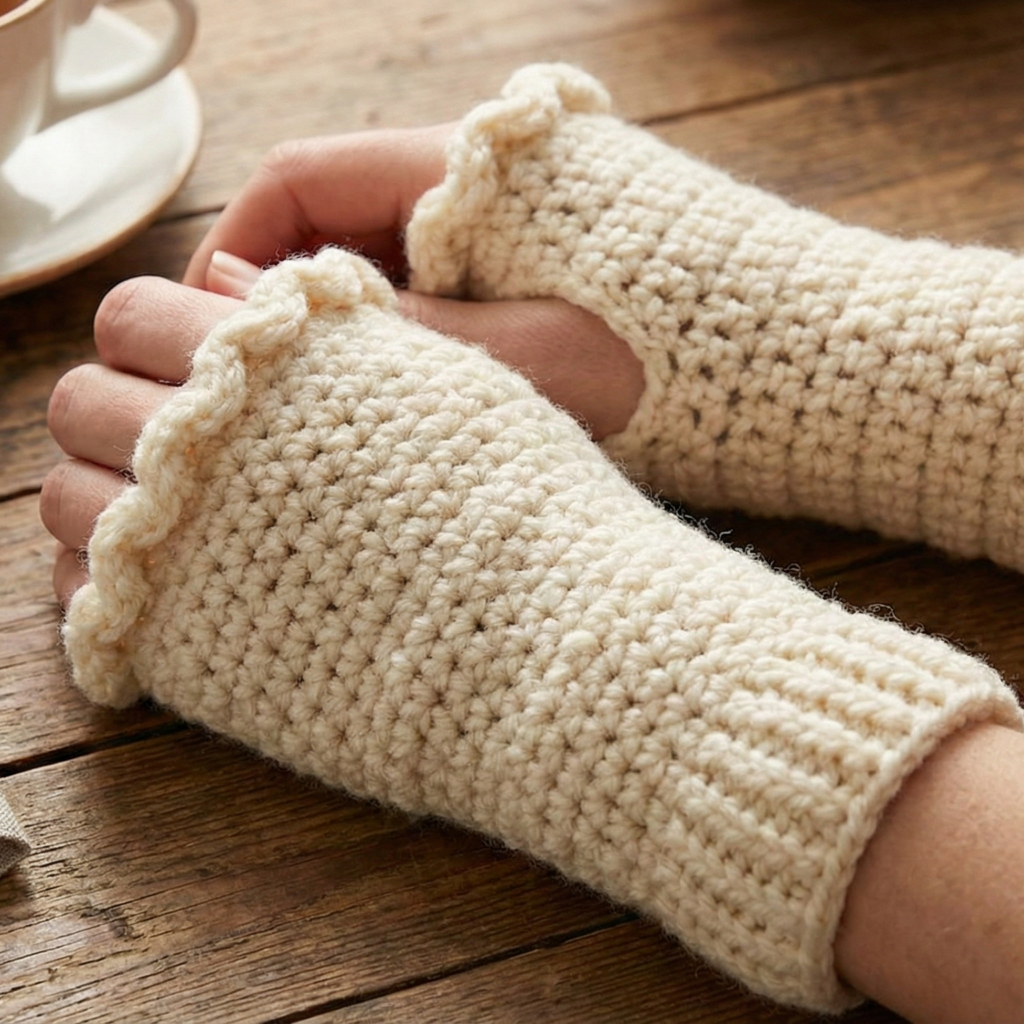
Soft, dense fabric with a cozy rolled cuff — evokes tea-time elegance. Thick enough for mild warmth but still delicate.
Skill level: confident beginner → intermediate
Materials (Medium example)
- DK or light worsted spun wool or acrylic-wool blend — ~120–160 yd.
- Hook: 4.0 mm.
- Tapestry needle, optional narrow elastic.
Finished (Medium)
- Circumference ~6.5 in, length ~5.5–6 in. Rolled cuff gives a classic look.
Stitch notes (texture)
- Feature: short, dense stitches — alternating hdc and dc rows create a slightly textured “clotted” look. Top is a soft rolled cuff.
Step-by-step
1) Compute foundation & join
- Example count (same gauge): ch 29, join into a loop. For a firmer fabric, you may chain a few more and adjust.
2) Foundation rounds & rib
- R1: ch 2, hdc in each st around (29). Join. Work 3 rounds of hdc for a firm base.
3) Clotted texture (main body)
- R4: ch 1, hdc in next st, dc in next st repeat around — the alternating stitches build soft texture. Join.
- R5: ch 1, dc in next, hdc in next — offset from previous round to create a subtle woven effect. Repeat R4–R5 for about 6–8 rounds total (depending on length).
4) Rolled cuff finish
- To make a rolled top, finish with 6–8 rounds of dc in BLO only (dc in BLO gives fabric a natural roll toward the outside). Alternatively work a round of sc tighter to keep edge flat. The roll will form after blocking/wearing.
5) Thumb option
- For closed tube (no thumb), finish here. For a thumb hole, at desired position (inner wrist), on one round: work to marker, ch 3, skip 3 sts, continue pattern then on next round rejoin and sc across the chain stitches to stabilize.
6) Finishing
- Weave ends and block lightly. The roll sets more with steam and after short wear.
Variations & tips
- Add a narrow decorative button sewn at seam if you made an opening.
- Work two-tone: alternate body in one color and cuff in a contrasting neutral.
3. Crochet Ruffles Wrist Warmers Pattern
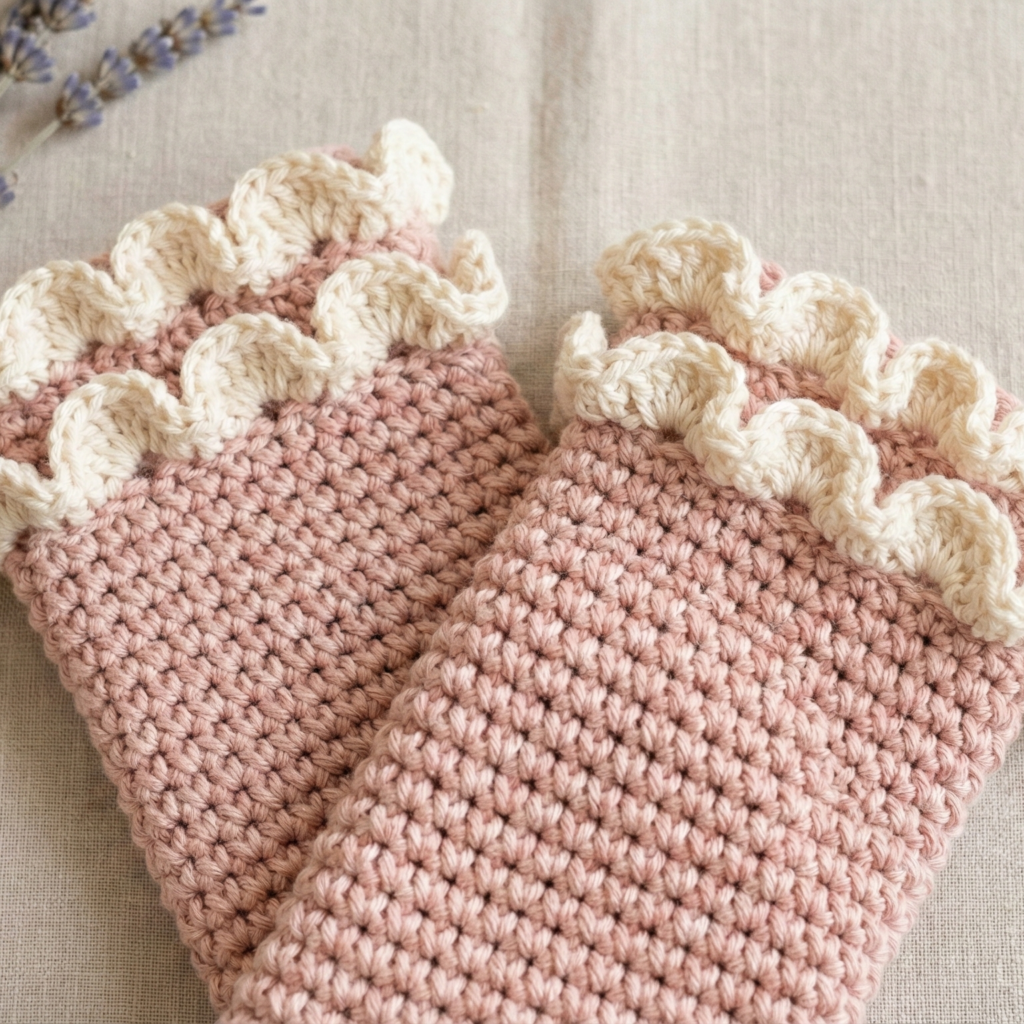
Feminine and fun — a tidy cuff with one or two rows of ruffles at the wrist or finger edge for a playful flounce.
Skill level: confident beginner
Materials (Medium example)
- DK cotton or acrylic-wool — ~100–130 yd.
- Hook: 3.5–4.0 mm.
- Tapestry needle.
Finished (Medium)
- Circumference ~6.5 in; length 6 in; ruffle depth ~0.75–1 in per row.
Stitch notes
- Base: firm sc or hdc tube.
- Ruffle: shells or gathered dc rows.
Step-by-step
1) Make the tube base
- Foundation: ch 29, join. R1: ch 1, sc in each ch around (29). R2–R8: sc in each st around until tube height before ruffle is ~4.5–5 in.
2) Ruffle round 1 (gentle)
- Join ruffle color or same yarn. R1: sc 2, (dc 5) in next st, sc 2 — repeat around. This gives spaced shells. Join.
3) Ruffle round 2 (fuller)
- For a fuller flounce, work a second ruffle round behind the first: sc in each sc from previous shell, and in shell space work (dc 7) or (7 dc, picot, 7 dc) to create doubled fullness. Only one or two rounds are typical for wrist warmers.
4) Top edge
- Optionally finish the top (finger edge) with a neat row of sc or tiny picot to avoid gaping.
5) Thumb or no thumb
- Leave as a simple tube or add a thumb hole as previously described.
6) Finish
- Weave ends and lightly block the ruffle to arrange scallops.
Variations & tips
- Try using a contrast color for the ruffle to make it pop.
- Make mini-ruffles at both wrist and finger edge for a glovelet look.
4. Crochet Floral Wrist Warmers Pattern
A textured, appliqué-driven design: a plain or textured tube decorated with layered flower appliqués and tiny leaves.
Skill level: intermediate (appliqués + sewing)
Materials (Medium example)
- DK or worsted cotton in base color + floral colors — ~150–200 yd total.
- Hook: 3.5–4.0 mm.
- Tapestry needle, small buttons for centers (optional).
Finished (Medium)
- Circumference ~6.5 in; length ~6 in. Appliqués sit neatly on one side.
Stitch notes
- Base can be sc/hdc; flowers are small 5-petal and layered for depth.
Step-by-step
1) Make base tube
- Ch 29, join. R1–R8: sc rounds until you have ~4.5 in height from cuff. You can add a decorative textured round (e.g., one round of fpdc columns) to break monotony where you’ll place flowers.
2) Small 5-petal flower appliqué (make several)
- MR, ch 1, 6 sc in ring. Sl st join.
- Round 2: (ch 2, 3 dc) in next st, sl st in next st — repeat 6 times to create 6 tiny petals. Fasten off. Make 3–4 flowers of varying sizes.
3) Layered flower for focal
- Make a larger petal round by joining a second color and working (ch 3, 5 dc cluster, ch 3, sl st) in the spaces between the small petals to create layered fullness.
4) Leaves
- With green, ch 6, sc in 2nd ch from hook, hdc, dc, hdc, sc — sew 2–3 leaves around flower.
5) Attach appliqués
- Arrange flowers on one side of the wrist warmer (outer side) and secure by stitching through the base tube and underside of petals. Add buttons or French-knot centers as desired.
6) Thumb / finish
- Add thumb hole if desired. Weave ends and press lightly.
Variations & tips
- Embroider tiny vines linking flowers for a botanical wreath.
- Use variegated yarn for subtle petal shading.
5. Crochet Bow Wrist Warmers Pattern
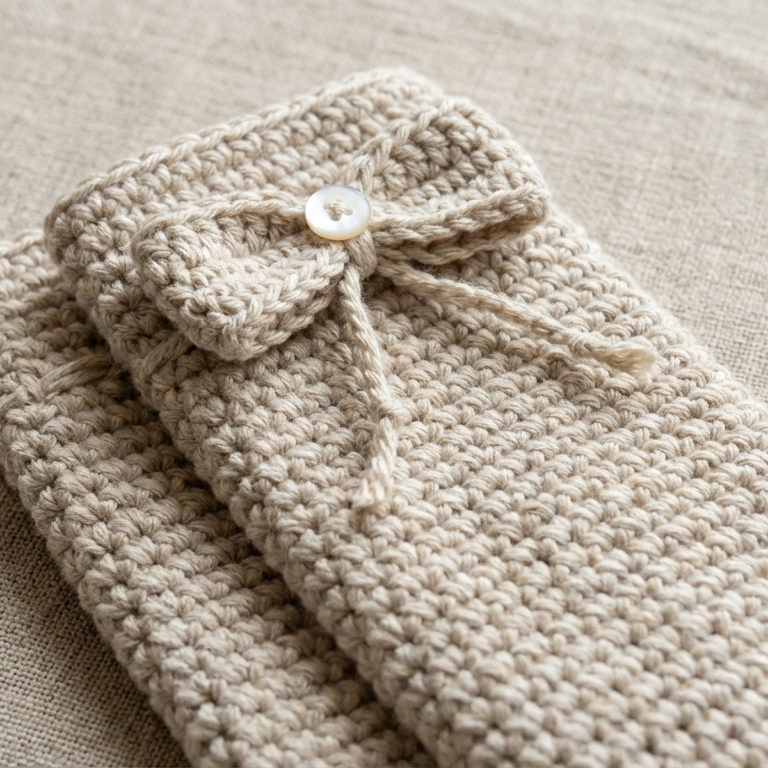
A cute, slightly preppy style: a small bow sits centered over the back of the hand or at wrist for a charming accent.
Skill level: confident beginner
Materials (Medium example)
- DK cotton or wool blend — ~120–150 yd.
- Hook: 3.5–4.0 mm.
- Small safety pin or snap if you want the bow detachable.
Finished (Medium)
- Circumference ~6.5 in; bow size ~2.5–3 in wide.
Stitch notes
- Base standard sc/hdc tube; bow is a rectangle cinched in middle.
Step-by-step
1) Tube base
- Ch 29, join. R1–R7: hdc (or sc) around until you have ~5 in height from cuff. Keep one round as anchor where bow will be attached.
2) Bow rectangle
- Ch 24 (for ~3 in width). Row 1: sc in 2nd ch from hook across (23 sc). Row 2–6: ch 1, sc across. Row 7: fasten off leaving long tail for sewing.
3) Form bow
- Fold rectangle lengthwise and wrap yarn tightly around center to cinch into a bow. Secure by wrapping yarn around center several times and tying neatly on the underside. Alternatively fold into loop and whipstitch ends to secure, then cinch.
4) Attach bow
- Sew bow to the back of the hand on the wrist warmer. For removable option, sew the bow onto a small snap or safety pin so wearer can remove before laundering.
5) Finish
- Weave ends. Optionally add a small decorative button or bead at bow center.
Variations & tips
- Make double-bow by stacking two rectangles (different sizes).
- Use wired ribbon wrapped in crochet for a more polished bow.
6. Crochet Vintage Wrist Warmers Pattern
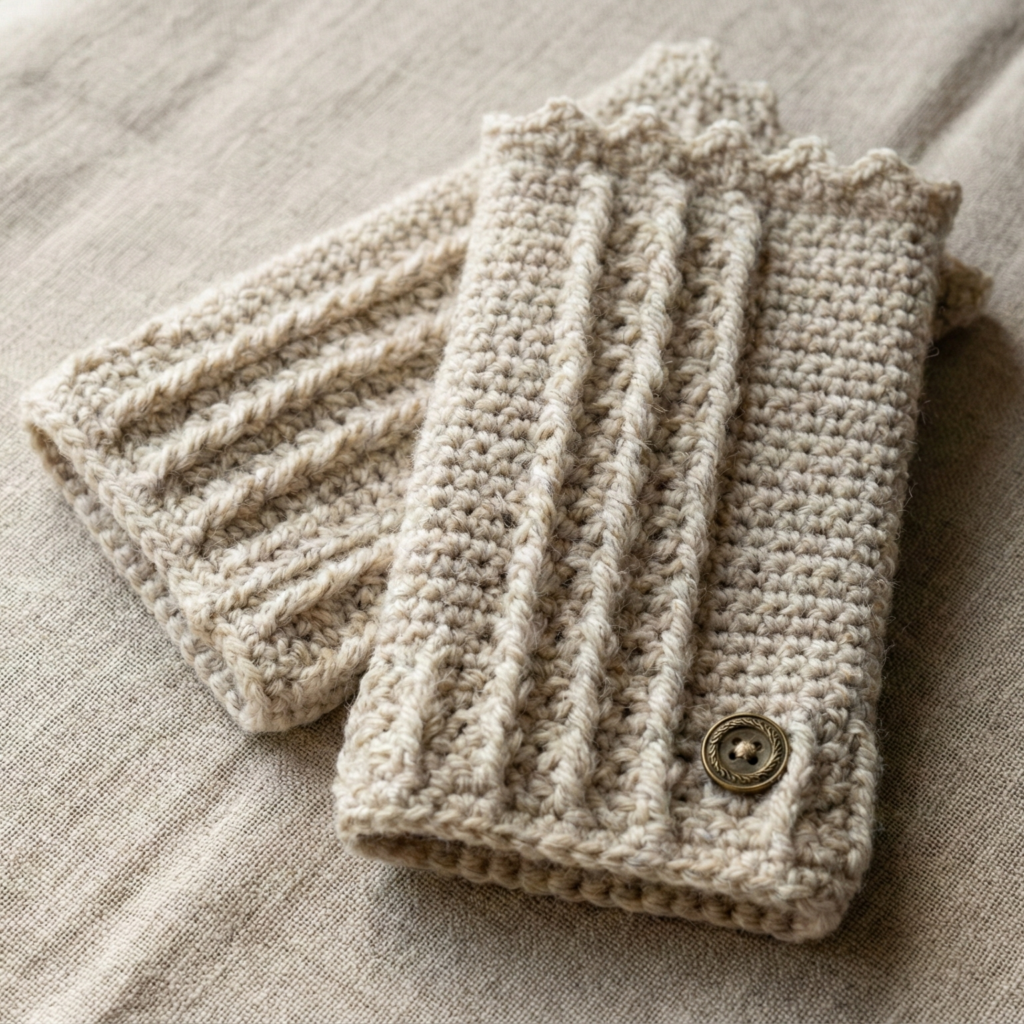
Classic, with decorative vintage motifs — think textured panels, tiny picots, lattice, and a small button detail. Slightly more structured and perfect for vintage-inspired wardrobes.
Skill level: intermediate
Materials (Medium example)
- DK wool or cotton blends — ~130–170 yd.
- Hook: 3.5–4.0 mm.
- Small vintage-style button or brooch (optional).
Finished (Medium)
- Circumference ~6.5 in; length 6–6.5 in. Textured panels show well in neutral tones.
Stitch notes
- Use a textured panel such as crossed double (cable-ish) or woven waffle, bordered by simple sc rounds. Add tiny picot edging for vintage detail.
Step-by-step
1) Foundation & rib
- Ch 29, join. R1–R4: BLO hdc for a snug foldable cuff.
2) Textured panel
- R5 (pattern start): ch1, sc across for one round (anchor).
- R6 (texture repeat): ch 2, fpdc around next st, bpdc around next st across — creates an alternating raised column. Repeat R6–R9 for 3–4 pattern repeats (depending on how tall you want the textured field).
3) Decorative mid-row (optional)
- Add a row of picots in the center or small eyelet row to thread a narrow ribbon through if you want a laced look: ch 3, sk 3, sc around in one round for tiny openings.
4) Top edge
- Work a round picot or scallop: sc, ch3, sl st in first ch of ch3 (tiny picot) to give vintage finish.
5) Optional button detail
- Sew a small decorative button near the cuff (purely ornamental) and add a tiny closure loop from a chain to mimic traditional mitten closures.
6) Thumb
- Add a small neat thumb slit using a 2–3 ch gap reinforced by sc or a small sewn tube.
7) Finishing
- Weave ends and block to flatten texture. If using wool, use a light steam and shape by hand.
Variations & tips
- Antique buttons and a neutral palette create a true vintage vibe.
- For warmth, use a wool-blend and a denser stitch; for daintiness, use cotton and fine hook.
Final finishing, blocking & care tips
- Swatch first: always make a short swatch in the stitch pattern and measure the stitches-per-inch — then use that number to calculate your foundation chain for a precise fit. (Example math above used 18 sc = 4 in → 4.5 sc/in; 4.5 × 6.5 in → 29 stitches as a worked example.)
- Try on early: after 2–3 rounds, slip the tube on to test fit; it’s much easier to adjust early than to take out many rounds.
- Thumb openings: keep thumb edges tidy by crocheting a short reinforcement row (sc around the opening) or by picking up stitches and working a small thumb tube.
- Blocking: for lace and textured patterns, wet-block or steam-block to set stitches and make motifs lie flat. Pin to shape. For wool, follow yarn label instructions.
- Care: cotton/wool blends should be washed per yarn label. For items with glued or metallic embellishments, hand-wash and lay flat. Avoid tumble drying delicate fibers.
Conclusion
Wrist warmers are a delightful mix of fashion and function: they’re one-skein projects you can finish in an afternoon, they make thoughtful gifts, and they’re an excellent place to practice lace, texture, or appliqué. The six patterns here — Victorian Lace, Clotted Cream Cuffs, Ruffles, Floral, Bow, and Vintage — cover looks from dainty and romantic to playful and retro. Remember to swatch, measure, and try on as you go so the finished pair fits just right.