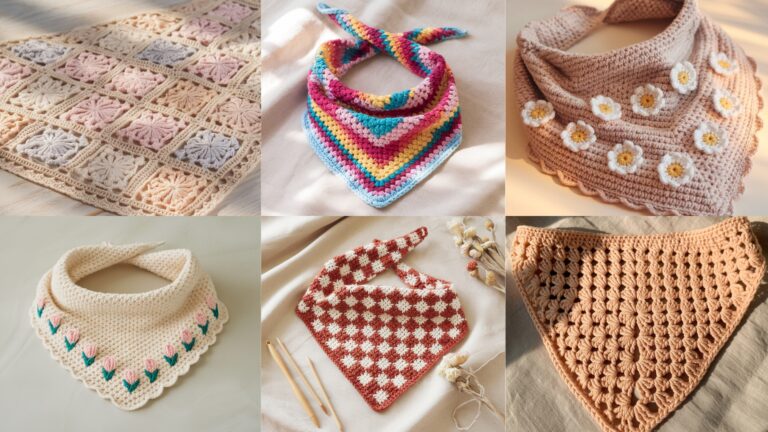
A great hair wrap (headband/tie/scarf) is one of those tiny handmade pieces that instantly lifts an outfit — practical for bad-hair days, sun protection, workouts, or a boho finishing touch. Below are six full hair-wrap patterns you can use as blog sections: each one includes skill level, materials, finished-size guidance, gauge suggestions, a very long step-by-step construction (with clear options for closures and sizing), variations, finishing & care, and styling tips. Use these patterns as-is or mix ideas (for example, add the Orchid Lane motif to the Mesh wrap for a hybrid design).
All instructions use US crochet terms. Where I give sample stitch counts I base them on a common reference gauge (worsted/FTA with 4.0–5.0 mm hook) and explain how to rescale.
Quick general notes (read before you start)
- Abbreviations: ch = chain, sc = single crochet, hdc = half double crochet, dc = double crochet, tr = treble crochet, sl st = slip stitch, FP = front post, BP = back post, BLO/FLO = back/front loop only, rep = repeat, st(s) = stitch(es), RS/WS = right/wrong side, MR = magic ring.
- Sizing basics: For most adult headbands/wraps:
- Circumference (finished length to tie or close): 18–22 in (46–56 cm) depending on fit and whether wrap sits across hair or close to hairline. If using elastic or buttons, allow less ease (18–19 in). For tie-on wraps allow 2–8 in extra for tying ends (example target overall chain 24–30 in including tail).
- Width: narrow headbands 1–2 in (2.5–5 cm); wider wraps/turban styles 3–6 in (7.5–15 cm). I give guidance per pattern.
- Gauge reminder: Always make a quick swatch when precise stitch counts are given. My worked examples assume a moderate gauge: worsted-weight cotton + 4.0 mm hook → ~14 sc = 4 in; adjust counts if your yarn/hook produce different density.
- Closures: Options include tied ends (simple and adjustable), sewn elastic loops, buttons & loops, metal sliders, or hidden snaps. I include closure suggestions for each pattern.
- Yarn choices: Cotton or cotton blends are excellent for hair wraps (breathable and stable). For drapier, softer wraps use bamboo, rayon, or fingering-weight blends. Ribbon yarn and tape yarn give a trendy boho look.
- Tools & finishing: tapestry needle, small scissors, stitch markers (for consistent centre), blocking mat and pins (recommended for lace patterns), optionally buttons and elastic.
1. Crochet Striped Hair Wrap Pattern
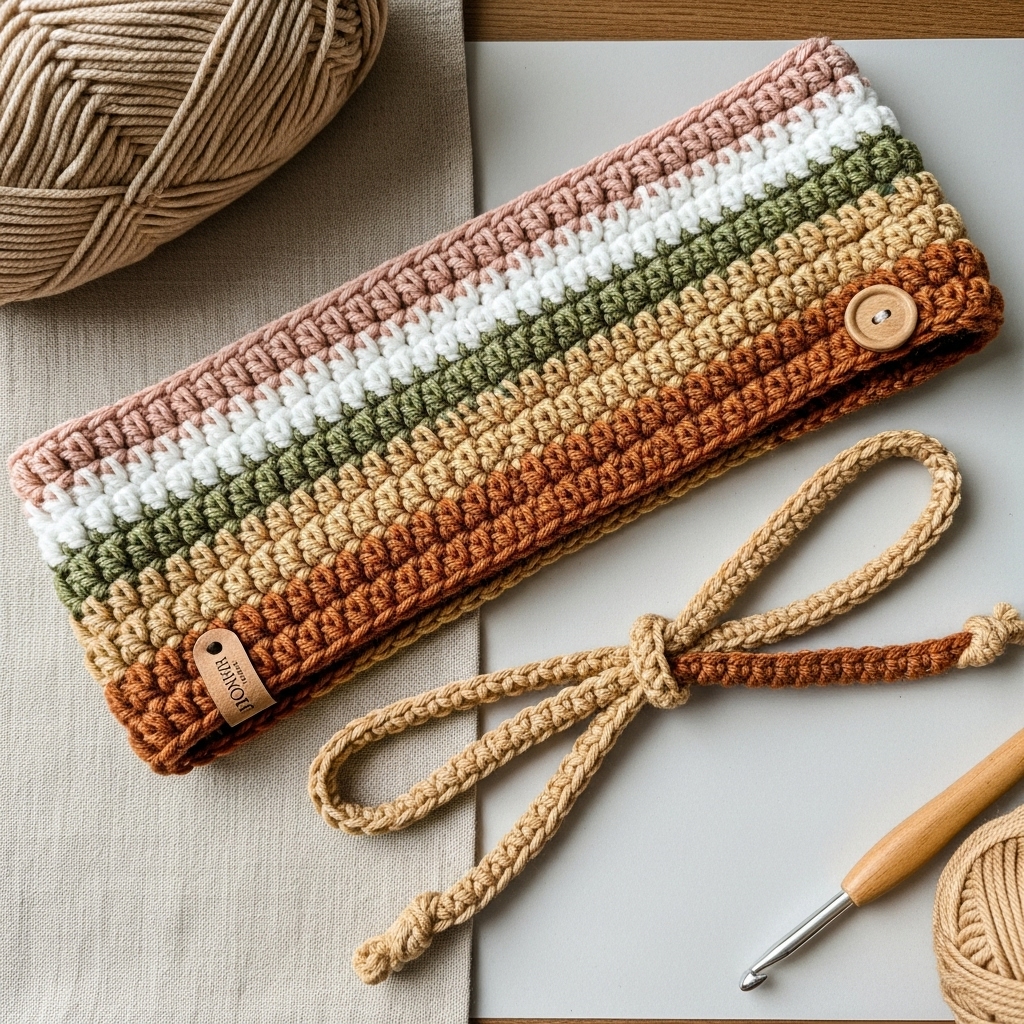
A classic, versatile wrap built in horizontal color stripes. Great for beginners, fast to make and lovely when you mix neutrals with a bright accent.
Skill level: Beginner → Confident beginner (basic rows, color changes)
Materials (sample — medium adult)
- Worsted-weight cotton in 2–4 colors (main + 1–3 accent colors). Total ~60–90 yds per wrap depending on width/length.
- Hook: 4.0 mm (use smaller for firm fabric, larger for relaxed).
- Small button (12–18 mm) or make tie ends.
- Tapestry needle, measuring tape.
Finished size (sample): length = 20 in (fits average adult snugly) + optional 6 in ties; width = 2.5 in (narrow band) or 4 in (wider wrap). Adjust as described.
Gauge example: 14 sc = 4 in (with metric above). Measure your stitches per inch to calculate chain length.
Construction — step-by-step (striped flat band with button-loop)
- Decide width & length.
- Example: width 2.5 in, length 20 in (for a snug fit) + 6 in ties each side if you want ties. If using a single button closure, you need the band length to meet comfortably over the back of the head: 20 in (target). For a tie wrap add extra tail length for knots: add 6–8 in at each end (total +12–16 in).
- If you want a wrap that ties at the nape, make a long rectangle that includes tie tails.
- Calculate foundation chain.
- Compute stitches-per-inch: example 3.5 sc/in → for 20 in band you need 20 × 3.5 = 70 sc. Add ch for turning and pattern start: foundation chain = 71 ch (if starting with sc rows). If you add ties at ends, chain extra for ties (e.g., +24 ch for 6 in tie length).
- Base rows — work in rows
- Row 1: ch foundation (71), sc in 2nd ch from hook and across = 70 sc. Turn.
- Rows 2–?: Ch1, sc across until you reach the target width. For 2.5 in width with sample gauge count ~9 rows of sc. For a wider band (4 in) make 14–16 rows. Keep edges neat by chaining 1 and turning each row.
- Create stripes
- Change colors every 2–6 rows depending on desired stripe width. To change color cleanly: finish last sc of the row with new color on the final yarn-over so joining is seamless (carry short floats on the wrong side if changing frequently).
- Edge finish
- Work 1 round sc around the long edges to neaten (pick up loops along side — 1 sc in end of each row to create even border). For a decorative touch work sc, ch2, sc at corners or add a picot edge on the long sides if you want a feminine look.
- Closure
- Option A — Button: sew button to center back of band (RS) and create a small loop on the opposite end: ch6, sl st to base, then secure with a few sc to anchor. Test loop over button; adjust ch length. For comfort, place button slightly off center if band rides.
- Option B — Tie tails: if you added tie length to chain, fold tails and weave ends; you can crocheted a small fringe or leave braided ties. Ties allow adjustable sizing and are teen-friendly.
- Finishing
- Weave ends, block gently if cotton (wet-block to shape edges). Trim tails if any.
Variations
- Use self-striping yarn for effortless stripes.
- Work alternating texture rows (hdc or dc) for variety.
- Make an over-the-head turban by sewing ends into a twist knot at front and securing seam on inside.
Styling tips
- Narrow band for sporty looks; wider band for boho-chic with loose waves.
- Stripe color choices: neutrals + one vibrant stripe read classic; pastel sets feel soft and feminine.
2. Crochet Zigzag Summer Hair Wrap Pattern
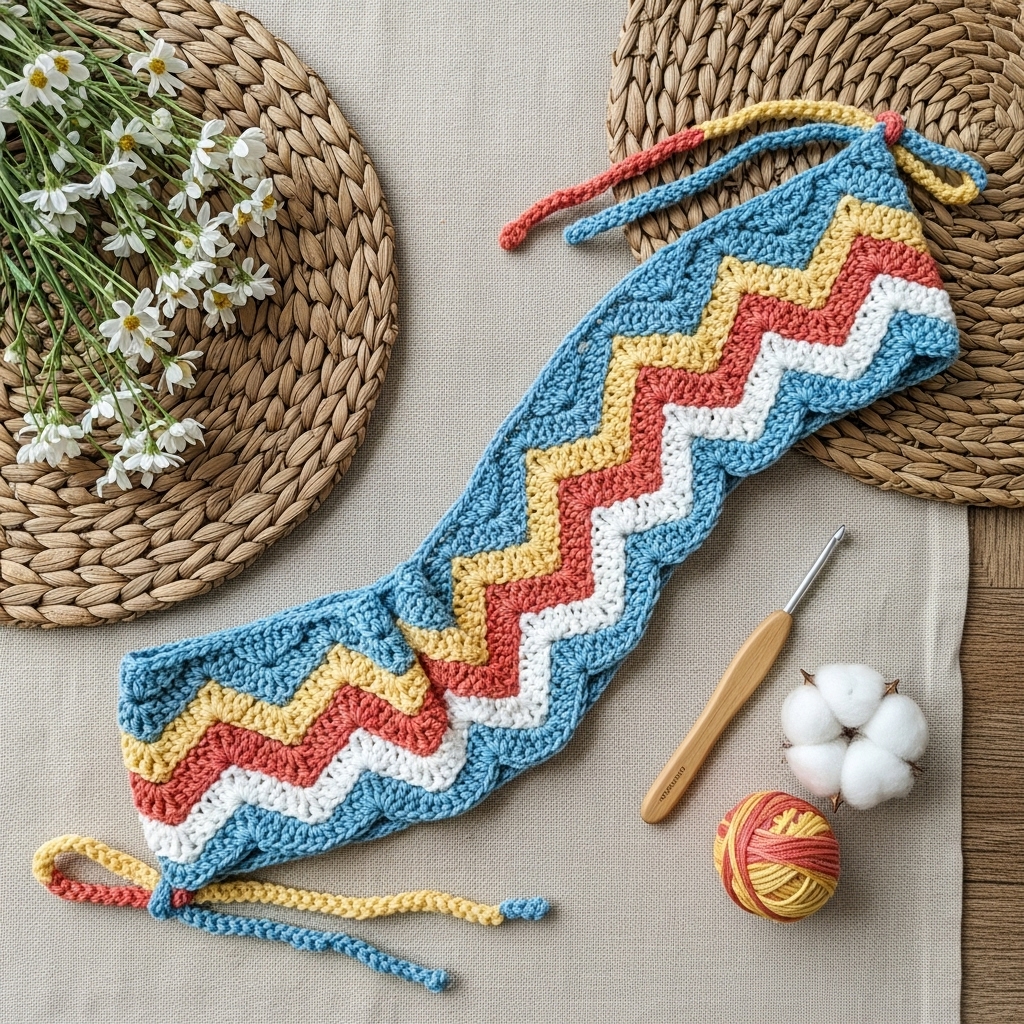
A lightweight, open zigzag (chevron) hair wrap perfect for breezy summer looks. The chevron texture offers nice stretch and visual interest while remaining breathable.
Skill level: Confident beginner (working increases/decreases in rows)
Materials (sample)
- Fingering to DK cotton (lighter yarn recommended for summer; aim ~100–120 yds).
- Hook: 3.5–4.0 mm for fingering/DK.
- Optional snap or tie ends.
- Tapestry needle, measuring tape.
Finished size (sample): length 24 in (including tie tails if desired), width 3–4 in for a full wrap; for a narrow headband target width 1.75–2.25 in.
Gauge & stitch repeat: Chevron pattern is typically worked on a multiple of 14 (example zigzag pattern). I’ll give an adaptable 18-stitch multiple for this version.
Construction — step-by-step (flat chevron band with tie ends)
- Foundation chain
- Determine length target: 24 in for a wrap that ties behind head. Using sample gauge: 3.5 sc/in → 24 × 3.5 ≈ 84 sc. Choose a multiple of the chevron repeat that lands close (e.g., 84 is divisible by 14? 14×6 = 84 yes). So ch 84 + 1 turning ch.
- Zigzag stitch row (one common pattern)
- Row 1: ch foundation. Row 2 (setup): sc across or use base row specific to pattern. For a simple chevron using dc clusters and v-stitches: dc3 in next ch, sk 2, dc1 in next 4 ch, (dc3tog) over next 3 sts to make valley, dc1 in next 4, sk2, 3 dc in next — this is conceptual; below I give a precise pattern that works for the given multiple.
- Exact chevron (example repeat, multiple of 14):
Row 1: ch 85, dc in 4th ch from hook and in next 6 ch, sk 2 ch, (dc3 in next ch), sk 2, dc in next 7 ch rep across ending with dc in last 3 ch to balance. Turning ch3 counts as first dc. (This creates peaks and valleys by clustered increases and decreases.) - Row 2 onwards: work into the stitches following the same geometry: peaks are groups of 3 dc, valleys are dc3tog (worked over three stitches to make a dip). This requires counting and occasionally working dc3tog – insert hook through 3 loops and complete decrease. Work until width reaches desired height (e.g., 3–4 in).
- Form tie tails
- If you planned ties, leave extra chain on both ends at foundation or crochet extra chain extension at each end and finish with a few rows to stabilize. You can also attach short crochet cords later (i-cord style) and braid them.
- Edge finish
- Work 1 round of sc around to tidy edges and fill the open chevrons. If the peaks are pronounced, add tiny picots on peaks for decorative look.
- Closure & finishing
- Either tie ends in a knot (square or bow) or add a small snap so wrap becomes a quick on/off headpiece. Sew ends securely and weave in the many tails if color changes.
Variations
- Work chevrons in two contrasting colors for a bold graphic summer look.
- Replace dc clusters with puff stitches to make the zigzag more textured.
Styling tips
- Wear across the forehead for bohemian festivals or as a conventional headband for yoga.
- Pair the zigzag wrap with woven sandals and linen dresses for a coordinated summertime outfit.
3. Crochet Orchid Lane Bohemian Hair Wrap Pattern
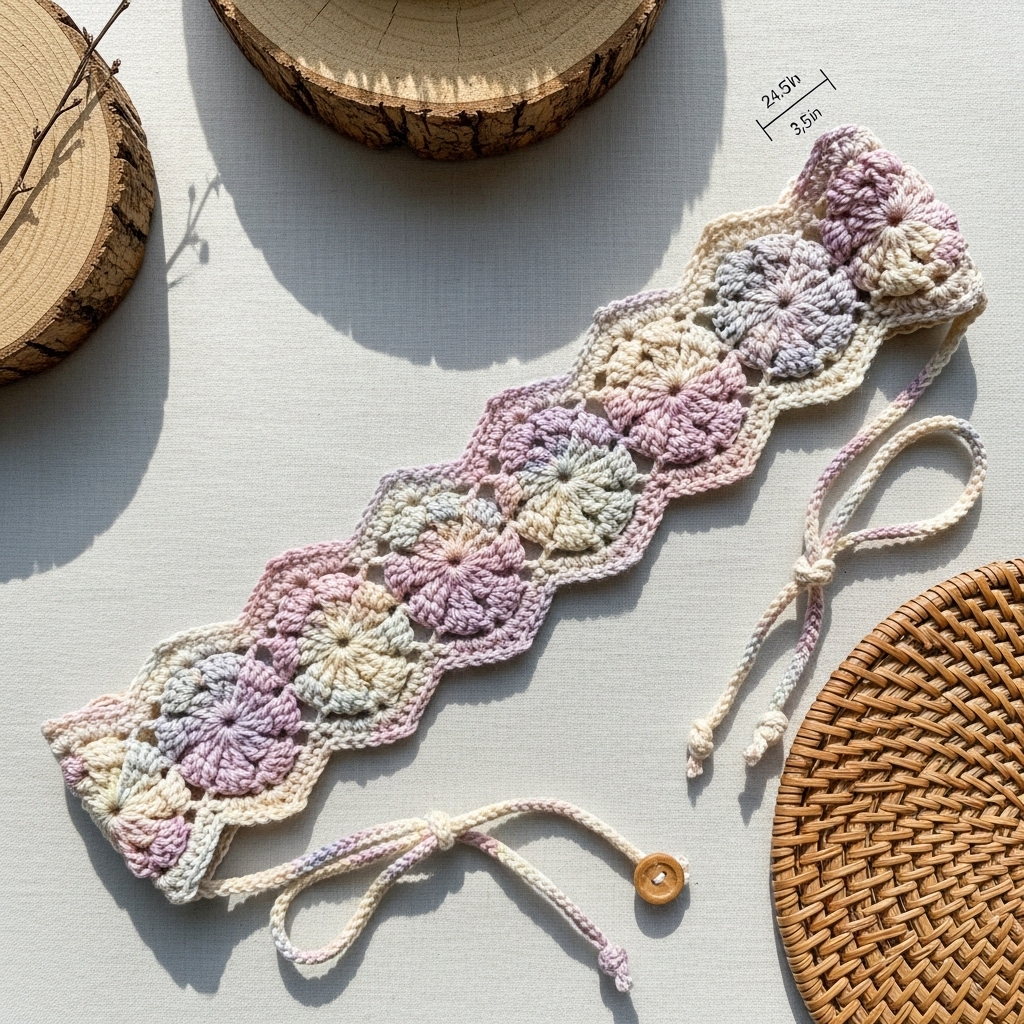
A lacy, bohemian-inspired wrap with small floral motifs and a soft scalloped edge. Slightly more advanced because it uses small motifs joined to create a flowing wrap.
Skill level: Intermediate (motif work and joining)
Materials (sample)
- Sport/DK cotton or bamboo blend for soft drape (approx 150–220 yds depending on length).
- Hook: 3.5–4.5 mm.
- Small buttons or tie ends.
- Blocking pins and mat (this pattern benefits from blocking).
Finished size (sample): length 24–26 in; width 3.5–5 in depending on number of motif rows.
Concept: Make several small floral/ostar motifs (flower medallions), join them in a horizontal strip (join-as-you-go or whipstitch), then add a delicate scalloped edging.
Construction — step-by-step (motif strip)
- Motif (petal medallion)
- Make a small round flower motif ~2–3 in diameter using MR and petal rows:
R1: MR, ch1, 10 sc into ring; sl st to join. (10)
R2: ch3, (2 dc, ch2, 3 dc) in alternating spaces or follow a 10-cluster petal sequence to get 10 petals. R3: anchor petals with sc round to flatten. Fasten off leaving tail.
- Make a small round flower motif ~2–3 in diameter using MR and petal rows:
- Make multiple motifs
- For a 24 in long band with each motif 2 in across, you need ~12 motifs if placed side-by-side with little overlap; if motifs are 3 in each, you need 8 motifs. Decide on layout: single row of motifs or staggered double row for more width.
- Join motifs
- Join-as-you-go method (recommended for smooth join): on the last round of each new motif, join into the adjacent motif’s edge through sl st into corresponding sts so they connect with small, almost invisible joins. Alternatively, whipstitch motifs through the back loops so the RS shows clean on front.
- Create width
- If you want a wider wrap, make two rows of motifs offset and join them, creating a slightly larger textile with a boho mosaic look.
- Scalloped edge
- After joining motifs into a strip, work 1 round of sc around entire strip to tidy; then add a scalloped round: skip 2, 5 dc in next, skip 2, sc in next to create a lacy scallop.
- Closure & extras
- Add a small crocheted loop at one end to fit over a button sewn at the other end. For a tie style, leave 6 in tails and add braided tassels at ends.
- Blocking
- Lay the strip pinned to exact shape and block so petals open and motif joins sit flat.
Variations
- Make motifs in gradient shades for a flowing ombré Orchid Lane effect.
- Insert tiny seed beads into motif centers for sparkle (pre-string beads on yarn).
Styling tips
- Tie at the nape of the neck with low chignon or wear as a wide forehead band with loose boho waves.
- The subtle floral detail pairs beautifully with linen and earth tones.
4. Crochet Mesh Hair Wrap Pattern
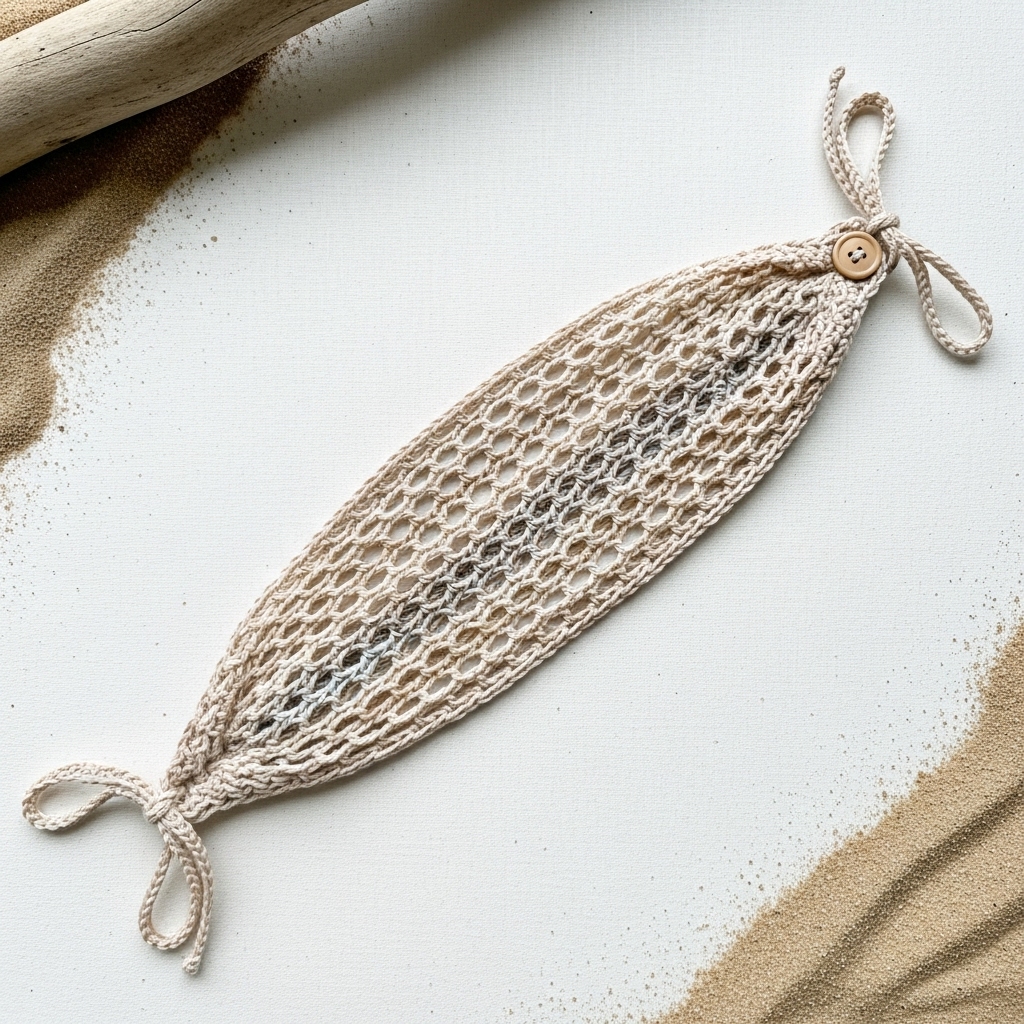
A minimalist, airy wrap made from a mesh/ladder stitch that’s ideal for vacations and beachy styling. Mesh is quick, lightweight, and dries fast — great if you’re wearing it post-swim.
Skill level: Beginner → Confident beginner (chain spaces and even tension)
Materials
- Ribbon yarn or worsted cotton (use a lighter yarn for airy mesh). Approx 80–130 yds.
- Hook: 4.5–6.0 mm depending on yarn. Larger hook gives more openness.
- Optional snap closures or tie ends.
- Tapestry needle.
Finished size (sample): length 24 in with ties or 20 in with button; width 2–3 in for headband or up to 6 in for wrap.
Construction — step-by-step (mesh long strip)
- Foundation chain
- Make a long chain for required length. For an adult wrap that ties at back: 24 in × stitches-per-inch. Using a loose mesh, your chain may be fewer stitches per inch (e.g., 2.5 st/in). So chain ~60 for 24 in. Add extra for ties if desired.
- Mesh repeat (very open)
- Row 1: sc in 2nd ch from hook and across to stabilize. Turn.
- Row 2: ch4 (counts as tr + ch1), sk 2 st, sc in next st, ch3, sk 3, sc in next st repeat across; finish with ch1, tr in last sc if counts require. The effect is an open ladder. Turn.
- Row 3: ch1, sc in each sc and into ch-spaces as anchors so you get a stable pattern. Repeat these two rows until desired width.
- Sides & anchors
- Add a row of sc around the long edges to make the mesh less likely to stretch out excessively. The sc round also helps hold beads or embellishments if you want them.
- Closure options
- Tie ends (braided) are simplest. For a sleeker finish sew small snaps at ends to make it fast and tidy.
- Finishing
- Weave ends and block lightly. For ribbon yarn blocking may be minimal.
Variations
- Crochet beads into the mesh row by sliding a bead up before doing the sc that anchors it.
- Make wider wrap and use as neck scarf or hair turban.
Styling tips
- For beach days, loop into a wide band and let ends hang loose; for active days, knot at back and tuck tails under hair.
- Try it with patterned swimsuits — mesh keeps the vibe light and airy.
5. Crochet Rainbow Lace Knit Hair Wrap Pattern
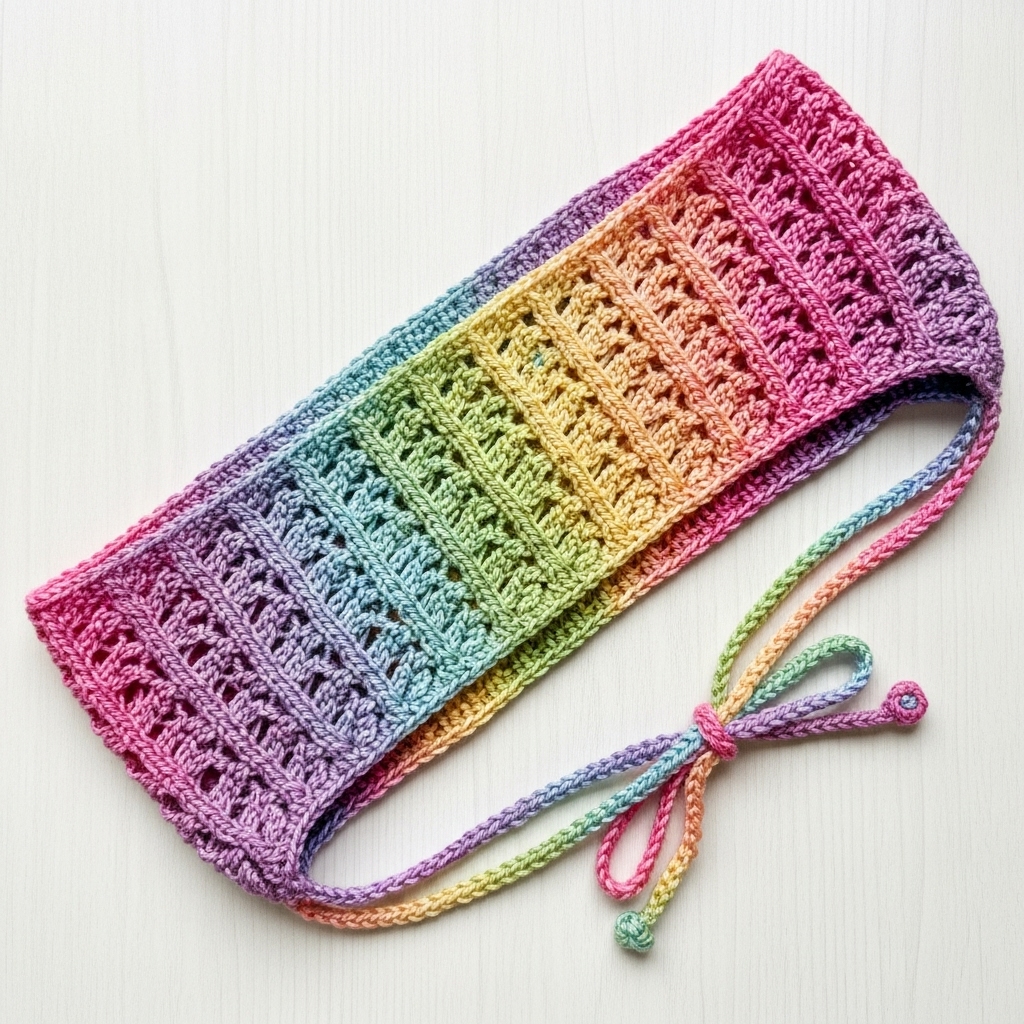
An elegant lace-inspired wrap that mimics knit lace (open vertical ribs and lacy edges). Use a rainbow or variegated yarn to make this pattern pop.
Skill level: Intermediate (Lace repeats and attention to stitch placement)
Materials
- Fingering or sport yarn in variegated/rainbow cake, approx 120–180 yds.
- Hook: 3.5–4.0 mm recommended for lace definition.
- Blocking supplies.
- Optional button or ties.
Finished size (sample): length 20–24 in; width 3–4 in for a full lace head wrap.
Construction — step-by-step (lacy vertical ribband)
- Calculate foundation
- Because lace stitch is taller, fewer stitches per inch are typical (e.g., 3 st/in). For a 20 in wrap: 60 st. Start chain 61.
- Lace rib motif (sample 6-row repeat)
- Row 1 (RS): ch1, sc across to anchor.
- Row 2: ch3 (counts as dc), ch1, sk1, dc in next — this begins vertical ladder columns.
- Row 3: ch1, sc across contacting dc and chain spaces as anchors.
- Row 4: ch4, fpdc around next dc to create raised column, ch1, sk1, fpdc repeat — the front-post double creates an upright rib.
- Row 5: ch1, sc across; Row 6: decorative chain-eye row (ch3, sl st into next ch-space) — this opens the lace. Repeat these 6 rows until width reached. The vertical fpdc columns paired with chain-lace create knit-like ribs when blocked.
- Edge finishing
- Add a lace picot or shell on the long edges to highlight rainbow color changes and make the wrap feminine.
- Closure
- For a polished finish stitch a small button and loop; because lace is flexible, button placement can also be decorative at side.
- Blocking
- Fully wet-block and pin to open the lace and make the vertical ribs firm. This defines the pattern and improves drape.
Variations
- Switch to a neutral solid for the border to tone down too-bright rainbow cakes.
- Add a narrow crochet-covered elastic loop at one end for a secure hold.
Styling tips
- The lace wrap looks gorgeous with low buns or half-up hairstyles where the lace peeks at the crown.
- Pair with soft floral dresses or denim for a balanced look.
6. Crochet Small Floral Lace Hair Wrap Pattern
A delicate narrow wrap built from linked tiny floral lace motifs. This one is ideal for teens or adults who prefer subtle, feminine head accessories.
Skill level: Intermediate (small motifs + joining)
Materials
- Fingering cotton thread or light DK yarn; small hook 2.5–3.5 mm.
- About 80–120 yds depending on length and motif size.
- Small button or snaps.
- Blocking supplies.
Finished size (sample): total length 20 in (plus tie or closure), width 1.25–1.75 in (a dainty band).
Construction — step-by-step (chain of flowers)
- Small flower motif (approx 0.75–1″ each)
- MR, ch1, 6 sc into ring. R2: ch3, sl st into next sc repeat 6 times to form 6 loops. R3: In each loop make (sc, hdc, dc, hdc, sc). Make 20–24 flowers to reach 20 in when joined side-by-side (if each flower is ~0.8″, 20 × 0.8 ≈ 16 in; plan accordingly and add ties).
- Joining as you go
- On last round of each flower, sl st into the adjacent motif’s corresponding petal base in order to join them into a neat row. This join-as-you-go method minimizes seaming and keeps the right side clean.
- Straighten the strip
- After joining, the strip may curve. Steam or wet-block pinned flat to even petal curvature.
- Tidy edges
- To make the band comfortable, work a single row of sc along both long edges (pick up stitches through petal bases) to create a soft edge and to keep the band from snagging.
- Closure
- Add a small button sewn through multiple motif openings or add a little loop of ch6 at the opposite end. Because motifs are small, test button placement so that the band sits flat. Alternatively use a snap for invisible closure.
- Finishing
- Weave ends under petals; block again to set final shape.
Variations
- Add tiny seed beads at each flower center as a subtle glimmer (pre-string beads).
- Work flowers in two tones (pale center + petal color) for vintage charm.
Styling tips
- Perfect for proms, bridal parties, or romantic everyday wear. Wear with loose braids for a fairy-tale finish.
- Because the band is narrow and delicate, it easily layers under or over other hair accessories.
Final finishing & care advice (applies to all patterns)
- Blocking: Lace and motif-based wraps benefit from careful blocking (wet or steam per yarn instructions) to open lace and settle stitches. Pin to a garment shape or straight line to ensure consistent length/edges.
- Washing: Cotton wraps are usually machine-washable on a gentle cycle; more delicate yarns (bamboo, silk blends) should be hand-washed and laid flat to dry. Avoid tumble-drying. Always check yarn labels.
- Fasteners: When using buttons or snaps, sew them through 3–4 secure passes and reinforce the surrounding crochet fabric with a few hidden stitches; optionally add a small leather patch behind the button to reduce wear. For elastic loops, sew elastic securely and back-stitch through the crochet fabric to anchor.
- Storing: Store flat or gently rolled to avoid kinks in delicate lace. Avoid hanging for long periods (it can stretch).
- Sizing cheatsheet: If you want a substitute fit quickly: measure the wearer’s head circumference (above the ears) and subtract 0.25–0.75 in for a firm fit depending on yarn stretch. Add tie tails if in doubt.
Conclusion
Those six patterns — Striped, Zigzag Summer, Orchid Lane Bohemian, Mesh, Rainbow Lace Knit, and Small Floral Lace — deliver a complete editorial of hair wraps for teens and adults: from sporty, everyday bands to dreamy, festival-ready lace. Each design can be shortened to a narrow headband or widened into a full wrap/turban; closures are flexible (ties, buttons, snaps), and the materials range from practical cotton to luxurious bamboo and ribbon yarn for different moods.