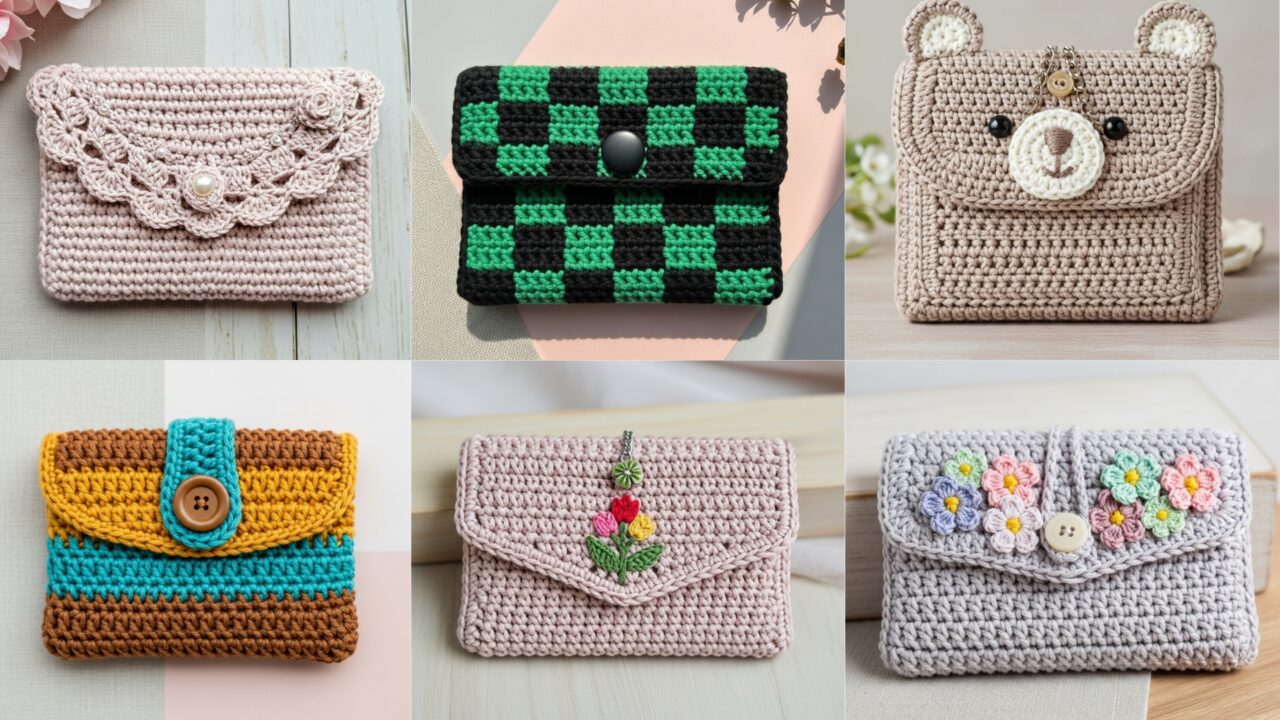
Small, fast, and endlessly useful — crochet card holders are perfect little projects for market stalls, gift bundles, or just tidying your wallet essentials. This post gives you six different, finished-ready card holder designs (each with a secure button closure): a soft Bear holder, a Tanjiro-inspired checkered holder, a romantic Coquette version, a Tulip applique holder, a Mini Flower cluster holder, and a Retro color-block holder. Each pattern section includes: skill level, materials, finished size guidance, a step-by-step construction (band/body, flap, button-loop), variations, lining & finishing tips, and care.
All patterns use US terms. I give clear band/row examples using a common gauge so you can scale to fit your yarn and tension.
Quick general notes (read before you start)
- Credit card size to fit: Standard credit card = 3.37″ × 2.125″ (85.6 × 53.98 mm). Aim for an interior pocket slightly bigger: 3.5″ × 2.5″ minimum. Most card holders are finished at ~4″ × 3″ to allow easy insertion.
- Sample gauge used below: For examples I assume worsted weight yarn + 4.0 mm hook with a working gauge ~ 14 sc = 4 in. If your gauge differs, calculate stitches-per-inch from a swatch and scale foundation chain length to reach ~4″ width (e.g., stitches-per-inch × 4).
- Abbreviations: ch = chain, sc = single crochet, hdc = half double crochet, dc = double crochet, sl st = slip stitch, sk = skip, FLO/BLO = front/back loop only, rep = repeat, RS/WS = right/ wrong side, MR = magic ring, inc = 2 sc in same st, dec = sc2tog.
- Construction choice: All designs use a flat rectangle worked in rows (or worked in the round and seamed) for the body and a flap worked continuing the fabric or added later. Flap closure uses either a crocheted button loop (chain loop anchored with sl st) or a small yarn loop made of scs — both secure and neat. For extra durability, add a fabric lining (light cotton or felt) and top-stitch the flap.
- Notions & tools: Tapestry needle, small buttons (12–18 mm typical), scissors, stitch markers (optional), small piece of felt or cotton for lining (optional), matching thread for sewing lining or button.
1. Crochet Cute Bear Card Holder Pattern
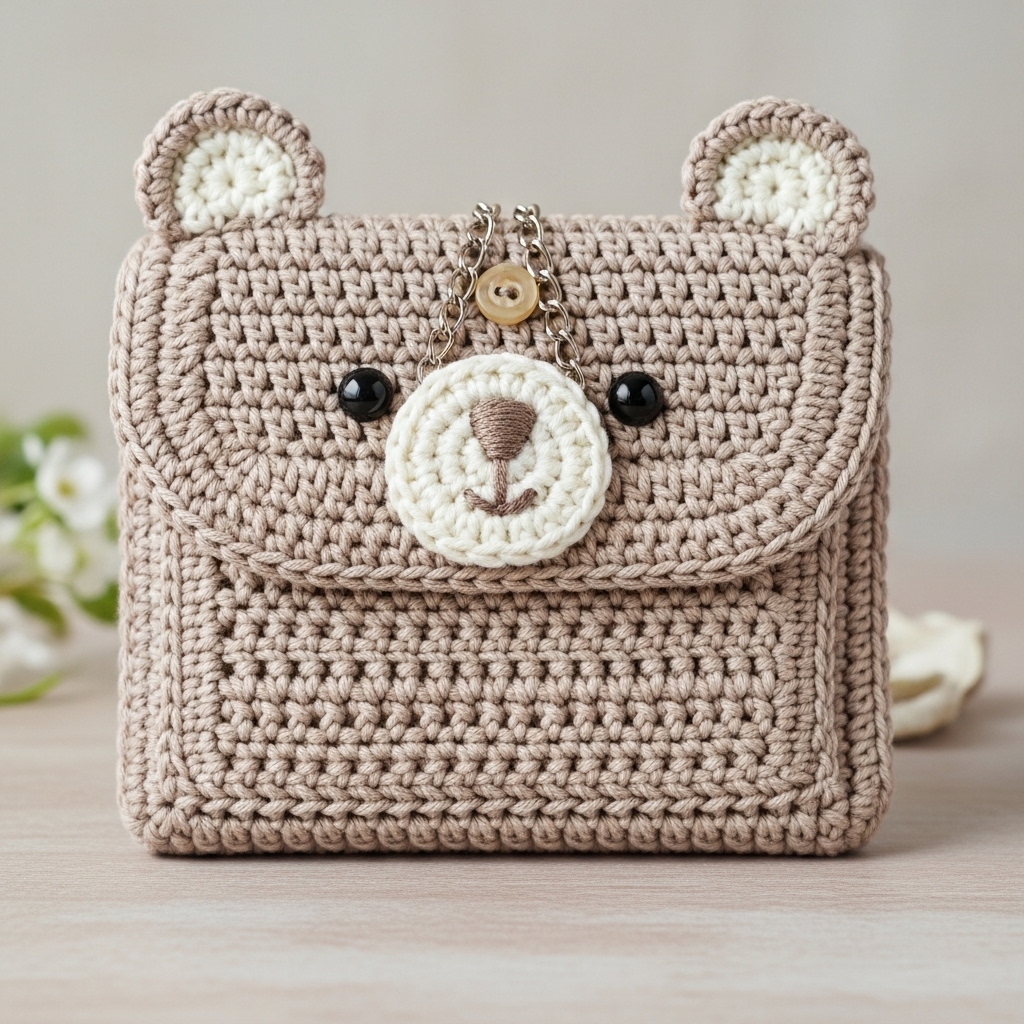
A soft, rounded card holder with an adorable bear face on the flap. Feminine and very giftable.
Skill level: Confident beginner — straight rows, simple shaping for ears and applique.
Materials
- Worsted-weight cotton in Main Color (MC) — e.g., warm taupe or cream ~ 30–40 yds.
- Small amount contrast for muzzle/inner ear and nose (off-white + black embroidery thread).
- 4.0 mm hook (or one to match gauge).
- 1-button (12–16 mm).
- Tapestry needle, small piece of felt for lining (optional).
Finished size (example): Exterior ~4.25″ wide × 3.25″ tall with flap down; pocket interior ~4.0″ × 2.75″ — fits 2–3 cards.
Step-by-step
- Band / body (rectangle) — main pocket
- Chain foundation: ch 15 (example: 14 sc ≈ 4 in). Join if prefer working in the round, otherwise work rows.
- Row 1 (RS): Sc in 2nd ch from hook and across — 14 sc. Turn.
- Rows 2–10: Ch1, sc across (work for pocket height ~2.75″ = 7–9 rows depending on gauge). For a sturdier pocket, work 8 rows.
- Fasten off after last row; keep yarn attached if you’ll continue to flap in same color.
- Flap
- From RS at the top of pocket, ch1, turn and sc across 14 sc. Work rows decreasing gradually to form rounded flap: Row 1–2: sc across; Row 3: sc2tog at start and end (decrease 2 total); Row 4: sc across; Row 5: sc2tog at start and end; Row 6: sc across. This creates a gentle rounded diagonal. Continue until flap width ~8–10 sts; then finish with a neat sc row and bind off leaving tail to sew a button if needed. (Alternatively shape flap into half-circle by working short rows and sl st around top to round edge.)
- Tip: you can also work flap as a rectangle and round outer edge with sc/shells.
- Bear appliqué (muzzle + ears)
- Muzzle: MR, ch1, 6 sc into ring; R2 inc around to 12 sc; fasten leaving tail. Flatten slightly and sew to center of flap bottom third.
- Ears (make 2): MR, 5 sc in ring; flatten and sew to top of flap corners. Add inner ear with small oval of contrasting color (ch4 sc3) and sew inside ear.
- Embroider face: Using black embroidery floss, stitch a small oval nose on muzzle and two small eyes above muzzle with satin stitch or French knots. Keep embroidery flat and secure.
- Button & loop
- Sew button on front of pocket (center, about 1″ below flap edge so flap overlaps).
- Make loop on flap by chaining 6–8 stitches from flap edge, join to base of loop with sl st, and secure with extra sc to fasten. Test loop snugness over button.
- Lining & finishing
- Cut a rectangle of lightweight felt or cotton matching pocket interior (approx 4″ × 2.75″). Hand-stitch lining inside pocket (hidden stitches) catching the crochet fabric every few sc for stability. This prevents stretching and protects cards.
- Weave in ends, trim, and block lightly.
Variations
- Make a fox by changing colors and shaping muzzle triangle.
- Use safety eyes for decorative non-child-use holders but prefer embroidery for gifts to children.
Care
- Hand wash or gentle machine wash; reshape while damp. Felt lining should be sewn with cotton thread to tolerate washing if you plan to machine wash.
2. Crochet Tanjiro Inspired Checkered Card Holder Pattern

A bold, graphic checkered wallet inspired by the iconic Tanjiro check — alternating solid squares across the body and a neat flap with matching button.
Skill level: Intermediate — carries two-color tapestry or block join technique.
Materials
- Worsted-weight cotton in two colors: Forest Green (A) and Black (B).
- Hook 4.0 mm.
- Button 14–18 mm.
- Tapestry needle, scissors.
Finished size (example): ~4.25″ × 3.25″ exterior.
Design concept & options
- Two ways to build check: A) tapestry crochet (carry floats on wrong side) while working one rectangular panel, or B) make small colored squares (granny-like mini squares) and join-as-you-go. Tapestry is faster and yields a clean geometric surface.
Step-by-step (tapestry two-color panel)
- Calculate checks
- Decide checks across: e.g., 7 checks across width; with 14 sc = 4″, each check = 2 sc. So pattern: (A,B stripes) alternating every 2 sts across.
- Foundation ch: ch 15 (14 sc wide ≈ 4″); adjust for your gauge.
- Row 1 (RS): With Color A or B pick starting color, sc across with tapestry technique: carry alternate color along wrong side or let floats be up to 6 stitches before catching. Work neat tension so fabric remains flat.
- Rows 2–12: Continue sc in pattern (switch color per check width and row) to create alternating checkerboard rows. A simple 2×2 check is created by alternating checks on every row.
- Row count for pocket depth: Work ~8–10 rows to reach pocket height (~2.75″). Leave yarn attached for flap.
- Flap
- Continue pattern over flap area, or switch to a solid color matching one of checks and add contrasting trim to make a banded flap.
- For a geometric look, make flap triangle or rectangular with a centered check motif.
- Button & Loop
- Choose a contrasting button (brass or wood for authenticity). Sew button centered at pocket top. Make button loop on flap using ch6 anchored on RS and reinforce with sc around base of loop.
- Optional lining
- Because two-color tapestry can be slightly stiff, add cotton lining for card protection and to hide floats. Sew lining inside with neat whipstitch around edges.
Variations
- Use smaller check sizes (1×1) or larger blocks (4×4) depending on your taste.
- Add a narrow slip pocket on the back for a transit card by sewing an extra strip of crochet.
Finishing & care
- Machine wash gentle for cotton yarn; line-dry. Press lightly avoiding flattening colors.
3. Crochet Coquette Card Holder Pattern
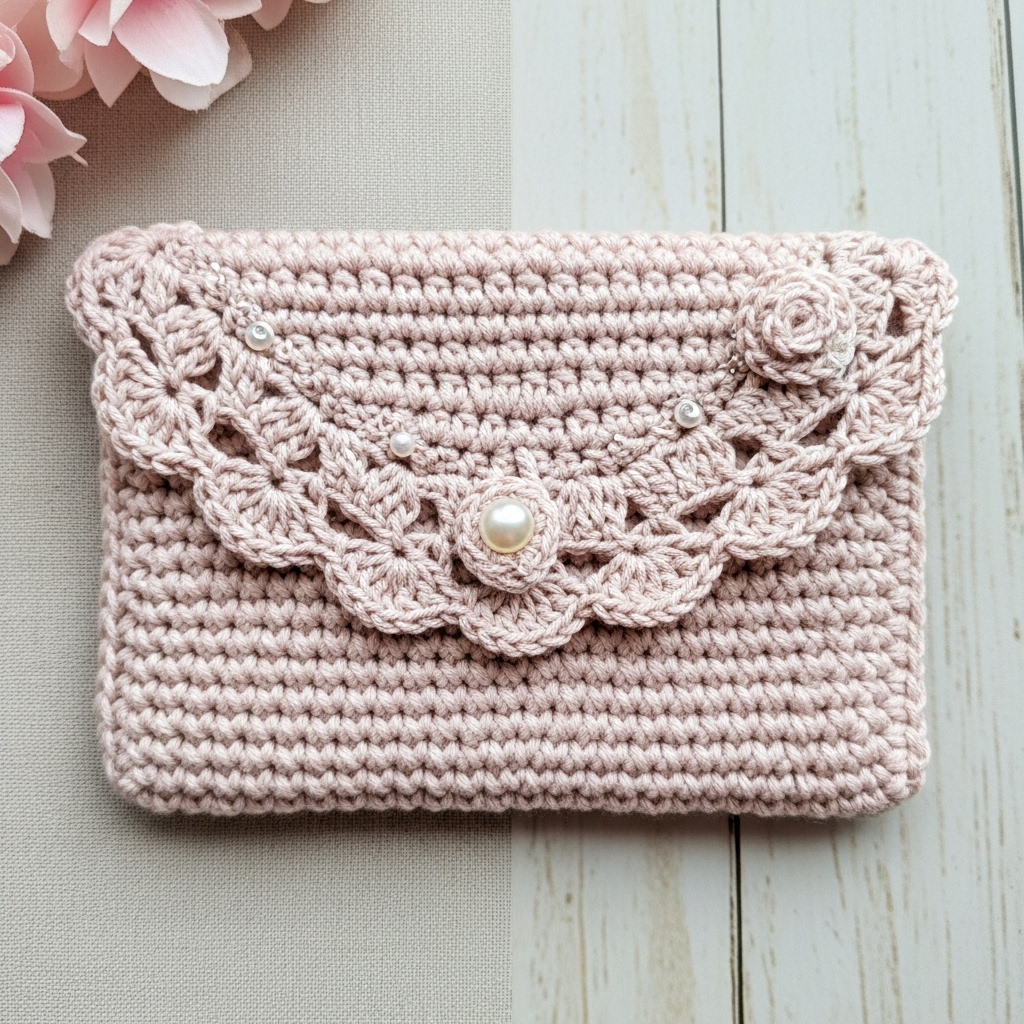
Romantic, Victorian-inspired holder: scalloped lace flap, pearl button, and a softly textured body (linen or moss stitch) — feminine and elegant.
Skill level: Intermediate — textured stitch + scallop edging.
Materials
- Sport or DK cotton (main color e.g., blush, cream) ~ 40–50 yds.
- Hook: 3.5–4.0 mm.
- Small pearl-button (12 mm) or brass cameo.
- Yarn needle, optional lining.
Finished size (example): ~4.25″ × 3.25″ exterior.
Stitch choices
- Body: moss (linen) stitch — creates small, dense fabric ideal for card protection.
- Flap: scallop shell edging with picot.
Step-by-step
- Body (moss stitch rectangle)
- Chain 15 (example). Row 1: sc in 2nd ch from hook and across (14 sc) — turn.
- Row 2: ch1, sc in first st, ch1, skip next st, sc in next across (this is the moss/linen set up). Turn.
- Row 3: ch1, sc in ch-1 space, ch1, sc in next sc across. Turn.
- Repeat Rows 2–3 for approx 10–12 rows to reach pocket height ~2.75″.
- Flap (lace scallop)
- Continue from top edge (no break) or join new color for contrast.
- Row 1 of flap (setup): ch1, sc across.
- Row 2 (scallop round): skip 2 sts, (5 dc) in next st, skip 2, sc in next st repeat across — creates shells.
- Row 3 (picot finish): sc across shell tops, picot at shell peaks: (sc1, ch3, sl st into sc) — makes dainty point. Work 2–3 shell rounds for a full scalloped look. Fasten off.
- Button & loop
- Sew small pearl button to pocket front, centered.
- Make a loop of ch8 (or make a small cord), anchor it into center of scallop underside so it’s hidden when flap closed. Reinforce loop base with extra sc stitches.
- Optional embellishment
- Sew small faux pearls to scallop peaks or add a tiny crocheted rose (MR, spiral) to one corner of flap.
- Lining & finishing
- For a refined interior, sew a cotton lining with hand stitches. Press and top-stitch lining at top edge of pocket for a professional finish.
Variations
- Make a tiny matching coin purse by reducing counts.
- Work flap in a soft lace triangle instead of scallops for a different coquette aesthetic.
Care
- Hand wash recommended if pearls are glued; otherwise gentle machine wash in delicates bag.
4. Crochet Tulip Card Holder Pattern

A sleek slim holder with a tulip applique centered on the flap; the tulip is flat and embroidered (safe for pockets), giving a clean botanical accent.
Skill level: Confident beginner — applique sewing and basic shaping.
Materials
- DK or worsted cotton in main color + tulip colors (green stem, colored petals).
- Hook 3.5–4.0 mm.
- Button (leaf/flower themed or neutral) 12–14 mm.
- Tapestry needle.
Finished size (example): ~4.25″ × 3.25″.
Step-by-step
- Body (dense sc rectangle)
- Chain 15; Row 1: sc across (14). Rows 2–10: sc across for a dense fabric (8–10 rows for pocket height).
- Flap
- Continue with sc rows for 4–6 rows for flap length or work a rounded flap by decreasing 1–2 stitches at ends on a couple of rows.
- Tulip applique
- Petals (make 3 small petals): MR, ch1, 6 sc in ring; sl st. R2: ch3, sl st into next st repeat three times to form little loops; into each loop work sc, hdc, dc, hdc, sc to shape petals. Fasten off leaving tail.
- Stem and leaf (embroidery): Using green yarn or embroidery floss, stitch a vertical stem from flap base up to petal base and two small leaves on either side with satin stitch. Sew petals on top of stem base.
- Button & loop
- Sew button to pocket center; make loop on flap using ch6 anchored and reinforced with sc.
- Lining and finish
- Add lining as desired; weave in ends and block.
Variations
- Work tulip as Tunisian small motif for more texture.
- Make a bouquet of 3 tiny flowers for a cluster.
Care
- Colorfast cottons okay for machine wash; reshaping while damp recommended.
5. Crochet Mini Flower Card Holder Pattern
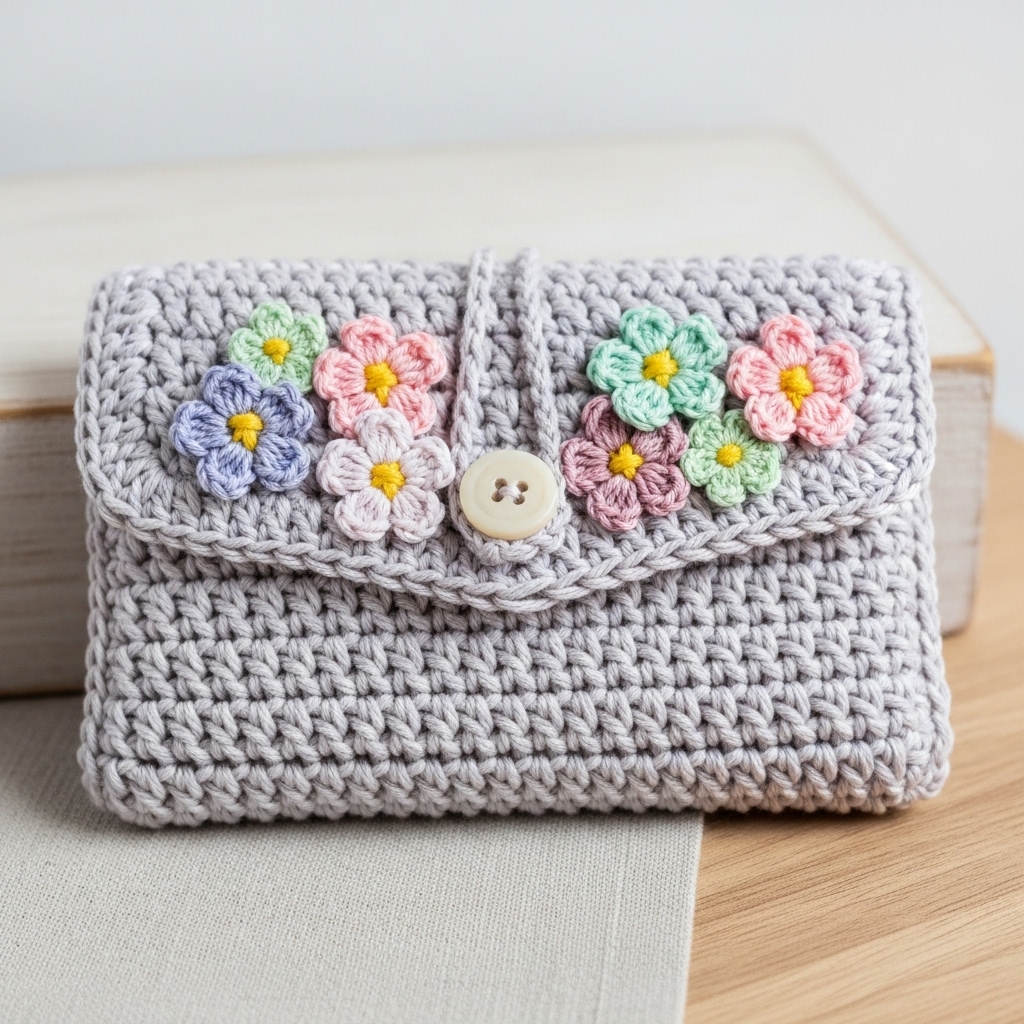
A minimalist, modern holder with a cluster of tiny flowers across the flap — great for scrap yarn and quick production.
Skill level: Beginner — small motifs and simple assembly.
Materials
- Fingering or DK weight yarn in MC + 3–4 small-contrast colors.
- Hook 3.5–4.0 mm.
- Small button 12 mm.
- Tapestry needle.
Finished size (example): ~4″ × 3.25″.
Step-by-step
- Body
- Chain 15; Row 1 sc across; Rows 2–8 sc across for pocket height (adjust to suit).
- Flap
- Row 9–12 sc continue for flap length; round outer edge with sc and small shell if desired.
- Tiny flower motif (make 6–8)
- MR, ch1, 6 sc in ring; sl st to join. Petal round: ch3, sl st into next st × 6 to make loops; in each loop: sc, hdc, dc, hdc, sc. Fasten off and make several in assorted colors.
- Attach cluster
- Arrange 4–6 tiny flowers in a cluster on flap corner or central flap and sew down. Add embroidered yellow center (tiny French knots) for pop.
- Button & loop
- Sew button to pocket front; make a small sc loop (5 sc in a ring) or a chain loop anchored into the flap.
Variations
- Use metallic thread for tiny centers for a little shine.
- Make a horizontal band of flowers across flap for a more dramatic look.
Finishing
- Lining optional. Weave ends, check for loose petals.
6. Crochet Retro Card Holder Pattern
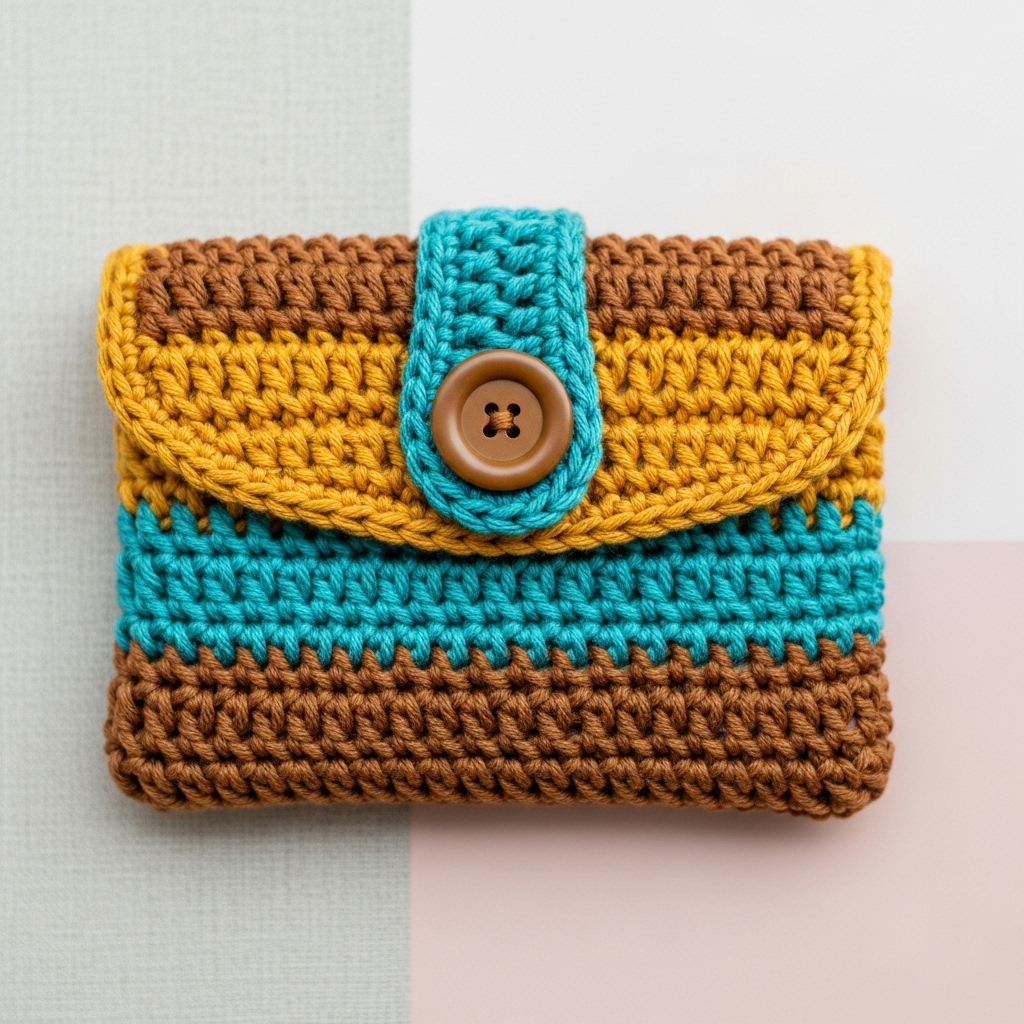
Bold color-blocked holder that channels mid-century modern vibes — contrasting blocks, rounded flap, and chunky button.
Skill level: Confident beginner — color changes in rows and neat joining.
Materials
- Worsted-weight cotton in 3 contrasting colors (A/B/C).
- Hook 4.0 mm.
- Chunky button (16–20 mm).
- Tapestry needle.
Finished size (example): ~4.25″ × 3.25″.
Design concept
- Work body in bands of color (e.g., A for the bottom third, B for middle, C for top & flap) with clean horizontal stripes and a rounded flap.
Step-by-step
- Body
- Chain 15; Row 1: sc across with Color A for base band (3 rows).
- Change to Color B for 3–4 rows. Carry color neatly or fasten off.
- Change to Color C for top band (3 rows) — keep last row as pocket top.
- Rounded flap
- With Color C continue additional rows decreasing at ends to round: Row 1: sc across; Row 2: sc2tog at ends; Row 3: sc across; Row 4: sc2tog at ends; Row 5: sc across; Row 6: sl st around to tidy. Fasten off.
- Button & loop
- Sew a large retro button onto pocket front (centered). Make a small wide loop: ch10, sc back across to make a flat loop strip, join to flap underside and secure with extra stitching so it lies flat and grips the button easily.
- Optional top-stitching
- Emphasize band lines with a running surface slip-stitch in accent color along band seams for graphic definition.
Variations
- Swap colors for monochrome mid-century palette (mustard + teal + brown).
- Use a wooden or enamel button for retro flair.
Finishing
- Add lining if you want extra longevity and crisp interior edges. Weave ends tidy and press lightly.
Common finishing steps for all holders
- Button loop test: Before securing loop permanently, test with intended button and several cards to ensure snugness. You want the loop to fit comfortably over the button with slight friction.
- Lining: For a professional finish and to protect cards (especially if using yarn that stretches), cut lining fabric or felt slightly smaller than pocket interior and hand-sew inside with small whipstitches. For machine finish, top-stitch lining to top edge and then close sides by hand.
- Seams & joins: Use mattress stitch or whipstitch on RS for neat joins if you seamed two panels. Invisible joins keep surface smooth.
- Labeling / branding: If selling, add a small leather or woven tag sewn into a side seam for branding.
- Blocking: Light steam or wet block (depending on fiber) to square pocket and set flap shapes. Avoid over-stretching which can make pockets too loose.
- Care: Cotton holders are generally machine washable on gentle; wool or specialty yarns require hand wash. Remove lining if it’s delicate.
Conclusion
Small, quick to make, and highly customizable — crochet card holders are the perfect mix of form and function. This collection gives you six styles to suit different personalities and markets:
- Bear — soft and giftable; great for baby-shower favors (embroidered details).
- Tanjiro Checkered — bold and graphic; a pop-culture inspired bestseller.
- Coquette — feminine and elegant; pearl buttons and scallops for bridal or boutique shoppers.
- Tulip — botanical and chic; beautiful for spring capsule collections.
- Mini Flower — stash-busting, fast, and endlessly variable.
- Retro — color-block modernism with strong visual appeal.