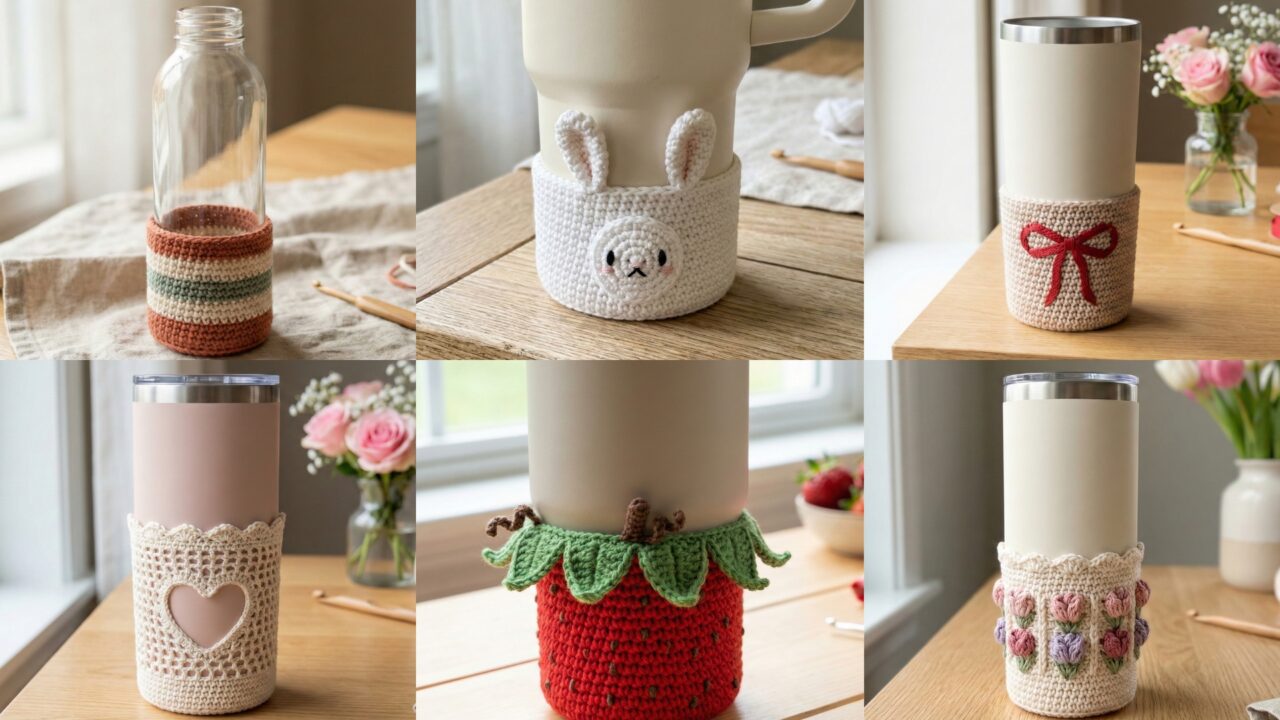
A crocheted bottle boot (also called a bottle cozy, bootie, or sleeve) is a tiny, satisfying project: fast to make, useful, and absolutely giftable. They keep bottles cozy, help with grip, and are a lovely way to dress up water bottles, wine bottles, or homemade drinks. Below you’ll find a practical introduction (materials, measuring, gauge, notes on sizing different bottle shapes), then six full, friendly patterns with materials lists, sample sizes, stitch notes, detailed step-by-step instructions, finishing tips, and variations: Striped, Miffy, Tulips, Lacy Heart Cutout, Bow Ribbon Embroidered, and Strawberry. Each pattern is written so you can make it now and customize it easily.
Quick Intro — materials, measurement, gauge & construction approaches
Which yarn to use
- Cotton / cotton blend (DK or worsted) — excellent choice: machine-washable, good stitch definition, and grips a bottle nicely.
- Acrylic / acrylic blends — soft, colorful, inexpensive; quick to wash.
- Plush / chenille — cozy, hides stitches; best for large, chunky boots.
- Wool — warm and natural but may smell if wet; not ideal for drink-cozy that gets wet frequently.
Choose yarn depending on desired look (crisp vs squishy) and care-level.
Hooks & other notions
- Hooks: 3.0–5.5 mm depending on yarn.
- Tapestry needle, stitch markers, scissors.
- Optional: small buttons, safety eyes (for plush toys — do not use safety eyes on items for young children where choking is a risk), thin elastic, thin ribbon for ties, scrap of felt for applique reinforcement.
What bottle sizes work
- The pattern instructions are written to be scalable. Always measure the bottle you’re making for:
- Neck circumference (just below where the bottle curves in; useful if creating snug neck shaping)
- Mid-body circumference (widest point) — this is the main number you’ll size for
- Height of the area you want covered.
How to calculate foundation stitches (digit-by-digit example)
- Make a small swatch in the main stitch you’ll use and measure stitches per inch (spi).
- Multiply spi × bottle circumference to find the number of stitches around.
Example: Suppose your swatch = 4 sc = 1 in and your bottle mid-body circumference = 9 in. Then stitches needed = 4 × 9.
- 4 × 9 = (4 × 10) − (4 × 1) = 40 − 4 = 36 stitches.
If your stitch pattern requires a repeat (e.g., multiple of 3 or 6), round to the nearest multiple and adjust the fit by adding a round of tighter stitches or a seam.
Construction approaches (pick one)
- Worked in the round (bottom-up): start at bottle base and crochet a flat circle, then work up the sides in rounds to the neck. Easiest for seamless boots.
- Worked in the round (top-down): start at the neck and work down — helpful if you want a snug neck.
- Flat panel & seam: crochet a rectangle and sew seam to wrap bottle — fast and easy for color-work or stripes.
For most of these patterns I’ll give a bottom-up in-the-round approach plus notes for flat panel if you prefer sewing.
1. Crochet Striped Bottle Boot Pattern
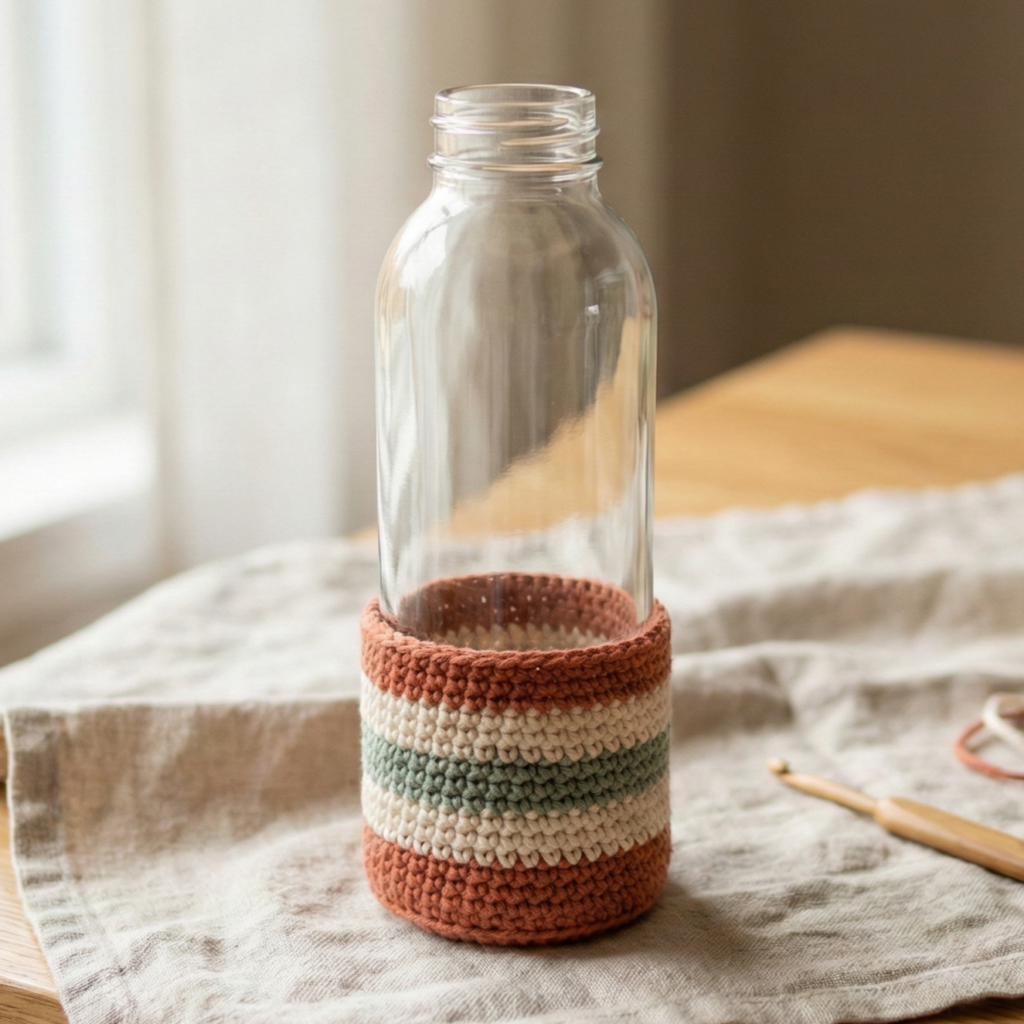
A quick, versatile cozy with clean color stripes — great for using up scraps and for gifting in sets.
Skill level: confident beginner
Sample finished size (example): fits a standard 500 mL water bottle — adjust with gauge and measurements.
Materials (one boot)
- DK weight cotton in 2–4 colors — ~40–60 yd total (depends on bottle height and number of stripes)
- Hook: 4.0 mm (adjust for gauge)
- Small stitch marker, tapestry needle
Stitch used
- Single crochet (sc) in the round — sturdy, fast, and hides color changes nicely.
Construction overview
Bottom-up flat circle base → increase rounds to match bottle circumference → work even rounds with color changes for stripes → optional neck shaping → finish with tidy edge.
Step-by-step
A — Swatch & measure
- Swatch 20 sc × 10 rows in the round and measure spi. Example spi = 4 sc = 1 in. Measure bottle circumference (example 9 in). Compute foundation: 4 × 9 = 36 sts.
B — Base (flat circle)
2. MR, ch1. R1: 6 sc in MR. (6)
3. R2: inc in each st around → 12.
4. R3: sc 1, inc around → 18.
5. R4: sc 2, inc around → 24.
6. R5: sc 3, inc around → 30.
7. R6: sc 4, inc around → 36. Now your circle should be approximately the bottle base diameter. If it’s too small, continue increases adding one more sc between increases each round until base matches. Stop increasing once the round count equals desired stitch count (36 in example).
C — Sides — first rounds
8. R7: sc around in back loop only (BLO) for a stable join then R8+: sc in both loops around (or continue BLO for a slightly ribbed effect). Work even rounds in chosen color until you reach neck area or desired height before color pattern changes.
D — Stripes
9. To stripe: change color at the end of a round. Fast and neat method: finish the last stitch of the round with the new color (pull through new color on final yarn over) or use standing sc for cleaner joins. Work 2–4 rounds per color band depending on stripe thickness preference. Keep ends on inside and weave them in invisibly later.
E — Neck shaping (optional)
10. If you want a slightly narrower top: do 1–2 decrease rounds spaced evenly: e.g., R: sc 5, sc2tog repeat around → reduces circumference by number of decreases. Try on bottle as you go.
F — Finish
11. Last round: sc in BLO for a tidy folded edge or sc, ch1 to form a little picot-ish edge. Weave in ends and trim.
Variations & tips
- Use two bright colors for bold graphic stripes or subtle tonal shades for a minimalist look.
- Add a small loop at top: ch10, sl st to last round to make a hanging loop for drying.
- Make a matching set of 2–4 boots in different stripe patterns as a gift box.
2. Crochet Miffy Bottle Boot Pattern
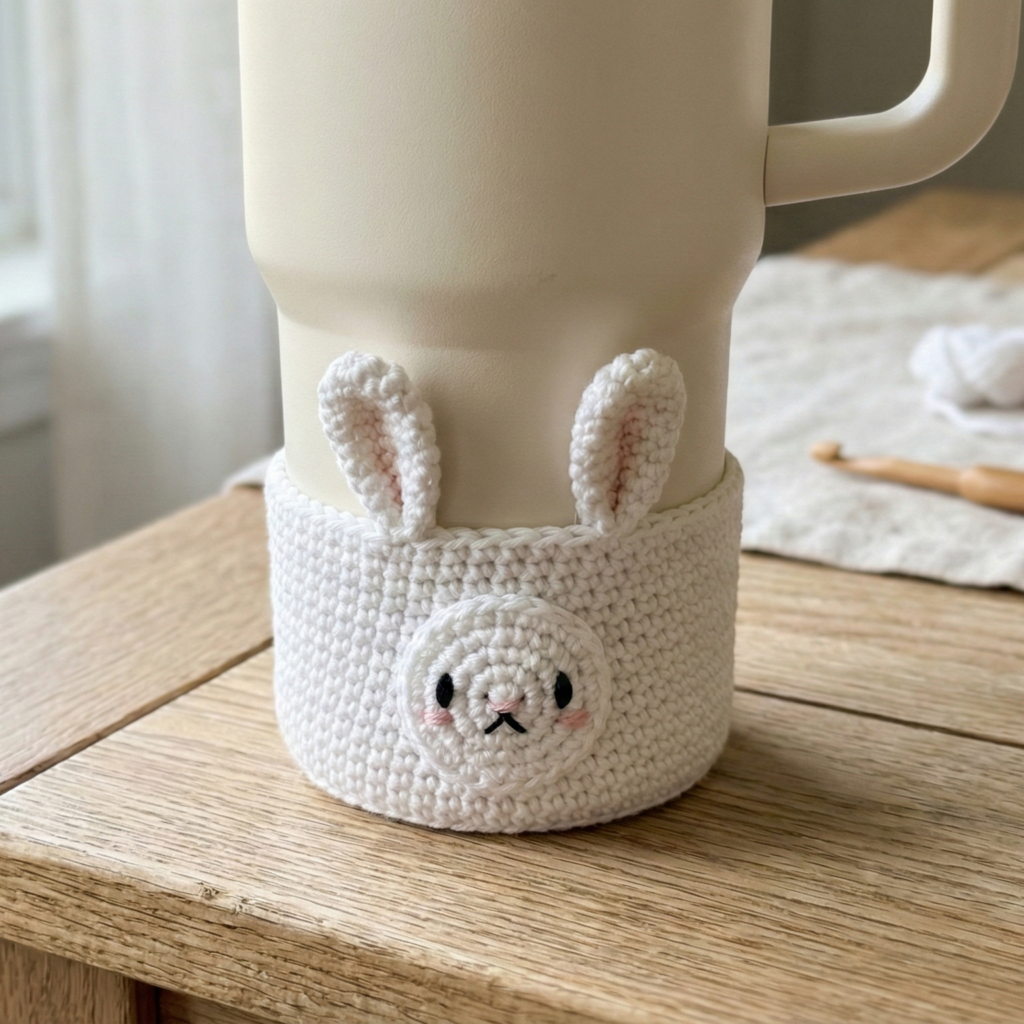
A cute character-inspired boot with Miffy-like simple face applique and ear loops (Miffy is a copyrighted character — if publishing commercially, consider making a bunny-inspired or “minimal bunny” design rather than using exact copyrighted imagery). This write-up suggests a bunny-style motif that’s similar in vibe (simple, kawaii) but original.
Skill level: intermediate (appliqué + placement)
Materials
- DK white or soft beige for main boot, small black and pink bits for face accents — ~60 yd total
- Hook: 4.0 mm
- Felt backing for applique (optional), small bead/button for nose (optional), hot-glue (optional) or sewing needle for secure attachment
Construction overview
Striped or plain boot base, small round face appliqué (embroidered or crocheted) sewn on, and two small ear tabs attached at the rim or slightly above.
Step-by-step
A — Make the boot base
Follow the Striped Bottle Boot base steps (pattern #1) but make it in a solid color (white). Make it slightly taller if you want ears to sit above the rim.
B — Bunny face appliqué (crochet circle)
- MR, ch1, 6 sc in ring. (6)
- R2: inc around → 12 sc. R3: sc1, inc around → 18 sc. Fasten off and leave a long tail for sewing. Lightly stuff if you want a raised nose area (optional). Sew small black French knots or tiny safety beads for eyes (hand-sewn).
Important safety note: if the bottle boot is a child’s gift, do not use small beads that could detach; embroider the eyes/nose instead.
C — Ears (make 2)
- Small triangular ear: ch6, Row 1: sc in 2nd ch and across (5 sc). Row 2: ch1, sc2tog, sc, sc2tog → 3 sc (taper). Row 3: ch1, sc3tog to finish small point. Fasten off, leave tail. Fold the base slightly and sew to make a curved ear. Alternatively make slightly larger ears using 8–10 chains and more rounds.
D — Placement & assembly
- Sew face circle centered on the bottle boot front, approx 1.5–2″ below rim. Sew ears at rim edge on either side of the face. Sew very securely with many passes so the ears don’t fall off. Add blush (tiny pink embroidered ovals) under eyes if you like.
E — Finish
Weave in ends. Optionally add a detachable tiny scarf: ch 30, sc across, seam ends to form a collar that tucks under the face for extra charm.
Variations & copyright note
- For commercial sales, avoid using the exact name/likeness of copyrighted characters. Use bunny-inspired descriptors and your own original face style.
3. Crochet Tulips Bottle Boot Pattern
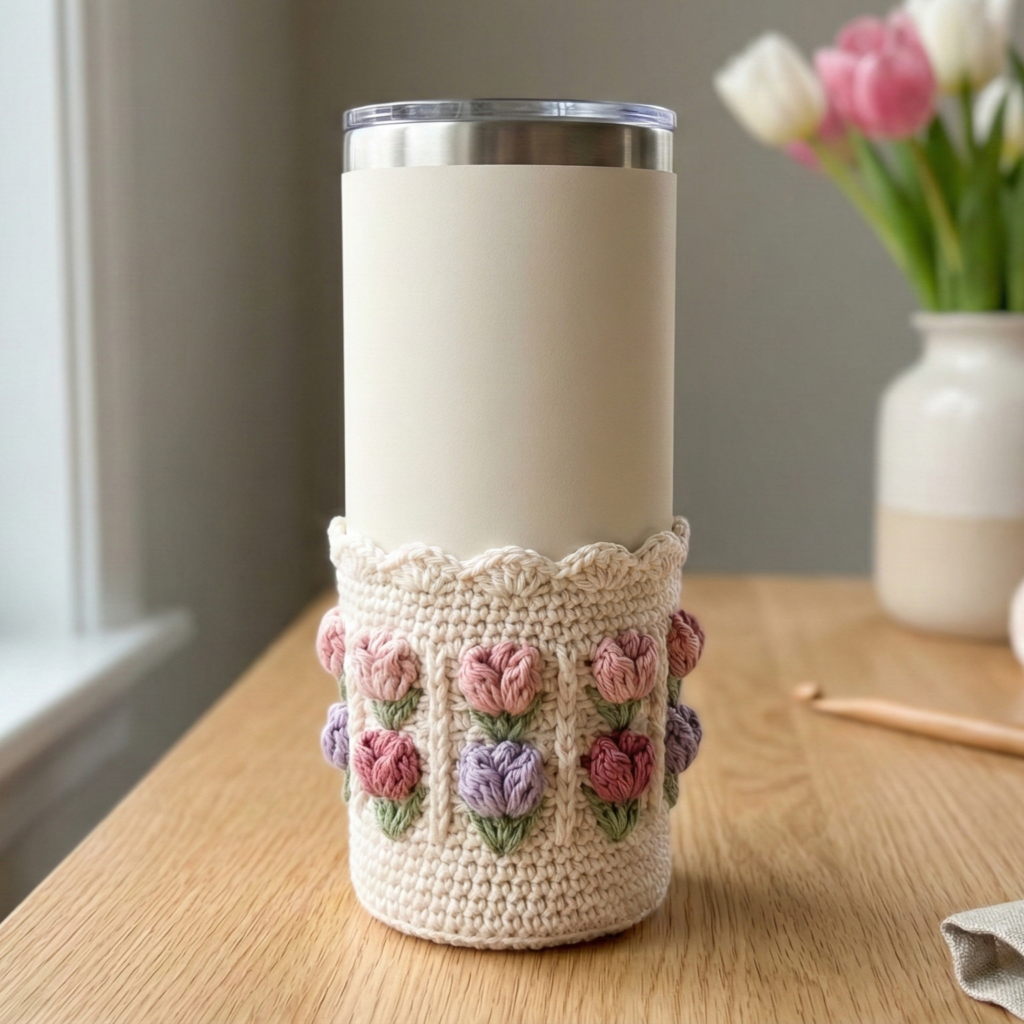
An elegant, floral bottle boot with alternating vertical tulip motifs — delicate enough for a spring brunch gift, sturdy enough to protect a bottle.
Skill level: intermediate (textured stitches + color changes)
Materials
- DK cotton: main color for background, contrasting color for tulip petals and leaves — ~60–80 yd
- Hook: 4.0 mm
- Tapestry needle, stitch markers
Stitch used
- Combination of dc shells and short post/cluster stitches to create tulip shapes. Worked as vertical repeats around the boot.
Construction overview
Flat bottom circle → establish required circumference → work vertical tulip repeat rounds (each tulip is formed across several rounds) → finish with scalloped edge.
Step-by-step
A — Swatch & compute
- Swatch the tulip repeat: make one vertical repeat about 1″ wide by 1.5–2″ tall so you know how many repeats fit around your bottle. Suppose one repeat = 1 in and bottle circumference = 9 in → need 9 repeats (stitches adjusted to pattern repeat).
B — Base & start
2. Bottom circle increases as in pattern #1 until you reach the stitch count that equals the number of tulip repeats × stitches per repeat. For example, if each repeat uses 6 stitches and you need 9 repeats → 6 × 9 = 54 stitches around. Continue increases until you reach 54.
C — Establish background rounds
3. Work 2–3 rounds sc in background color for stability.
D — Tulip pattern (example repeat — multiple of 6)
You’ll work the tulip over 4 rounds so that petals build up vertically.
- Round A (setup): sc 2, ch2, sc 2 (creates spacing for petal columns across repeats).
- Round B (petal anchor): in ch2 space work [(dc, ch1, dc) × 2] to make small petal stitches (or 3-dc cluster depending on your style).
- Round C (petal shaping): work sc around clusters and hdc in sc area to anchor petals.
- Round D (leaf/sepals): change to stem/leaf color and work small leaf clusters or front post stitches below petals to shape tulip stems.
Repeat A–D around for full height until desired boot height reached (e.g., 4–5″). Keep color changes tidy by carrying yarn short distances or weaving ends.
E — Top scallop
4. Work a decorative round: sc, skip 1, 5 dc in next → scallop around the top to echo petals. Fasten off.
Finishing
- Weave ends; block lightly if desired to even the tulip petals. Tulip designs look especially nice in two-tone palettes (soft pink petals + green stems).
4. Crochet Cute Lacy Heart Cutout Bottle Boot Pattern
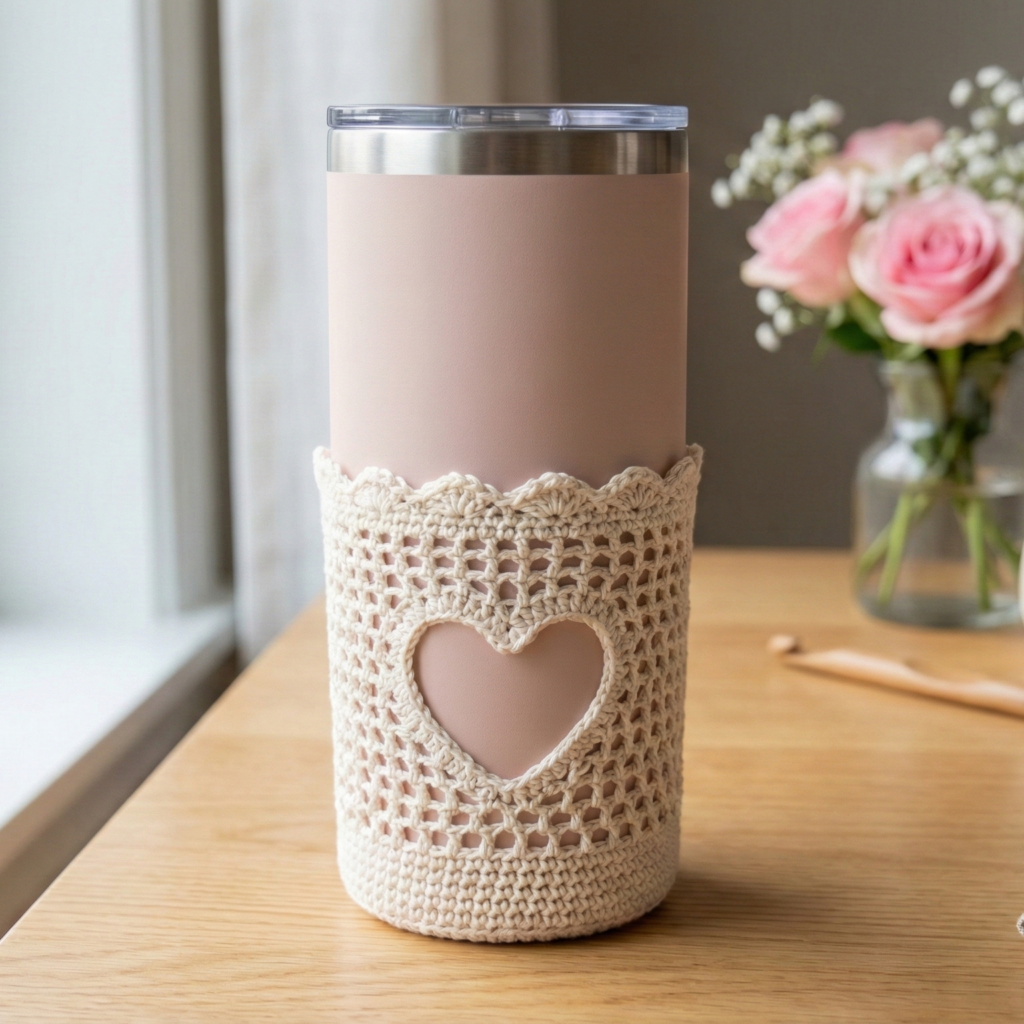
A romantic, airy cozy featuring little heart cutouts in a lace field—lovely for Valentine’s gifts and pretty packaging.
Skill level: intermediate (lace & cutout placement)
Materials
- Sport or DK cotton (two colors optional for hearts) — ~50–80 yd
- Hook: 3.5–4.0 mm
- Tapestry needle
Stitch used
- Filet mesh / small openwork grid with heart-shaped blocks created by filled vs. open meshes.
Construction overview
Work a mesh in the round (filet-style) and place small filled blocks to form heart shapes. You can either work the hearts into the rounds as you go, or make them as appliqués and sew on — the first is more elegant.
Step-by-step
A — Filet mesh basics
- Filet mesh is dc/ch1 grids. A basic filet row in the round: dc, ch1, skip 1 st (if working as grid) or work into chain spaces if working flat. To do filet in the round, you’ll need a planned stitch count so that your grid aligns.
B — Heart chart & math
2. Draw a small heart chart on graph paper or in a spreadsheet: hearts often occupy an odd number of grid squares both wide and high (example heart: 7 squares wide × 7 squares high). Decide how many hearts you want around circumference and compute repeats.
Example: If each heart chart is 7 grid units wide and you plan 2 units of spacing between hearts (total 9 units per heart), and your bottle circumference in grid units is 36 → 36 ÷ 9 = 4 hearts. Pick the closest whole number.
C — Work base & mesh
3. Build the base diameter as usual. Once you reach the cylinder side, work filets: for each grid square you either work a filled square (4 dc in a block or 1 dc, ch1, 1 dc depending on your chosen scheme) or an open square (dc, ch1, skip). Follow your heart chart row by row as you work around — this is like knitting fair isle but in filet form.
D — Example heart block method (simple)
- Open square = ch3, skip next 3 sts? (filet conventions vary; adapt to chosen multiple).
- Filled square = 3 dc in the next 3 loops or work a “solid block”.
Because filet in the round can be fiddly, alternative approach: make the boot as a flat rectangle in filet pattern: chain width to match circumference, work mesh rows, then seam rectangle and close bottom by working in rounds for base or by joining edges and crocheting a bottom circle. This can be easier for charted patterns.
E — Top edge
4. Add a decorative scallop round (shells or picots) around the rim to enhance the lacy look.
Finishing & variations
- Add a tiny ribbon threaded through top for cinching and decoration.
- Make hearts in a contrasting color by switching yarn for filled squares only (requires extra yarn ends to weave).
5. Crochet Bow Ribbon Embroidered Bottle Boot Pattern
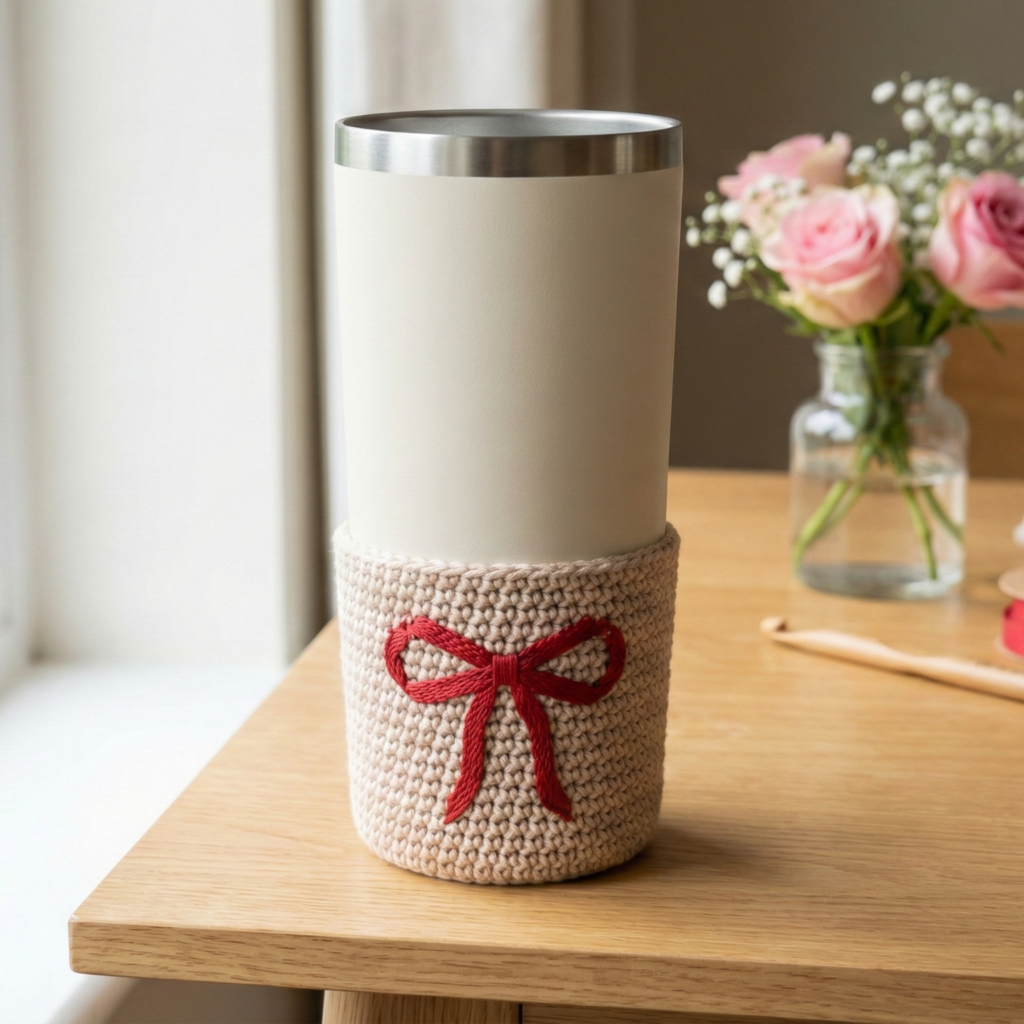
A feminine, embroidered cozy with a crocheted bow permanently stitched on and stitched ribbon detail — elegant gift-ready packaging.
Skill level: intermediate (embroidery + applique)
Materials
- DK cotton for base, small contrast yarn for bow and ribbon — ~50–80 yd total
- Hook: 4.0 mm
- Small felt circle (to stabilize bow), tapestry needle, small ornament button or bead (optional)
Construction overview
Crochet a smooth tube base in solid color, make a small bow (crochet or fabric), sew it to the front, and embroider ribbon lines across the boot to look like tied ribbon.
Step-by-step
A — Base tube
- Make bottom-up boot as in pattern #1 in a solid neutral color (e.g., cream, pale grey). Keep height moderate so bow sits centered.
B — Crocheted bow
- Bow body: ch 25 (or desired length). Row 1: sc in 2nd ch and across. Row 2–3: sc across. Fasten off leaving long tail. Roll strip tightly into bow loops and wrap a short narrow crocheted strip around middle (ch10, sc across 3–4 rounds) to form bow knot. Sew knot to hold. Alternatively make a small ribbon bow from fabric and glue/sew a felt backing behind to prevent slippage.
C — Embroidered ribbon
- Using contrasting thread (e.g., red or navy), work a running stitch or bullion stitch across the boot to simulate a ribbon band horizontally and vertically: you can wrap an embroidered band just above or below the bow to make it look tied. Use long sturdy stitches and go through several boot rounds to anchor embroidery so it doesn’t snag.
D — Assembly
- Sew the bow to the boot front, catch stitches through the felt backing and into the boot stitches to secure well. Add a small decorative bead at bow center if desired.
E — Finishing
Weave ends and trim. This cozy is very giftable; tie a real ribbon around the bottle over the crocheted bow for extra presentation.
6. Crochet Strawberry Inspired Bottle Boot Pattern
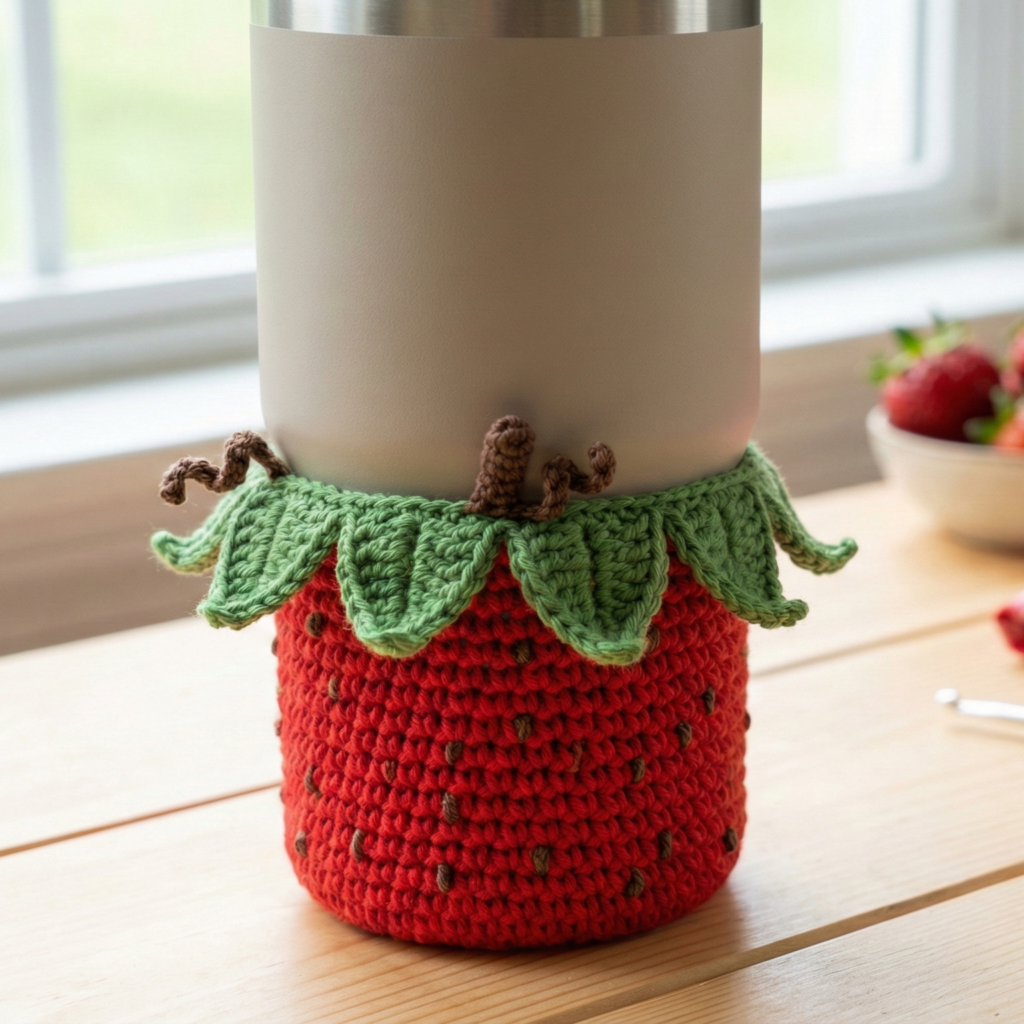
A sweet fruity cozy with seed stitch texture and a leafy cap — adorable for picnic-themed gifts or seasonal markets.
Skill level: intermediate (surface detail + applique)
Materials
- DK yarn: red for berry, tiny amount of brown for seeds, green for leafy top — ~60 yd total
- Hook: 4.0 mm
- Embroidery needle or small beads for seeds, small button or loop to secure leaf cap
Construction overview
Crochet red boot base in a lightly textured stitch (e.g., mini-bean or bobble) to mimic seeds; add tiny embroidered seeds or beads. Top the boot with a green leaf crown or a small lid that tucks under a rim.
Step-by-step
A — Base with seed texture
- Make bottom-up base as in pattern #1 in red. For texture, use a mini bean stitch (see earlier guidance) or a simple bobble staggered every few stitches: Row pattern (worked in rounds) — sc 2, bobble in next repeat around. This creates the appearance of tiny seeds dotting the berry.
B — Seeds
2. After finishing base, embroider tiny French knots in contrasting seed color (yellow or brown) spaced evenly to mimic seeds. Alternatively, sew on tiny yellow seed beads securely for sparkle.
C — Leaf crown / cap
3. Leaf ring: ch 30 (or circumference of top, whichever fits), join; Round 1: sc in each ch to form a strip. Round 2 (leaf round): ch6, sl st in next st around to create loops, then work shell petals into each ch6 — (sc, hdc, 3 dc, hdc, sc). This makes leafy points that will look like strawberry leaves. Slip-stitch leaf ring onto top edge, or make a small removable cap that tucks over the rim and fastens with a tiny button/loop.
D — Optional stem
4. Add a short ch4 stem in brown on top center and a tiny green curled tendril (ch10, sl st along chain) if you like.
E — Finish
Weave ends and check seed security. This makes a charming picnic gift or table decoration for party drinks.
Final finishing tips & care (applies to all boots)
- Weave ends inside so the interior looks tidy when you slide the bottle out.
- Secure appliqués well — bottles get handled; ensure sewn parts are firmly anchored with multiple passes.
- Wash instructions: cotton DK boots: machine wash gentle; reshape while damp. Embroidery and beadwork may require hand wash.
- Sizing check: always test-fit a boot on the intended bottle — yarns stretch differently, so adjust with a round of decreases or insert an elastic in top if you want snug fit.
- Presentation idea: slip the bottle with boot into a small gift box with tissue and a tag that says “Handmade with ♡ — machine wash gentle”.
conclusion
These six bottle boot patterns give you a wide palette of styles: clean and modern Striped, adorable bunny-inspired Miffy/Bunny, floral Tulips, romantic Lacy Heart Cutouts, feminine Bow Ribbon Embroidered, and charming Strawberry. Each pattern is intentionally scalable — measure your target bottle, swatch for stitches-per-inch, and adapt the foundation stitch count. Small details (appliqués, embroidery, beads) elevate a cozy from utilitarian to gift-worthy.