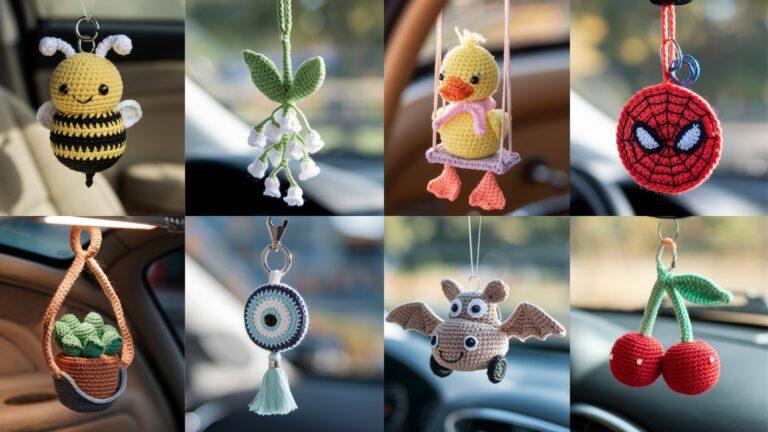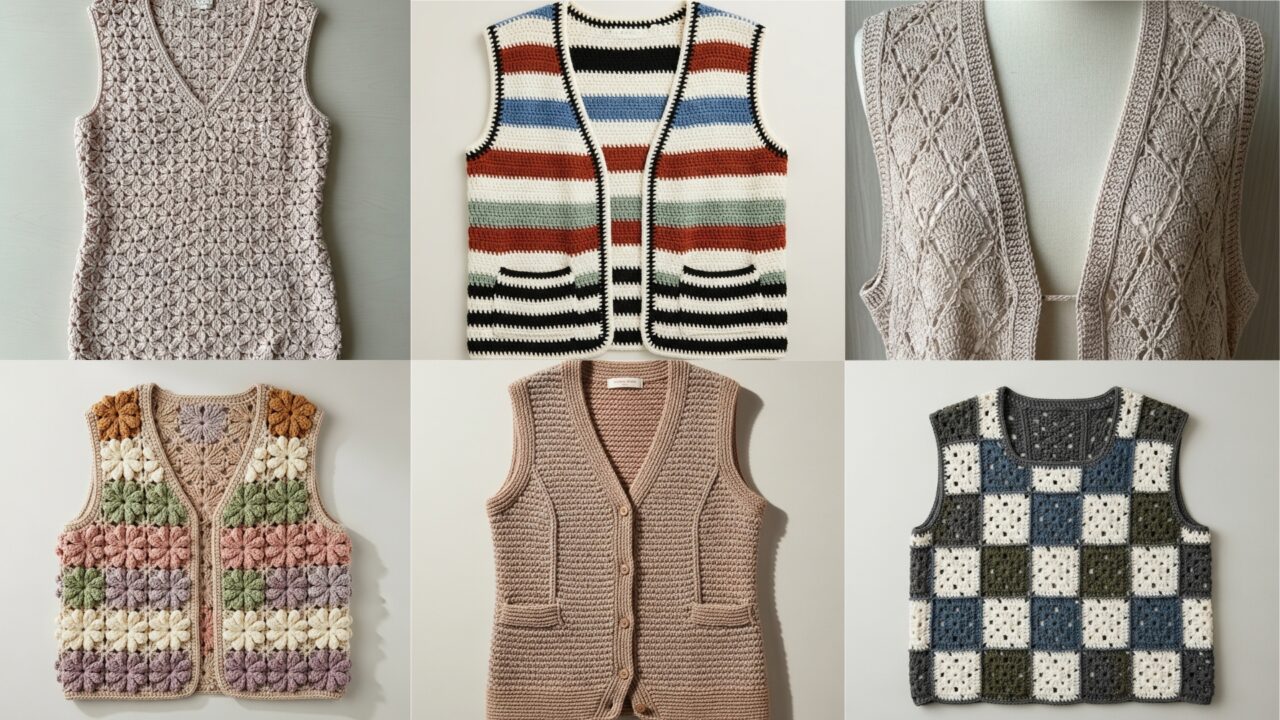
A crochet vest is one of the most versatile handmade garments: lightweight or chunky, cropped or longline, lacy or structured — it adds instant polish over a tee, blouse, or dress. Below are six complete vest designs you can use for your blog post: Flower Vest, Gridlock Vest, Classic Vintage Vest, Striped Vest, Lacey Vest, and Petal Vest. Each section contains:
- Skill level
- Materials and yardage (sample adult size M, with notes for sizing up/down)
- Gauge and how to measure to fit
- A step-by-step construction plan (clear, practical, and adaptable), including shaping and finishing details
- Variations, styling tips, and care instructions
All instructions use US crochet terms. Read the quick notes below once — they apply across all patterns.
Quick notes (abbreviations, sizing & how to adapt)
Abbreviations (US): ch = chain, sc = single crochet, hdc = half double crochet, dc = double crochet, tr = treble, dtr = double treble, rev sc = reverse single crochet (crab stitch), sl st = slip stitch, sk = skip, st(s) = stitch(es), rep = repeat, BLO/FLO = back/front loop only, MR = magic ring, RS = right side, WS = wrong side.
Sizing basics & measuring:
- Typical finished bust dimensions (adult)—approx: S 34–36 in, M 38–40 in, L 42–44 in, XL 46–48 in. For a vest choose 0–6 in positive ease for a close layering piece, or 6–12+ in for looser layering.
- To adapt: make a 4″ (10 cm) swatch in the main stitch, measure stitches-per-inch (spi) and rows-per-inch (rpi). Multiply spi × desired width (in inches) to find foundation stitches. For example, spi = 4 → for a 40 in bust ÷ 2 (front or back panel) = 20 in panel width → 20 × 4 = 80 sts across.
General construction approaches used below:
- Many vests are easiest as simple panels: back panel, two front panels, then seamed at the shoulders and sides (or left open for a duster). Some patterns use one-piece construction or minimal seaming (e.g., motifs joined). I specify options where helpful.
Blocking & finishing: always block panels before seaming; it evens stitches and helps shaping.
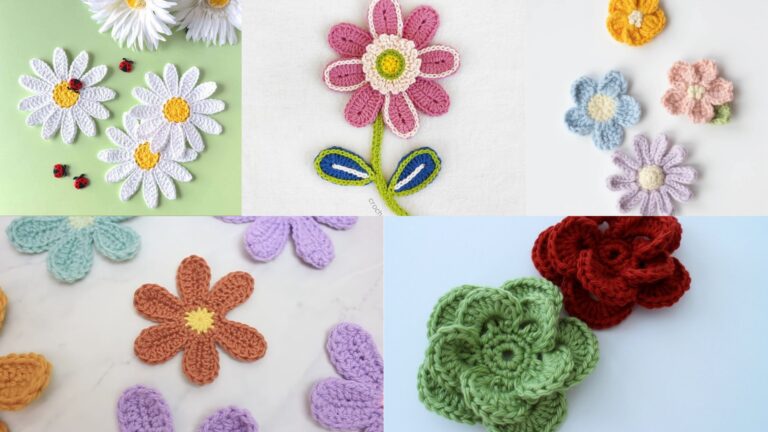
1. Crochet Flower Vest Pattern

Mood & silhouette: feminine, textural, slightly cropped or hip length depending on preference. The front is decorated with raised flower appliqués or worked-on motifs for a garden-inspired look.
Skill level: Confident beginner → intermediate (appliqué + basic shaping)
Materials (adult M sample):
- DK / light worsted yarn (soft cotton-blend or acrylic): ~900–1100 yds total.
- Hook: 4.0 mm.
- Tapestry needle, stitch markers, optional small buttons or tie cord.
Size & gauge example: 18 dc = 4 in (4.5 dc/in). Make a 4″ swatch in the body stitch to confirm.
Design & construction overview
Work a rectangular back panel and two front panels in a textured mesh or simple dc field. Make flower motifs separately (flat 5-petal flowers), sew them across the front panels in a pleasing arrangement, then seam shoulders and sides leaving armholes.
Step-by-step
- Swatch and calculate panel widths
- Decide finished bust and ease. For M bust 40 in with 6 in ease → finished bust 46 in. Back panel width = roughly 46 ÷ 2 = 23 in. If spi = 4.5 then cast on 23 × 4.5 ≈ 104 sts (round to repeat multiple).
- Back panel
- Foundation: ch 104 +1 turning ch (or use foundation dc). Row 1: dc across. Turn.
- Row 2–Rows until desired length to underarm: work Mesh Option A (for airy look): Row A: ch1, sc across; Row B: ch3, dc in next st, ch1, sk1, dc repeat across — or choose simple dc rows for a denser fabric. Continue until back panel measures shoulder to underarm (e.g., 14–16 in for a hip-length vest more, reduce for cropped).
- Front panels (make 2, mirror image)
- Foundation: cast on ~half back width each (here ~52 sts). Work same pattern. For V-front shaping, decrease 1 dc at the inner edge every 4–6 rows to form a gentle V (optional). Work until same underarm height as back.
- Make flowers (appliqués)
- Small 5-petal flower (approx 2–3 in): MR; ch1; 10 sc in MR; sl st. Round 2: ch4, sl st into next sc × 5 to form 5 loops. In each loop work (sc, hdc, dc, hdc, sc) to shape petal. Make 8–12 flowers for a cropped vest, more for full coverage. Make 2–3 tiny blossom centers (puffs or beads optional). Block flowers with a little steam to open petals.
- Assembly
- Block panels flat. Seam shoulders with mattress stitch leaving neck opening ~8–10 in depending on collar. Seam sides for desired armhole length (leave 7–9 in for armhole depth depending on sizing). Alternatively leave side seams open for a more draped look.
- Attach flowers
- Arrange flowers on both front panels in staggered rows, baste them in place, then sew securely with yarn through the base rounds. Keep stitches small and anchored to the fabric so appliqués won’t snag.
- Add edging
- Work 1–2 rounds of sc around armholes and front edges for a neat finish. For a decorative look, add a shell round on the hem.
- Optional closure
- Sew a small crochet cord with loops and buttons, or leave open as a layering piece.
Variations
- Instead of appliqués, work flowers directly into front panel using on-the-fly placement (advanced).
- Make a longline vest by extending the panel lengths; add pockets using small flower motifs as pocket flaps.
Styling & care
- Wear over a tank for a soft spring look or over a turtleneck for winter contrast. Hand wash or machine-wash gentle depending on yarn; block flat to dry.
2. Crochet Gridlock Vest Pattern
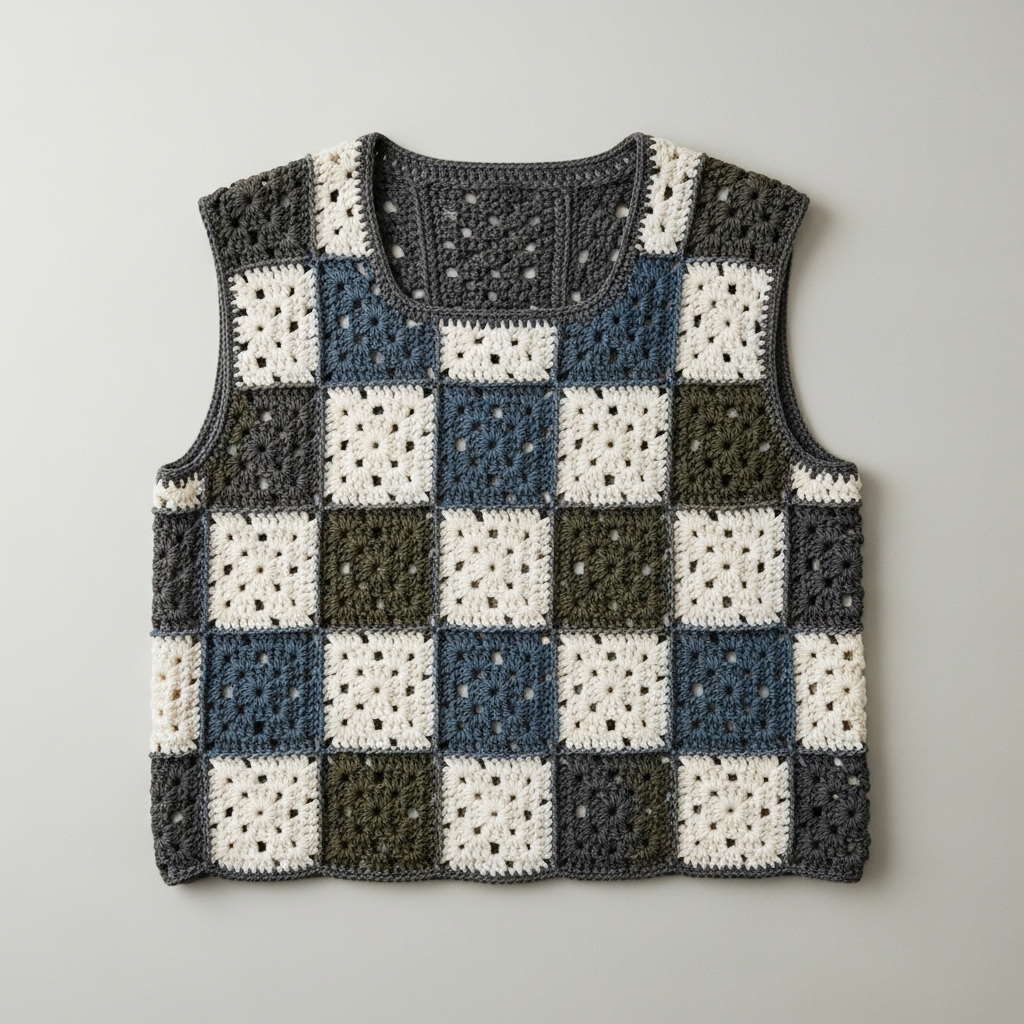
Mood & silhouette: modern, geometric, and slightly boxy — a great unisex option that reads contemporary and sharp.
Skill level: Confident beginner (filet/grid technique + straightforward shaping)
Materials (adult M sample):
- DK or worsted yarn (smooth, plied for clear stitch definition) — ~1000–1300 yds.
- Hook: 4.0–5.0 mm depending on yarn.
- Tapestry needle, blocking tools.
Gauge: example 16 dc = 4 in in dense filet ground.
Design & construction overview
Use a bold grid motif created with a filet or tapestry approach: solid squares alternated with open squares create a checkerboard/grid. Work back and front panels and seam; optional collar or band.
Step-by-step
- Chart & swatch
- Create or pick a grid chart in a multiple that fits your bust. For a repeat of 8 sts per block, calculate width: e.g., 104 sts foundation = 13 blocks.
- Back panel
- Foundation ch (104 + 3 for turning if working filet dc pattern). Work filet grid in rows: dc, ch2, skip2 for open mesh and solid blocks as required: a solid block = work dc across, an open block = dc in first st, ch2, skip2. Continue until underarm height.
- Front panels (make 2)
- Same as back but each front is half the width; if you want center-front grid pattern mirrored, make sure to plan chart placement so motifs line up at seams. For a V-neck or rounded opening, stop pattern early or decrease rows along inner front edge.
- Shoulder & side seams
- Seam shoulders leaving neck opening. For a structured look, slip-stitch a narrow band along the neckline and fronts.
- Optional pockets
- Make small square pockets using the same grid motif and sew on for a modern utility look.
- Edging
- Work 1–2 rounds of sc around armholes and front edges to stabilize. A reverse single crochet (crab stitch) on the external edge gives a tidy rope-like finish that complements geometric lines.
Variations
- Use contrasting color for grid lines (work color changes at block boundaries).
- Make a cropped version by working fewer rows.
Styling & care
- Layer over shirts or button up for a structured look. Machine-wash gentle if yarn label allows.
3. Crochet Classic Vintage Vest Pattern
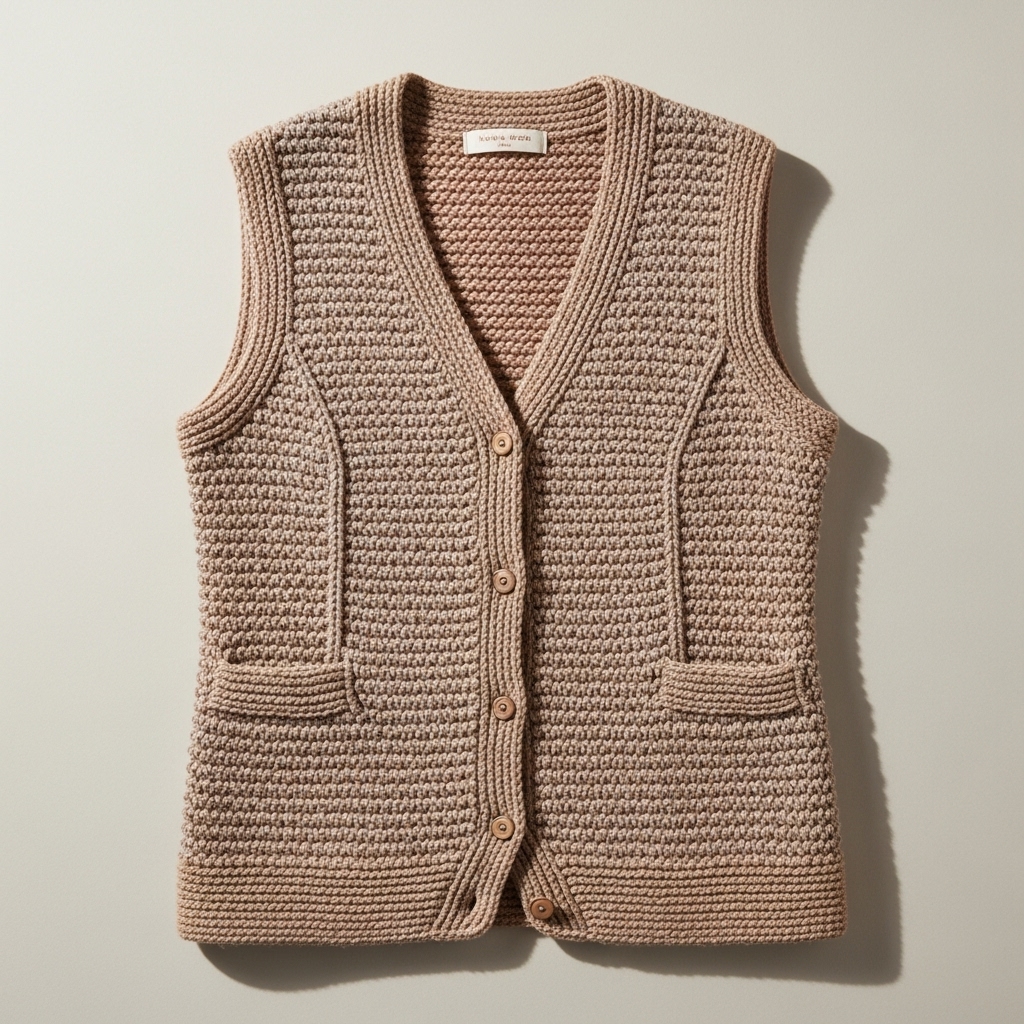
Mood & silhouette: timeless, slightly fitted, with a hint of retro tailoring — think structured ribbing, a neat buttonband, and possibly small pockets.
Skill level: Intermediate (ribbing technique, shaped waist)
Materials (adult M sample):
- Sport weight or DK wool-blend for drape — ~1000 yds.
- Hook: 3.5–4.5 mm (smaller than body’s hook if you prefer tighter ribbing).
- Buttons (5–7), blocking board, tapestry needle.
Gauge: example 20 hdc = 4 in.
Design & construction overview
Work bottom-up panels with subtle waist shaping via decreases/increases and a ribbed hem and buttonband for a knit-like vintage finish.
Step-by-step
- Back panel (bottom-up)
- Foundation chain: measure hip/waist depending on desired length. Example: finished bust 40 in → back panel width at waist ~20 in → chain 20 × spi. Row 1: hdc across. Row 2–N: work seed stitch or moss stitch (hdc in BLO alternated with sc rows) for a textured vintage handfeel. Work until underarm.
- Waist shaping (optional)
- To achieve a gently tapered waist, decrease 1–2 sts on each side every 8–10 rows for a few inches, then increase back toward bust width; alternate shaping should be subtle so the garment remains classic.
- Front panels (make 2)
- Each front panel includes buttonband area; work same stitch but set aside 3–4 st at inner edge for a neat folded buttonband. For a V-neck, start decreases earlier along inner edge.
- Shoulder shaping & seaming
- Work short rows or standard shoulder decreases to shape cap. Seam shoulders.
- Sleeve openings & armhole finish
- Work a few rounds of sc around armhole or add a narrow 1–2 in rib cuff.
- Buttonband & collar
- Pick up stitches along the front edges and work a 1.5–2 in wide rib (BLO hdc rows or fp/bpdc rib) as the buttonband. Add evenly spaced buttonholes across one band (ch3 loops every X rows) and sew buttons to the other.
- Pockets (optional)
- Make small welt pockets: crochet a rectangle, fold in half, seam sides and attach to front at hip level. Top with a ribbed flap for a polished vintage look.
Variations
- Add a small shawl collar by extending the buttonband into a wider band that folds.
- Work in variegated yarn for a tweedy retro vibe.
Styling & care
- Classic vest pairs well with blouses and high-waisted trousers. Hand or machine wash per yarn instructions; reshape damp.
4. Crochet Striped Vest Pattern
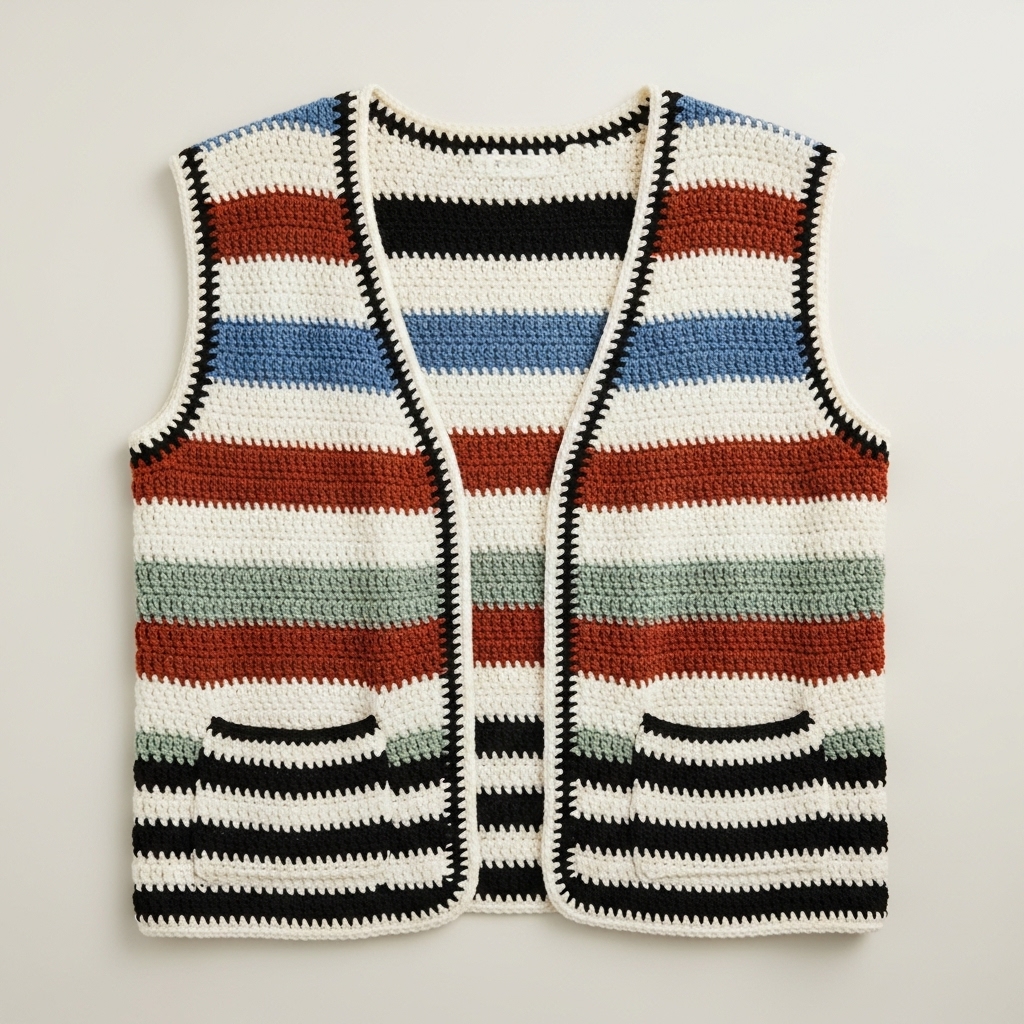
Mood & silhouette: casual, bold, and modern — horizontal stripes, can be longline duster or cropped.
Skill level: Confident beginner (stripe changes + seaming)
Materials (adult M sample):
- Worsted yarn in 2–6 colors depending on stripe plan — total ~1100–1500 yds.
- Hook: 5.0 mm for slightly open, relaxed fabric.
- Tapestry needle.
Gauge: example 16 dc = 4 in.
Design & construction overview
Work in panels using simple dc or hdc stripes, changing color every 4–6 rows for classic stripes or every 2 rows for pinstripes. Seams minimal; finish with a clean sc round.
Step-by-step
- Choose stripe plan
- Decide band height: 2 rows (pinstripe), 4–6 rows (classic). Pre-plan total yardage per color.
- Back panel
- Foundation chain for desired width. Row 1: dc across. Row 2–N: change color at row end: cut yarn and join new color with a sl st or use carry method if you prefer floats at the inside. Work until the underarm.
- Front panels
- Each front is half back width; for open-front vest leave center edges unjoined. For buttoned versions reserve space for buttonband.
- Seams & finishing
- Seam shoulders and sides. Work sc around armholes and front edges. For a tidy finish, add a narrow reverse-single crochet around all edges to give a neat rope-like border.
- Optional pockets & details
- Make stripe-matched pockets or contrast bands at pocket edges.
Variations
- Add an oversized hood in matching stripe motif for a sporty vibe.
- Use textured stitches in alternating stripes (e.g., dc stripe followed by moss stitch stripe) for visual and tactile interest.
Styling & care
- Stripe vests are casual and pair well with denim. Machine-wash gentle for prefered yarn.
5. Crochet Lacey Vest Pattern
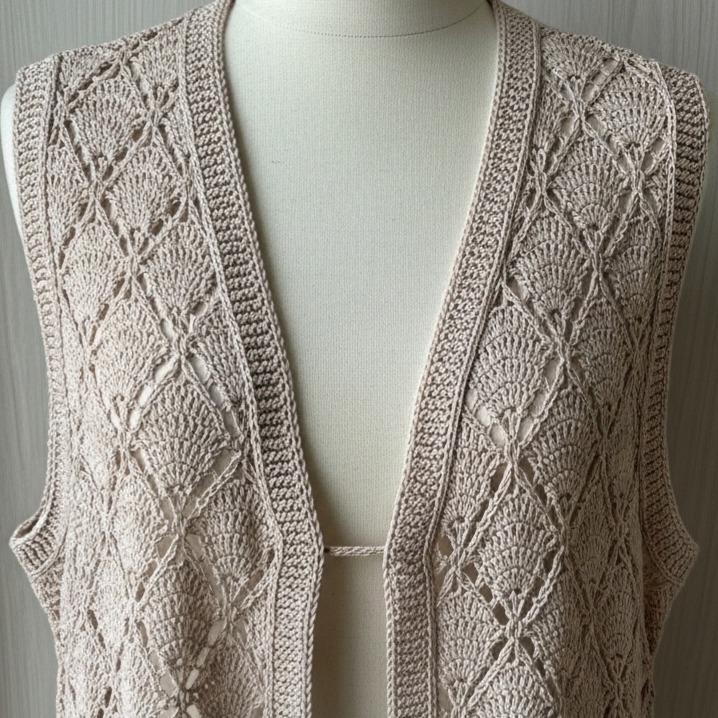
Mood & silhouette: open, romantic, and airy — perfect for warm weather layering over tanks or dresses.
Skill level: Intermediate (lace repeats and consistent stitch placement)
Materials (adult M sample):
- Fingering or sport-weight yarn (cotton or bamboo blends) — ~900–1100 yds for airy drape.
- Hook: 3.0–3.75 mm depending on yarn.
- Blocking tools for lace.
Gauge: lace depends on stitch; measure in the lace pattern rather than plain dc.
Design & construction overview
Work a repeating lace panel (V-stitch, shell-lace or trellis) in back and fronts; minimal seaming and light blocking give an elegant finish. Optionally, add a narrow waist tie or belt.
Step-by-step
- Choose a lace repeat
- Common repeats: V-stitch (dc, ch2, dc), shell rows (5 dc in 1 st, sk next), or fan and mesh alternation. Make a 4″ lace swatch to find spi/rpi in pattern.
- Back panel
- Foundation chain in multiples of the lace repeat. Work lace pattern rows until underarm.
- Front panels
- Mirror back; for V-neck decrease at inner edge per repeat to form gentle V or leave straight for an open draped vest.
- Seaming
- Seam shoulders with minimal joining; because lace can be delicate, consider joining with a slip-stitch join that keeps the RS clean. Seam sides leaving generous armholes.
- Edging
- Work a narrow band of sc or a feminine picot edge around openings to reinforce and tidy.
- Blocking
- Wet or steam-block the vest to open lace and set final measurements. Pin to measurements and let fully dry.
Variations
- Add a narrow crocheted belt threaded through lace eyelets.
- Work in a longline length for boho dresses.
Styling & care
- Ideal for warm climates; pair with linen pants or sundresses. Hand wash and block to preserve lace geometry.
6. Crochet Petal Vest Pattern
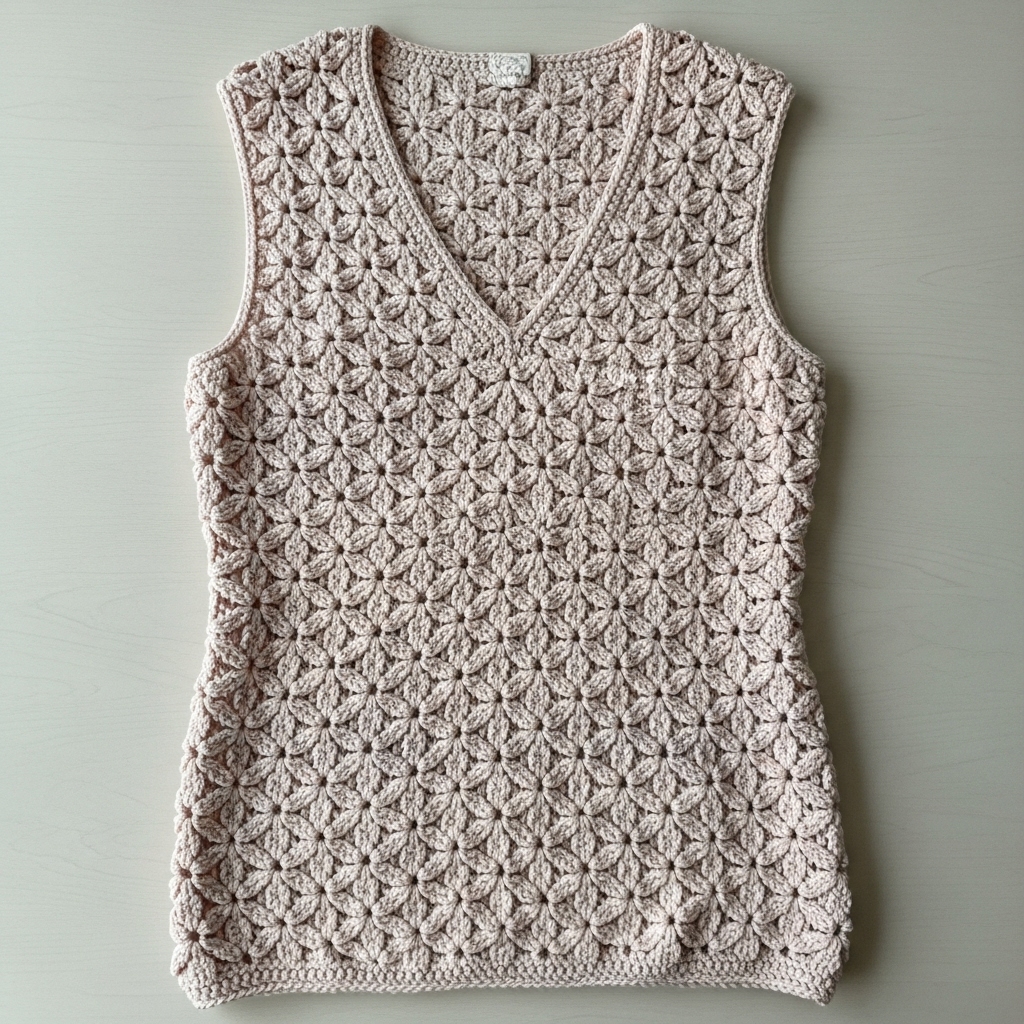
Mood & silhouette: sculptural, feminine, with layered petal motifs forming the body or hem — slightly more advanced and highly decorative.
Skill level: Intermediate → advanced (shaping with motifs, multiple joins)
Materials (adult M sample):
- DK yarn (good stitch definition) — ~1000–1400 yds.
- Hook: 4.0 mm.
- Tapestry needle, blocking board.
Gauge: motif size matters — plan petal motif diameter and count needed.
Design & construction overview
Construct the vest from repeated petal or scallop motifs (semi-circular fans or layered petals). Join motifs into panels or work petal rows onto a fabric base (appliqué). The layered petal arrangement gives dimensional texture.
Step-by-step
- Petal motif recipe (fan-shaped)
- MR or small foundation row. Round 1: ch3, 11 dc into ring (12 dc). Round 2: ch1, sc into each stitch, sl st to join. Round 3 (petal): ch5, in the loop: (sc, hdc, dc, hdc, sc) repeat to form a fan. Make enough motifs to build panels.
- Panel construction
- Decide panel layout: three rows of overlapping petals produce a scale effect. Join motifs with join-as-you-go along edges so overlap mimics petals of a flower layered over each other. For a structured vest, join motifs to a rectangular dc ground — sew petal tops to the ground so petals hang.
- Assembly
- Once front/back panels are built, seam shoulders and sides as desired. If motifs are heavy, reinforce seams with a narrow dc band to distribute weight.
- Edge finishing
- Work a top scalloped edge that echoes petal curves. Add a narrow inner facing for comfort if petals create texture around the neck.
- Optional lining
- For extra warmth or to hide joins, sew a lightweight cotton lining to the inside.
Variations
- Use gradient yarn and arrange petals so color flows top to bottom like a bloom.
- Reduce motif size for a subtle textural vest.
Styling & care
- Petal vests are statement pieces: wear over a solid tee. Hand wash and reshape while damp; store flat to avoid stretching.
Final finishing & publishing tips
- Schematic & measurement charts: for each pattern consider adding a simple schematic with key measurements (front width, back width, length, armhole depth). Readers love printable measurement charts.
- Photos & styling: show each vest in at least three scenarios — flatlay, on-model front, and back detail (close-up of stitch or motif). For motifs like Flower and Petal vests include a close-up of applique/motif construction.
- Size grading: offer S/M/L/XL stitch counts for readers who want quick sizing; when space is limited provide a “how to resize” paragraph (swatch → multiply → repeat adjustments).
- Yarn & hook notes: include substitutions: use thicker yarn and larger hook to make a cozier version quickly; use lighter yarn and smaller hook for delicate, summer versions.
- Care & labeling: always remind readers to check yarn labels for care; include recommended care on each pattern card.
Conclusion
These six vests — Flower, Gridlock, Classic Vintage, Striped, Lacey, and Petal — cover a wide spectrum of handmade styles you can offer readers: romantic, modern, retro, casual, delicate, and sculptural. Each pattern is designed to be adaptable: change yarn weight for warmer or lighter versions, modify length easily by adding or removing rows, and personalize with appliqués, pockets, or different edging.