A handmade glasses case is a small project that makes a big difference: it protects lenses from scratches, keeps frames safe in a bag, and is a lovely way to show off color and stitchwork. Below you’ll find a single practical introduction (materials, sizing, gauge, construction options, and finishing tips) followed by six complete sunglasses-case patterns. Each pattern includes: skill level, materials, gauge and finished size (with notes to scale), a clear step-by-step construction method, finishing (lining, closures), variations, and care instructions.
Read the introduction first — it contains tips that apply to every case — then jump to whichever design you want to make.
materials, sizing, gauge, and construction basics
Typical materials & notions
- Yarn: For protective cases sturdy, non-fuzzy yarns are best. Worsted weight cotton or cotton blends (category 4) give structure and washability. Acrylic can work but tends to be slightly slick; a cotton blend or wool/cotton mix gives a nice hand. For a soft, padded case choose bulky yarn or double up a lighter yarn.
- Hook: Use the hook size recommended on the yarn label as a starting point. A slightly smaller hook than label will produce a tighter fabric (good for scratch protection).
- Notions: tapestry needle, stitch markers, measuring tape, scissors, optional interfacing/fabric for lining, button/magnetic snap/snap fastener or toggles for closure, small piece of quilt batting or felt for extra padding, sewing thread and needle (if lining).
- Optional: fabric lining (cotton or microfibre), iron-on interfacing, Velcro, small plaque or label.
Finished size targets & how to scale
Sunglasses come in different sizes. A good target finished case for most adult sunglasses is:
- Width (flat, across opening): 7.0–7.5 inches (18–19 cm)
- Height: 3.0–3.5 inches (7.5–9 cm)
- Depth: 0.75–1.0 inch (2–2.5 cm) if padded or boxy
If you prefer a slimmer sleeve for reading glasses, scale down the width to 6.0–6.5 inches and the height to 2.75–3.0 inches.
How to scale with gauge: Make a 4-inch square swatch in your chosen stitch, block as you will finish. Count stitches per inch (spi) and rows per inch (rpi). Multiply desired width by spi to get starting chain (round to a stitch multiple required by the stitch pattern). Multiply desired height by rpi to know how many rows to work before folding/seaming.
Example (digit-by-digit): target width 7 in, swatch shows 4 stitches/inch. 7 × 4 = 28 stitches across. If pattern requires a multiple of 3 + 1, round 28 to nearest valid multiple (28 works if multiple of 3 + 1 → 27 +1 = 28).
Construction approaches
There are three reliable construction methods for cases:
- Flat rectangle folded and seamed — easiest for decorative stitch panels, ideal for lining. Work a rectangle to size, fold in half, seam two sides, add top closure.
- Worked in rounds as a tube — seamless exterior, good for post stitches and texture; close one end, insert lining and closure.
- Motif join (granny hexagon, squares, pineapple motifs) — join motifs into a rectangle or envelope that is seamed; very decorative but may need lining for lens protection.
Lining and padding
- Lining with soft cotton (or microfibre) protects lenses and gives a professional finish. Sew the lining slightly smaller than the crocheted shell so it stays tucked inside.
- For extra protection add a layer of quilt batting or a thin piece of felt between shell and lining. If you plan to machine wash, use washable batting or remove it before washing.
- Securely stitch lining at the opening or top seam so it doesn’t shift.
Closures
- Button + loop: simple and pretty; a crochet loop or buttonhole will do.
- Magnetic snap: low profile and easy to use; sew snap to lining or secure inside shell.
- Zipper: for full protection, sew a small zipper into top edge (requires more sewing).
- Fold-over flap: work extension that folds down and fastens with button or snap.
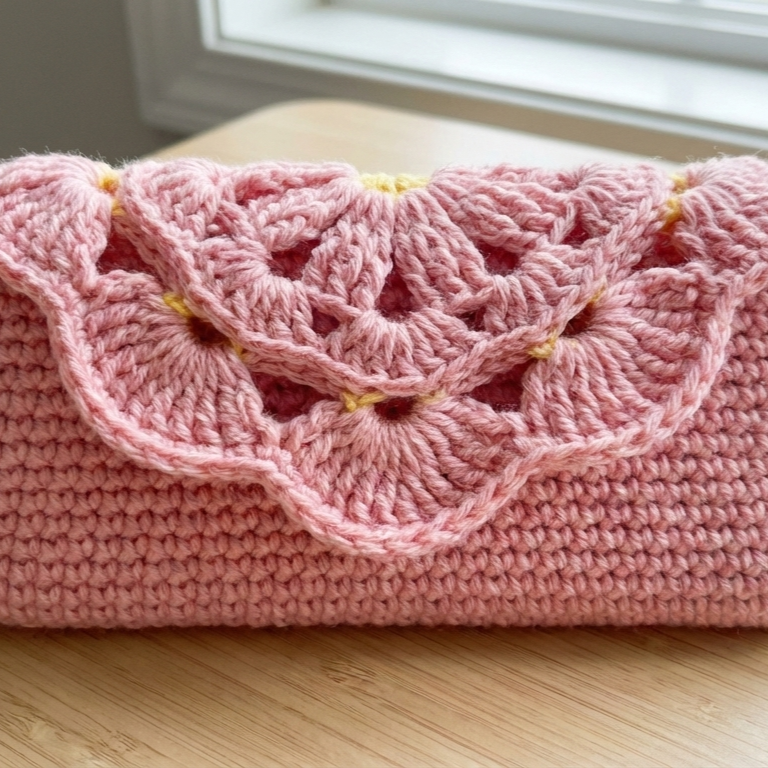
1. Crochet Granny Hexagon Glasses Case Pattern
Skill level: Confident beginner — motif join and basic seaming
Finished size (sample): approx 7.25″ × 3.25″ when assembled (one large hexagon folded), adjustable by adding rounds.
Materials
- Worsted cotton yarn — ~120–150 yd (main color plus contrasting for rounds if desired).
- 4.0 mm hook.
- Tapestry needle, scissors.
- Optional: cotton lining 8″ × 5.5″, batting 8″ × 5.5″.
- Button and small loop or magnetic snap.
Gauge & plan
- Make a sample hexagon motif: how many rounds until the hexagon measures about 7.25″ across? For medium adult sunglasses you’ll typically work 6–9 rounds in a classic hex granny motif using worsted yarn. Swatch to confirm.
Construction — one large hexagon folded method
- Make the hexagon:
- Round 1 (center): MR; ch3 (counts as dc), work 11 dc in MR; join — 12 dc.
- Round 2: ch3, dc in same st, ch1, 2 dc in next st around to make corners (you will have 6 corners created by grouping clusters). Join.
- Round 3+: Increase at corners by making (2 dc, ch1, 2 dc) into corner ch-spaces; along edges work dc clusters separated by ch1 as desired. Add rounds until the flat distance across opposite sides is approx 7.25″. Block flat.
- Fold & seam: Fold the hexagon so one third becomes the back, one third the front flap; there will be a natural flap shape (imagine folding a hexagon into a pouch). Seam the two side edges with whipstitch leaving the top open. If you prefer a sleeve rather than a flap, you can seam differently (see variations).
- Lining & padding: Cut lining and batting to fit inside the pouch (a little smaller than shell). Sew the lining into a pouch and, before closing the top, insert batting. Tuck lining into crochet shell and stitch a tidy top seam around the opening to secure.
- Closure: Add a button at center front and create a crochet loop on the flap (chain 6, join to form a loop) or install a small magnetic snap inside flap and front panel.
Variations & styling
- Make several small hexagons joined into a rectangle if you prefer a more rectangular case.
- Use two contrasting colors for rounds for a vintage granny look.
- Add a small exterior pocket (1–2″ wide) by sewing a small granny square onto front for cleaning cloth.
Finishing & care
- Weave in ends, lightly steam-block the hexagon for crisp shaping.
- Lining: hand-sew with small slip stitches for invisibility.
- Care: hand wash or machine gentle if lining is cotton and yarn is machine-washable; remove any non-washable interfacing first.
2. Crochet Fondant Pink Daisy Glasses Case Pattern
Skill level: Confident beginner — textured daisy applique and flap closure
Finished size (sample): 7.25″ × 3.25″ (rectangle folded with daisy flap about 2.5″ tall)
Materials
- Worsted cotton in fondant pink (main), leaf green and soft yellow for center — ~100–140 yd total.
- 3.5–4.0 mm hook for slightly dense fabric.
- Tapestry needle, small snap or button.
- Optional: thin batting and microfibre lining.
Gauge & plan
Make a rectangular panel wide enough to fold to 7.25″ width and tall enough to fold forming a pocket plus flap (panel height approx 6.5–7.5″ before folding).
Construction — folded rectangle with applique flap
- Body panel (worked flat):
- Chain 28 (example — compute with your gauge if different). Row 1: sc in 2nd ch from hook across; turn.
- Rows 2–36 (or until panel measures ~6.5–7.0″ tall): sc across (or alternate with linen stitch for texture). Keep fabric firm.
- Daisy applique: (make 1–2 small daisies for flap)
- MR; ch1; R1: 8 sc in MR; join.
- R2 (petals): ch3, 3 dc, ch3, sl st into next st repeat for 8 petals. Fasten off, flatten petals, sew a small yellow puff or French knot to center.
- Fold & seam: Fold the lower 2/3 as the pocket and the upper 1/3 becomes a flap. Seam sides leaving top open. Add thin batting inside before securing lining if desired.
- Attach daisy & closure: Sew daisy onto flap center. Install snap (male part on body, female on flap) or sew a button on body and a crochet loop on flap.
Variations & styling
- Make a row of tiny daisies down the flap edge.
- Work the body in a subtle rib (hdc in BLO) for a bakery-inspired texture to mimic fondant layers.
Finishing & care
- For soft pastel yarns, test for colorfastness before lining with lighter fabric. Machine wash gentle if yarn allows; line dry to preserve shape.
3. Crochet Pink Checkerboard Glasses Case Pattern
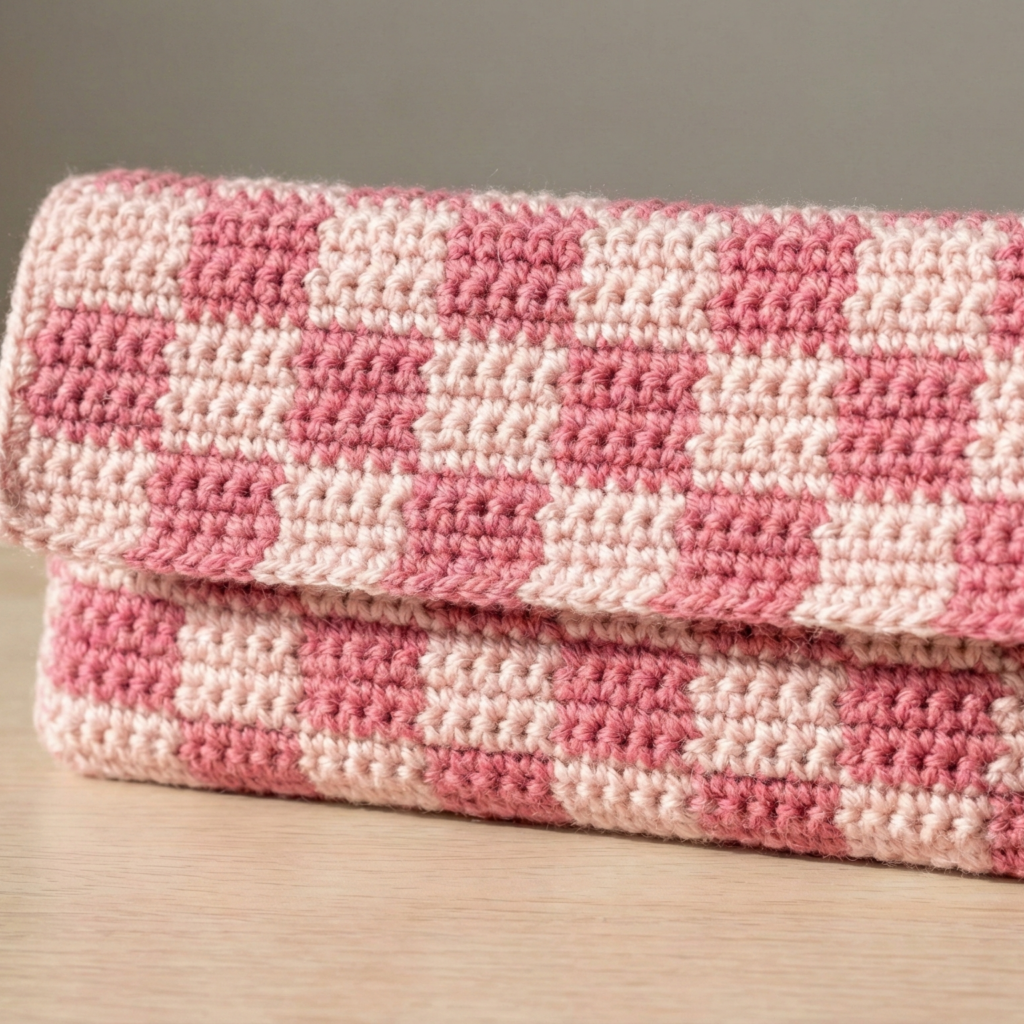
Skill level: Intermediate — colorwork / tapestry crochet or simple surface crochet for checkerboard effect
Finished size (sample): 7.0″ × 3.25″ rectangle folded
Materials
- Two colors of worsted cotton (two shades of pink or pink + blush) — ~150 yd total.
- 3.75–4.0 mm hook.
- Tapestry needle, optional lining fabric, button or magnetic snap.
Gauge & technique
- Tapestry single crochet is an excellent way to achieve a tidy colorwork checkerboard. Swatch in sc with both colors carried to determine stitches per inch. The pattern repeat is typically a multiple of 4 (e.g., 4×4 pixel blocks).
Construction — flat checkerboard panel
- Foundation: Chain the stitch count required for width. Example: 28 ch. Row 1: sc across.
- Tapestry rounds/rows (checkerboard):
- Row pattern (example for 4×4 blocks): Work sc in color A for 4 sts, switch to color B for 4 sts, repeat across. On next row, carry floats across the back and alternate block positions so squares stack like a chessboard. Use tapestry technique — keep tension even, catch floats every 4–6 stitches with the unused yarn to avoid long floats.
- Complete panel: Work rows until panel height ~6.5–7″ then fasten off.
- Fold, seam & lining: Fold in half with pattern outward, seam sides, add lining and batting as desired.
- Closure: Top flap can be formed by leaving extra height on one end before folding. Add a decorative button or use a magnetic snap.
Variations & styling
- Use three or four shades for a gradient checkerboard.
- Instead of tapestry, work a base in single color and surface-embroider small squares afterwards if you prefer no floats.
Finishing & care
- Tapestry SC has a firm fabric; lining optional but recommended to protect lenses.
- Machine wash gentle if yarn allows; use a laundry bag for lining.
4. Crochet Lacy Pineapple Motifs Glasses Case Pattern
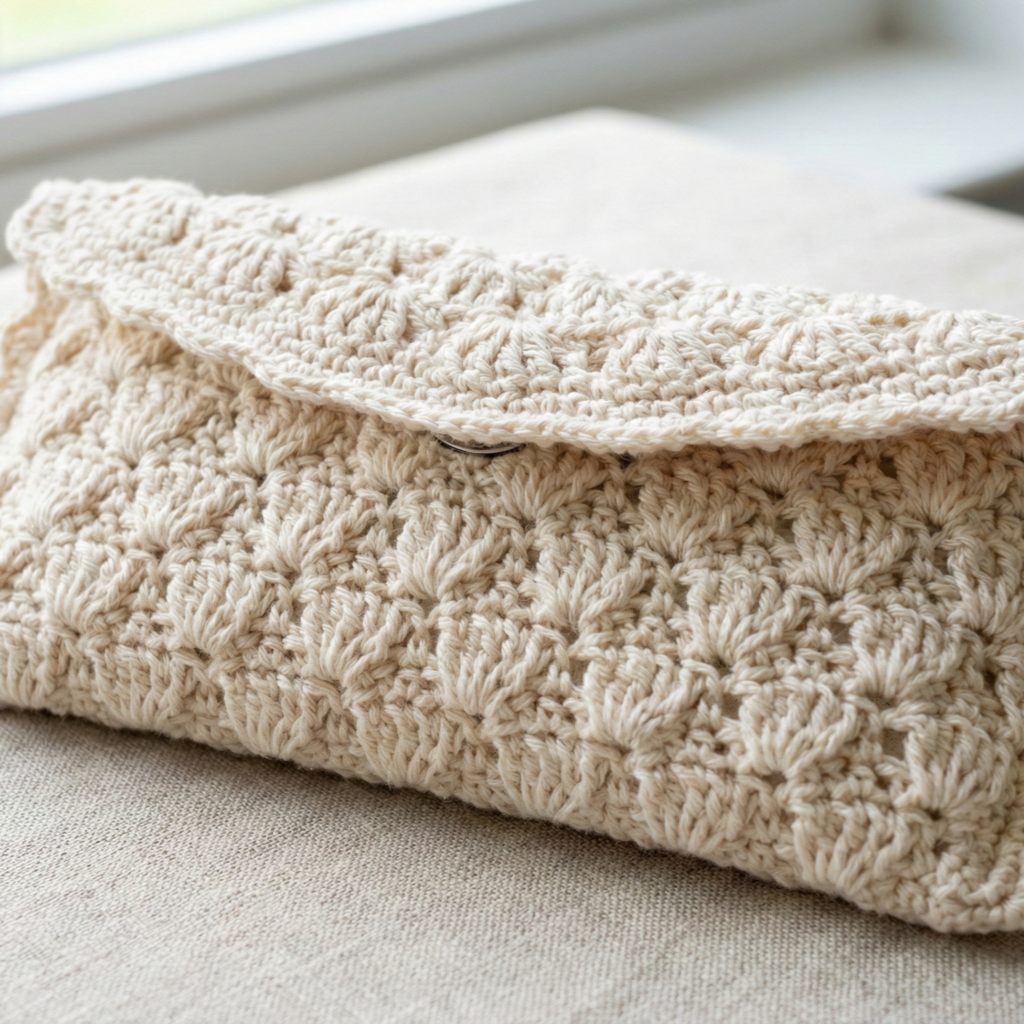
Skill level: Intermediate — working pineapple lace motifs and joining
Finished size (sample): about 7.25″ × 3.25″ when two motif rows are joined and seamed
Materials
- Sport or DK cotton (for fine lace) — ~140 yd.
- Hook 3.25–3.75 mm.
- Lining fabric and batting recommended for delicate lace.
- Tapestry needle, small magnetic snap.
Gauge & motifs
- Pineapple motif size depends on yarn and how many rounds. Typical pineapple motif (worked flat) will be 2.5–3.0″ across for DK; join 3 motifs across and 2 rows high to reach the desired width/height (adjust counts).
Construction — motif join method
- Make pineapple motifs: Work a classic crocheted pineapple motif using a published pineapple lace repeat (chains, clusters, picots). Work motifs until you have enough to make a rectangular panel (for a 7.25″ width, plan 2–3 motifs across depending on motif size). Block each motif carefully to open the lace.
- Join motifs: Join motifs using whipstitch, join-as-you-go, or a decorative joining stitch that provides some solidity (e.g., sc join with two strands carried).
- Add side trims: After rectangle is assembled, crochet a solid sc border around the piece of 1–2 rounds to make it easier to line and to give stability.
- Lining & padding: Cut lining slightly smaller than outer panel and sew into a pouch. Insert batting if you wish. Sew lining into the inside of the crochet panel and stitch the top seam securely.
- Closure: Add a flap (crochet an extra rectangle and seam into the top) or leave top edge to close with magnetic snap sewn into the lining.
Variations & styling
- For a vintage look use soft neutrals like cream or ecru.
- Add a narrow ribbon thread through edge chains as decorative trim and to help cinch the opening slightly.
Finishing & care
- Hand wash recommended to preserve delicate pineapple points; reshape on blocking board while damp. Lining will absorb washing stresses and protect the lace.
5. Crochet Leap Stitch Dynamite Glasses Case Pattern
Skill level: Confident beginner — textured stitchwork using “leap” or long-loop techniques
Finished size (sample): 7.25″ × 3.25″ tube worked in rounds
“Leap stitch” here refers to a textured technique where stitches ‘leap’ across the row to create raised diagonal bars or long-loop texture (you can approximate with elongated stitches, crossed stitches, or twisted post stitches).
Materials
- Worsted weight cotton yarn — ~120 yd.
- 4.0 mm hook.
- Tapestry needle, optional button or snap, lining.
Gauge & stitch concept
- The leap stitch texture is created by working a stitch into a previous row’s stitch (for example, dc into row-below or long loop + secure) to form a dramatic diagonal or raised effect. Swatch to determine spi.
Construction — tube with leap texture
- Foundation loop (worked in the round): Chain 28 (or appropriate stitch count for width), join into ring.
- Base rounds: Work 4 rounds of sc to form a sturdy base.
- Leap stitch rounds:
- Example leap repeat (worked around): [ch1, dc worked into the stitch two rows below or into the stitch 3 sts back (leap), sc in next st] repeat. This creates a staggered diagonal texture. Another option: work elongated loop by pulling the loop up 1.25–1.5 in then secure with a sc in the next stitch for long-loop texture.
- Continue textured rounds until tube height is approx 3.75–4.0″. Finish with 1–2 rounds of sc for a tidy edge.
- Close one end: If you’re making a sleeve, close one end with sc decreases (sc2tog across) or make the bottom flat by working a circle base and then seaming to the tube bottom.
- Lining & closure: Insert lining and secure; add closure (button + loop or magnetic snap).
Variations & styling
- Use two contrasting colors and leap stitch in a diagonal stripe for a dynamite effect.
- Make the long loops slightly longer for a plush, tactile case.
Finishing & care
- Remove lint/ fluff from long loops before inserting glasses; line with microfibre for lens safety. Machine wash gentle if yarn quality allows.
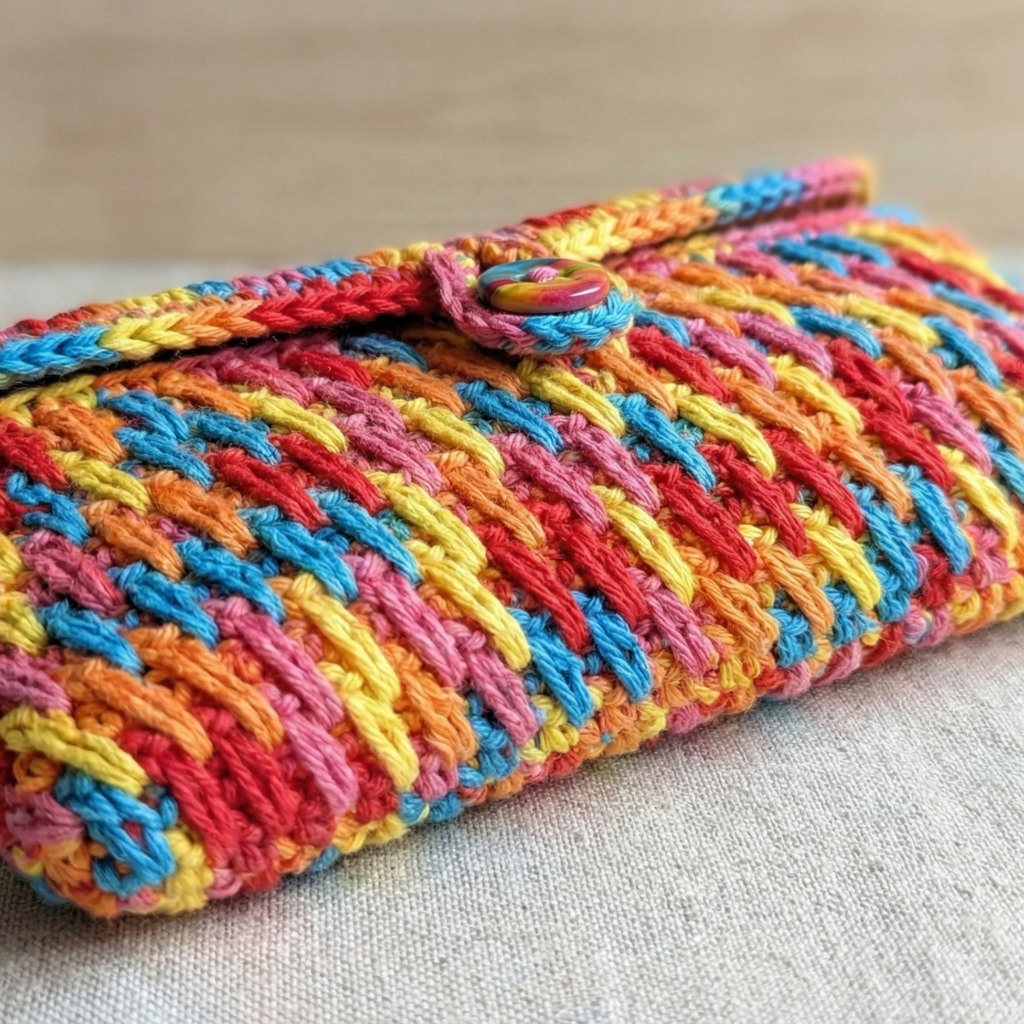
6. Crochet Summer Breeze Sunglasses Case Pattern
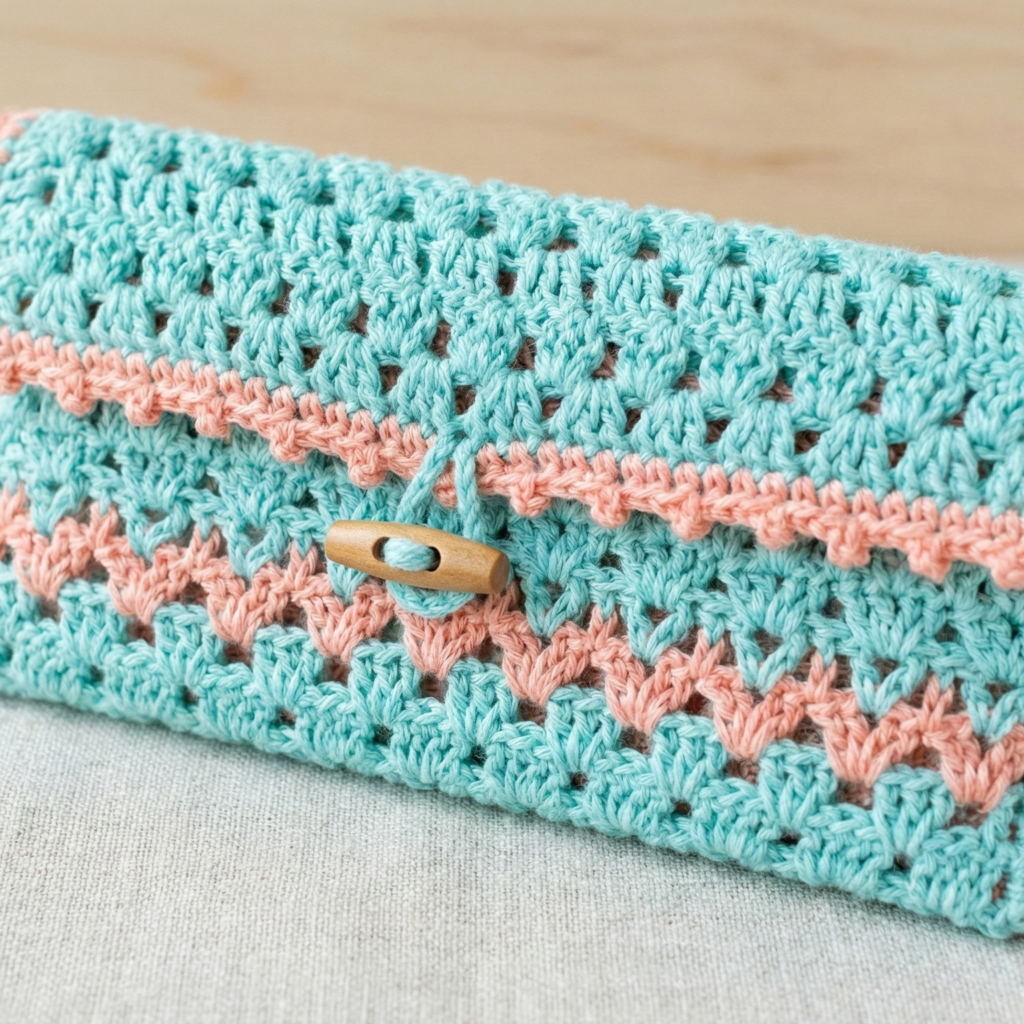
Skill level: Confident beginner — airy stitch, light structure, fold-over flap
Finished size (sample): 7.25″ × 3.25″ (folded flap about 2.25″)
Materials
- Light worsted (DK) cotton or cotton-linen blend in two summery shades — ~120 yd.
- 3.75 mm hook.
- Tapestry needle, small wooden toggle or button.
- Thin batting or felt for a lightweight padded finish, microfibre lining optional.
Gauge & stitch
- Use a breezy open stitch such as extended V-stitch or shell stitch. Swatch to get spi for width and rpi for height.
Construction — flat panel with fold-over flap
- Foundation chain: Chain 28 (or as needed). Row 1: sc across to form tidy bottom edge.
- Breeze stitch body (example V-shell repeat):
- Row A: ch3, skip 2, sc in next st across to create spaces.
- Row B: in each ch-space work (2 dc, ch1, 2 dc) (small shell).
- Row C: repeat Row A. Continue alternating until panel height is about 6.5–7.0″.
- Top flap: Leave extra rows at one end to form a flap (approx 2.0–2.5″ taller than the body fold line). Finish flap edge with decorative crochet picot or sc border.
- Fold & seam: Fold panel and seam sides leaving top open. Insert microfibre lining and tack it in place.
- Closure: Sew a small wooden toggle onto body and make a crochet loop on flap or add a button and loop.
Variations & styling
- Lace openwork is pretty but add lining and batting for real protection.
- Add a short wrist strap (crocheted chain strap attached to back) so the case hangs from a bag.
Finishing & care
- Block the shell motifs for an even look.
- Hand wash if delicate fibers used; otherwise machine wash gentle and dry flat.
Conclusion
You now have six thoughtful, blog-ready sunglasses-case patterns — from motif-based granny hexagons to delicate pineapple lace and textured leap-stitch sleeves. A few final practical tips to make your finished cases look and feel professional:
- Measure twice, crochet once. Make a small swatch to calculate stitches per inch and rows per inch, then adjust counts to reach your desired finished size. This avoids surprises and produces cases that fit sunglasses reliably.
- Always line lacy or openwork cases. Lining prevents lens scratches from textured stitches and hides floats or seam tails.
- Use batting for protection. A thin layer of batting or felt between shell and lining adds impact cushioning without making the case bulky.
- Secure closures well. Magnetic snaps are low profile and long-lasting; sew them through the lining for strength. Buttons and loop closures are charming but check that loops don’t loosen over time.
- Edge finish matters. A tidy round of single crochet around openings or a reverse single crochet (crab stitch) gives a durable, professional edge.
- Care instructions: Include care notes in your post—most cotton cases can be machine washed on a gentle cycle and air-dried; delicate lace should be hand washed.