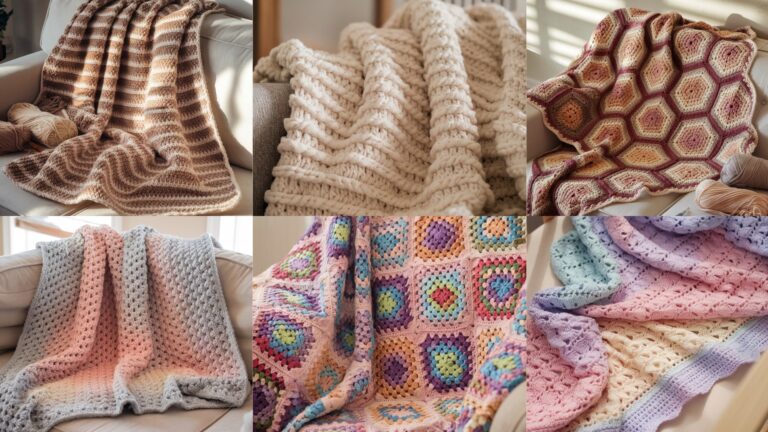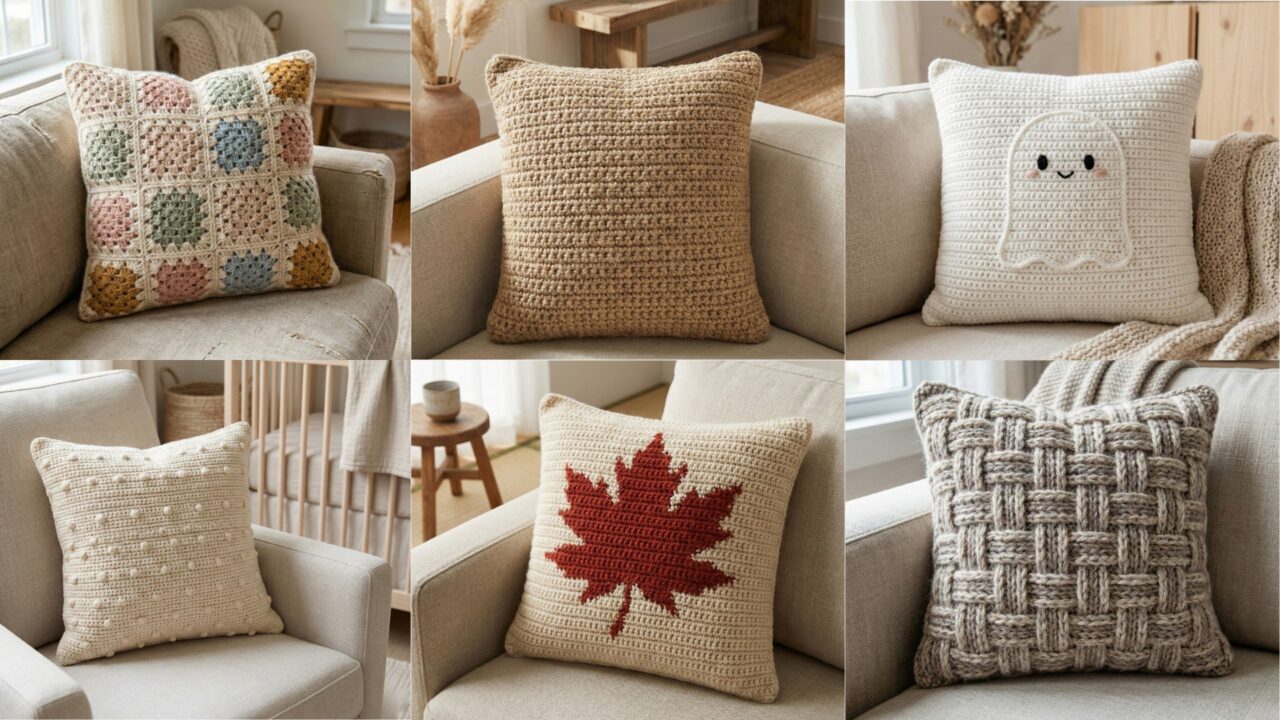
A textured crochet pillow is an instant way to lift a room — it’s tactile, decorative, and a satisfying project that shows off stitch skills. Below are six full pillow projects you can use as blog sections: Granny Throw Pillow, Basketweave Throw Pillow, Japanese Maple Pillow, Jute Pillow, Modern Neutral Nursery Pillow, and Cute Ghost Pillow. Each section includes:
- Skill level
- Materials (with example yarn choices) and finished-size guidance (I give two standard examples: 16″ × 16″ and 18″ × 18″)
- A clear gauge and sizing method with example calculations (so readers can scale the pattern to any pillow form)
- Detailed step-by-step construction for the pillow cover (front, back, joining, closure), plus finishing, blocking, and care notes
- Variations, styling tips, and troubleshooting/common fixes
All instructions use US crochet terms. Read the sizing/gauge section once — it applies to every pillow below and makes adapting to other sizes straightforward.
Quick sizing & gauge primer (use this for every pillow)
Before you begin any pillow cover, you need two measurements and a swatch.
- Measure your pillow form or desired finished pillow size:
- Example small: 16 inches square (16″ × 16″).
- Example large: 18 inches square (18″ × 18″).
- Make a 4″ × 4″ swatch in the stitch you’ll use for the main fabric. Measure stitches per inch (spi) across your swatch and rows per inch (rpi) vertically.
- Calculate foundation stitches (horizontal):
- Stitches needed = finished width (in inches) × spi.
- Show example arithmetic (digit-by-digit) for clarity:
- For 16″ pillow and a gauge of 4 stitches/inch: multiply 16 × 4 = (10 × 4) + (6 × 4) = 40 + 24 = 64 stitches.
- For 18″ pillow at the same 4 st/in: 18 × 4 = (10 × 4) + (8 × 4) = 40 + 32 = 72 stitches.
- Round the result to match the stitch multiple required by the pattern (I provide the multiple for each design).
- Calculate vertical rows:
- Rows needed = finished height (in inches) × rpi.
- Example: if rpi = 3 rows/in and pillow height = 16″, multiply 16 × 3 = (10 × 3) + (6 × 3) = 30 + 18 = 48 rows.
- Work in the round or as flat panels (pattern-dependent). Always block swatches and retest gauge if switching yarn or hook size.
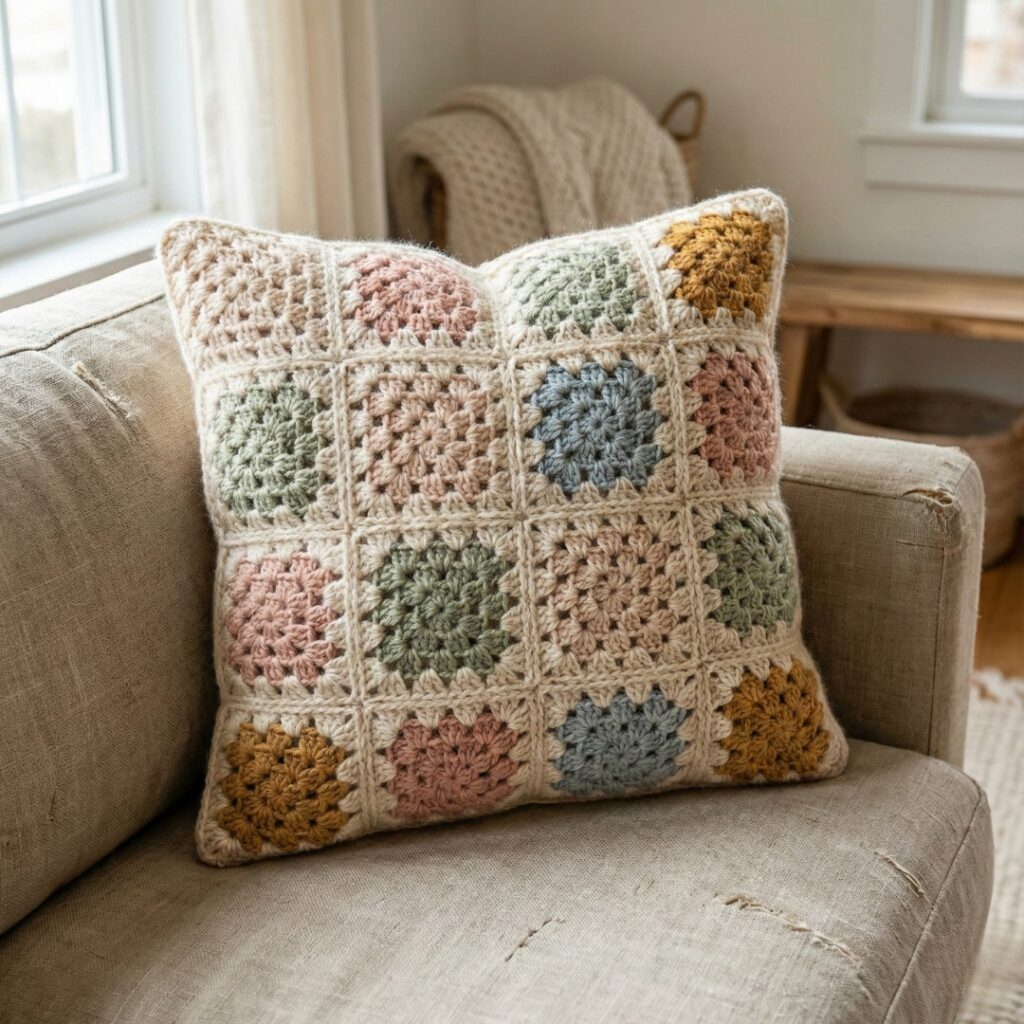
1. Crochet Granny Throw Pillow Pattern
Skill level: Confident beginner — granny squares and simple joins.
Materials (examples for one pillow cover)
- Worsted-weight yarn (acrylic or cotton): approx 350–500 yds depending on size and whether you make a full-square front or a granny panel.
- Hook: 5.0 mm (H).
- Pillow form: 16″ or 18″ square.
- Tapestry needle, scissors, optional zipper or buttons for closure.
Design concept
Classic granny squares joined into a front panel; back panel can be solid or another granny panel. This creates a colorful, textured throw pillow with charm.
Gauge & multiples
A standard granny square has no strict stitch multiple, but for a neat rectangular layout I recommend squares ≈4″ each (so 4 squares × 4″ = 16″). Adjust square rounds to hit your precise size.
Step-by-step
A — Make your granny squares
- Square pattern (traditional 4-round granny to ~4″)
- MR; Round 1: ch3 (counts as dc), 2 dc, ch2, 3 dc, ch2 repeat total 4 corners; sl st to top of ch3.
- Round 2: sl st to next ch2 sp, ch3, (2 dc, ch2, 3 dc) in same ch2 sp; ch1, (3 dc, ch2, 3 dc) in next ch2 repeat around.
- Round 3: repeat Round 2 adding ch1 spaces between corner clusters. Continue to Round 4 if needed to reach ~4″. Block squares as you progress.
- Make how many squares you need:
- For a 16″ pillow: if each square is ~4″, you’ll need a 4 × 4 grid = 16 squares for the front (4 across × 4 down).
- For an 18″ pillow: you can make 4.5 squares across — better to make 5 × 5 smaller squares (~3.6″ each) or adjust square size by adding rounds. Using 16 squares for 16″ is straightforward.
B — Join squares into front panel
3. Lay squares in the desired order. Use join-as-you-go or whipstitch/seam with mattress stitch for an invisible join. For a bold look, use a contrasting slip-stitch join around each square.
C — Back panel
4. Make a back panel in one piece:
- Option A: Make same number of squares and join for a matching textured back.
- Option B: Work a solid rectangle in sc or hdc sized to the same counted stitches and rows (use the math in the sizing primer). This is quicker and gives a smoother back surface.
D — Assemble the pillow cover
5. With RS facing out, seam three sides (bottom + two sides) with mattress stitch or single crochet seam. Insert pillow form. Close remaining side with:
- Hidden zipper sewn into the seam before assembly (recommended for a removable cover), or
- Buttons and buttonholes: make a flap on the back and add buttons, or
- Slip-stitch seam and close permanently (for a decorative pillow).
E — Finishing
6. Weave in ends and block the assembled cover to even out stitches.
Variations & tips
- Make larger squares for chunky boho pillows.
- Mix yarn textures: cotton for smooth squares, acrylic for softness, and a boucle accent square for interest.
- For a modern look use three neutral colors in an offset grid.
Care
- Machine wash gentle for acrylic; cotton can be machine-washed cold and reshaped. Remove pillow form before washing.
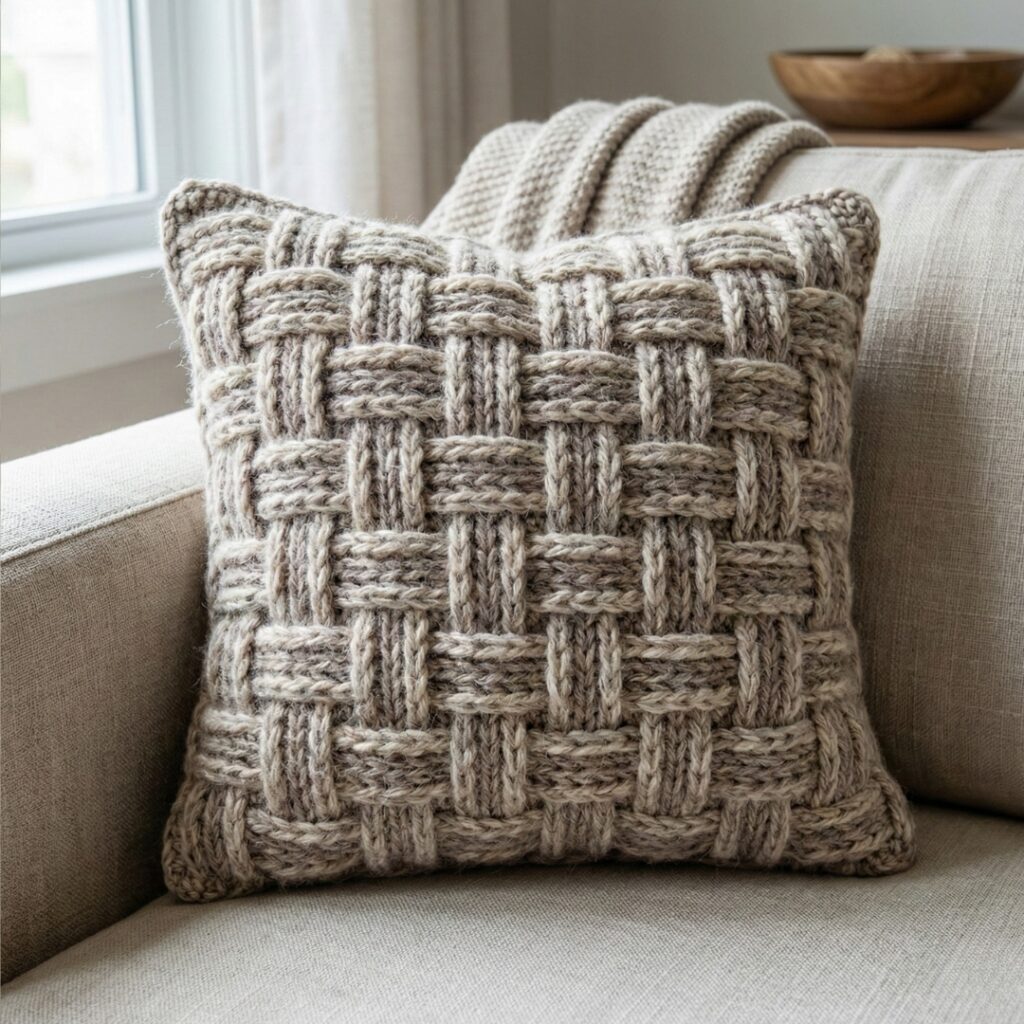
2. Crochet Basketweave Throw Pillow Pattern
Skill level: Intermediate — post stitches for woven texture.
Materials
- Aran/worsted-weight yarn (wool-blend or acrylic): approx 400–600 yds for one 18″ pillow.
- Hook: 5.5 mm (I) or 6.0 mm (J) depending on yarn.
- Pillow form (16″ or 18″), tapestry needle, upholstery needle and stuffing method if making an insert.
Design concept
Basketweave uses alternating front-post and back-post stitches to create a reversible woven texture that reads like a woven basket — excellent for cozy, tactile pillows.
Gauge & multiple
Basketweave repeat = multiple of 4 stitches (e.g., 4, 8, 12…). Use the sizing primer: if your spi in basketweave is ~3 stitches per inch (denser because of post stitches), and you want 16″, multiply 16 × 3 = (10 × 3) + (6 × 3) = 30 + 18 = 48 stitches. Round to nearest multiple of 4: 48 is already a multiple of 4.
Step-by-step
A — Front panel (worked flat)
- Foundation: ch 48 (for 16″ example). Turn.
- Row 1: sc across (or hdc for height); turn.
- Basketweave row pattern (height and width set): Use a standard 4-row repeat:
- Row A: fpdc in next 4 sts, bpdc in next 4 sts rep across.
- Row B: repeat Row A.
- Row C: bpdc in next 4 sts, fpdc in next 4 sts rep across.
- Row D: repeat Row C.
- These 4 rows create the woven blocks. Repeat A–D until panel height equals pillow height (use rpi to calculate rows; e.g., if rpi = 3 rows/in and height = 16″, rows = 16 × 3 = 48 rows; match repeats to get near that number).
- Finish with one round/row of sc for a tidy edge.
B — Back panel
5. Option 1: Work a matching basketweave panel. Option 2: Work a plain sc/herringbone back with a centered zipper allowance: leave gap in center for zipper insertion or create an overlap (envelope-back).
C — Assembly
6. Block panels. Align RS (right sides) facing out, and seam three sides using slip-stitch or whipstitch (or use a sewn zipper). Insert form and close remaining side.
D — Finishing
7. Run a final decorative sc border; weave ends.
Variations & tips
- Use a chunky yarn and larger hook to create an oversized, dramatic basketweave pillow.
- For a modern twist, make basketweave in two colors, alternating color blocks per repeat for a checker effect.
Care
- Wool-blend: hand wash or gentle machine cycle cold; reshape and dry flat. Acrylic: machine wash gentle.
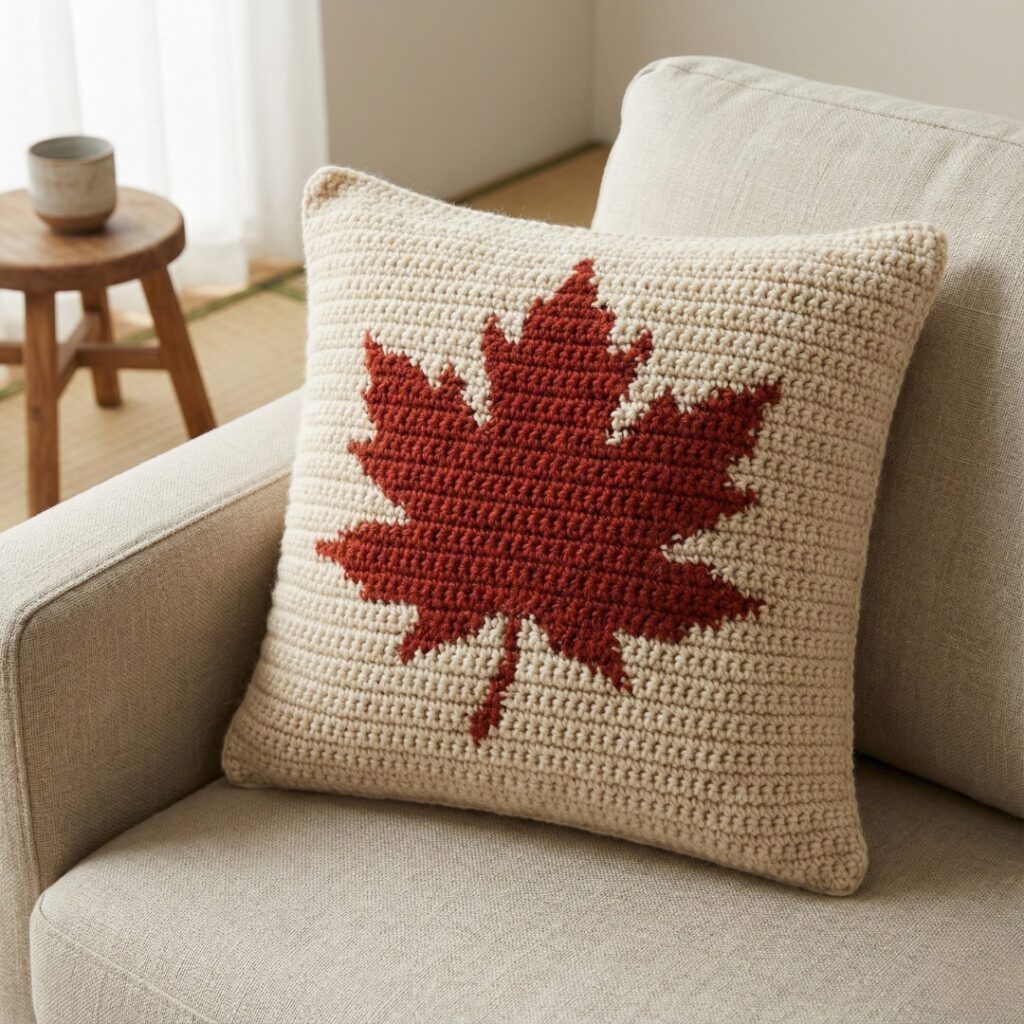
3. Crochet Japanese Maple Pillow Pattern
Skill level: Advanced-intermediate — colorwork (tapestry or intarsia) or surface crochet for motif.
Materials
- Two colors of DK or worsted yarn (background + leaf color): approx 400–600 yds.
- Hook: 4.0–5.0 mm depending on yarn.
- Pillow form 16″ or 18″, tapestry needle, blocking tools.
Design concept
A single large Japanese maple leaf silhouette on a textured background. You can achieve this with tapestry crochet (working both colors in the same row) or by crocheting the background then surface-crocheting or embroidering the leaf on top.
Gauge & planning
Because colorwork compresses fabric, make a tapestry swatch. Example spi = 4 stitches/in. For 16″ width: 16 × 4 = 64 stitches (as before). Decide whether to work front panel flat for easier color charting.
Step-by-step (surface crochet method — simpler if you’re less comfortable with tapestry)
A — Make textured background panel
- Foundation: ch 64 (for 16″ example). Work in a textured stitch that doesn’t obscure motif — e.g., linen stitch (alternating sc and dc) or small waffle stitch. Work rows until height reaches pillow height (calculate via rpi).
B — Transfer maple motif (charting)
2. Choose or draw a maple leaf chart on graph paper scaled to your stitch count (e.g., 64 wide by 64 high grid). The leaf silhouette is then marked as filled squares.
C — Surface crochet the leaf
3. With the leaf color, use surface slip stitch or single crochet surface embroidery to outline and fill the motif:
- Outline the leaf shape following the chart with a surface slip stitch.
- Fill in the interior with rows of surface slip stitches or tiny sc stitches worked on the right side only, making the silhouette solid.
Alternative: Tapestry crochet
4. For full-colorwork front, carry both yarns and follow the chart, catching floats no longer than 4–5 stitches to avoid snagging and distortion. Work flat panel.
D — Back panel & assembly
5. Make matching back panel (plain or small motif), seam three sides, insert pillow form, and close. Add decorative piping as desired.
Variations & tips
- Use subtle tonal contrast for elegant minimalism (e.g., heathered beige background with rust leaf).
- Use gradient yarn for background for a sunset effect behind the maple leaf.
Care
- For colorwork, hand wash cold and dry flat to avoid bleeding and stretching.
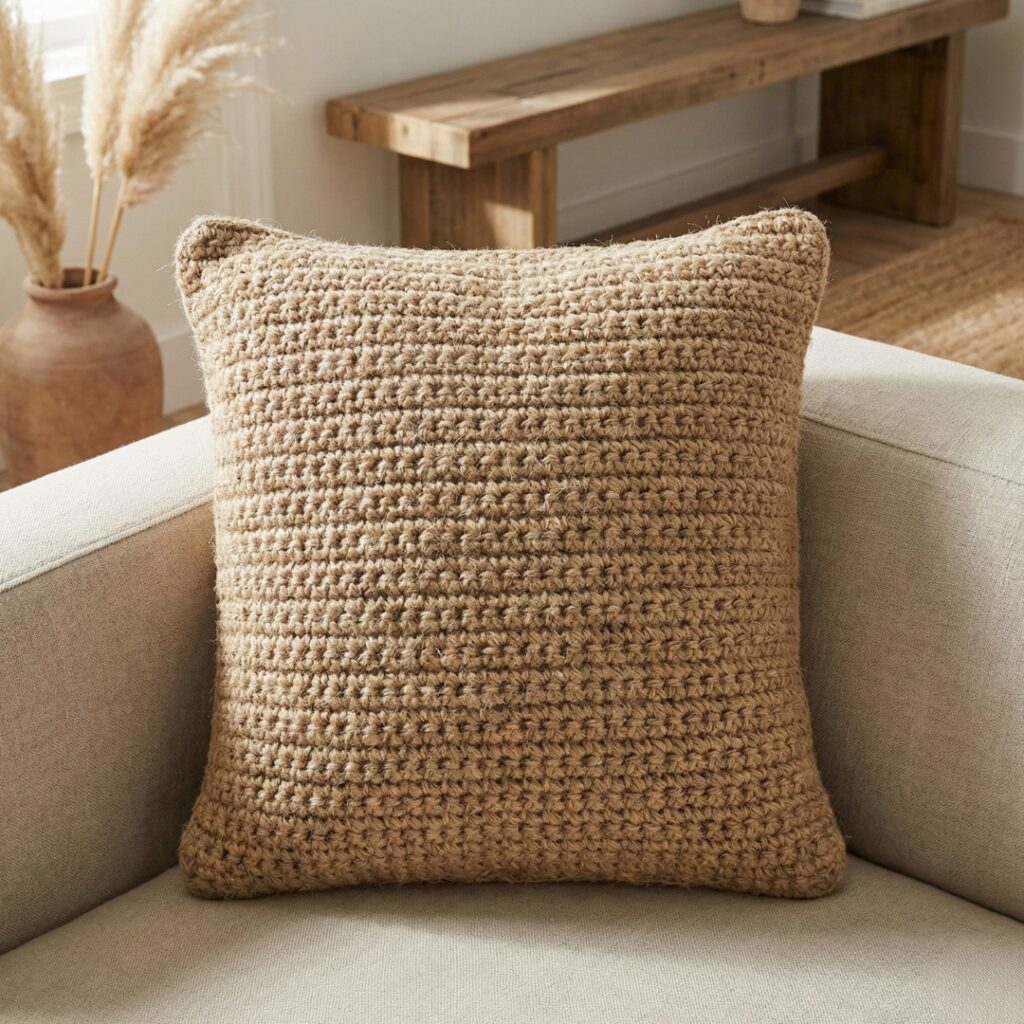
4. Crochet Jute Pillow Pattern
Skill level: Confident beginner — works up quickly with bulky jute or rope yarn.
Materials
- Jute or natural fiber rope yarn (t-shirt yarn alternative) — approx 300–600 yds depending on thickness and pillow size.
- Hook: 8.0–10.0 mm (or larger per rope thickness).
- Pillow form 16″ or 18″.
- Lining fabric recommended (to protect fibers and for comfort).
Design concept
A rustic, farmhouse-style pillow using jute gives natural texture and is extremely durable. Because jute can be rough, include a soft cotton liner inside the cover.
Construction choices
- Work in sc rounds for a dense fabric, or alternate sc and hdc for a slightly softer texture.
Step-by-step
A — Base
- MR, work 6 sc. Increase in rounds until a base diameter approximates pillow width when folded (usually slightly smaller because jute is thick). For a 16″ pillow and bulky rope with ~2 sts/in, chain math would differ — better to measure as you go until the flat circle is a few inches less than pillow width, typically 8–10″ to be joined with sides to reach final dimension.
B — Sides
2. After forming base, stop increasing and work even sc rounds to build height until cover reaches desired pillow height. For jute, about 12–14 rounds may equal several inches — measure as you go.
C — If making square
3. You can make a square cover by making a rectangle of sc rows sized to pillow circumference and height, then seaming edges.
D — Lining & assembly
4. Cut cotton lining to same dimensions and sew into cover; this protects skin and trap fibers. Insert pillow and seam closed.
Variations & tips
- Add leather tassels or wooden buttons for a natural look.
- For safety/comfort, line jute covers with a cotton slip sewn in — recommend always using liner for jute.
Care
- Spot clean; avoid heavy washing — jute may shrink or stiffen. If washable, hand wash cold, reshape, dry flat.
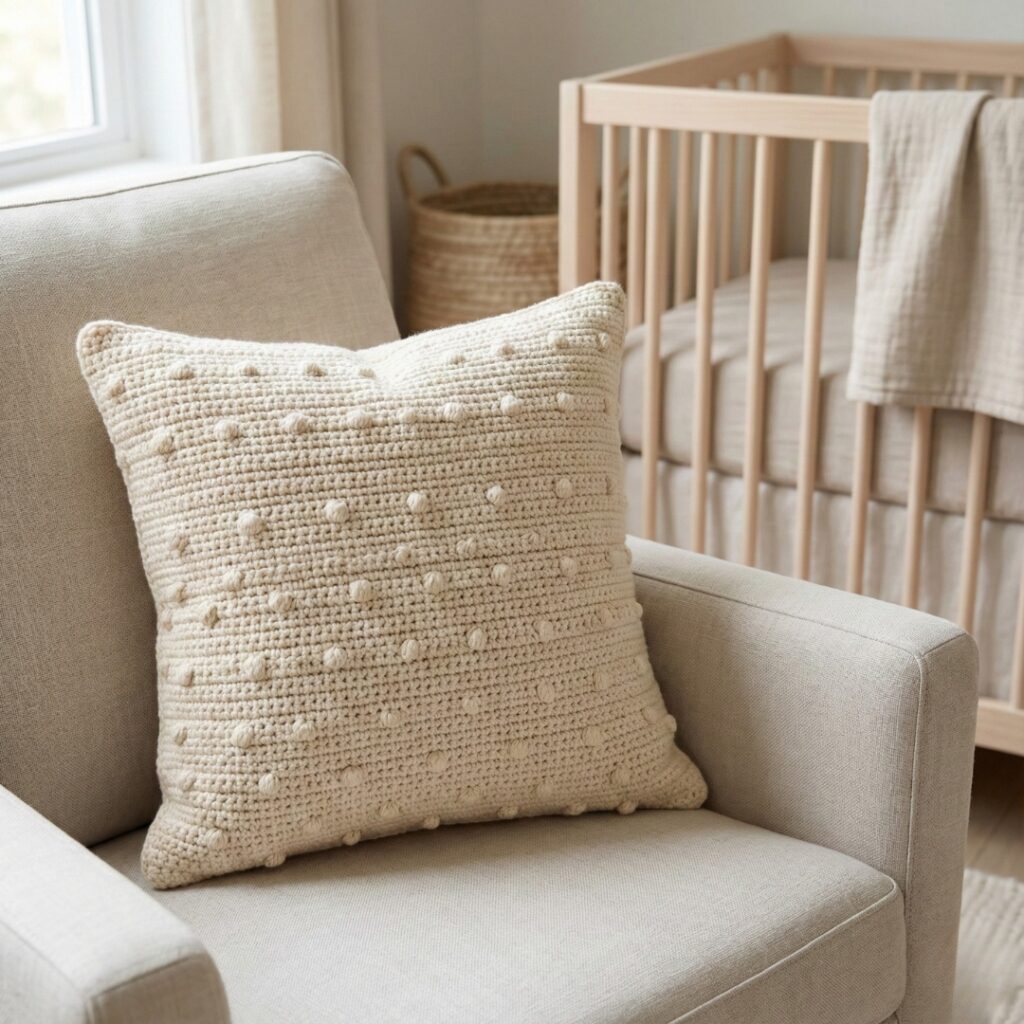
5. Crochet Modern Neutral Nursery Pillow Pattern
Skill level: Confident beginner — soft yarns and simple texture; baby-safe.
Materials
- Superwash wool or cotton-blend yarn, soft and machine-washable — approx 300–500 yds.
- Hook: 4.0–5.0 mm depending on yarn.
- Hypoallergenic pillow form sized 16″ or 18″.
- Tapestry needle, fabric lining optional.
Design concept
A soft, neutral pillow in buttery pastels or warm grays using plush textures (waffle stitch, shell stitch, or bobble clusters) that are soothing and baby-safe.
Safety note
- Use OEKO-TEX or similarly certified yarns if intended for a nursery. Always prefer machine-washable yarn for ease and hygiene.
Step-by-step (waffle stitch example — comfy and tactile)
A — Gauge/maths
- Waffle stitch (tunisian or simple post stitch variant) often yields ~3–4 sts/in. Use the sizing primer: for 16″ with 4 st/in → 64 sts.
B — Front panel (waffle pattern in rows)
2. Foundation: ch 64. Row 1: sc across.
3. Waffle repeat (row-based):
- Row A: ch2, fpdc around next st, bpdc around next st repeat across, turn.
- Row B: ch2, sc across to lock the pattern. Repeat A–B until height reaches pillow dimension (calculate rows using rpi, or measure as you go).
C — Back panel and closure
4. Back panel can be plain sc or include buttons for an envelope closure:
- Option 1: Envelope back — make two panels: one shorter (height = pillow height / two + overlap) and one taller; overlap them and add buttons.
- Option 2: Zipper — seam in a hidden zipper.
D — Assembly & finishing
5. Weave in ends; block lightly if the yarn allows. Insert hypoallergenic form and close.
Variations & tips
- Make matching baby blanket or toy set.
- Use mitered squares for a modern geometric look.
Care
- Machine wash on gentle per yarn label; tumble dry low if yarn allows; otherwise lay flat.
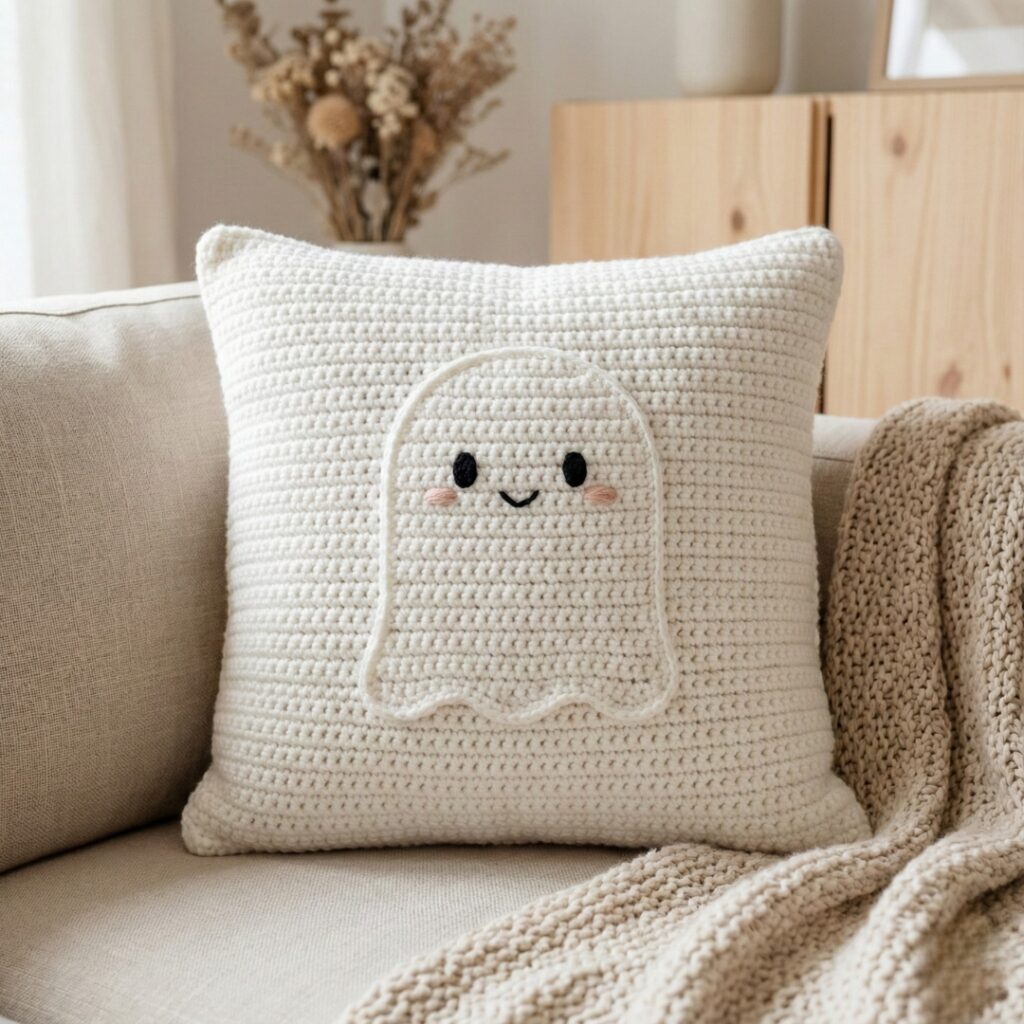
6. Crochet Cute Ghost Pillow Pattern
Skill level: Confident beginner — novelty pillow with applique details.
Materials
- Soft worsted yarn in white for ghost plus accents in black and blush pink — ~300–450 yds.
- Hook: 5.0 mm (H).
- Pillow form 16″ (round or square; square two-sided looks good).
- Black felt or embroidery thread for eyes and mouth.
Design concept
A playful ghost motif as a square or circular pillow — great for seasonal decor or a kid’s room.
Step-by-step (square ghost applique on a solid panel)
A — Front panel (solid base)
- Make a simple square panel in sc or hdc sized to pillow (use the sizing math — e.g., 64 sts for 16″). Work rows until panel matches height.
B — Ghost applique (worked separately)
2. Ghost body (simple rounded shape):
- MR, 6 sc in ring.
- Increase rounds until the oval/round matches the desired ghost body size (approx 8–10″ tall depending on pillow). Decrease slightly at top for a curved head if desired. Finish and leave long tail for sewing.
- Eyes and mouth: cut small circles of black felt or embroider with black yarn for safety — sew firmly.
C — Attach applique
4. Position ghost on front panel and whipstitch around the edge. Add embroidered blush circles with light pink yarn for cheek details; secure well.
D — Back panel & closure
5. Back panel can be a matching solid square or a spooky patterned block. Sew three sides, stuff with pillow form, then close final side with ladder stitch.
E — Optional stuffing for 3D ghost
6. For a 3D plush ghost, crochet front and back ghost shapes, sew edges leaving an opening, stuff lightly, then sew onto panel or make a fully stuffed ghost pillow (smaller than 16″ form).
Variations & tips
- Make a whole set of seasonal pillows — pumpkin, bat, moon — in the same size for a cohesive vignette.
- Use safety embroidery thread and secure felt with small zigzag stitches to prevent detachment if used by kids.
Care
- Remove pillow cover if possible; hand wash or machine wash gentle; air dry.
Final finishing & publishing tips (applies to all pillows)
- Seams: mattress stitch or invisible join gives neat results for seamed edges. For a quick finish, slip-stitch seam on RS works too but will be visible.
- Closures: zippers are the most professional and removable; envelope backs are easiest for handmade covers; buttons add charm. Include a hidden lining if using textured yarns that could snag the pillow insert.
- Blocking: block panels before assembling to even stitch tension and get crisp edges (especially important for lace or motifs). Use rust-proof pins.
- Labeling & care card: include fiber content and care instructions in your blog patterns (e.g., “machine wash cold on gentle; reshape and dry flat; do not bleach”).
- Photos & styling: show close-ups of textures, a staged shot on sofa or nursery, and a flatlay of the front/back/closure. Readers love usable styling tips: which throw to pair with each pillow, color palette notes, and placement ideas.
Conclusion
These six pillow patterns — Granny Throw, Basketweave, Japanese Maple, Jute, Modern Neutral Nursery, and Cute Ghost — offer a wide range of textures and moods: from classic and colorful to sculptural, rustic, soft baby-safe, and whimsical. Each pattern can be scaled using the gauge/sizing primer at the top so you can make a 16″, 18″, or custom-size pillow.