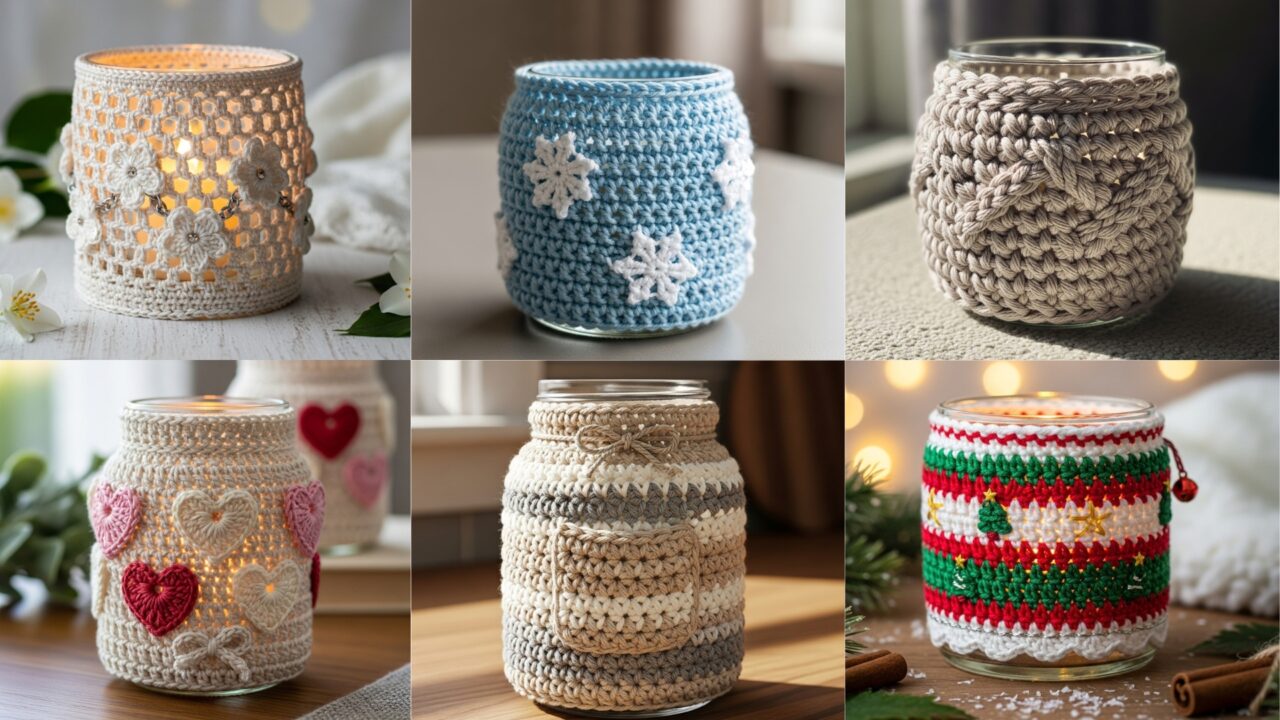
A handmade candle cover is a quick, satisfying project that instantly warms a room — literally and visually — when paired with jars, votives, or LED candles. Below are six full patterns you can use as separate blog sections: Heart Jar Candle Cover, Christmas Candle Cover, Jasmine Candle Cover, Winter Snowflake Candle Cover, Cabled Candle Cover, and Farmhouse Candle Cover. Each section includes:
- Skill level
- Materials & finished-size guidance (and how to adapt)
- Gauge and sizing notes (how to measure your jar)
- Clear step-by-step instructions (US terms) you can follow or paste into a pattern page
- Variations, finishing tips, washing/care, and — crucially — safety guidance about candles.
Very important safety note (read before crocheting any candle cover):
Yarn is flammable. Never place a yarn cover directly over an open flame or hot wax. These covers are intended for use around glass jars, votives, lanterns, or battery-operated (LED) candles only. For real flame candles, keep the cover outside the immediate heat zone (for example, cover a cooled jar or use the cover as a sleeve around a glass jar so the flame is contained in the jar and cannot touch yarn). Always supervise burning candles, and when in doubt, use an LED candle for display.
Quick general notes (abbreviations, yarn, sizing)
Abbreviations (US): ch = chain, sc = single crochet, hdc = half double crochet, dc = double crochet, tr = treble crochet, sl st = slip stitch, MR = magic ring, rep = repeat, BLO/FLO = back/front loop only, sp = space, st(s) = stitch(es).
Yarn & hook choices: For candle covers use 100% cotton or cotton-blend yarn (good heat resistance and absorbency). Cotton thread (size 10) makes delicate lace covers; worsted cotton creates chunky, rustic covers. Suggested hooks range from 1.75 mm (thread) to 5.0 mm (worsted). Use a tighter hook for a denser fabric.
Measure your jar (essential):
- Measure the circumference of the jar at the widest point where the cover will sit (use a soft tape).
- Measure the height where the cover should reach (e.g., to the lip, to mid-jar, or to the base).
- Make a small 4″ swatch in sc (or the main stitch) to find stitches per inch horizontally and rows per inch vertically. Multiply stitches-per-inch × jar circumference to get total stitches for the round; multiply rows-per-inch × desired height to get total rows.
- Example reference gauge: worsted cotton + 4.0 mm hook ≈ 3.5 sc = 1 in (so 3.5 st/in). If your jar circumference = 10 in → 10 × 3.5 = 35 stitches around.
Now—let’s make covers.
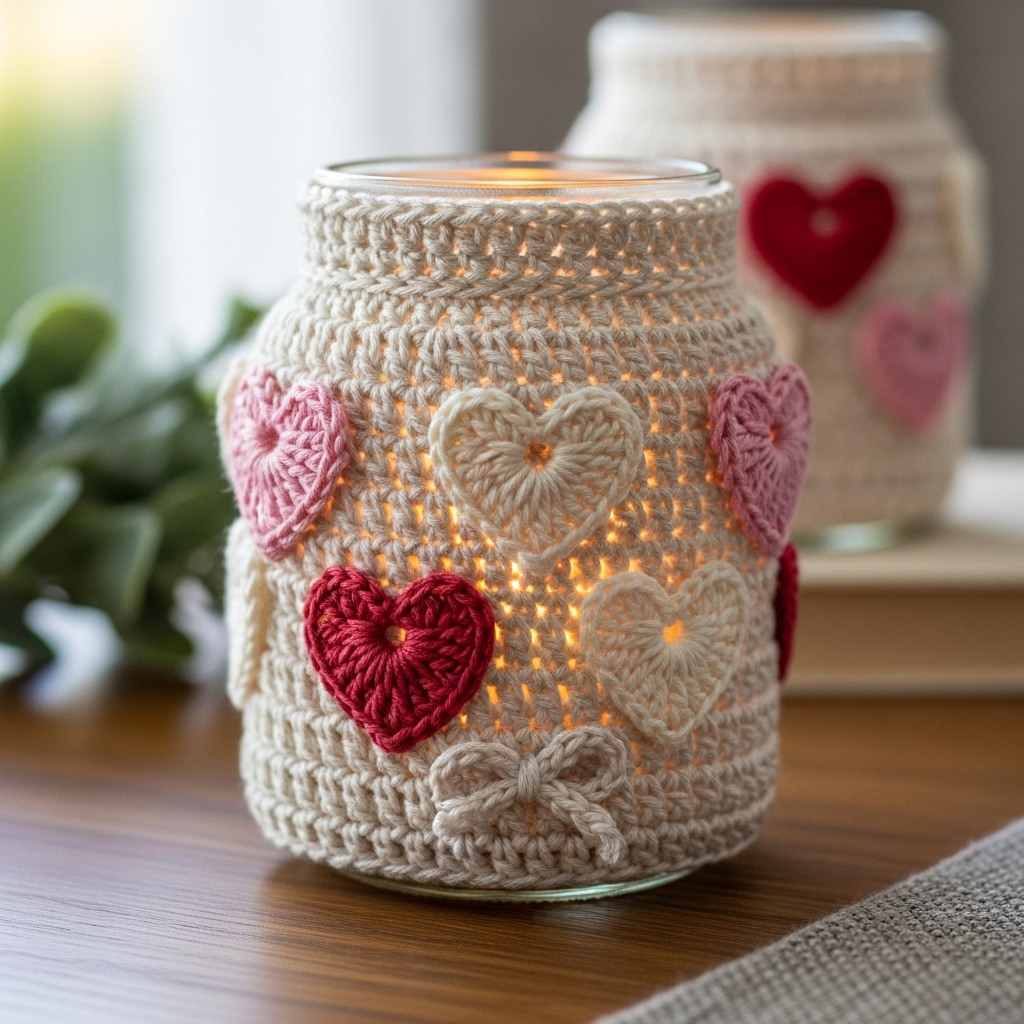
1. Crochet Heart Jar Candle Cover Pattern
Skill level: Confident beginner — basic rounds, appliqué hearts, seaming.
Best for: glass jars (mason jars, recycled jars) or LED candle jars.
Materials
- Cotton worsted-weight yarn (or DK for slightly smaller stitches) — about 50–80 yds per cover.
- Hook: 4.0 mm (adjust to gauge).
- Tapestry needle, stitch marker, small scrap of felt (optional) for inside reinforcement.
- Optional: small ribbon for bow, glue gun.
Finished size (example): fits a jar circumference ~10 in and height 3.5 in. Adjust using measuring notes above.
Pattern overview
Make a cylindrical base worked in continuous rounds (or joined rounds) to the desired height. Crochet small heart appliqués and sew them on in a staggered band. Add a tidy top edge and optional felt liner for safety and structure.
Step-by-step
- Swatch & calculate
- Make a 2″–4″ sc swatch to get sts/in. Example: gauge = 3.5 sc/in. For a 10″ circumference: 35 sts around. Chain 36 and join for working in rounds OR use foundation sc: fsc 35.
- Base tube (body)
- Round 1: ch (example 35), join with sl st to make a ring (avoid twisting). Ch1, sc in each ch around. Sl st to first sc. (35 sc)
- Rounds 2–N: sc in BLO (back loop only) for a neat vertical rib look OR sc in both loops for denser fabric. Work until piece measures desired height minus 0.25–0.5″ to allow top border. Example: 3.5 in height → if rows/in = 4 rows/in → work ~14 rows.
- Top border
- Round: ch1, (hdc, ch1) around for a lacy looped top if desired, or simply sc around 2 rounds for a tidy rim. Fasten off.
- Heart appliqués (make several) — small, flat hearts
- Make MR. R1: ch1, 6 sc into MR, sl st to join. (6)
- R2: ch3, 3 dc in next st, ch3, sl st into next st repeat 3 times to make 3 small petal loops (this creates a tiny heart shape). Alternatively use this tiny written heart: ch5, sc in 2nd ch from hook, hdc in next, dc in next, tr in last; join to base and shape into heart. Make 8–12 hearts depending on jar size and spacing.
- Position & sew
- Place hearts in a row or staggered rows around the jar. Use tapestry needle and matching yarn to sew hearts onto the cover through the base and cover only. For extra durability slip a small felt circle inside at each heart’s center (glue) to keep stitches from pulling through the glass.
- Finishing touches
- Add a narrow ribbon threaded through top loops and tied, or a small bow sewn at center front. Weave and hide ends.
Variations
- Work hearts in a contrasting color for graphic pop.
- Make heart band near top, middle, or base.
- Use crochet puff heart motifs for a puffed texture.
Care & safety
- Use around LED candles or place over a glass jar containing a lit candle so yarn is not in direct contact with flame. If using with a real candle, make sure glass lip protects yarn from flame and never leave unattended. Wash by hand in lukewarm water and lay flat to dry.
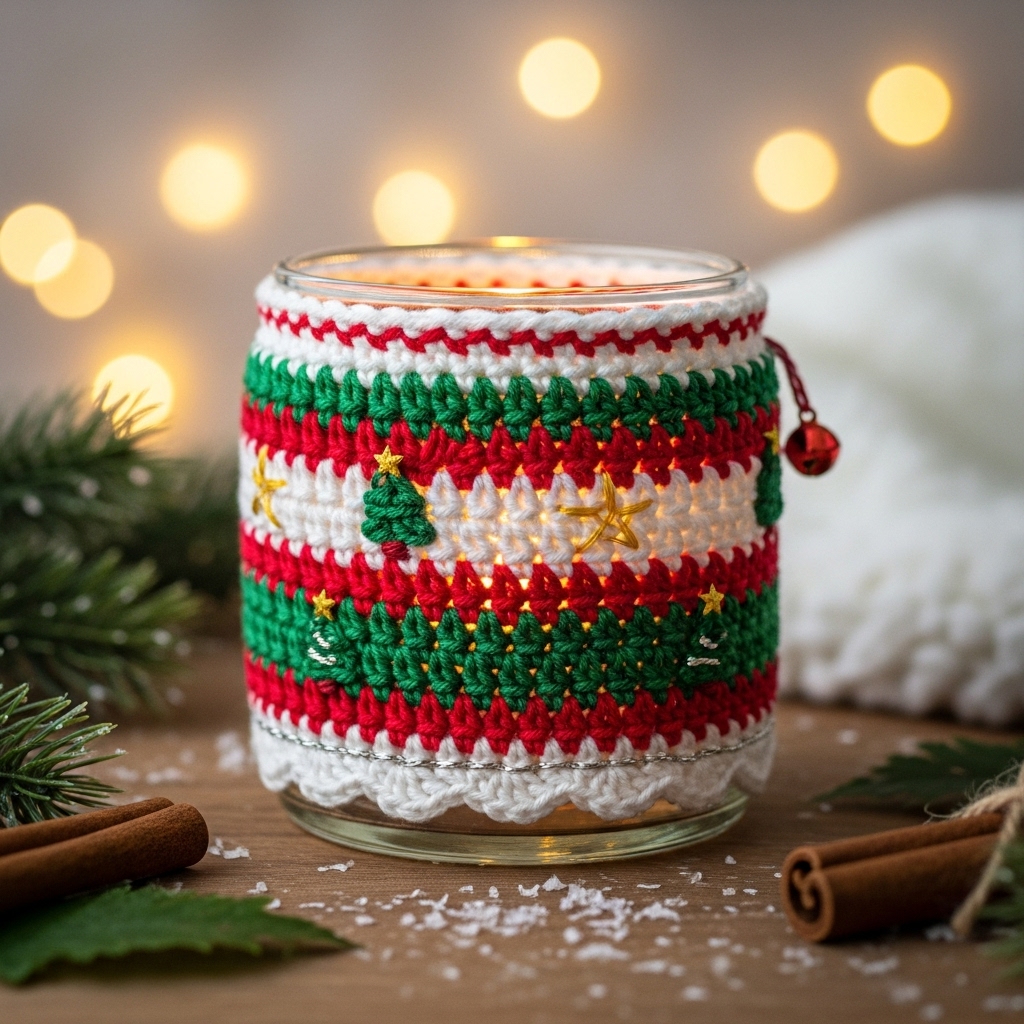
2. Crochet Christmas Candle Cover Pattern
Skill level: Intermediate — color changes, small surface embroidery or appliqués.
Best for: Holiday decor — fits votives or small jars; pairs beautifully with LED tealights.
Materials
- Cotton in red, green, white; contrast metallic thread optional.
- Hook: 3.5–4.0 mm (a slightly smaller hook helps structure).
- Tapestry needle, small bells or wooden buttons (optional).
Finished size (example): fits votive jar circumference 8–9 in; adjust by measuring.
Design concept
A stripped or color-blocked tube worked in rounds with added motifs: tiny Christmas trees, stars, or embroidered snowflakes. A bottom scallop or little pompom trim finishes the cozy look.
Step-by-step
- Measure & foundation
- Measure votive circumference. Example: 8 in circumference; with gauge 3.5 st/in: 8 × 3.5 = 28 sc. Make foundation ch 28 (or use fsc 28).
- Body in rounds
- Round 1: ch28, join; ch1, sc in each st around (28).
- Rounds 2–4: sc around in color A (background). Change color every few rounds if making stripes: carry color up the inside.
- Add motifs (trees / stars)
- For tiny tree (appliqué): ch4, sc in 2nd ch from hook and next 2 (3 sc), sl st to join to make base; work 1 row of ch3, shell (5 dc) in next st to make triangle-like tree. Or use surface embroidery to stitch small triangular trees in contrasting green directly onto the finished tube: a simple satin-stitch triangle with a tiny brown base for trunk. Space motifs evenly (e.g., every 6–7 sts).
- Festive edging
- Bottom: work a scallop row: skip 1 st, 5 dc in next st, skip 1 st, sc in next repeat for neat scallops. Top: Work a row of sc and then ch3 loop for a hanging loop if you want to hang the whole thing or add a tiny jingle bell.
- Optional cozy base
- Make a small circular base (if you want full covering for a votive jar) by working MR increases until diameter matches jar base, then seam to lower edge of tube.
- Finish
- Sew on tiny wooden buttons or sew a bell to the front for sound and charm.
Variations
- Make an Advent set: six or twelve covers with incremental motifs.
- Work in thread for delicate ornament-style covers.
Care & safety
- Use LED candles for open display, or place over glass to keep yarn away from flame. Hand wash and reshape while damp.
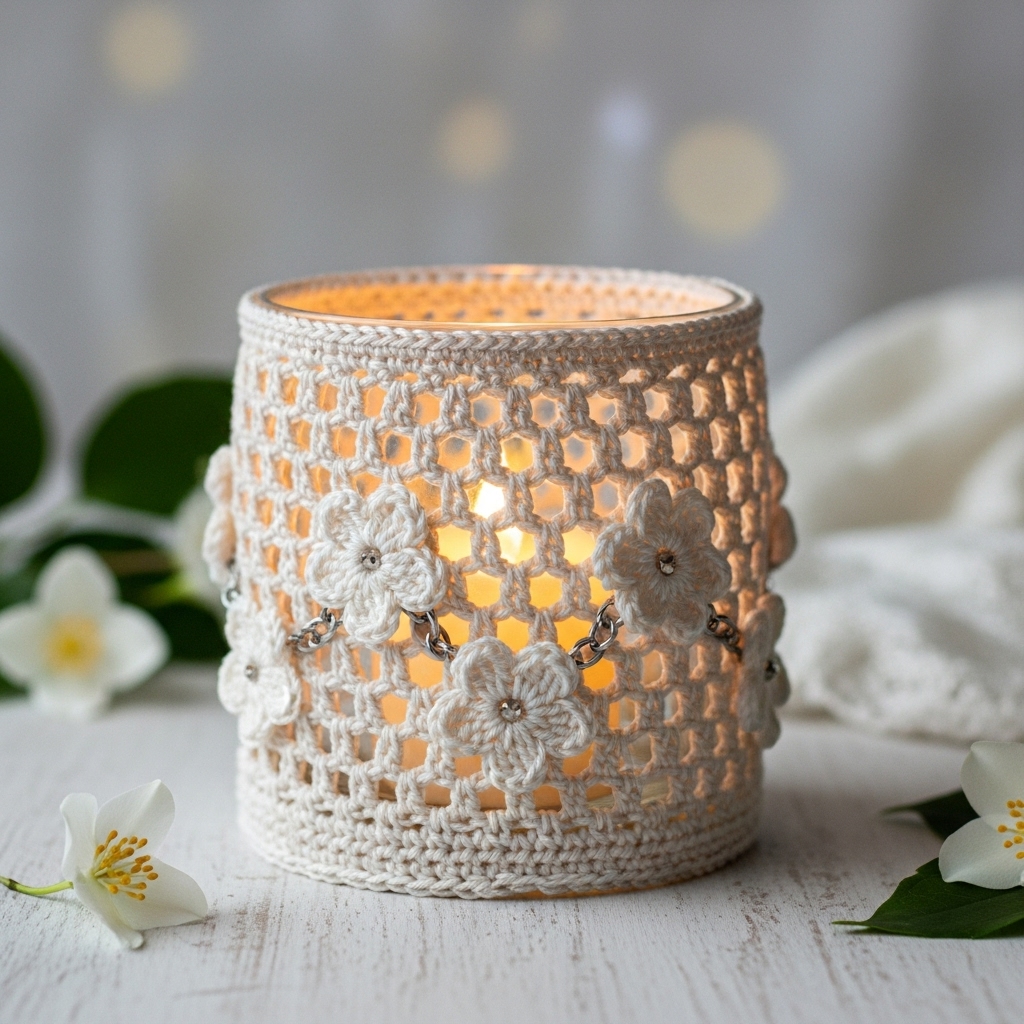
3. Crochet Jasmine Candle Cover Pattern
Skill level: Intermediate — motif work, joining, small floral appliqués.
Best for: mid-size jars and decorative lanterns; creates a delicate floral wrap.
Materials
- Cotton DK or fingering (bamboo-cotton blends for sheen) — ~60–100 yds.
- Hook: 3.0–3.5 mm.
- Tapestry needle, optional small beads for flower centers.
Finished size (example): circumference 10 in, height 3–4 in.
Design concept
A delicate open lace body with tiny jasmine motifs (5-petal flowers) joined in a garland around the jar. The lace background is worked in a mesh or filet to let candlelight glow.
Step-by-step
- Lace mesh base
- Ch foundation for circumference. Example: 35 ch (for 10 in with 3.5 st/in). Join and work Rows in fileting mesh: Row (round): ch3 (counts as dc), dc in next st, ch1, skip 1 rep around to create open mesh. After a few rounds, switch to sc rounds to anchor flowers.
- Jasmine flowers (appliqué)
- Small jasmine: MR, ch1, 5 sc into ring, sl st to join. R2: ch 3, sl st into next sc 5 times to create petal loops. In each loop work (sc, hdc, dc, hdc, sc) to form petals. Add tiny bead or French knot in center with embroidery thread. Make as many as needed to space around jar (e.g., 6–8 depending on size).
- Join flowers to mesh
- On the anchor sc rounds, position flowers and sew centers through the mesh with small stitches — keep joins minimal so light still filters. For a garland look, connect flowers with short chain arches: ch10 between flowers and sl st into mesh; this creates a string-of-flowers look.
- Top & bottom finish
- Work 1–2 rounds of sc around top and bottom for stability. Add picot edging at top for feminine finish: ch3, sl st in first ch (picot), sc next st — repeat.
- Lining (optional)
- For a smoother glow and to protect fabric from smoke/residue, slip a thin glass votive insert (or small jar) inside the cover.
Variations
- Make a garland of larger flowers for a more dramatic effect.
- Use different colored bead centers for subtle contrast.
Care & safety
- Because the design is lacy, avoid direct flame contact. Best used with LED or with the cover around a jar that contains the flame. Hand wash gently; reshape and block while damp.
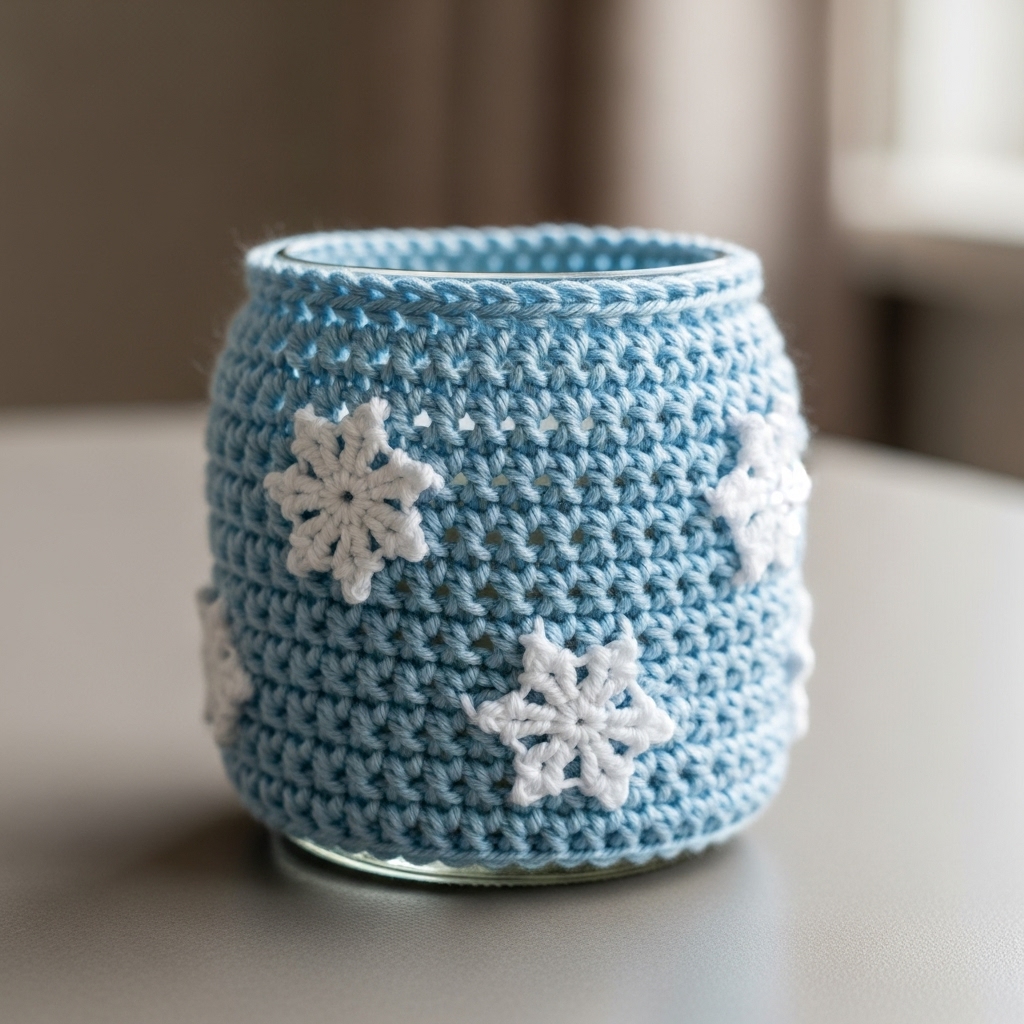
4. Crochet Winter Snowflake Candle Cover Pattern
Skill level: Intermediate → advanced (lace and flat motif work)
Best for: holiday centerpieces, mantels, or as a gift set.
Materials
- Mercerized cotton thread size 10 (for crisp lace) and 1.75–2.25 mm hook — small needles for fine detail. Or use DK for larger snowflakes.
- Tapestry needle, blocking pins, starch (optional) for stiffening.
- Optional small battery tealight use recommended.
Finished size (example): snowflake motif ~3.5–4 in across; assemble 2–4 motifs around jar.
Design concept
Create several flat snowflake motifs, join them edge-to-edge to form a circular sleeve, and optionally stiffen motifs for crisp shape. Light will shine through snowflake arms.
Step-by-step
- Make a snowflake motif (classic medallion)
- R1: MR, ch3, 11 dc into ring, sl st to join (12).
- R2: ch5 (counts as tr + ch2), tr in next st, ch2 repeat around.
- R3: sl st into ch2 sp, ch1, (sc, ch3, sc) in each ch2 sp to make 12 little loops.
- R4 (points): In each loop work: ch1, sc, ch4, picot (ch3 sl st in 3rd ch), sc, ch1 — shape into pointed arms. Work decorative cluster rounds until desired arm length (3–4 rounds). Block each motif carefully into a star shape.
- Stiffen (optional but pretty)
- If using thread, lightly starch the motifs on blocking board for crisp star points. This helps motifs stay defined around candlelight.
- Join motifs
- Position motifs around jar so arms interlock slightly. Join using small whipstitches on the back or a tiny chain join that forms small connecting loops between each motif. Aim for snug but not tight fit.
- Add facing (optional)
- Crochet a narrow strip (sc rounds) to seam the inside edges together for a smoother interior that prevents abrasion. Alternatively glue a thin strip of felt to the inside to prevent snagging of glass.
Variations
- Make snowflakes in metallic thread or add tiny sequins (avoid for real flame).
- Use larger DK yarn and hook for a chunky wintery cover.
Care & safety
- Use LED tealights or place a glass insert so thread cannot be heated by flame. Dry-cleaning and hand-wash for starch-treated pieces — test starch cleanup carefully.
5. Crochet Cabled Candle Cover Pattern

Skill level: Intermediate — post stitches and cable crosses.
Best for: chunky rustic jars and knitted-look seasonal decor.
Materials
- Cotton aran/bulky (weight 4–5) for a strong cable texture — 50–100 yds.
- Hook: 5.5–6.5 mm depending on yarn.
- Tapestry needle, stitch markers.
Finished size (example): fits jars circumference 10–11 in and height 3–4 in. Adjust to fit.
Design concept
Work a small tube in alternating rounds of front-post and back-post stitches to simulate knitted cables. The dense fabric gives a cozy knit-like look.
Step-by-step
- Gauge & foundation
- Make sc swatch in pattern: cable textures are denser. Example gauge ~2.5 sc/in in bulky cotton. For a 10 in circumference: 10 × 2.5 = 25 sts. Chain 25 and join.
- Base rounds (anchor)
- Round 1: sc in each ch around. Round 2: sc around in BLO to create a little ridge.
- Cable pattern (worked in rounds)
- Cable repeat example (multiple of 8):
- Round A (setup): sc 2, fpdc around next 3 sts, bpdc around next 3 sts rep around.
- Round B: sc around (or sc in flo to define ribs).
- Every 8–10 rounds perform a cable cross: work the bpdc group first, then work the fpdc group so they visually cross (or use stitch-holding technique: remove some loops and work them in different order). This produces over/under cable texture. Because cable crossing in crochet is less standardized than knitting, a simple visual cable is to alternate the order of working post stitches: on cable-cross round, do the post groups in reverse order so one set appears in front of the other.
- Cable repeat example (multiple of 8):
- Continue rounds until desired height; finish with a tidy round of hdc or sc.
- Optional rim
- Work 1–2 rounds of sc around top and bottom in contrasting color for visual framing.
Variations
- Make a tall cozy that covers more of the jar for a lantern look.
- Add a small toggle (wooden button) sewn on and a chain loop to fasten for a snug fit.
Care & safety
- Cable covers are thick and best used with LED candles or with glass inserts for actual flame. Machine wash gentle if yarn label allows; reshape damp.
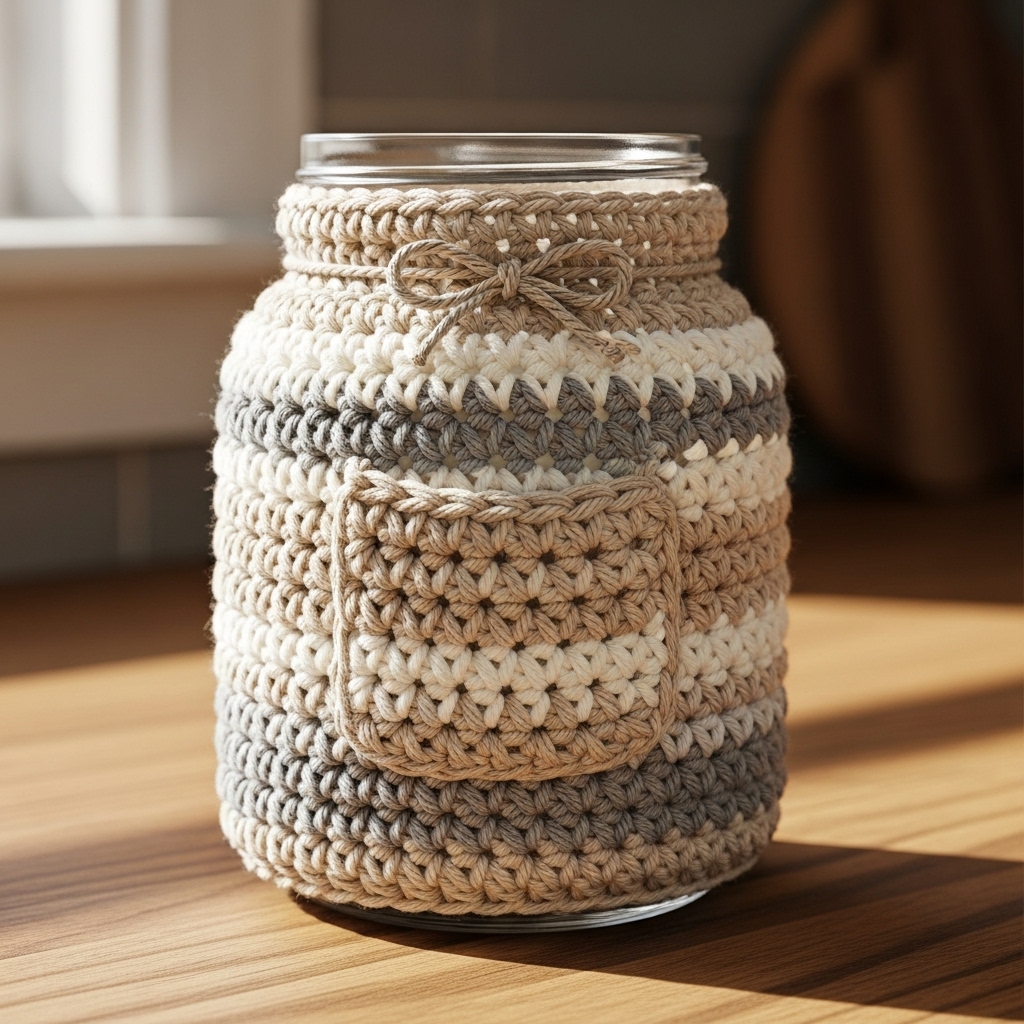
6. Crochet Farmhouse Candle Cover Pattern
Skill level: Confident beginner — classic stitches, stripes, tassels.
Best for: rustic decor — mason jars, large kitchen jars, or grouped centerpieces.
Materials
- Cotton worsted in neutral tones (cream, ecru, soft gray) — approx 80–120 yds.
- Hook: 4.0–5.0 mm.
- Tapestry needle, small twine for bows, optional wooden buttons.
Finished size (example): fits wide-mouthed mason jar circumference ~11–12 in. Measure jar and adjust.
Design concept
A simple, dense sc tube with contrasting horizontal stripes and a farmhouse-style bow or tassel. Add a small pocket on the front for dried lavender sprig or a label tag.
Step-by-step
- Measure & foundation
- For an 11 in circumference and gauge 3.5 sc/in: 11 × 3.5 = 38.5 → round to 38 stitches. Chain 38 and join to work in rounds (or fsc 38).
- Body
- Rounds 1–N: sc around in color A for base. Add 1–2 rounds of stripes in color B every 3–4 rounds for a classic look. Work until desired height. For a tighter farmhouse look do half-double crochet (hdc) for slightly taller rows and denser fabric.
- Optional front pocket
- Make pocket: ch (st count for width ~6–8 in divided by gauge), work sc rows to desired pocket height (2–3 in), fasten off leaving tail. Sew pocket centered on front with small whipstitches. Add a small wooden button top, or sew a twine bow.
- Tassel & bow
- Make small tassel or pompom using yarn and attach at front, or tie a twine bow around top with small sprig of dried lavender slipped through.
- Finishing
- Work 2 rounds of sc around top for neat edge. Tuck in yarn ends.
Variations
- Add a leather tab label attached with rivet for market-style jars.
- Use natural-dyed yarns for an authentic farmhouse palette.
Care & safety
- Because these covers are often used with real candles on dinner tables, put the jar with the burning candle inside the cover only if the glass completely contains the flame and the yarn does not contact the flame or hot glass. Prefer LED for safety. Clean by hand-washing and dry flat.
Final finishing tips & reminders
- Fit adjustments: Always measure the jar and make a small test tube (4–6 rounds) to check gauge and circumference before committing to a full cover. Adjust hook size to tighten or loosen fit.
- Lining & protection: For direct-contact with flame never allow yarn to sit next to flame. If you plan to use a real candle inside the same jar, it’s safest to use a glass insert and ensure the cover sits outside the heat zone. If you want to protect yarn from soot, make a small felt liner or choose LED candles.
- Fastening & hanging: Add a small loop and button so covers are easy to remove for washing. If you intend to hang covers as ornaments, weave sturdy cord loops into the top edge.
- Gifting & presentation: Package covers with a small LED tealight for a ready-to-give gift. Include a safety card inside the packaging that explains how to safely use the cover with real candles (advising LED or glass-contained flame).
Conclusion
These six candle cover patterns give a wide set of styles — from romantic jasmine garlands and crisp snowflakes to rustic farmhouse wraps and knit-look cables. Each design is easily adaptable: change yarn weight and hook size for a smaller or larger cover, swap colors to suit seasons, or turn a candle cover into a jar cozy or small vase sleeve.