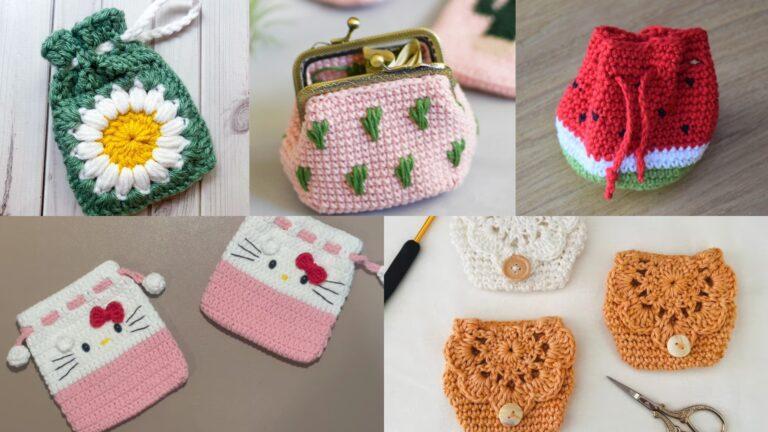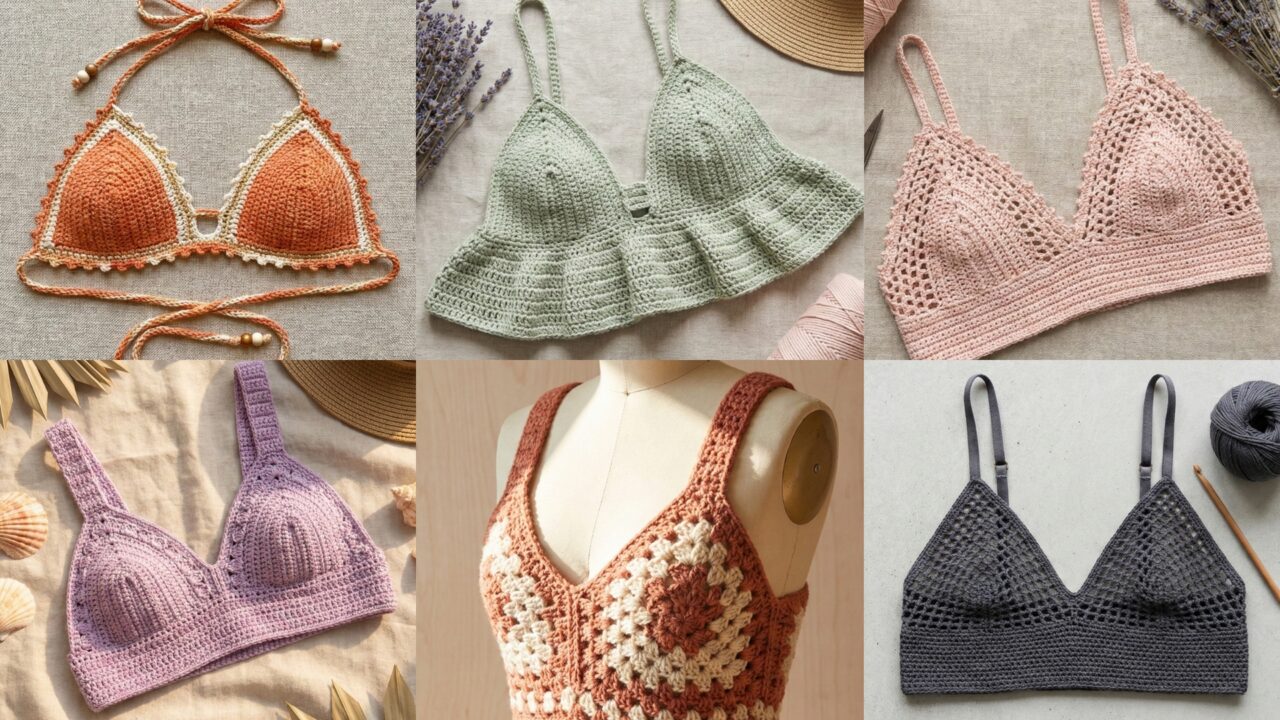
Bralettes are one of the best crochet projects: quick to make, flattering, comfortable, and highly customizable. The trick to a bralette that actually fits is good measuring, predictable gauge, and building support into the band and shape (not just the cups). Below you’ll find a full blog-ready post: a short introduction with tools, sizing and fit advice, then six detailed patterns — Lilac Beach, Ruffled, Lace, Mesh, Granny Stitch, and Festive Triangle — each with materials, gauge, worked example (Medium), step-by-step construction, fitting notes and variations. Friendly, practical, and written so readers can follow along and adjust to their size.
Before you start — tools, yarn, sizing & fit basics
Tools & notions
- Crochet hooks: commonly 3.0–4.5 mm for bralettes in DK/ fingering weight; use the hook recommended for your yarn but swatch.
- Yarn: breathable yarns are best — cotton / cotton blends / cotton-modal / bamboo (DK or sport weights). For lightweight summer bralettes use fingering/DK; for more supportive bands consider holding two strands of fingering or using light worsted. Avoid super-slippy yarns unless you’ll line it.
- Notions: tapestry needle, stitch markers, measuring tape, safety pins, narrow elastic (¼–¾ in) for band casing if desired, thin ribbon or soft cord for ties, optional hooks/eyes or snaps for closures.
- Optional: soft foam pads or removable bra cups for shaping, sewing needle + matching thread to attach lining.
Measurements you’ll need (measure accurately)
- Underbust (A): measure snugly around the ribcage just under the bust — this is the band size target.
- Bust circumference (B): measure around the fullest part of the bust (at nipple height) while relaxed.
- Cup height (C): from the base under the center of the bust up to the fullest point (helps with cup depth).
- Center front height and strap drop: measure from base of neck to underbust to set desired bralette length and strap placement.
How to plan fit
- Band fit: target 2–4 in less than bust circumference for a snug, supportive band only if fabric has good stretch. Or target underbust measurement as finished band with added elastic/casing to tune fit. Example: underbust 32 in → aim for a finished band 31–32 in (fabric stretch will give comfort).
- Cup coverage: decide how much coverage you want (full, demi, triangle). For larger busts choose wider bands and fuller cup shapes.
- Ease: bralettes are not engineered like bras — plan for adjustable straps/ties and optional elastic in band for reliable support.
Gauge & swatch
- Make a 3–4 in swatch in the stitch pattern you’ll use for cups and band. Measure stitches per inch and rows per inch. Use that to calculate counts:
stitches per inch × target width = foundation stitch count.
Support & modesty
- For more support and opacity: line bralette with a thin cotton lining or add removable foam cups.
- Consider a firmer stitch for the band (hdc or sc) and a lighter or lacy stitch for cups for style, but keep the band sturdy.
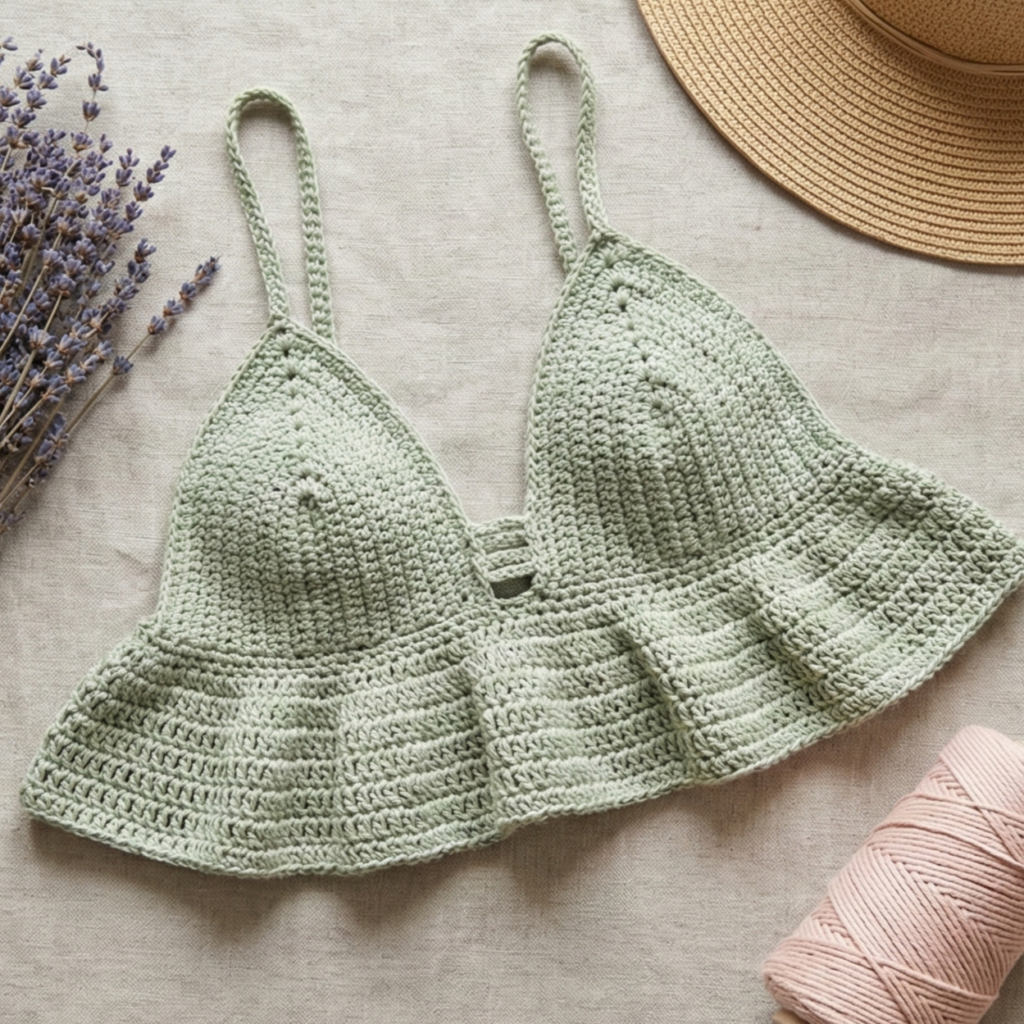
1. Crochet Lilac Beach Bralette Pattern
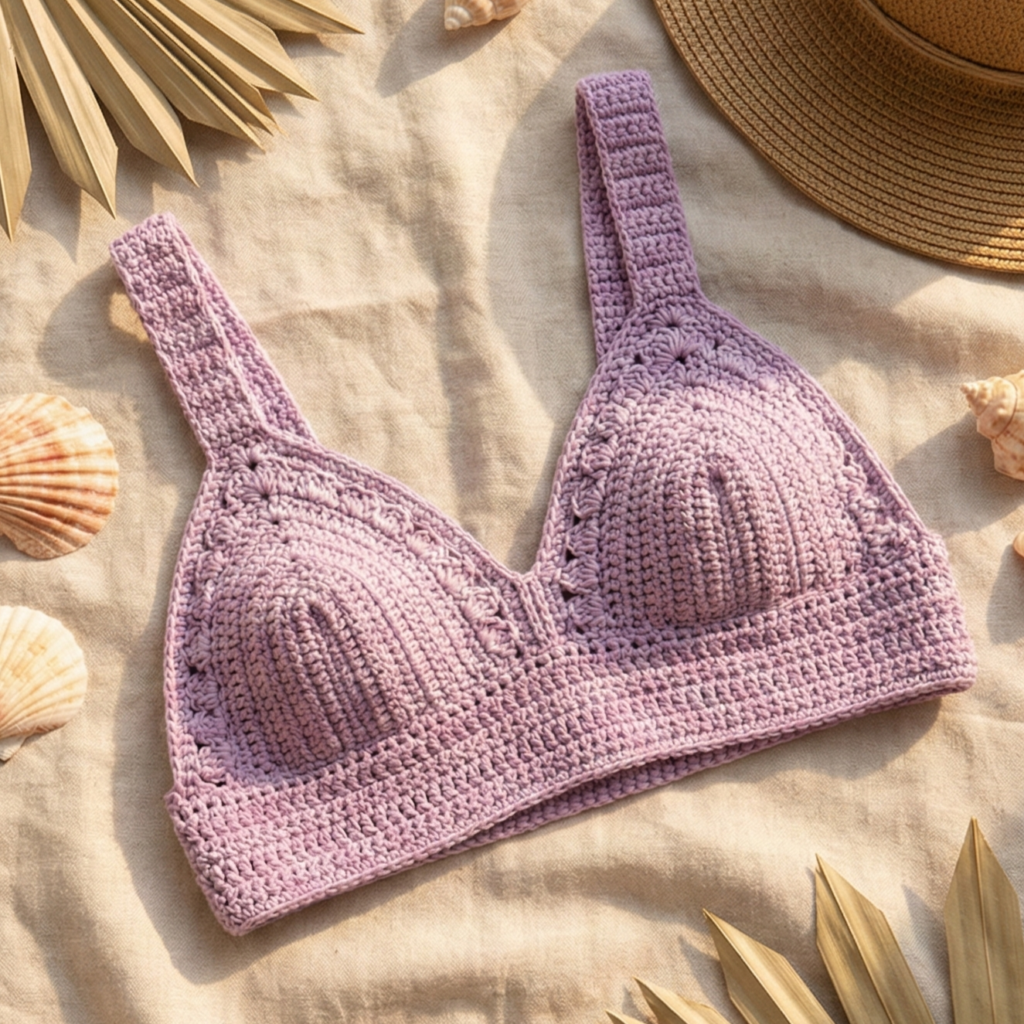
Soft, feminine and tailored for summer wear — the Lilac Beach bralette gives light support with a wide band and gentle bust shaping. It’s perfect as a standalone top for beach coverup wear or layered under a shirt.
Skill level: confident beginner → intermediate
Yarn & materials (Medium example)
- DK cotton or cotton blend ~250–300 yd.
- Hook: 3.75 mm (or your swatch hook).
- Notions: tapestry needle, optional removable foam cups, narrow elastic (¼–⅜ in) for band if desired.
Finished (Medium)
- Band (unstretched) ≈ 30–32 in; cup width ≈ 7.5 in across center; cup height ≈ 6.5 in. Adjust using measurements above.
Stitch notes
- Cups use a short-row increase triangle worked in alternating dc and shell rows for pretty texture. Band is worked in hdc for stability and finished with an elastic or tie option.
Step-by-step (top-down triangle cups + wide band)
1 — Swatch & compute
- Make a small swatch in your cup stitch (example: 14 dc = 4 in). For a cup base width target of 7.5 in: 7.5 × (14/4) = 26.25 → aim for 26 or 27 stitches.
2 — Make 2 cups (worked flat, mirrored)
- Foundation: Ch 13 (example; adjust to your gauge to create base width). Row 1: dc in 4th ch from hook and across (10 dc). Turn.
- Row 2: ch 3 (counts as dc), dc2tog in first 2 dc (or increase at center depending on shaping approach), dc across to last 2 sts, dc2tog. The goal here is to shape a triangle — options: increase at center with short rows or use symmetrical increases at edges. For a clean triangle I recommend short-row increases at center:
- Use a short-row triangle: Start with ch 2; Row 1: 1 dc in next ch, turn. Row 2: ch 2, turn, 2 dc in next st, turn. Continue increasing 1 dc at the inner edge every row until you reach your target cup width. (This produces a neat triangular cup.)
- Repeat to make a second cup, ensuring mirror symmetry. Block cups lightly.
3 — Join cups to form center & band
- Join cups at the center front by slip-stitching the inner edge of both cups together for about 1 in or attach a small rectangular bridge crocheted as
ch 12, sc across jointo make the center gore. This increases modesty and stability.
4 — Build the underbust band
- Pick up stitches along bottom edge of cups and work in the round in hdc (BLO for foldable casing) around to form a band. Aim for a band height of 2–3 in. Count the stitches and join to work in the round; work even until band height = 2–3 in.
- Optional: create a folded casing for elastic: work a round of sc in BLO, fold band up and stitch to create a small channel; insert elastic cut to target band size minus ¼–½ in for snugness and stitch ends.
5 — Straps & finishing
- Make sturdy straps by crocheting two strips: ch desired length (approx 50–60 ch for shoulder drop ~10–12 in depending on gauge), sc back across chains for 6–8 rows to make a 1 in strap. Attach ends inside top of cups and to back band with several passes of reinforced stitches. Alternatively, make braided cords for ties and tie behind the neck or back for adjustability.
- Weave in ends and block to set shape. Add removable cups if desired.
Fitting notes
- If the cup feels shallow, add extra rounds to cup height before joining.
- For larger busts, widen the cup base by increasing foundation chain or hold two strands together for firmer fabric.
Variations
- Add a row of shell trim across top edge for a seaside vibe.
- Make an underwire look by adding a narrow plastic arc inside the bottom seam (only for experienced makers and with sewing skills).
2. Crochet Ruffled Bralette Pattern
A playful bralette with a little ruffle band and soft cups. The ruffle gives flirty coverage and a light decorative hem.
Skill level: confident beginner
Yarn & materials (Medium)
- Fingering or light DK cotton ~220–300 yd.
- Hook: 3.0–3.5 mm for delicate drape.
- Notions: tapestry needle, optional lining.
Design idea
- Cups are simple triangle cups worked in dc or hdc; the lower band is a broad ruffle formed by working increased shell rounds. Straps are thin ties.
Step-by-step
1 — Cups (triangles, worked flat)
- Ch 12 (adjust to gauge for cup width). Row 1: dc in 4th ch from hook and across. Row 2: ch 3, turn, dc in first st and in each st—increase 1 st at inner edge every right-side row to shape the triangle OR use the short-row method described earlier for neat triangular cups. Make two identical cups.
2 — Join cups center
- Join with a 1–1.5 in crocheted bridge: ch 8, sc across and sew to inside of cups to fill center gap (creates modesty and a tidy center). Alternatively join with a narrow crocheted band.
3 — Ruffled underband
- Pick up stitches across bottom of cups and join in the round. Work 1–2 rounds of hdc to stabilize.
- Ruffle rounds: Shell ruffle: (dc 5) in next st, skip 2, sc in next — repeat around for a dense ruffle. For more drama, increase shell size (7 dc) and repeat several rows, increasing shells every other round.
4 — Straps & ties
- Make thin cords by chaining and sl st back (crochet chain rope) — attach to outer edges of cups and to the back band. For an adjustable back, make the band with eyelets (ch-3 loops) and use a ribbon through them.
Fitting & tips
- Because ruffles add length, the bralette sits slightly lower — measure center front height before finishing.
- For additional support, add a firm round of sc below the ruffle to anchor it and avoid excessive stretch.
Variations
- Add contrast-color picot edging to the ruffle tips.
- Make a marginally wider band and add buttons for decorative closure.
3. Crochet Lace Bralette Pattern
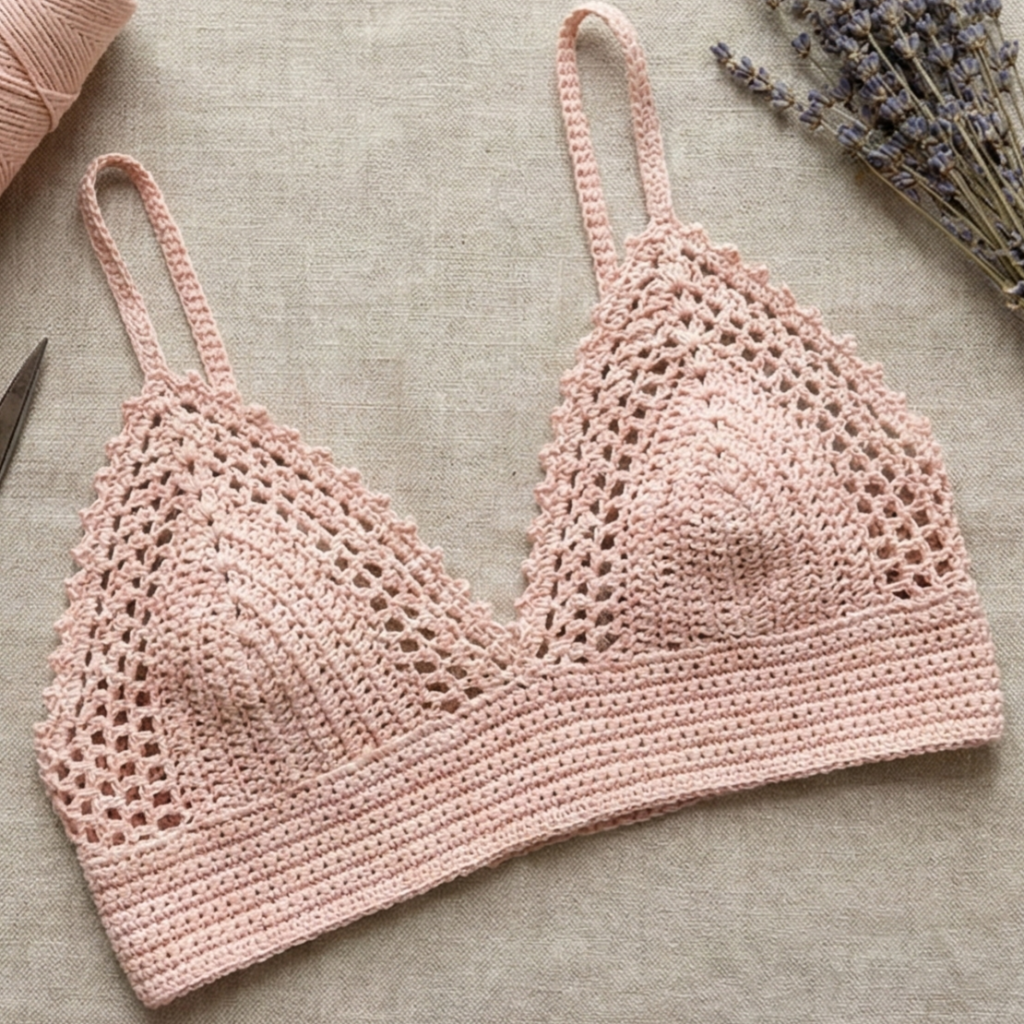
Airy, romantic and delicate — the lace bralette uses openwork stitches for an elegant look while a sturdy band underpins support.
Skill level: intermediate (working lace repeats and maintaining gauge)
Yarn & materials (Medium)
- Fingering or lightweight DK cotton ~250–300 yd.
- Hook: 3.0–3.5 mm.
- Notions: tapestry needle, optional lining.
Stitch notes
- Lace pattern: alternating V-stitches and chain meshes; cups shaped with increases/short rows then joined to a firm sc/hdc band.
Step-by-step
1 — Make cups (flat, lace pattern)
- Ch foundation for half-cup width: e.g., ch 18. Row 1: dc, ch 1, skip 1 across establishing mesh. Row 2 (lace): V-stitch (dc, ch 1, dc) in the chain spaces to make lacy shells. Increase at inner edge every 2 rows to build the triangle cup.
- Work until cup height matches measurement (C). Block cups to open lace.
2 — Center & band
- Join cups at center with several sc rows to create a gore, or crochet a small band (hdc band) to connect them.
- Pick up along bottom edge and work several rounds of hdc (or sc) to create a firm band. Add elastic casing if needed or work sc in BLO and fold for a casing.
3 — Straps & edging
- Add narrow strap ties or crocheted bands. Edge cup tops with a small scallop (shell) or picot to keep lace stable.
Fitting & tips
- Lace stretches; design the band to be firmer than the cups. Add a lining if transparency is a concern.
- For larger busts, add an extra vertical seam at the cup center by placing a dc column down the center and shaping accordingly.
Variations
- Make the lace denser near the cup center to increase support by hybridizing with hdc columns.
4. Crochet Mesh Bralette Pattern
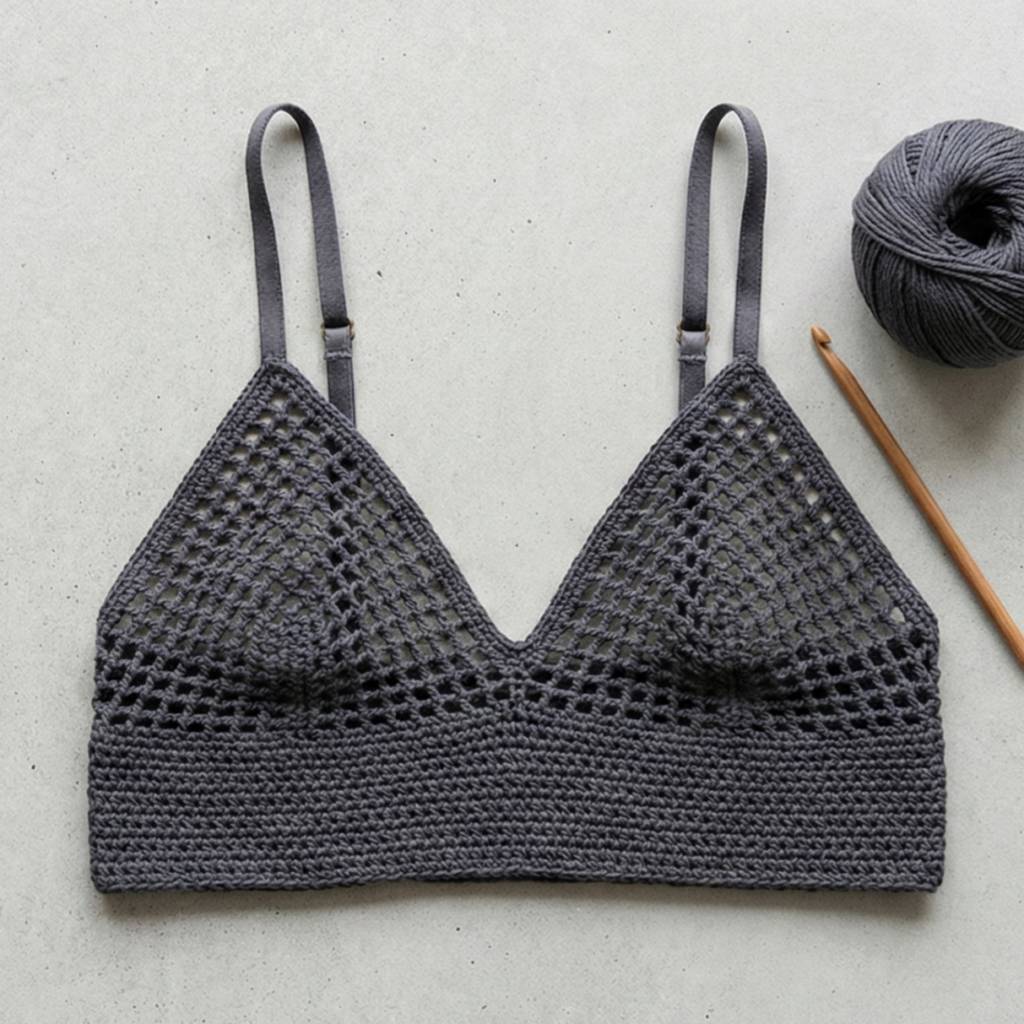
Clean, modern, and super breathable — mesh bralettes are quick and work well in cotton blends. They’re great for layering.
Skill level: confident beginner
Yarn & materials (Medium)
- DK cotton or cotton-blend ~220–280 yd.
- Hook: 3.75–4.0 mm.
- Notions: narrow elastic (optional), removable pads optional.
Stitch notes
- Mesh is often worked as alternating dc and chain spaces in the round or rows, producing a grid that’s stable when anchored by a firm band.
Step-by-step
1 — Cups (mesh triangles)
- Ch 12 (or width for cup). Row 1: dc in 4th ch and across. Row 2: ch 3, dc in next, ch2, skip 2, dc across to form mesh. Increase at inner edge every 2 rows to shape triangle.
- Work second cup.
2 — Join cups & band
- Join at center with a small bridge or sc strip. Pick up along bottom and work 3–4 rounds of hdc for a firm band. Optionally add elastic casing and insert ¼–⅜ in elastic for secure fit.
3 — Straps & finishing
- Make adjustable straps with a small eyelet row on the back band and tie-through strap or add slide adjusters (if you have sewing gear).
Fitting & tips
- Mesh breathability comes with more stretch; shorten band length or add elastic for better support.
- For opacity, line cups with thin cotton or add a soft lining panel sewn in.
Variations
- Make a tall racerback by shaping the band and joining straps higher at center back.
5. Crochet Granny Stitch Bralette Pattern
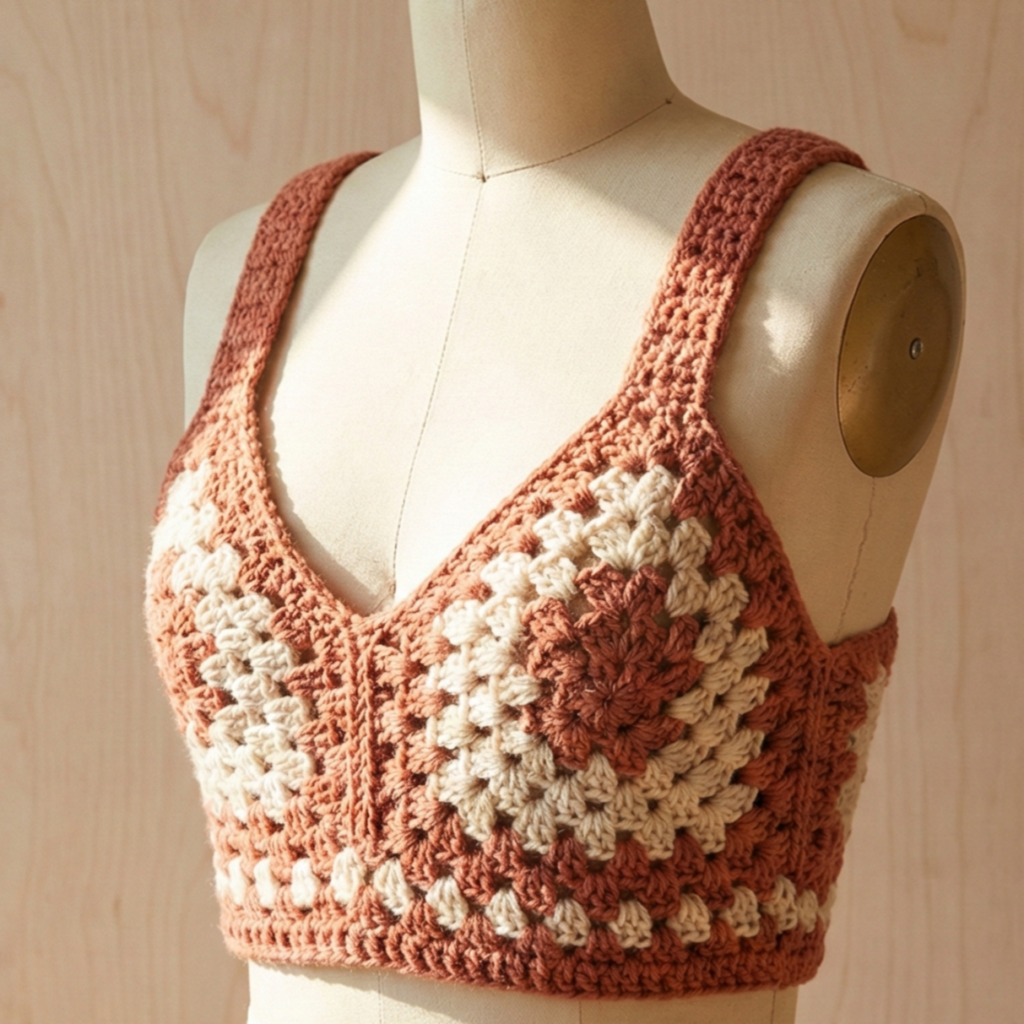
A casual, retro-friendly bralette that uses a granny-inspired stitch for texture and stretch. Works well in worsted held double for support.
Skill level: confident beginner
Yarn & materials (Medium)
- Sport/DK held double or light worsted ~300–400 yd for a firmer fabric.
- Hook: 4.0 mm (adjust for gauge).
- Notions: tapestry needle, optional lining.
Stitch notes
- Granny stitch variant: cluster groups (3 dc) with chain corners used to form a textured repeat — reworked into triangular cups and a broad band.
Step-by-step
1 — Cups using granny clusters
- Start center with MR: ch 3, 2 dc, ch 2, 3 dc, ch 2 rep 3 times (classic corner start). But for a triangular cup we’ll increase along one side each row:
- Alternate method: make a small rectangular granny strip and then work diagonal increases to create a triangular cup — simpler: work rows of [3 dc cluster, ch 1] with increases at the inner edge until cup width and height match.
- Make a second cup.
2 — Join cups & wide band
- Join similar to previous patterns: small bridge or 3–4 rounds of dense sc between cups.
- Pick up along bottom edge and work a wide band in hdc or sc for stability (3–4 in tall). For less sagging, work the band in two rounds of BLO and fold to create a casing for elastic.
3 — Straps & adjustability
- Use wider crochet straps for comfort (2 in), or attach short straps and use a back tie for adjustability.
Fitting & tips
- Granny stitch has more give; test band tension and consider elastic casing for firm fit.
- This style has a vintage vibe when made in muted neutrals.
Variations
- Make the band in contrasting color or add a center bow.
6. Crochet Festive Triangle Bralette Pattern
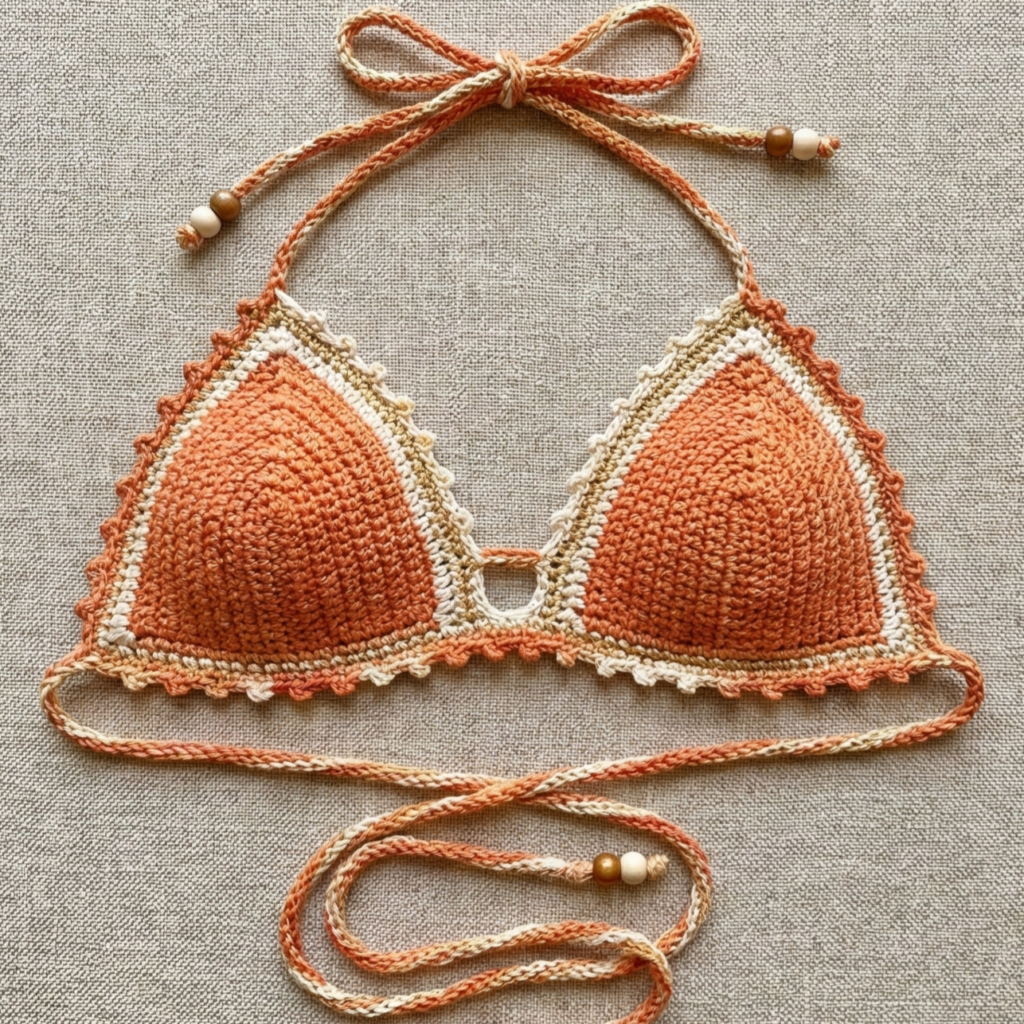
A quick and versatile triangle bralette perfect for festival wear or layering — simple triangles, a narrow band, and adjustable ties.
Skill level: confident beginner
Yarn & materials (Medium)
- Fingering/DK cotton ~200–250 yd.
- Hook: 3.0–3.75 mm.
- Notions: tapestry needle, optional beads for ties.
Design idea
- Two classic triangles with decorative edge (picot or shell), joined by a slim band and with tie straps for fully adjustable fit.
Step-by-step
1 — Make the triangles
- Ch 12 (or width per gauge). Row 1: dc in 4th ch and across. Row 2+: work short-row triangle increases at inner edge until desired height, or increase at both sides for symmetrical triangle. Repeat for second cup.
- For a decorative edge, work a round of picot or small shell after cups are finished.
2 — Connect & make band
- Join cups with a narrow strip: ch to length of desired front band (e.g., ch 8–12), sc across and sew to the other cup to create center strip. Alternatively, make a small rectangle
ch 12, sc across 2–3 rowsand sew. - Make long crocheted cord for lower band:
chlong enough to wrap underbust and tie around back (for example, 120–150 ch depending on measurement and gauge). Use sturdier cording (crochet-over chain) if you want a sturdier band. Tie ends to outer cup corners or thread the cord through eyelets worked along the band.
3 — Straps
- Make long cords for neck ties — attach to top outer points of cups and tie behind neck for halter style, or make adjustable straps with loops.
Fitting & tips
- Fully adjustable with ties; great if you’re unsure of band size or making as a gift.
- For more coverage add a small ruffle or a row of dc at top of cup.
Variations
- Add color-block stripes or metallic thread for festival sparkle.
- Add a short fringe on bottom of band for boho vibe.
Final tips for sewing, lining, and grading sizes
Lining & removable cups
- If you want more support or modesty, cut a lining from lightweight cotton to match cup shape, sew it into the cups, and hand-stitch into place. Use removable foam pads for shaping that can be inserted into small pockets.
Elastic & stability
- If your stitch choice is open or super stretchy, always add a firm band round of sc before making a casing and inserting elastic. Elastic width: ¼–½ in is comfortable for most; wide elastic (1 in) gives more hold.
Grading sizes
- Use your swatch to compute stitches per inch. For a different size:
target underbust (in) × stitches per inch = band foundation countandtarget cup width × stitches per inch = cup base chain. Adjust the number of increases/rows to match cup depth measurement (C above).
Try on as you go
- For a great fit, try on at three points: after cups are built, after band is started, and after straps are attached. It’s much easier to tweak early.
Care
- Most cotton bralettes: hand wash or gentle machine cycle and lay flat to dry to keep shape and avoid elastic damage.
Conclusion
A comfortable crochet bralette starts with accurate measuring, reliable gauge, a sturdy band, and adjustable details (ties, elastics, or straps). The six patterns above give a range of styles — from the Lilac Beach’s soft support to the playful Ruffled, the romantic Lace, the airy Mesh, the textured Granny Stitch, and the adjustable Festive Triangle. Each design is easy to adapt: make the band firmer for more support, widen cups for more coverage, or add lining/foam inserts as needed.