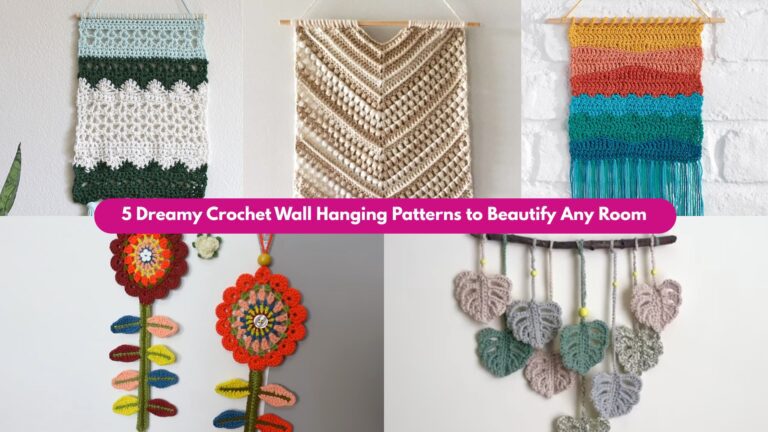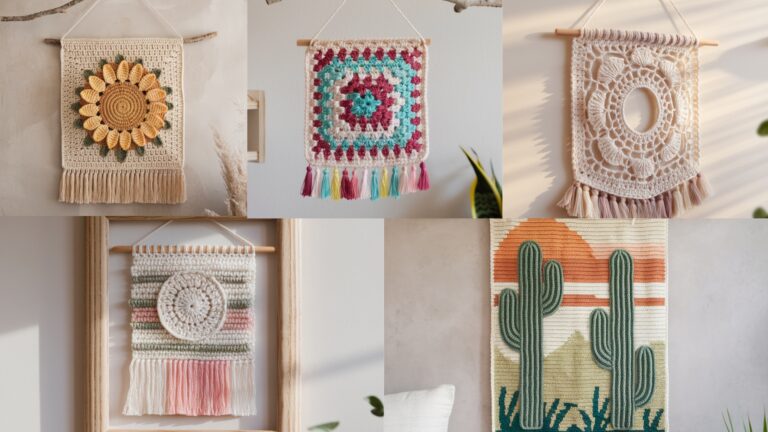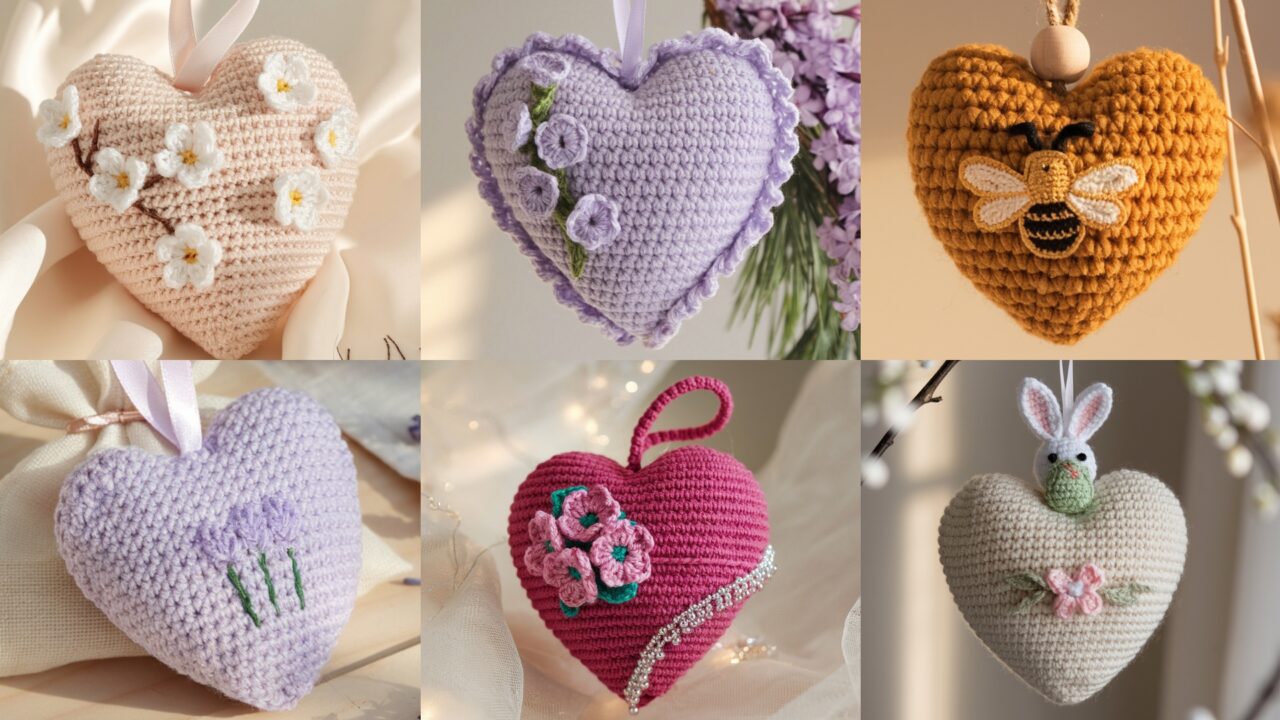
Hearts are the Swiss Army knife of ornaments: tiny, fast, layerable, and effective as decorations, gift tags, tree ornaments, or sachets. These six patterns — Lilac, Fuchsia, Lavender (scented), Cherry Blossom, Honey, and Easter Bunny Heart — are designed for makers who want beautiful results without hand-wringing over complicated shaping.
Each ornament below is written for an accessible sample size (about 3.0–3.5 inches / 7.5–9 cm wide), which is large enough to show detail but small enough to make several in an evening. I include yarn and hook options so you can use what you have: cotton for crisp shape, acrylic for color variety, or cotton-blend for a balance of structure + softness.
Universal notes — read this first (the boring but useful part)
Abbreviations (US): ch = chain, sc = single crochet, hdc = half double crochet, dc = double crochet, tr = treble, sl st = slip stitch, st(s) = stitch(es), MR = magic ring, inc = 2 sc in same st, dec = sc2tog, BLO/FLO = back/front loop only, RS/WS = right/wrong side.
Yarn & hooks (options):
- For a crisp, slightly stiff ornament: mercerized cotton thread (size 10) + 1.5–1.75 mm hook, or cotton DK + 2.5–3.5 mm hook.
- For cozy look: sport or DK acrylic/wool blend + 2.75–3.5 mm hook.
- For scented sachets: breathable cotton or cotton-linen blend so scent escapes.
- Sample patterns below use DK / light worsted (#3–#4) and a 3.0 mm hook unless I call out thread.
Gauge & size: I design these so gauge isn’t mission-critical. If you want exact size: sample gauge ≈ 5–6 stitches per inch in sc with DK yarn. A finished heart will be about 3.0–3.5 in (7.5–9 cm) across when you follow the instructions below.
Stuffing & weight: Use polyester fiberfill for volume. For weighted, washable ornaments (e.g., for doorstops or heavier tree decorations), put a small sealed pouch (zip or stitched) of glass seed beads or steel shot inside the filling — never mix beads loose with fiberfill. For sachets, use dried lavender in a sealed inner cloth bag.
Finishing & hanging: Add a crocheted loop, metallic thread loop, or ribbon. Reinforce attachment points with a few hidden stitches so ornament hangs confidently.
Blocking & stiffening: Block cotton pieces to flatten; use diluted white glue (50/50 with water) or fabric stiffener if you want rigid ornaments. For flexible keepsakes, skip stiffener.
Care: spot clean or hand wash unless you used a removable bead pouch; reshape and air dry.
1. Crochet Lilac Heart Ornament Pattern
Soft, romantic, and floral-ready — a small lacy heart with a picot edge for a classic finish.
Skill level: Confident Beginner
Finished size (sample): ≈ 3.0 in / 7.5 cm wide.
Materials: DK cotton (or cotton-linen) in lilac, 3.0 mm hook, small bit of fiberfill, tapestry needle, soft ribbon for hanging (6–8 in / 15–20 cm). ~15–25 yds.
What this is
A slightly lacy, two-sided heart worked flat in rounds, seamed around, lightly stuffed and edged with tiny picots to look delicate and heirloom-y.
Step-by-step
Make two identical heart halves (we’ll join later).
Half A (top lobes → point)
- MR. R1: ch1, 6 sc into MR. (6) Pull ring tight.
- R2: inc in each st around → 12 (six increases). (12)
- R3: sc1, inc repeat around → 18 (12 + 6 = 18). (18)
- R4: sc2, inc repeat around → 24. (24)
- R5: sc3, inc repeat around → 30. (30)
- R6: sc around 30 sts evenly for one round to widen the lobe base. Fasten off leaving 8–10″ tail for joining.
Make a second identical Half B.
Join & finish
7. Place halves RS together. With tail from Half A and tapestry needle, whipstitch or sc through both loops around the heart, but stop when you reach the top center — leave a gap for stuffing about 1.0 in (2.5 cm).
8. Turn RS out through the gap or, if you prefer, stuff through the gap using polyester fill to a lightly plump shape. Insert a tiny inner sachet if you want (lavender option). Finish joining to close gap.
9. Picot edge: With RS out, join yarn at top center seam and work: sl st into next st, ch3, sl st into same st repeat every 4–5 stitches around to create delicate picots (or do sc, ch3, sl st in top of sc). Fasten off and weave ends.
Hanging loop
10. Make 12 ch, sl st into top seam to form loop; fasten off and secure base with 4–6 sturdy stitches. Alternatively, attach a silk ribbon loop and secure with hidden stitches.
Variations & finishing notes
- Add a tiny button or a seed bead cluster at the heart center for sparkle.
- Brush a few drops of floral essential oil onto the inner sachet for scented ornaments (lavender, rose, or lilac).
- For a stiffer ornament, after final assembly brush all-over with diluted glue and let dry on a block.
2. Crochet Fuchsia Heart Ornament Pattern
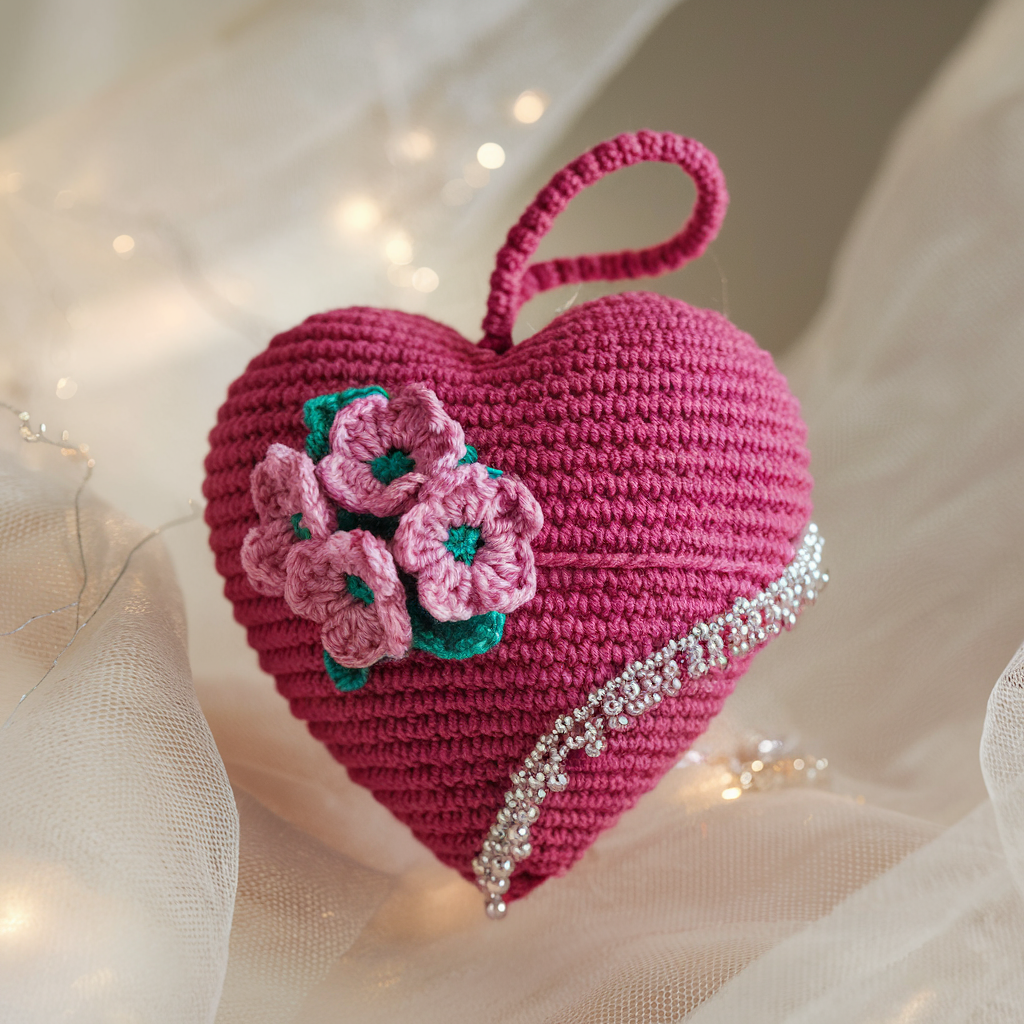
Punchy color, bead fringe, and attitude — this one pops on evergreen and modern trees alike.
Skill level: Confident Beginner → Intermediate (beadwork)
Finished size (sample): ≈ 3.5 in / 9 cm across.
Materials: DK cotton in fuchsia, 3.0 mm hook, small seed beads (6–12), 2 jump rings, earring wire or ornament hook if you want to make pairable earrings, fiberfill. ~20–30 yds.
What this is
A slightly larger 3D heart with beaded fringe along the bottom curve for motion and glint. Works great as tree ornament or bundled on gift bows.
Step-by-step
Make one continuous tube heart (single piece, in rounds)
- MR, R1: 6 sc in MR. (6)
- R2: inc in each st → 12. (12)
- R3: sc1, inc ×6 → 18. (18)
- R4: sc2, inc ×6 → 24. (24)
- R5: sc3, inc ×6 → 30. (30)
- R6–R8: sc around 30 for 3 rounds — this builds the lobe bulk. (30 each)
- Divide for lobes/point: fold piece so that 30 sts form the heart circumference. Hold and work sc across 15 sts to form the first lobe area (count 15), then ch 2 and turn and work 3–4 short rows (sc 5, sc2tog, sc2? ) to round the lobe — this is a shaping step you adjust as you go. (Because exact small-row shaping varies with yarn, test-fitting the first lobe on the doll or object is the practical step.)
Practical option (safer and recommended): Make two halves as in Lilac pattern and join for a cleaner symmetrical result — then add beads.
If using two halves: make two halves (use rounds R1–R6 as above, then fasten off), join RS together, stuff, seal.
Add beaded fringe
8. After final join, with RS facing, attach bead strand at bottom edge: thread 3–6 seed beads onto short lengths of thread or small chain and tie to edge every 6–8 stitches — or threaded onto yarn tail before knotting and secured with a tiny dab of clear glue on knot to avoid slipping.
Hanging loop
9. Crochet a small loop or use metallic thread for bright shimmer; sew to top seam.
Variations & notes
- Use two-tone fuchsia + magenta rounds for depth.
- Make matching small bead-dangle heart earrings by following initial small-rounds only, securing bead as dangle, and attaching to fishhook earwires.
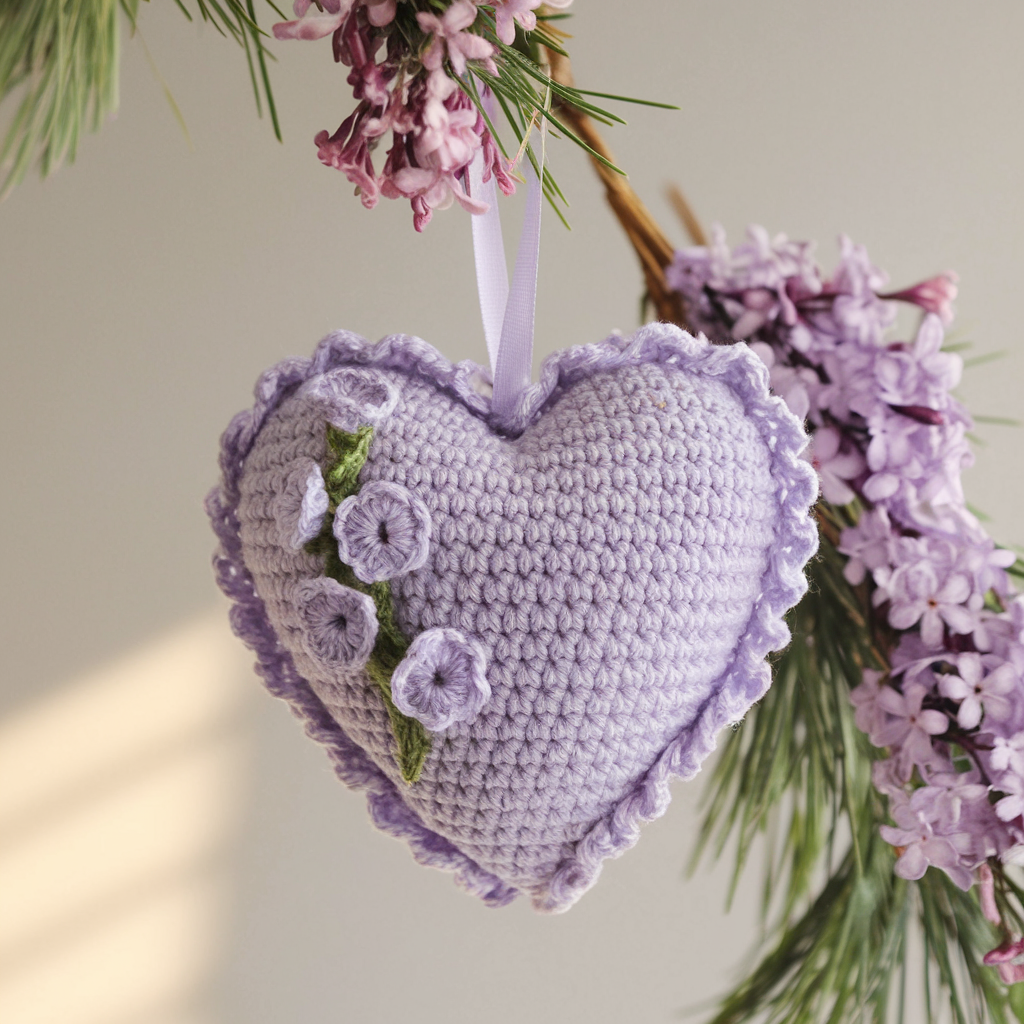
3. Crochet Lavender Heart Ornament Pattern
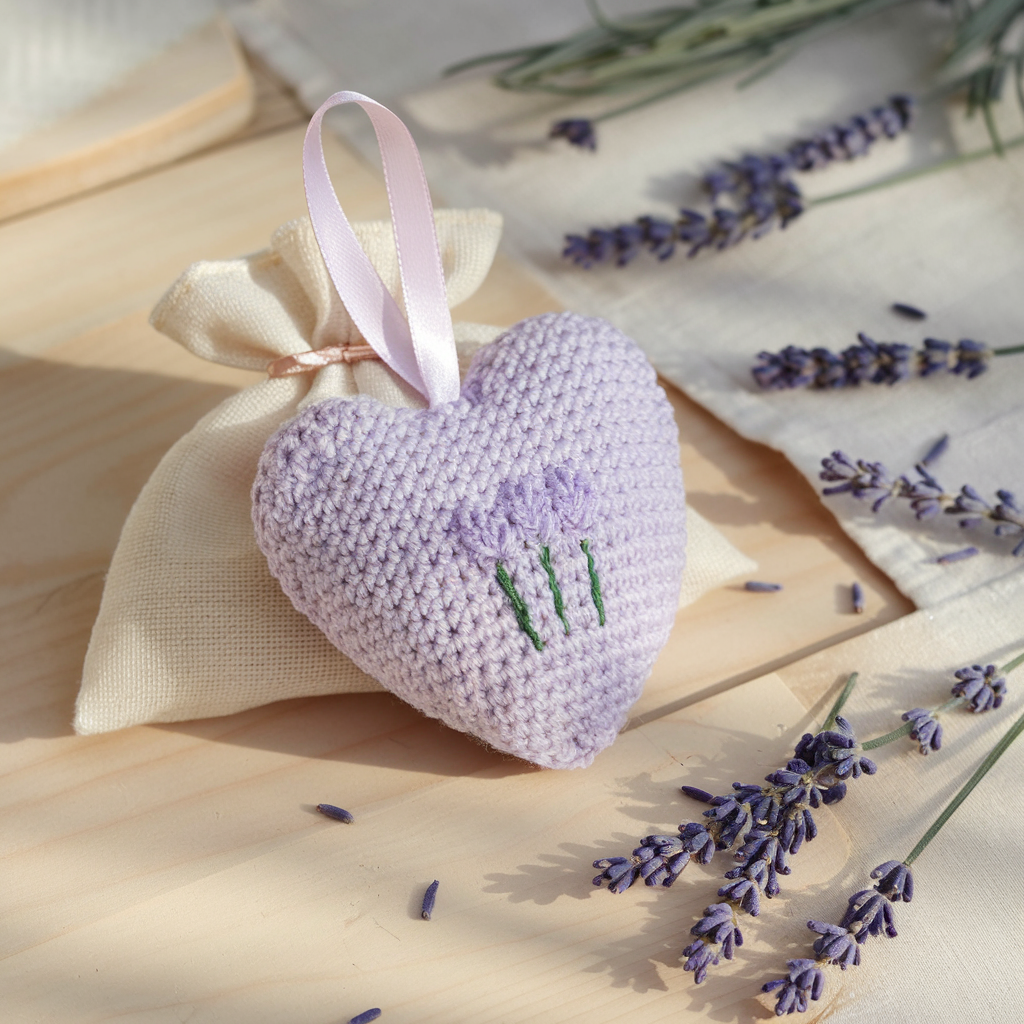
A tiny scented pouch in heart form: sew an internal pouch of dried lavender, leave outside crochet cover removable for washing.
Skill level: Confident Beginner
Finished size (sample): ≈ 3.0 in / 7.5 cm wide.
Materials: Cotton or cotton-linen yarn in pale lavender, 3.0 mm hook, small envelope or muslin sachet (4 in × 4 in) to hold dried lavender, dried lavender 1–2 tablespoons, fiberfill (optional), ribbon loop. ~15–20 yds.
What this is
A double-layer ornament: a small fabric sachet filled with lavender goes inside a crocheted heart cover. The cover is removable for washing and display.
Step-by-step
Make the tiny sachet (fabric method)
- Cut a 4 in × 4 in (10 × 10 cm) square of muslin. Fold in half, sew side seam and bottom seam leaving top open. Fill with 1–2 tablespoons dried lavender and a little polyfill to make it puffy. Sew top closed.
Crochet cover — two flat hearts (identical)
2. MR, R1: 6 sc in MR (6). R2: inc every st → 12. R3: sc1 inc → 18. R4: sc2 inc → 24. R5: sc around 24. Fasten off; make second identical heart.
Assembly
3. Place fabric sachet between heart halves, seam around three-quarters leaving a small opening to insert sachet if you made hearts first; put sachet in and finish seaming. For a removable cover, sew only 3 sides permanently and use a tiny snap or stitch/loop on the last side so the sachet can be removed.
Hanging loop
4. Sew ribbon loop into top seam; reinforce with a few stitches. Optional iron-on patch inside to protect against oil transfer if you add essential oil.
Variations & finishing
- Add a few drops of essential oil (lavender) to cotton ball inside a sealed inner pouch for scent boost (don’t saturate or oils may stain yarn).
- Embroider a small sprig motif on the heart front before seaming.
4. Crochet Cherry Blossom Heart Ornament Pattern
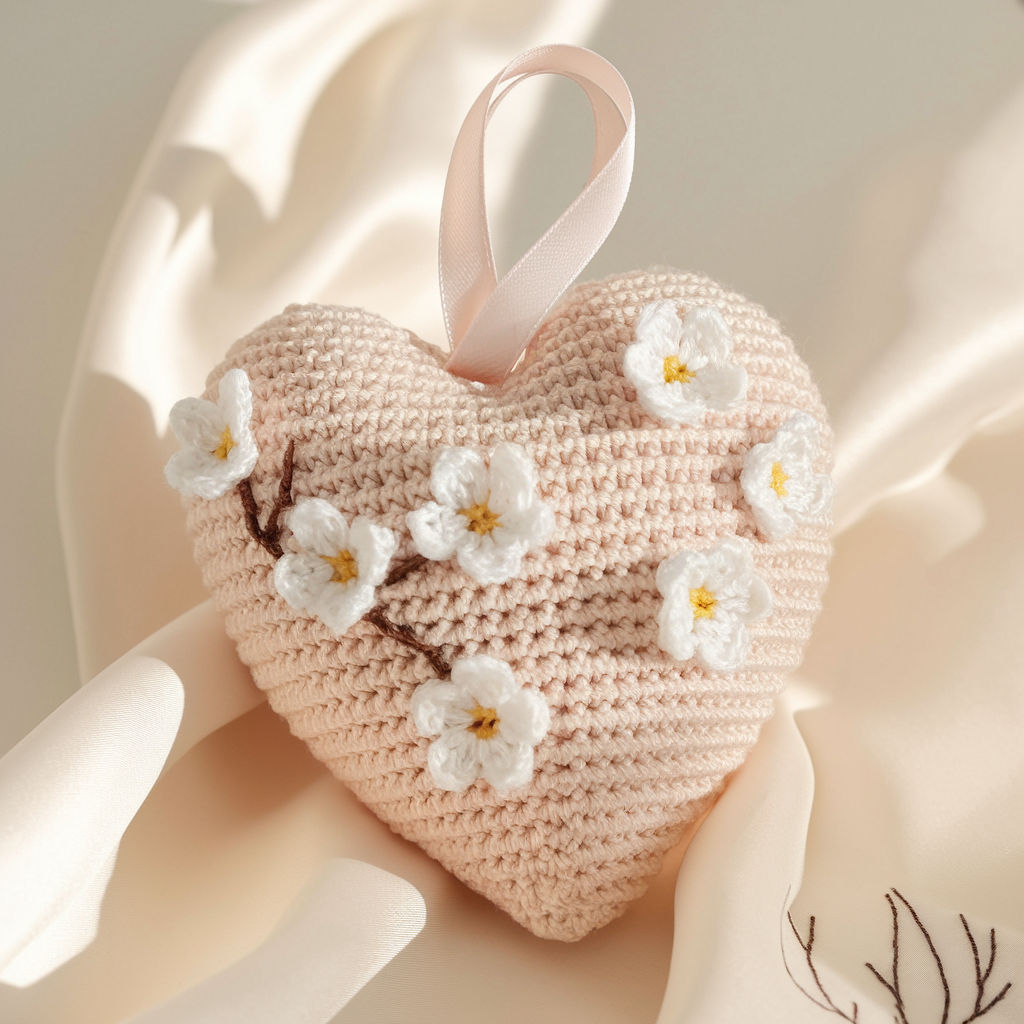
Two-tone romantic heart with petite crocheted blossom appliqués.
Skill level: Intermediate (appliqué + colorwork)
Finished size (sample): ≈ 3.25 in / 8.25 cm wide.
Materials: DK cotton in pale blush + white, 3.0 mm hook, small yellow embroidery thread for blossom centers, polyester fill. ~25–30 yds.
What this is
A soft heart in blush with tiny five-petal cherry blossom appliqués sewn onto the surface. Very giftable for springtime décor.
Step-by-step
Heart body (two halves)
- Make two halves as in Lilac pattern: MR→6→12→18→24→30 (R1–R5), sc around two rounds. Fasten off; two halves total.
Blossom appliqué (make 4–6)
2. MR, ch1, 6 sc in MR. (6)
3. R2: ch4, sl st into next st around to make 6 loops.
4. In each loop: (sc, hdc, 3 dc, hdc, sc) → one petal. Fasten off leaving tail. Add a French knot or tiny bead for center using yellow embroidery floss.
Assembly
5. Join heart halves leaving a small gap; stuff lightly. Before closing fully, position blossoms on front and sew them into place using the long tails and a few small stitches through heart body to anchor. Close heart and secure threads.
Hanging loop & finish
6. Attach a slim silk ribbon as hanging loop. Add a tiny branch stitch in espresso/brown yarn behind blossoms for realism (surface embroidery).
Variations
- Make blossom clusters (3 small + 1 medium) for visual interest.
- Add a little gold metallic thread as a highlight on petal edges for a luxe look.
5. Crochet Honey Heart Ornament Pattern
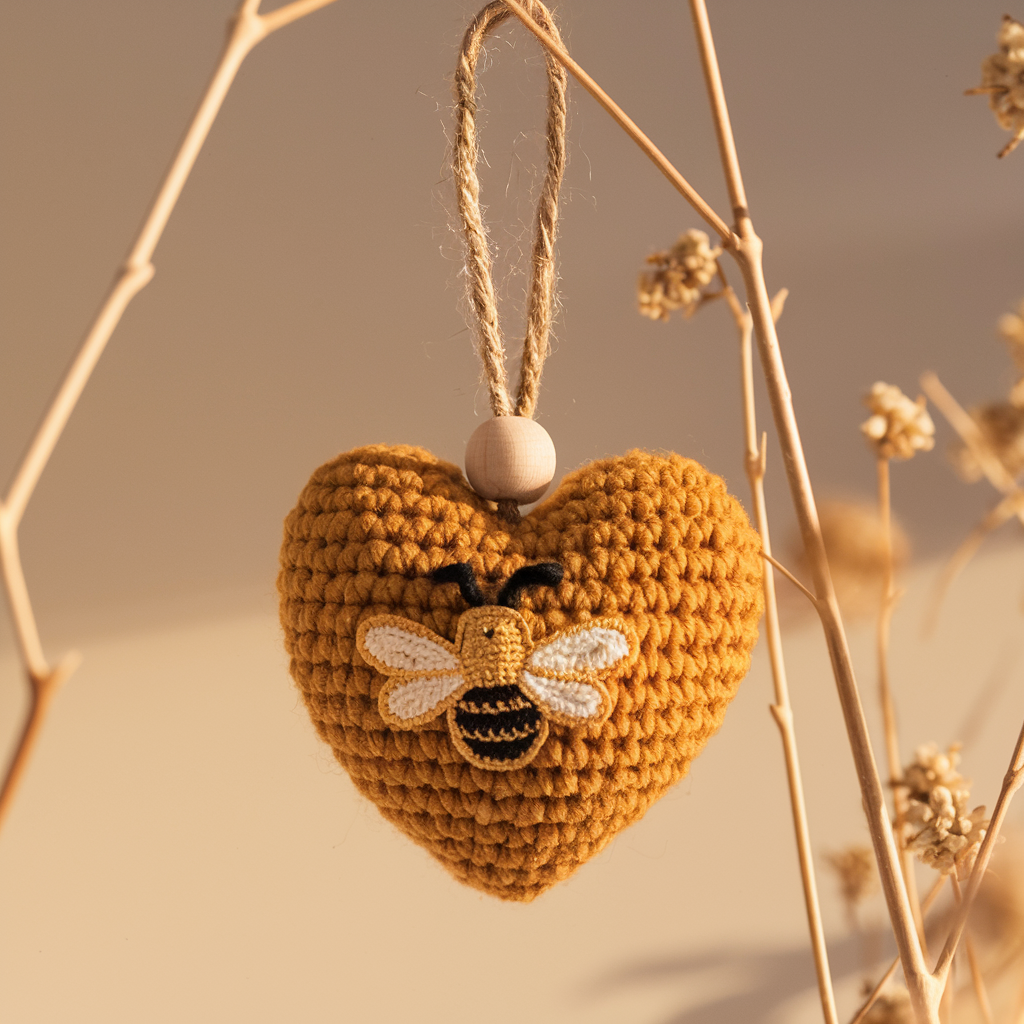
Warm honey-color heart with tiny crocheted bee appliqué. Slightly rustic, perfect as hostess gifts or paired with a jar of honey.
Skill level: Intermediate (appliqué + small shaping)
Finished size (sample): ≈ 3.5 in / 9 cm wide.
Materials: DK cotton in golden honey and black/cream for bee, 3.0 mm hook, small wooden bead for bee head (optional), fiberfill. ~25–35 yds.
What this is
A golden heart ornament with a small bee attached — playful, seasonal (late summer / autumn), and a great market item.
Step-by-step
Heart body
- As in earlier patterns, two halves: MR→6, inc→12, (sc1 inc)→18, (sc2 inc)→24, sc around 24–30 for bulk. Fasten off two halves.
Bee applique
2. Body: MR, ch1, 6 sc into MR. R2: inc each → 12. R3–R4: (sc around 12) two rounds in golden. R5: switch to black and sc around 12 for stripe. Add another round golden then decrease rounds to create small oval for bee. Attach small wood bead for head or make MR6 small head and sew on.
- Wings: ch5, sl st back into next st to make tiny loops (two wings). Sew wings to bee body.
Assembly
4. Join heart halves leaving small gap; place a tiny flat stitch to anchor the bee to heart front (use a few stitches through heart interior to secure). Stuff lightly; close. Make sure bee is sewn with multiple passes so it doesn’t detach from ornament.
Hanging & finishing
5. Add jute twine loop for rustic look or satin ribbon for gift-y feel. Tin glaze beeswax lightly on bead head for sheen (optional).
Variations
- Stitch a tiny honeycomb motif in the background using surface crochet.
- Make a set of honey + lavender hearts for a themed hostess gift.
6. Crochet Easter Bunny Heart Ornament Pattern
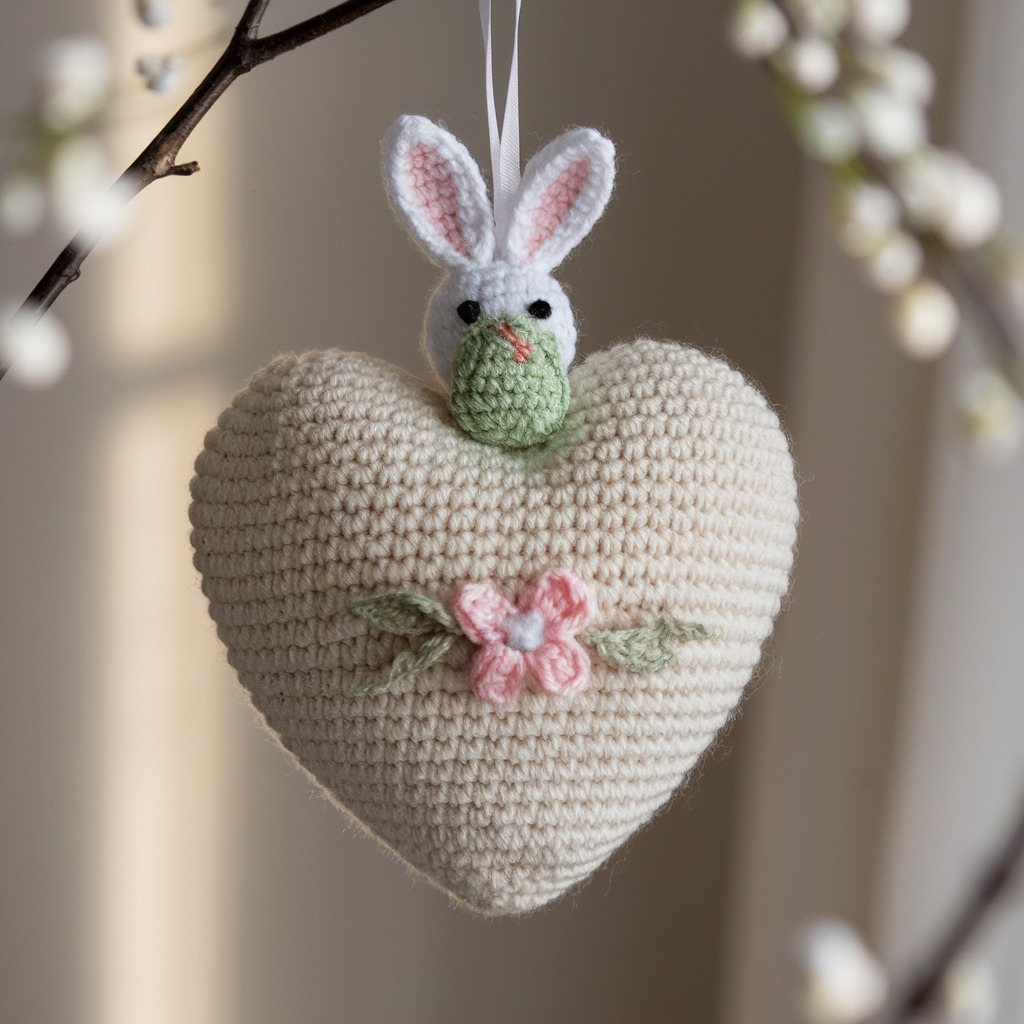
Playful heart with little bunny ear applique — ideal spring or Easter tree décor.
Skill level: Confident Beginner
Finished size (sample): ≈ 3.25 in / 8.25 cm wide (heart plus small ears).
Materials: DK cotton in pastel white/cream + pink, 3.0 mm hook, tiny safety eyes or embroidered eyes for face (if adding a bunny face), fiberfill, ribbon. ~20–30 yds.
What this is
A sweet heart with two small ears sewn on top and optional embroidered face for a little character.
Step-by-step
Heart body
- Two halves again: MR→6→12→18→24→sc rounds (see pattern 1). Make two halves.
Ears (make 2)
2. Ch 6. R1: sc in 2nd ch from hook and across (5 sc). R2: ch1, inc in first st, sc across, inc in last st → 7 sts. R3: sc across 7 sts. Fasten off leaving tail. Fold and seam base to make a small ear shape — press lightly. Make inner pink ear: ch4, sc across 3 sts, fasten off and sew in center of outer ear for detail.
Assembly
3. Join heart halves, but before fully closing, sew ears into top center seam pointing slightly apart. Stuff and close.
Face (optional)
4. Embroider tiny eyes and whiskers with soft gray or brown thread, or use two tiny black French knots for cheeks. Keep face subtle so ears are the star.
Hanging & finishing
5. Attach pastel ribbon loop; consider tying a small bow at base of ears for extra charm.
Variations
- Make a whole set in pastel palette and tie them onto wrapped Easter baskets.
- Add a tiny carrot applique at lower corner for extra sweetness.
Final finishing & display tips (don’t skip these)
- Reinforce hanging points: make a few invisible stitches through the seam at the top center where loop attaches; if using ribbon, tie a knot on the inside and stitch over it for security.
- Make them washable: keep bead/shot pouches removable or avoid heavy watery finishes. If you want washable but scented, put scent in a small sealed sachet inside.
- Gift-ready sets: package 3–6 ornaments in a small box with tissue and a care card: “spot clean or hand wash, reshape while damp.”
- Batch production tips: chain up several MR starts at once to speed up sewing, and assemble as a final stage.
conclusion
There. Six heart ornaments that won’t embarrass you at the holiday table: lacy Lilac, statement Fuchsia with beads, Lavender sachet for sleepy drawers, floral Cherry Blossom, rustic Honey with a bee, and the playful Easter Bunny heart. Make a benchful in an evening, stack them in a jar, or string a garland of hearts across a mantle. The trick to perfect ornaments is simple: pick the right fiber for the purpose (cotton for scent + washability; acrylic for vivid color), reinforce your hanging loop, and use a tidy inner pouch for any loose filling. Now pick a color palette and make a set — they ship well and vanish from gift bundles faster than cookies at a bake sale.