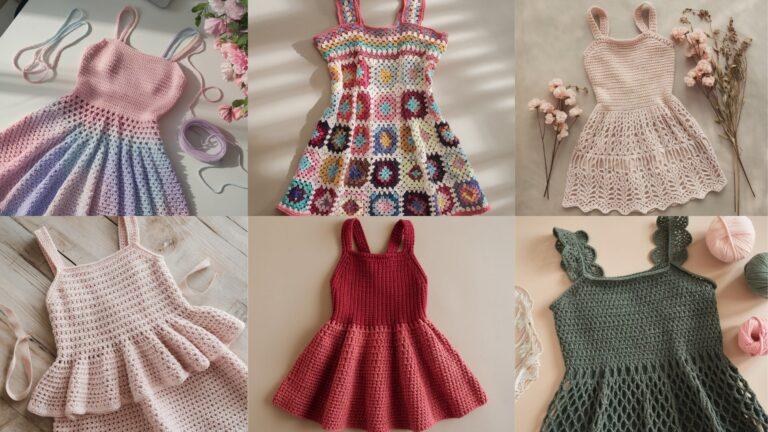
Brooches are the quiet accessory that says, “I care about details” without you having to explain why you bought three yarn colors and a spare glue gun. These six patterns give you tiny, fast, useful pieces you can wear on coats, bags, or gift-wrap like a civilized person. Each pattern below is fully worked: skill level, exact materials, finished size, gauge notes, step-by-step stitch instructions, assembly (pin attachment and backing), finishing, care, and variations. I’ll also point out safety and durability traps so your brooch doesn’t fall apart in public.
Make a swatch if you want perfect scale. If you don’t, your brooch still might be cute — it just may not sit straight on the lapel.
Quick common notes (read this once — it helps)
Abbreviations (US): ch = chain, sc = single crochet, hdc = half double crochet, dc = double crochet, tr = treble, sl st = slip stitch, st(s) = stitch(es), MR = magic ring / magic circle, BLO/FLO = back/front loop only, inc = 2 sc in same st, dec = sc2tog, sk = skip.
Tools & materials baseline (use sensible substitutions):
- Yarn: cotton or cotton-blend fingering/DK for crisp shapes; sport/DK or light worsted for chunkier brooches. Avoid super-fuzzy yarns unless you want a shaggy carrot.
- Hooks: 2.5–4.0 mm depending on yarn weight. I’ll list a recommended hook per pattern.
- Notions: yarn needle, small sharp scissors, brooch pin backs (safety brooch pins with bar + clasp), small oval felt pieces (for backing), strong thread (polyester), hot glue (optional), sewing needle.
- Optional: tiny stuffing (for 3D appliqués), small beads (for centers) — see safety note.
Finished sizes: Most brooches below are designed ~1.5–2.5 inches / 4–6 cm across — big enough to be seen, small enough to not droop a sweater. I give exact sample stitch counts for those sizes.
Safety: If the brooch will be used by/near children, do not use glued beads or safety eyes; embroider features instead. Sew pin backs through felt and yarn with multiple passes — don’t rely on glue alone.
How to attach a brooch pin securely:
- Cut a felt oval ~3–4 mm smaller than brooch back.
- Sew the pin onto the felt with 6–10 passes of strong thread through both holes and felt.
- Sew felt to crochet brooch with small whipstitches around the edge, stitching through both felt and yarn so the pin’s stress sits on many thread passes. Add a dot of fabric glue inside for extra insurance (hidden).
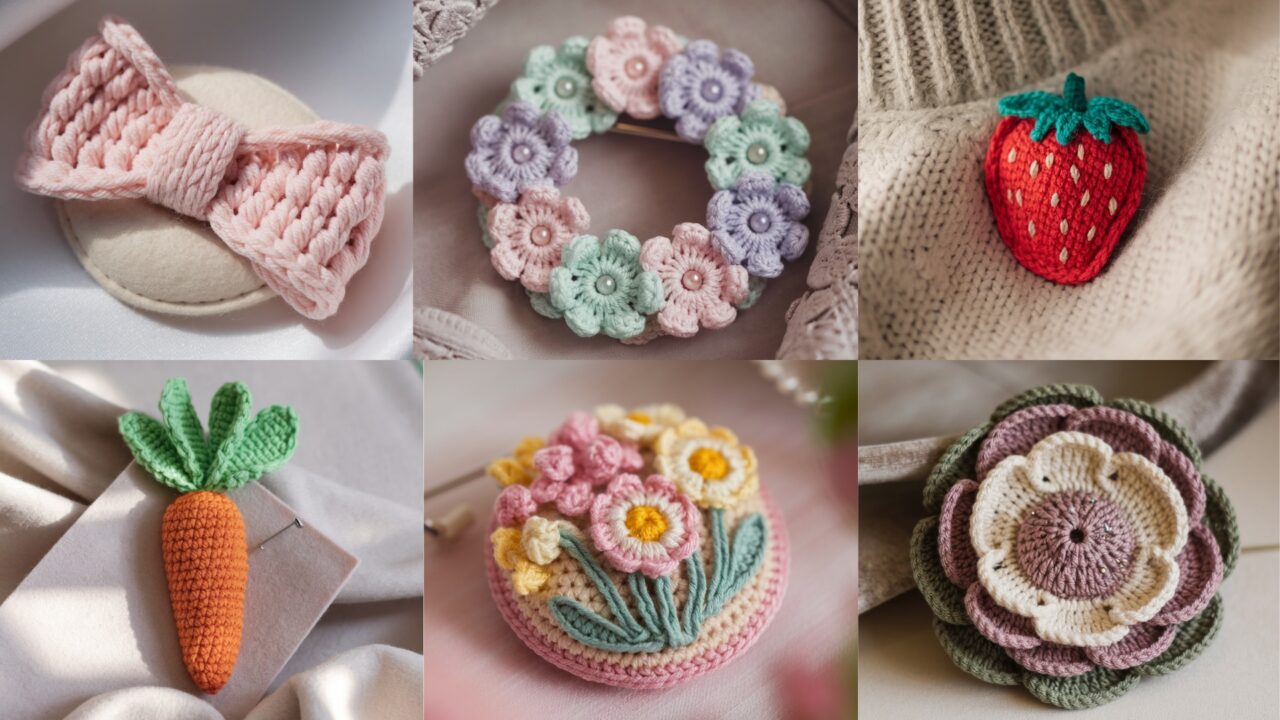
1. Crochet Mini Bow Brooch Pattern
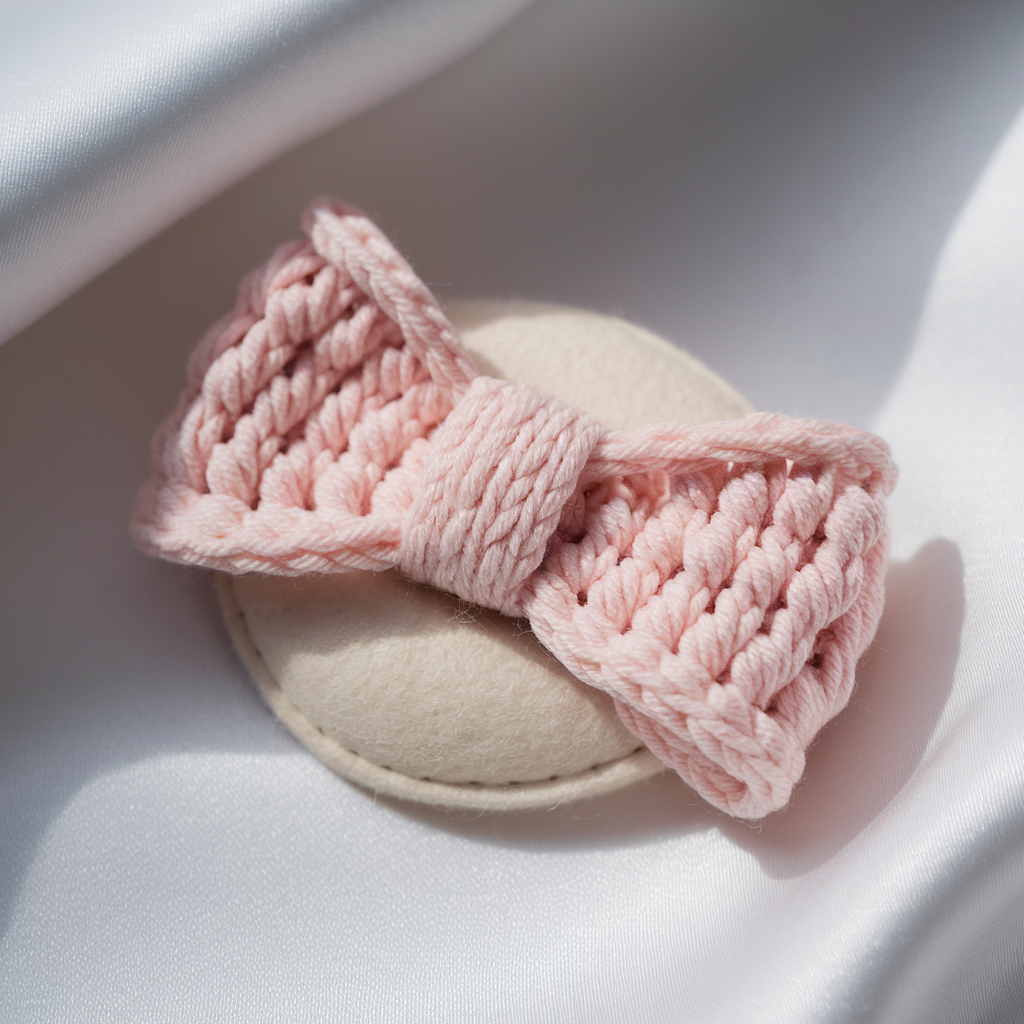
A crisp little bow — quick, classic, and wearable with anything.
Skill level: Confident Beginner
Materials: DK cotton (or worsted held single) — sample uses DK; 3.5 mm hook, yarn needle, felt oval ~2″ × 1.25″, 1 small 1″ brooch pin/back, ~10–15 yds yarn.
Finished size (sample): ~2.0″ (5 cm) wide × ~1.0″ (2.5 cm) tall.
Gauge & sizing notes
This is a small rectangular piece folded into a bow. Gauge is not critical; if you want precise size use swatch: e.g., sample gauge 5 sc = 1″ (5 stitches per inch). For a 2″ wide bow: stitches needed = 2 × 5 = 10 stitches. (Two times five equals ten.) The pattern below uses 11 ch foundation to give a neat edge; adjust by multiples if your gauge differs.
Pattern — bow body (flat)
- Ch 12. (This yields 11 working stitches.)
- Row 1: sc in 2nd ch from hook and across. (11 sc)
- Rows 2–8: ch1, turn, sc across 11 sc. Work until rectangle measures ~1″ tall (or 7–8 rows depending on your rows/in). Fasten off leaving long tail for wrapping.
- Make center band: ch 6, sc in 2nd ch and across (5 sc), work 10–12 rows until long enough to wrap and overlap; fasten off leaving tail.
Assembly
- Pinch the rectangle center into a bow shape (make two small accordion pleats) and wrap the center band tightly around it; stitch the band closed at the back with hidden whipstitches.
- Cut a felt oval about 1.5″ × 1.0″. Sew your brooch pin to felt: run a sturdy needle with polyester thread through one hole of the pin, through the felt, back through the other pin hole, and repeat 6–10 times in an X-box pattern for strength. Tie off.
- Sew the felt + pin to the back of the bow with small stitches, catching both yarn and felt to distribute strain.
Finishing and care
- Weave ends and trim. Steam-block lightly for a neat finish. Wash by hand or machine in mesh bag on gentle; reshape while damp.
Variations
- Make larger bows by holding two strands together or by increasing foundation chain.
- Use ribbon wrapped center instead of crochet for contrast.
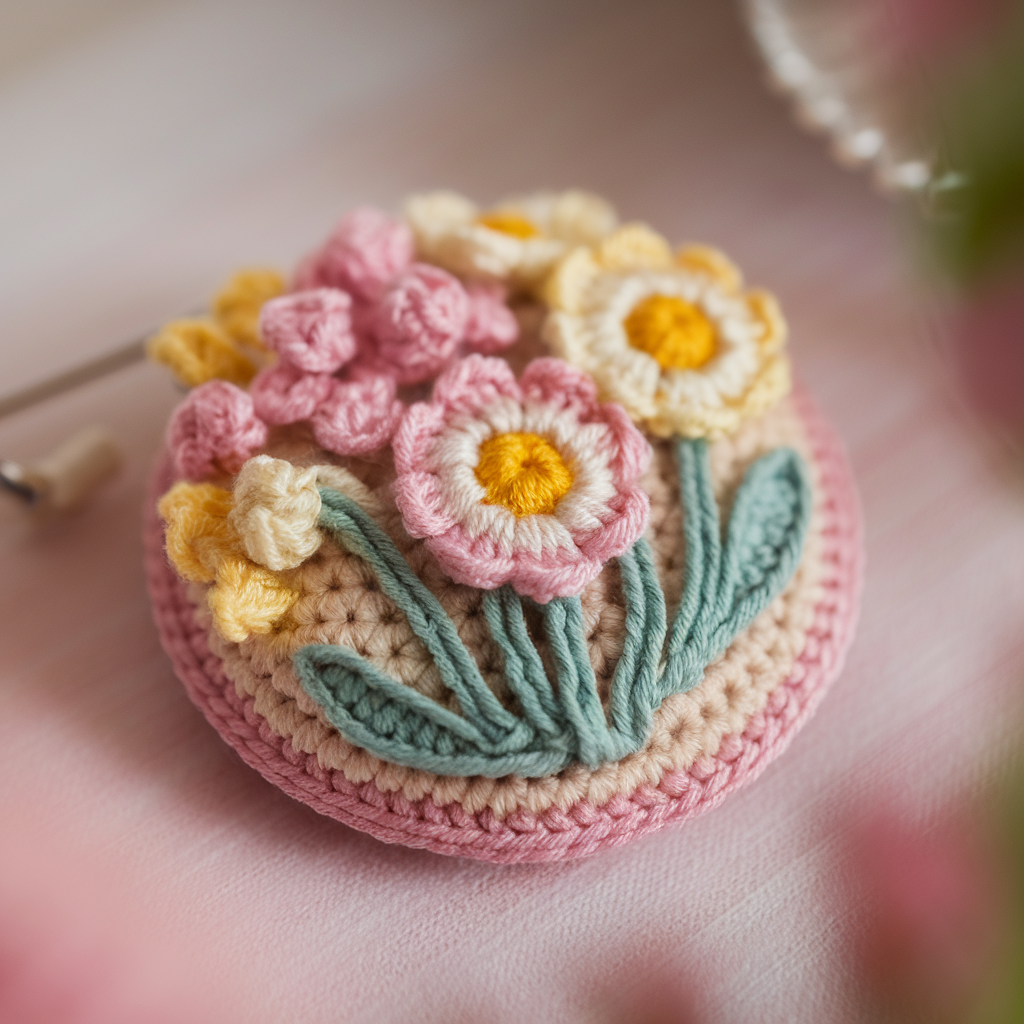
2. Crochet Vintage Flower Brooch Pattern
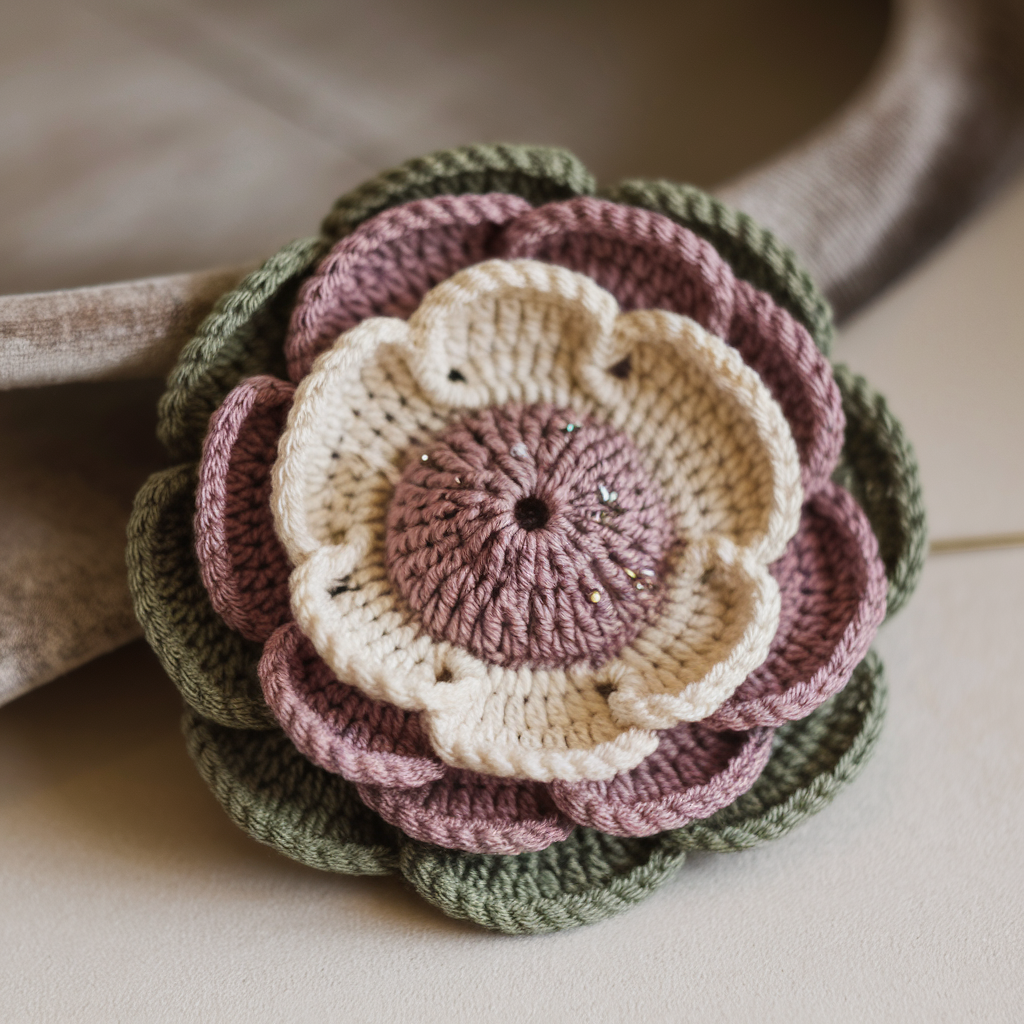
Old-fashioned, layered petals and a textured center — perfect for a blazer or vintage scarf.
Skill level: Intermediate (layered motifs + assembly)
Materials: Mercerized cotton size 5 or DK, 3.5 mm hook for crisp petals, small 1/2″ bead or embroidered center (optional), felt backing, brooch pin. Yarn ~15–30 yds depending on layers.
Finished size (sample): ~2.5″ (6–6.5 cm) diameter.
Construction overview
Make a small disk center, a round of petals, then a smaller round of petals stacked on top for depth (3 layers total). Sew together and attach backing.
Pattern — round & petals
Center disk
- MR, ch1, 6 sc into MR. Join with sl st. (6)
- R2: ch1, inc around → 12 sc. (12)
- R3: ch1, sc1, inc around → 18 sc. (18) Fasten off.
Outer petal round (layer 1)
- Join petal color in any st on R3. Ch4, sl st in same st repeat around to make 18 loops (ch-4 loops) — one per stitch.
- In each ch4 loop: work (sc, hdc, 3 dc, hdc, sc) — this forms a full petal. Join to first petal. Fasten off.
Second petal layer (smaller petals)
- Join contrasting yarn into spaces between petals or into R2 if you want nested look. Make ch3 loops (or ch4 for slightly larger), then (sc, hdc, 3 dc, hdc, sc) in each loop but use fewer stitches (e.g., sc, hdc, 2 dc, hdc, sc) for smaller petals. Join and fasten off.
Center finish
- Sew a small bead or French knot cluster in center (if brooch for adult; embroidered center is safer for kids).
Assembly
- Stack layers: sew inner disk to first petal round with small whipstitches; sew second petal round centered on top. Make sure layers are vertically centered.
- Cut felt backing slightly smaller than outermost petal cluster. Sew brooch pin to felt securely with many passes. Sew felt to underside of petals with small stitches across multiple points so the stress is distributed.
Finishing & care
- Press gently with steam to open petals. Hand-wash for longevity; lay flat to dry.
Variations
- Make tonal vintage: use cream + dusty rose + olive for a real grandma-cool vibe.
- Make a set of three small flowers to cluster on one larger pin.
3. Crochet Embroidered Flowers Vintage Brooch Pattern
Flat crocheted base with embroidered bouquet on top — looks like needlepoint without the hours of intense regret.
Skill level: Intermediate (requires embroidery skills)
Materials: DK cotton or cotton-thread, 3.5 mm hook, tapestry needle for embroidery, embroidery floss or contrasting yarn (2–3 colors), felt backing, brooch pin. Yarn ~15–25 yds for base + embroidery threads.
Finished size (sample): ~2″–2.25″ (5–5.5 cm) diameter.
Construction overview
Make a flat circle (doily-like small medallion), then embroider small flowers (French knots, lazy daisy, straight stitch) on top. Back with felt and add pin.
Pattern — flat medallion base
- MR, ch1, 8 sc in MR. Join. (8)
- R2: ch1, inc in each st → 16 sc. (16)
- R3: ch1, sc1, inc → 24 sc. (24)
- R4: ch1, sc2, inc → 32 sc. (32) — stop when about 2″ diameter. Fasten off and weave ends.
Embroidery (suggested stitches)
- French knot cluster: for small buds — use embroidery floss; make 2–3 per bud.
- Lazy daisy: for flower petals — anchor a loop with sc and tack down tip with small stitch; do 3–6 petals per flower.
- Straight stitches: for stems and leaves — use two-strand embroidery floss and simple straight stitches or split-stitch stems.
Design idea: arrange 3 tiny daisies off-center with small stems and 2 leaves.
Assembly
- Once embroidery is complete, press lightly (place cloth between iron and work if steaming).
- Sew brooch pin onto felt (as usual).
- Center felt on medallion back and whipstitch with small, even stitches through felt and crochet, making sure stitches catch several yarn loops so stress is broad.
Safety & finishing
- If embroidered beads used, sew through felt backing for strength and use multiple stitches; avoid beads for children’s pins.
Variations
- Make a monogrammed brooch by embroidering a small initial in centre.
- Use metallic floss for a dressy, evening-ready brooch.
4. Crochet Strawberry Applique Brooch Pattern
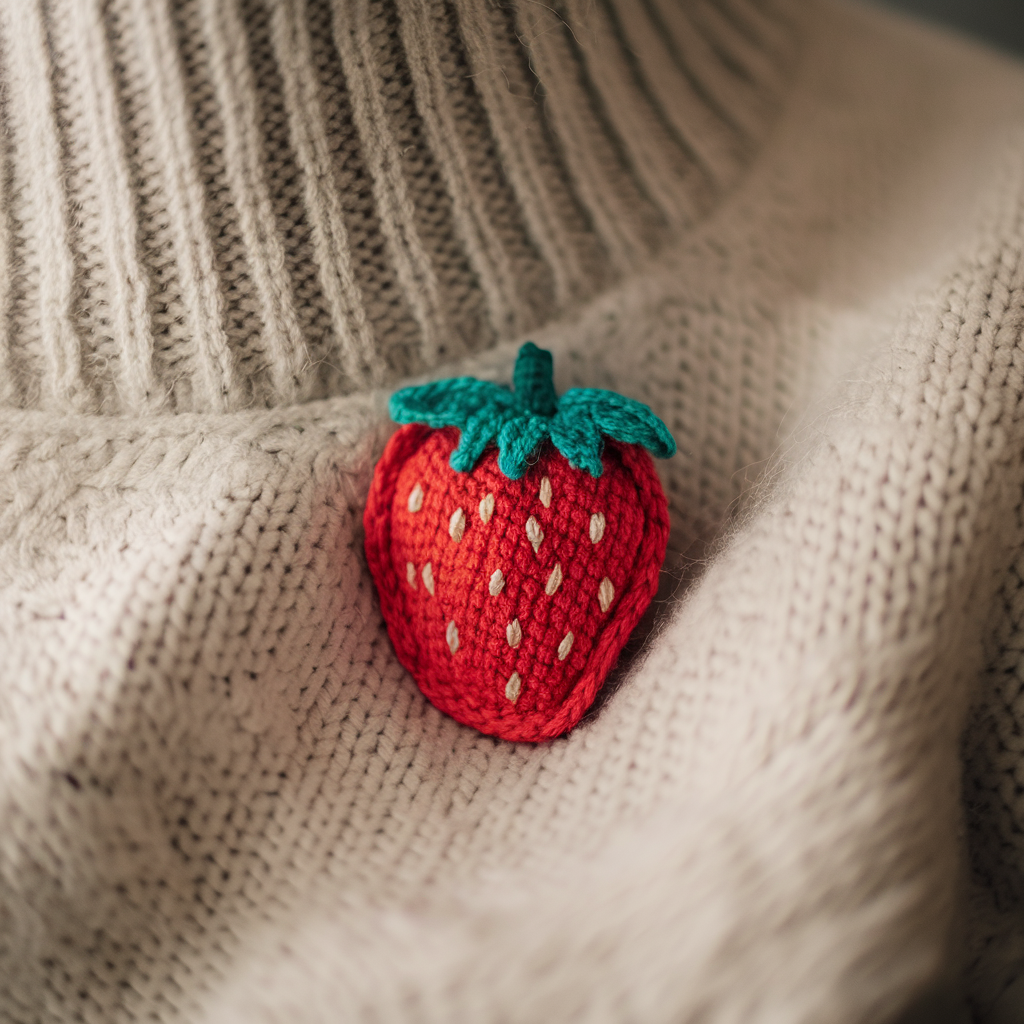
Sweet little strawberry with embroidered seeds — fast and adorable on a knitted sweater.
Skill level: Confident Beginner → Intermediate
Materials: DK or fingering cotton in red + green, 2.75–3.5 mm hook (smaller hook for tiny, denser fabric), tiny bit of stuffing optional, felt backing, brooch pin. Approx yarn 10–20 yds red + small amount green.
Finished size (sample): ~1.5″–1.75″ (4–4.5 cm) high — small and dainty.
Pattern — strawberry body (flat or slightly 3D)
Flat applique version (recommended for brooch):
- Ch 6. R1: sc in 2nd ch from hook and across (5 sc). Turn.
- R2: ch1, inc in first st, sc across until last st, inc in last st → increases give a slight dome. (7 sc)
- R3: ch1, sc across 7 sc. R4: ch1, dec in first two sts, sc across, dec in last two → shape the bottom to a point. Continue shaping until you get a tapered bottom; fasten off and weave tail.
3D small berry (optional): make a small oval: MR 6 sc round, inc round to 12, work 2–3 rounds even, decrease rounds and add polyester fill lightly before closing.
Green cap (calyx)
- Join green at top opening: ch6, sl st into same base to create little leaf loop; repeat 4–5 times around top. Alternatively work small leaves: ch5, sc in 2nd ch, hdc, dc, hdc, sc — then sl st into base.
Embroider seeds
- Use cream or pale yellow embroidery floss; make 6–10 small straight stitch “seeds” randomly across red body. For texture, French knots work too (but that adds bulk).
Assembly
- If 3D, stuff lightly and close. Sew green cap to top neatly.
- Felt backing → sew pin to felt with many stitches. Sew felt to back of strawberry with small whipstitches.
Finishing & care
- Hand wash recommended; lay flat to dry to maintain shape.
- If you want a sturdier brooch for heavy coats, make 2 appliqués and sew them together around the felt pin to hide the felt.
Variations
- Make a mini strawberry pair on one pin (twin berries) for extra charm.
- Make into a set — strawberry brooch + matching keychain.
5. Crochet Pastel Delicate Wreath Brooch Pattern

A lightly lacy wreath with tiny buds — dainty, subtle, great for spring.
Skill level: Intermediate (tiny motifs joined in round)
Materials: crochet thread size 10 or fingering yarn for delicate look, 2.0–2.75 mm hook, tapestry needle, tiny beads optional for buds. Felt backing, brooch pin. Yarn ~20–40 yds depending on complexity.
Finished size (sample): ~2.0″–2.5″ (5–6.5 cm) outer diameter.
Construction overview
Crochet a small ring base, then add 8–12 tiny leaves and bud motifs around the ring using join-as-you-go or by sewing.
Pattern — ring base
- MR, ch1, 10 sc into MR. Join. (10)
- R2: ch1, inc in each st around → 20 sc. (20) Work one more sc round if you want slightly larger ring. Fasten off.
Tiny leaf motif (make 8–12)
- Ch6, sc in 2nd ch from hook, hdc, dc, hdc, sc. Fasten off with long tail for sewing. Alternatively make picot leaves: ch4, sl st back in 2nd ch for tiny point.
Bud motif (tiny)
- MR, ch1, 6 sc in MR. Sl st, fasten off leaving tail.
Assembly
- Using long tails, sew leaves edge-to-edge around ring, slightly overlapping so they cover the ring and form a wreath. Insert buds intermittently and secure with small stitches; attach tiny beads at centers if desired (sew through felt backing for safety).
- Felt backing + pin attachment: sew pin to felt thoroughly, then stitch felt to wreath underside at 6–10 points for durable attachment.
Finishing & care
- Press gently with steam to shape leaves outward. Hand wash recommended; lay flat to dry.
Variations
- Make an autumn-toned wreath with cinnamon and mustard yarn.
- For a bold statement, double the ring and layer two wreaths for thickness.
6. Crochet Carrot Brooch Pattern

Whimsical vegetable brooch. Slightly more sculptural; great paired with salad-themed humor.
Skill level: Confident Beginner → Intermediate
Materials: orange DK or worsted, green DK, 3.5 mm hook, small toy stuffing (optional), felt backing, brooch pin. Yarn ~15–25 yds orange + 5–10 yds green.
Finished size (sample): ~2.5″ (6–7 cm) long × ~1″ wide (narrow carrot).
Pattern — carrot body (3D)
Body (worked in rounds)
- MR, ch1, 6 sc in MR. (6)
- R2: inc around → 12 sc. (12)
- R3: sc1, inc around → 18 sc. (18)
- R4–R7: sc around evenly for 4 rounds to lengthen body.
- R8: sc1, dec around → 12 sc. (12)
- R9: dec around → 6 sc. (6) — stuff lightly before final decreases. Fasten off and close with yarn needle.
Top greens (leaves)
- Join green yarn at carrot top: ch10, sc in 2nd ch, hdc, dc, hdc, sc — repeat 4–6 times around to make several leaves. Fasten off.
Assembly
- Flatten top opening slightly and sew green leaves to top ring neatly.
- Felt backing: pin on felt and sew pin to felt with many passes. Sew felt to carrot underside with small stitches to anchor.
Finishing & care
- Light hand wash only. Keep stuffing minimal to keep brooch flat. If you want washable brooch, make flat carrot applique instead (use earlier flat body shaping).
Variations
- Tiny carrot pair on one pin for punny “peas and carrots” duo.
- Make set: carrot brooch + matching strawberry brooch (from pattern 4).
Final finishing, packaging & quick selling tips
- Durability checklist: sew pin back through felt with at least 6–10 strong passes; use polyester or upholstery thread for longevity; hide knots inside felt.
- Gift presentation: mount brooch on a small card (punch two tiny slits for the pin to hold) or attach to a felt square inside a small organza bag. People like packaging.
- Care card: include “Hand wash cold, reshape flat” on a tiny tag for buyers/gift recipients.
- Pricing & sets: brooches sell better as multipacks (three small ones) than single oddities. Pair vintage flower + embroidered bouquet for a pretty combo.
Conclusion
There — six brooches you can actually make and wear. The secret to a permanent-looking brooch is not fancy stitches; it’s two things: a firm little shape and a good attachment. Do your finishing properly: felt backing, many stitches through the pin, and a tidy wrap or sewn band so nothing droops.