

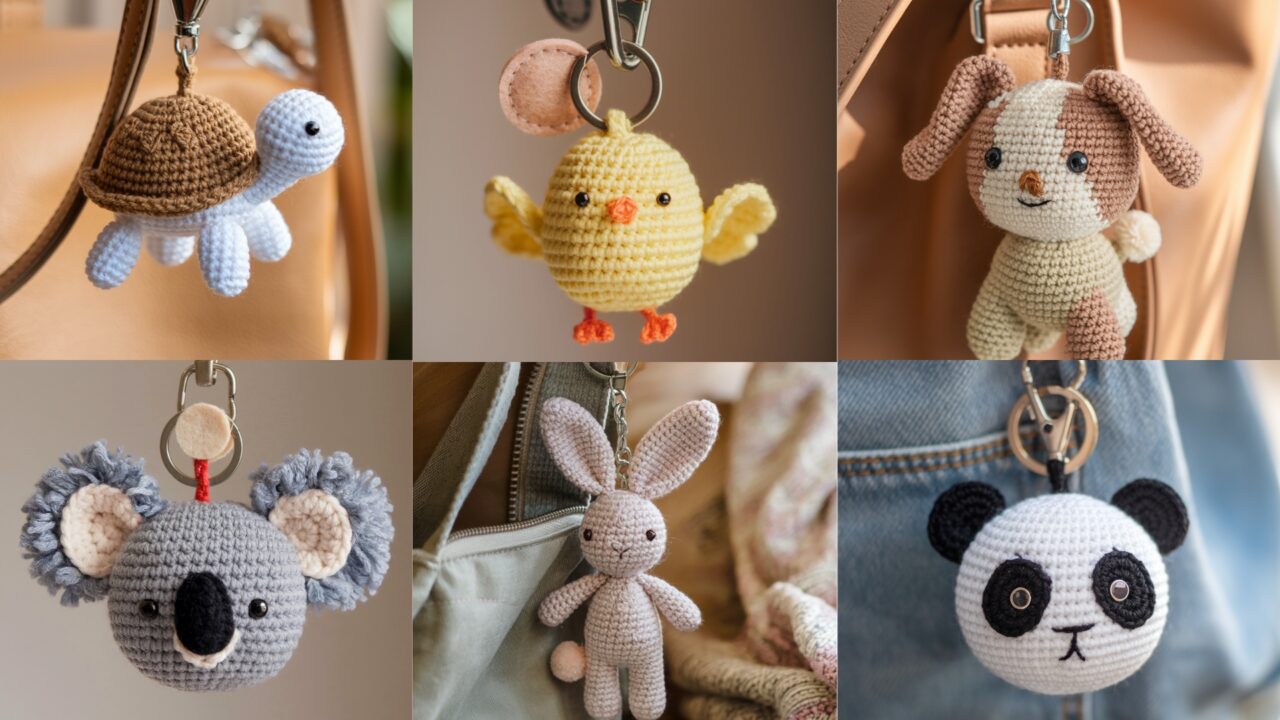
Handmade animal keychains are fast, delightful projects — perfect for using small yarn scraps, practicing amigurumi shaping, and making sweet gifts. Below you’ll find six full, usable designs (Bunny, Round Cute, Panda, Turtle, Chick, Koala). Each pattern section includes: a short description, skill level, materials, finished size, gauge guidance, a clear step-by-step stitch-by-stitch construction (with rounds and stitch counts), assembly and finishing instructions, variation ideas, and safety notes. Patterns use US crochet terms.
Quick note: these patterns are written to be small (about 1.5–3 in finished). Use a smaller hook than the yarn label recommends to get tight stitches (prevents stuffing from showing). When making items for young children, avoid safety eyes and beads — embroider eyes and features instead.
Abbreviations (US terms)
- MR = Magic ring
- ch = chain
- sc = single crochet
- inc = increase (2 sc in same stitch)
- dec = invisible decrease (sc2tog)
- sl st = slip stitch
- st(s) = stitch(es)
- BLO / FLO = back loop only / front loop only
- RS / WS = right side / wrong side
General materials & advice that apply to all patterns
- Yarn: Sport/DK or worsted scraps. For ~1.5–2.5 in keychains DK or worsted works well. Cotton or acrylic both fine.
- Hook: 2.75–3.5 mm depending on yarn and how tight you want fabric. Use smaller hook than recommended on yarn label for dense fabric.
- Stuffing: Polyester fiberfill (very small amount).
- Keyring: small split ring (20–30 mm) or lobster clasp + short chain. You can crochet a loop and pass the keyring through, or attach a short metal chain into stitch before closing and weave tail in for strength.
- Needles & thread: yarn needle for sewing pieces; embroidery floss for facial features if avoiding beads.
- Safety: For items intended for children under 3, do not use safety eyes or small sewn-on beads. Embroider eyes and noses securely instead. Double-stitch and knot embroidery ends and hide tails.
Why make animal keychains?
Animal keychains are the perfect small crochet project — quick to make, portable, and highly giftable. They’re great for using leftover yarn, practicing shaping and small parts, and making a little character that’s instantly lovable. The designs below are compact but carefully shaped; follow the stitch counts and assembly guidance for a neat, durable keychain.
1. Crochet Bunny Keychain Pattern
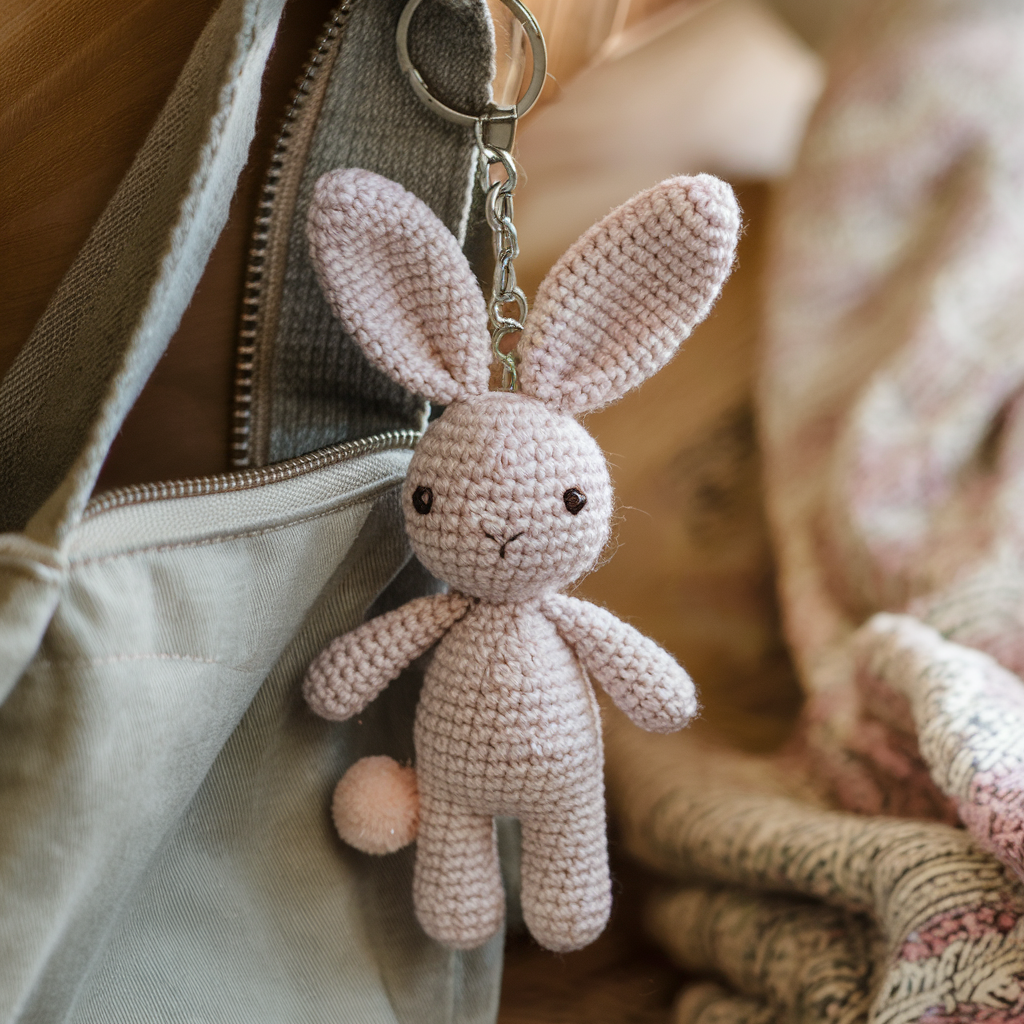
Style: Cute rounded body with long ears and tiny pompom tail — classic and adorable.
Skill level: Beginner–Intermediate (basic amigurumi shaping + sewing small parts)
Finished size: ~2.5–3 in tall (including ears) when using worsted yarn and a 3.0 mm hook. Smaller with sport yarn and a 2.75 mm hook.
Materials
- DK/worsted yarn (main color) ~10–20 g
- Small scrap in contrasting color for inner ears (optional)
- 3.0 mm hook (adjust to get tight fabric)
- Small amount stuffing
- Yarn needle, stitch marker
- Small split ring or lobster clasp + jump ring
- Embroidery floss (for mouth/whiskers) or safety eyes (optional)
Body / head (worked as one rounded shape)
All rounds are continuous (no join), place stitch marker at first st and slide up each round.
- MR, R1: 6 sc in MR. (6)
- R2: inc around — 12. (12)
- R3: (sc, inc) ×6 — 18. (18)
- R4: (2 sc, inc) ×6 — 24. (24)
- R5: (3 sc, inc) ×6 — 30. (30)
- R6–R9: sc around — 30 (work 4 rounds even).
- R10: (3 sc, dec) ×6 — 24. (24)
- R11: (2 sc, dec) ×6 — 18. (18)
- Insert safety eyes between R7–R8 about 6–8 sts apart (or embroider eyes later).
- R12: (sc, dec) ×6 — 12. (12)
- Begin stuffing firmly but not overfull.
- R13: dec around — 6. (6)
- Fasten off leaving a long tail and close hole by weaving tail through remaining 6 sts and pulling tight. Weave tail into body.
Ears (make 2)
- MR, R1: 6 sc in MR. (6)
- R2: (sc, inc) ×3 — 9. (9)
- R3: sc around — 9.
- R4: (sc 2, inc) ×3 — 12. (12)
- R5–R6: sc around — 12 (2 rounds).
- R7: (sc 2, dec) ×3 — 9. (9)
- R8: sc around — 9. Fasten off leaving tail for sewing. Flatten slightly and sew bottoms to top of head so ears point upward. Optionally sew a small inner-ear oval (contrasting color) before attaching.
Tail
- Make a tiny pompom (wrap yarn around fingers 20–30 times, tie center and trim) or make a small MR: MR, 6 sc and fasten off leaving tail; stuff tiny and sew to back.
Assembly & keyring loop
- Sew ears to top center of head using yarn needle and long tail; secure with multiple passes.
- Embroider nose and mouth with a few tight stitches (triangle nose + small mouth). Add whiskers with short embroidery stitches if desired.
- For keyring loop: at the crown before final stuffing/closing, make a small crocheted loop: attach yarn and ch 8–10, sl st to base to create loop (or ch 4 and sl st back to make tighter loop). Pull loop through split ring and sew the loop’s base securely into the top of the head with several passes. Alternatively use a short metal chain: sew one end of chain firmly into top of head and weave tail through several times.
Variations
- Make lop-eared version by attaching ears lower and folding them over.
- Make a mini carrot accessory using orange yarn and a tiny green top and stitch to hand.
Safety
- Use embroidered eyes and sewn-on details for gifts to young children. Reinforce keyring attachment with extra threads and a felt circle on the inside for strength.
2. Crochet Round Cute Dog Keychain Pattern
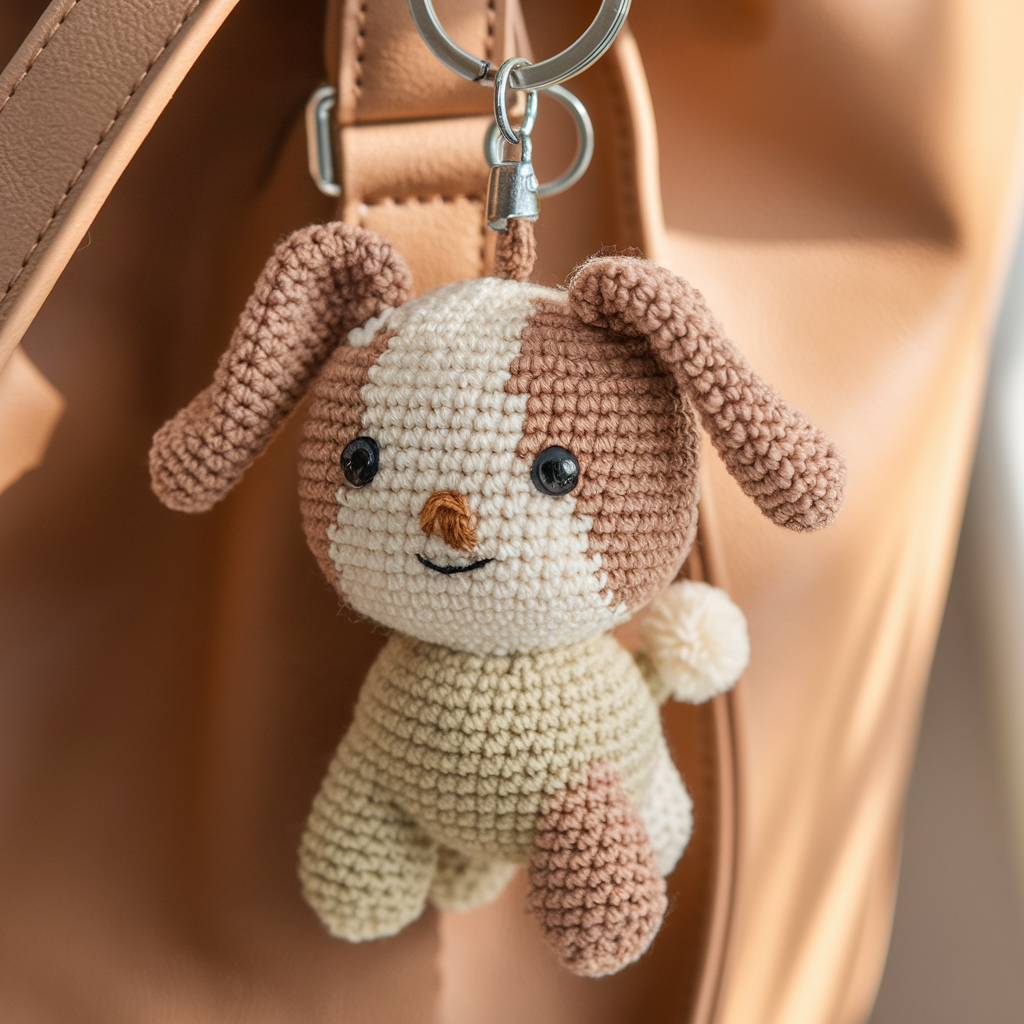
kill level: Beginner — suitable for makers new to amigurumi who can work in continuous rounds and do basic sewing/embroidery.
Materials: Small amounts of DK or worsted yarn (main color + small contrast), 2.75–3.5 mm hook, small amount of stuffing, yarn needle, embroidery floss (for child-safe eyes/nose), and a split ring or lobster clasp.
Finished size: Approximately 3–4 in total (round head + slightly round lower body), depending on yarn and hook.
Construction overview (short):
Worked as two compact rounded pieces — a spherical head and a slightly larger round lower body — joined together and finished with small ears, an embroidered face, and a reinforced loop for the keyring. Fabric is worked in continuous rounds for a neat, seam-free look; parts are sewn on and secured internally with a small felt reinforcement where the ring attaches.
Variations:
• Make the ears floppy or pointy to suggest different breeds.
• Add a contrasting muzzle patch, one-eye spot, or embroidered freckles for personality.
• Scale size down using sport yarn and a smaller hook for a mini charm, or up with bulkier yarn for a larger bag charm.
• Add a tiny crocheted collar, bandana, or pompom tail as an accessory.
Safety & durability:
For gifts to young children, use embroidered eyes and nose instead of safety eyes or beads; always back the keyring attachment with a small felt disc and secure with multiple passes to prevent tearing.
3. Crochet Panda Keychain Pattern
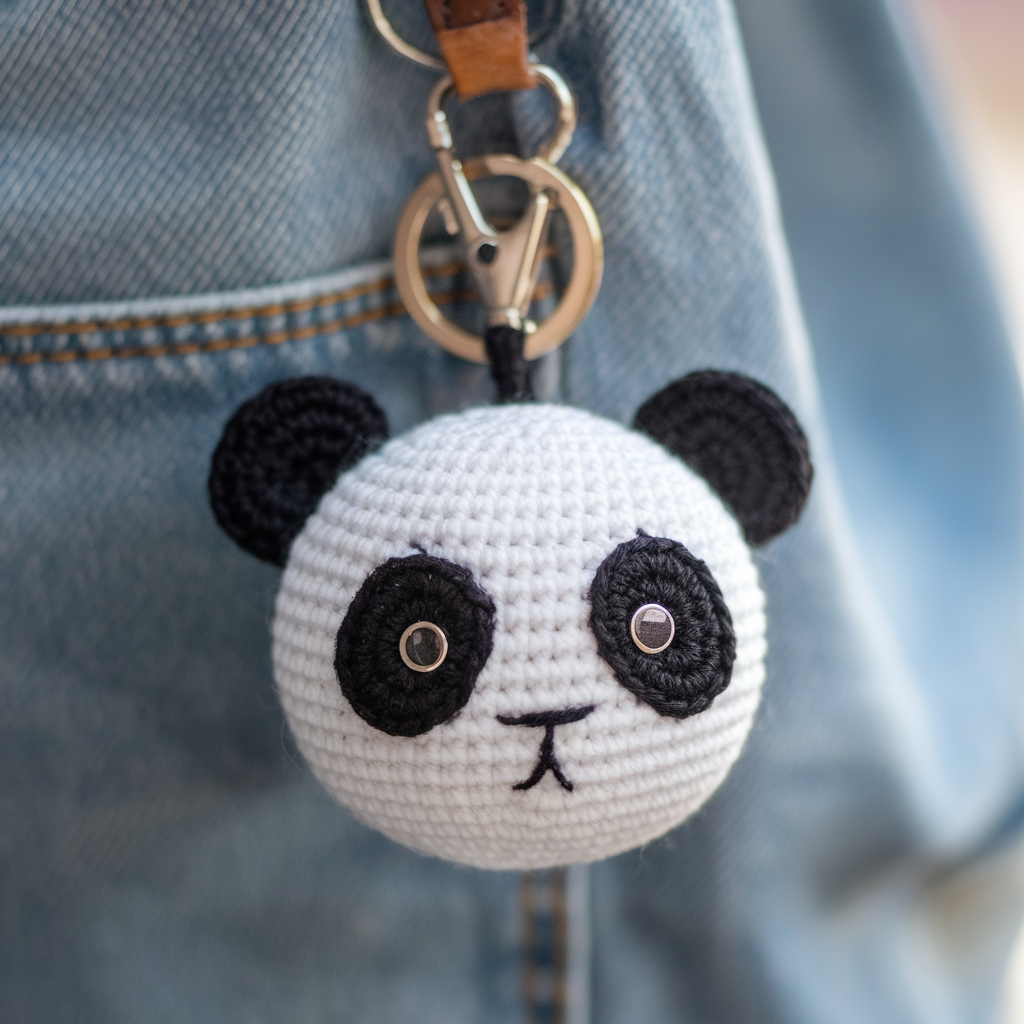
Style: Round white head with black eye patches and ears — simple but instantly recognizable.
Skill level: Intermediate (color placement and small part sewing)
Finished size: ~2 in diameter
Materials
- White main yarn, small black scraps for patches & ears
- 3.0 mm hook, tiny stuffing
- Yarn needle, stitch marker
- Embroidery floss (optional) or tiny black safety eyes (4–6 mm) — recommended to embroider for young kids
Head (white)
- MR, R1: 6 sc in MR. (6)
- R2: inc around — 12.
- R3: (sc, inc) ×6 — 18.
- R4: (2 sc, inc) ×6 — 24.
- R5: (3 sc, inc) ×6 — 30.
- R6–R8: sc around — 30 (3 rounds even).
- R9: (3 sc, dec) ×6 — 24.
- R10: (2 sc, dec) ×6 — 18. Insert safety eyes between R5–R6 spaced ~6–8 sts apart (or embroider eye shapes later).
- R11: (sc, dec) ×6 — 12. Stuff now.
- R12: dec around — 6. Close and weave in tail.
Ears (make 2) — black
- MR, R1: 6 sc in MR. (6)
- R2: inc around — 12.
- R3: sc around — 12. R4: dec rounds optional to shape, then flatten and sew to top sides of head.
Eye patches (make 2) — black, small ovals
Option A — small oval:
- ch 6, sc into 2nd ch and across (5 sc), turn.
- sc across for 3 rows. Fasten off leaving tail and sew patches centered under eye area (cover safety eyes or align embroidered eyes).
Nose patch/muzzle (optional)
- Small oval or embroidered nose in black center under eyes.
Assembly & keyring
- Sew ears securely to crown. Sew patches centered under where eyes will be placed. If you used safety eyes, install them before sewing patches if necessary.
- Embroider nose and small mouth with a few satin/back stitches.
- Attach keyring loop as described for Bunny: crochet a small loop or sew a jump ring into crown before closing and anchor it with extra stitches and felt disc inside.
Variation
- Make panda with blush by attaching a tiny pink yarn dot under each eye (felt or yarn).
Safety
- For kids under 3, embroider eyes and nose and avoid any glued or small sewn beads.
4. Crochet Turtle Keychain Pattern
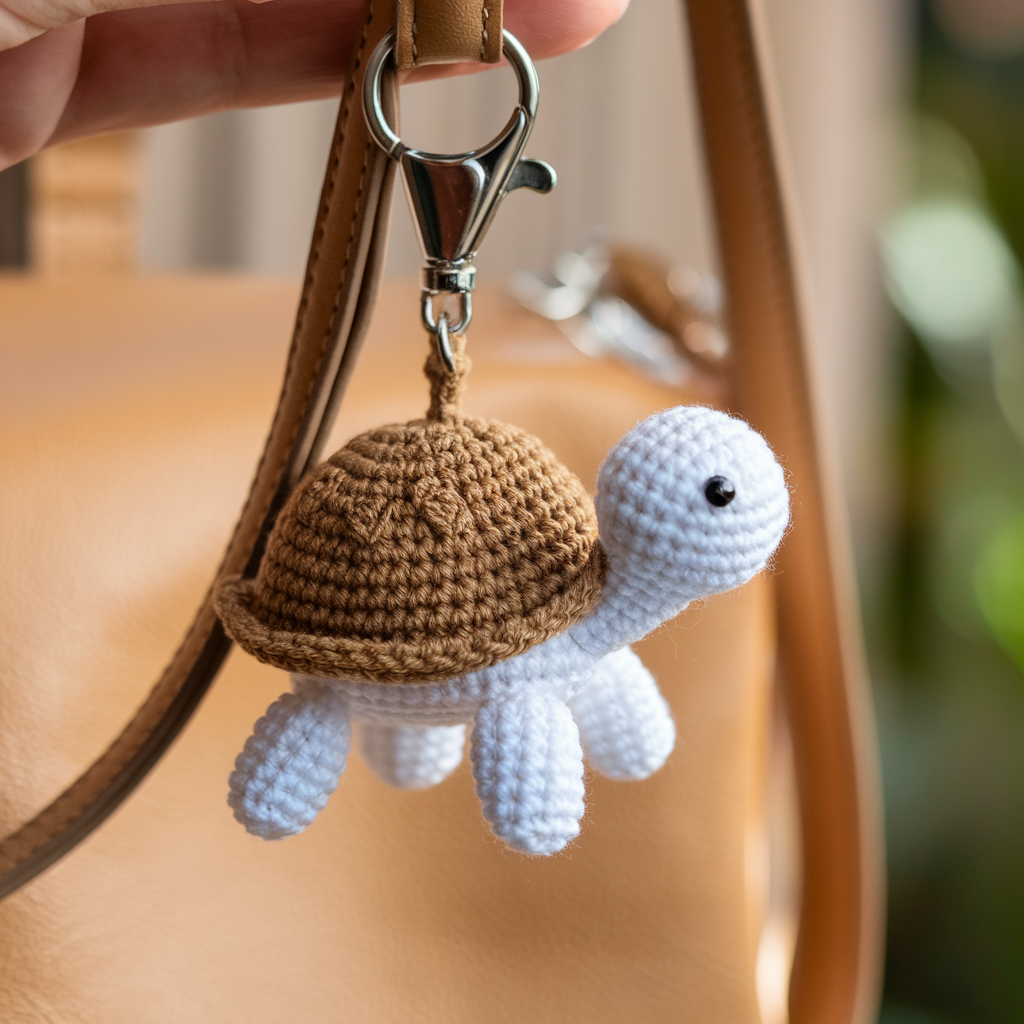
Style: Little rounded body with an appliquéd / crocheted shell on top and four tiny legs.
Skill level: Intermediate (several small parts + applique)
Finished size: ~2–2.5 in long
Materials
- Green main yarn for body, contrasting greens/browns for shell top
- 3.0 mm hook, stuffing, yarn needle, stitch marker
- Keyring
Body (oval base + low dome)
- MR, R1: 6 sc in MR. (6)
- R2: inc around — 12.
- R3: (sc, inc) ×6 — 18.
- R4: (2 sc, inc) ×6 — 24.
- R5–R7: sc around — 24 (3 rounds) — this will be lower dome (body).
- R8: (2 sc, dec) ×6 — 18.
- R9: (sc, dec) ×6 — 12.
- Stuff lightly and leave opening for shell attachment; fasten off leaving tail.
Shell top (make 1)
Work a small flat disk in contrasting color:
- MR, R1: 6 sc in MR. (6)
- R2: inc around — 12.
- R3: (sc, inc) ×6 — 18.
- R4: (2 sc, inc) ×6 — 24.
- R5: (3 sc, inc) ×6 — 30. Fasten off and block slightly flat.
Optional textured shell: after R4, work 1–2 rounds of puff or cluster stitches to create raised shell texture, then continue outer round for edge.
Legs (make 4)
- MR, R1: 6 sc in MR. (6)
- R2: sc around — 6 (or inc once to 8 if you want stouter legs).
- R3–R4: sc around — 6. Stuff lightly and leave tail to sew.
Tail (tiny)
- Ch 3, sc back along chain and sew base to rear.
Assembly
- Sew four legs evenly spaced to underside of body (two front, two back) using yarn needle. Sew tail at rear.
- Center shell disk on top of body and whipstitch around edge to attach. Add a few sewing stitches through body to secure shell to body so it won’t slip. Sew a neat seam and hide tails inside.
Keyring
- Attach small metal jump ring before fully closing shell or sew a loop at front-top of shell and thread keyring through and secure by sewing through shell to the body for extra security.
Variations
- Embroider hexagon outlines on shell with contrasting yarn to mimic turtle scutes. Use surface slip-stitching or embroidery.
Notes
- Because the shell is an applique, reinforce attachment points thoroughly for durability.
5. Crochet Chick Keychain Pattern
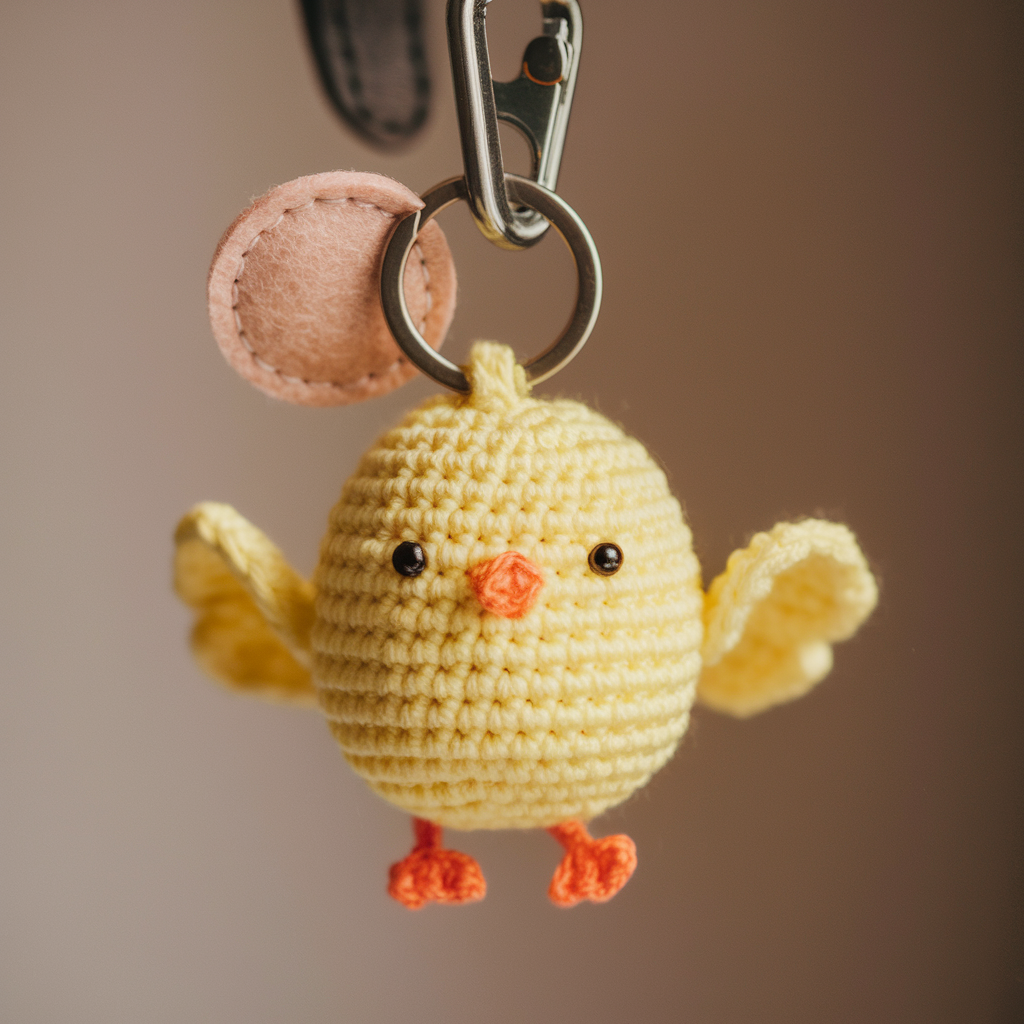
Style: Tiny yellow round chick with a small beak and wing tufts — cheerful and super-fast.
Skill level: Beginner
Finished size: ~1.5–2 in tall
Materials
- Yellow yarn main, orange for beak, small black scrap for embroidered eyes
- 2.75–3.0 mm hook, small stuffing, yarn needle
Body (round)
- MR, R1: 6 sc in MR. (6)
- R2: inc around — 12.
- R3: (sc, inc) ×6 — 18.
- R4: (2 sc, inc) ×6 — 24.
- R5: sc around — 24 (1 round even).
- R6: (2 sc, dec) ×6 — 18.
- R7: (sc, dec) ×6 — 12. Begin stuffing.
- R8: dec around — 6. Fasten off and close as before.
Beak (orange)
- Ch 4. R1: sc in 2nd ch from hook and across (3 sc). Turn.
- R2: sc across. Fasten off leaving tail for sewing. Fold and sew to front center of chick about between R3–R4.
Wings (make 2)
- ch 6, sc from 2nd ch across (5 sc). Turn.
- Row 2: sc in next 4 sts, sl st in last to create tapered wing. Fasten off leaving tail and sew to each side.
Feet (optional)
- Tiny V-shaped feet: embroider two short straight stitches with orange thread at base.
Assembly & keyring
- Sew features securely. Add keyring at top by crocheting a small loop or stitching a metal ring into the top of body before final closing; back with a small felt disc inside for strength.
Variation
- Make Easter chick with removable tiny felt hat or pompom.
Safety
- Embroider eyes (French knots or satin stitch) for children’s gifts.
6. Crochet Koala Keychain Pattern
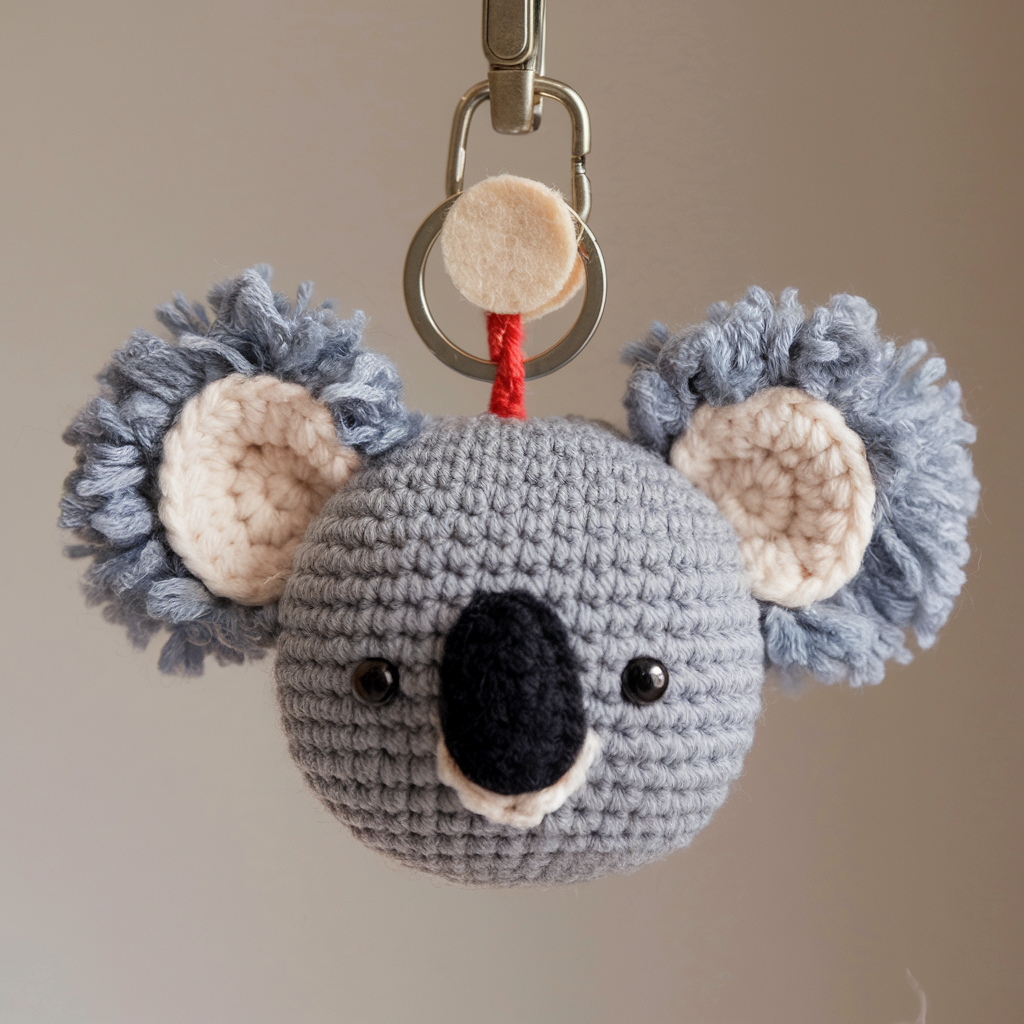
Style: Grey rounded head, big fluffy ears, white muzzle — iconic and very cuddle-worthy.
Skill level: Intermediate (ear shaping and muzzle applique)
Finished size: ~2–2.5 in diameter
Materials
- Grey main yarn, white small scrap for muzzle, black for nose
- 3.0 mm hook, stuffing, yarn needle, stitch marker
Head (rounded)
- MR, R1: 6 sc. (6)
- R2: inc — 12.
- R3: (sc, inc) ×6 — 18.
- R4: (2 sc, inc) ×6 — 24.
- R5–R8: sc around — 24 (4 rounds)
- R9: (2 sc, dec) ×6 — 18. (18)
- Insert safety eyes between R5–R6 or embroider later.
- R10: (sc, dec) ×6 — 12. Stuff.
- R11: dec around — 6. Close and weave tail.
Ears (make 2) — grey outer, white inner optional
Outer ear:
- MR, ch1: 6 sc in MR. (6)
- R2: inc around — 12.
- R3: (sc, inc) ×6 — 18.
- R4: sc around — 18 (1–2 rounds). Fasten off leaving tail to sew; slightly fold and sew bottom to head so ear looks rounded and fluffy.
Inner ear (white):
- MR, 6 sc in ring, fasten off leaving tail. Sew inner patch to ear front before attaching ear to head.
Muzzle (white)
- MR, R1: 6 sc in MR. (6)
- R2: inc around — 12.
- R3: sc around — 12. Fasten off leaving tail. Flatten slightly and sew onto lower front of head. Stuff lightly under muzzle to make it stand out.
Nose (black)
- Embroider an oval nose on muzzle with black embroidery floss (satin stitch) or crochet a tiny oval (MR 6 sc, flatten and sew).
Assembly & keyring
- Sew ears centered and slightly angled toward top sides of head.
- Sew muzzle centered and embroider nose and mouth. Add two small white felt highlights on eyes if desired.
- Make a small loop at top of head for keyring as described previously and reinforce with extra stitching and a felt backing inside.
Variation
- Make baby koala by making smaller proportions and adding tiny arms (little tubes) that wrap around a tiny “leaf” accessory.
Final finishing tips (applies to all patterns)
- Tight stitches: Use a smaller hook for amigurumi than you might use for garments to avoid stuffing showing.
- Stuffing: Use small amounts and stuff firmly but not so much that stitches stretch. Overstuffing makes seams pop.
- Sewing parts: Use ladder stitch or whipstitch with yarn tail; make several passes to secure small pieces. Hide tails inside the body.
- Reinforce keyring attachment: Sew through fabric and lining (or use a felt backing disk) and pass thread through metal ring multiple times for durability. Consider using a short metal chain link embedded in the top and sewn through several times for heavy-use keychains.
- Embroidery: If adding faces, do so before your final closing where possible — it’s easier to embroider on a flat-ish surface. Secure knots inside and weave in tails.
- Washing & care: Small amigurumi keychains can be hand-washed gently and laid flat to dry. Avoid tumble-drying if metal hardware is present. If giving as a gift, include care instructions and a note about small parts if applicable.
Conclusion
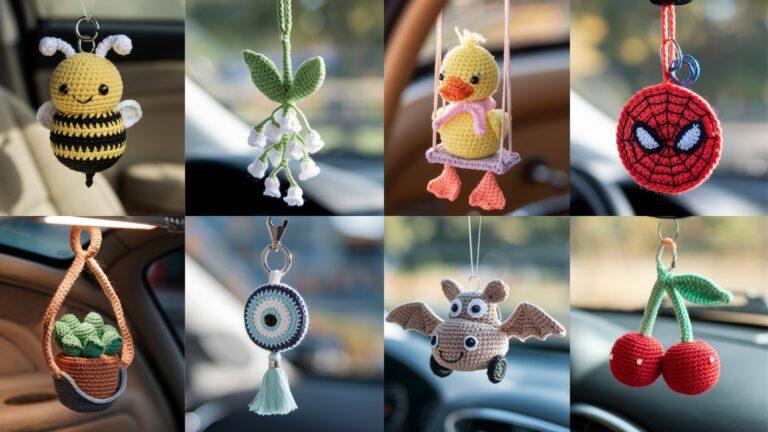
These six adorable animal keychains are fast to make, endlessly customizable, and excellent gifts or craft-fair items. Use different yarn textures, tiny accessories (scarves, flowers, hats), or colorways to create entire sets (zoo collection, pastel party, holiday-themed).

j4r7w5
Để tạo thêm động lực cho hội viên tham gia cá cược thì nhà cái đã thiết lập vô 188v chính thức chương trình ưu đãi đặc sắc. Thương hiệu không ngần ngại đầu tư một khoản tiền rất lớn để tổ chức nhiều sự kiện tri ân nổi bật dành cho mọi đối tượng. Một trong những món quà tặng đặc biệt nhất là hoàn tiền khi thua cược.