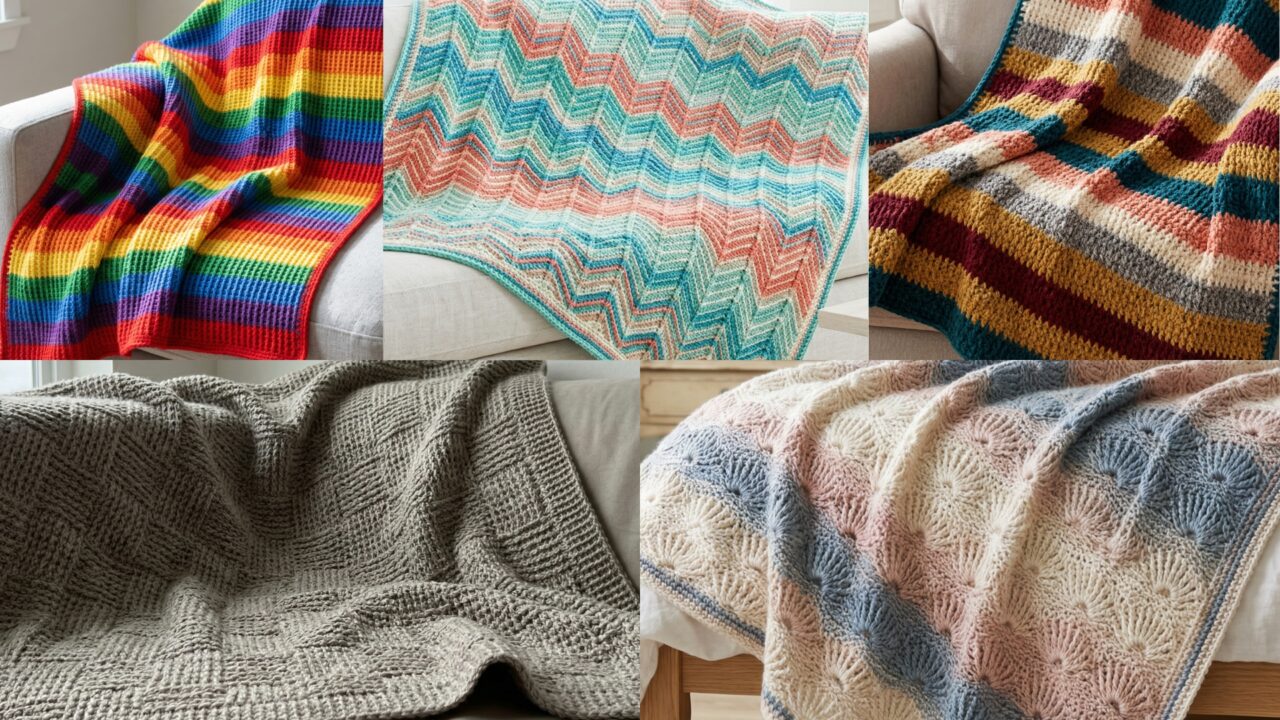
A crochet Tunisian blanket is one of those projects that feels relaxing to make and beautiful to finish. Tunisian crochet has a unique texture that sits somewhere between knitting and traditional crochet, which gives blankets a rich, cozy look without losing that handmade charm. The stitches stack neatly, the fabric often feels warm and substantial, and the finished result can range from soft and airy to thick and wonderfully snug depending on the yarn and stitch pattern you choose.
What makes Tunisian blankets especially appealing is how versatile they are. A shell pattern can feel decorative and elegant. A Bahama-inspired blanket can bring a breezy, island-like feel. A no-curl blanket is perfect if you want a clean, flat finish. A full stitch blanket creates a dense, plush fabric that is ideal for cooler weather. A simple striped Tunisian blanket offers a timeless, modern look that works in any room. Each design has its own personality, but all of them make lovely projects for gifting, home decor, or simply enjoying the process of making something warm and useful.
In this post, you will find five warm and stylish Tunisian blanket ideas with detailed step-by-step guidance, helpful notes, and practical finishing tips. Each section is written to be easy to follow while still giving you enough detail to plan, crochet, and finish a beautiful blanket. Whether you are making your first Tunisian project or looking for fresh inspiration for your next throw, these blanket patterns are a great place to start.
Quick Notes
Project type: Tunisian crochet blankets
Best for: Throws, bed blankets, gifts, home decor, and seasonal layering
Skill level: Beginner to intermediate, depending on stitch and size
Hook size: Tunisian hook or hook with cord, usually larger than the yarn label suggests for drape
Yarn weight: DK, worsted, or bulky depending on the warmth and thickness you want
Best yarn choice: Soft acrylic, cotton blends, wool blends, or any yarn with good stitch definition
Finished size: Baby blanket, throw, lap blanket, or bed blanket depending on your goals
Time to complete: Several days to several weeks depending on size and yarn weight
Helpful stitches: Tunisian simple stitch, Tunisian knit stitch, Tunisian purl stitch, full stitch, honeycomb-style texture, return pass, chain spaces, increases, decreases, color changes
Common Materials
Most Tunisian blanket patterns use a similar set of tools and supplies.
- Yarn in your chosen colors
- Tunisian crochet hook with cord or a long hook
- Yarn needle
- Scissors
- Measuring tape
- Stitch markers, if needed
- Blocking tools, optional
- Row counter, optional
For Tunisian crochet, the hook matters a great deal because the stitches stay on the hook while you work the forward pass. A regular crochet hook may work for smaller pieces, but for a blanket, a Tunisian hook with a cord is usually much more comfortable. Yarn choice also affects the drape and curl of the blanket, so it is worth choosing a yarn that feels soft but not overly slippery.
1. Crochet Tunisian Shell Blanket Pattern
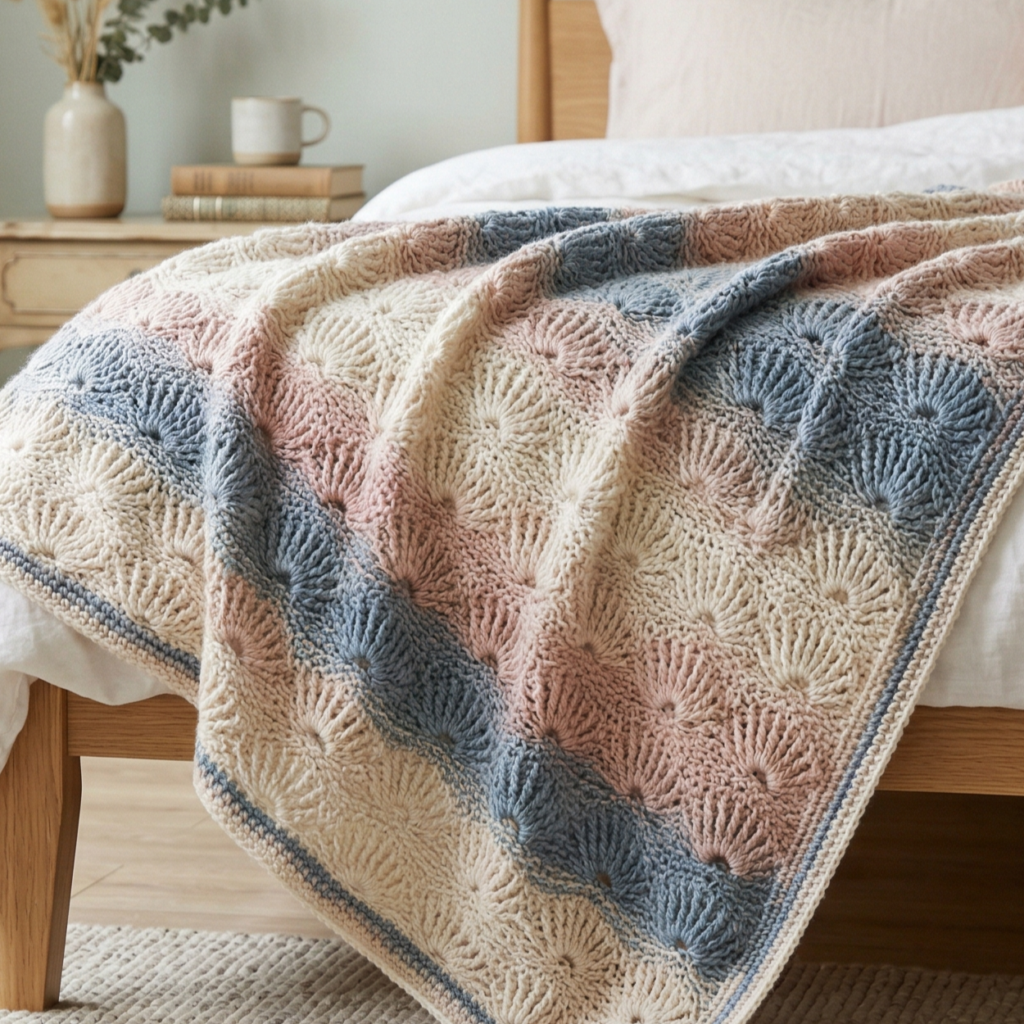
A Tunisian shell blanket has a graceful, decorative look that makes it feel special without being overly complicated. Shell-style texture gives the blanket a soft wave-like appearance, making it ideal for a throw that looks elegant on a couch or bed. The repeated shell motifs also create a soothing rhythm while you work, which is one of the reasons many crocheters enjoy this style.
Quick Notes
Skill level: Beginner to intermediate
Finished size: Throw, lap blanket, or baby blanket depending on stitch count
Style: Decorative, soft, flowing, cozy
Best colors: Cream, blush, dusty blue, sage, taupe, or gradient yarn
Materials
- Medium-weight or light bulky yarn
- Tunisian crochet hook with cord
- Yarn needle
- Scissors
- Measuring tape
- Optional blocking mat and pins
Step-by-Step Guide
Step 1: Choose your blanket size
Before you begin, decide whether you want a small lap blanket, a throw, or a full-size blanket. Tunisian shell patterns often look lovely in larger formats because the shell repeat has room to shine. If you are making a gift, a medium throw size is usually a safe and practical choice.
Knowing your size ahead of time helps you plan your stitch count and yarn amount.
Step 2: Create the foundation chain
Start with a chain long enough for the width you want. Keep in mind that Tunisian crochet tends to create fabric that is denser than regular crochet, so the finished blanket may be slightly smaller in width than the foundation chain suggests. Make the chain loosely so it does not become too tight.
A loose foundation helps the edges stay flexible and neat.
Step 3: Work the first Tunisian row
Insert your hook into each chain across the row and pull up loops until you have all the stitches on the hook. Then work the return pass to close the row. This is the standard start for most Tunisian projects and sets up the structure of the blanket.
This first row creates the base for your shell texture.
Step 4: Begin the shell stitch repeat
Work the shell pattern across the blanket by grouping stitches in a way that creates fan-like or shell-like shapes. Depending on your version of the stitch, this may involve working several loops into one space and then separating the shells with a few stitches or chain spaces. Keep the pattern consistent across the row so the shell effect remains visible.
This decorative repeat gives the blanket its soft, rippling texture.
Step 5: Maintain even tension
Tunisian crochet can sometimes tighten as you work, so keep your tension even and comfortable. If the fabric starts pulling in or curling too much, you may need to relax your grip or go up a hook size. The shell pattern should feel full and elegant, not stiff.
A balanced tension makes the blanket drape beautifully.
Step 6: Continue until the blanket reaches the desired length
Repeat the shell pattern row by row until the blanket is long enough. It can help to measure as you go so you do not end up with a blanket that is too short. Since shell patterns are visually prominent, the length should feel balanced with the width.
Step 7: Finish with a border
A simple border can make the blanket feel complete. You might choose a single crochet border, a shell border, or a clean Tunisian-style edging. The border helps flatten the edges and gives the finished piece a polished look.
Step 8: Block the blanket if needed
If your shell stitches curl slightly or the edges feel uneven, blocking can help settle the fabric. This is especially helpful for decorative stitch patterns because it brings out the shape more clearly.
Helpful Tips
A shell blanket looks especially beautiful in soft tonal yarns or subtle color changes. If you want a romantic look, use blush, cream, or rose tones. If you want a more modern feel, keep the colors neutral and let the texture do the work.
2. Crochet Bahama Tunisian Blanket Pattern
A Bahama-inspired Tunisian blanket brings a light, breezy, tropical feel to a cozy project. This style is perfect if you want a blanket that feels warm but still fresh and stylish. The texture can be kept simple or slightly decorative, and the color palette often plays a big role in making the design feel summery and relaxed.
Quick Notes
Skill level: Beginner to intermediate
Finished size: Throw or lap blanket
Style: Breezy, relaxed, coastal, cheerful
Best colors: Aqua, coral, cream, sea glass green, sand, turquoise
Materials
- Cotton blend or soft acrylic yarn
- Tunisian crochet hook with cord
- Yarn needle
- Scissors
- Measuring tape
Step-by-Step Guide
Step 1: Pick a color story
The Bahama look often comes alive through color. Choose shades that feel sunny, ocean-inspired, or tropical. You can use one main color with a contrasting border, or a few colors that blend like a beach sunset. The palette will shape the entire mood of the blanket.
A thoughtful color combination makes the blanket feel more seasonal and fresh.
Step 2: Start the base chain
Chain the width you want for your blanket. Since this pattern is meant to feel airy and stylish, a medium-width throw often works very well. Keep the chain loose enough that the first row does not feel tight.
A smooth foundation helps the blanket hang better.
Step 3: Work a simple Tunisian stitch body
Use a basic Tunisian stitch such as the simple stitch, knit stitch, or a lightweight textured repeat. The Bahama style works best when the fabric feels relaxed and easy, not too dense. A simple stitch allows the yarn color to take center stage.
The body should feel breezy and comfortable.
Step 4: Add subtle texture or striping
If you want more visual interest, add stripes or a light texture repeat. Small color bands can give the blanket a beach-house feel, while a subtle stitch pattern can create gentle movement. Keep the design soft and uncluttered so it remains easy on the eye.
This keeps the blanket lively without overwhelming it.
Step 5: Continue in rows
Repeat the chosen stitch and color pattern until the blanket reaches the length you want. Check your work occasionally to make sure the edges remain even. Tunisian fabric can sometimes pull, so a consistent rhythm is helpful.
A steady row repeat makes the process relaxing.
Step 6: Add a border that frames the design
A simple border in a solid color works beautifully here. White, cream, or sand tones are especially nice because they make the bright colors look cleaner. If you want a more finished vacation-inspired look, a slightly wider border can really help.
The border gives the blanket a fresh, polished edge.
Step 7: Block lightly
A Bahama-inspired blanket usually benefits from light blocking, especially if you have used color changes or a slightly open stitch. Blocking helps the fabric relax and sit more neatly.
Helpful Tips
This style is wonderful for spring and summer use because it feels cheerful without being too heavy. If you want it to look especially polished, keep the stitch pattern simple and let the colors do the storytelling.
3. Crochet No-Curl Tunisian Blanket Pattern
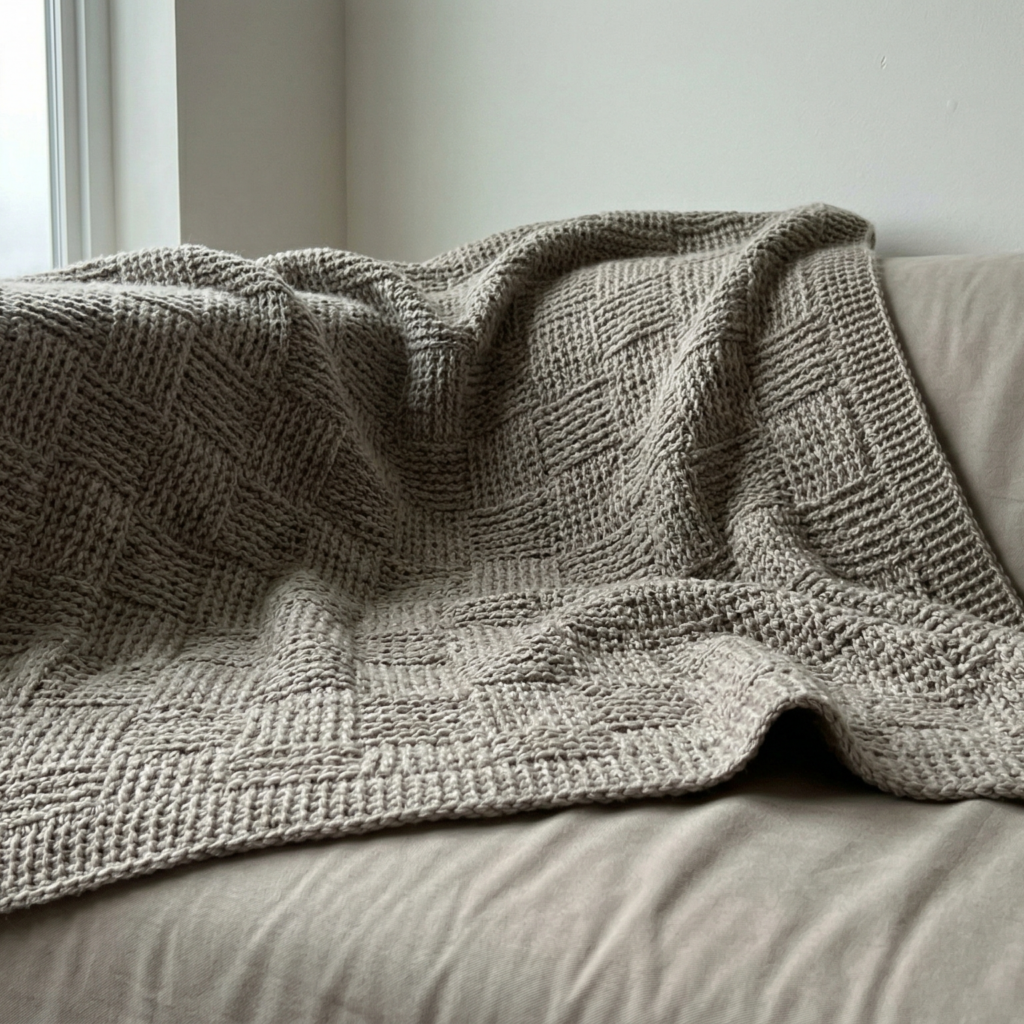
A no-curl Tunisian blanket is a must-have for anyone who loves Tunisian crochet but wants a flat, easy-to-use result. One of the most common challenges in Tunisian crochet is curling at the edges, so choosing a stitch pattern designed to reduce curl is both practical and rewarding. The result is a blanket that looks neat, feels comfortable, and lays beautifully flat.
Quick Notes
Skill level: Beginner
Finished size: Any size from baby blanket to large throw
Style: Clean, practical, modern, easy to wear into any room
Best colors: Any color, especially solids and soft neutrals
Materials
- Smooth yarn with good stitch definition
- Tunisian crochet hook with cord
- Yarn needle
- Scissors
- Measuring tape
Step-by-Step Guide
Step 1: Choose a stitch that naturally reduces curl
Some Tunisian stitches curl more than others. A no-curl pattern usually uses a stitch combination that balances the fabric, such as alternating Tunisian simple stitch with another stitch or using a denser stitch that counteracts the pull. The right stitch choice makes a big difference.
This is the key to a blanket that lies flat.
Step 2: Work a foundation row carefully
Begin with a loose foundation chain and a neat first row. Since the first row sets the tone for the whole blanket, keep the loops even and avoid pulling too tightly. A relaxed foundation helps reduce edge tension.
The first row should feel smooth and balanced.
Step 3: Follow the no-curl stitch repeat
Work the chosen stitch pattern across each row. The design should balance raised and flat areas so the fabric does not twist inward. If the pattern includes alternating stitch types, keep the sequence consistent so the texture stays even.
This repeat is what keeps the blanket stable.
Step 4: Check the edges often
As you work, lay the blanket flat every so often to see how the edges behave. If you notice curling, you may need to adjust your hook size, tension, or border plan. Catching this early makes finishing much easier.
Small corrections along the way are very helpful.
Step 5: Continue until the blanket is the right size
Because this is a practical blanket pattern, it works beautifully in any size. Keep going until the length feels right, checking your measurements as you crochet. The flat stitch structure should stay neat from start to finish.
Step 6: Add a stabilizing border
Even a no-curl stitch can benefit from a border. A simple border in single crochet or another low-profile stitch can reinforce the edges and help the blanket lie flat even more effectively. If needed, you can add more than one border round.
A border can make the blanket look complete and polished.
Step 7: Block if necessary
Some yarns or stitch combinations still need a little blocking to settle into place. If the blanket is very slightly wavy, blocking can smooth it out and improve the final drape.
Helpful Tips
This is a great blanket for beginners who want a cleaner Tunisian result without worrying too much about curl. It is also a wonderful choice if you plan to use a highly textured yarn or a color that you want to show off without distraction.
4. Crochet Caron Full Stitch Blanket Pattern
A Caron Full Stitch blanket is plush, warm, and beautifully textured. The full stitch creates a dense, soft surface that feels wonderfully cozy while still showing off the stitch pattern clearly. This type of blanket is especially lovely for colder weather or for anyone who wants a thick, comforting throw.
Quick Notes
Skill level: Beginner to intermediate
Finished size: Lap blanket, throw, or bed topper
Style: Plush, cozy, textured, substantial
Best colors: Deep seasonal shades, neutrals, or one rich solid color
Materials
- Bulky or worsted yarn, depending on the yarn line used
- Tunisian hook with cord
- Yarn needle
- Scissors
- Measuring tape
Step-by-Step Guide
Step 1: Understand the full stitch texture
The full stitch creates a dense and rounded surface that feels more filled-in than simple stitch fabric. It is perfect for a blanket because it adds warmth and body. Before starting the full project, make a small swatch so you can see how thick the stitch feels.
This helps you choose the right hook size and yarn balance.
Step 2: Make your foundation chain
Start with a chain that matches the width you want. Since the full stitch is dense, the blanket may look smaller than a more open stitch pattern, so plan accordingly. Keep the chain relaxed enough to allow comfortable movement in the fabric.
A flexible base makes the blanket easier to work.
Step 3: Work the first rows
Follow the full stitch technique row by row, keeping your loops even and your return pass consistent. The fabric will begin to feel thick and cushioned very quickly. This is one of the best parts of the stitch because the texture becomes satisfying almost immediately.
The blanket should feel plush without becoming stiff.
Step 4: Keep the rows straight
Dense fabric can sometimes shift if the tension changes, so check your edges occasionally. A straight edge is especially important for a full stitch blanket because the heavy texture can make irregularities more noticeable later.
Careful counting helps keep the blanket balanced.
Step 5: Continue for the full length
Repeat the stitch until the blanket is the size you want. Because the fabric is thick, progress may feel slower than with a looser stitch, but the finished result is usually worth the extra time. The blanket should grow into a substantial, soft throw.
Step 6: Add a simple border
A clean border often works best with a textured blanket like this one. The stitch texture is already strong, so a border in a matching color can frame it beautifully without competing for attention.
Step 7: Finish and enjoy the texture
Weave in the ends and gently shape the blanket. If needed, give it a light steam or blocking treatment, but avoid flattening the texture too much. The plush feel is what makes this blanket so appealing.
Helpful Tips
This is a fantastic blanket for cozy rooms, reading corners, and chilly seasons. If you want a more elegant look, choose a single deep color. If you want a softer homey look, try warm neutrals or heathered yarns.
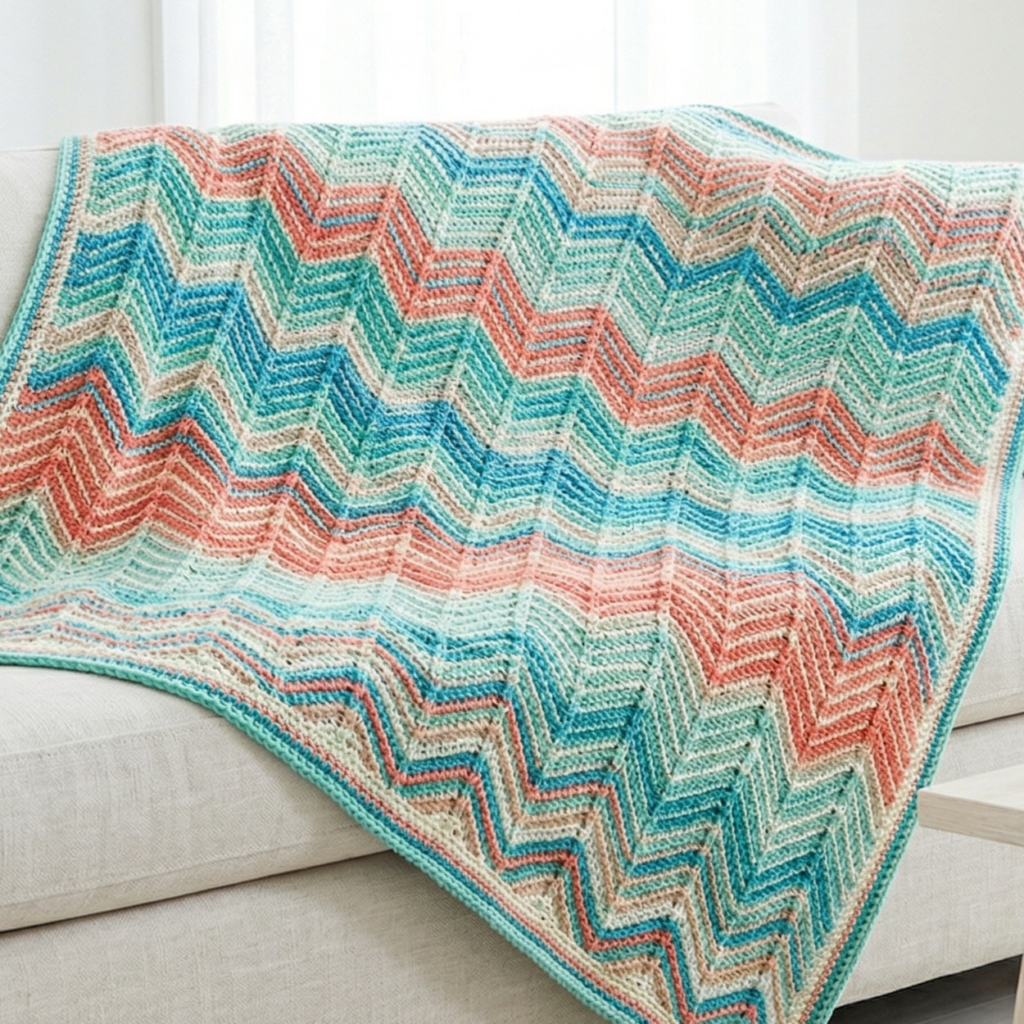
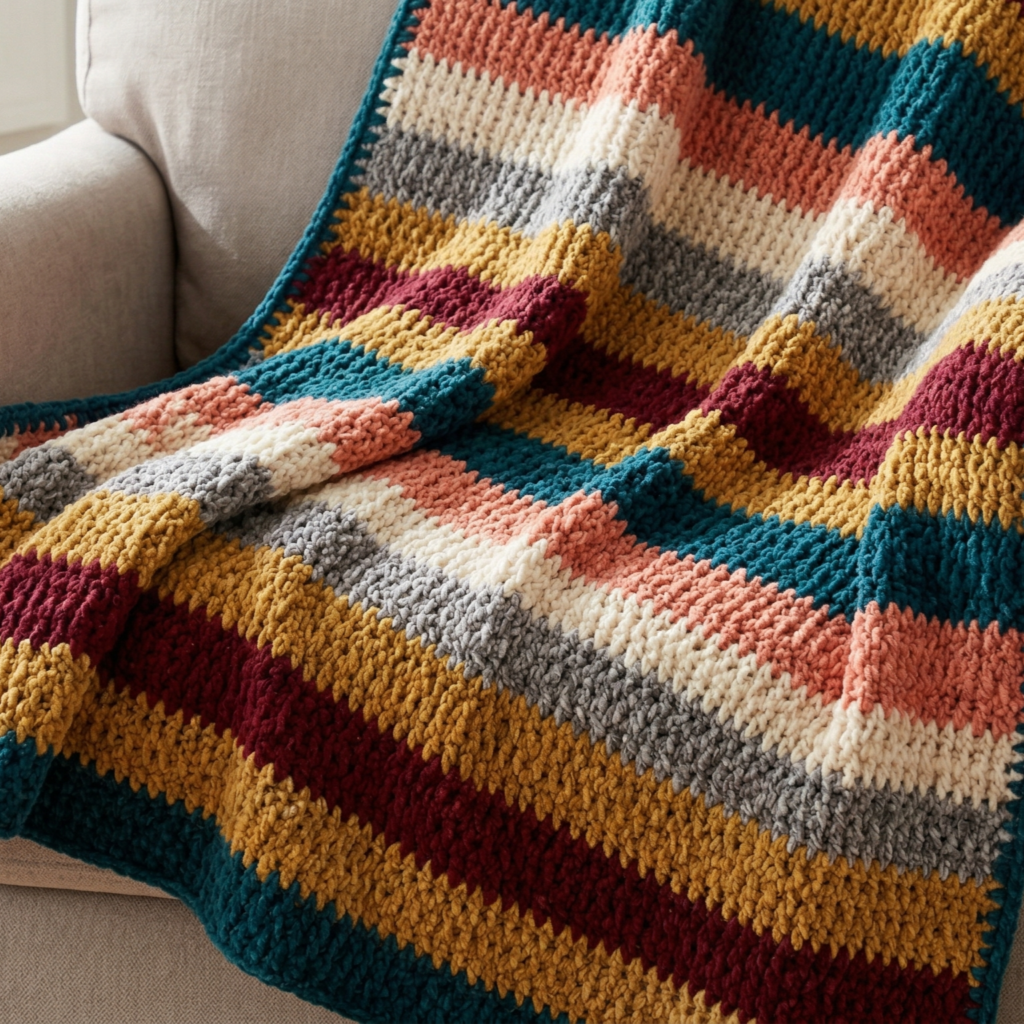
5. Crochet Simple Striped Tunisian Blanket Pattern
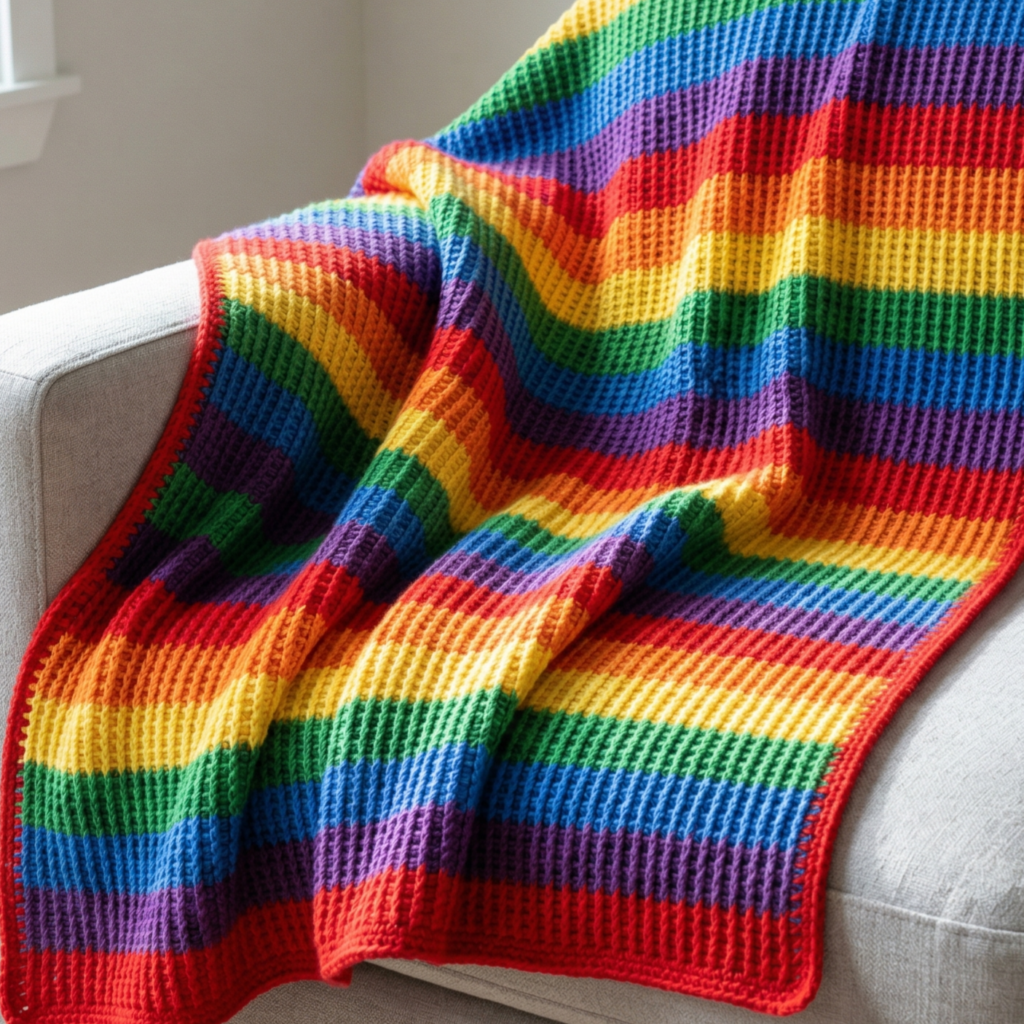
A simple striped Tunisian blanket is timeless, versatile, and easy to customize. Stripes give you a chance to play with color without needing a complicated stitch pattern, which makes this style perfect for both beginners and experienced crocheters. It is the kind of blanket that can fit into almost any home.
Quick Notes
Skill level: Beginner
Finished size: Any size, from baby blanket to full throw
Style: Classic, modern, customizable, easygoing
Best colors: Two-tone combinations, neutrals, rainbow palettes, or soft ombré shades
Materials
- Yarn in two or more colors
- Tunisian crochet hook with cord
- Yarn needle
- Scissors
- Measuring tape
- Stitch marker, optional
Step-by-Step Guide
Step 1: Plan your stripe layout
Before beginning, decide how wide each stripe should be and how many colors you want to use. Wide stripes feel bold and modern, while narrow stripes feel delicate and busy in a charming way. A two-color blanket is often the easiest place to start.
Planning the stripe sequence early keeps the project organized.
Step 2: Start the foundation
Chain the width of your blanket and work the first Tunisian row in your base color. Keep the foundation neat and loose enough to prevent tight edges. This first color creates the starting point for the whole design.
A clean foundation helps the stripes look crisp.
Step 3: Add color changes
When it is time to switch colors, join the new yarn neatly at the end of a row. Keep the change smooth so the stripe line looks sharp. You can alternate colors in equal sections or use one main color with smaller accent stripes for variety.
The color change is what gives the blanket its personality.
Step 4: Keep your stitch repeat simple
Because the stripes already create visual interest, a simple Tunisian stitch pattern is often enough. This lets the colors stand out while still giving the fabric that classic Tunisian structure. The simplicity makes the blanket feel modern and versatile.
Step 5: Continue to the desired length
Keep working your rows and color changes until the blanket is the size you want. It helps to keep a written note of your stripe sequence so the pattern stays consistent throughout the project.
Consistency is especially important in striped designs.
Step 6: Add a border that ties the colors together
A border in one of the main colors often works beautifully. It helps frame the stripes and gives the blanket a complete look. If your stripes are very bold, a neutral border can calm them down and make the design feel balanced.
Step 7: Weave in ends carefully
Striped blankets can have many yarn tails, so take your time weaving them in securely. A neat finish makes the blanket more durable and helps the stripes look clean from every angle.
Helpful Tips
This pattern is excellent for using leftover yarn or building a coordinated color story. If you want a playful feel, use bright rainbow stripes. If you want a more timeless piece, choose a neutral palette with one accent color.
Conclusion
Tunisian blankets are such a rewarding project because they combine structure, texture, and warmth in a way that feels both practical and beautiful. They can look delicate or bold, simple or decorative, cozy or airy, depending on the stitch pattern and yarn choices you make. That flexibility is one of the reasons Tunisian crochet has such lasting appeal.
These five blanket patterns each offer a different style. The shell blanket feels graceful and decorative. The Bahama blanket brings in relaxed, sunny energy. The no-curl blanket is clean and practical. The Caron Full Stitch blanket gives you plush warmth and texture. The simple striped blanket offers timeless style with endless color possibilities. Each one can become a favorite piece in your home or a meaningful handmade gift.
A good blanket is more than just something warm to wrap around yourself. It is a project that takes shape slowly, row by row, until it becomes something you can use and enjoy for years. With Tunisian crochet, that process feels especially satisfying because the fabric grows into something rich, beautiful, and full of character.