Crochet shorts are one of those handmade pieces that feel equal parts fun, stylish, and surprisingly practical. They are perfect for warm weather, lounging, beach outfits, festival looks, or adding a personal handmade touch to your everyday wardrobe. Because they are smaller than full garments, they can be a rewarding project to make without feeling overwhelming. At the same time, they still give you plenty of room to play with shape, stitch texture, fit, and color.
What makes crochet shorts especially appealing is how versatile they can be. A boho pair can feel relaxed and carefree. Shell stitch shorts bring a soft, textured look. A tie-waist design feels casual and adjustable. Lace scallop shorts can look delicate and feminine. Ribbed micro shorts give off a fitted, modern vibe. Each pattern has its own personality, but all of them can be styled in many ways and adapted to your taste.
In this post, you will find five trendy crochet shorts patterns with detailed step-by-step guidance, quick notes, and practical finishing tips. Each section is written to be clear and easy to follow, whether you are making your first pair of crochet shorts or adding another handmade staple to your collection. If you want a project that feels creative, wearable, and a little fashion-forward, these shorts ideas are a great place to start.
Quick Notes
Project type: Crochet shorts
Best for: Summer wear, beach outfits, loungewear, festival looks, handmade fashion
Skill level: Beginner to intermediate, depending on shaping and fit
Hook size: Usually 2.5 mm to 5.0 mm, depending on yarn and drape
Yarn weight: Cotton, cotton blends, DK, sport, or light worsted yarn
Best yarn choice: Cotton or cotton blends for breathability and structure
Finished size: Usually fitted or relaxed, depending on the design
Time to complete: Several hours to a few days depending on detail and size
Helpful stitches: Chain, slip stitch, single crochet, half double crochet, double crochet, increase, decrease, shell stitch, ribbing, lace stitch, ties, waist shaping
Common Materials
Most crochet shorts patterns use a similar set of supplies.
- Yarn in your chosen color or colors
- Crochet hook matched to the yarn
- Yarn needle
- Scissors
- Measuring tape
- Stitch markers
- Optional elastic for waistband
- Optional lining
- Optional drawstring cord or tie
- Optional buttons or decorative details
For shorts, fit matters a lot. A comfortable waistband, enough ease through the hips, and a fabric that is not too stiff will make a big difference in how wearable the final piece feels. Cotton yarn is usually a great choice because it is breathable and helps the garment keep its shape. If you want more stretch or drape, you can also choose a cotton blend or a yarn with a softer hand.
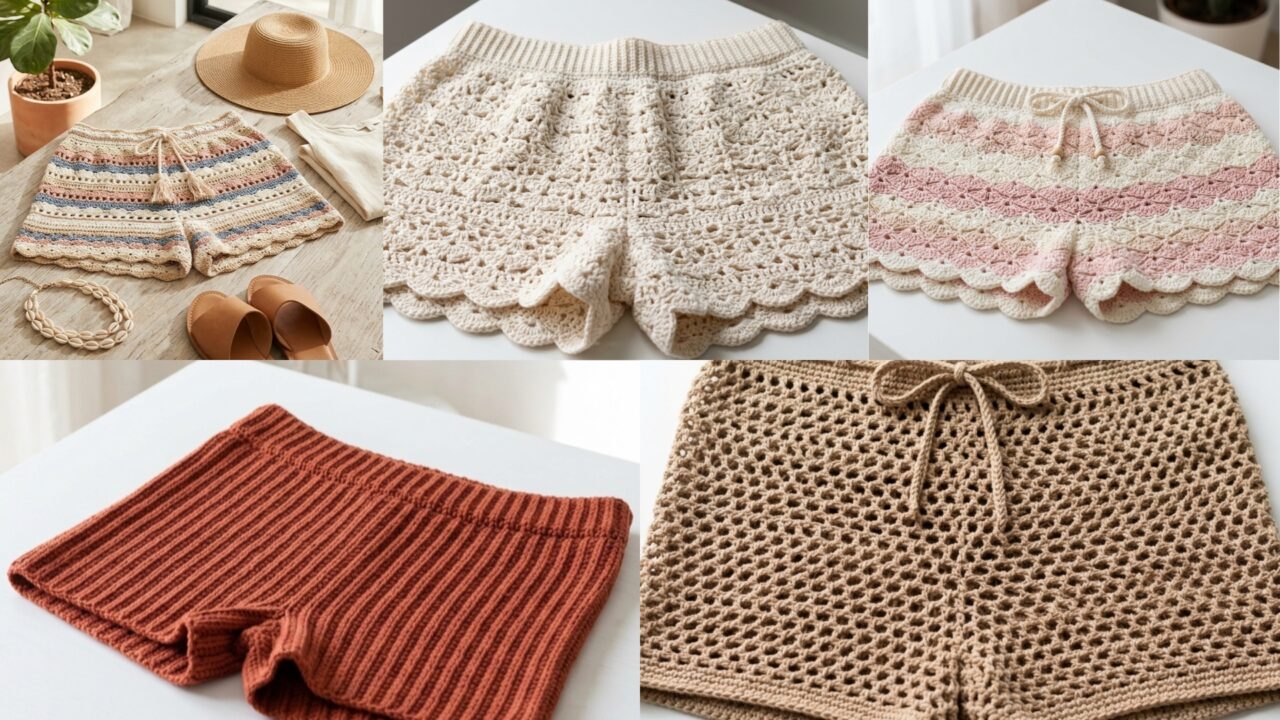
1. Crochet Easy Boho Shorts Pattern
Easy boho shorts are relaxed, effortless, and full of laid-back charm. They are a great choice if you want a pair of crochet shorts that feels comfortable, stylish, and simple enough to wear with tanks, loose shirts, or swimwear cover-ups. The boho look usually comes from a relaxed shape, airy texture, and a soft handmade feel.
Quick Notes
Skill level: Beginner to intermediate
Finished size: Relaxed fit with a comfortable waistband
Style: Free-spirited, casual, beachy, bohemian
Best colors: Cream, sand, olive, rust, blush, dusty blue, earthy neutrals
Materials
- Cotton or cotton blend yarn
- Crochet hook suited to yarn
- Yarn needle
- Scissors
- Measuring tape
- Optional drawstring or elastic
Step-by-Step Guide
Step 1: Measure the waist and hips
Before you begin, measure your waist, hips, and desired inseam length. Crochet shorts should fit comfortably through the hips and legs, so accurate measurements are especially important. Since boho shorts are often relaxed, you can allow a little extra ease for a softer drape.
Good measurements help the shorts feel wearable from the start.
Step 2: Create the waistband
Start with a waistband that fits comfortably around the waist. You can make it with rows of single crochet or a ribbed band for extra stretch. If you want the shorts to sit more securely, add a drawstring or elastic casing later.
A stable waistband gives the shorts a good foundation.
Step 3: Crochet the upper body
Work downward from the waistband or create front and back panels depending on your preferred construction. Boho shorts often look lovely with a slightly loose upper section that feels relaxed rather than tight. Keep the stitches even so the fabric hangs nicely.
The upper body sets the tone for the whole pair.
Step 4: Shape the hips and leg openings
As you move down, make sure there is enough room through the hips and upper thighs. If needed, add slight increases at the sides. The leg openings should feel easy and comfortable, with a little movement in the fabric.
A gentle shape keeps the boho style soft and flattering.
Step 5: Add a boho texture
If you want more handmade character, use a light stitch pattern such as shell-like repeats, openwork rows, or subtle texture bands. Keep the texture simple so the shorts remain comfortable and easy to wear.
The texture adds personality without making the shorts bulky.
Step 6: Finish the leg edges
Add a neat border around each leg opening. A simple single crochet edge or slightly decorative scallop can give the shorts a polished finish. If you want a more relaxed boho look, keep the edge soft and understated.
Step 7: Add drawstring or elastic if desired
A drawstring works beautifully for boho shorts because it adds adjustability and a casual feel. You can crochet a cord or use a ribbon. If you prefer more security, add elastic inside the waistband.
Helpful Tips
Easy boho shorts look especially pretty in natural, earthy colors. If you want them to feel softer and more feminine, use blush or cream. If you want them to feel more festival-ready, try a warmer shade like rust or terracotta. The looser the fit, the more relaxed the boho effect tends to be.
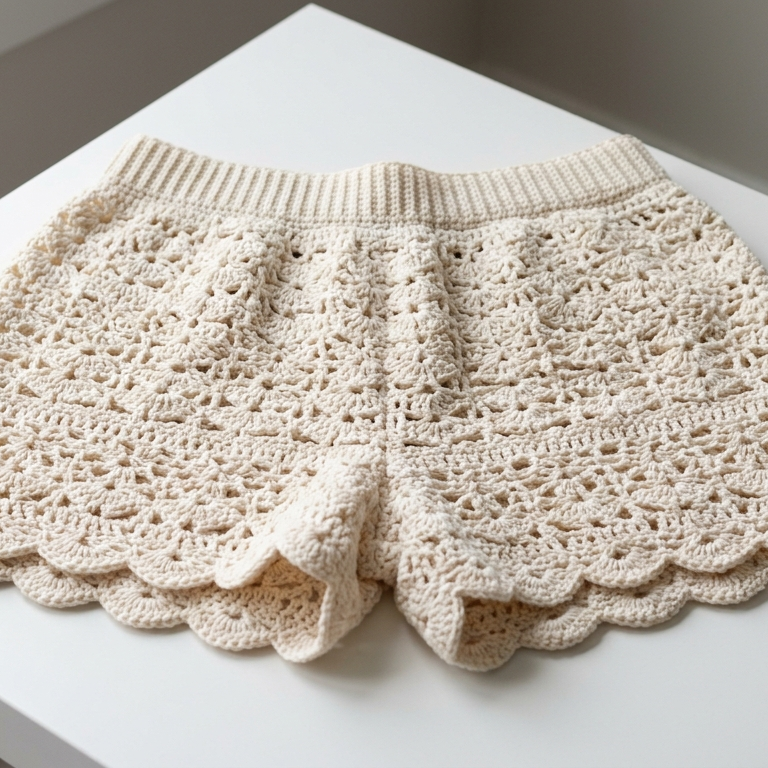
2. Crochet Shell Stitch Shorts Pattern

Shell stitch shorts are soft, feminine, and beautifully textured. The shell stitch creates a delicate layered effect that gives the shorts a romantic and slightly vintage look. This style is perfect if you want something that feels pretty and decorative but still wearable in warm weather.
Quick Notes
Skill level: Beginner to intermediate
Finished size: Fitted or gently relaxed
Style: Feminine, textured, romantic, decorative
Best colors: Ivory, blush, lavender, seafoam, soft peach, cream
Materials
- Cotton or cotton blend yarn
- Crochet hook suited to yarn
- Yarn needle
- Scissors
- Measuring tape
- Optional elastic
Step-by-Step Guide
Step 1: Choose a shell-friendly silhouette
Shell stitch looks especially lovely on shorts with a slight flare or soft shaping. Decide whether you want them fitted through the hips or slightly relaxed. The shell texture will stand out best when the overall silhouette is simple and balanced.
A good shape helps the shell pattern shine.
Step 2: Make the waistband
Create a waistband that fits securely but comfortably. A ribbed band works especially well because shell stitch fabric tends to be decorative, so the waistband should provide some structure. If needed, leave space for elastic or a tie.
A strong waistband balances the delicate shell pattern.
Step 3: Work the shell stitch body
Begin crocheting the main body using shell stitch rows or rounds. The shell repeat forms a scalloped, layered look that feels beautiful and soft. Keep the shells even across each row so the fabric remains balanced and neat.
This is the signature texture of the shorts.
Step 4: Check the fit often
Because shell stitch can create a slightly open fabric, it is important to check the fit as you go. Make sure the shorts are not too loose around the hips or too tight through the thighs. Small adjustments during the process can help the final fit feel much better.
Fit matters just as much as texture.
Step 5: Shape the legs
As you near the bottom of the shorts, make sure the leg openings are even. Shell stitch can create lovely edges here, so let the final rows flow naturally into the hem. If you want a more finished look, add a final scalloped border.
The leg opening can become part of the design.
Step 6: Join and seam carefully
If you are making panels, join them securely along the crotch and sides. Keep the seams neat so they do not interrupt the shell texture too much. A clean join helps the shorts feel more polished and wearable.
Step 7: Finish the waistband and hem
Add a final border at the waistband and legs if needed. A simple clean edge or delicate shell border can make the shorts look complete. If desired, add elastic or a drawstring for extra comfort.
Helpful Tips
Shell stitch shorts look especially beautiful in soft pastel or neutral shades because the texture becomes the main attraction. If you want a more vintage-inspired look, try cream or blush. If you want a beachy feel, seafoam or pale blue works beautifully.
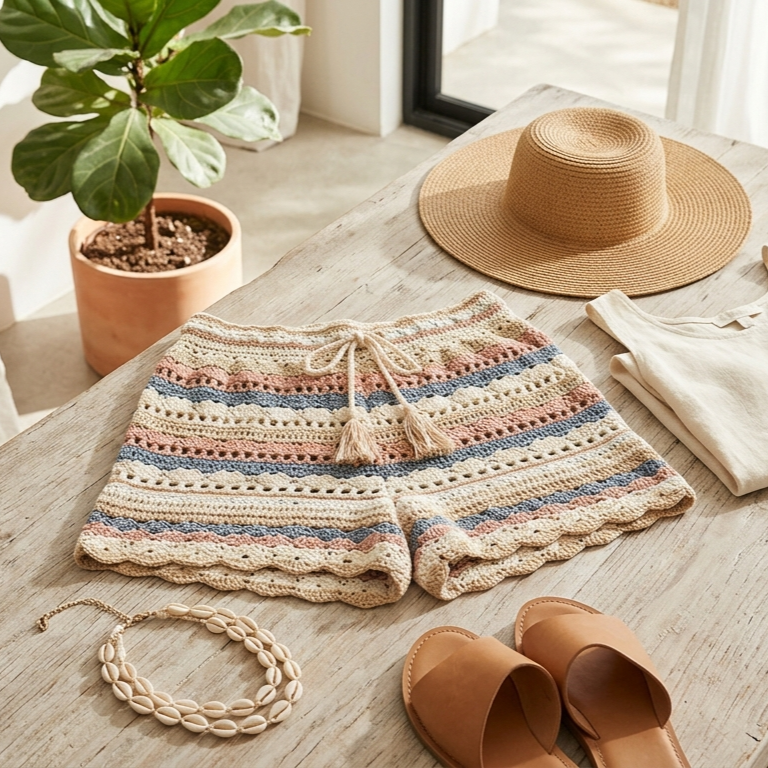
3. Crochet The Tan Tie Tory Shorts Pattern
The Tan Tie Tory shorts are a classic-style crochet short with a practical tie-waist detail. The tan color gives them a warm, timeless look, while the tie adds a casual and adjustable finish. This style is easy to dress up or down, making it a great everyday crochet short.
Quick Notes
Skill level: Beginner to intermediate
Finished size: Comfortable, slightly fitted
Style: Casual, modern, warm-toned, practical
Best colors: Tan, camel, beige, sand, oatmeal, light brown
Materials
- Cotton yarn in a tan or neutral shade
- Crochet hook suited to yarn
- Yarn needle
- Scissors
- Measuring tape
- Optional tie cord or drawstring
- Optional elastic
Step-by-Step Guide
Step 1: Measure and plan the fit
Before starting, measure the waist and hips carefully. Since tie-waist shorts rely on a comfortable fit, you want the body to sit well even before the tie is adjusted. Plan how high you want the waist to rise and how long you want the legs to be.
Good planning creates a better fit and more comfort.
Step 2: Make the waistband
Start with a structured waistband, either by crocheting a ribbed band or by working rows of tighter stitches. The waistband should feel firm enough to support the tie but not so tight that it becomes uncomfortable. This is the part that anchors the shorts.
A neat waistband gives the shorts a tailored look.
Step 3: Crochet the main body
Work the shorts body from the waistband down or by joining panels. Keep the stitches simple so the tan color and tie detail become the focal point. A smooth stitch pattern gives the design a clean and modern look.
The body should feel comfortable and easy to move in.
Step 4: Add hip shaping
If needed, add a few increases around the hips to create a better fit. This prevents the shorts from pulling or feeling too tight. Since the style is meant to be easy and wearable, a little extra room often improves the drape.
Slight shaping can make a big difference.
Step 5: Create the tie channel
Add a row or section near the waistband that can hold the tie. You can leave spaces for a cord or create a folded casing. This lets the tie pass through smoothly and makes the shorts adjustable.
The tie detail is one of the design’s main features.
Step 6: Make the tie
Crochet a cord or use a ribbon for the tie. Keep it long enough to tie comfortably at the waist. If you crochet the tie, make sure it is sturdy and not too stretchy. A well-made tie adds charm and function.
Step 7: Finish the hem and seams
Add a clean border to the leg openings and check all seams carefully. The tan color usually looks best with a simple finish because it gives the shorts a clean, polished appearance.
Helpful Tips
Tan tie shorts are very versatile because neutral shades pair well with almost anything. They look especially good with white tops, oversized shirts, or beachwear. If you want them to feel more elevated, use a slightly firmer cotton yarn so the shape stays neat.
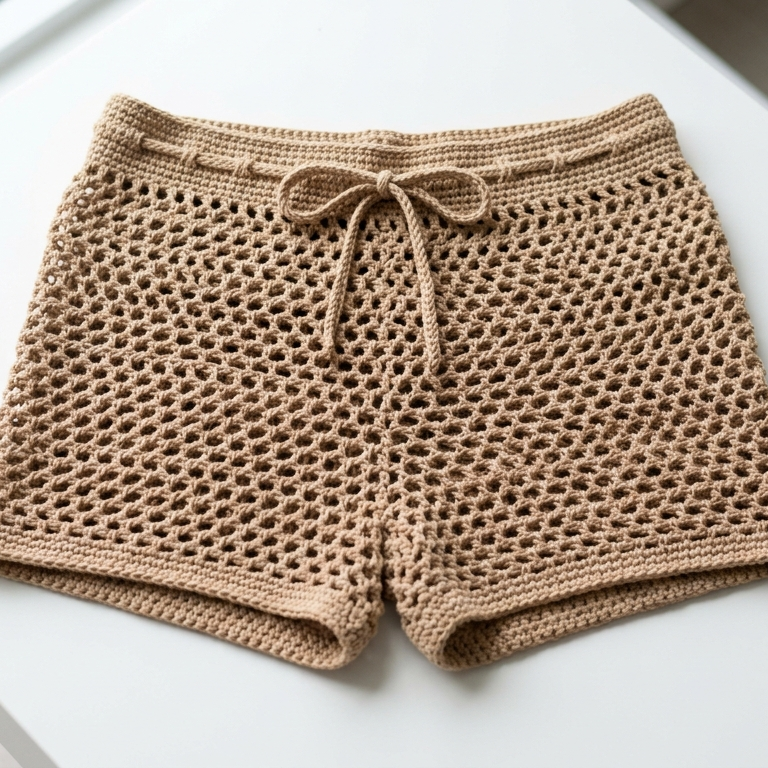
4. Crochet Lace Scallop Shorts Pattern
Lace scallop shorts are elegant, airy, and beautifully feminine. The lace detail gives them a soft romantic feel, while the scalloped edges add a polished decorative finish. These shorts are perfect if you want something that feels light and stylish for summer outfits or layered beach looks.
Quick Notes
Skill level: Intermediate
Finished size: Fitted or softly relaxed
Style: Delicate, airy, romantic, feminine
Best colors: White, cream, blush, lavender, soft blue, pastel peach
Materials
- Lightweight cotton yarn or cotton blend
- Crochet hook suited to yarn
- Yarn needle
- Scissors
- Measuring tape
- Optional elastic waistband
Step-by-Step Guide
Step 1: Decide on the lace structure
Lace scallop shorts can be made with a denser base and decorative lace sections, or they can be more open and lightweight depending on how you want to wear them. Decide how much coverage and stretch you want before starting.
The lace structure determines the comfort level.
Step 2: Build the waistband
Start with a firm waistband so the shorts stay in place. A ribbed waistband or tighter stitch band works well with lace because it gives the garment structure. If you want extra comfort, plan for elastic inside the band.
A solid waistband balances the lace body.
Step 3: Create the lace section
Work the main body using a lace stitch repeat, such as chain spaces, shells, or openwork clusters. Keep the repeats even so the fabric stays balanced and does not become too loose. The lace should feel light but not fragile.
The lace section gives the shorts their airy look.
Step 4: Add scalloped shaping
Use scallop stitches or shell-like rows to form decorative curves along the edges or through the main body. These scallops can create a sweet, feminine texture that feels elegant and handmade. Keep the pattern consistent so the shorts remain symmetrical.
The scallops are the signature detail of the pattern.
Step 5: Shape the fit carefully
Because lace can stretch more than denser fabric, fit is important. Try to keep the shorts close enough to the body without feeling tight. If the lace is very open, you may want to line the shorts or wear them as a beach layer rather than as fully opaque everyday shorts.
Step 6: Finish the leg openings
A scalloped hem or lace border can make the leg openings beautiful and polished. Keep the edge even so it frames the shorts nicely. A well-finished hem helps the design feel complete.
Step 7: Add waistband support
If needed, add elastic or a drawstring for better hold. Lace shorts benefit from extra waistband security because the stitch pattern can be more flexible than a plain fabric.
Helpful Tips
Lace scallop shorts look especially lovely in light colors because the pattern shows up softly and clearly. If you want a beachy feel, choose white or cream. If you want a romantic look, blush or lavender works beautifully. Because lace is naturally decorative, keep accessories simple so the shorts stay the main focus.
5. Crochet Ribbed Micro Shorts Pattern
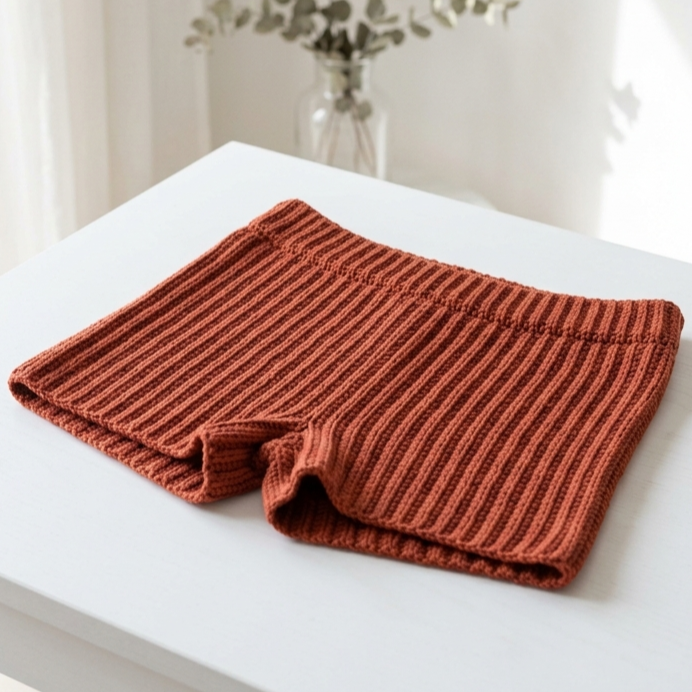
Ribbed micro shorts are bold, fitted, and very trendy. They have a snug, stretchy silhouette that feels modern and flattering. This style is perfect if you want something edgy and fashion-forward, especially for layering, festival styling, or a very fitted handmade look.
Quick Notes
Skill level: Intermediate
Finished size: Fitted, short length
Style: Modern, sleek, stretchy, trendy
Best colors: Black, cream, white, tan, gray, terracotta, deep jewel tones
Materials
- Cotton or cotton blend yarn with stretch
- Crochet hook suited to yarn
- Yarn needle
- Scissors
- Measuring tape
- Optional elastic for waistband
Step-by-Step Guide
Step 1: Measure very carefully
Because micro shorts are fitted, accurate measurements are essential. Measure the waist, hips, rise, and desired inseam before starting. These shorts should feel snug but still comfortable enough to move in. Taking precise measurements helps avoid fit problems later.
Fit is the most important part of this design.
Step 2: Crochet a ribbed waistband
Start with a stretchy ribbed waistband that sits securely on the body. Ribbing gives the shorts their snug fit and helps the waistband hold its shape. Keep the stitches firm and even so the band feels supportive.
A good waistband sets the tone for the entire garment.
Step 3: Build the fitted body
Work the main body of the shorts in ribbing or a rib-like stitch pattern. Since the fit is close to the body, make sure the fabric stretches comfortably. Ribbing naturally gives a sleek look, which is what makes this style so modern.
The ribbed texture is the main feature.
Step 4: Shape the rise
As you move into the crotch and seat area, shape the shorts carefully with increases or structured panel construction. This step is very important for comfort and fit. The shorts should follow the body without pulling too tightly.
Good shaping keeps the micro shorts wearable.
Step 5: Form the leg openings
The leg openings should be clean and evenly finished. Since micro shorts are short, the hem should not feel bulky. A simple ribbed edge or tight border works best. Keep the opening smooth so it sits flat against the leg.
Step 6: Check the fit as you go
Try the shorts on during construction if possible. This helps you make small changes before finishing. Adjusting the fit early is much easier than trying to fix it at the end.
Step 7: Finish with a clean waistband and hem
Add any final edging needed and secure the seams carefully. Ribbed micro shorts look best when the finishing is neat and minimal. You want the texture and shape to speak for themselves.
Helpful Tips
Ribbed micro shorts usually look best in solid colors because the texture becomes the main attraction. If you want a clean everyday style, try black, tan, or cream. If you want a more fashion-forward piece, deep red or earthy terracotta can look stunning. Because the fit is close, comfort and yarn choice are especially important.
Conclusion
Crochet shorts are a great way to bring handmade style into a warm-weather wardrobe. They can be relaxed, romantic, bold, or fitted depending on the shape and stitch pattern you choose. That makes them one of the most versatile clothing projects you can make, especially if you want something that feels both fashionable and personal.
These five shorts patterns each offer a different look. Easy boho shorts feel carefree and relaxed. Shell stitch shorts are soft and feminine. Tan tie shorts are practical and timeless. Lace scallop shorts are delicate and elegant. Ribbed micro shorts are sleek and modern. Together, they show how much variety you can create with just yarn, a hook, and a thoughtful design.
A pair of handmade shorts can be as practical or as stylish as you want them to be. With the right yarn, good shaping, and careful finishing, they can become a favorite part of your wardrobe and a satisfying project to make again and again. If you enjoy crochet pieces that blend creativity with wearability, these shorts patterns are a wonderful place to start.