Scarves are one of the easiest ways to change an outfit’s mood — from cozy everyday to romantic and dramatic. Below you’ll find a single, practical introduction that covers yarn, measuring, gauge, and general construction decisions, followed by five fully detailed scarf patterns. Each scarf section includes: skill level, materials, finished size, gauge guidance, a step-by-step build, variations, finishing and care notes, and styling tips so you can paste this straight into a blog post.
Read the introduction first (it saves time) then jump to the pattern you want.
yarn, hooks, sizing, gauge, construction approaches & abbreviations
Which yarn to choose
- Lightweight / spring scarves: fingering or sport weight fibers such as cotton, linen, bamboo or blends. They drape and photograph beautifully.
- All-purpose scarves: DK weight (materials like cotton blends or soft wool blends) — good stitch definition with gentle drape.
- Cozy winter scarves: worsted or bulky (wool, alpaca blends) for warmth and squish.
- Special finishes: use mercerized cotton or silk blend for shine and beadwork; chenille or faux fur yarn for plush pockets or trims.
Hooks & tools
- Use the hook recommended on the yarn label as a starting point, then swatch and adjust to get the fabric you want: tighter for structure, larger for drape and openness.
- Notions: tapestry needle, blocking pins, scissors, stitch markers, small amount of craft wire if you want to shape pocket edges or stems for flowers.
Sizing & finished dimensions
- Band / neck scarf (short): 10–14 in wide × 50–60 in long.
- Long drape scarf (styling wraps/skirts): 8–12 in wide × 60–80 in long.
- Pocket scarf (wearable with pockets): 8–10 in wide × 50–72 in long (pocket placement centered or near ends).
- You’ll see suggested finished sizes below — adjust for personal preference.
Gauge & swatching (digit-by-digit method)
- Work a 4″ × 4″ swatch using the stitch pattern you plan to use and block it how you plan to finish the scarf.
- Count stitches per inch (spi) and rows per inch (rpi).
- To compute stitches for desired width: multiply target width (in inches) by spi. Example: 10 in × 4 sts/in = 40 stitches. Round to the nearest repeat multiple required by the stitch.
Construction options
- Worked flat in rows (most common) — easiest and great for long scarves and pocket placement.
- Worked in panels or motifs (granny, flowers) then joined — great for decorative scarves and color blocking.
- Worked in the round (a continuous tube) — wearable infinity scarves without ends.
- Add pockets by making small rectangular pieces and sewing them to the wrong side, or leaving an opening when seaming.
Abbreviations (US)
- ch — chain
- sc — single crochet
- hdc — half double crochet
- dc — double crochet
- tr — treble (tr)
- sl st — slip stitch
- sk — skip
- st(s) — stitch(es)
- inc — increase (2 sts in one st)
- dec — decrease (sc2tog)
- BLO / FLO — back loop only / front loop only
- MR — magic ring
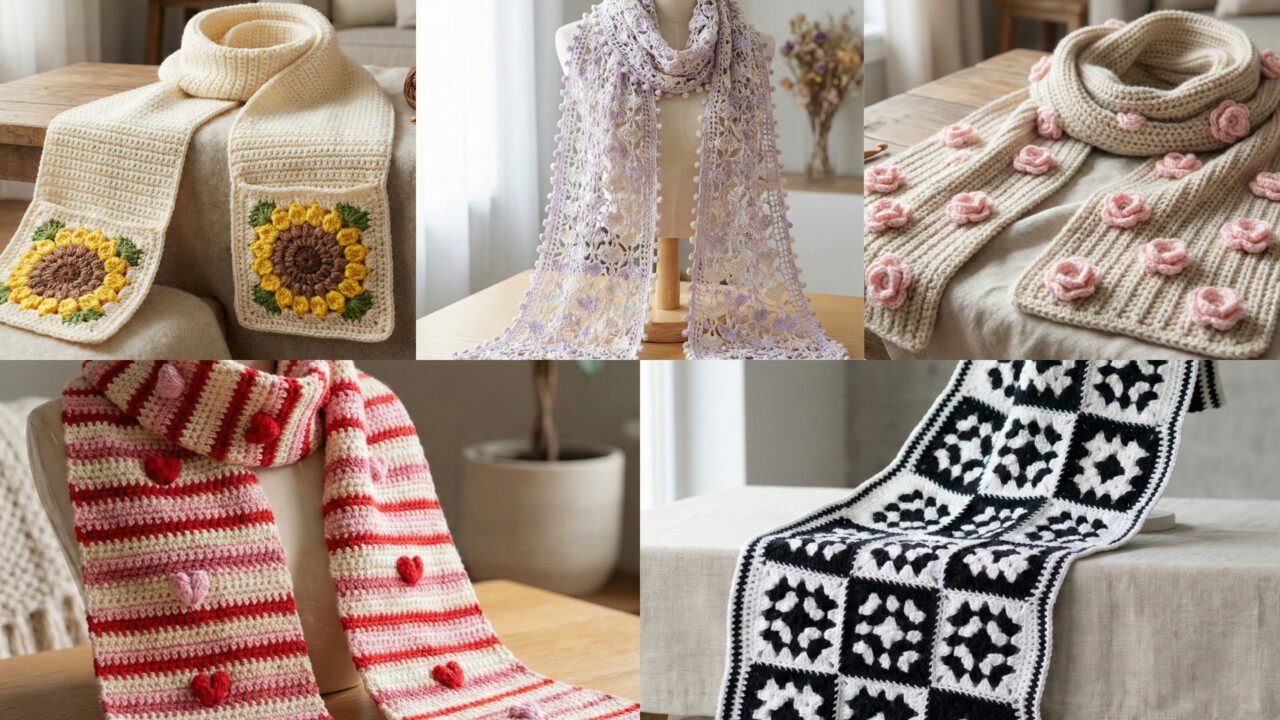
1. Crochet Sunflower Pocket Scarf Pattern
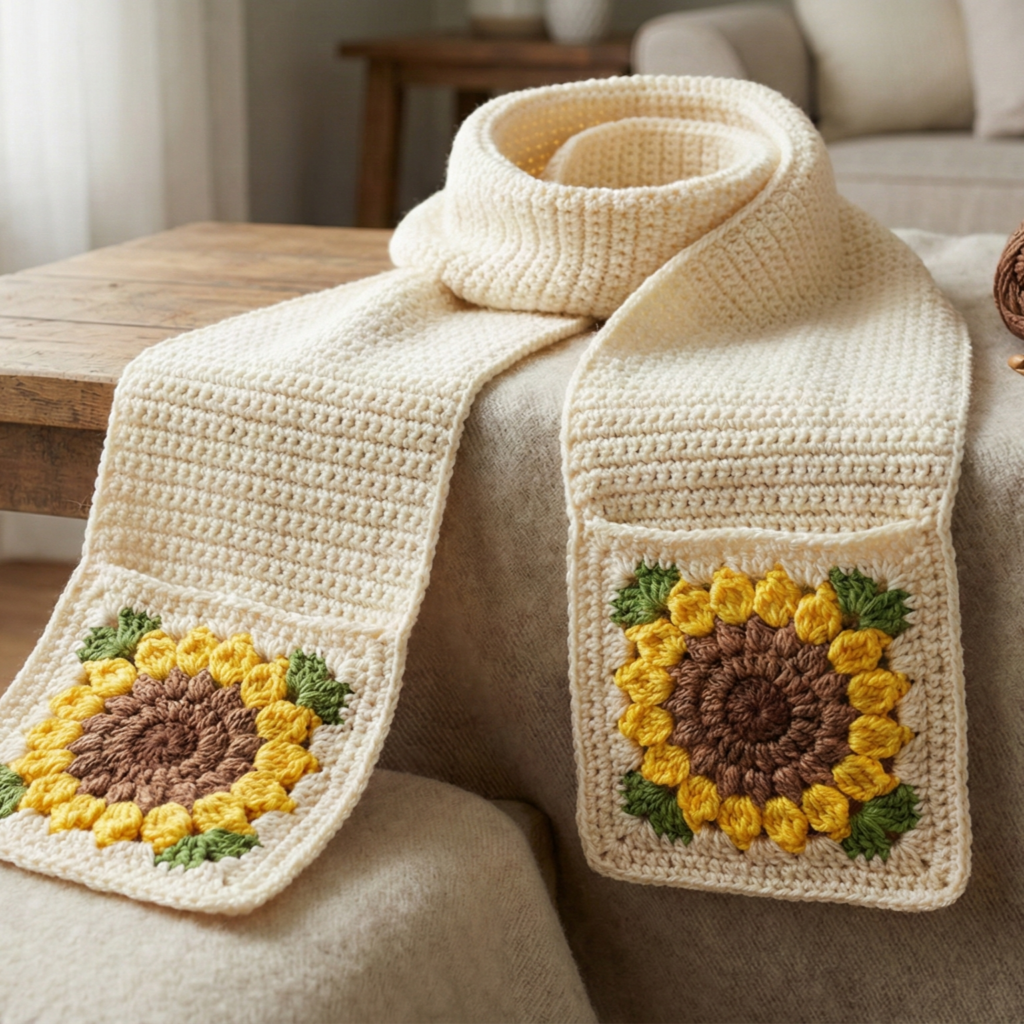
Overview & vibe: A cozy neck scarf with integrated hand pockets and sunflower appliqués — warm, practical and cheerful. Pockets are roomy for phone or hands; sunflowers give an eye-catching spring/summer accent when made in cotton, or autumnal charm in wool blends.
Skill level: Confident beginner — basic stitches, simple shaping and applique.
Materials (sample — adult size)
- Worsted weight yarn: main color (scarf body) ~350–450 yd, sunflower yellow ~50 yd, brown for center ~20 yd, green for leaves ~30 yd.
- Hook: 5.0 mm (adjust to your tension).
- Tapestry needle, stitch markers, blocking pins.
Finished size
- Width: ~9 in; Length: ~60 in (ends long enough to wrap). Pocket dimensions: ~6.5 in wide × 6 in deep each.
Gauge (example)
- 14 dc × 8 rows = 4″ in dc fabric (blocked). Use your swatch.
Plan & math (brief)
- Decide pocket placement — typically ~8–10 in from each scarf end. For a 60 in scarf with 9 in width, make the scarf body continuous and leave pocket openings by stopping row and turning or join pocket pieces after the main body is complete.
- If your gauge gives 4 dc = 1 in horizontally and you want 9 in width → 9 × 4 = 36 stitches across (rounded to pattern multiples if necessary).
Step-by-step
A. Make the scarf body
- Chain the number of stitches needed for desired width: example ch 36 + 2 turning chain.
- Row 1: dc in 3rd ch from hook and across. Turn.
- Row 2–X: Repeat Row 1 until scarf reaches pocket placement point (e.g., 10 in from start). Measure on wearer if possible. Keep edges square by working the turning chain consistently.
B. Adding pockets (worked flat)
4. At the pocket row, work across to the point where one pocket will start (leave stitches unworked for pocket width). Example: for pocket width 6.5 in × 4 sts/in = 26 sts — work up to the first pocket edge, place 26 sts on a stitch holder or leave unworked, continue working remaining sts for body to the end. On the next rows, work only across the body sections, leaving pocket stitches unworked as you build the top portion. Continue until you reach the other pocket location and repeat leaving stitches for second pocket.
5. Once you’ve worked the top portion of the scarf beyond both pocket openings (leave enough rows above pockets for strength — e.g., 4–6 rows), fasten off.
C. Pocket pieces
6. Using same yarn, pick up the held stitches or foundation chain of pocket width: ch 26 (or your computed width), Row1: sc across, Row2–12: sc across until pocket height ~6 in (or match desired depth). Fasten off and make second pocket the same way.
7. Sew pocket panels to the wrong side of the scarf aligning with the opening — whipstitch the sides and bottom securely. For extra strength add an inside row of hdc on pocket top and sew that row to the scarf top edge.
D. Sunflower appliqué
8. Sunflower center (brown): MR; R1: 6 sc in MR; R2: inc around → 12; R3: sc1, inc around → 18; sl st and fasten leaving tail to sew. Flatten and sew.
9. Petals (yellow) — make 12–16 petals: ch5, sl st in 2nd ch from hook to form small loop or create elongated petal via ch4, 3 dc in loop, ch4, sl st to base depending on desired look. Anchor petals around center: sew petals evenly spaced.
10. Leaves: small flat leaves made with ch8, sc in 2nd ch, hdc, dc, hdc, sc; fasten off and sew near pocket corners for natural placement.
E. Finishing
11. Weave in ends, block sunflower slightly to open petals. Optionally work a narrow sc border around scarf edges and pockets for neatness (1–2 rounds).
Variations
- Make pocket lining in fleece for warmth without visible stitches (hand sew lining).
- Make the scarf in bulky yarn and large sunflowers for dramatic winter look.
- Replace sunflowers with any motif: hearts, stars, or small granny motifs.
Care
- Wool: hand wash cold, lay flat to dry. Cotton/ blends: machine gentle, reshape and dry flat.
Styling
- Wear long draped over a coat with pockets accessible; sunflower side can be on display over one shoulder for visual interest.
2. Crochet Hand-Knitted 3D Roses Scarf Pattern
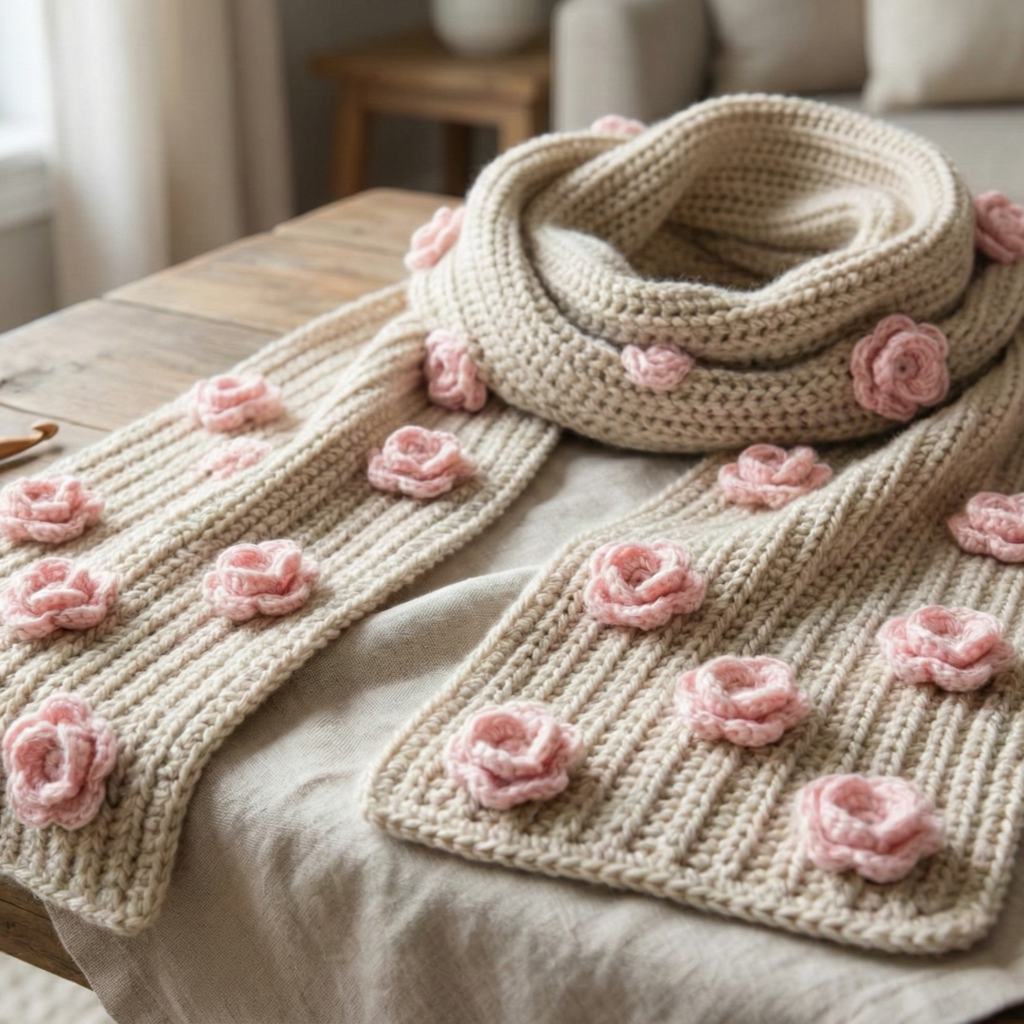
Overview & vibe: A romantic scarf covered in sculptural 3D roses (worked as spirals or layered petals) set on a simple textured band. Works beautifully in a lustrous yarn (silk blends) or cozy merino for winter.
Skill level: Intermediate — 3D flower construction and secure sewing.
Materials
- DK or worsted (for voluminous roses use worsted or hold two strands) — main color for band ~300–450 yd, contrast for roses ~100–200 yd depending on number and size.
- Hook: 3.5–5.5 mm depending on yarn.
- Tapestry needle, blocking pins, optional small beads for rose centers.
Finished size
- Width: ~8–10 in; Length: 60–72 in depending on roses (more roses = shorter scarf maybe 60 in).
Gauge (example)
- 16 dc × 8 rows = 4″ in dc pattern. Make a swatch.
Rose construction (two popular methods)
Method A — Spiral strip (fast and lush)
- Chain about 60 (or adjust based on desired rose diameter and yarn thickness). Row1: sc across (59 sc). Row2: ch3, 5 dc in next st, ch3, sl st in next st repeating will create petals; but the simplest spiral is: ch60, Row1 sc across; then roll the strip and whipstitch the base to form rose. For fuller roses use two layers: make a wider strip (ch80) and roll.
Method B — Layered petal rounds
2. MR; R1: 6 sc; R2: ch3, 3 dc around for petal loops; R3: attach next color and work a shell round into spaces to create an outward curving petal round; repeat until desired size. Sew each round at base.
Step-by-step full scarf
A. Make base band
- Chain foundation to desired width: example ch 32 + 2 = 10 in wide at 3.2 sts/in.
- Work a textured stitch that contrasts and supports petals well: e.g., Row: hdc in 2nd ch, hdc across. Or for a knit-look use hdc in BLO for subtle rib. Continue rows until the band length is the desired scarf length minus allowance for rose clusters (or make full length and sew roses on).
B. Make roses
3. Make 10–16 roses (depending on size) using above spiral or layered methods. Allow roses to cool and block gently (pin to shape if necessary).
C. Attach roses
4. Arrange roses on the band before attaching; stagger slightly for natural look. Sew each rose through the base stitches into the scarf backing by running multiple passes through the rose base and the scarf so the flower holds with no wobble. For extra security, add a circle of felt under each rose and sew through felt as well.
D. Embellish
5. Add small leaves between roses made with ch and sc shaping, and small bead centers if desired (sew beads securely with thread).
E. Finishing
6. Weave ends, block lightly the entire scarf to settle rose placement.
Variations
- Make a single rose focal near one end and fewer roses for a lighter look.
- Use gradient yarn for roses to get an ombré bouquet effect.
Care
- Delicate: hand wash and reshape. If you want washability, make roses removable: sew with just a few stitches so they can be cut free and reattached later.
Styling
- Wear with a simple coat or dress; the 3D roses are the statement — keep other accessories minimal.
3. Crochet Granny Square Black & White Scarf Pattern
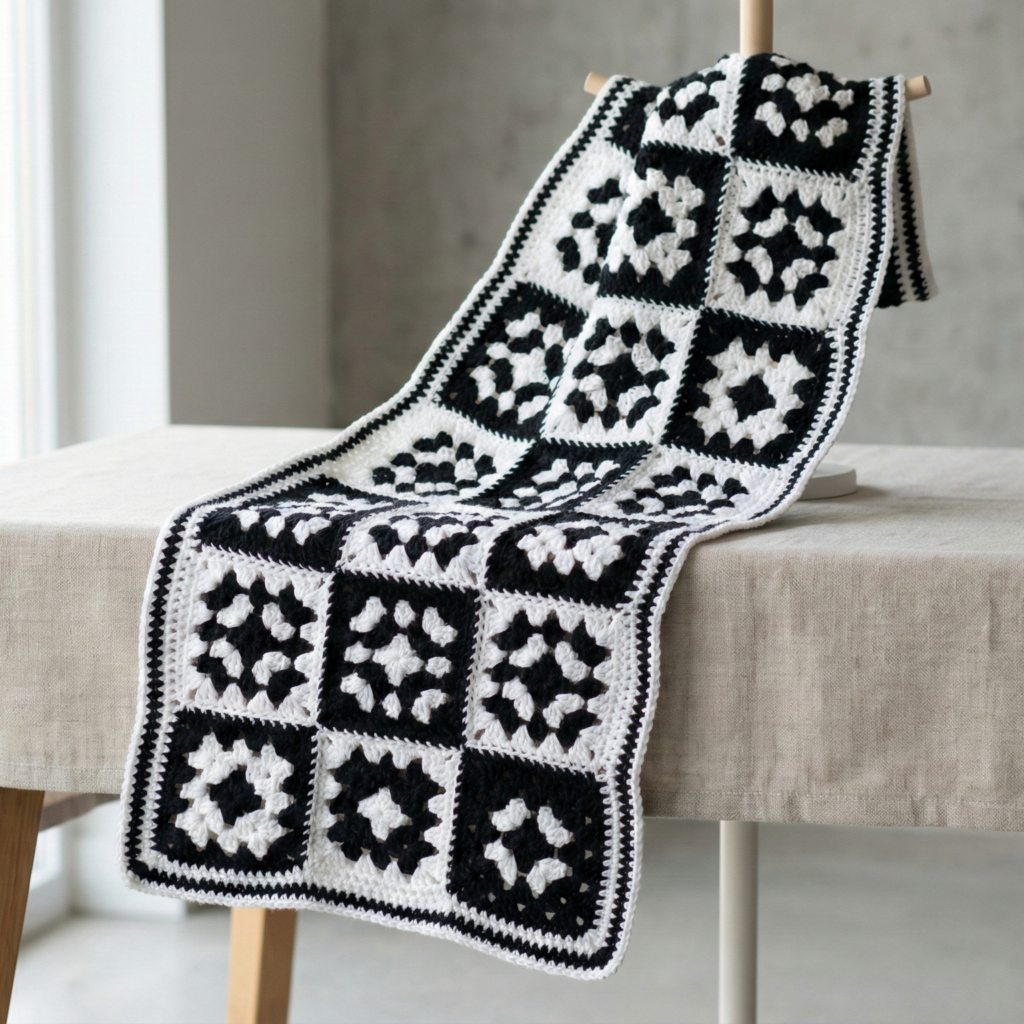
Overview & vibe: A graphic, modern scarf made of alternating black and white granny squares joined into a long strip. Bold, high-contrast and great for seasonal styling.
Skill level: Confident beginner — granny squares and joining techniques.
Materials
- DK or worsted cotton/acrylic in black & white — ~400–650 yd combined depending on square size and scarf length.
- Hook: 4.0–5.0 mm.
- Tapestry needle, blocking pins.
Finished size
- Using 4″ finished granny squares, join 3 squares across by 12 long to create approx 48″ length (crop or extend by number of squares).
Plan & math
- Decide square size first (work a sample granny to blocked size). For a 60 in scarf and 4″ squares you’ll need 15 squares in a line (15 × 4 = 60). For a wider scarf use 2–3 squares across.
Step-by-step
A. Make granny squares
- Classic small granny: MR; R1: ch3 (counts as dc), 2 dc, ch2, 3 dc, ch2 × 3, join. R2–R3 add rounds to reach desired size, alternating color every round or every square. Finish edges neat.
B. Layout
2. Make all squares — for a bold checkerboard alternate colors so each white square neighbors black squares horizontally and vertically.
C. Join-as-you-go (JAYG) or whipstitch
3. Use join-as-you-go to assemble a long strip: lay out first row of squares, then join squares as you make them by slip stitching into the adjacent square’s spaces. Alternatively, seam by whipstitch or mattress stitch on WS after all squares are made.
D. Add border
4. Work 2–3 rounds of sc around the entire assembled strip to create a unifying edge. For a delicate finish add a crab stitch (reverse sc) final round.
E. Finishing
5. Block the entire scarf lightly to flatten squares and neat joins.
Variations
- Use color blocks instead of strict checkerboard for an ombré effect.
- Make baby or infinity version by joining square strips into a loop.
Care
- Cotton/wool choice determines wash; cotton machine gentle, wool hand wash.
Styling
- Black & white scarves are signature pieces that work with bright coats, neutrals and monochrome outfits. Fold over a blazer lapel for a chic, editorial look.
4. Crochet Valentine’s Day Striped Scarf Pattern
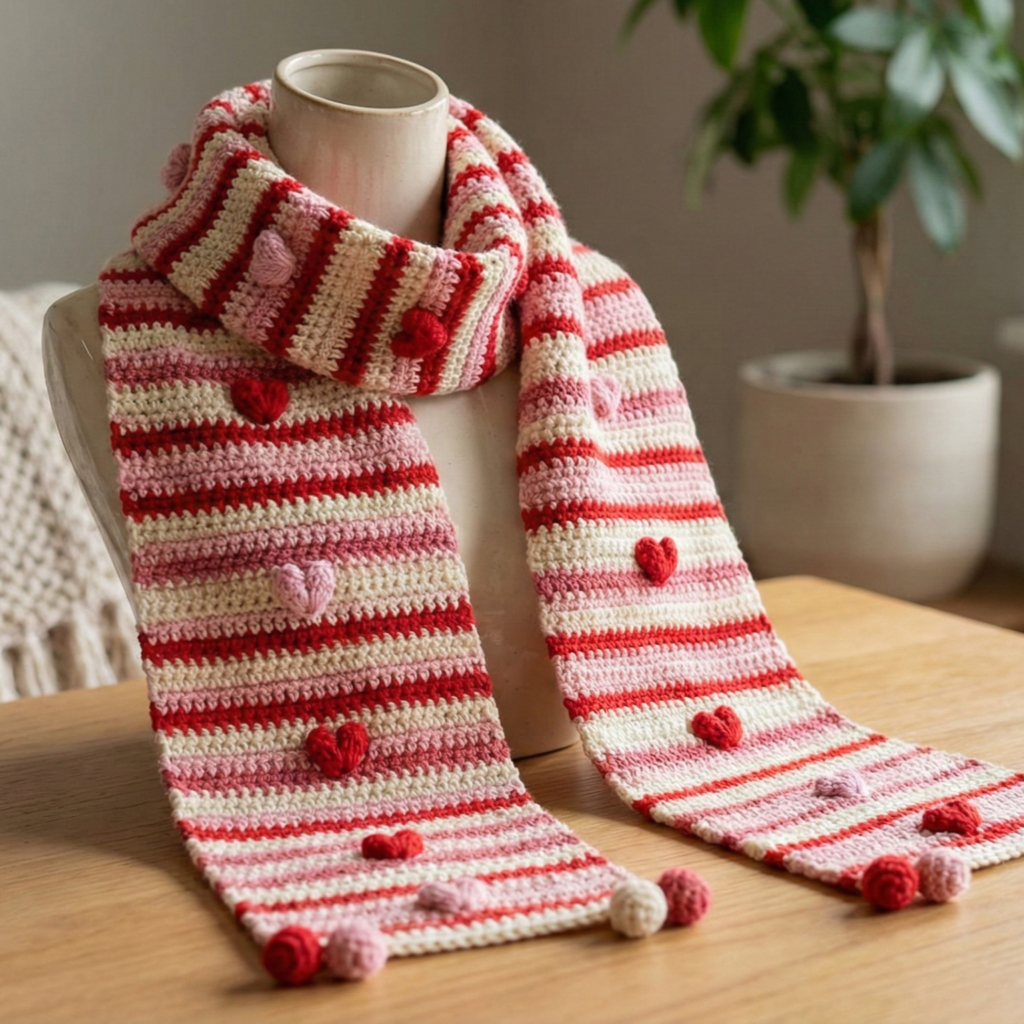
Overview & vibe: A festive scarf of narrow stripes in Valentine’s colors with heart-bobble accents and optional tassels or pom poms — playful and quick to make as a seasonal gift.
Skill level: Confident beginner
Materials
- Sport/DK yarn in red, pink, cream or white — total ~350–500 yd.
- Hook: 4.0 mm.
- Tapestry needle, pom pom maker or small bits of extra yarn.
Finished size
- Width ~8 in; length ~60 in. Stripe width and heart spacing customizable.
Gauge (example)
- 18 dc × 10 rows = 4″ — swatch to confirm.
Step-by-step
A. Stripe base
- Chain to width: example ch 36 + 3. Row 1: dc across. Turn.
- Work rows of dc changing color every 4 rows (or 6 rows for wider stripes). To change color, finish the final yarn-over of the last dc with the new color for a neater join.
B. Heart bobbles (worked on RS)
3. For small heart appliqués or bobbles, make removable small hearts: MR; ch3, 3 dc, ch3 sl st in ring to form petal; make 3 petals and shape into heart; or simply surface-embroider hearts using duplicate stitch on the stripe surface using contrast yarn. Place hearts evenly along the length — e.g., every 6th stripe change.
C. Pom-pom or tassel ends
4. Make small pom poms in matching colors and attach each end or make tassels in a trio at each end for playful movement. Secure with multiple knots through scarf and weave ends.
D. Finishing
5. Weave in ends, and if you used frequent color changes, run a row of sl st across the back to lock floats, or catch floats inside with a tapestry needle.
Variations
- Make a chevron stripe by changing the stitch pattern in alternate blocks.
- Add a narrow lace edge using picots along one long edge for feminine detail.
Care
- Depending on yarn, hand wash or machine gentle. Pom poms often fluff after wash — reshape and air dry.
Styling
- Cute with casual coats and sweaters — tip end with a small knot or a playful pom pom peeking from a jacket collar.
5. Crochet Wisteria Vine Scarf with Pom-Pom Pattern
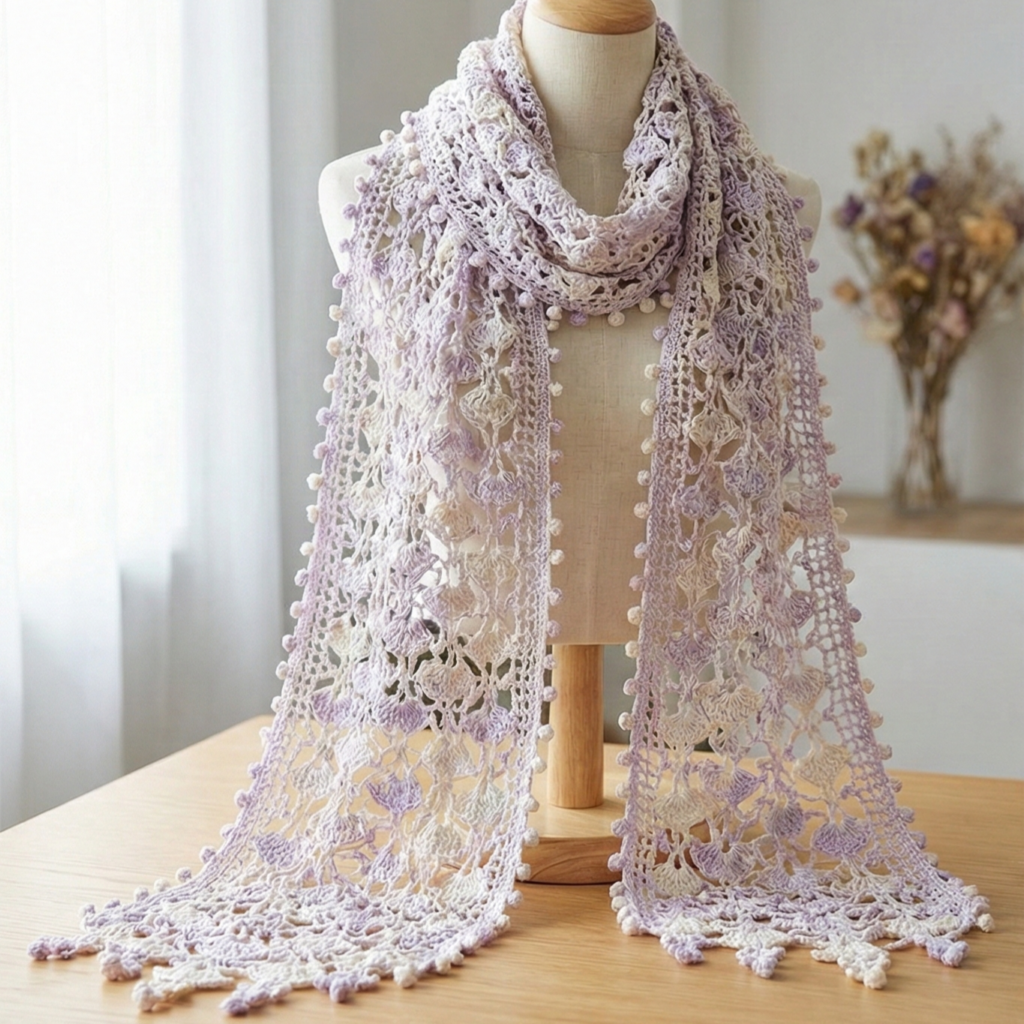
Overview & vibe: A lacy vine scarf with cascading wisteria-like cluster stitches and delicate pom-pom fringe — lightweight and romantic. Especially lovely in lace or silk blends for elegant spring/summer wear.
Skill level: Intermediate — lace repeats + pom pom finishing.
Materials
- Fingering weight silk or cotton blend ~400–500 yd for a long airy scarf.
- Hook: 3.0–3.5 mm.
- Small pom pom maker or scrap yarn for pom poms, tapestry needle.
Finished size
- Width ~7–10 in (lace fans expand); length ~65–80 in to show off trailing vines.
Gauge
- Lace is measured in repeats per inch; e.g., 6 pattern repeats = 4″. Swatch to confirm.
Stitch concept
- The wisteria vine is formed by alternating fan clusters (shells) and chain arches. Cluster stitches form the hanging blooms and the scarf body is airy but long.
Step-by-step
A. Foundation & set up
- Chain foundation: multiple of lace repeat (example multiple of 12 + 3). Example ch 192 for length and width target (adjust per gauge). Work Row1: set up row in dc to stabilize (dc across).
B. Lace repeat (example repeat — adapt for your pattern)
2. Row A: ch5, sk 3, sc in next repeat across to make chain arches.
3. Row B: into each ch5 arch work (3 tr, ch2, 3 tr) to form hanging clusters, sl st into base — these are the wisteria blossoms.
4. Repeat rows A and B in sequence until the scarf reaches desired length. The clusters will hang down and create vertical movement.
C. Pom-pom fringe
5. Make small pom poms in contrasting color (pale lavender, cream) and attach one to each chain arch along both long edges or only on the ends for more subtlety. To attach, sew through the pom pom center into a few stitches of the lace base and knot securely.
D. Finishing
6. Block gently, pinning each cluster so the hanging effect is even. Block pom poms gently out of the way so they don’t get crushed.
Variations
- Add tiny bead accents at the tip of each cluster for a shimmering dew effect. Use a beading needle and pre-string beads on the yarn if using seed beads.
- Work the scarf as an infinity loop by joining ends with invisible seam.
Care
- Silk blends: hand wash cold and air dry flat. Cotton: machine gentle, reshape.
Styling
- Drape across shoulders as a delicate stole or knot loosely for daytime elegance. Works beautifully with a simple dress or linen blazer.
Conclusion
You now have five detailed, stylistically diverse scarf patterns that cover functional, romantic, graphic and festive looks. A few final practical notes to make the blog post shine and help readers succeed:
- Swatch & calculate: always make a 4″ swatch in your pattern and block it to the final shape—then compute stitches per inch and repeat counts precisely. This avoids surprises in width or motif alignment.
- Placement matters: for appliqué or pockets, lay elements out before you sew—take a photo of the layout to keep orientation consistent when attaching.
- Secure attachments: when sewing flowers, pockets or heavy embellishments, use a felt backing and multiple secure stitches through both felt and scarf to distribute weight.
- Blocking is essential for lace: pin the scarf to shape and let it dry completely; this is especially important for the Wisteria Vine scarf to show cluster drape.
- Care labels & yarn notes: for gifting or selling include fiber content and care instructions. For multi-color scarves include a short note on how you secured ends at color changes.
- Photography tips for your post: show each scarf flat (full length), a close-up of stitch texture, one-on-body photo for scale (draped over shoulder, around neck, tucked into a coat), and a detail shot of pockets/appliqués. Natural light near a window gives true color. For pins create a vertical 9:16 Pinterest image featuring a styled shot with bold title text overlay.
- SEO & shareability: give each pattern a short, SEO-friendly meta description and 2–3 suggested Pinterest titles. Example meta: “Sunflower Pocket Scarf — step-by-step crochet pattern with integrated hand pockets and bold sunflower appliqués. Great for weekend markets.”