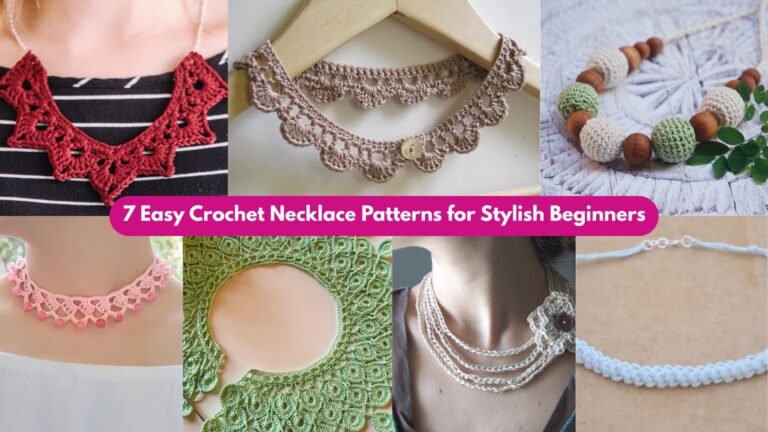
Handmade crochet necklaces are the easiest way to make a statement with yarn — they’re light, customizable, and fast to stitch up. Below you’ll find a full blog-ready post: a helpful introduction with materials, measurements, tools and safety notes, then five fully detailed necklace patterns (Wedding Petals, Wooden Beaded, Lacy Leaf, Bridal Shoulder, and Pearl-in-the-Shell). Each pattern includes materials, skill level, finished-size examples, stitch notes, a step-by-step guide, assembly and finishing tips, styling ideas, and care instructions so your finished necklaces look professional and wear well.
Quick intro — materials, measurements, tools & safety
Yarn / thread choices
- Cotton thread (#10 or #20) or fine mercerized cotton — classic choice for delicate, lacy necklaces (crisp, holds shape).
- Fingering / lace yarn (1–2 ply) — softer, drapier for boho pieces.
- Silk, bamboo, or rayon — luxurious drape and sheen for wedding/bridal jewellery.
- Embroidery/floss or cord — great for beadwork and very fine motifs.
- Use a small hook suitable for your chosen thread so stitches read sharply (see individual patterns for recommended hooks).
Findings & non-yarn materials
- Beads: pearls, glass seed beads, wooden beads, faceted crystals. Match bead hole size to thread/cord.
- Clasps: lobster clasps, toggle clasps, magnetic clasps.
- Jump rings & crimps (if using beading wire/cord).
- Cord ends / end caps and a short length of jewelry wire for secure joins.
- Optional: small felt backing for a pendant, glue (E6000 or jeweller’s), and a light spray fabric stiffener for motifs.
Tools
- Crochet hooks (sizes 0.75 mm — 3.5 mm depending on thread/yarn).
- Tapestry needle and fine beading needle.
- Jewelry pliers (round nose, flat nose, cutters).
- Stitch markers, ruler or tape measure, small sewing scissors.
Necklace lengths (common)
- Choker: 13–15 in (33–38 cm)
- Princess: 17–19 in (43–48 cm) — most common for pendants
- Matinee: 20–24 in (51–61 cm) — casual, layered looks
- Opera: 28–36 in (71–91 cm) — long and dramatic
Decide your target length before you start: you’ll measure as you go and add clasp/chain as needed.
Basic jewelry assembly tips
- If your yarn is soft or slippery, consider using a thin cord (waxed cotton or beading cord) as the inner core for beaded pieces; crochet around it or use it to string beads then crochet over/around.
- Use end caps or tiny crimps to attach crochet cord to jump rings and clasps for a tidy finish.
- If you use glue, use very small amounts and allow full cure time; avoid gluing in contact areas that will flex repeatedly.
Safety note (important)
Because beads and small jewelry parts can be choking hazards, avoid giving pieces with small beads to very young children. Supervise younger teens when using sharp jewelry tools and small parts.
Stitch abbreviations (US)
ch = chain
sc = single crochet
hdc = half double crochet
dc = double crochet
tr = treble (tr)
sl st = slip stitch
mr = magic ring
st(s) = stitch(es)
rep = repeat
sp = space
YO = yarn over
1. Crochet Wedding Petals Necklace Pattern
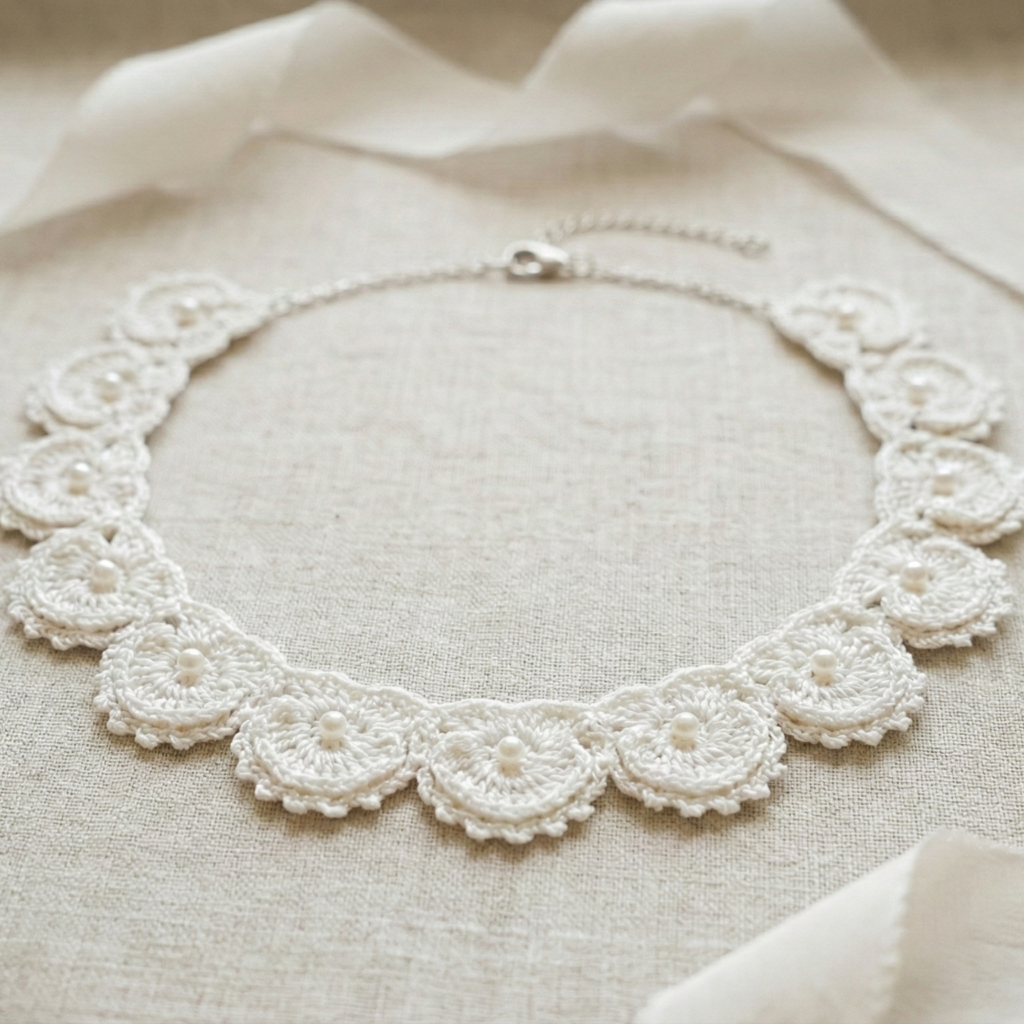
Delicate, romantic petal motifs linked into a collar or pendant necklace — perfect for brides, bridesmaids, or elegant everyday wear.
Skill level: intermediate (small motifs + joining)
Materials (for a princess collar ~17–18 in)
- Size 10 mercerized cotton thread (or fingering with smaller hook) — ~100–150 yd.
- Hook: 1.5–2.5 mm (match thread).
- Small seed beads or tiny pearls (optional) — 30–50.
- Fine jewelry chain (optional extender), 2 jump rings, 1 lobster clasp, small end caps or a few crimps, jewelry pliers.
- Tapestry needle, blocking board/pins.
Finished concept
Make 10–14 small floral “petal rosette” motifs and join them into a crescent collar that sits at the collarbone. Add tiny pearls in centers if desired.
Stitch notes
Motif is worked in rounds: MR → petal round → picot edging. Join-as-you-go on final round to create a flat necklace.
Step-by-step
A — Make a single petal motif (make 12 for a 17.5 in collar)
- MR, ch3 (counts as dc). R1: 11 dc into MR. Join with sl st to top of ch3. (12 dc)
- R2: ch4, skip 1 st, sl st in next around to make 6 arches. Join.
- R3 (petals): Into each ch4 arch work (sc, hdc, 3 dc, hdc, sc) — this makes 6 rounded petals. Fasten off, leaving ~6–8 in tail for joining. Block motif to open petals.
B — Join motifs into necklace
4. Layout motifs in a crescent curve on blocking board. For join-as-you-go: when you crochet the final petal round of a new motif, slip-stitch into the matching petal of the already-laid neighbor at a single point (or sew with tail for precise placement). Alternatively sew motifs together through the petal base with the long tails. Aim for slight overlap so the seam is hidden by petals.
C — Add bead centers (optional)
5. Using a beading needle and thin thread, sew a small pearl into the center of each motif and secure with several passes, knotting tail and burying end inside petals.
D — Create inner band & finishing
6. After motifs are joined into a crescent, crochet a neat inner band: with thread, pick up stitches along the inner straight edge and work 4 rounds of sc to create a stable band. Add a little length to each band end for attaching findings (~0.5 in). Attach end caps or fold and sew band ends around small jump rings: if using end caps, place cord inside cap and crimp; if sewing, stitch through band end and the jump ring until secure.
- Attach jump rings and a short chain + lobster clasp (or sew in a small loop and use a toggle/clasp).
E — Optional pendant version
- Make a larger petal motif (use more rounds) and mount it on a small piece of felt for stability; sew or glue a loop at top and hang it from a thin crochet chain or delicate jewelry chain.
Styling
- Wear over a strapless dress, boat neck wedding gown, or over a simple tee for romantic contrast. For a bridal set, make matching earrings with 1–2 mini petal motifs attached to earring hooks.
Care
- Hand-wash gently and reshape while damp. Store flat to protect petal shape.
2. Crochet Wooden Beaded Necklace Pattern
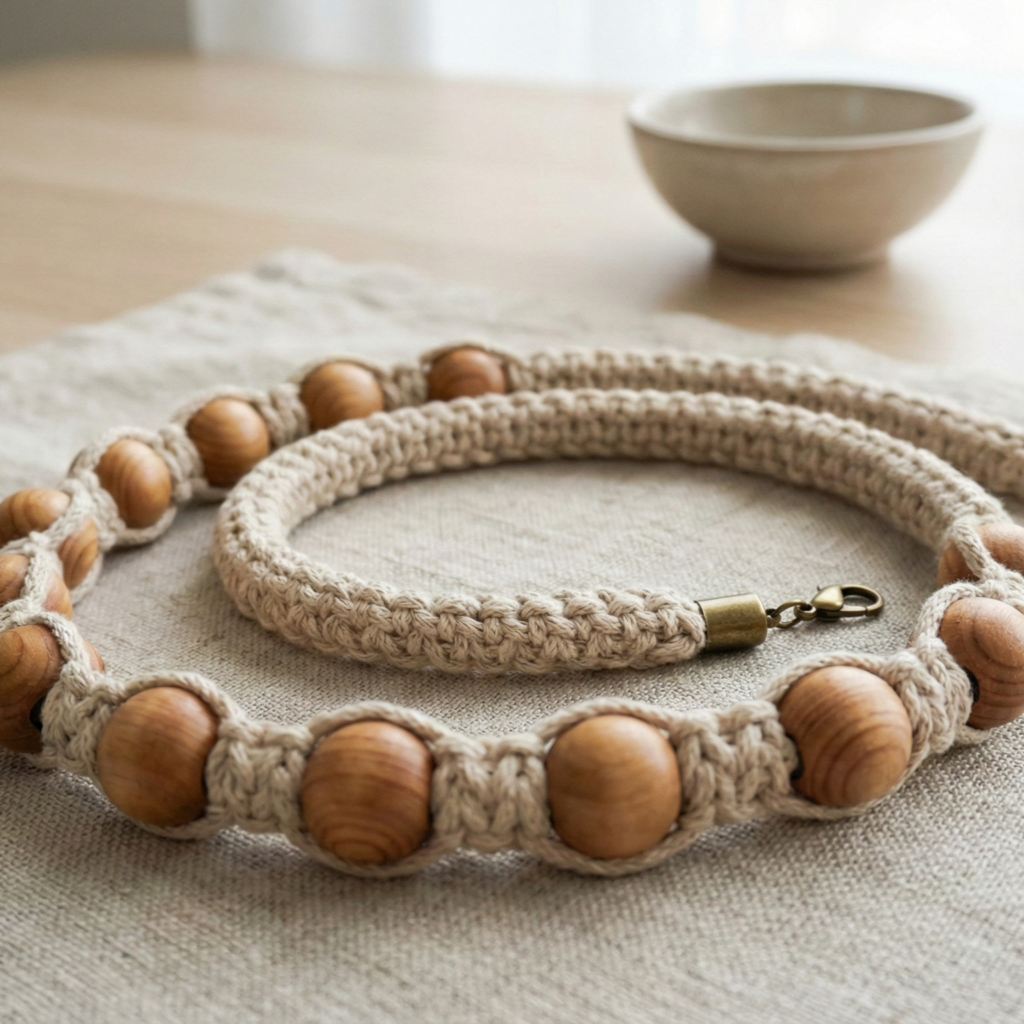
Casual, boho and tactile — a crocheted cord threaded through natural wooden beads. Very quick and great for beginners.
Skill level: confident beginner
Materials (one long matinee ~22 in)
- Cotton macramé cord or 2 strands of DK cotton held together (~100–150 yd depending on length).
- Hook: 3.5–5.5 mm depending on cord thickness (you’re making a tight tube).
- Wooden beads with large holes (bead hole ≥ 2.5–3 mm) — about 12–20 depending on spacing.
- End caps, jump rings, clasp (or tie ends for slip-on).
- Jewelry pliers, tapestry needle.
Finished concept
Crochet an i-cord–style tube (or tightly-worked single crochet rope) and slide wooden beads on as you go (or string them on first and crochet through them). Finish with caps and clasp.
Step-by-step
A — Make a crochet bead cord (method A — string beads on cord first)
- Before crocheting, cut a long length of cord (allowing for hook and a little extra) and slide all beads onto cord (use thin beading wire to help thread if needed). Position beads out of the way.
- Using the cord on hook, make a tight chain the length you want the necklace to be plus 1″ for finishing. Join into a ring (optional) or work tubular sc over the cord: sc into each chain stitch then slide the bead along to its intended position, or, easier, work single crochet in continuous rounds around the cord to create a neat tube: ch 6–8, join, sc around in the round for desired length.
B — Method B — crochet then bead
- Crochet a rope using foundation sc into a chain then sc in rounds (or make a crocheted i-cord): ch 3, sc in 2nd ch and next, ch1, pull through to make small tube; continue and then use a beading needle to thread beads onto the finished cord.
C — Adding beads as you go
2. For integrated beads: every N stitches (e.g., every 4″), slide one wooden bead down the cord and hold it to the outside of your tube; when crocheting over that area, work the sc so the bead is locked into place (crochet around bead and cord). This secures beads without extra glue.
D — Finishing
3. Trim ends short and insert into end caps. Use a drop of glue inside cap for extra hold; crimp if caps are supplied with crimp rings. Attach jump rings and clasp. Or simply tie a tight knot and hide ends inside the end cap before inserting.
Styling
- Make adjustable length with a sliding knot or an extender chain. Use painted wooden beads for color pops or raw wood for earthy neutrals.
Care
- Wipe beads with a damp cloth. If cord is cotton, hand wash gently.
3. Crochet Lacy Leaf Necklace Pattern
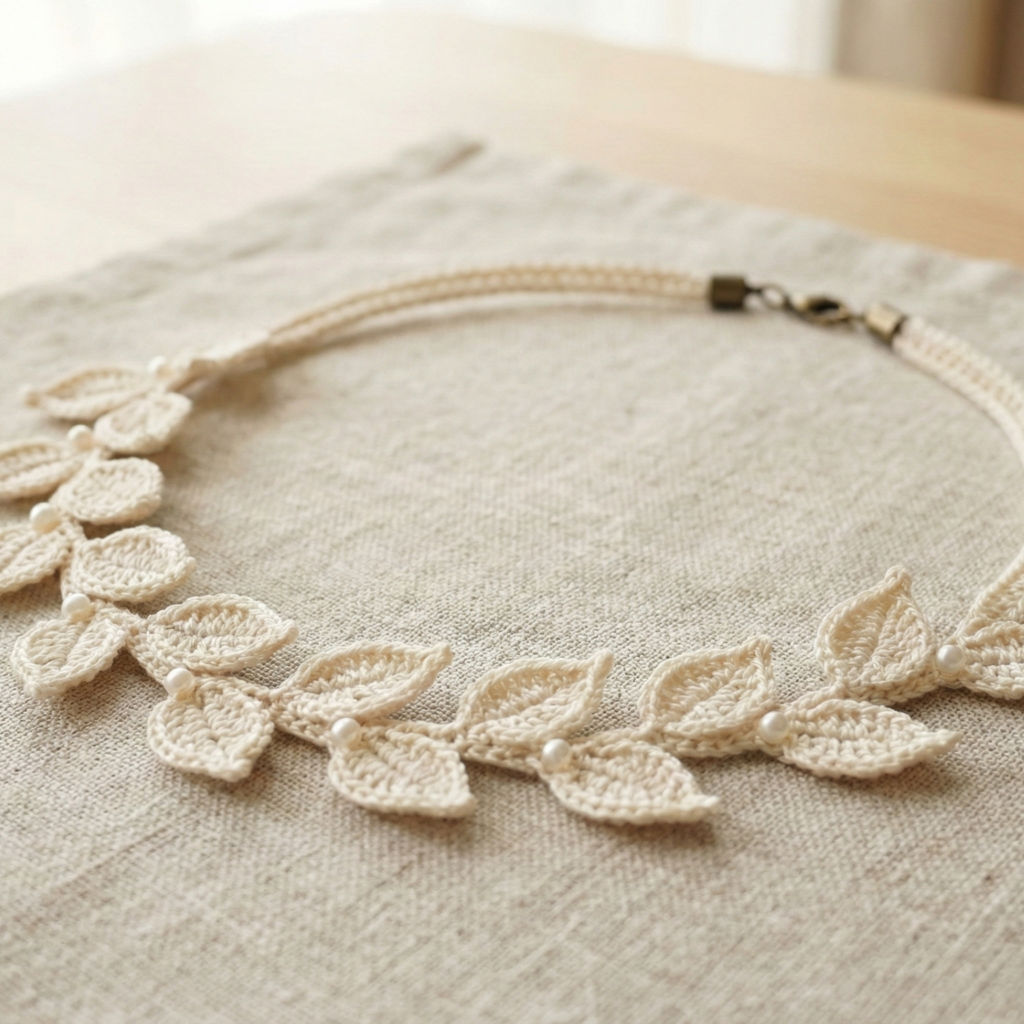
Delicate leaves worked as a series of layered leaf motifs — great as a single long pendant strand or a short collar with dangling leaves.
Skill level: intermediate (small shaping + assembly)
Materials (princess collar + 9 leaves)
- Size 10 cotton thread or fine lace yarn — ~80–120 yd.
- Hook: 1.5–2.5 mm.
- 9 small beads for leaf centers (optional), 2 jump rings, clasp.
- Tapestry needle, blocking supplies.
Finished concept
Crochet a slender inner chain band (sc rounds) and stitch-on or join leaf motifs that overlap slightly like a vine. Leaves can be worked flat and sewn on, or worked in the round and joined-as-you-go.
Leaf motif (make 9)
A — Leaf pattern (flat leaf)
- Ch 9. Row 1: sc in 2nd ch from hook, sc across (8 sc). Turn.
- Row 2: ch1, sc in next 3, hdc in next, dc in next 2 (tip), hdc in next, sc in last — now decrease along opposite side: sc2tog, sc across to end. You’ll create a tapered leaf. Fasten, block flat.
B — Work many leaves
2. Make 9–12 leaves depending on length. Embellish with tiny bead sewn into base of each leaf or a picot on the tip.
C — Make inner band
3. Chain the length for your neck minus leaf coverage (e.g., 15 in inner band if full necklace length with leaves will be 17 in). Join into ring and work 4–6 rounds sc (or hdc) to make a stable but flexible band.
D — Attach leaves
4. Sew leaves to the band with small stitches at the base so they overlap slightly. Start at center front and attach symmetrically each side. Use a tiny bead at each leaf base for decorative anchor if you like.
E — Finishing
5. Add end caps/jump rings to band ends and attach clasp/chain.
Variations
- For a longer vine necklace, crochet the leaves on a long crocheted chain and leave ends to tie or finish with a clasp.
- Make leaves in ombré greens for a more organic look.
Care
- Hand-wash fine cotton pieces; reshape leaves while damp.
4. Crochet Bridal Shoulder Necklace Pattern
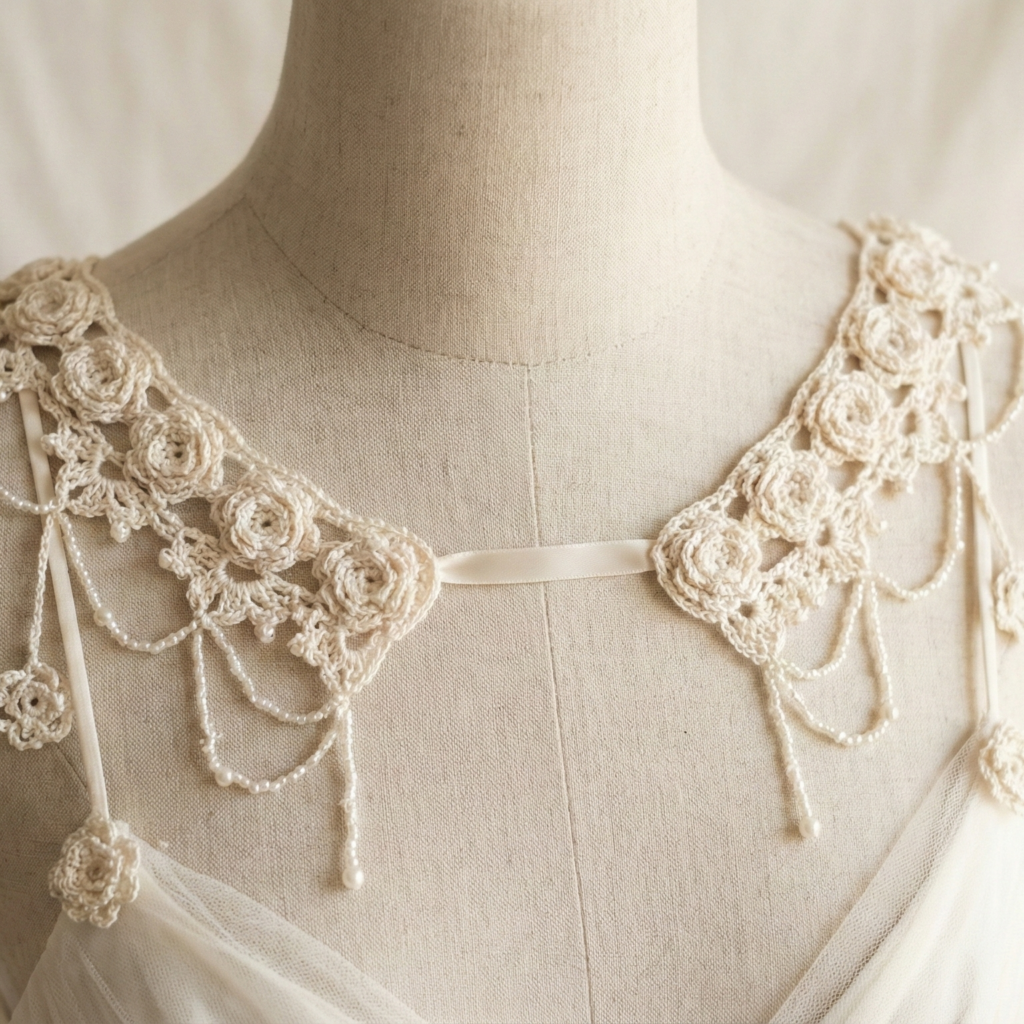
A dramatic statement piece that drapes over both shoulders — a detachable decorative collar for bridal gowns or formal wear.
Skill level: advanced (shaping, many motifs, fittings)
Materials (shoulder drape that covers front & back yoke)
- Mercerized cotton or silk-blend thread (size depends on desired drape) — 300–600 yd (varies widely).
- Hook: 1.75–3.0 mm.
- Many small rosette and lace motifs, small seed pearls (optional), several jump rings.
- Lightweight satin ribbon or short chain and lobster clasp for fastening at center back or front.
Finished concept
Create two mirrored shoulder panels (left & right) joined at the chest with a small central clasp or ribbon tie and draping pieces in front/back so the necklace looks like jewelry and a light shoulder cape.
Design & structure
- Each shoulder panel = a grid of small motifs (rosettes, small shells, leaf sprays) that form a comfortable pad across the shoulder. Chains, beads and small dangling motifs add sparkle and movement.
Step-by-step (overview)
A — plan & measure
- Measure from shoulder tip across chest to the front center (or halfway to the neckline) as well as back to center back. Decide how wide the shoulder pad should be (e.g., 3–5 in across the shoulder). Sketch the shape.
B — make motif modules
2. Make small rosettes (rolled petal strips or round layered motifs) and small connecting chains of lace (tiny fan rows). Each rosette ~2″. Make enough to create left and right panels (e.g., 6 rosettes per panel arranged in 3×2 grid = 12 rosettes total + connecting lace).
C — assemble shoulder panels
3. Join rosettes into panel shapes with join-as-you-go or whipstitch flat so seams are invisible. Add small lace connectors (dc arches or chain lace) to fill gaps and shape the panel to the contour of the shoulder.
D — add drape chains & beads
4. At the front and back edges add decorative beaded chains and small dangles (tiny pearls on beaded briolettes) — attach with a small jump ring or sewn loop. Keep weight light — too heavy will pull.
E — connectors & fastenings
5. Connect left & right panels across chest with a delicate chain and a clasp at the center (or two ribbon ties to the gown’s loops). For a bridal gown, a satin ribbon tie in the front looks elegant and can be hidden under a bow.
F — fit & finish
6. Try on over the gown or a blouse. Adjust placement and sew or add extra connectors where panels move. Trim yarn tails and reinforce every connection. Add a felt backing if you want to protect the garment fabric beneath.
Styling
- This piece is worn like a jewelry shawl over sleeveless or strapless dresses. It’s detachable so the wedding dress remains unchanged.
Care
- Because of beads and delicate joins, spot-clean or hand-wash gently and reshape on a form or flat towel.
5. Crochet Pearl in the Shell Necklace Pattern
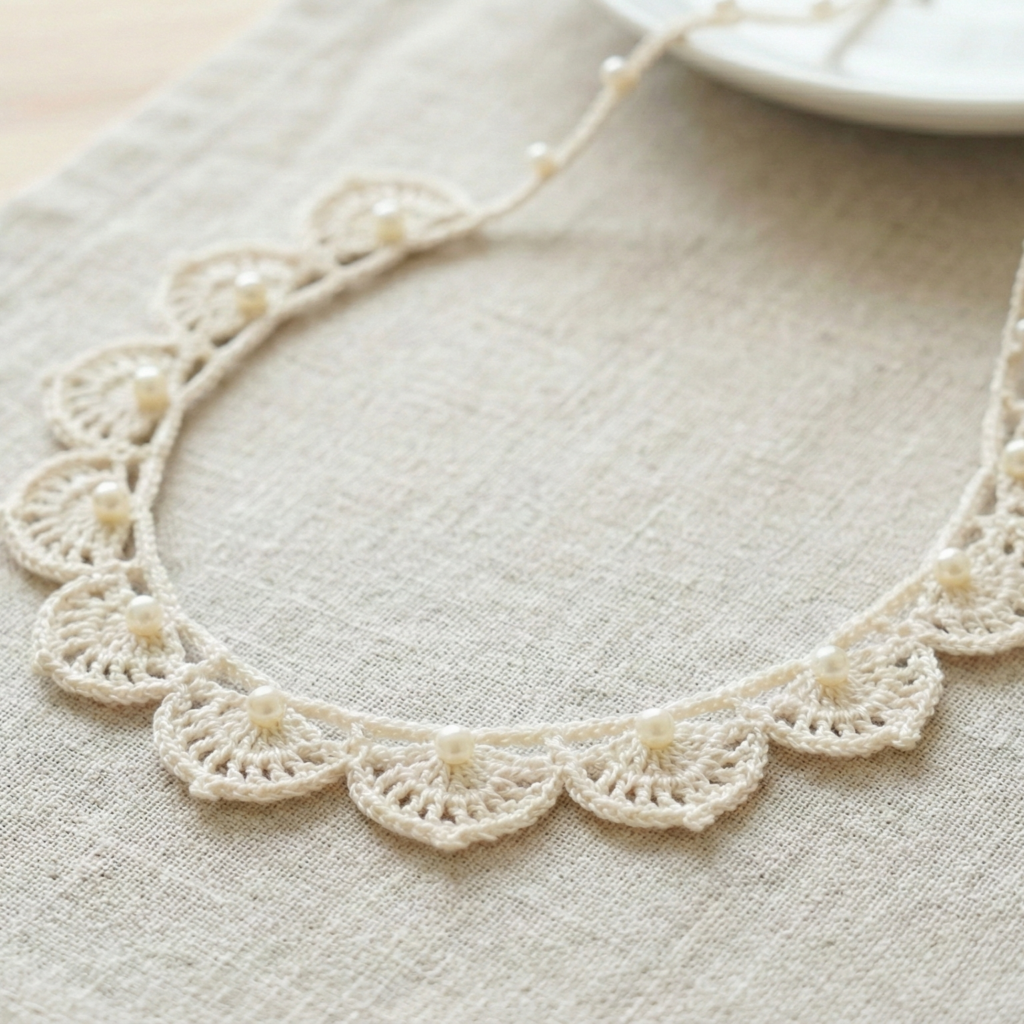
Tiny crochet shells that cup pearls — a playful, elegant motif repeated on a chain for a seaside-inspired piece.
Skill level: confident beginner → intermediate
Materials (princess necklace with 9 shells)
- Fine cotton thread or fingering yarn — ~80–120 yd.
- Hook: 1.75–2.75 mm.
- 9 small cultured or faux pearls (6–8 mm), or seed pearls for delicate look.
- Thin jewelry chain or crochet cord for the necklace base; jump rings & clasp; flat-nose pliers.
Finished concept
Each shell is a little 3–5 dc scallop that is sewn around a pearl so the pearl sits snugly in the shell. Shells are spaced along a thin chain or crocheted cord.
Shell motif (make 9)
A — Tiny shell pattern
- MR, ch1. Round 1: 6 sc in MR, sl st to join. (6) — this is the cup base.
- Round 2 (shell row): ch3, 5 dc in next st, ch3, sl st in next st — repeat to make three or four tiny shells around the base (adjust so the shell will hold a small pearl). Fasten off leaving long tail.
B — Insert the pearl
2. Slip the pearl into the ring so it sits centered. Using the long tail, whip-stitch the base circle closed behind the pearl and catch a few stitches over the pearl edge so it’s held snugly but not glued. If pearl is slippery, use a tiny dab of jeweler’s glue inside the base before stitching (use very sparingly). The thread should make a small cup so the pearl is visible but secure.
C — Spacing & mounting
3. Decide necklace length and spacing (e.g., 9 shells across a 17–18 in length → spacing every ~1.5–2 in). Make a crocheted cord the desired length (chain the required number of stitches, then sc in back loops to form a neat cord) or use a fine jewelry chain.
- Attach shells to cord/chain by sewing the base tail through the cord and around a few times, or by connecting the shell base to the chain with a tiny jump ring through a small picot loop made on the shell base.
D — Finishing
5. Add jump rings and a clasp. Make sure shells are level and pearls face outward.
Variations
- Use colored glass beads instead of pearls for fun pops of color.
- Make one large pendant shell with a larger pearl and wear it on a simple chain for a focal necklace.
Care
- Avoid soaking pearls in perfumed water; wipe pearls gently with a soft cloth. Hand-wash the thread gently if needed and reshape.
Final finishing tips, troubleshooting & packaging ideas
- Tension & drape: jewelry pieces across the neck usually look best when slightly snug and not floppy. Use smaller hooks for crisper shapes (petals will hold up) or larger hooks for softer drape (leaf necklaces).
- Securing ends: never rely only on a knot to attach construction yarn to metal findings — sew through the band and back through several times or use an end cap/crimp.
- Blocking: always block small motifs to shape petals, leaves, and shells before assembly. A crisp motif looks much more professional.
- Knot hiding: bury knots inside petals, shells or under beads so the outside surface looks clean.
- Presentation: package necklaces on a small card with a velvet backing, or display on a simple bust for photos — add a care card with fiber content and cleaning instructions.
conclusion
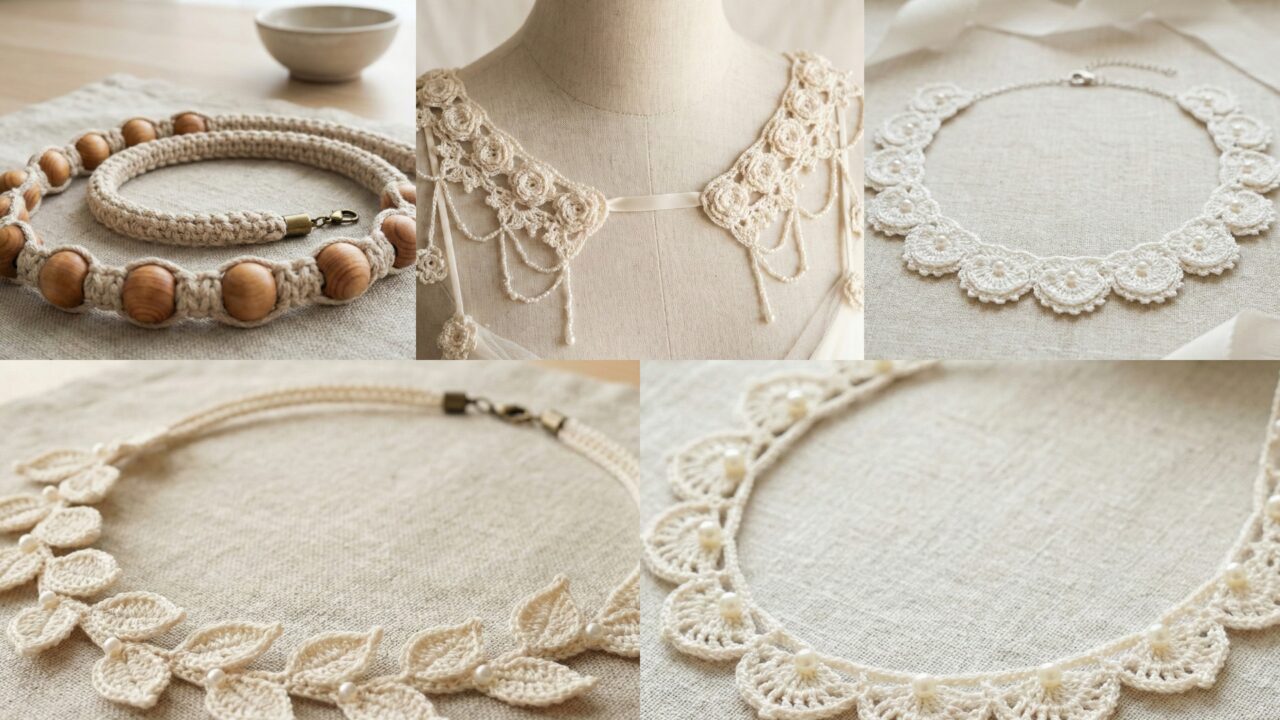
These five crochet necklace designs give you a range of styles you can make into sellable pieces, gifts or keepsakes:
- the romantic Wedding Petals collar,
- a tactile Wooden Beaded boho rope,
- delicate, nature-inspired Lacy Leaves,
- a dramatic Bridal Shoulder drape for special occasions, and
- the pretty, seaside Pearl in the Shell strand.