Headbands are one of the most satisfying quick projects: small, useful, wearable, and easy to customize for every season. Below you’ll find a single introduction followed by five complete headband patterns — Zigzag Striped, Floral Granny Squares, Mushroom Appliqué, Boho Summer Lacy, and Cottagecore Tulip — each with materials, skill level, clear step-by-step instructions, gauge & sizing math, finishing options, and variations. Read the intro and sizing notes once, then jump to the design you like.
Quick essentials (tools, yarn, abbreviations, sizing)
Tools & yarn
- Yarn: choose yarn appropriate for the season and stitch: worsted (category 4) or aran for cozy winter headbands; sport or DK for all-season; cotton or linen blends for warm weather. Many headbands use 1 skein or under 150 yd.
- Hooks: typical sizes 3.5–5.5 mm depending on yarn. See each pattern’s recommended hook.
- Notions: tapestry needle, stitch markers, scissors, measuring tape, small elastic (optional for extra hold), optional blocking tools.
Common abbreviations (US)
- ch = chain
- sc = single crochet
- hdc = half double crochet
- dc = double crochet
- tr = treble (UK dc)
- sl st = slip stitch
- rep = repeat
- tog = together (decrease)
- st(s) = stitch(es)
- BLO / FLO = back/front loop only
- MR = magic ring
How to size a headband (simple method and examples)
Headbands are measured by the finished length around the head where the headband will sit (above the ears for ear warmers or across the forehead for fashion headbands). Use a soft tape measure around your head where you want the band to sit. Typical adult head circumference targets:
- Small / Child: 19–20 in (48–51 cm)
- Medium / Women: 21–22 in (53–56 cm) — common average ~21.5 in
- Large / Men: 23–24 in (58–61 cm)
Headbands are elastic to a degree. If you want a firm ear-covering earwarmer, aim for very close fit (1–2% negative ease). For decorative headbands allow 1–3% positive ease for comfort.
Gauge & stitches-per-inch math (worked example)
- Make a small swatch in the stitch you plan to use (in the round or flat, depending on construction). Measure stitches per inch (spi). Example: your 2-inch swatch has 20 sc → spi = 10 sc/inch.
- Multiply spi × target circumference to get stitches needed. Example: target = 21.5 in × 10 spi = 215 stitches.
- Adjust to the stitch repeat required by the pattern (e.g., chevron multiple of 14 + 2). Round to nearest valid multiple. If result is 215 and pattern repeat is 14, 14 × 15 = 210 (slightly snug) or 14 × 16 = 224 (slightly loose). Pick the one that gives desired fit.
- For styles that have a wide band (more height) you may want to make the top pattern slightly shorter and add a stretchy join (elastic thread) at the back for comfort.
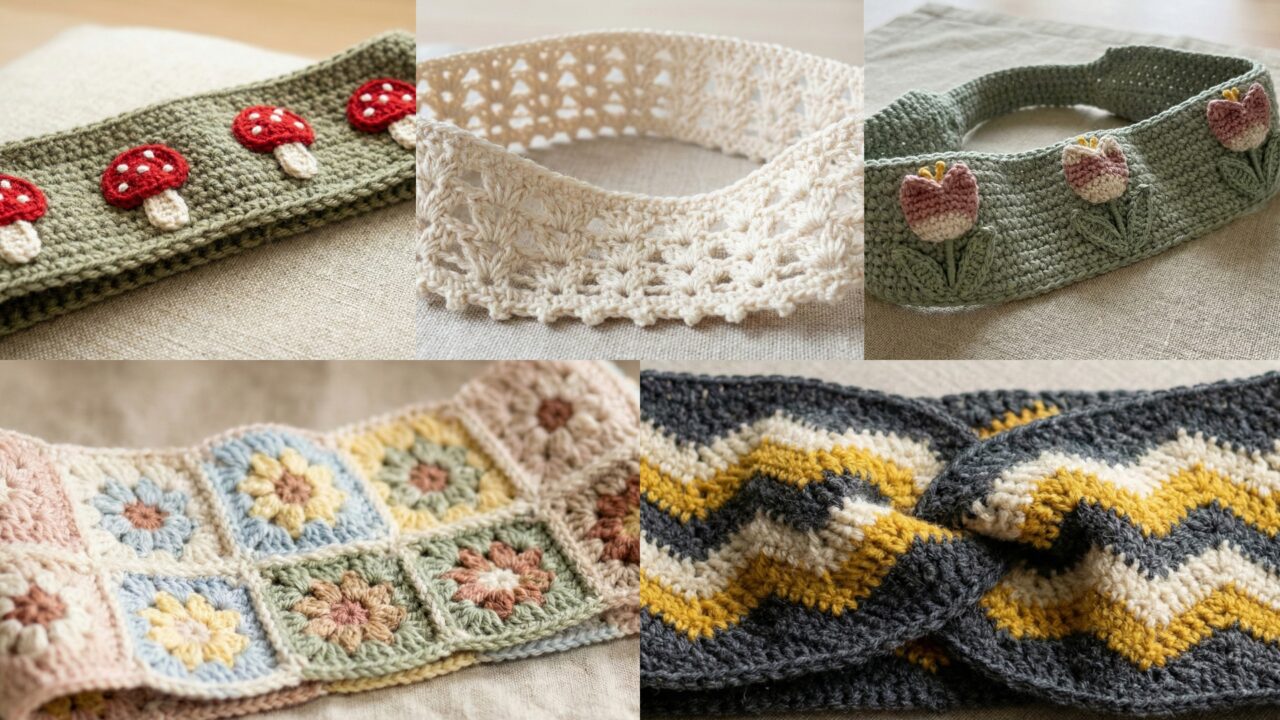
1. Crochet Zigzag Striped Headband Pattern
Vibe: modern chevron/zigzag stripes — bold color blocks or subtle tonal changes. Works well in worsted or aran for winter warmth.
Skill level: confident beginner — basic increases/decreases and color changes.
Finished width: typical 3.5–4.0 in (9–10 cm) wide (adjustable).
Materials
- Worsted weight yarn (MC + 1–3 contrasting colors) ~120–160 yd total.
- Hook: 5.0 mm (H) or hook to obtain gauge.
- Tapestry needle, stitch markers, optionally a small piece of elastic for back.
Stitches used
- dc (double crochet), dc2tog (decrease), ch, sl st. Chevron is formed by increases and decreases.
Gauge (example)
- 12 dc × 6 rows = 4 in. Use your own gauge to calculate stitch counts.
Construction overview
Work a rectangular panel in chevron (zigzag) stitch, seam ends (overlap or join with twist), and add a lining or banding for comfort. For a knotted or twisted front, join rectangle with a twist before seaming.
Step-by-step
Panel foundation
- Decide target head circumference (example medium: 21.5 in). Swatch to find spi in dc. Example spi = 3 dc/inch (example only). Required stitches = 21.5 × 3 = 64.5 → round to 66. Chevron multiple example = 12 + 3 (for symmetry). Choose 63 or 75 etc. For example pick 63 (multiple of 12 + 3) if that fits the math.
- Ch foundation = your chosen stitch count + 2 turning ch. Example: ch 65 (63 + 2).
Row 1 (setup)
3. Row 1: dc in 4th ch from hook (counts as first dc), dc in next 7 ch, dc2tog (decrease), ch 1, skip 1 ch, (2 dc, ch 1, skip 1 ch) in next ch (this forms the peak), then dc in next 7 ch, dc2tog repeat across finishing with dc to end. This creates shallow chevrons; exact placement depends on your multiple — follow a standard chevron chart sized to your multiple. Turn.
Note: If you prefer an exact chevron repeat, use a known multiple: (multiple of 14) example pattern: dc in next 5, dc2tog, ch 1, skip 1, (2 dc in next) repeat — many chevron tutorials are easy to adapt; match to your chosen multiple.
- Rows 2–X: ch 3, dc across following peaks and valleys made in previous row, maintaining increases (2 dc in valley) and decreases (dc2tog at each valley top) to keep zigzag. Work until panel height = desired width (e.g., 3.5–4 in). Finish on an even row and fasten off.
Finishing and join options
5. Option A — Basic seam: fold rectangle so ends meet and sl st or mattress stitch seam the short edges together with RS facing out — you’ll have a tubular headband.
6. Option B — Twist front knot: lay panel flat, make one half-twist of the panel once and bring ends together, then seam ends to form tube; align twist to front and seam at back for a knot look.
7. Option C — Top seam with overlap: fold ends to overlap by ~1 in and sew to create a smoother inside seam (comfortable against skin).
Optional lining & elastic
8. To add stability and comfort, sew a 1-inch wide strip of soft fleece as a lining inside the headband or pick up sts along inner edge and work a round of sc BLO to create a fold-in casing for thin elastic. Insert elastic of length slightly less than circumference (for snug fit), sew ends of elastic securely and hide within casing.
Edge finishing
9. Work 1 round sc around inner and outer edges for a neat look. Weave in ends.
Variations & styling
- Use 2–3 contrasting colors for bold stripes; change color every 3–6 rows.
- Make a wider headband for ear coverage by adding more rows.
- Use bulky yarn and larger hook for plush ear warmer.
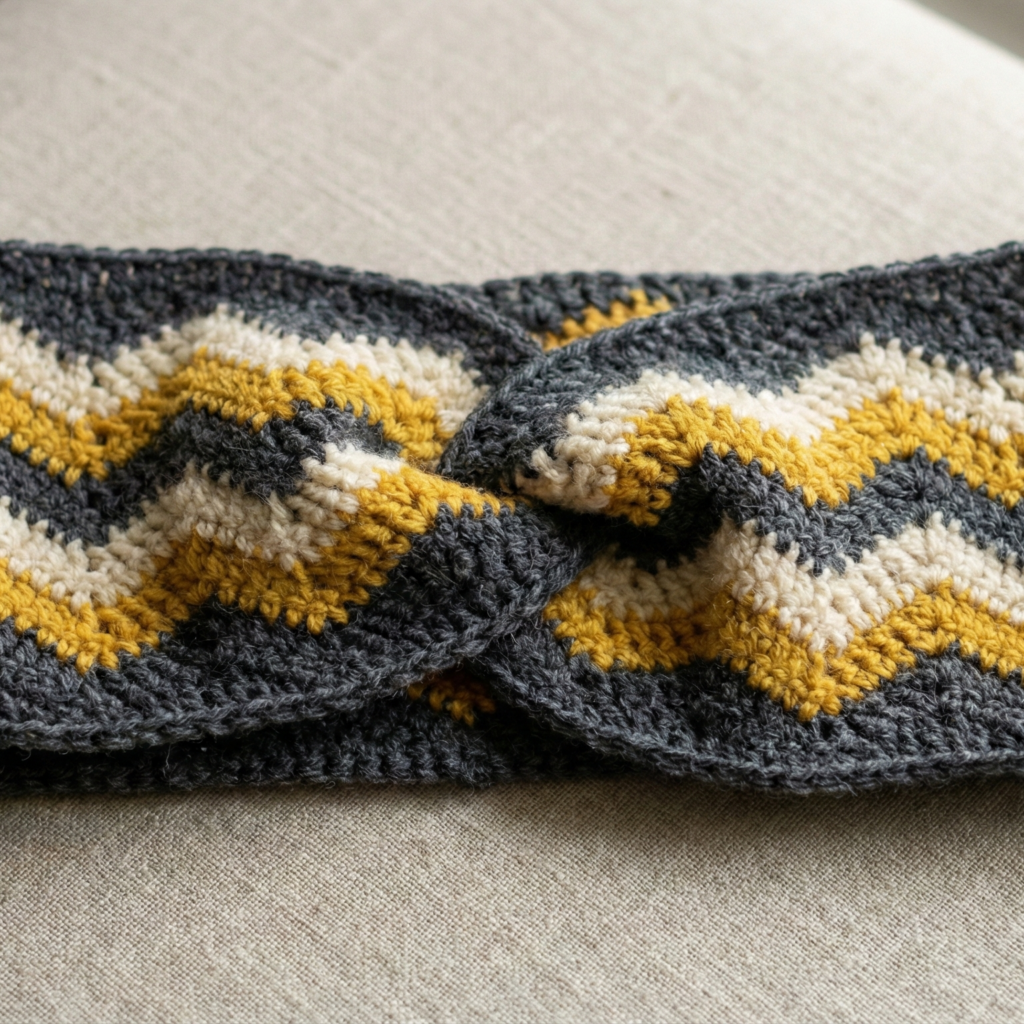
2. Crochet Floral Granny Squares Headband Pattern
Vibe: cottagecore floral charm — a strip of small granny square flowers joined into a band. Great for leftover yarn and multi-color headbands.
Skill level: confident beginner — basics of granny squares and seaming.
Finished width: depends on granny size — typical 2–3 square panels tall (e.g., 3×1 layout) for ~3–4 in wide.
Materials
- Worsteds or DK in multiple colors — 50–150 yd depending on number of squares.
- Hook: 4.0 mm (G) for worsted or 3.5 mm for DK (adjust).
- Tapestry needle.
Construction overview
Make multiple small floral granny squares, join into a strip to desired length, add a sturdy backing or border, and seam into a loop. You can make a single wide band (stacked squares) or a thin chain of squares for a delicate band.
Step-by-step
Granny square (flower center) — make as many squares as needed to reach circumference
- MR, ch 3 (counts as dc), 2 dc in MR, ch 2, 3 dc in ring, ch 2 rep 3 more times to create four 3-dc clusters separated by ch-2 corners. Sl st to join. (This is Round 1 of classic granny.)
- Round 2: Sl st into corner ch-2; work (3 dc, ch 2, 3 dc) in corner, ch 1, 3 dc in next ch-1 space repeat around to expand for one or two rounds until square reaches ~2.0–2.5 in across (finished). Use a contrasting color for the flower petals on Round 2 by working petal loops before the granny rounds (e.g., make 5-chain loops that become petals then work granny joining rounds around). Block squares lightly.
Layout & join
3. Decide layout: for a 21.5 in headband, if each square is 2 in and you plan to place squares side-by-side, you need ~11 squares (21.5 ÷ 2 = 10.75 → 11). Arrange squares in one row or two rows (double stacked) for width. For a 2-row headband with squares 2 in each, you might need 11 × 2 = 22 squares to form a 2×11 rectangle; fewer if you choose larger squares.
- Join squares with join-as-you-go (JAYG) or whipstitch: whipstitch RS together with yarn and tapestry needle (tight joins). For a neater edge pick a single color border after joining: pick up and work 2–3 rounds of sc or shell around the whole assembled strip.
Backing & rim
5. To make the band comfortable, pick up stitches along inner edge and work 1–2 rounds sc in a softer yarn or add a felt lining. This hides seams and makes the headband comfortable against the skin.
Seaming into a loop
6. Overlap ends slightly and whipstitch to join; for stability add a short piece of elastic inside seam and stitch in place before closing entirely.
Variations & tips
- Make flower squares with raised petals using picot or cluster stitches for dimension.
- Use monochrome for elegant look or rainbow scrappy squares for playful vibe.
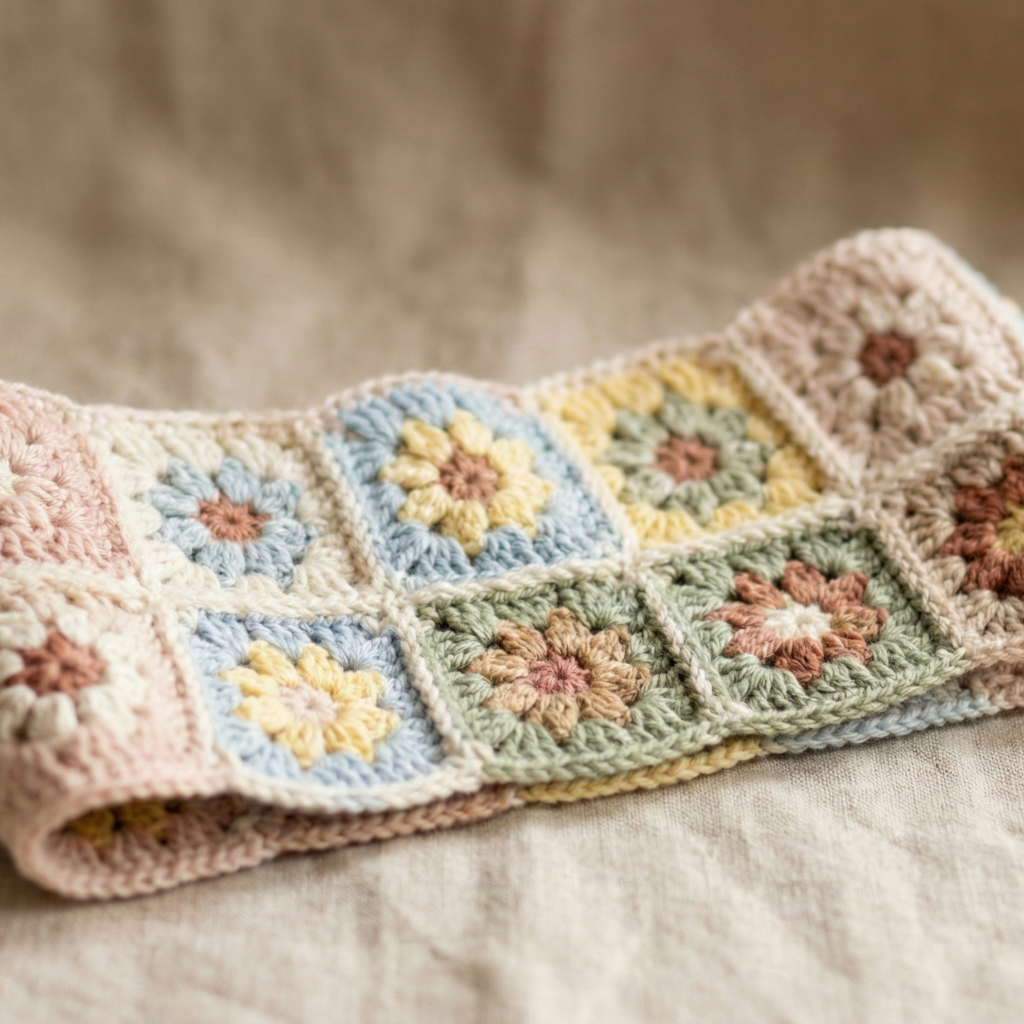
3. Crochet Mushroom Headband Pattern
Vibe: whimsical, playful — small mushroom appliqués on a solid band; excellent for autumn or quirky style.
Skill level: confident beginner — basic appliqué and sewing skills.
Finished width: 2–3 in with 3–5 small mushrooms across.
Materials
- DK or worsted yarn for band (main color) ~100 yd.
- Small amounts of red, white, cream (appliqués).
- Hook: 4.0–5.0 mm.
- Tapestry needle.
Mushroom appliqué (make 3–5)
- Cap (red): MR, ch 1, 6 sc in MR, sl st (6). Rnd 2: ch 1, 2 sc in each st around — 12 sc. Rnd 3: ch 1, sc in next st, inc in next around — 18 sc. Fasten off leaving tail.
- Underside / spots (white): embroider small French knots or make tiny white circles: MR, 4 sc, flatten and stitch onto cap as spots.
- Stem (cream): ch 3, sc in 2nd ch from hook and next (2 sc). Rnd 2–4: join to work in rounds 2–3 sc to create short tube; leave tail. Sew stem to cap underside.
Band
4. Use worsted yarn: measure head circumference (example medium 21.5 in). Determine spi in sc (example 4 sc/in → 21.5 × 4 = 86 sc). Ch 87 join. Rnd 1: sc in each st around for 8–10 rounds to create 2–3 in width. Optionally work 2 rounds BLO for a foldable cuff. Fasten off and weave ends.
Assembly
5. Place mushrooms evenly along band (3–5 depending on headband length). Sew each appliqué to band using long tails; reinforce with multiple passes. If mushrooms are slightly stiff, you can pad the cap with a tiny bit of stuffing before sewing to give a 3D look.
Finishing
6. Work one round sc around inner edge or attach a soft fabric lining for comfort.
Variations & styling
- Use variegated yarn for fun speckled caps.
- Make one large statement mushroom in center instead of multiple small ones.
4. Crochet Boho Summer Lacy Headband Pattern
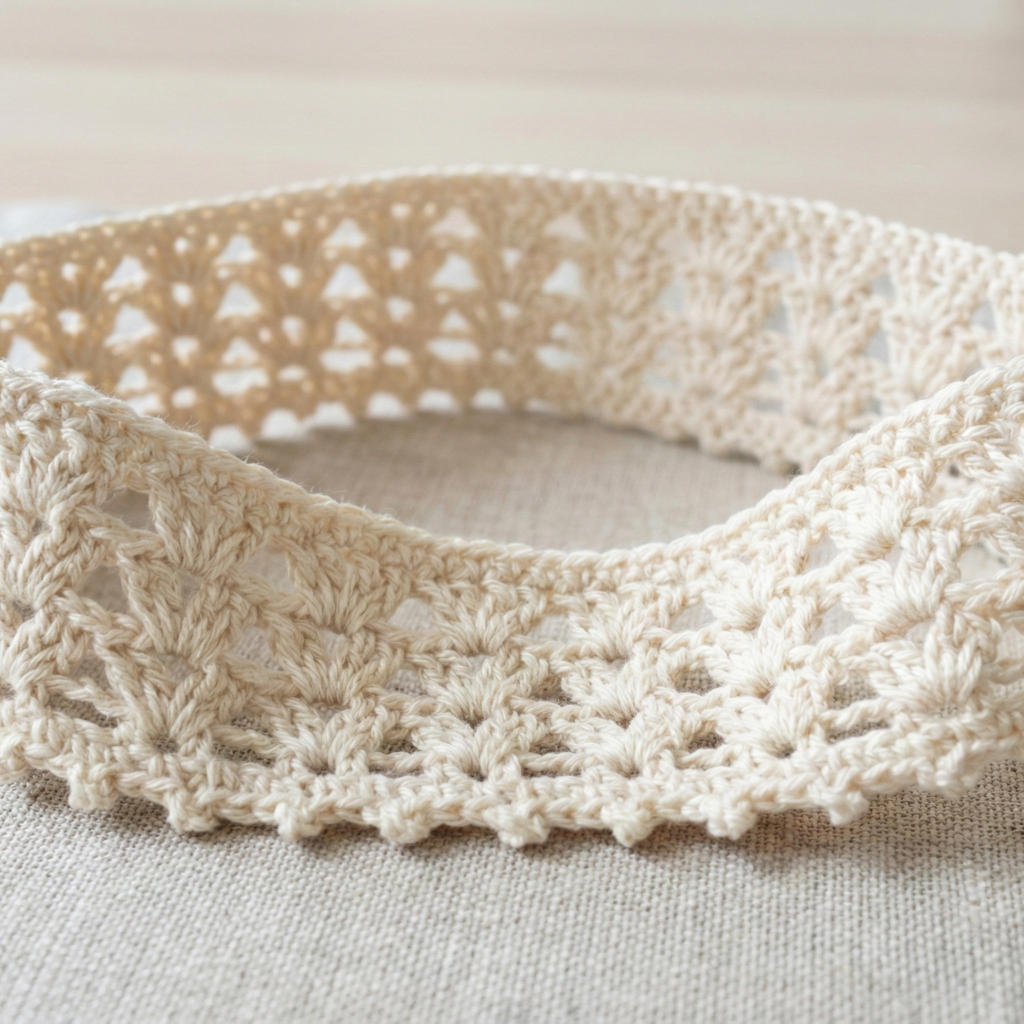
Vibe: open, airy lacework perfect for spring/summer, festivals, or layered boho looks. Works well in cotton or linen blend.
Skill level: intermediate (lace repeats and potentially filet or shell stitches).
Finished width: 1.5–3.0 in depending on lace repeat height.
Materials
- DK cotton or linen blend ~100 yd.
- Hook: 3.5–4.5 mm depending on yarn and stitch openness.
- Tapestry needle.
Common stitches
- chain spaces, V-stitch (dc, ch1, dc), shell (5 dc in one st), picot.
Gauge & repeat
- Pick a lace repeat you like (e.g., V-stitch row alternating with shell row). Determine how many repeats across you need to reach head circumference: if SPI in your lace is 3 motifs per inch and target 21.5 in → 64.5 motifs → round to 64 or 66.
Construction overview
Work a long rectangular lace strip in repeat, finish edges with narrow band for comfort, seam ends with twist or lie flat for headband.
Step-by-step (one elegant lace repeat)
Foundation
- Pattern multiple example: multiple of 6 + 3 (for V-stitch and shell alignment). If you need 64 motifs and repeat 6, choose 63 or 69. Example: ch 69 + 2 turning ch.
Row 1 (base / setup)
2. Row 1: dc in 4th ch from hook (counts as first dc), ch 1, skip 1 ch, dc in next across. Turn.
Row 2 (V-stitch row)
3. Row 2: ch 3 (counts as dc), skip 1 st, (dc, ch1, dc) in next st (V-stitch), skip 1 st, dc in next st repeat across. Turn.
Row 3 (shell row)
4. Row 3: ch 1, sc in first st, skip 2 sts, shell (5 dc) in next ch-1 space or designated spot, skip 2 sts, sc in next st repeat across. Turn.
Row 4 (spacer row)
5. Row 4: ch 3, dc across into shell spaces to connect; maintain alignment with Row 2. Turn.
- Repeat Rows 2–4 until panel height = desired headband width (e.g., 6–8 rows for narrow band, 10–12 for wider boho headband).
Edging & finishing
7. On both ends, work a round of sc (or sc BLO) to create comfortable inner edge. For a secured finish, pick up sts along inner edge and work 2 rounds of sc to create a firmer interior strip.
- Close ends: Add a half twist for a turban look or seam straight with mattress stitch for flat style. Add elastic at back if you want a snug ear-covering fit.
Optional embellishment
9. Add small tassels at ends of twisted style, or attach a metal slider ring to make adjustable headband.
Variations
- Work a central medallion for front detail before joining ends.
- Use a gradient or ombré cotton to highlight the lace pattern.
5. Crochet Cottagecore Tulip Headband Pattern
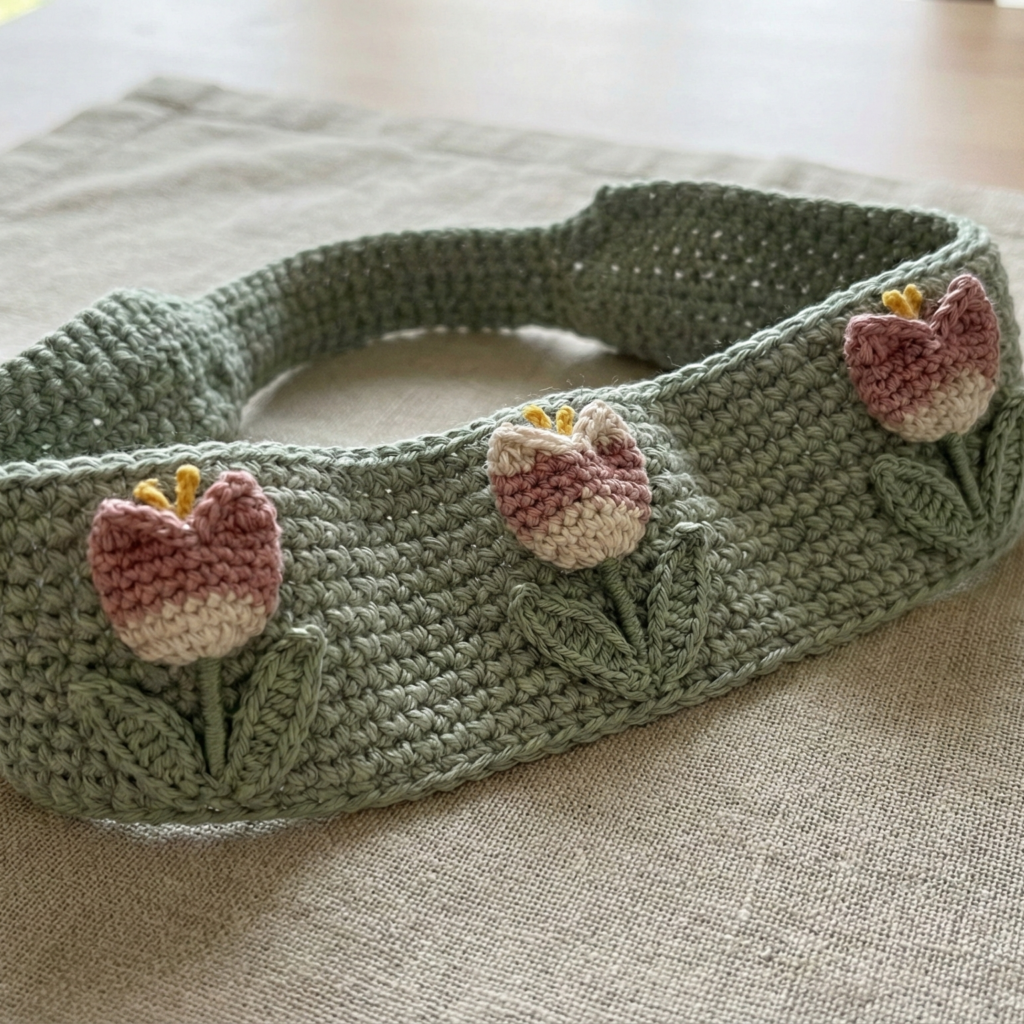
Vibe: soft, floral, vintage-inspired — single or multiple tulip appliqués on a textured band. Great with natural fibers and muted palettes.
Skill level: intermediate (appliqués and textured band).
Finished width: band 2–3 in, tulip height ~1.5–2 in.
Materials
- DK cotton or soft worsted for band ~100–150 yd.
- Contrasting color for tulip petals and green for leaves; small amount of yellow for stamen if desired.
- Hook: 4.0 mm for DK or 5.0 mm for bulky effect.
- Tapestry needle.
Tulip appliqué (one large or several small)
Petal section (make 3 petals per tulip)
- Ch 5, sl st to form a loop, join. Round 1: ch 1, 8 sc in loop, sl st. (8 sc)
- Round 2: ch 3, sl st into same st around to make 8 loops. Fasten off and change petal color if desired.
- In each loop work (sl st, sc, hdc, 3 dc, hdc, sc, sl st) to form a rounded petal. Repeat for 3 neighboringloops that will be sewn together as the tulip crown. Make 3 such petals and sew them together side by side creating a tulip top.
Stem & leaves
4. Stem: ch 8–12, sl st in 2nd ch from hook and across to make narrow stem tube. Attach to base of petals and sew secure.
5. Leaf (make 1–2): ch 10; Row 1: sc in 2nd ch, hdc, dc, tr, dc, hdc, sc — fasten off and sew to stem base.
Textured band
6. Band pattern example (seed/granite stitch): Multiple of 2 + 1 for width calculation. Seed stitch: ch foundation equal to circumference computation from gauge (spi example 4 sc/in, target 21.5 in → 86 sc). Ch 87 and join. Round 1: sc in each st around. Round 2: sc in next st, ch1, skip next st — this is an open seed version; for fully textured use moss/linen stitch (sc, ch1, skip st next row). Alternatively do hdc ribbing BLO for ear coverage.
- Work 8–12 rounds depending on desired width. For cottagecore look, use a subtle textured stitch like hdc in back loop only to create ribbing.
Assembly
8. Arrange tulips along the band — center three small tulips with leaves in cluster or make two opposite tulips for symmetry. Sew appliqués to band and reinforce.
Finishing
9. Work inside round of sc to hide seams and make comfortable edge. Attach a small piece of elastic inside seam at back for stretch or knit a small strip of velvet ribbon inside for comfort.
Variations & tips
- Use tonal colors (dusty rose, sage, cream) for cottagecore palette.
- Add embroidered veins to leaves with contrasting green thread.
Final finishing & care notes (applies to all headbands)
Blocking
- For lace or shaped headbands, block flat to measurements to even stitches and set shape. Use spray or wet block per yarn label.
Seams
- Mattress stitch or whipstitch with matching yarn works well for joining. If seam meets the skin, add felt or fabric backing for comfort.
Elastic & adjustability
- A small piece of 1/4–1/2 in elastic sewn into the back seam of an ear warmer gives excellent fit and prevents slippage. For decorative headbands skip elastic to keep shape.
Lining
- For winter earwarmers add a fleece lining; for summer keep them unlined for breathability.
Care
- Follow yarn care instructions. In general, cotton and acrylic headbands are machine washable on gentle; wool should be hand washed and reshaped.
conclusion
These five headband patterns give you a full seasonal toolkit: the Zigzag Striped headband for bold winter colorblocking, the Floral Granny option for cottagecore charm, the playful Mushroom appliqué for quirky statement pieces, the airy Boho Lacy headband for warm weather, and the Tulip headband for a refined floral accent. Each pattern is intentionally modular — swap yarn weights, tweak width and length with the sizing math above, and choose finishing touches (lining, elastic, twist knot) to match function and comfort. Want one pattern expanded into size-graded, printable PDF instructions with full stitch charts and a photo reference? Tell me which design and I’ll prepare it. Happy crocheting — and enjoy making headbands you’ll reach for every season.