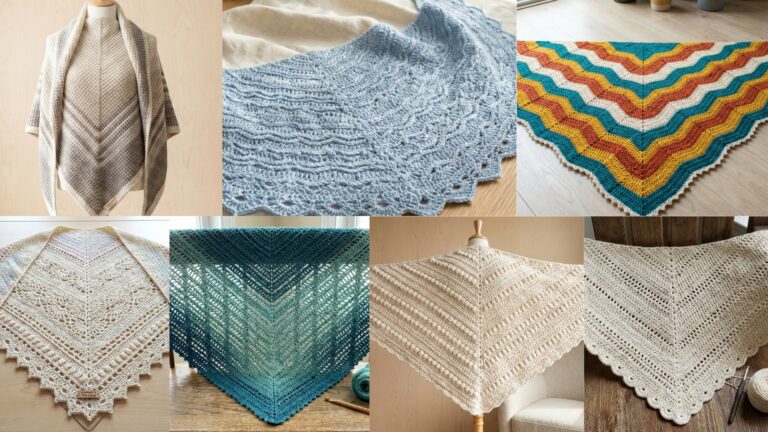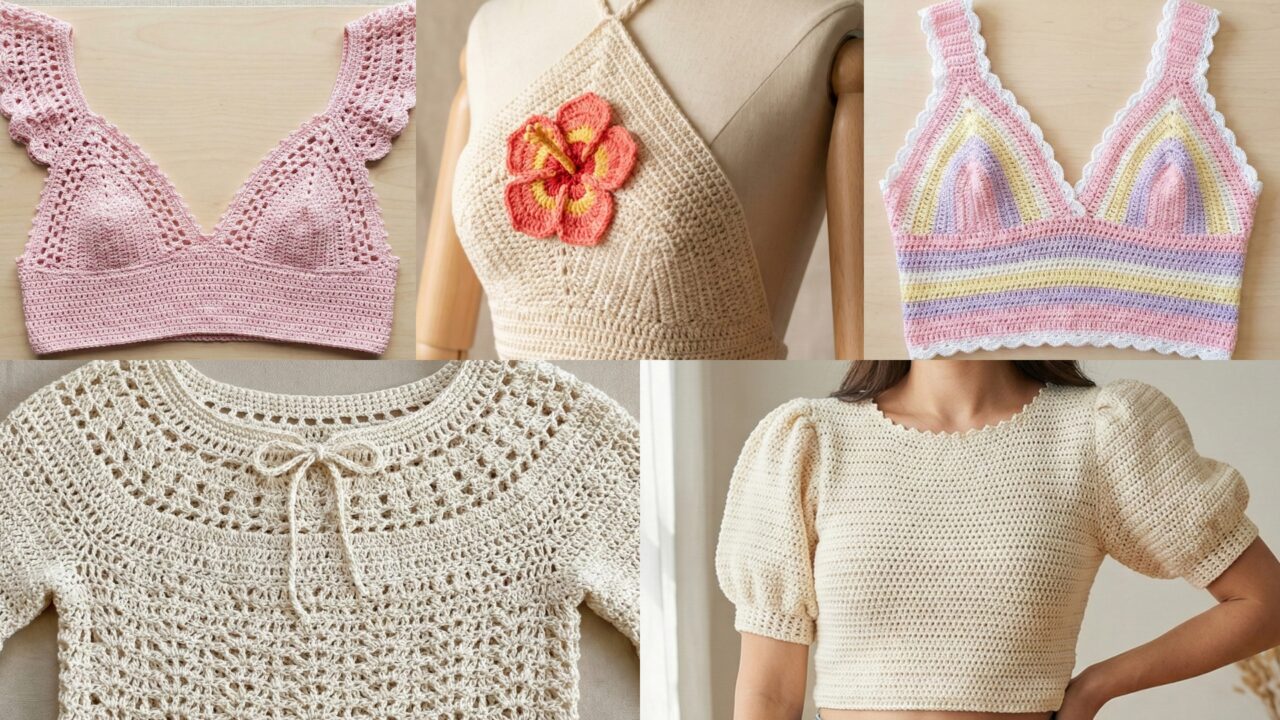
Light, wearable, and fun to style, crochet crop tops are a summer staple: they’re fast to make, suit a wide range of outfits, and let you show off stitch textures or bold colorwork. Below are five full, publish-ready crop-top patterns — each with a clear introduction, skill level, material lists (graded sizes), gauge, step-by-step construction, finishing, variations and care notes. Patterns are written for adult sizes (S–XL); adjust using the explained gauge math if you need other sizes.
Stitch abbreviations (US): ch = chain, sc = single crochet, hdc = half double crochet, dc = double crochet, tr = treble (UK tr = dc), sl st = slip stitch, st(s) = stitch(es), rep = repeat, BLO = back loop only, FLO = front loop only, sk = skip, inc = increase, dec = decrease. Work in continuous rounds for a seamless look unless stated otherwise.
what to know before you start
Crop tops vary in fit: some are fitted (close to the bust and underbust), others are boxy or loose. Before you start:
- Decide fit: tight/fitted, semi-fitted with positive ease (+1–2″), or loose/boxy (+3–6″).
- Yarn choice: summer-weight cotton, cotton-blends or bamboo blends are ideal — breathable, washable, and hold shape. For a softer drape, use a cotton/acrylic blend. For structural puff sleeves use a yarn with more body.
- Hook: pick a hook that gives you the gauge in each pattern. If you prefer a looser drape, go up one hook size; for more structure, go down one size.
- Sizing: measure bust circumference and desired crop length (from underbust up to waist). Use the size charts in each pattern and the gauge notes to match your measurements.
- Construction styles included: top-down seamless, waist-up, separate cups seamed, raglan or rectangular yoke depending on pattern — instructions include options for shorter or longer crops.
1. Crochet Beautiful Puff Sleeves Crop Top Pattern
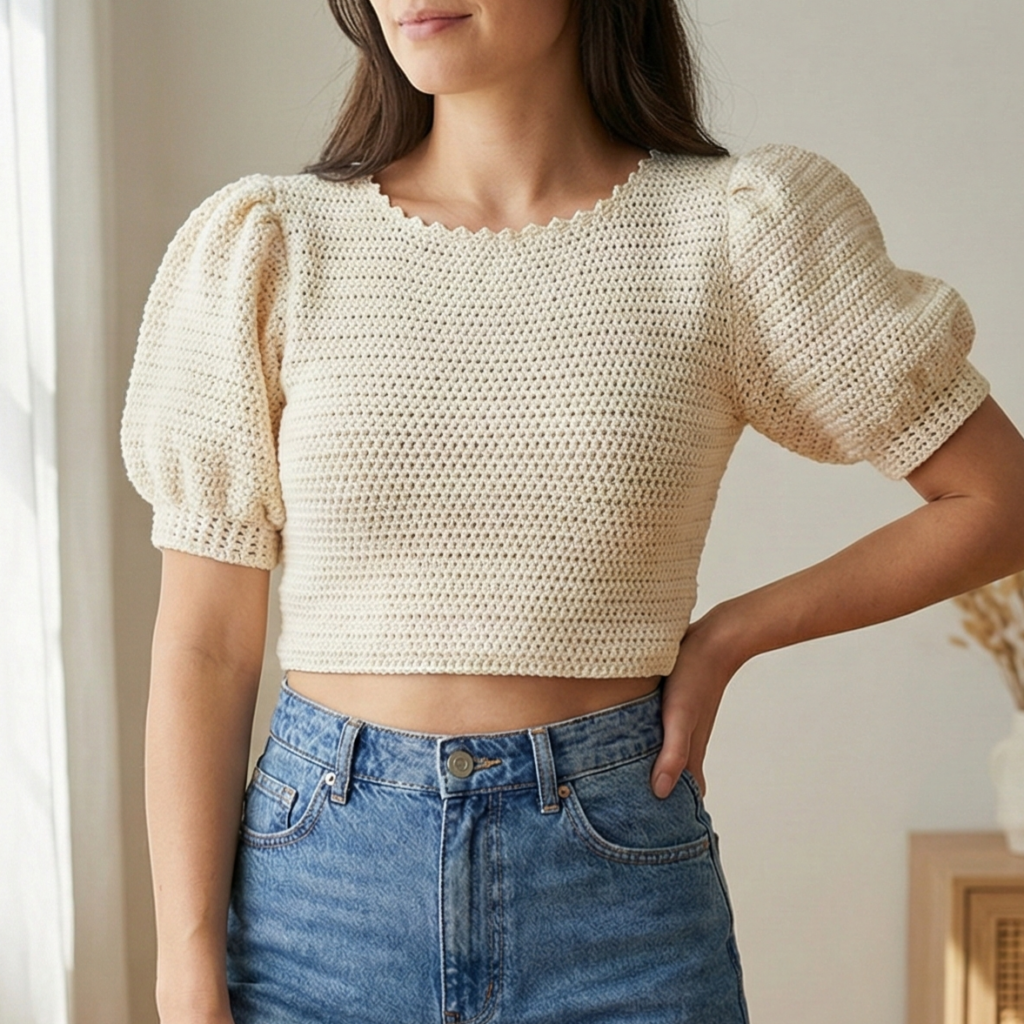
Vibe: feminine, slightly voluminous short puff sleeves with a fitted bodice — great with high-waist shorts or skirts.
Skill level: intermediate (reading short-row shaping, working sleeve gathers).
Sizes included: S (M, L, XL) — bust finished circumference (approx): 32 (36, 40, 44) inches.
Yarn & hook: sport / DK cotton or cotton blend. Yarn weight: 250–400 yd total depending on size. Hook: 4.0 mm (G) or as required for gauge.
Notions: stitch markers, tapestry needle, small elastic (for sleeve gather optional), measuring tape.
Gauge
- 18 hdc = 4″ in pattern used for bodice (measure blocked fabric). Adjust hook to match.
Construction overview
Worked from the top-down: a short round yoke is shaped with increases, then the body is worked in rounds to underbust or crop length. Puff sleeves are worked in the round onto the armhole opening, with a gathered cuff formed by elastic or tighter rounds.
Step-by-step
1. Yoke — short round raglan/top-down
- Ch 4, join to form a loop. Rnd 1: ch 2 (counts as hdc), work 11 hdc into loop—12 hdc total. Join.
- Rnd 2: ch 2, hdc in same st, hdc in next 11 sts — increase evenly by making 12 increases around (24 sts). Join.
- Mark raglan points: to create puff sleeves and front/back, plan four raglan increases placed evenly — you’ll place stitch markers for front-left, front-right, back-right, back-left. On each round, increase at each marker by working (hdc, inc) or working 2 hdc in the marker st — this forms a yoke with raglan shaping. Continue rounds increasing until yoke circumference reaches upper chest at desired underarm point: approximately 6–8 rounds depending on gauge. Aim for the yoke to measure ~2–3″ less than finished bust measurement, so that when body is worked in rhythm the bust shaping happens.
2. Divide for body and sleeves
- On a round where the yoke reaches the underarm, place markers and count the number of stitches between raglan markers. For example, if stitches between markers are 20 (front), 18 (sleeve), 20 (back), 18 (sleeve). Remove the sleeve stitches from the live work by placing them on scrap yarn (or mark them as sleeve holders) and continue working the body in the round: front+back panels joined in the round. Join front and back stitches to work the main body.
3. Body (fitted)
- Work hdc (or your preferred texture — see variations) in the round for the body. For a fitted crop stop 1–2″ below bust; for a standard crop measure 12–15″ from underarm depending on body length. Decrease or increase slightly to fit: if it sits loose, add a round or two of dec spaced evenly. If too tight, add an inc round.
4. Sleeves (puff)
- Remove sleeve holders and rejoin yarn to sleeve stitches. Work 2 rounds hdc evenly. For puff shape, work 4–6 rounds of (hdc in BLO) to narrow the armhole top slightly, then work several rounds of increase rounds to create volume: example pattern — rnd 1: hdc; rnd 2: (hdc, inc) repeat; rnd 3: hdc; rnd 4: (hdc, inc) — this creates a puff cap. After the puff cap, work straight sleeve rounds in hdc to desired length (short puff: 2–3″ total). For the cuff: either work 2 rounds in sc tight to create a gathered cuff OR leave a small gap and insert 3/8″ elastic inside a folded cuff: fold last 3 rounds inward and sew forming a small casing, thread elastic in and secure.
5. Finishing
- Weave in ends, block gently to shape puff. If you used cuffs with elastic, stitch securely. Add an optional decorative picot edge to the neckline: sc around neckline then 1 row of picots (ch 3, sl st into base every 4th sc) for a finished look.
Variations & styling
- Replace the simple hdc body with shell stitch rows for a lacy look.
- Make cap puff sleeves or longer bishop sleeves by extending sleeve length and tapering at wrist with elastic.
- For a summery boho look, use a variegated cotton yarn.
Notes
- Puff shaping relies on even increases on the sleeve cap; if puffs are too dramatic, reduce increase rounds.
- This pattern is modest and works well cropped at high-waist garments.
2. Crochet Hibiscus Crop Top Pattern

Vibe: graphic floral appliqué panels (hibiscus motifs) on a minimalist fitted crop — playful, summer-ready.
Skill level: intermediate (joining motifs, shaping bust).
Sizes: S (M, L, XL); bust approx 32 (34, 38, 42) in final.
Yarn & hook: sport/DK cotton, contrast colors for flowers; hook 3.5–4.5 mm.
Yardage: main color ~300–500 yd depending on size; contrast for flowers ~50–120 yd.
Notions: tapestry needle, sewing pins, blocking mats.
Gauge
- 20 sc = 4″ in single crochet (tight fabric). Use this gauge to calculate panel width.
Construction overview
Make two rectangular panels (front and back) worked bottom-up (or top-down if preferred) and stitch seam at sides. Hibiscus appliqués are crocheted separately and sewn to the front panel. For support and smoothing, add an internal band (crochet or elasticized fabric) under the bust.
Step-by-step
1. Body panels
- Foundation: calculate foundation chain for width: desired bust circumference / 2 plus 1 inch for seam. Example for S: target bust 32″ → panel width ~16″ + 1″ = 17″. If gauge = 20 sc / 4″ → 5 sc/inch. Panel foundation chains = 17″ × 5 = 85 chains. Chain 85 + 1 turning chain.
- Work: Row 1 onward: sc across (85 sc). Turn. Continue working rows in sc until panel height equals desired crop length (example 12″). Repeat for back panel. Block panels.
2. Bust shaping (optional)
- If you want more shaping: add short rows at front bust by increasing rows at center with a 1–2″ bust dart or work simple decreases under the bust for light shaping.
3. Hibiscus appliqués
- Flower motif (one): MR; ch 3 (counts as dc), work 11 dc into MR; sl st join (12 dc). Round 2: ch 3, sk 1 dc, sl st around to form 6 ch-3 loops for petals. Round 3 (petals): in each ch-3 loop work (sc, hdc, 3 dc, hdc, sc) to make full petals. Fasten and weave ends. Make 3–5 hibiscus flowers depending on layout. Block flowers flat.
4. Assembly
- Layout flowers on the front panel in desired arrangement. Sew flat across center using matching yarn. Attach leaves and small centers (a contrasting French-knot style embroidery or a small button) as desired.
5. Underbust band
- To add support: with main color, pick up stitches along bottom edge of both panels and work 4–6 rounds of hdc. Fold this band inward and slip stitch into place to create a small supportive band. Optionally insert a 1″ elastic inside a small casing made by folding the band and stitching, securing elastic ends.
6. Seaming & finishing
- Seam side edges with mattress stitch or sc seam leaving armholes open. Add a neat sc round around neck and armholes for a clean finish (1 round sc, then 1 round hdc).
Variations & tips
- Make smaller flowers and cluster at one shoulder for asymmetry.
- For more coverage, extend panel length by 2–4″.
Care
- Cotton yarn: machine wash cold gentle and tumble low; reshape when damp.
3. Crochet Sexy Y2K Cami V-Neck Angel Wing Like Crop Top Pattern
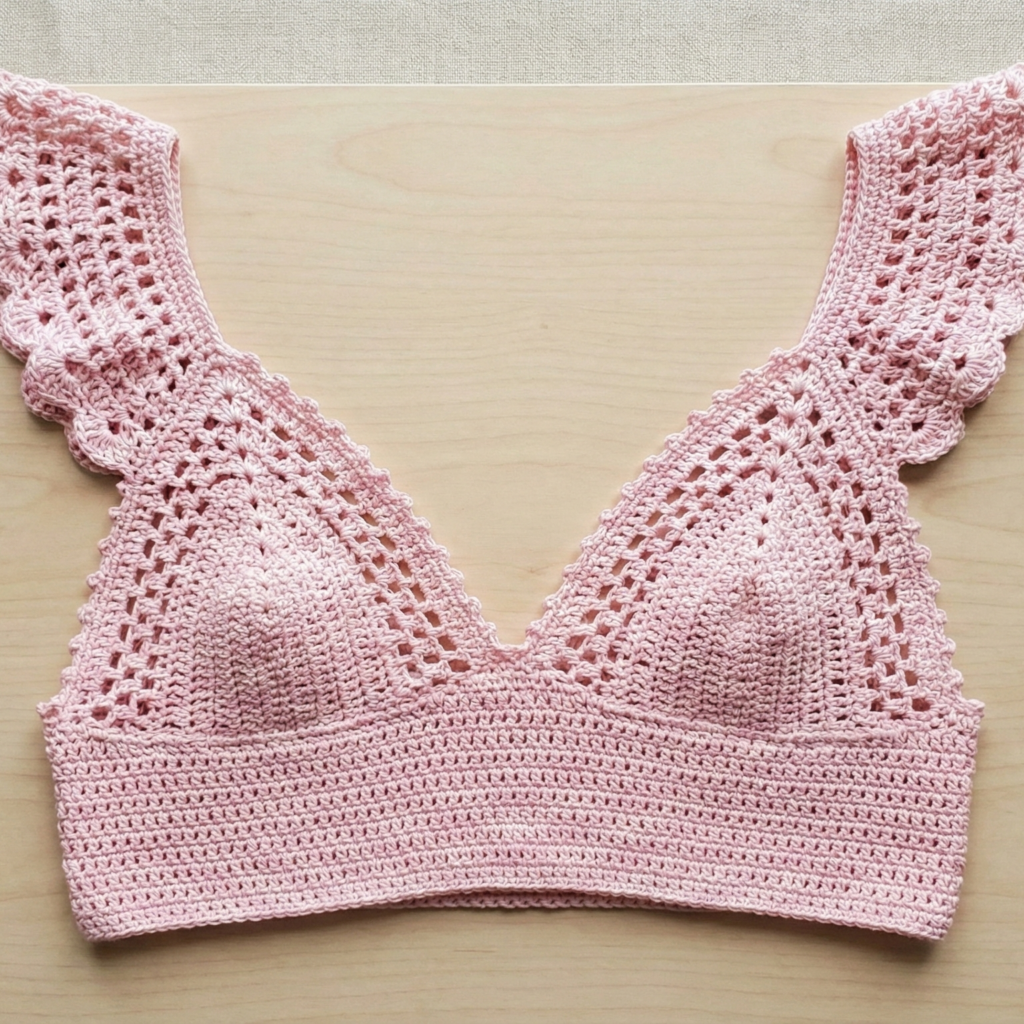
Vibe: low (but tasteful) V-neck cami with short flutter/angel-wing straps — inspired by early 2000s Y2K style but made in breathable cotton. Pattern avoids explicit styling and focuses on tasteful coverage.
Skill level: intermediate (triangle shaping, neat finishing).
Sizes: S (M, L, XL) — bust finished 32 (36, 40, 44) in.
Yarn & hook: fingering or sport cotton; hook 3.5–4.0 mm.
Yardage: 300–500 yd main.
Notions: tapestry needle, optional lingerie strap clips if converting to adjusters.
Gauge
- 22 dc = 4″ in open lace stitch. Match gauge for fit.
Construction overview
Worked as two triangular cups with short angel-wing flutter straps connected by a band under the bust. Cups are worked top-down or bottom-up (this pattern uses bottom-up cup shaping), then joined under the bust with a band worked in rounds. Wing straps are worked separately and sewn to the cup tops.
Step-by-step
1. Cups (make two) — Bottom-up triangular cup
- Ch 18 (adjust for desired cup width). Row 1: dc in 4th ch from hook and across to form a base row (14 dc). Turn.
- Row 2: ch 3 (counts as dc), dc across in pattern stitch (for slight openwork alternate between dc and ch1 spaces to keep breathability). Turn.
- Cup shaping: at the end of each right and left edge, dec one stitch every other row to form a triangle — example: row: dc2tog at start and end of row until triangle point is reached matching desired cup shape. The cups should meet at center front with a few inches of overlap or a closing seam. Stop when cup height equals measured vertical cup depth (e.g., 6–7″).
2. Underbust band
- With right sides together, place cups and join at center front by slip stitch or row of sc to make a continuous underbust channel. Alternatively, crochet a separate long band: foundation chain equal to combined bottom widths of cups + seam allowances. Work 6–8 rounds of hdc in the round to form the band. Try on and adjust: the band should sit snugly but comfortably under bust.
3. Angel wing / flutter straps
- Work small rectangular wings: ch 18–24; Row 1: sc across; Row 2: ch 1, sc across with slight increases on center rows to create a gentle ruffle. For a wing effect, add 2–3 shell rounds along the long edge: 5 dc in one st, skip 2, sc in next across.
- Fold the rectangle and sew the short edge to cup outer top to form a flutter strap draping over shoulder. Adjust length so strap covers a comfortable area and does not slip. Secure firmly with sewn stitches.
4. Finishing details
- Add a neat sc edging around cups and neckline: sc evenly across edges, and for a decorative edge add a small picot every 6th sc.
- Optionally add thin adjustable straps (crocheted cords or purchased straps) attached to inner cup tops if wearer wants additional security.
Variations & fit notes
- For more coverage, increase cup width and height by adding more foundation chains.
- For less revealing look, line the cups with a lightweight cotton fabric sewn inside.
Care
- Gentle wash, hang to dry to maintain shape of wings.
4. Crochet Strawberry Shortcake Crop Top Pattern
Vibe: playful, slightly retro, with strawberry motif accents and scalloped edges — great for festival wear or playful outfits.
Skill level: confident beginner/intermediate (appliqué and scallop edges).
Sizes: S (M, L, XL) bust finished: 32 (36, 40, 44) in.
Yarn & hook: fingering/sport cotton in strawberry red, green for leaves, and neutral for main body — hook 3.5–4.0 mm.
Yardage: main 300–500 yd, accent small amount.
Notions: tapestry needle, small buttons or beads for strawberry seeds optional.
Gauge
- 22 hdc = 4″ in pattern body (blocked).
Construction overview
Worked as two simple panels (front and back) or as continuous round tube worked bottom-up with a split for armholes. Strawberries are small appliqués sewn on the front. Edging with scallops completes the cute look.
Step-by-step
1. Body (continuous tube bottom-up)
- Foundation: chain to desired lower bust or waist circumference divided by gauge. For S: desired underbust 30″ × 5.5 hdc/in (if 22 hdc = 4″ ⇒ 5.5 hdc/in) = 165 ch. Join to work in the round carefully not to twist.
- Work in rounds of hdc for the desired crop length (10–12″ from underbust measured up or down depending on intended coverage). For a fitted top, make rounds even; for boxier, add 2–4″ to circumference.
2. Armhole & neckline (if making tank style)
- If you want tank style: fold tube and seam side edges leaving armholes of desired length (approx 7–8″ height). Alternatively, work top-down after splitting.
3. Strawberry appliqués
- Small strawberry: MR, ch 1, 6 sc in MR; Rnd 2: (inc) around to 12 sc; Rnd 3: sc around; Rnd 4: change to green yarn, ch 3, sl st into a few top loops to make leaves; finish and shape. Embroider small seed dots with contrasting yarn or sew tiny beads. Make 5–8 strawberries and arrange across front panel clustered or scattered.
4. Scallop edging
- With contrast color, work sc round around armholes and neckline. For scalloped hem, on lower edge do: sc in next st, (5 dc in next st), sc in next 3 sts repeat — this produces a slinky scallop. Fasten off and weave in ends.
5. Finishing
- Sew appliqués securely onto front panel. For durability sew through the inside lining loop or add a small felt backing inside for extra sturdiness.
Variations & styling
- Add a central strawberry at the chest and tiny ones along the hem.
- Use variegated red yarn for more organic fruit coloring.
Care
- Cotton: machine wash cold and lay flat to dry if you want to preserve scalloped edges best.
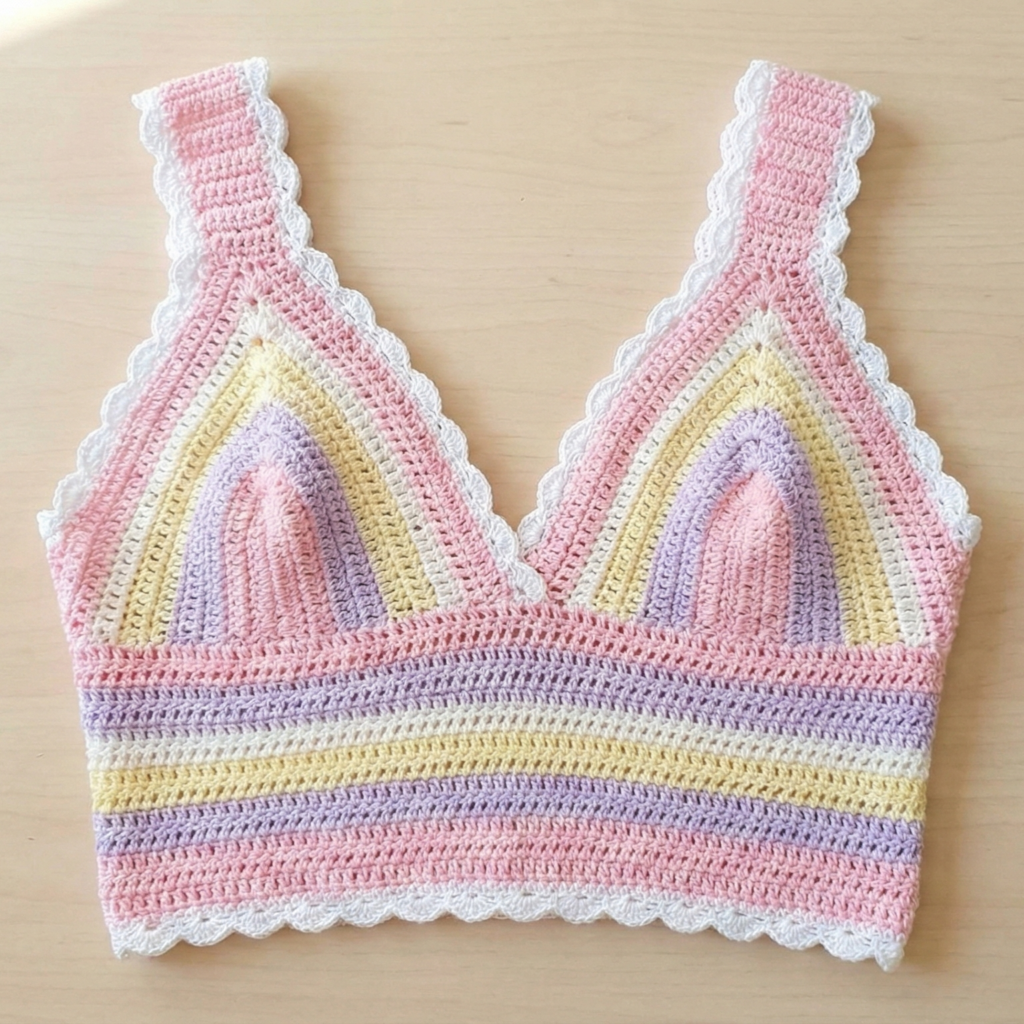
5. Crochet Lilia Sleeves Crop Top Pattern
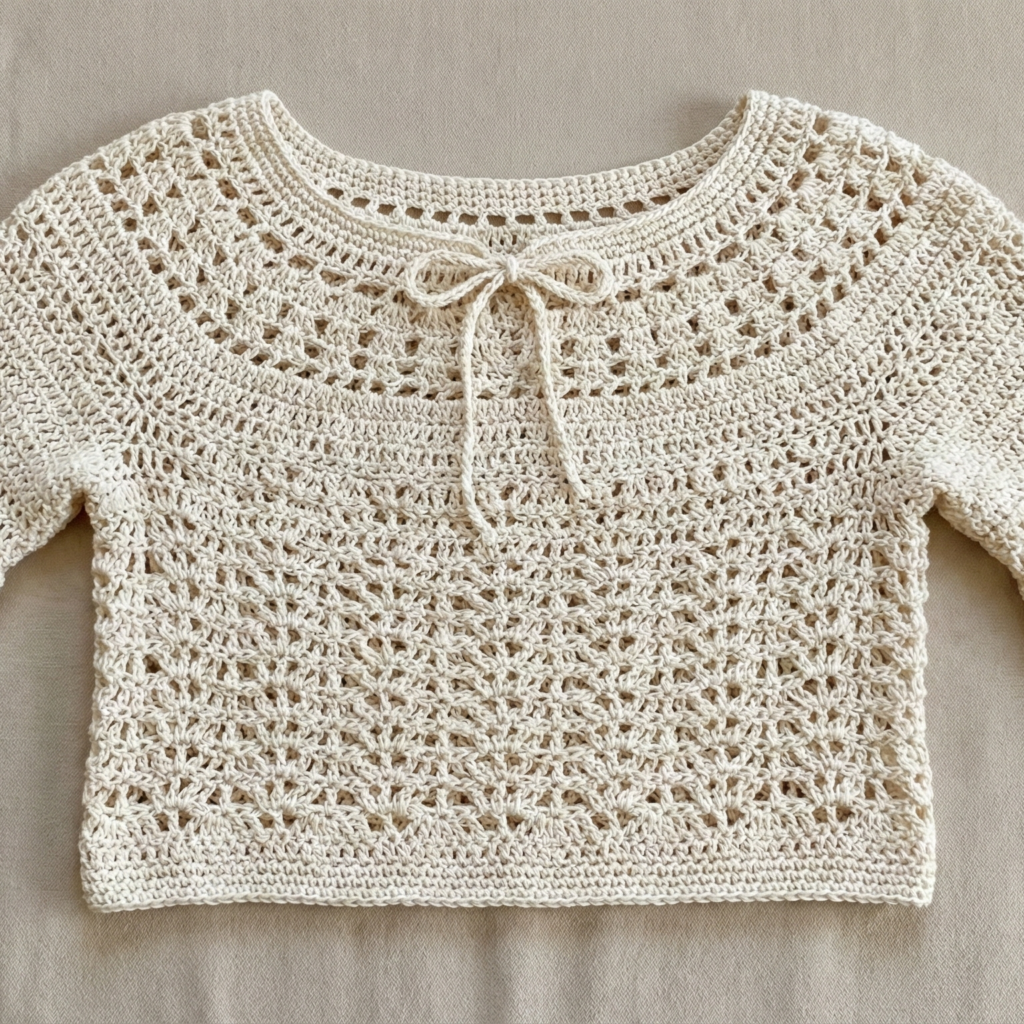
Vibe: a transitional piece with delicate lilia-style sleeves (slender, slightly flared) and a textured lace yoke — elegant and breathable.
Skill level: intermediate (lace stitches, sleeve picks).
Sizes: S (M, L, XL).
Yarn & hook: sport / DK cotton-linen blend for drape; hook 3.5–4.5 mm.
Yardage: 300–500 yd main depending on size.
Notions: stitch markers, tapestry needle.
Gauge
- 18 dc = 4″ in lace motif. Match gauge for fit.
Construction overview
Worked top-down in one piece with a square or round yoke in a lacy Lilia motif, then separated into body and sleeves. Lilia sleeves are slightly flared and short, ending above the elbow or at mid-sleeve.
Step-by-step
1. Yoke (top-down round lace)
- Start with a center ring: MR, ch 3, 12 dc in ring; sl st to first dc. (12 dc).
- Work lace rounds: Round 2: ch 4, sk 1, dc in next, ch 2 around to create openwork. Continue working increases at 4 cardinal points (if round yoke) using (dc, ch2, dc) clusters to produce a square yoke or evenly increase to form a circle. Continue lace repeat until yoke measures across shoulder to armpit (approx 8–10″ from neck depending on size). Use markers to divide sleeve and body stitches: e.g., after lace rounds, count stitches and assign sleeve stitches (small sections) to holders.
2. Separate for body and sleeves
- Place sleeve stitches on holders and join remaining body stitches to work in the round downwards. For a crop, work body rounds to desired length (10–12″). Use the same lace repeat or switch to simple weave stitch (hdc) for smoother finish.
3. Sleeves
- Rejoin yarn to sleeve stitches and work in round: 2–4 rounds of lace pattern to maintain continuity from yoke; then work straight rounds or slight increases for the flared Lilia shape: every 4th round work an increase round (dc, inc) across to add flare. Stop at desired sleeve length and finish with a scallop or picot edge.
4. Neckline finishing
- Work 1–2 rounds sc around neckline to stabilize. For a decorative finish work one round of puff stitch around the neckline spaced evenly.
5. Finishing
- Weave ends and block gently to open lace; attach small decorative button or tie at center front if desired (keeps neckline modest).
Variations
- Make the yoke square by increasing in four points; square yokes pair nicely with raglan-like shaping.
- For warmer climates, reduce sleeve length or omit sleeves and keep as sleeveless top.
Care
- Cotton-linen blends: hand wash or machine on gentle and reshape while damp.
Conclusion
These five crop-top patterns give you a broad set of options for summer wardrobes: a romantic puff-sleeve top, a floral-appliqué hibiscus crop, a tastefully styled Y2K cami, a playful strawberry-motif top, and a lacy Lilia-sleeved piece. A few closing tips:
- Sizing tips: always swatch to find stitches per inch then use the size charts and the simple formula: (desired finished bust ÷ spi) = foundation stitches. Add seam allowances or ease as desired (+1–4″ total for comfort).
- Modesty & fit: if you want fuller coverage, increase crop length by 1–4 inches or add a lining by sewing a lightweight cotton panel inside the cups or full body. For added support, add an underbust band with elastic.
- Care: cotton and cotton-blend tops normally wash well on a gentle cycle; block while damp to restore shape and open lace. Avoid tumble drying delicate lacy pieces.
- Finishing: weave ends and block each piece before final assembly — blocking evens lace, smooths edges, and gives a professional finish.