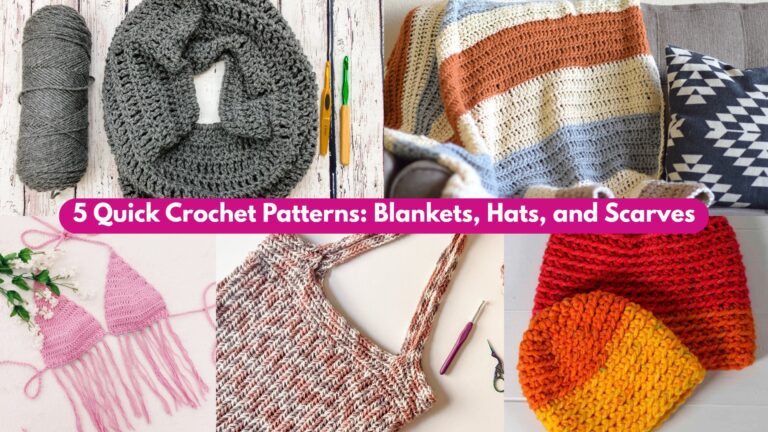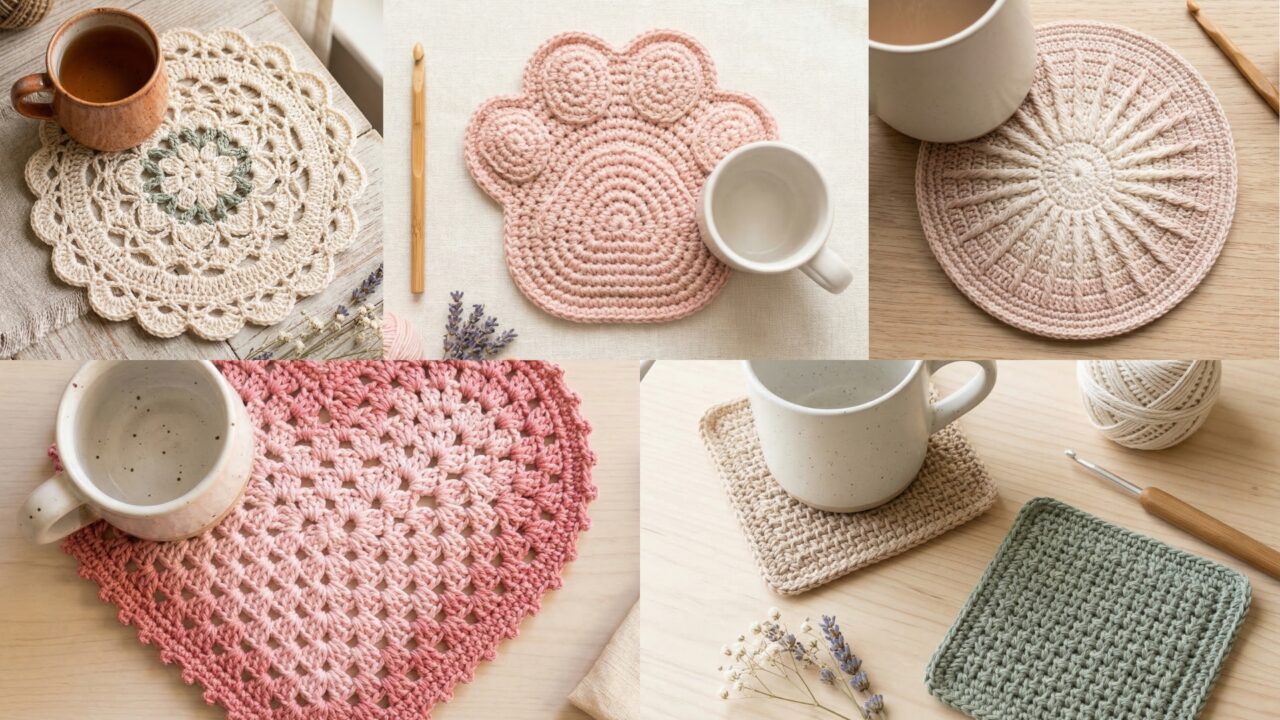
Handmade coasters are the fastest way to add personality to a coffee table — and they’re perfect stash-busters, quick gifts, and practice pieces for new stitches. This post walks you through five trendy coaster patterns with everything you need: skill level, finished size, materials and yardage, stitch abbreviations, gauge guidance, very detailed step-by-step instructions (construction, shaping, and finishing), blocking/finishing tips, care instructions, and ideas for variations so you can make each design your own.
Quick shared notes before patterns:
- I use US crochet terms throughout.
- For coasters, use cotton or cotton-blend yarn (dish-cloth cotton, mercerized cotton, or cotton/linen blends). They’re absorbent and wash well. Avoid super-springy acrylic for drinkware protection unless you will back with cork/felt.
- Recommended hook sizes are a starting point — your personal tension may require a smaller hook for a denser coaster to avoid sagging.
- Always weave ends in securely — coasters get handled a lot.
Abbreviations (US)
- ch = chain
- sc = single crochet
- hdc = half double crochet
- dc = double crochet
- tr = treble (UK tr = US dc — here I mean US treble)
- sl st = slip stitch
- st(s) = stitch(es)
- inc = increase (2 sc in same st)
- dec = decrease (sc2tog)
- BLO / FLO = back/front loop only
- MR = magic ring
- rep = repeat
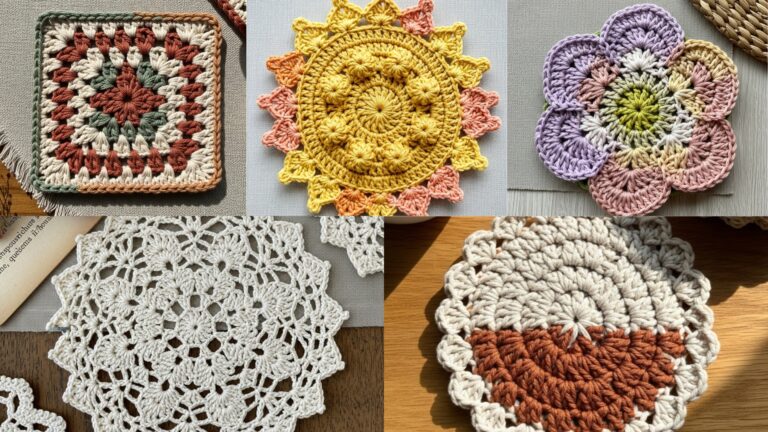
1. Crochet Paw Shaped Coaster Pattern
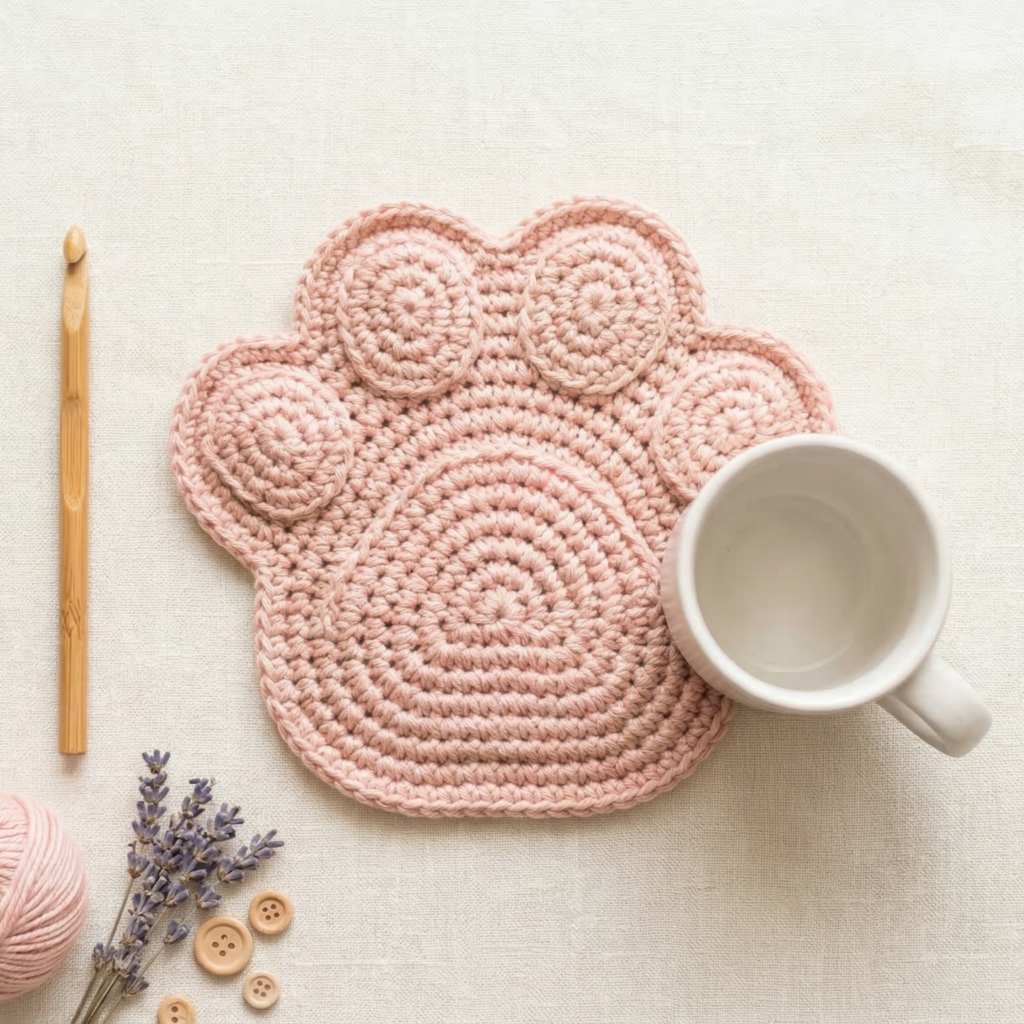
Cute and playful — a paw-shaped coaster is a small statement piece that’s perfect for animal lovers or pet-themed gifts.
Skill level: Beginner–Intermediate (simple shaping)
Finished size: approximately 4.5″ × 4.5″ (dimensions vary with yarn/hook)
Yarn & hook: Sport/DK cotton or worsted cotton held double for extra density — ~30–40 yds. Hook 3.5–4.5 mm (use smaller for denser fabric).
Materials: cotton yarn, 3.5–4.5 mm hook, tapestry needle, scissors, blocking pins, optional cork/felt backing.
Why this works
The coaster is built from a circular base (palm) with four small round “toe” pads worked separately and sewn on or joined-as-you-go. Dense sc fabric keeps cups stable and absorbs light condensation.
Gauge (informal)
- ~16 sc × 20 rows = 4″ in sc (not strict; check coaster diameter as you go).
Stitch key / notes
- Work the base in rounds with increases; make toes as small rounds (magic ring). Option to join toes with surface slip stitch or sew for sturdier hold.
Step-by-step
Palm/base (round disc)
- MR, ch1, 8 sc in MR. Pull tight. (8)
- Round 2: inc around — 16 sc.
- Round 3: (sc, inc) ×8 — 24 sc.
- Round 4: (2 sc, inc) ×8 — 32 sc.
- Round 5: (3 sc, inc) ×8 — 40 sc.
- Round 6: work even sc around for 1–2 rounds if you want a slightly larger, flatter palm (40 sc). Stop when base diameter ≈ 3.0–3.5″ (this becomes the center of the paw).
Tip: If the disc begins to ruffle, skip an increase round; if it cups, add one more increase round.
Toes (make 4)
Make four identical small pads.
- MR, ch1, 6 sc in MR. Pull tight. (6)
- Round 2: inc around → 12 sc.
- Round 3: sc around (12). Fasten off leaving a long tail for sewing.
Arrange four toe pads in an arc at one side of the palm (two outer small pads slightly lower, two central slightly higher — reference a paw photo). Pin in place.
Assembly
Option A — Sew-on: Using yarn tails and tapestry needle, whipstitch through the base of each toe into the edge of the palm, taking small stitches through both layers. Sew each pad with several passes for durability.
Option B — Join-as-you-go: When making last round of toe, align it on the palm edge and sl st into corresponding base sc as you complete the last round (harder if you made toes separately).
Edge & finishing
- With main color, work one round of sc around entire coaster (working sc into the join between toes and palm) to create a tidy edge. In corners between toes and palm, place 2 sc in the same st for a smoother curve. Fasten off and weave ends.
Backing (optional)
- For practical use, glue or stitch a thin cork or felt circle slightly smaller than base to underside with fabric glue — this protects surfaces and reduces slipping.
Blocking & care
- Wet-block lightly to even stitches and flatten. Cotton coasters can be machine-washed on gentle but reshape while damp. Cork or glued backings should be spot cleaned only.
Variations & styling
- Use two colors: a neutral base and contrasting toes (e.g., cream paw with pink toe pads).
- Make a matching set of four paw coasters to gift with a mug.
2. Crochet Stargazer Coaster Pattern
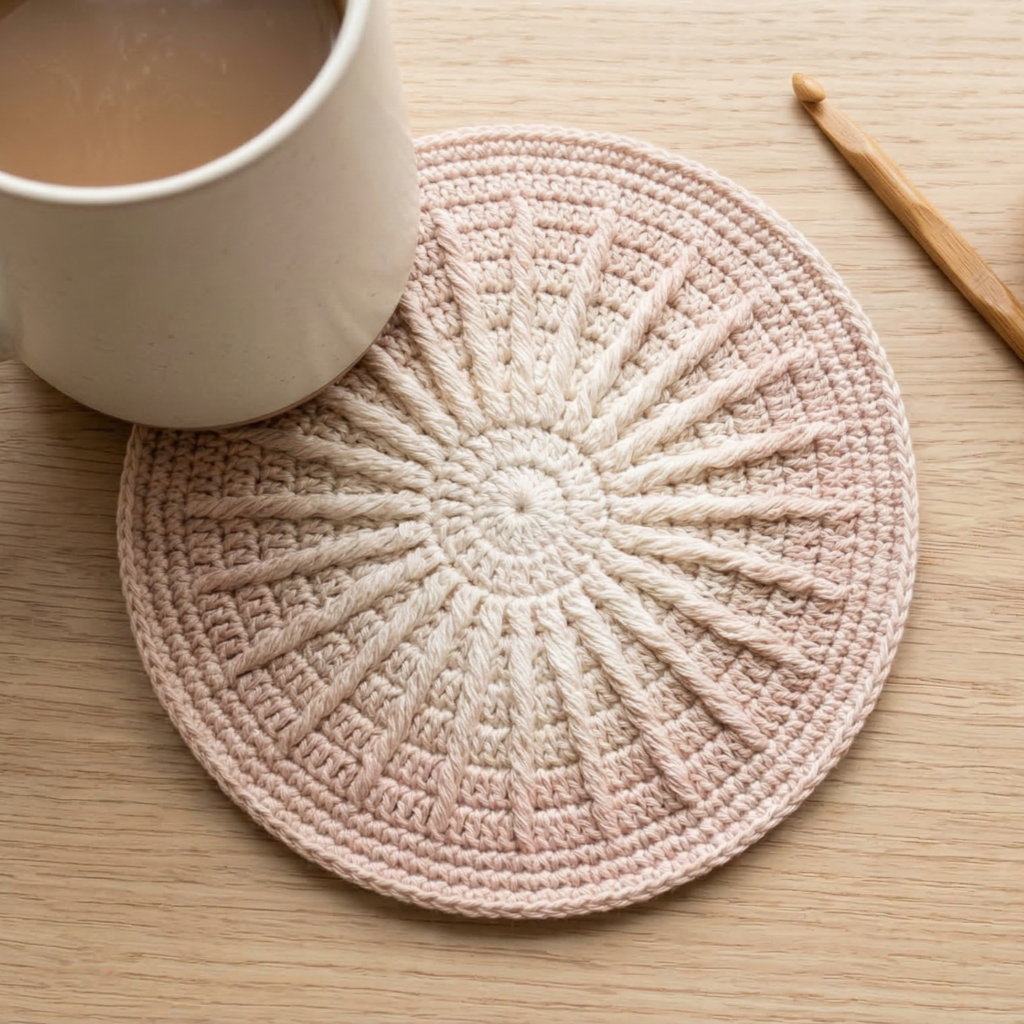
A geometric, starburst coaster — modern, graphic, and eye-catching. Great for color-play and gradient yarn.
Skill level: Intermediate (working in motifs and joining)
Finished size: approximately 4.5″–5″ diameter
Yarn & hook: DK/midweight cotton — ~35–50 yds. Hook 3.5–4.5 mm.
Materials: cotton yarn, tapestry needle, pins for blocking.
Why this works
The star (stargazer) is made by working a central motif with raised stitches (post stitches or clusters) to create radiating points, then finishing with a round of sc for a strong edge.
Stitch palette used
- dc, puff or cluster stitches for raised rays, front/back post for texture (optional), sc border.
Step-by-step
Center medallion
- MR, ch3 (counts as dc), work 11 dc into MR. Join to form 12 dc total. Pull ring tight. (12)
Star rays (round 2)
- ch4, skip next dc, sl st in next dc — repeat around to create 6 ch4 loop positions (if you did 12 dc, use every other dc to get 6 rays). Join.
Raised ray petals (round 3)
- Into each ch4 loop work (puff stitch of 4 loops, ch1, sl st to secure) — adjust puff size to taste. Puff example: (yo, insert hook, pull up loop) ×4 — yo and pull through all loops — ch1 to secure. This builds 6 raised rays.
Anchor & expansion (round 4)
- Ch1, sc around across the base of petals into dc and sl st joins creating a round that connects petals. Between petals, work (sc, ch2, sc) to form small spacers.
Add outer points (round 5)
- For a more dramatic star, work: into each spacer ch2 work (dc, ch1, dc) — small point and in petal bases place 5-dc shells to widen. Adjust to reach target diameter (4.5–5″).
Final edge
- Round final: sc around evenly, placing 3 sc in each outer point corner to avoid puckering. Fasten off and weave ends.
Blocking & finishing
- Pin out the star points and block wet/steam to set points flat and sharp. This improves the graphic look and makes the coaster sit flat.
Care
- Wash and block again as needed. Cotton coasters can be machine-washed gentle, but repeated machine drying may relax points — reshape after washes.
Variations
- Use two contrasting colors: inner star in one color; outer shells in second color.
- Make mini sets with gradient yarn for a sunset-inspired stargazer series.
3. Crochet Floral Farmhouse Coaster Pattern
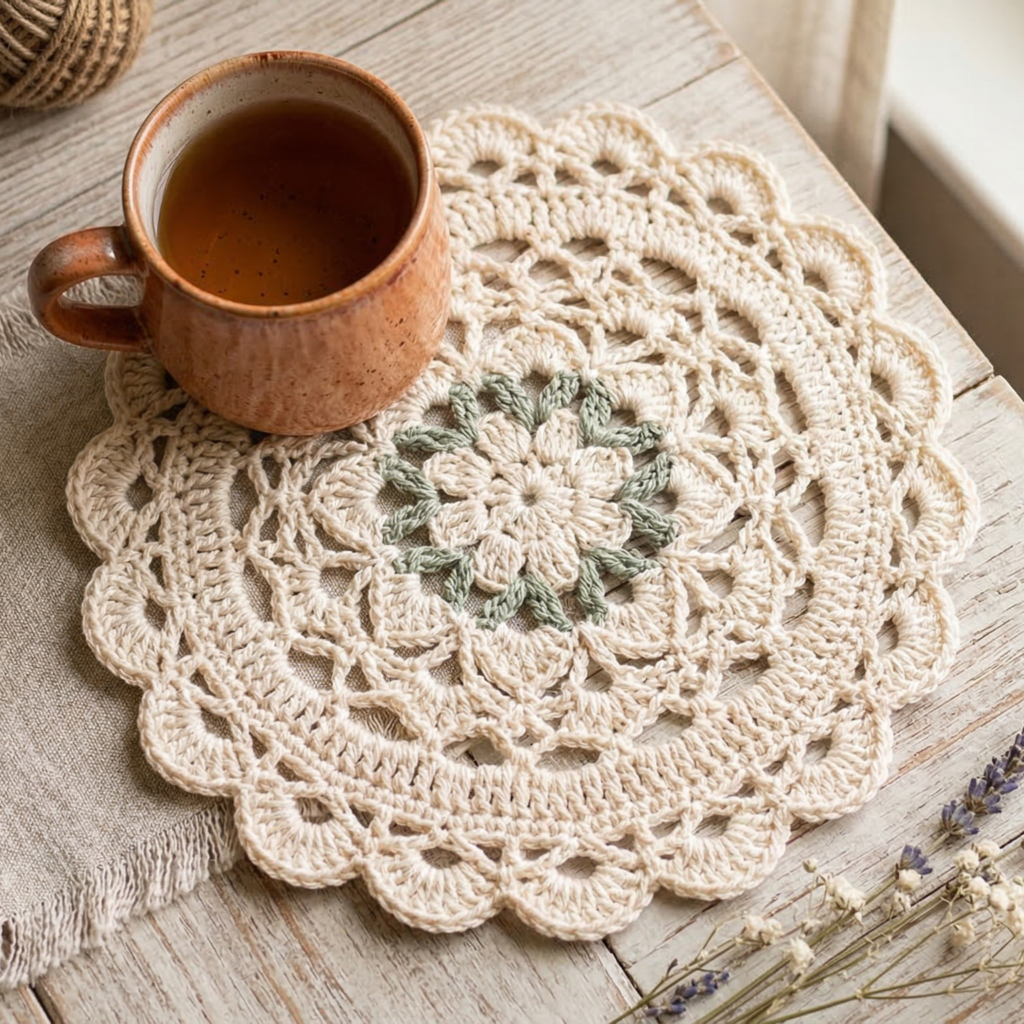
Classic round coaster with a raised floral motif and scalloped edge — vintage-inspired and very giftable for a farmhouse aesthetic.
Skill level: Intermediate (textured stitches + scalloped edging)
Finished size: approx 4″–4.5″ diameter
Yarn & hook: Mercerized cotton DK or sport for nice stitch definition; ~35–50 yds. Hook 3.0–4.0 mm.
Materials: yarn, hook, tapestry needle, blocking pins.
Design idea
Work a central raised flower (popcorns, bobbles, or cluster stitches), then surround with rounds of dc and a scalloped rim for a cottagey look.
Stitch palette
- bobble or popcorn stitch for the flower center, dc rounds, shell scallops for edge.
Step-by-step
Center flower (bobble cluster)
- MR, ch1, 8 sc into MR. Pull tight. (8)
- Flower round (bobble): ch2, work a 5-dc popcorn into the next sc (popcorn: 5 dc in same st, remove hook, insert hook into first dc of the 5, pull loop through to close), ch2, sl st in next sc — repeat around to create 8 popcorn petals. Join and secure.
Alternative: Use 3-dc clusters instead of popcorn if you prefer flatter petals.
Surrounding rounds
- Round 3: ch3, dc around into each sc and between popcorns forming a circular band (use ch-spaces to keep it flat). Join.
- Round 4: ch1, sc around to even the surface.
Scalloped edge
- Round 5: skip 2 sc, shell (5 dc) in next sc, skip 2 sc, sl st in next sc — repeat for scallops around. If scallops crowd near popcorn petals, space them so they align between petals.
Final tidy round
- Work one round of sl st in back loops only (BLO) if you want a subtle ridge to prevent cups sliding. Fasten off and weave ends.
Blocking & finishing
- Pin scallops to shape and steam/wet-block. The scalloped edge benefits from careful shaping.
Care
- Cotton coasters are strong; machine wash gentle; reshape after wash.
Styling & variations
- Embroider tiny leaves or French knots between scallops for extra farmhouse charm.
- Make a set with neutral base and varied flower colors (blush, sage, mustard).
4. Crochet Granny Stitch Heart Coaster Pattern
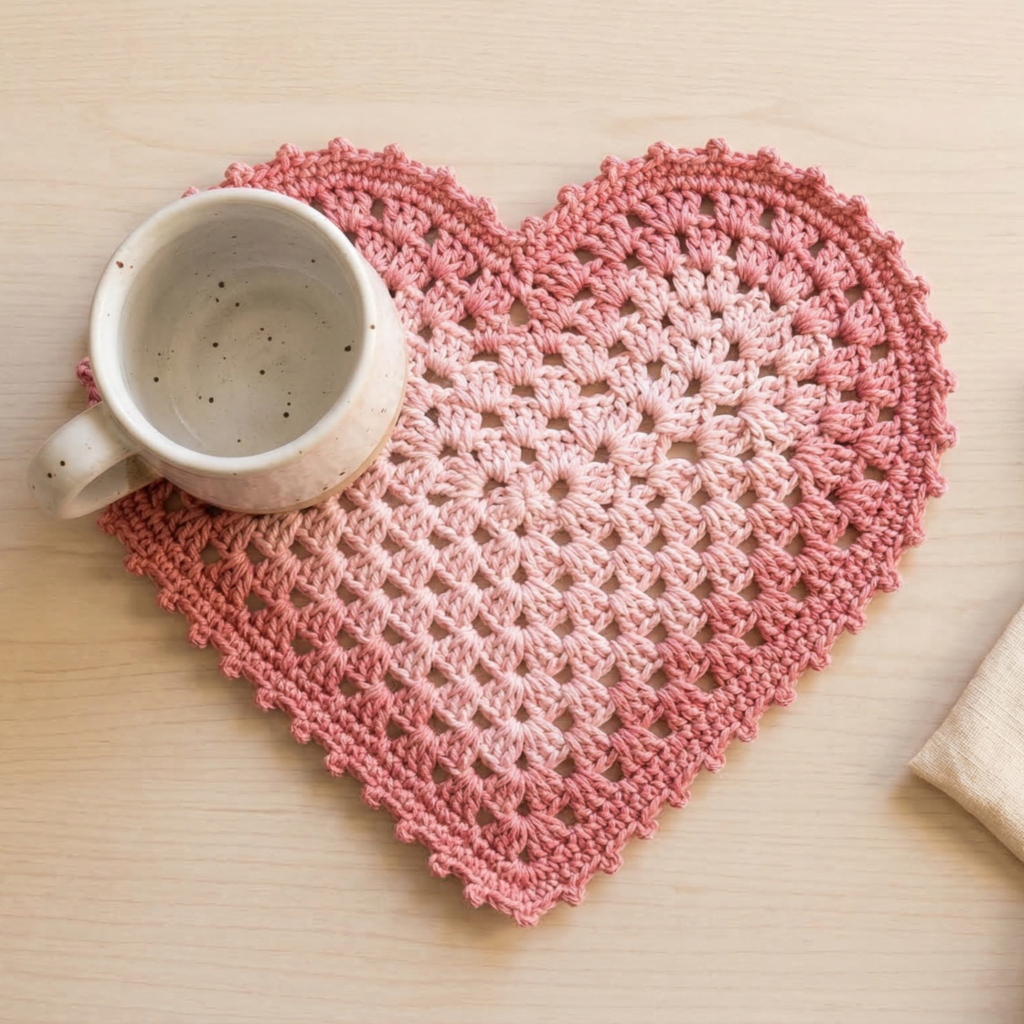
A cosy, heart-shaped granny coaster — adorable for Valentine’s gifts, wedding favors, or a romantic coffee set.
Skill level: Beginner (granny clusters + shaping)
Finished size: approx 4.5″ wide × 4.0″ tall
Yarn & hook: DK cotton or sport; ~30–45 yds. Hook 3.5–4.5 mm.
Materials: yarn, hook, tapestry needle.
Why this works
The heart is built using simple granny clusters and purposeful increases/decreases to form the heart lobes and point. The classic granny texture gives a handmade, homespun vibe.
Stitch palette
- 3-dc granny clusters + chain corners; sc finish around edge creates neat border.
Step-by-step
Heart foundation (worked as joined motifs/triangular granny halves)
Two simple approaches: (A) make two granny semicircles and join; (B) work a modified centered granny heart from a long strip and fold. Here’s a clear way using a small granny square + rounds to shape into a heart.
Method A — Two-lobed granny heart (clear beginner-friendly)
- Start with two identical small granny semicircles for lobes:
Lobe (make 2)
- MR, ch3, work 2 dc in MR, ch3, sl st to close (a tiny arched starter). This is more of a shape-start; instead, you can adapt from the small granny below.
Better: Use a 3-round small granny and then shape.
- MR, ch3 (counts as dc), 2 dc in MR, ch2, 3 dc in MR → join (small circle with one corner). This is basically a 1-corner granny; to make a semi-lobe, do 3 rounds of increasing to create a small fan that you then trim.
(This pattern is a little fiddly to describe in text; a simpler strip method below is straightforward.)
Method B — Strip + fold (recommended)
- Chain 28 (adjust for desired width). Row 1: sc in 2nd ch and across. Turn.
- Row 2: ch3, dc in next 2, ch1, skip 1, (3 dc in next) across — create a row of small clusters. Repeat rows to make a strip about 5–6 rows tall. This strip will be folded and shaped into a heart.
- Fold gently so one short end forms two lobes (fold in thirds and shape). Sew or stitch across to anchor fold, then shape the bottom point by tapering with a few decreases in sc and rounding the sides by stitching in as you sew.
Given space and clarity constraints, the easiest heart for beginners is:
Simple heart (granny-like, very clear)
- Make two small circles: MR, ch1, 6 sc in MR, join. Make 2. These are the lobes.
- Make a base triangle: Ch 12, sc across to make a small triangle strip: ch12, turn, sc across (11 sc), turn, dec at ends to taper for 4–5 rows.
- Assemble: Overlap two circles side by side for lobes and stitch the tapered triangle so its top edges are sewn to the inner edges of the two circles. Sew together to form a heart silhouette. Add a sc border around the whole heart: into each seam work sc to tidy edges. This is very beginner-friendly.
Edge & finishing
- Add one round of sc around edge to even shape; picot or scallop optional: sc 3, picot (ch3 sl st to first ch) for cute points.
Blocking & care
- Pin heart to shape and block lightly. Cotton holds shape with starch if you prefer stiffer coaster.
Variations
- Make heart sets in ombré shades; add tiny embroidered initials in center as a gift.
5. Crochet Moss Stitch Coaster Pattern
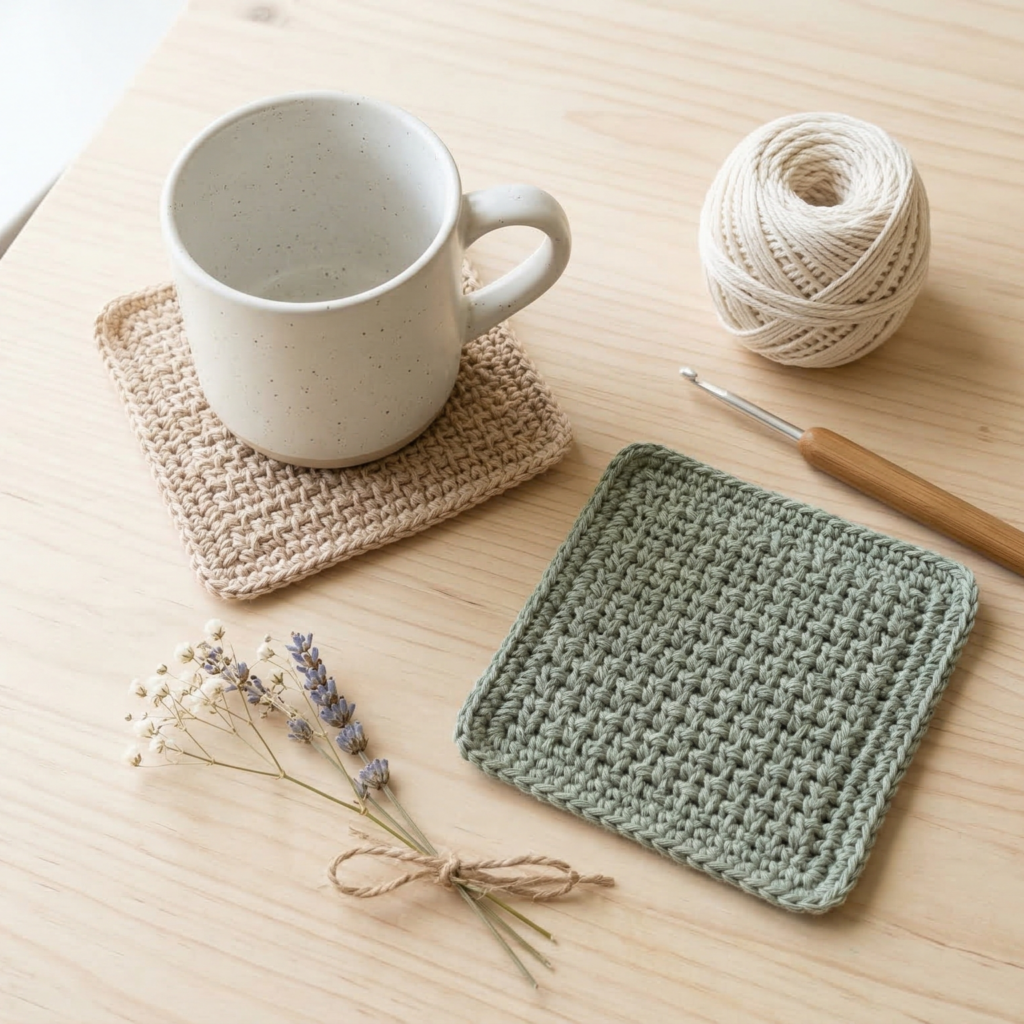
Moss stitch (also called linen stitch) creates a dense, textured fabric that’s perfect for a minimal, modern coaster that grips a mug well.
Skill level: Beginner (easy repeat, great for new stitch practice)
Finished size: approx 4″ square (make as square or round)
Yarn & hook: Sport/DK cotton; ~35–45 yds. Hook 3.5–4.0 mm.
Materials: yarn, hook, tapestry needle, blocking tools, optional cork backing.
Why moss stitch?
Moss stitch alternates sc and ch1 spaces in paired rows to create a woven, linen-like fabric that lies flat and is absorbent. Coasters made in moss stitch are dense enough to protect surfaces, yet attractive and modern.
Stitch key
- Moss stitch (linen stitch) pattern:
- Row A: sc in 2nd ch from hook, ch1, skip ch, sc in next across.
- Row B: ch1, sc in ch1 spaces across (working sc into spaces), ch1 at edges as needed.
Step-by-step — square coaster (recommended for beginners)
Foundation
- Chain 28 (or any even number to get ~4″ width; adjust for gauge). Turn.
Row 1 (setup)
- Sc in 2nd ch from hook and ch1, skip ch, sc in next across until last ch, sc in last ch. Turn.
Row 2
- Ch1 (does not count as st), sc into first ch1 space, ch1, sc into next ch1 space across; at the end sc into turning chain if available. Turn.
Repeat
- Repeat Row 2 for about 28 rows (or until coaster reaches approx 4″ square). Because moss stitch rows are short, count rows to keep square instead of rectangular (adjust chain foundation length if needed).
Border finish
- Once desired height achieved, work a round of sc around the entire square (work 3 sc in each corner to keep it flat). Fasten off and weave ends.
Alternative round coaster
- Make a round moss coaster by beginning with MR, increasing to a flat circle in sc to desired diameter, then switch to moss stitch in rounds: for round-based moss stitch, think in pairs of rounds — Round 1: sc around, Round 2: ch1, sc in next st around, anchoring ch1 spaces on next round. This is trickier to keep even — squares are the simplest.
Blocking & backing
- Block flat to even edges. For longevity, glue a thin cork circle to underside for heat and moisture protection — use fabric glue suitable for both cork and cotton.
Care
- Machine wash gentle; cotton may shrink slightly — reshape while damp.
Variations & uses
- Make moss stitch coasters in a neutral set and add one colorful coaster as an accent.
- Use a thicker cotton strand and larger hook for chunkier farmhouse coasters.
Conclusion
These five trendy coaster patterns give you a range of moods — playful (paw), modern (stargazer), vintage/farmhouse (floral), romantic (granny heart), and minimalist (moss stitch). A few final practical tips to make your coaster set professional and durable:
- Yarn choice is everything. For drinkware use 100% cotton or cotton-blend for absorbency and heat resistance. Mercerized cotton gives a subtle sheen for gift-quality coasters.
- Density matters. If drinks make the coaster sag, go down half a hook size to tighten the fabric or hold two strands together for extra density.
- Backings help. Thin cork or felt glued to the underside gives stability and protects furniture. Use fabric glue suitable for both yarn and backing.
- Blocking & shaping. Block all coasters flat to even the fabric — scallops and star points look sharp after blocking.
- Sets & styling. Make sets of 4 or 6 with a unifying color palette (neutrals + one accent). Pair a set with a handmade mug or tea towel for a lovely gift.
- Care labels. If you sell or gift coasters, include a small care tag (fiber content + washing instructions).