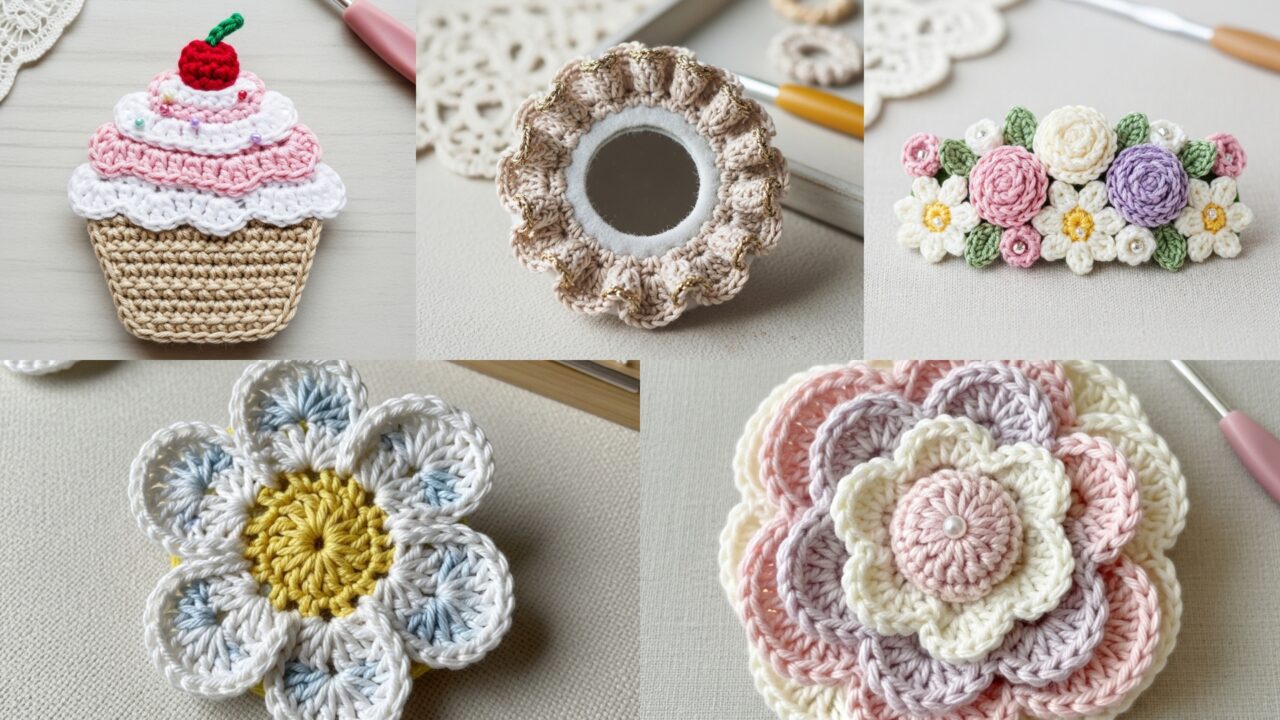
Brooches are tiny miracles — one little accent can lift a whole outfit, a bag, or a hat. Below is a full, blog-ready post with a practical introduction (materials, sizing, safety, and finishing), then five detailed brooch patterns with supply lists, skill level, finished-size examples, stitch notes, and step-by-step instructions: Soft Coquette Flower, Bouquet, Cute Cupcake, Cotton Flower, and Little Vintage Mirror. Each pattern is written so you (and your readers) can follow along, customize, and make brooches you’ll actually wear.
Quick intro — materials, safety, tools, and abbreviations
Why make crochet brooches?
They’re small, fast projects that let you experiment with texture, color and tiny embellishments. Brooches are perfect for gifting and for using yarn scraps.
Common materials & tools
- Yarn: fingering–DK (or thread for tiny lace). Cotton/mercercized cotton gives crisp petals; acrylic or blends give fluff and durability.
- Hooks: 1.75–3.5 mm for thread/fingering; 3.5–4.5 mm for DK. The pattern will suggest a size.
- Notions: tapestry needle, small sharp scissors, stitch markers (optional), blocking pins/mat (for shaped petals).
- Findings: brooch pin backs (safety pin-style or locking bar pin), small felt circles for backing, hot glue (optional but sewing is preferable), tiny jump rings for dangling charms.
- Extras: tiny beads, seed pearls, small buttons, metallic thread, thin ribbon, tiny mirror cabochon (for Vintage Mirror brooch).
- Safety note: if the brooch is for a young child, avoid small beads or glued-on parts that could detach — use embroidered centers instead.
Stitch abbreviations (US)
- ch = chain
- sc = single crochet
- hdc = half double crochet
- dc = double crochet
- tr = treble crochet
- sl st = slip stitch
- MR = magic ring
- inc = increase (2 sc in same st)
- dec = decrease (invisible dec if possible)
- rep = repeat
- BLO / FLO = back loop only / front loop only
General finishing & attachment
- Always sew the yarn tail ends into the piece and knot inside so ends don’t poke out.
- For a neat back, cut a small felt circle the same diameter as the brooch back and sew it on, catching the pin and fabric to secure. If you use glue, sew afterwards too — stitching is more durable.
- To attach a pin back: position the pin, tack-stitch it to the felt with matching thread, then sew felt to brooch with small invisible stitches.
1. Crochet Soft Coquette Flower Brooch Pattern
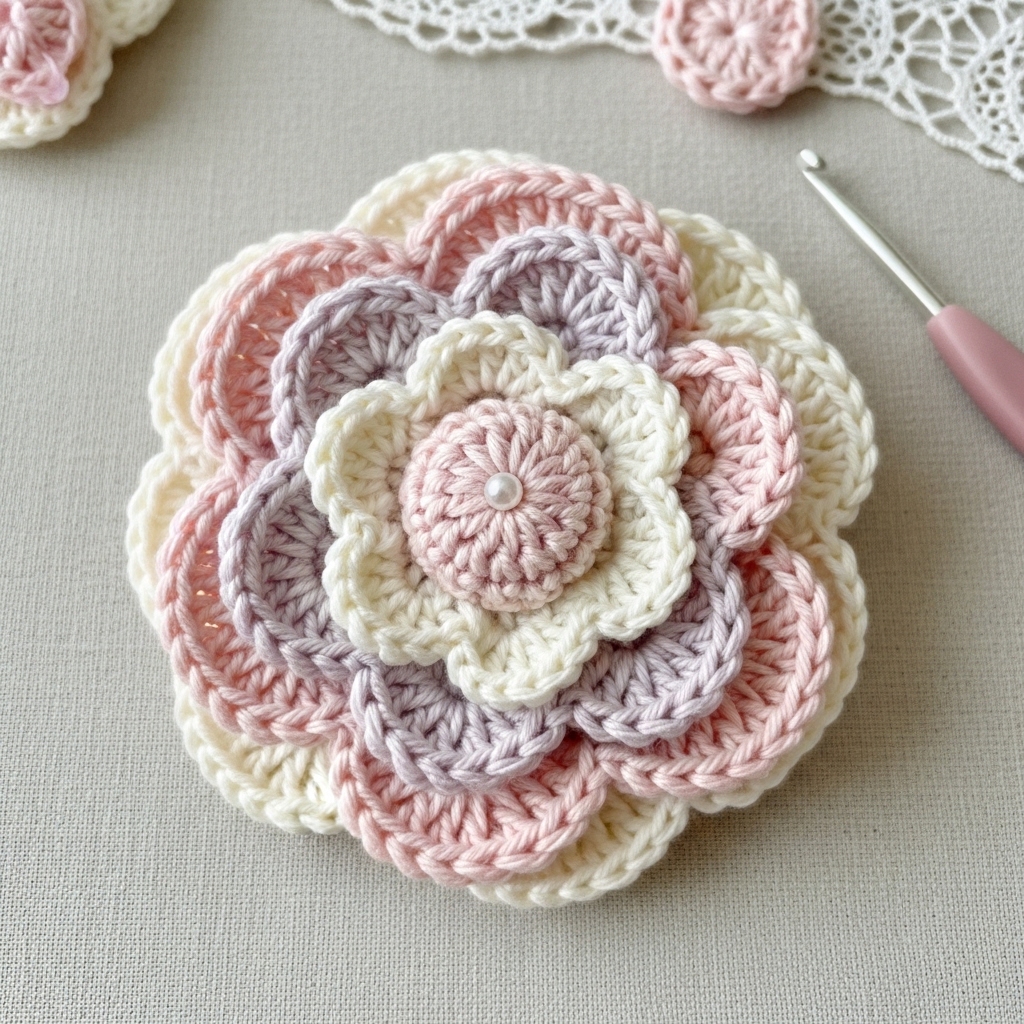
Vibe: fluffy, feminine, layered petals — a wearable little cloud.
Skill level: confident beginner
Finished size: ~2.25–2.75 in diameter (depending on yarn & hook)
Materials
- DK cotton or soft acrylic main color ~15–25 yd; contrast for center optional.
- Hook: 3.5 mm.
- Small amount of stuffing (optional for puffy center), felt circle (about 1–1.5 in), brooch pin back, tapestry needle.
Stitches used
sc, hdc, dc, tr, puff stitch (or cluster), sl st.
Pattern overview
Make two layered petal rounds (large and small) and a puffy center. Stack and stitch together; finish with felt backing and pin.
Step-by-step
A — Small petal layer (inner)
- MR, ch1, 6 sc in MR. Pull ring tight. (6)
- Round 2: ch3, sl st in next st around to make 6 loops for petals. Sl st into first loop and work petal row: in each ch-3 loop work (sc, hdc, dc, hdc, sc). Fasten off leaving a tail.
B — Large petal layer (outer)
- MR, ch1, 8 sc in MR. (8)
- Round 2: ch4, sl st in next st across to create 8 larger loops. In each ch-4 loop work (sc, hdc, 3 dc, hdc, sc) for full petals. Fasten off leaving a tail.
C — Puffy center
- With main or contrast color: MR, ch1, 6 sc in MR, pull tight. R2: inc around → 12. R3: sc around 12. Stuff lightly (optional) to make a slight dome. Fasten off leaving long tail.
D — Assembly
- Layer the small petal round on top of the large petals (centered). Use the long tails to whipstitch through both layers around inner ring, and secure puffy center on top. Make sure stitches go through all layers.
- Cut a felt circle slightly smaller than brooch back. Position brooch pin on felt and tack pin down with thread (stitch through pin holes if it has them). Then sew felt to the back of brooch, catching inner stitches but leaving a neat outer edge.
- Weave ends and trim.
E — Variations & styling
- Add a tiny pearl or bead to the center (sew securely) for vintage coquette effect.
- Use two contrasting colors for stronger visual pop.
2. Crochet Bouquet Brooch Pattern
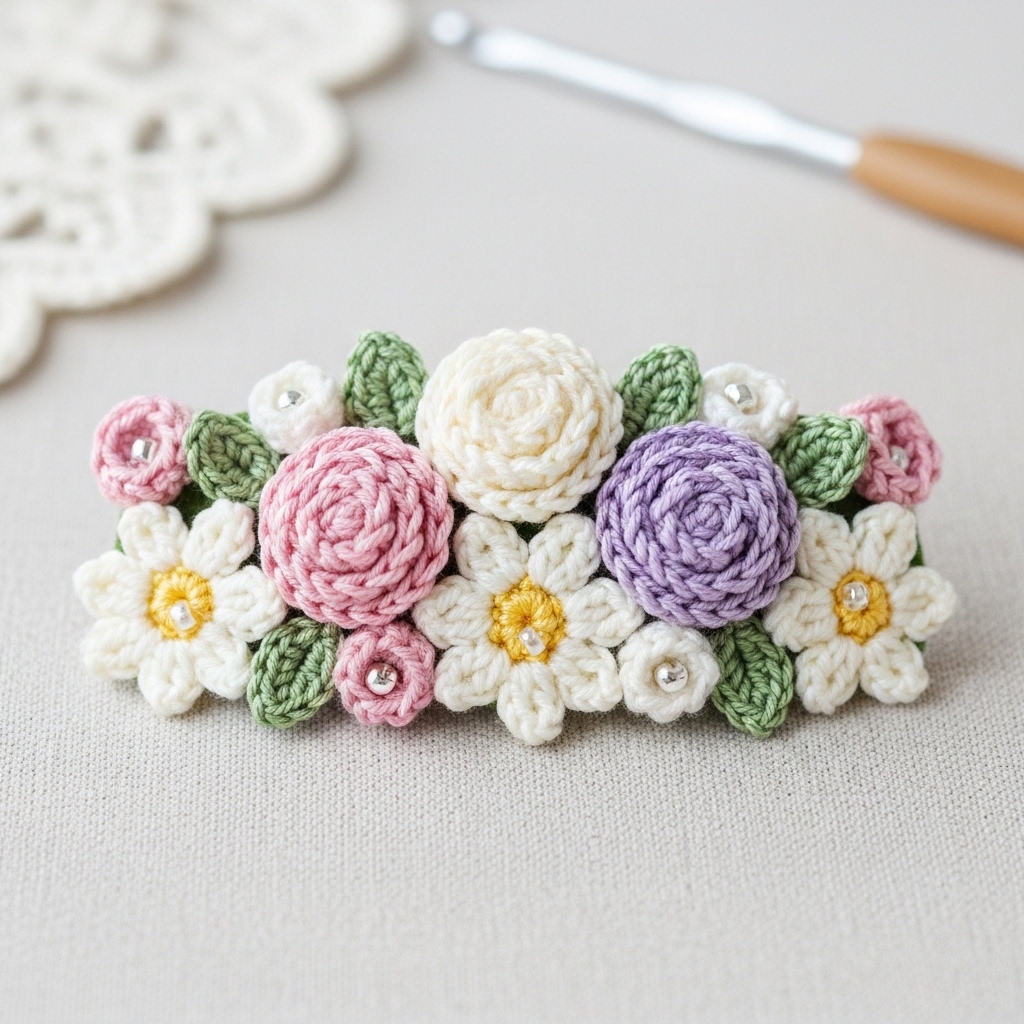
Vibe: tiny arranged flowers and leaves sewn into a bouquet — looks like a wearable posy.
Skill level: intermediate (multiple small motifs + assembly)
Finished size: ~2.5–3.25 in depending on number of bloomlets
Materials
- Fingering / sport yarn in 3–5 colors for small flowers + leafy green ~25–40 yd total.
- Hook: 2.5–3.0 mm for crisp small flowers.
- Small beads for centers (optional), felt backing, brooch pin back.
Elements used
- Micro roses (tiny spiraled rosette), tiny daisy motifs, leaf motif.
Pattern pieces (make several small motifs)
A — Tiny rose (make 2–4)
- Ch 21. Row 1: sc in 2nd ch from hook and across (20 sc). Row 2: ch3, turn, (3 dc) in first st, sl st in next along to make ruffled strip — loosely roll this strip from one end and sew along base to secure into a rose shape. Fasten and leave tail for sewing.
B — Tiny daisy (make 3–6)
- MR, ch1, 6 sc in MR, sl st to join.
- R2: (ch 3, sl st in next st) around to create 6 little loops. R3: in each loop work (sc, hdc, 2 dc, hdc, sc) for petals. Fasten off leaving tail.
C — Leaf (make 4–6)
- Ch 8: sc in 2nd ch, hdc, dc, hdc, sc; ch2, sl st to base to create a small leaf shape. Fasten off.
Assembly
- Arrange roses, daisies and leaves into a small posy composition on your blocking mat until you like the layout.
- Use long tapestry needle and matching thread to sew each motif securely to each other at base (go through base of rose coil, underside of daisies, and leaf stems). Make sure bouquet base is compact so it hides the felt backing.
- Sew a felt circle to underside and anchor pin back as in Pattern 1. Add tiny seed bead centers to daisies (sew through felt and into bead for extra security).
Variations
- Make a single bold rose with three leaves for a minimalist brooch.
- Add a tiny tied ribbon sewn under bouquet for coquette charm.
3. Crochet Cute Cupcake Brooch Pattern
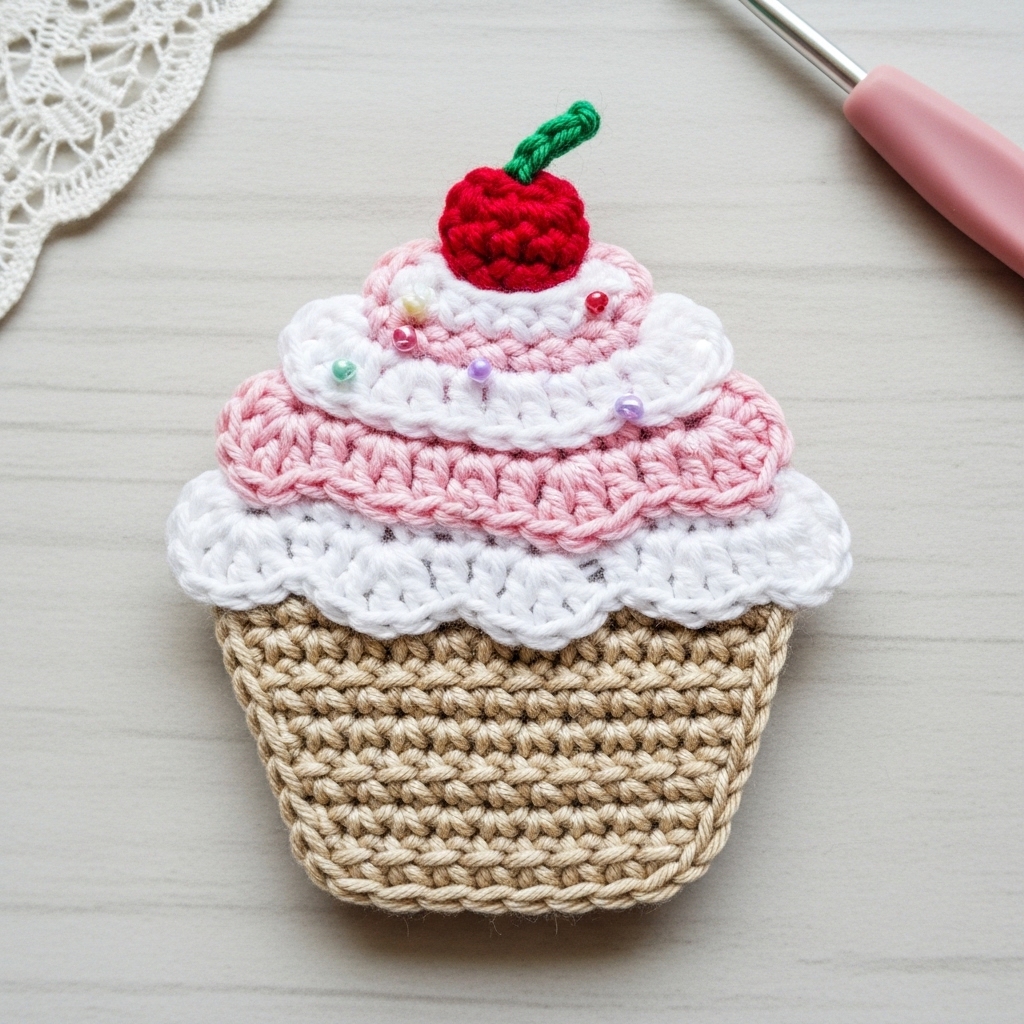
Vibe: playful dessert — a little cupcake with frosting swirl and optional bead “sprinkles.”
Skill level: confident beginner
Finished size: ~2–2.5 in tall (cupcake including cherry)
Materials
- Fingering or sport yarn: cake base color (beige/tan), frosting color (pink/white), tiny red yarn for cherry.
- Hook: 2.5–3.5 mm.
- Small bead or felt circle for cherry, felt backing, brooch pin.
Stitches used
sc, hdc, dc, puff stitch (for frosting texture), sl st.
Step-by-step
A — Cup (base)
- MR, ch1, 6 sc in MR. R2: inc around → 12. R3: sc1, inc around → 18. R4: sc around 18 (this forms the base top).
- R5–R7: switch to beige and work sc in back loops only (BLO) to create ridged cake wrapper texture for 3 rounds. Fasten off leaving tail.
B — Frosting (swirl)
- With frosting color, join at center top of base: MR, ch1, 8 sc in MR. Pull tight.
- R2: inc around → 16. R3: sc1, inc around.
- R4: make decorative puff/swirl: ch2, (puff in next st, ch1) around — puff = yo, insert, pull up loop x3, yo pull through all loops, ch1 to close. This gives a textured frosting look. Fasten off leaving tail.
C — Cherry
- Tiny cherry: MR, 6 sc in MR, pull tight, fasten leaving tail. Sew to top center of frosting. Optionally place a tiny bead as a cherry and stitch through felt to secure.
D — Assembly
- Sew frosting to cup base at top edge with matching yarn, ensuring hidden stitches. Stitch felt backing and pin as before.
E — Embellish
- Add “sprinkles”: sew tiny seed beads onto frosting spaced evenly (sew through felt underside as extra security).
Variations
- Make a mini cupcake pair for a double-pin cluster.
- Use sparkly thread for holiday-themed frosting.
4. Crochet Cotton Flower Brooch Pattern
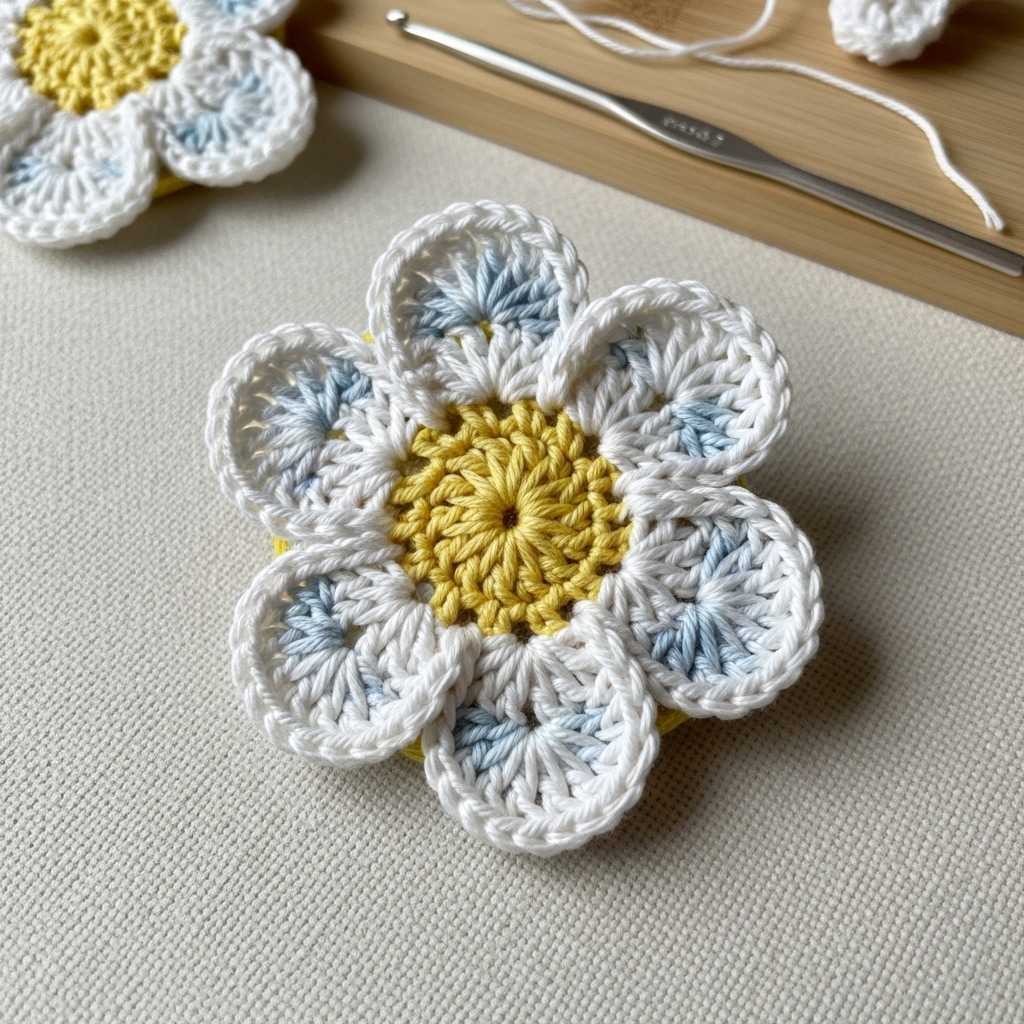
Vibe: crisp, classic single-layer cotton flower (timeless and wearable).
Skill level: confident beginner
Finished size: ~2–3 in diameter (depends on hook / thread)
Materials
- Mercerized cotton (fingering or thread) in the flower color ~10–15 yd; yellow/contrast for center.
- Hook: 2.0–3.0 mm depending on yarn.
- Felt back, brooch pin, tapestry needle.
Stitches used
MR, sc, hdc, dc, picot (optional), sl st.
Step-by-step
A — Center
- MR, ch1, 6 sc in MR; pull tight. R2: sc around 6 or inc around to create a larger disk if you want more center.
B — Petals (6 petals)
- Join petal color to any stitch: ch5, sl st in base st (to form a loop) repeat 6 times to make 6 loops around.
- In each loop work sc, hdc, 3 dc, hdc, sc to form a rounded petal shape. Fasten off and weave in tail.
C — Optional picot edge
- Work a small picot round around outer petal edges for delicacy: sc across petals, ch3, sl st in same st at each petal tip.
D — Assembly & backing
- Sew center neatly to petal layer with small stitches. Cover back with felt and sew on pin. For extra stability when wearing on heavy coats, use a slightly larger felt backing and reinforce pin.
E — Styling tips
- Works beautifully as monochrome or with different colored petals for ombré.
- Because cotton holds shape, you can lightly steam-block petals into flat shapes.
5. Crochet Little Vintage Mirror Brooch Pattern
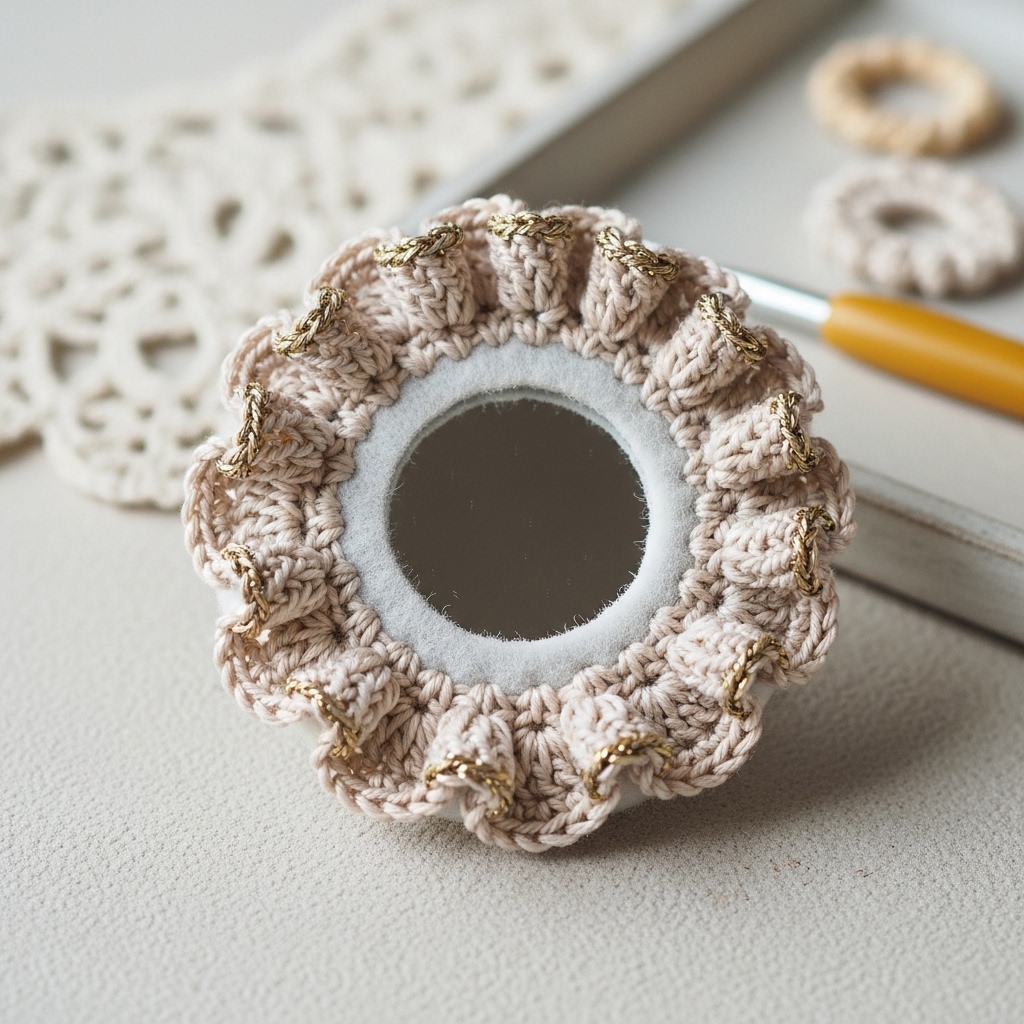
Vibe: antique-inspired brooch with a tiny faux mirror or cabochon set in a ruffled frame — elegant, decorative.
Skill level: intermediate (cabochon mounting + neat finishing)
Finished size: ~2–2.5 in diameter (mirror/cabochon ~1 in)
Materials
- Fine cotton or fingering yarn for lace frame ~15–25 yd.
- Small round mirror cabochon, button mirror, or decorative metal disc (~1 in).
- Hook: 2.5–3.0 mm.
- Felt backing, brooch pin, strong glue (E6000 or fabric glue) only if you also sew.
Concept
Create a crochet bezel that holds a small round mirror/cabochon and frames it with picots or scallops. Back with felt and secure pin.
Step-by-step
A — Bezel for cabochon
- Measure cabochon diameter (example 1 in). Work a tight circle to match: MR, ch1, 6 sc. R2: inc around → 12. R3: sc1, inc around → 18. Continue rounds until circle slightly smaller than cabochon edge so the cabochon will sit snugly on top.
- Final round (wall): work a round of sc into back loops only (BLO) to create a small ridge that forms the cabochon pocket wall.
B — Place cabochon
- Set cabochon into pocket; it should sit snug. If slightly loose, add a thin layer of felt under cabochon inside the pocket and press it in.
- For extra security, stitch tiny overhand stitches across cabochon edge at 4 points (like sewing a bezel) from inside to outside using strong thread. Avoid glue as sole method — always sew for safety.
C — Decorative frame
- With lace yarn, work a round of larger loops: ch3, sl st in next st around. In each ch-3 loop work picot or shell: (sc, ch2, sc) or (5 dc) depending on look. This creates a ruffled frame.
D — Backing & pin
- Sew felt circle behind bezel, stitch around edge to secure. Stitch pin onto felt: place pin back, tack it through felt several times with strong thread to create secure attachment (also stitch through crochet base to felt for robustness). Hide threads.
E — Variations & faux-antique finish
- Wrap metallic embroidery thread around outer scallops for a gilded look.
- For true vintage mirror effect, distress metal cabochon gently or choose an antiqued brass button instead.
Final finishing, care & gift ideas
- Durability: Always sew pin backs through felt and into crochet fabric with multiple passes. If you use glue, let it cure fully and back it up with stitches.
- Washing: Most yarn brooches should be spot-cleaned. Cotton can be hand-washed gently. Remove brooch from clothing before washing items.
- Presentation: Mount brooch on a little card (punch two holes and stitch through), place in small kraft box with tissue, or attach to ribbon for gift-ready look. Include care instructions and fiber content.
conclusion
These five brooch patterns cover a wide range of styles — from the puffy romantic Coquette Flower to the tiny wearable Bouquet, the playful Cupcake, the crisp Cotton Flower, and the elegant, heirloom-style Vintage Mirror. They’re small projects with big impact: great for using scraps, testing a new stitch, or making heartfelt gifts. Pick a brooch that fits your style, swatch for neatness, secure the pin well, and enjoy turning everyday outfits into something special.