

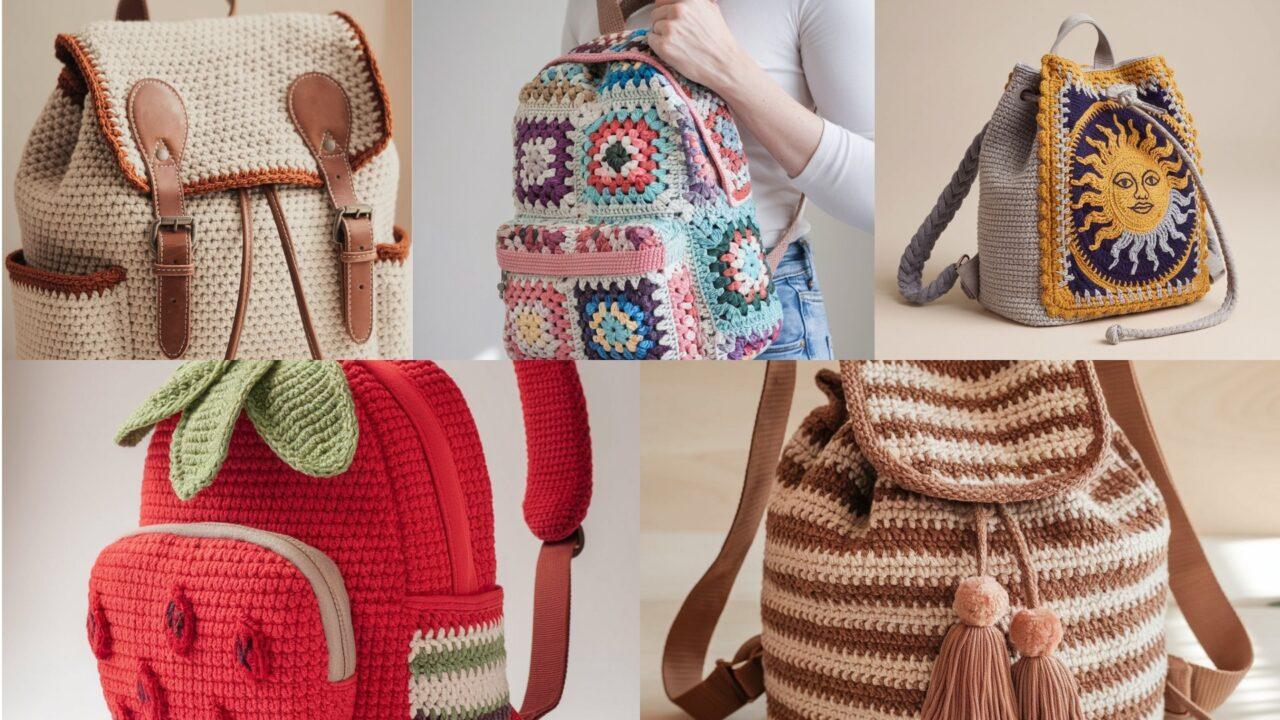
A handmade crochet backpack is equal parts fashion statement and practical accessory — perfect for gifting, markets, or building a signature everyday bag. This post gives you everything in one place: a clear intro, full, ready-to-use instructions for five backpack patterns, construction tips (lining, reinforcement, straps), materials and hardware advice, and a solid conclusion that tells readers exactly what to do next. Pick a pattern, follow the step-by-step, and you’ll have a sturdy, wearable bag — not just a pretty sample.
Quick notes, sizing & abbreviations (read first)
General sizing (example finished dimensions)
- Small daypack: ~10″ H × 8.5″ W × 3.5–4″ D
- Medium (sample): ~12–13″ H × 10–11″ W × 3.5–5″ D
- Large tote/backpack: add 2–4″ to height & width
Yarn & hook
- Use 100% cotton or cotton-blend worsted for durability and low stretch. For sturdier bags, use bulky yarn but always line.
- Hook: 4.5–5.5 mm for worsted; 6.5–9 mm for bulky. Use a slightly smaller hook for a tighter fabric.
Hardware & reinforcement
- Zippers (9–12″), D-rings, slider buckles, rivets (optional), cotton webbing for straps, fusible interfacing, Insul-Bright or plastic canvas for base reinforcement.
Why line?
Lining stabilizes shape, allows secure hardware attachment, and protects yarn from wear and contents from snagging.
Abbreviations
ch = chain · sl st = slip stitch · sc = single crochet · hdc = half double crochet · dc = double crochet · tr = treble · st(s) = stitch(es) · inc = 2 sc in same st · dec = sc2tog · BLO/FLO = back/front loop only · MR = magic ring.
1. Crochet Mochila Boho Backpack Pattern
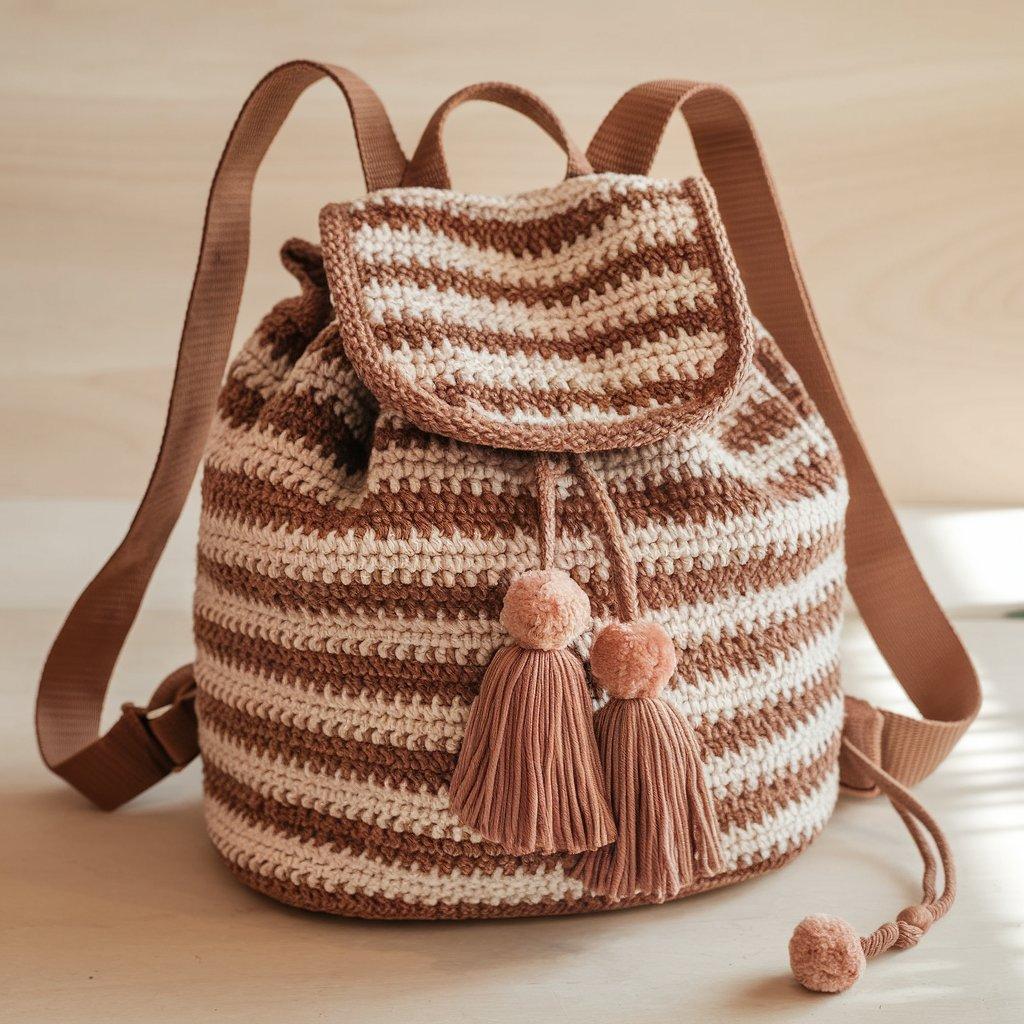
Style: Rounded, drawstring + flap, tassels/poms — boho everyday pack.
Finished (medium): 12″ H × 10″ W × 4″ D
Skill level: Intermediate (shaping + lining)
Materials
- Worsted cotton (main + accent) 400–600 yds
- Hook 5.0 mm
- Cotton cord or leather drawstring ~30″, small magnetic snap, lining fabric & fusible interfacing
Construction (bottom-up, in the round)
Base (oval)
- MR; ch 1, 8 sc in MR; join. (8)
- R2: inc around → 16.
- R3: sc 1, inc → 24.
- R4: sc 2, inc → 32. To make an oval increase only at two opposite sections (mark long axis) to elongate. Continue rounds until base ≈ 10″ long × 4″ wide.
Body
5. Rounds: ch 1, sc around (work in BLO for the first 2 rounds for a neat ridge), then sc in both loops until height ≈ 9″ from base.
Pocket
6. Make pocket rectangle: ch 30, sc across; rows until pocket ≈ 5″ tall. Sew centered on front, reinforce with a sc round across the top.
Drawstring channel & top
7. Work 2 rounds of BLO sc, then a row of sc 2, ch 3, sk 3 for eyelets. One more sc round to stabilize. Feed cord through eyelets.
Flap & straps
8. Flap: attach at back top; make a triangle or half-circle to cover drawstring; secure with snap.
9. Straps: crochet 2 wide straps or make braided leather; attach with D-rings and secure through lining with reinforced stitches/leather patch.
Lining & finishing
10. Cut lining to interior shape, fuse interfacing on base/pocket areas, sew lining tube, insert, and ladder-stitch top edge to bag top. Add tassels to drawstring ends.
2. Crochet Wildrose Backpack Pattern

Style: Romantic with 3D rose appliqués; zip top.
Finished (medium): 13″ H × 11″ W × 4″ D
Skill level: Intermediate → Advanced
Materials
- Worst ed cotton main + rose contrast 500–700 yds
- Hook 5.0 mm, 10–12″ zipper, leather straps or crocheted straps + buckles, lining & interfacing
Construction
Panels
- Make front & back rectangles: ch 34 (or width to get ~11″), sc rows until height ~13″. Make side strip or base oval for depth.
Roses (appliqué)
2. Ruffle strip: ch 50; sc 1, hdc, dc, tr, dc, hdc across to create a ruffled strip. Coil the strip and sew into a rose (secure with whipstitch). Make multiple sizes and sew onto front.
Zipper & assembly
3. Sew zipper to top edges (RS facing). Attach side strip to panels, insert lining (fuse interfacing where roses attach). Sew lining to zipper for clean finish.
Straps
4. Attach sturdy straps using rivets or D-rings sewn through reinforced leather patches.
3. Crochet Patch Backpack Pattern
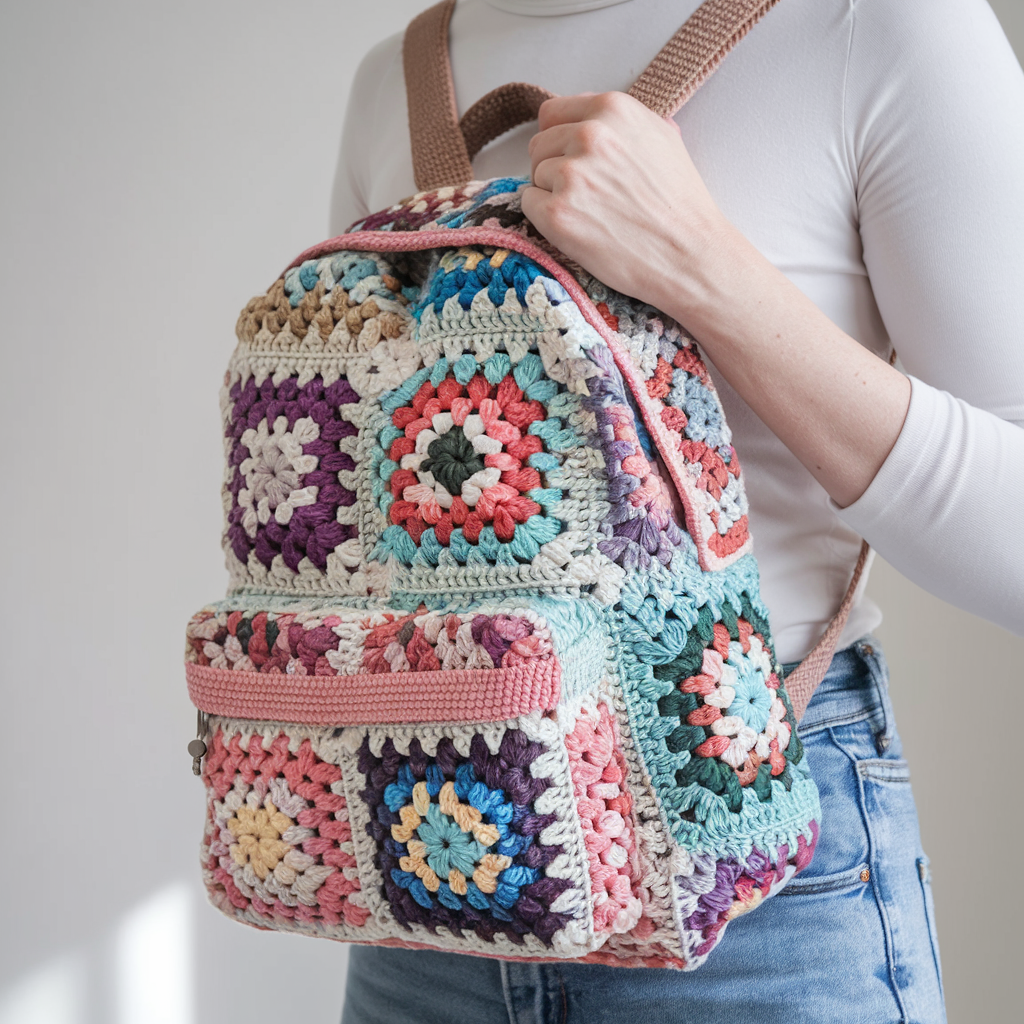
Style: Scrap-friendly patchwork of granny squares — endlessly customizable.
Finished (medium): 12″ H × 10″ W × 4″ D
Skill level: Beginner → Intermediate
Materials
- Multiple scrap yarns (or chosen palette) ~400–700 yds total
- Hook 4.5–5.0 mm, lining & interfacing, straps/webbing
Construction
Motifs
- Make granny squares (3–4″ each). Layout front: 3 across × 4 high (12 squares). Repeat for back. Make side/base strip (long row of squares) or make base oval.
Join & assemble
2. Block squares, join with whipstitch or JAYG. Piece together front, back and side strip; sew into a box. Line interior with canvas + interfacing. Add flap or zipper as desired.
Straps & reinf
3. Make sturdy straps by crocheting over cotton webbing (crochet tube or cover) and attach to base with reinforced stitching.
4. Crochet Sun and Moon Drawstring Backpack Pattern
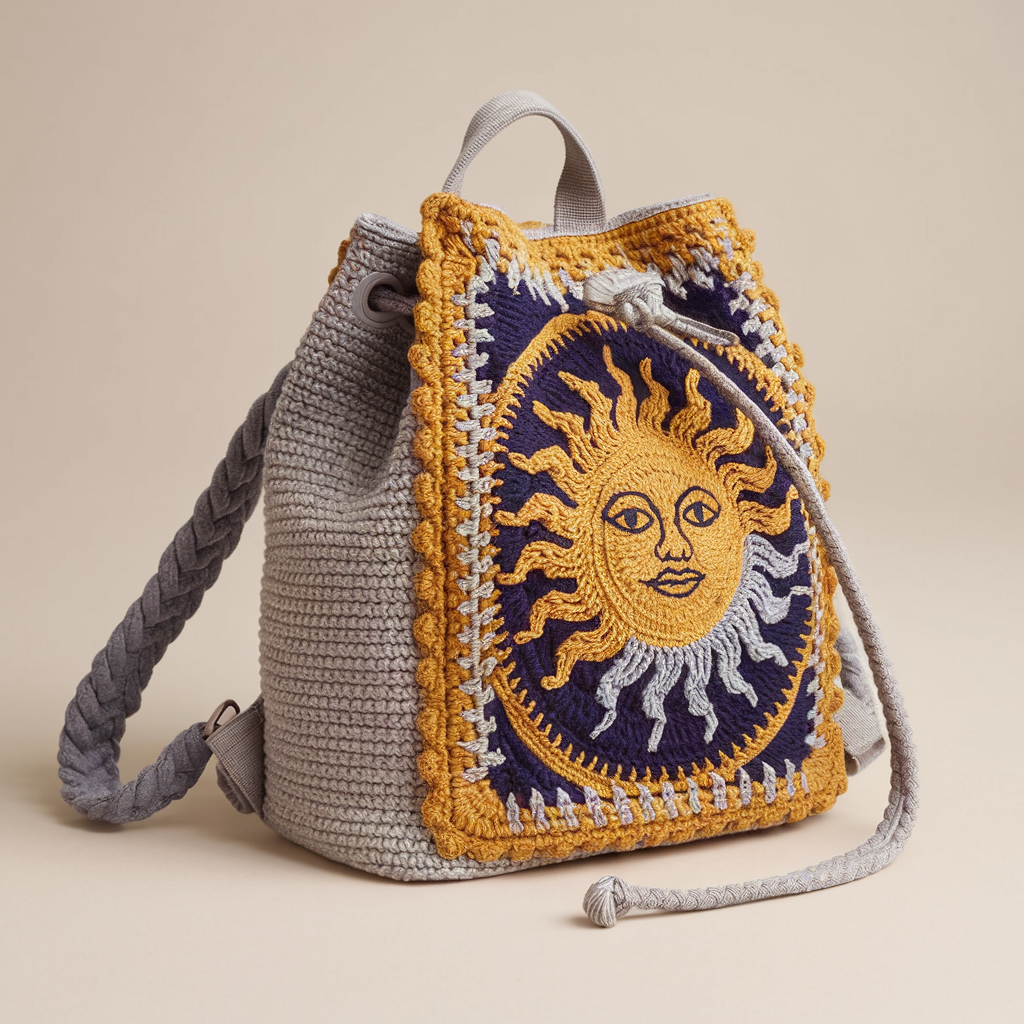
Style: Graphic tapestry/tapestry-style front panel with drawstring closure.
Finished (medium): 12″ H × 10″ W × 4″ D
Skill level: Intermediate (colorwork)
Materials
- Worsted cotton for motif 400–550 yds
- Hook 4.5–5.0 mm, cotton cord drawstring, lining
Construction
Motif panel
- Plan motif on a grid (e.g., 30 sts × 36 rows). Work tapestry crochet (sc or dc) or surface crochet later: carry unused color on WS and keep floats < 4 sts.
Body & drawstring
2. Make back panel plain, join side strip/base. At top create eyelet row (sc 2, ch 3) as drawstring casing; one more sc round to stabilize. Thread cord through.
Straps & lining
3. Make braided cord straps or crocheted straps threaded through bottom loops to create backpack functionality. Line bag and secure hardware.
5. Crochet Strawberry Themed Backpack Pattern
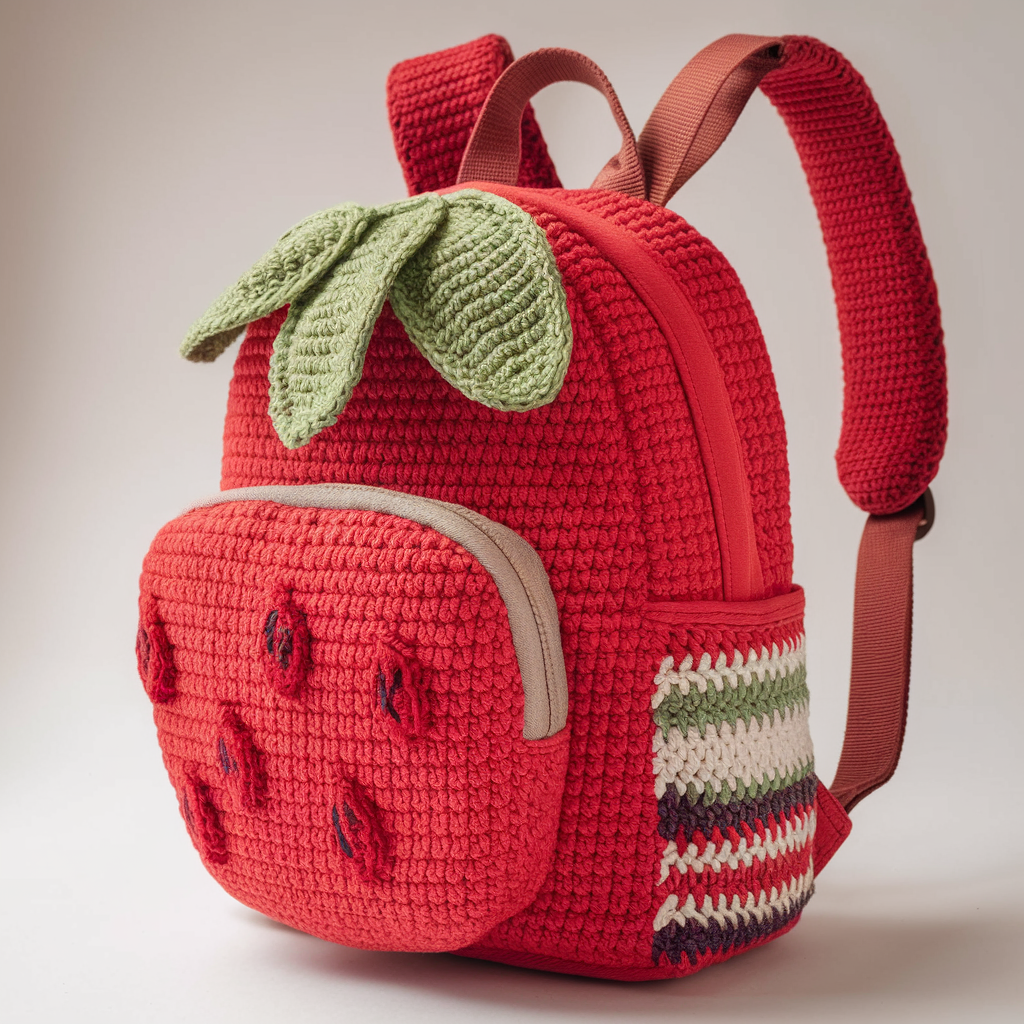
Style: Playful bag with strawberry pocket, leaf flap — great for kids & quirky fashion.
Finished (medium): 11″ H (bag); strawberry pocket ~6–7″ H
Skill level: Beginner → Intermediate
Materials
- Red + green + cream/black cotton 350–500 yds
- Hook 5.0 mm, lining, snap or zipper for pocket closure
Construction
Body & base
- Make rectangle or oval base as in other patterns, sc rounds for dense fabric.
Strawberry pocket
2. MR, 8 sc; increase rounds to shape teardrop/heart; stop when pocket ≈ 6–7″. Add embroidered seeds (French knots) in cream/black. Attach pocket to front and top-stitch for reinforcement.
Leaf flap & strap
3. Crochet leaf-shaped flap (several leaf appliqués joined) to cover pocket; secure with snap. Make straps (crocheted tubes with webbing inside for strength) and attach.
Lining, Straps & Strengthening — practical guide
Why line? Prevent sagging and make hardware attachment strong.
How to line (step-by-step)
- Measure interior and cut lining pieces (subtract seam allowance). Fuse interfacing to base/pocket areas.
- Sew lining tube (leave top open). Insert lining into bag (wrong side of lining faces RS of crochet). Pin and ladder-stitch top edge to crochet or sew lining to zipper. Reinforce strap anchor points with extra interfacing or leather patches.
Strap construction
- Best practice: crochet a tube and slip cotton webbing inside; sew ends securely. Or use leather/webbing with crocheted covers for comfort. Use D-rings and slider buckles for adjustability.
Base inserts
- Insert plastic canvas or covered plywood for a rigid base. Cut to lining shape and slip in under lining base so it’s hidden.
Care, washing & final tips
- Yarn choice matters: 100% cotton recommended. Avoid acrylic for heat (melts) and heavy weight.
- Washing: spot-clean often; machine wash gentle (inside out), air dry flat; remove leather hardware first if possible.
- Blocking: block panels flat pre-assembly for neat seams.
- Hardware: metal hardware lasts longer and looks professional.
- Sizing adjustments: change chain counts by gauge (sts per inch) × desired width. Add rows to increase height.
Conclusion
You’ve got five solid, fully explained backpack designs that cover a range of skills and styles — boho drawstring mochila, romantic Wildrose with appliqués, customizable Patchwork square, graphic Sun & Moon drawstring, and the playful Strawberry pocket pack. Each pattern is intentionally built to be useable: dense stitches for durability, recommended cotton yarn for safety and longevity, and clear guidance for lining, reinforcement and strong straps.
Next steps for your readers (simple, actionable):
- Pick a style that matches your skill & use case. If you’re new: start with Patch or Strawberry. Intermediate? Mochila or Sun & Moon. Want a showcase piece: Wildrose.
- Make a tiny swatch. Test gauge and decide if you need to adjust hook size for a denser fabric.
- Gather hardware first. Zipper length, D-rings and strap webbing determine final finishes — buy these before you start to ensure compatibility.
- Line it. Don’t skip lining if you plan to carry heavy items — it makes the bag last and keeps stitches tidy.
- Reinforce stress points. Add a small leather patch or extra interfacing where straps attach.


Your article helped me a lot, is there any more related content? Thanks!
Can you be more specific about the content of your article? After reading it, I still have some doubts. Hope you can help me. https://www.binance.com/sk/register?ref=WKAGBF7Y
Your article helped me a lot, is there any more related content? Thanks! https://accounts.binance.com/uk-UA/register-person?ref=XZNNWTW7
Can you be more specific about the content of your article? After reading it, I still have some doubts. Hope you can help me.
Can you be more specific about the content of your article? After reading it, I still have some doubts. Hope you can help me. https://www.binance.info/vi/register?ref=MFN0EVO1
Your point of view caught my eye and was very interesting. Thanks. I have a question for you.
Thank you for your sharing. I am worried that I lack creative ideas. It is your article that makes me full of hope. Thank you. But, I have a question, can you help me?
I don’t think the title of your article matches the content lol. Just kidding, mainly because I had some doubts after reading the article. https://accounts.binance.com/ph/register?ref=IU36GZC4
Thanks for sharing. I read many of your blog posts, cool, your blog is very good.
Your article helped me a lot, is there any more related content? Thanks! https://www.binance.info/id/register?ref=UM6SMJM3
Thanks for sharing. I read many of your blog posts, cool, your blog is very good.
Thank you for your sharing. I am worried that I lack creative ideas. It is your article that makes me full of hope. Thank you. But, I have a question, can you help me? https://accounts.binance.com/si-LK/register-person?ref=LBF8F65G
Your article helped me a lot, is there any more related content? Thanks!
Thanks for sharing. I read many of your blog posts, cool, your blog is very good. https://www.binance.com/register?ref=QCGZMHR6