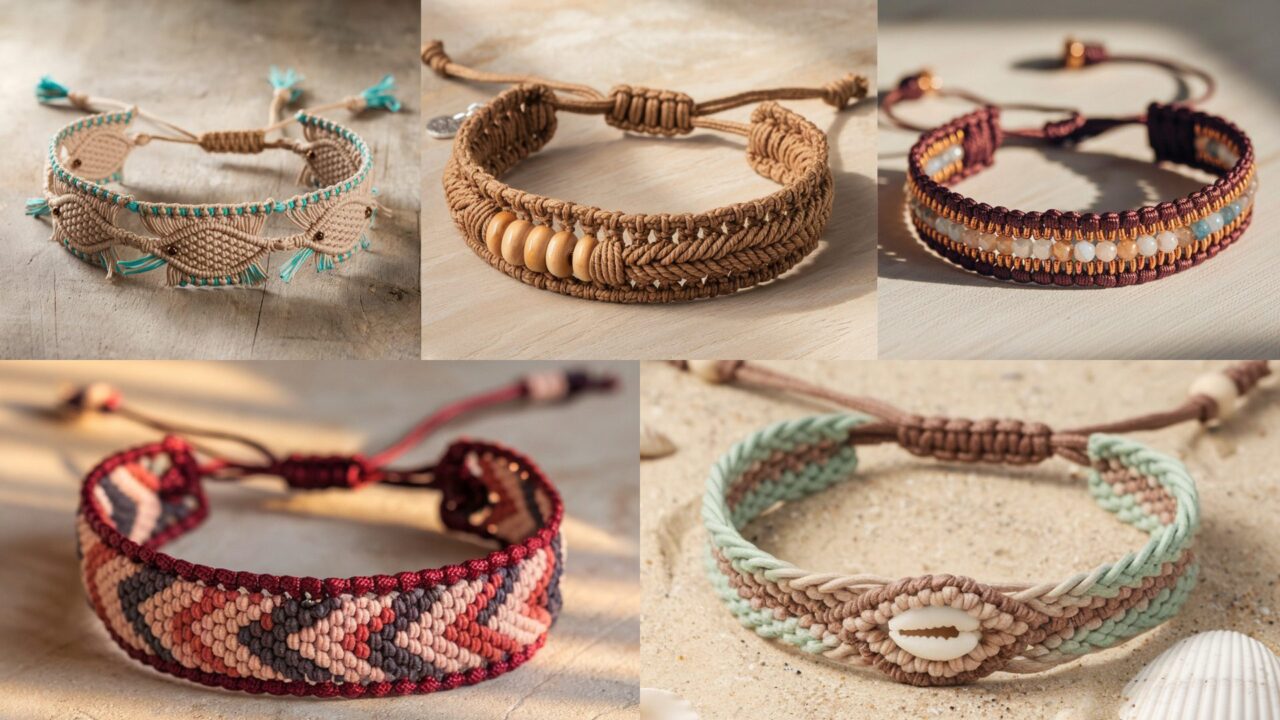
Macramé bracelets are the perfect gateway to handmade jewelry: portable, forgiving, endlessly customizable, and incredibly satisfying. Whether you love the beachy texture of plaited rope, the rustic vibe of hemp, or the tiny precision of micro-macramé, this post gives you five full patterns with step-by-step instructions, photos-in-your-mind tips, finishing techniques, and ideas for personalizing each piece. I’ll assume you know basic macramé knots (square/knot, half knot, lark’s head, and slip knot) — but where a less-common technique appears I’ll explain it fully. Read straight through or jump to the pattern you want. Grab your cords and let’s make something stylish.
1. Seaside Plaited Macrame Bracelet Pattern
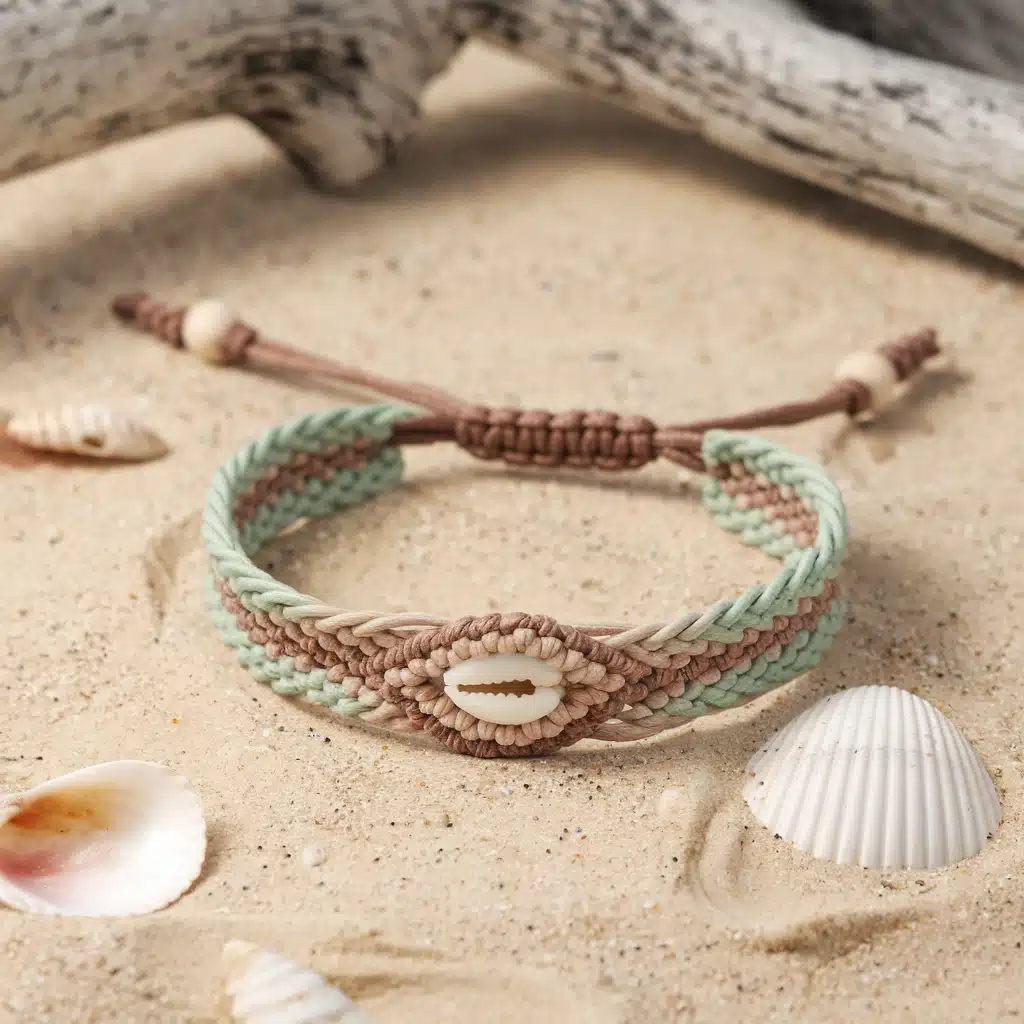
Skill level: Beginner–Intermediate
Finished size: Adjustable; single-wrap wrist 6–8″ (15–20 cm) depending on tension.
Style: Casual, beachy, perfect with shell beads and wooden accents.
Materials
- 3 lengths of 1.5–2 mm nylon or cotton cord, each 18–24″ (45–60 cm) long (adjust by wrist size). Thicker cord → chunkier bracelet.
- 2 smaller cords (optional) for detail or beading.
- 1 small shell or bead (optional) to thread onto central cord.
- Small button, bead loop, or metal clasp for closure.
- Scissors, lighter (for nylon), tape or clipboard to hold cords while plaiting, ruler.
Knots used (quick refresher)
- Lark’s Head — for attaching cords to a loop or ring.
- 3-strand Plait (braid) — basic over-under 3-strand braid.
- Square knot (optional) — for decorative segments.
- Overhand knot — to secure ends.
Overview of the design
This bracelet is a braided 3-strand core with an optional central bead and short decorative square-knot sections near the bead for a seaside look. The ends are finished with an adjustable sliding knot so it fits many wrists.
Step-by-step
- Measure & prepare cords. Fold each of the three main cords in half and align their centers. If you want a central strand with beads, choose one cord to be the middle and fold so the bead can slide onto it before you begin.
- Create a working loop. Hold all cords together at the folded center and tie a temporary overhand knot about 2″ (5 cm) from the fold to create a small loop. Alternatively, attach the folded center to a clipboard with tape to hold it steady.
- Add central bead (optional). If using a bead, thread it onto the middle strand so it sits near the loop. Push the bead up toward the loop to mark the center.
- Anchor & begin plaiting. Secure the loop (taped or clipped). Divide the cords into three groups of two strands each (if you folded three cords in half you will have six working strands; treat pairs as a single strand for a chunky braid). Start a 3-strand braid: move the left group over the center, then move the right group over the new center, repeat. Keep tension even.
- Decorative square-knot section (optional). After ~1–1.5″ (2.5–4 cm) of braid, stop and set up a short square-knot ladder: use two outer groups as filler cords and the middle pair as working cords. Tie 4–6 square knots (each square knot uses 4 strands). This gives a textured beachy transition.
- Continue plaiting. Resume braiding until you reach the length needed to wrap comfortably around your wrist with about 1–1.5″ allowance for closure. Place the bead at the center/top if you plan a focal element; otherwise keep the braid continuous.
- Finish braid. Secure the braid with a tight overhand knot using all cords. Trim tails leaving about 1.5–2″ (4–5 cm) to form the adjustable closure.
- Create adjustable sliding knot closure.
- Lay the bracelet so braided loop and tail ends overlap. Take one tail and wrap it around the other tail twice, then thread the tail through the wrapped loop and pull tight to form a sliding knot. Repeat from the other side using the other tail to make a second sliding knot for a double-adjustable system. Trim surplus and melt the ends (nylon) or fray and glue (cotton).
- Test & adjust. Pull sliding knots to test opening/closing. Tighten everything and hide any exposed knots by sliding them under a decorative bead or tucking them into the braid.
Finishing & styling tips
- Add a tiny shell or wooden bead at the sliding knot for extra seaside flair.
- For a layered look, make two bracelets with different cord colors and stack them.
- Use waxed polyester cord for a long-lasting, slightly shiny finish.
2. 4-Fish Macrame Bracelet Pattern
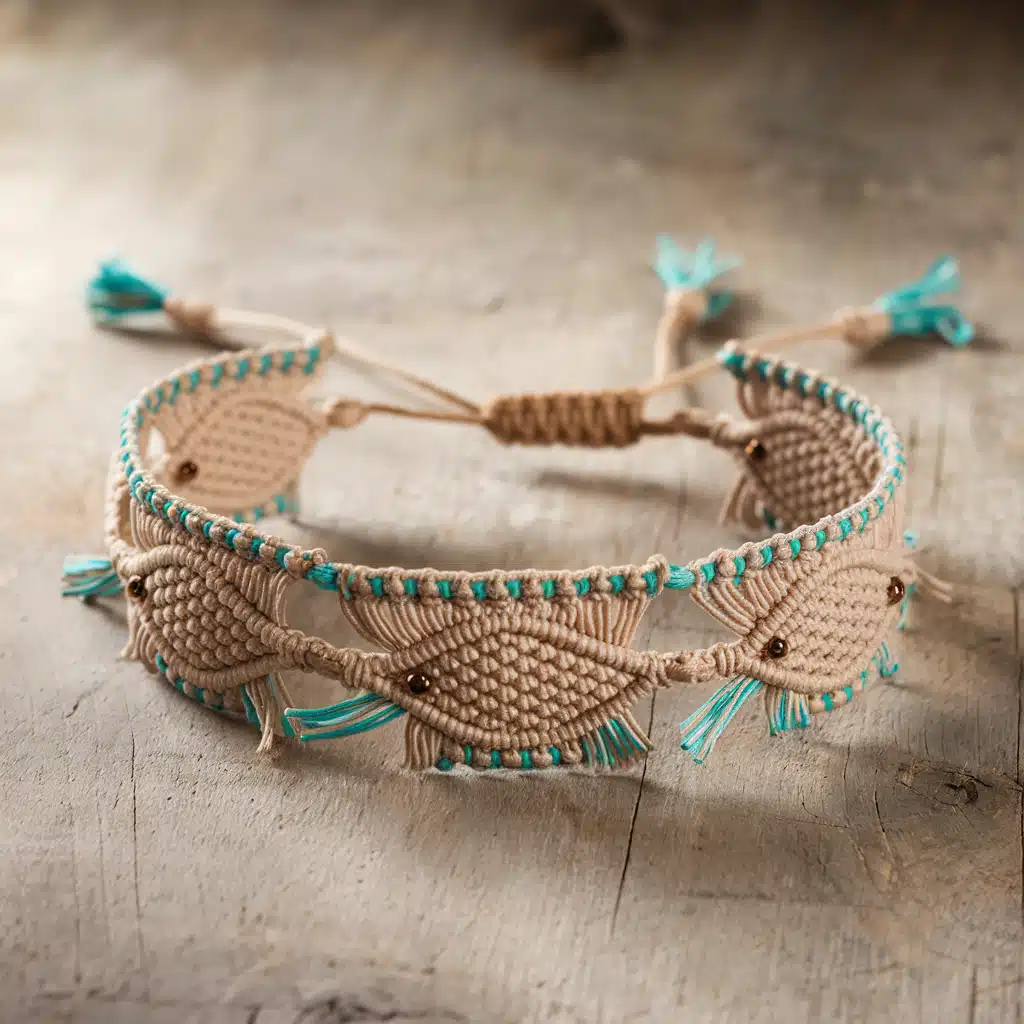
Skill level: Intermediate
Finished size: About 7″ (18 cm) finished (adjust by adding/remove fish motifs).
Style: Playful boho with repeating “fish” motifs made from alternating half knots and picot tails.
Materials
- 1 base cord (center) — 1.5–2 mm (nylon or waxed cotton), ~24–28″ (60–70 cm).
- 4 working cords (two on each side) — same diameter, each ~40–50″ (100–125 cm).
- Optional beads for fish eyes.
- Key ring or bracelet clasp, scissors, tape/clipboard.
Knots used
- Lark’s head, half hitch (left & right), square knot, picot/tail loop (tiny loop formed by chain or knot).
How the “fish” is made (concept)
Each fish is created by forming a diamond/lozenge made from alternating half hitch rows around the center cord, with a final picot at the tail and a small bead for the eye.
Step-by-step
- Set up. Secure the base cord horizontally on your board. Attach four working cords to the base cord with lark’s head knots: two on each side spaced evenly — these are the strands you’ll knot around the base.
- Form first fish head (diamond top). Using the two leftmost working cords, tie a left-half hitch over the base cord forming a diagonal. Mirror with the two rightmost cords tying right-half hitch diagonally until you form a small triangle meeting in the middle. Keep tension consistent.
- Build the body. Continue alternating rows of left and right half-hitches: left side works across, then right side works back. After 4–6 rows you’ll see a diamond/eye shape forming. This diamond is the fish body.
- Add fish eye. Before closing the diamond, slide a tiny bead onto the top row’s center base cord and secure it by tying a tiny overhand knot or a stitch to hold it in place. The bead will sit as an eye.
- Create tail (picot). When diamond is complete, finish with a picot: leave a short loop (ch 3 equivalent) or tie a small three-strand overhand knot and trim tails to 1–1.5″ leaving a fringe tail for a fish tail look. Optionally comb the tails for a feathery tail.
- Repeat for total of 4 fish. Space each fish evenly along the base cord, leaving about 0.5–1″ between motifs. Repeat steps 2–5 for each fish motif.
- Edge finishing. On either side of the motifs, use square knots or a spiral half-knot rope as an edge to stabilize the bracelet.
- Closure. Braid the remaining working cords into two braided tails and finish each with a knot. Use a bead loop or sliding knot to create an adjustable closure.
Tips & variations
- Make fish in alternating colors by swapping working cords color for each motif.
- For a delicate look, use thinner 0.8–1 mm cords and smaller beads.
- To make a cuff (non-adjustable), sew the cord ends to a fabric backing or leather strip.
3. Hemp Macrame Bracelet Pattern
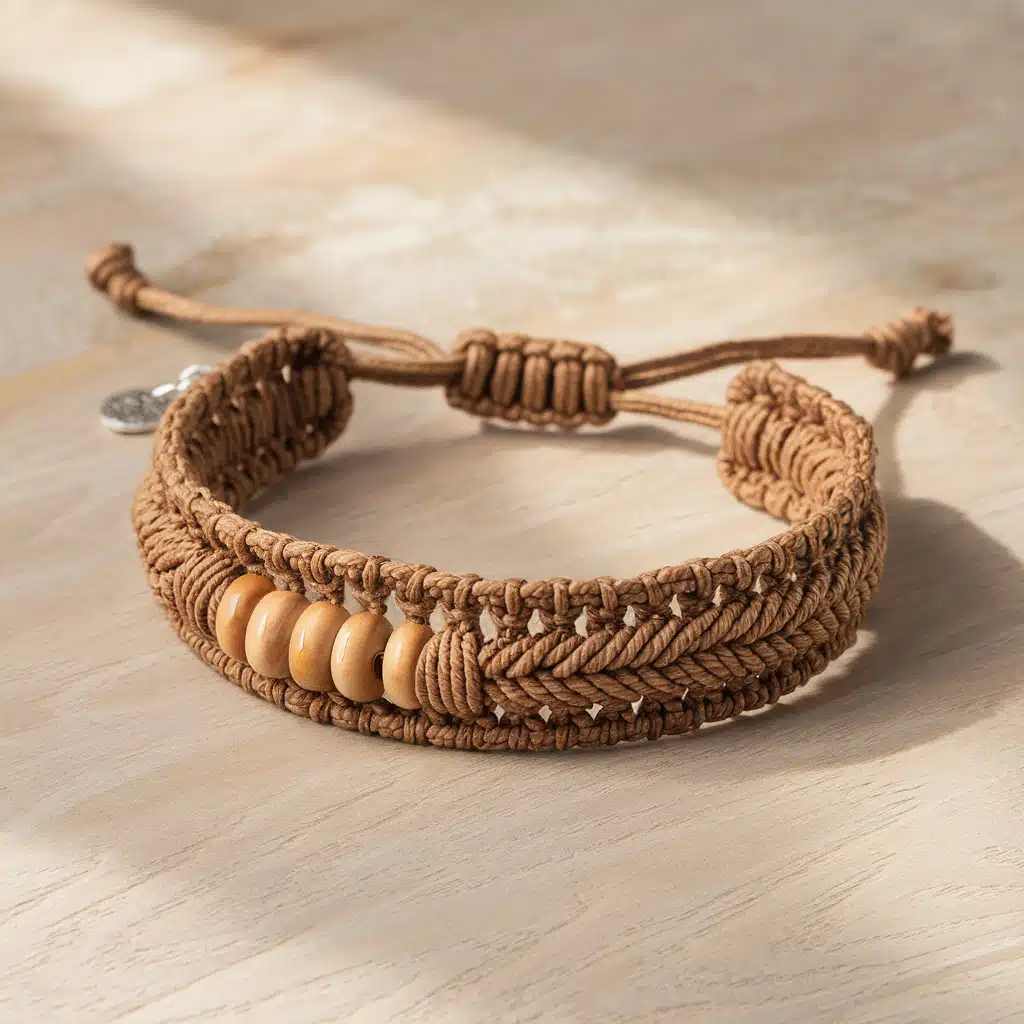
Skill level: Beginner–Intermediate
Finished size: Adjustable; typical fit 6.5–8″ (16.5–20.5 cm).
Style: Rustic, eco-friendly, great for unisex wear; pairs well with wooden or metal beads.
Materials
- Hemp twine (1–2 mm) — 1 main cord for core + 2–4 working cords depending on pattern (approx. 1–2 yards total per bracelet).
- Wooden beads (optional) — 4–6 mm to 8–10 mm depending on look.
- Sliding knot closure supplies: one 2–3″ spare cord.
- Tape or clipboard, scissors.
Knots used
- Lark’s head, square knot, half hitch, overhand, sliding knot.
Pattern options included here
- Classic square-knot band with bead accent.
- Alternating spiral half-knot rope for a twisted rustic cord.
Option A — Square-knot hemp band (classic)
- Measure & set up. Cut 1 central core cord 1.5–2x wrist circumference. Cut 4 working cords (two per side) each ~3x wrist circumference. Fold core cord and secure; attach working cords via lark’s head evenly spaced.
- Start square knots. Use the two outer cords as working cords, the two inner as fillers:
- Left working cord over fillers, right working cord over left working, under fillers, through loop formed by left working cord — pull to tighten (first half).
- Repeat mirrored to complete one full square knot.
- Continue making square knots across the desired length (~1/2–3/4″ before/after bead area).
- Add beads. Slide a wooden bead onto the core cord (under the knot band) so it sits centered. Continue knotting either side of the bead to lock it in place — make 3–4 knots on each side.
- Finish band. Once desired length is reached, tie a few overhand knots to secure. Trim and burn ends (if hemp with coating) or small dab of glue to secure. For a neat finish, wrap a short cord around the end a few times and knot.
- Make sliding closure. Use a spare cord to make a classic sliding knot closure: overlap ends, wrap one tail around both overlapped cords 3–4 times, feed the tail back through the loops, pull tight. Repeat mirrored for the other side. This makes the bracelet adjustable.
Option B — Half-knot spiral (twisted look)
- Setup: Attach three working cords on each side of the core.
- Half-knot: Repeatedly tie only the left half of the square knot (left working cord over fillers and through), not completing the mirrored half; the band will spiral. Add beads by threading them onto the central core between spiral sections.
Care & style tips
- Hemp softens with wear and keeps its shape — hand wash and air dry.
- Add a protective beeswax rub to make colors richer and strands more durable.
- Pair with a small silver charm threaded onto the core cord for a mixed-media look.
4. Micro-Macrame Bracelet Pattern
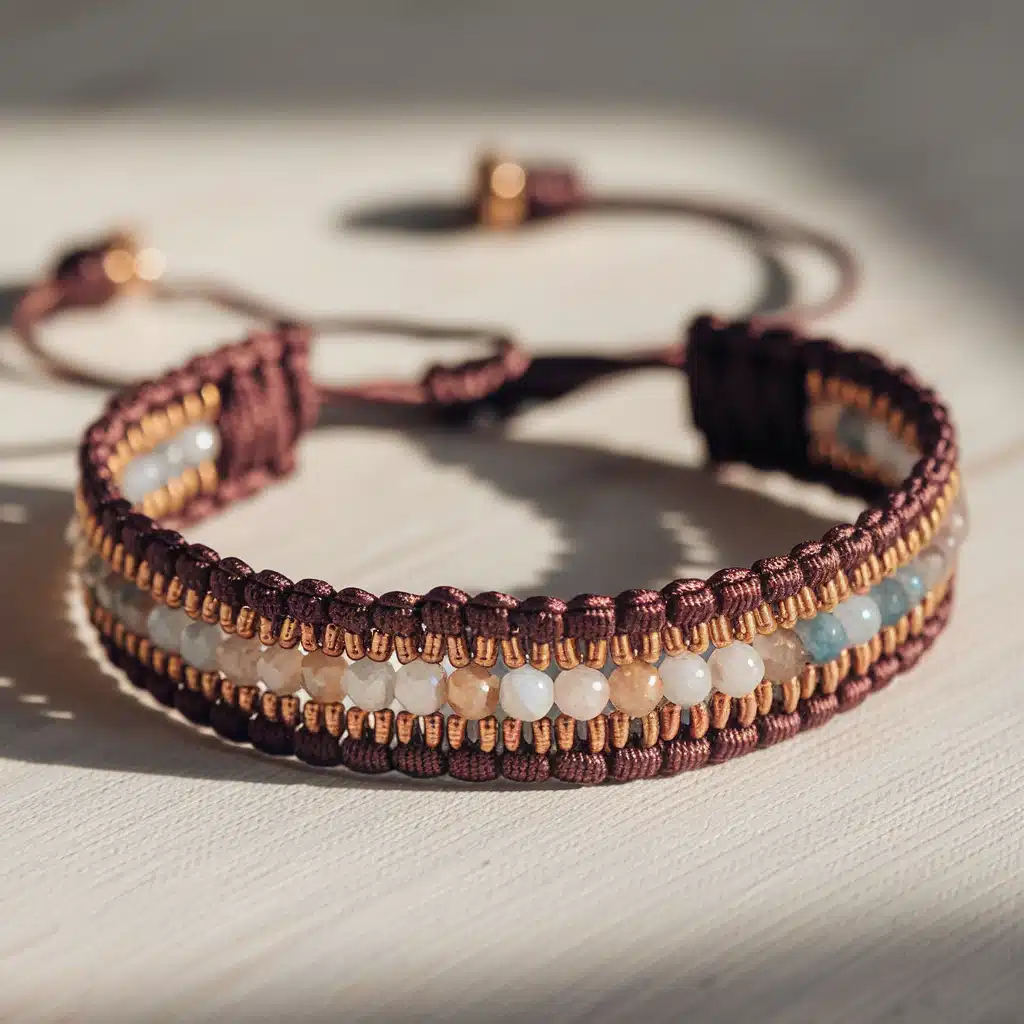
Skill level: Advanced (precision, many tiny knots)
Finished size: Delicate band 6–8″ (15–20 cm).
Style: Intricate, elegant — perfect for fine beads, crystals, or gemstones.
Materials
- Fine nylon or polyester micro cord (0.5–1.0 mm).
- Tiny seed beads or 1–3 mm rondelle beads (gemstone beads work well).
- Beading needle (if beads with small holes), tape/clipboard, ruler.
- Clasp set (lobster & jump ring) or micro sliding knot.
- Scissors, clear nail glue.
Knots used
- Micro square knots (flat), micro half-hitches, alternating knot patterns, and occasional lark’s head for bead attachment.
Design idea
A central row of tiny beads is held in place by two micro square-knot ladders on each side, forming a neat beaded micro-macramé bracelet.
Step-by-step
- Cut your cords. Cut one center (core) cord long enough to string all beads + extra for finishing — typically 3x wrist + bead allowances (~45–60 cm). Cut four working cords each 3–4x length for comfortable knotting.
- Attach working cords. Fix the core to your board and attach working cords in pairs on each side with lark’s head knots.
- Fix beads on core. Pre-string all beads onto the core cord in the order you want them to appear.
- Make the first micro square-knot row. Use the two outermost cords as working cords and the core + inner fillers as the center. Tie neat tiny square knots across the core so that each knot sits snugly around the bead area — you will make one or two knots between beads to secure them.
- Secure beads. Each time you reach a bead, slide it into position and tie a half-hitch around the core just to lock its placement, then continue the square-knot ladder. The knots should be very small and tight — keep tension consistent.
- Build edges. After the bead row, create two symmetrical micro square-knot ladders on each side to frame the beads. These ladders also strengthen the band and create a pretty border.
- Finish ends & add clasp. Once the central beaded section is the desired length, finish with 4–6 rows of plain micro knots to stabilize the ends. Attach clasp by sewing working cords into a small metal crimp or by tying into a jump ring wrapped in glue. Trim excess close to knots and add a tiny drop of clear glue to prevent untying.
Micro tips
- Work under good light and use magnification if needed — these knots are tiny.
- Use beading needles to string beads; wax the core lightly to prevent fraying.
- Keep tension consistent — uneven tension is the main cause of poor micro-macramé results.
5. Macrame Woven Friendship String Bracelet Pattern
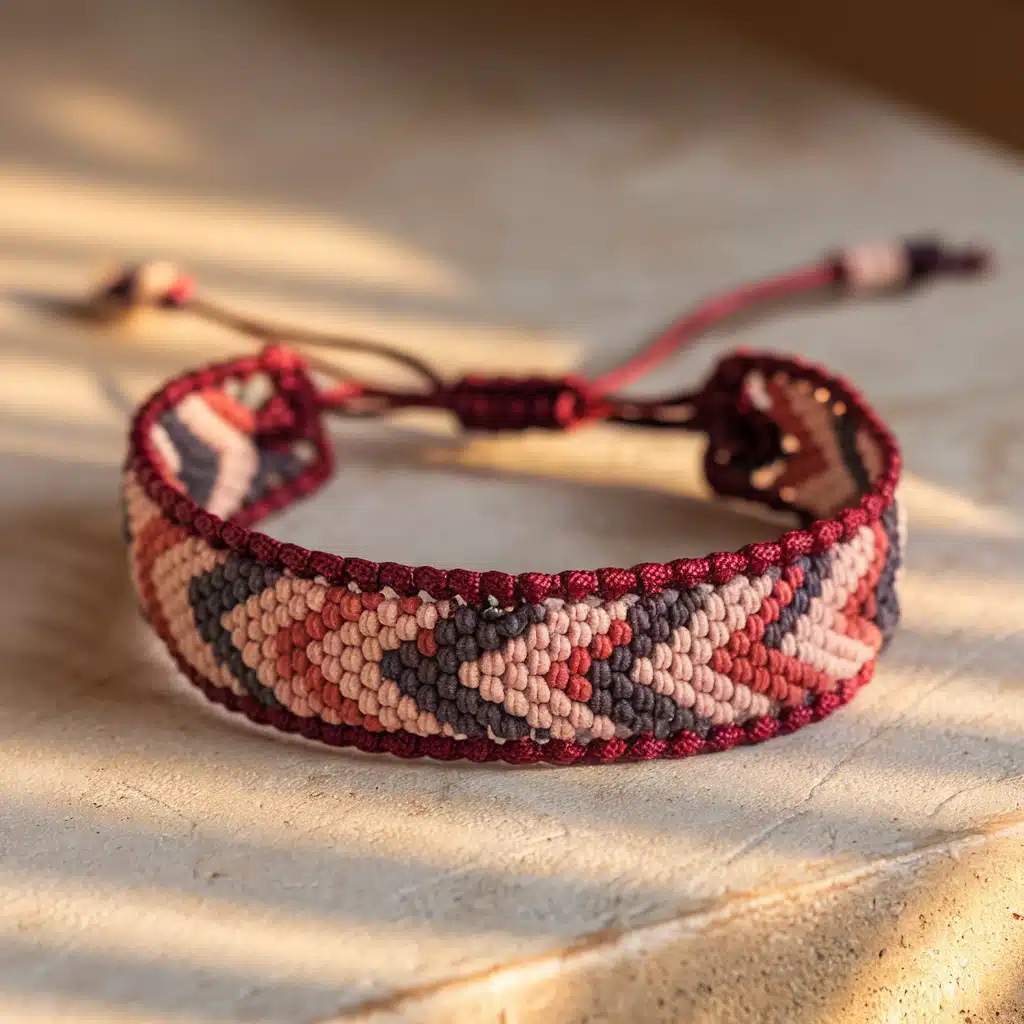
Skill level: Beginner–Intermediate
Finished size: Typical 6–8″ (15–20 cm) — adjustable, great as a stackable friendship bracelet.
Style: Classic woven look reminiscent of friendship string bracelets, but with macramé knots for added durability.
Materials
- 4–6 colored cotton or embroidery cords (0.8–1.5 mm) — choose contrasting colors. Each cord ~30–40″ (75–100 cm).
- Tape/clipboard, ruler, scissors.
Knots used
- Forward knot (as in friendship bracelets), backward knot, square knot variations, alternating half-hitches.
Pattern concept
Create a flat woven stripe pattern where each color is knotted across the band in alternating diagonal lines, producing a chevron or striped woven look done with macramé knotting technique.
Step-by-step
- Prepare cords & anchor. Fold all cords in half and secure them to a clipboard or tape them down — this forms a loop at top for a closure or attaching to a keyring.
- Arrange color order. Spread cords in the order you want your pattern to show (e.g., A B C D C B A). The outermost cords will knot toward the center forming a chevron.
- Make forward/backward knots (friendship style using macramé technique).
- Forward knot: take the leftmost cord, cross it over the adjacent cord making a “4” shape, loop under and pull through twice to create the forward knot. Repeat across to the center.
- Backward knot: mirror on the right side moving left.
- Form chevron. Repeat forward knots from left to center and backward knots from right to center until the two center cords meet; tie them together with a final knot. This makes one chevron stripe. Continue repeating to desired length.
- Alternative woven stripe. Instead of chevrons, use repeating square knots with different color sets to make horizontal bands: make 2–3 square knots with colors A & B, then switch to C & D, etc.
- Finish with braided ties. Once the main woven panel reaches desired length, braid or twist remaining cords into two tails and knot each end. Create a loop at the top to make a button-and-loop closure or use a sliding knot.
- Optional embellishments. Add seed beads threaded onto specific knots while knotting to embed them into the pattern, or tie on a small charm before finishing.
Care & gifting tips
- Cotton holds color well and is comfy against skin. Pre-wash cords if dyes are new to avoid color transfer.
- When making for friends, personalize with initials sewn in using tiny embroidery stitches or with a contrasting knot color.
Conclusion
Each bracelet above — from the breezy Seaside Plaited to the precise Micro-Macramé — is designed to be learned and customized: change cord thickness, swap materials, add beads, or alter closures to match your style. Key practical tips that apply to every pattern: keep knot tension consistent for a neat finish, secure your ends with extra wraps or glue, and always test closure strength so your bracelet lasts.


