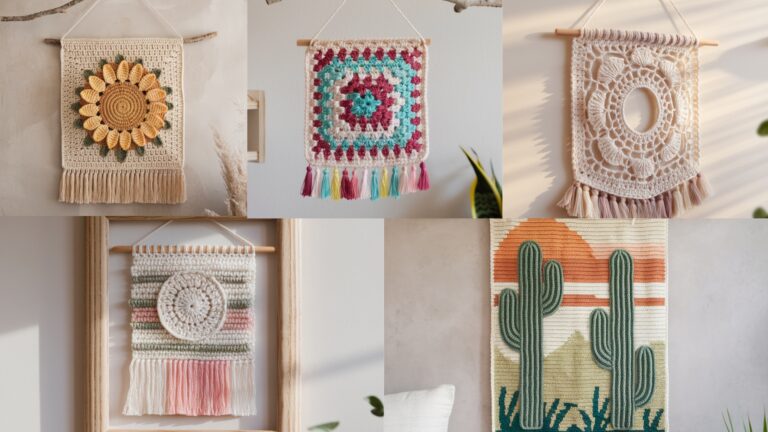
Crochet wall hangings are one of the fastest ways to change the mood of a room — they add texture, color, and personality without needing paint or major redecorating. Whether you love modern minimalism, cottagecore charm, or boho tassels, a handmade wall hanging can be tailored to your space. Below you’ll find a practical introduction (materials, measurements, how to hang, and finishing notes) followed by five full patterns with materials lists, stitch notes, and long, step-by-step construction guides: Cool Waves, Simple Moon Phase, Checkerboard Lacy Cherry on Top, Sunflower Sunburst, and Stripe Granny Stitch Tassel. Each pattern includes tips for sizing, variations, and final finishing so you can make something beautiful and display-ready.
Before you start — tools, materials, sizing, and hanging options
Materials (common)
- Yarn: cotton / cotton-blend for crisp definition, wool or acrylic for softer texture, or chenille/plush for ultra-soft pieces. For wall hangings, worsted/DK are common; use the weight that gives the look you want.
- Hook: match the yarn (typically 3.5–6.5 mm). A slightly larger hook gives an airier drape.
- Support: driftwood, wooden dowel, metal rod, branch, or a decorative hanger. Dowels 12–36″ long are typical depending on wall width.
- Notions: tapestry needle, scissors, measuring tape, blocking pins or board (optional), stitch markers, comb for brushing fringe (if you want a fluffy look).
Sizing
Decide the finished width before you start. Typical indoor wall hangings:
- Small: 8–12″ wide
- Medium: 16–24″ wide
- Large: 30–40″+ wide
Length is flexible — many people hang pieces with a 1:1.5 or 1:2 height:width ratio (e.g., 20″ wide × 30–40″ long), but shorter, squat pieces also look great. When I give stitch counts, I’ll use a sample width (e.g., 18″) but show how to scale.
Yarn amounts (very rough)
- Small (8–12″): 150–300 yd total
- Medium (16–24″): 300–700 yd total
- Large (30–40″): 800–1500+ yd depending on fullness and fringe
Hanging options
- Dowel pocket: crochet a looped top or pick up stitches across the top and fold to make a pocket for the dowel.
- Tied loops/tabs: crochet small loops or tabs and slide the dowel through them.
- Grommeted fabric band: sew a fabric header with grommets for a clean modern look.
- Tassel ties: tie the hanging to a branch with yarn tassels or a macramé wrap.
Finishing & blocking
- Light blocking (spritz + pin) helps open lace or flatten motifs. For cotton use steam or damp blocking.
- Trim fringes evenly with scissors; use a comb and a little fabric stiffener if you want full, brushed fringe.
1. Crochet Cool Waves Wall Hanging Pattern
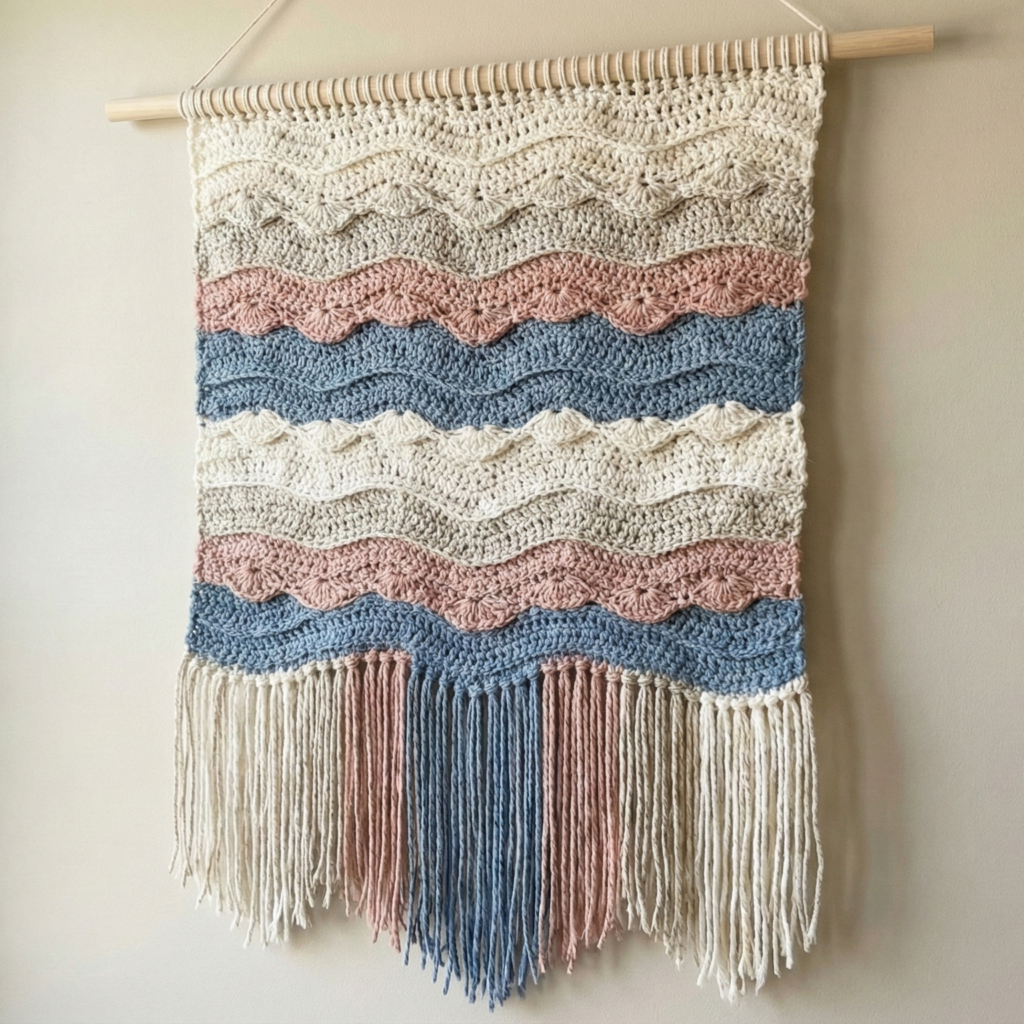
Vibe: Modern, calming, organic — rows of textured waves in graduated widths and colors.
Skill level: confident beginner → intermediate
Finished (sample): 20″ wide × 28–36″ long (including fringe)
Materials
- DK or worsted yarn in 3–4 colors (for gradient or contrast): ~400–600 yd total for a medium piece.
- Hook: 4.5–5.5 mm.
- Wooden dowel 22″–24″, tapestry needle, scissors.
Stitches used
sc, hdc, dc, fpdc (front-post dc), bpdc (back-post dc), shell (5 dc), sl st, ch.
Construction overview
Work a foundation chain to match width, then create horizontal bands of “waves” by alternating textured stitch panels and scalloped shell borders. Add long graduated fringe for motion.
Step-by-step
A — Foundation & base band
- Decide finished width (example 20″). Make a gauge swatch in hdc/dc combination and measure stitches per inch. Suppose gauge = 3.5 sts/in with chosen stitches. Foundation stitches = 3.5 × 20 = 70 stitches (round to nearest pattern multiple if required).
- Chain 71 (or foundation hdc 70) and join carefully to work in the round if you want a continuous strip — for this pattern we’ll work flat rows, so make a turning chain instead: ch 71, turn.
B — Bottom wave (textured ripple)
3. Row 1 (base): sc in 2nd ch from hook across (70 sc). Turn.
4. Row 2–4 (build base texture): ch2 (counts as hdc), hdc in next; fpdc around next st, bpdc around next st alternating to create a ribbed texture across 3–4 rows. The front/back post pair creates troughs and peaks — this is your textured “under-wave.”
C — Shell crest row
5. Row 5: create scalloped shells to form wave crests: sc in next 2, (5 dc) in next st, sc in next 2 repeat across. This produces large scallops. Fasten off or continue.
D — Middle wave panels
6. Attach a new color for banding and make several rows of alternating pattern: 3 rows of dc height in one color, then 2 rows of shell border, then a row of broken shell (3 dc) to vary wave scale. Combine with occasional slip-stitch mesh rows (ch1, skip) to add air.
E — Top ripple & pocket
7. When the piece reaches desired length (leave ~1–2″ for fold), work 4–6 rows of sc to create a sturdy top band. If you want a dowel pocket: fold the top 2″ down over the dowel area and seam along the edge with ladder stitch, leaving an opening to slide the dowel in. Alternatively add loops every 2–3″ across the top to hang.
F — Fringe & finishing
8. Cut fringe lengths. For a long flowing look, use lengths 10–18″ then fold and knot through bottom edge with a lark’s head. For graduated length, attach longest in the center and taper to shorter ends, or stagger by color. Trim even or leave organic.
Variations & styling
- Use undyed yarn for cottage minimalism or bright neons for a modern statement.
- Add a single metallic yarn row for shine.
2. Crochet Simple Moon Phase Wall Hanging Pattern
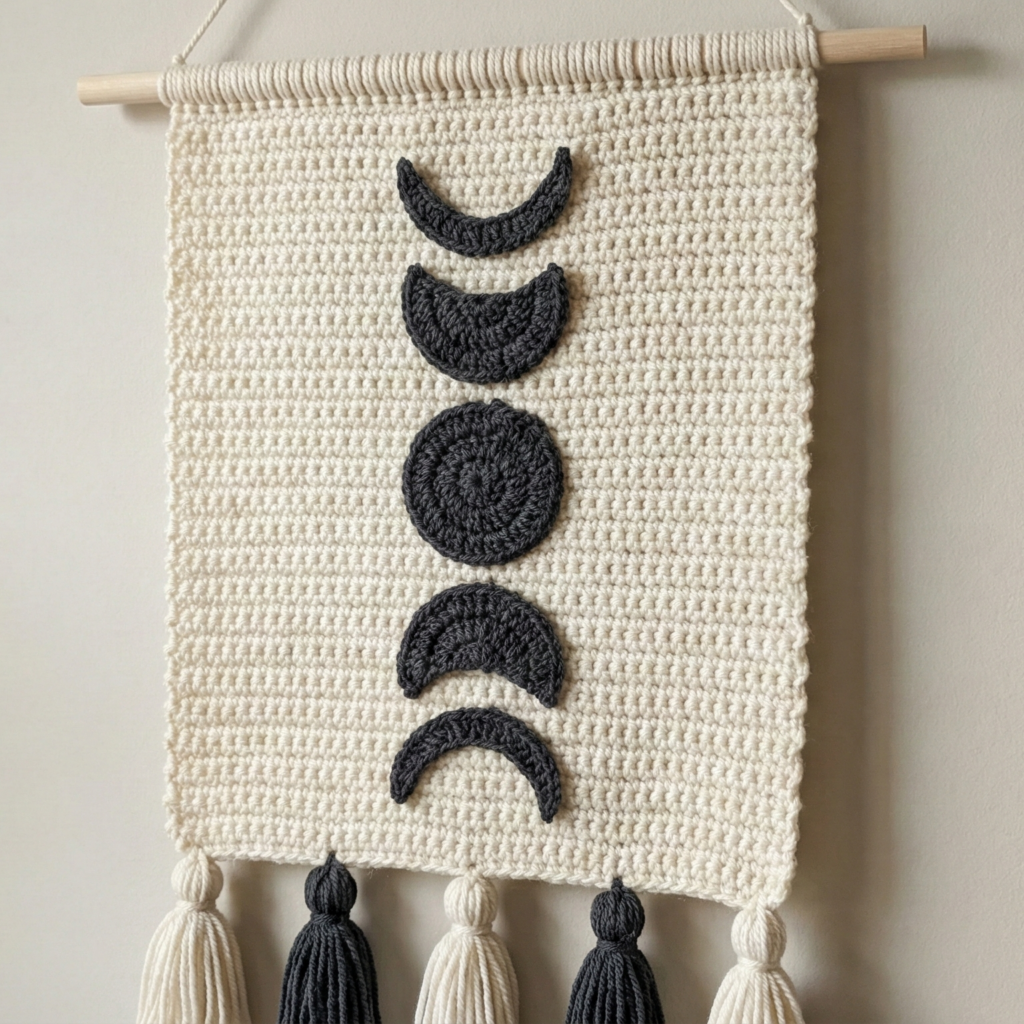
Vibe: Minimal, celestial, very photogenic. Clean silhouettes of moon phases across a neutral backdrop.
Skill level: beginner → confident beginner
Finished (sample): 18″ wide × 14–20″ high (phases centered) + dowel
Materials
- Sport/DK in two contrasting colors: e.g., warm cream (background) and charcoal (moon). ~250–350 yd total.
- Hook: 4.0 mm.
- Small dowel 18″, tapestry needle.
Stitches used
sc, hdc, dc, MR for circles, surface crochet, or appliqué sewing.
Construction overview
Make a rectangle base in background color. Create moon shapes either as appliqué circles (crocheted in a dark color and sewn on) or by surface crochet/top-stitching moons onto the background. Appliqués give crisp edges.
Step-by-step (appliqué method — easiest crisp moons)
A — Make background rectangle
- Swatch for width: for 18″ wide, chain 63 if gauge = 3.5 sts/in (3.5 × 18 = 63). Ch 63, work sc rows until height = about 10–12″ (leave room for row of moons and top/bottom margins). This rectangle is your canvas.
B — Crochet moon discs (make 7 for standard phases)
Use simple circle formula:
2. Small circle (new moon crescent base): MR, ch1, 6 sc in ring (6). R2: inc around → 12. R3: sc 1, inc around → 18. Adjust rounds to get desired disc diameter (example 1.5–2.5″). Make 7 discs: (new, waxing crescent, first quarter, waxing gibbous, full, waning gibbous, third quarter). For crescents you’ll cut away or overlap a small ellipse later.
C — Create crescents
3. For crescents, cut a small oval of felt or crochet a small oval in background color and sew it partly over the dark circle to create crescent silhouettes (or use careful sewing to overlap disc edge to mask a segment). Another technique: make each moon disc as two-color half-discs joined off-center so the darker moon shows the crescent.
D — Placement & sewing
4. Lay the background flat and mark a horizontal center line. Arrange moons evenly spaced across the center. Sew each moon onto the rectangle with small whipstitches or surface crochet around the edge for secure hold. Be sure to sew through both layers to prevent lifting.
E — Top mounting
5. Make a top pocket for the dowel or whipstitch loops: fold top 2″ down and seam leaving a pocket large enough for a dowel.
F — Finishing
6. Add a short tassel or small fringe at the bottom corners if desired. Block if needed to even rectangle.
Variations
- Make the moons in gradient color to echo phases (e.g., pale to dark blue).
- Instead of round discs, embroider detailed craters with French knots.
3. Crochet Checkerboard Lacy Cherry on Top Wall Hanging Pattern
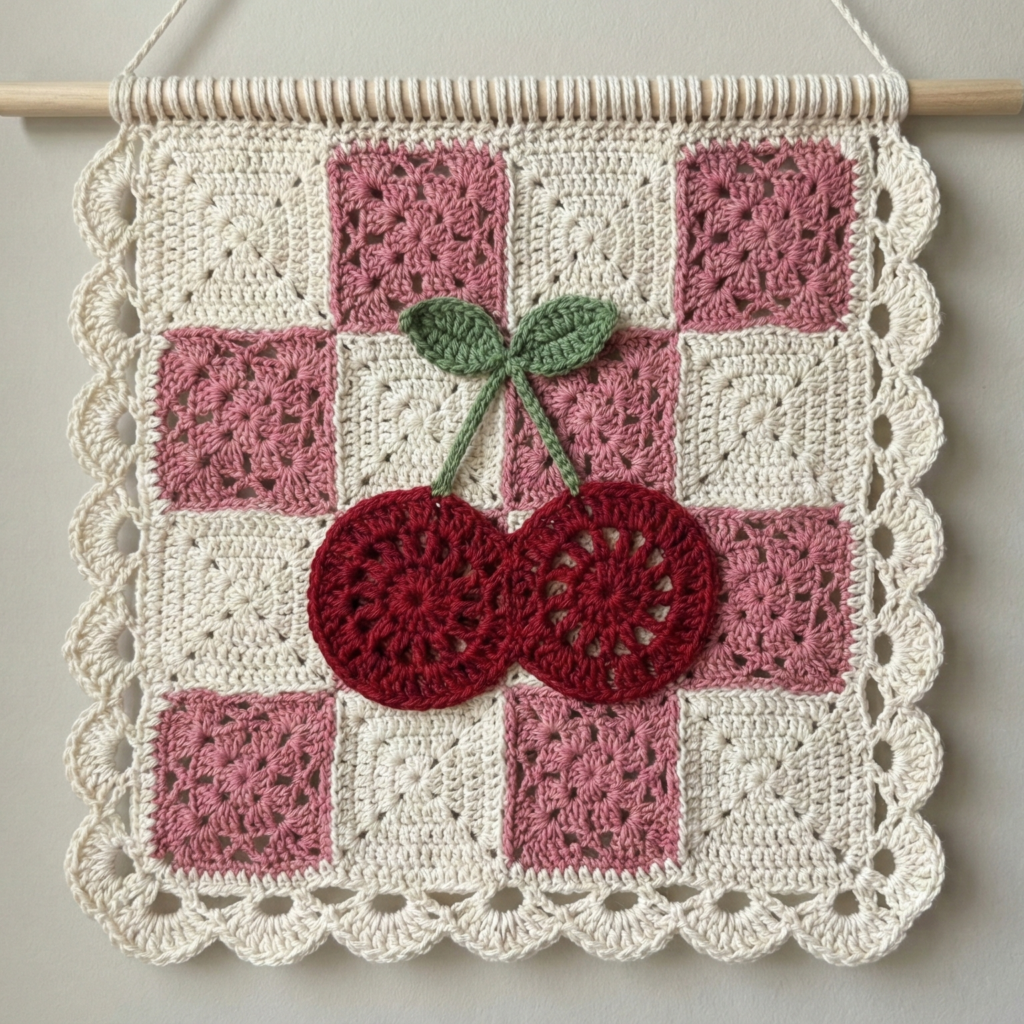
Vibe: playful, slightly vintage — checkerboard texture with a small lacy cherry appliqué (“cherry on top”) as a focal point.
Skill level: intermediate (textured colorwork + appliqué)
Finished (sample): 16″ square (hung diamond or square) × dowel
Materials
- DK cotton in two contrasting colors for checkerboard (e.g., cream + muted pink), plus red & green for cherry appliqué. Total ~350–500 yd.
- Hook: 4.0–5.0 mm.
- Dowel 16″, small stitch markers.
Stitches used
moss stitch or filet/mesh for checker effect, sc for dense squares, shell for lacy cherry leaves.
Construction overview
Work a square in alternating textured blocks to produce a checkerboard. Crochet a small lacy cherry motif and sew it in one square as the “on top” focal point.
Step-by-step
A — Plan checkerboard grid
- Decide number of squares across (example 8 × 8 grid, each block 2″). For an 8-block grid × 2″ = 16″ final width.
- Make a foundation row to equal the width in stitches. For a block size of 2″ and gauge 3.5 sts/in, each block = 7 sts (3.5 × 2 = 7). 8 blocks × 7 sts = 56 sts. Chain 56 + 1.
B — Block stitch choices
3. Two square types:
- Dense square: sc rows for 2″ (about X rows depending on rpi).
- Lacy square: mesh or shell pattern that measures same height (e.g., filet block height).
- Work squares horizontally: change color and stitch to create an alternating pattern across each row (use tapestry crochet or carry color, but keep back tidied).
C — Build the square panel
5. Alternate dense & lacy square blocks in each row. For stability, work a thin border of sc around each completed row to keep edges straight.
D — Cherry appliqué
6. Small cherry cluster: MR, 6 sc in ring (ch1), sl st join; make two small spheres (like small amigurumi but flattened) and sew together adjacent to form a twin cherry. Or make a single lacy cherry: MR, ch3, 12 dc, then small picot leaves in green. Sew the cherry motif centered within one of the checker squares (this is the “cherry on top”).
E — Edge finish & hang
7. Work a sweet scalloped border around whole square: sc, skip 1, 5 dc in next, skip 1, sc repeat around. Attach dowel by folding top edge over or creating loops.
Variations
- Make the checkerboard diagonal (hang on a point) for a modern twist.
- Replace cherry with any small motif (flower, heart, sun).
4. Crochet Sunflower Sunburst Wall Hanging Pattern
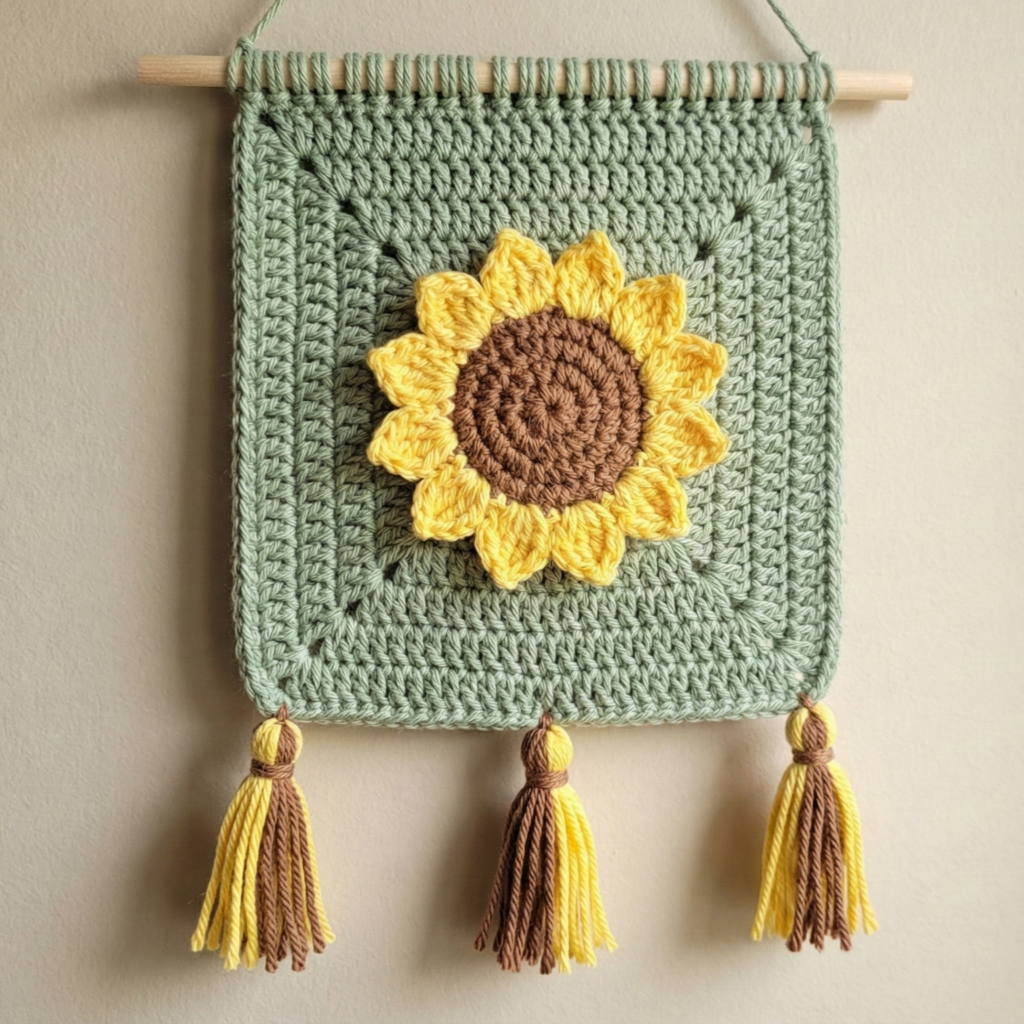
Vibe: warm, bold, radiant — big sunflower center surrounded by rays or clustered sunflower motifs.
Skill level: intermediate → advanced (motifs + appliqué)
Finished (sample): 18–28″ diameter sunburst + fringe
Materials
- Bulky or worsted yarn in golden yellow, brown, and green: ~400–900 yd depending on fullness.
- Hook: 5.0–6.5 mm (bigger hooks for chunky petals).
- Dowel or circular frame (embroidery hoop 16–20″ for round display).
Stitches used
MR, dc, tr, puff/petal clusters, surface slip stitches for rays, picots.
Construction overview
You can make one big sunflower as the center (crocheted in rounds) and then add radiating petals or knitted macramé rays, or create a cascading arrangement of multiple sunflower motifs attached to a dowel. I’ll describe the single big sunflower with radiating petal layers.
Step-by-step (big sunflower)
A — Seed center (worked flat circle)
- MR, ch1, 10 sc in ring (10). R2: inc → 20. R3: sc 1, inc → 30. R4: sc 2, inc → 40. Continue until center reaches desired diameter (e.g., 6–8″ for medium). Use brown/dark yarn for seed center. For texture, in R5 you can work fpdc/bpdc alternating to create raised texture.
B — Inner petal round (first yellow layer)
2. Join yellow. R1 (petal foundation): ch 5, sl st in next around to create loops for petals. R2: In each loop work (sc, hdc, 5 dc, hdc, sc) to form full petals. Fasten off.
C — Outer petal round (larger petals)
3. R3: Attach yarn behind first petal layer and work larger loops between petals (ch7), then in each ch7 work (sc, hdc, 7 dc, hdc, sc) for a second bigger layer of petals. Offset petals so they sit between inner petals and stack naturally.
D — Rays & texture
4. To make the sunburst effect beyond petals, either:
- Attach long tassels between outer petals (knot fringe of 10–18″ lengths),
- Or surface-crochet long straight rays: ch 30, sl st back along chain, anchoring ends to outer petal tips ; or
- Work a final round of spike stitches (long dc or tr worked down several rows) to create elongated rays.
E — Backing & hanging
5. Sew a felt circle to back to flatten and secure ends; sew loops on the top of the back for hanging on a dowel — or mount on an embroidery hoop and use the hoop as the frame. For dowel mounting, create a top loop (ch to width of dowel, seam) and slip over.
F — Finishing
6. Light blocking and shaping of petals helps them lie flat. You can also brush outer petals for a softer, fluffier look (careful).
Variations
- Cluster several small sunflowers on a dowel for a garland wall hanging.
- Make a half-sun over a door or shelf ledge.
5. Crochet Stripe Granny Stitch Tassel Wall Hanging Pattern
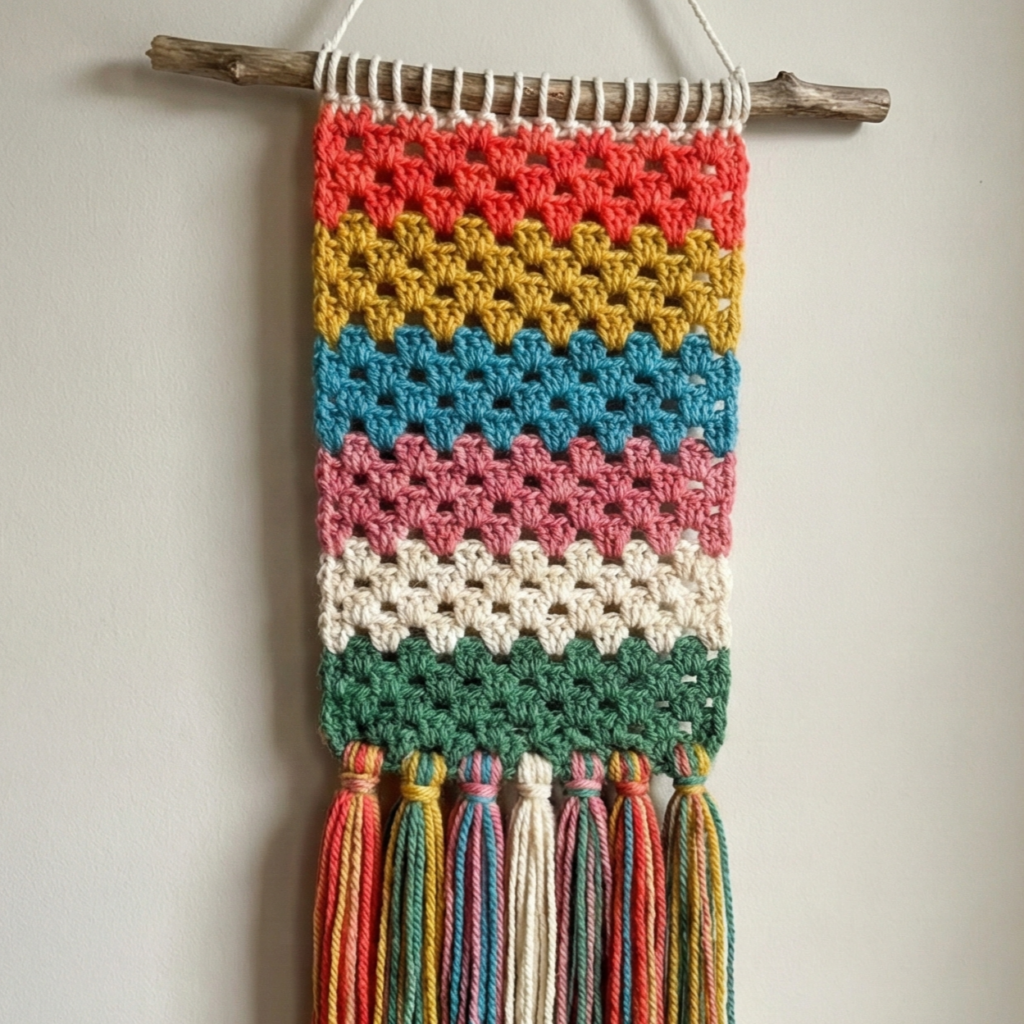
Vibe: Boho, colorful, very friendly to beginners. Uses granny-type clusters and long tassels for a classic boho textile.
Skill level: confident beginner
Finished (sample): 24″ wide × 36–48″ long (with tassels)
Materials
- Multiple colors DK/worsted (use scrap yarns) — ~700–1200 yd depending on size.
- Hook: 5.0 mm.
- Dowels or multiple small branches tied to make widths, comb for tassels.
Stitches used
granny clusters (3 dc clusters), ch, sc, join-as-you-go, tassel lark’s head knots.
Construction overview
Work rows of granny clusters in stripes across a wide rectangle or several strips joined together. Finish bottom edge with long tassels of mixed colors. Top can be a continuous dowel pocket or tabs.
Step-by-step
A — Make striped granny panels
- Choose desired width and compute foundation chain. Granny clusters are worked in chain spaces; a typical granny cluster panel uses multiples of 3 + 2 foundation chains. For 24″ at gauge 3.5 clusters/in (example): clusters needed 3.5 × 24 = 84 clusters; convert to chain count = 84 × 3 + 2 = 254 ch. Chain 254 + 2.
- Row 1: dc into 4th ch from hook (counts as dc + ch3), ch1, skip 3 ch, 3 dc in next ch repeat across to create granny clusters. Turn and work granny clusters into chain spaces for 4–6 rows per stripe. Change colors every few rows for stripes.
B — Join strips (if desired)
3. You can work one giant panel or make 4 narrower panels and seam them side by side for a geometric look. Join-as-you-go on the last round or use mattress stitch.
C — Top finishing
4. For a neat top, work 4–6 sc rounds across top to create a firm band. Fold 1.5–2.0″ and seam to make a dowel pocket; or make loops by chaining 12–18 and attaching as tabs every 3–4″.
D — Tassel fringe
5. Make long multicolor tassels: wrap yarn many times around a board 12–24″ long (depending on desired tassel length), tie at top, cut bottom loops, knot and attach by lark’s head along bottom edge. Vary color distribution for ombre or rainbow look. Trim tassels to shape and comb to fluff.
E — Styling
6. Hang on a large dowel or branch, add slight asymmetry by varying tassel lengths for a contemporary boho look.
conclusion
- Photo tips: natural window light + neutral wall background helps colors pop. Hang at eye level; include a scale object (plant, chair).
- Gifting: wrap the dowel + hanging in a kraft tube or tie with twine. Include care notes: “Spot clean or gentle hand wash; reshape while damp.”
- Scaling: these patterns scale easily — double yarn and hook for very large displays; use thinner yarn for delicate mini hangings.