A crochet tote bag is one of the most practical and satisfying projects you can make. It is the kind of handmade piece that feels useful from the moment you finish it, because you can carry it every day and still enjoy the beauty of something you made yourself. Unlike smaller accessories, tote bags have room to show off stitch texture, colorwork, shaping, and decorative details, which means they can be both functional and stylish at the same time.
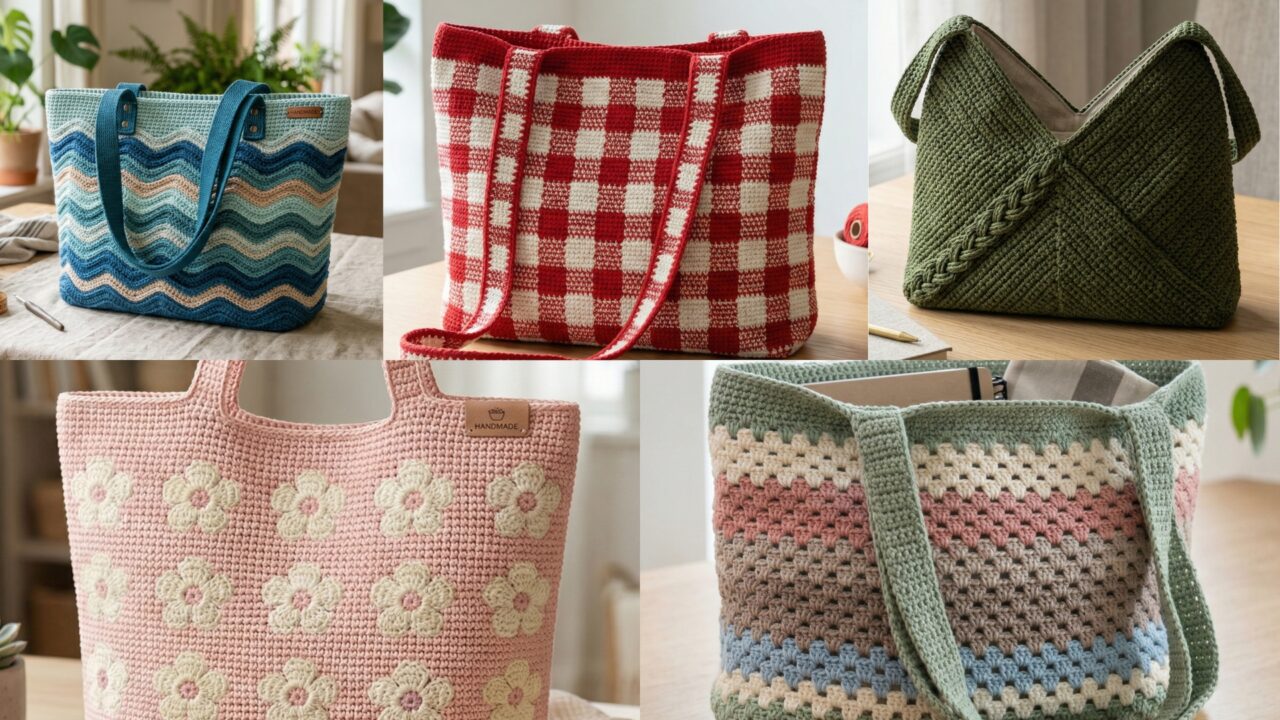
What makes crochet tote bags so appealing is their versatility. A wave design can feel modern and playful. Granny stripes bring a classic handmade charm. Gingham adds a crisp, timeless pattern that never really goes out of style. Floral print-inspired designs bring softness and personality. An origami-style tote feels structured, minimal, and fashion-forward. Each one has a different mood, but all of them are practical enough for everyday use, whether you are heading to the market, the beach, work, or just out for a casual day.
In this post, you will find five stylish crochet tote bag patterns with detailed step-by-step guidance, helpful notes, and practical finishing tips. Each design is written to be easy to follow while still giving you enough detail to create a bag that looks polished and feels sturdy. If you love handmade accessories that are both beautiful and useful, these tote bag ideas are a wonderful place to start.
Quick Notes
Project type: Crochet tote bags
Best for: Everyday use, shopping, gifts, beach trips, books, work essentials, and handmade fashion
Skill level: Beginner to intermediate, depending on shape and stitch detail
Hook size: Usually 3.5 mm to 5.5 mm, depending on yarn weight and desired structure
Yarn weight: Cotton, cotton blends, DK, or worsted weight yarn
Best yarn choice: Cotton yarn for durability and structure
Finished size: Usually medium to large tote size, depending on the design
Time to complete: Several hours to a few days depending on size and detail
Helpful stitches: Chain, slip stitch, single crochet, half double crochet, double crochet, increase, decrease, color change, shell stitch, granny stitch, tapestry-style colorwork, seaming, edging
Common Materials
Most crochet tote bags can be made with a similar set of supplies.
- Yarn in your chosen colors
- Crochet hook suited to the yarn weight
- Yarn needle
- Scissors
- Measuring tape
- Stitch markers
- Optional lining fabric
- Optional magnetic snap, button, or zipper
- Optional leather or crocheted handles
- Optional bag stiffener or interfacing
For tote bags, yarn choice matters a lot because the bag needs to hold weight and keep its shape. Cotton yarn is usually the best choice because it is durable, sturdy, and easy to clean. If you want a softer or slouchier bag, you can choose a cotton blend or a yarn with a little more drape. If you want a very structured bag, a tighter stitch and stronger yarn are helpful.
1. Crochet Waves Tote Bag Pattern
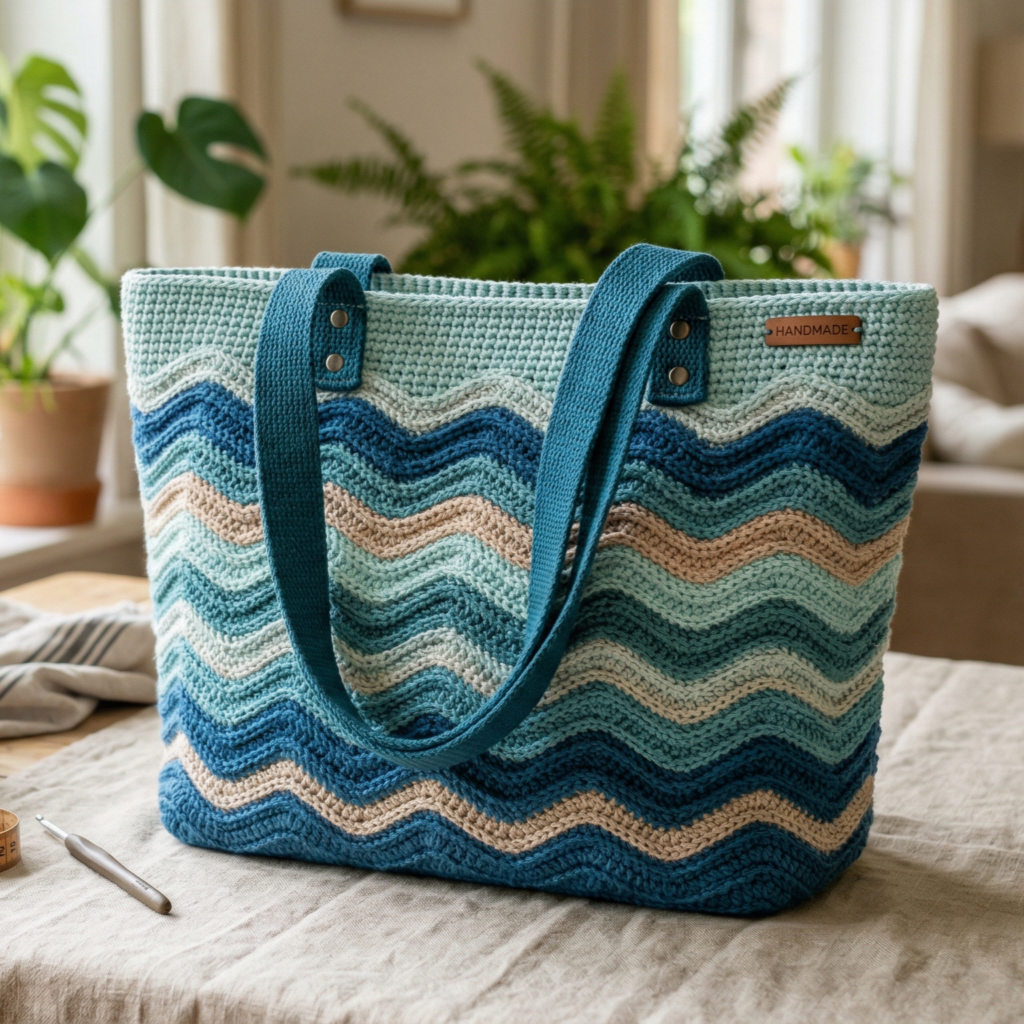
A waves tote bag is a beautiful way to add movement and texture to a practical everyday accessory. The flowing wave design gives the bag a lively look that feels fresh and stylish, while the tote shape keeps it useful for daily errands, books, or shopping. It is a perfect project if you want something eye-catching without making the construction too complicated.
Quick Notes
Skill level: Beginner to intermediate
Finished size: Medium to large tote
Style: Modern, playful, textured, casual
Best colors: Ocean blues, neutrals, sunset shades, or bold contrast colors
Materials
- Cotton or cotton blend yarn
- Crochet hook suited to yarn weight
- Yarn needle
- Scissors
- Measuring tape
- Optional lining fabric and handles
Step-by-Step Guide
Step 1: Choose the tote shape
Decide whether you want a tall tote, a wide market-style bag, or a more rectangular everyday shape. A waves pattern works beautifully on all of these, but the shape you choose will affect how the wave lines appear. A taller bag can make the waves look elongated, while a wider bag shows more horizontal flow.
A clear shape choice helps the stitch pattern stand out better.
Step 2: Create the base
Start with a flat base for the bag. You can make a rectangular or oval bottom depending on the style you want. Work evenly around the base to create a stable foundation. A strong base is especially important for tote bags because they need to support everyday items.
This step helps the bag sit properly when carried.
Step 3: Build the body in waves
Once the base is complete, begin the wave stitch pattern around the body of the bag. Depending on the version you choose, the waves may be created with increases and decreases or with a decorative stitch repeat that naturally forms curved lines. Keep the pattern consistent so the wave effect looks intentional and balanced.
The waves are the main design element, so they should remain even and readable.
Step 4: Keep the tension steady
Tote bags need to be sturdy, and wave patterns can sometimes become too loose if the tension changes. Keep your stitches consistent so the bag holds its shape and the design does not stretch too much over time. A firm fabric will make the bag more useful for everyday wear.
Stable tension gives the tote a better drape and finish.
Step 5: Continue until the bag reaches the right height
Work the wave pattern until the body of the bag is deep enough for your needs. If you want a structured tote, keep the height moderate. If you want more storage, continue a little longer. Make sure both sides remain even as you build upward.
A balanced height helps the bag function well.
Step 6: Add the top edge
When the tote is the right height, finish the top with a clean border. A row of single crochet or a tighter edge stitch can help reinforce the opening. This step is important because the top of a tote gets a lot of use.
A neat top edge improves durability and appearance.
Step 7: Attach the handles and lining
You can add crocheted handles, fabric handles, or a combination of both. Sew them securely to the top edges so they can hold weight comfortably. If you want extra strength, line the bag with fabric. This helps protect the stitches and keeps smaller items from slipping through.
Helpful Tips
A waves tote looks especially beautiful in ocean-inspired colors, but it also works very well in neutral tones if you want a more understated everyday bag. If you want to emphasize the pattern, use contrasting shades. If you want a softer look, try tonal yarns in the same color family.
2. Crochet Granny Stripes Tote Bag Pattern
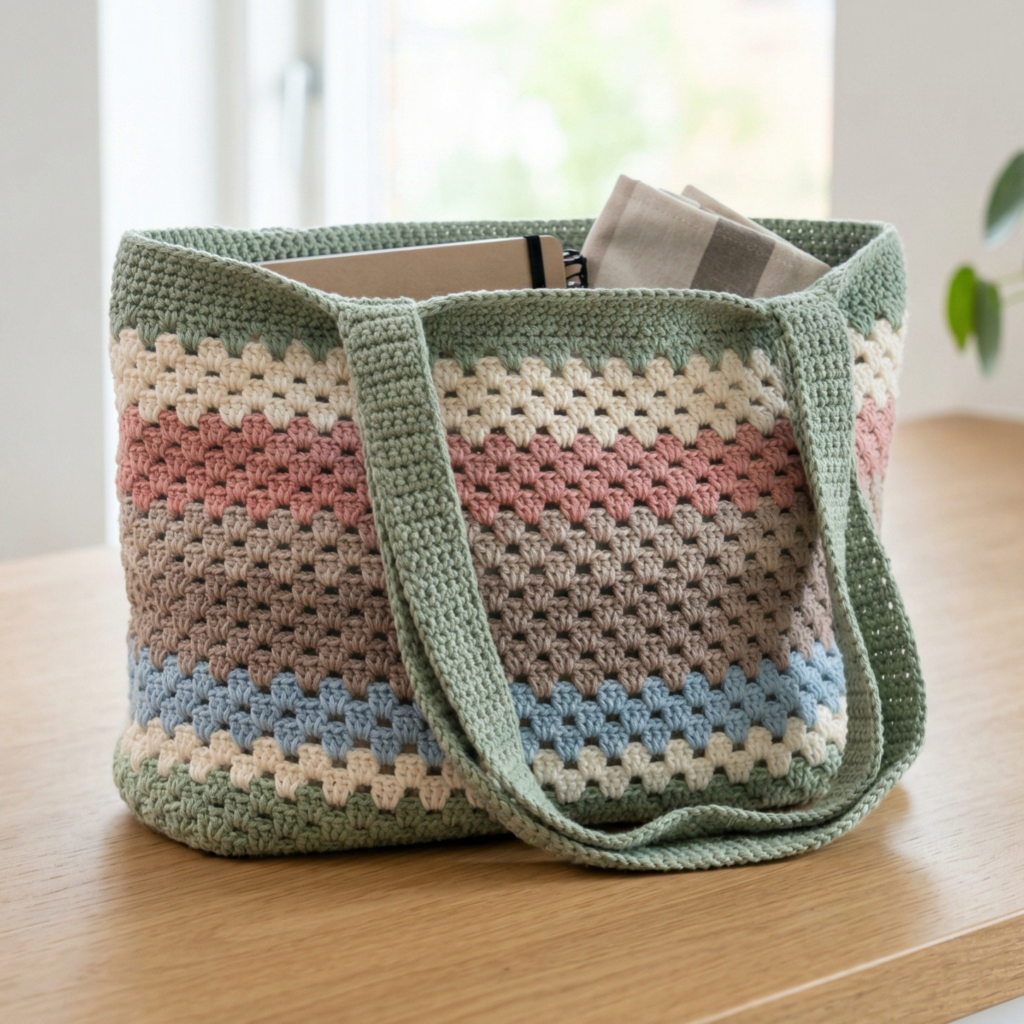
A granny stripes tote bag brings classic handmade charm into a practical shape. Granny stitch has a nostalgic feel that many crocheters love, and when it is used in stripes, it creates a colorful, cheerful tote bag that feels both retro and modern. This is a great project for using leftover yarn while still creating something stylish enough to carry every day.
Quick Notes
Skill level: Beginner
Finished size: Medium tote bag
Style: Retro, colorful, cheerful, handmade
Best colors: Rainbow shades, pastels, earth tones, or classic neutrals
Materials
- Cotton yarn in multiple colors
- Crochet hook suited to yarn weight
- Yarn needle
- Scissors
- Measuring tape
- Optional lining and handles
Step-by-Step Guide
Step 1: Plan the stripe order
Before starting, decide how you want the stripes to appear. You can make wide bold stripes, narrow delicate stripes, or a repeating color sequence. Planning the color order in advance helps the tote look polished rather than random.
A thoughtful stripe sequence gives the bag more visual balance.
Step 2: Crochet the base panel
Start with the base of the tote, which may be worked as a flat rectangle or as part of a folded construction. Some makers prefer to crochet one long panel that is folded into a bag, while others make separate front and back panels. Either approach works well.
A solid base makes the bag easier to shape later.
Step 3: Add the granny stripe rows
Begin working the granny stripe pattern across the bag. This usually involves clusters of stitches separated by chain spaces. Switch yarn colors as planned to create the stripe effect. The clusters should stay even across the width of the bag so the stripes look clean.
The granny stitch texture gives the bag a charming vintage feel.
Step 4: Maintain even edges
Because granny stitch can be a little open, it helps to keep your sides neat as you work. Check the edges often so the tote stays rectangular and does not flare unexpectedly. A clean shape will make the bag easier to seam and use.
Regular checking helps the bag keep its structure.
Step 5: Continue to the desired size
Work the striped panels until the bag reaches the height you want. If you are making separate panels, make sure both pieces match. If you are making one folded piece, check the fold line and ensure it is straight.
Symmetry is very helpful in bag construction.
Step 6: Seam the sides and bottom
Join the panels together neatly, leaving the top open. Strong seams are important for tote bags because they need to support daily use. Use a sturdy yarn needle or crochet seam method so the edges hold up over time.
A secure seam makes the bag feel durable.
Step 7: Finish the top and add handles
Add a top border to the opening, then attach handles. This can be crocheted straps or purchased bag handles. If you want the bag to feel extra strong, line the inside with fabric before attaching the handles. That will help the stripes stay crisp and clean.
Helpful Tips
Granny stripes look beautiful in almost any color palette. Soft pastels make the tote feel sweet and vintage, while bold rainbow stripes give it a fun, lively personality. If you want a more subtle look, use earthy shades or a monochrome combination.
3. Crochet Gingham Print Tote Bag Pattern
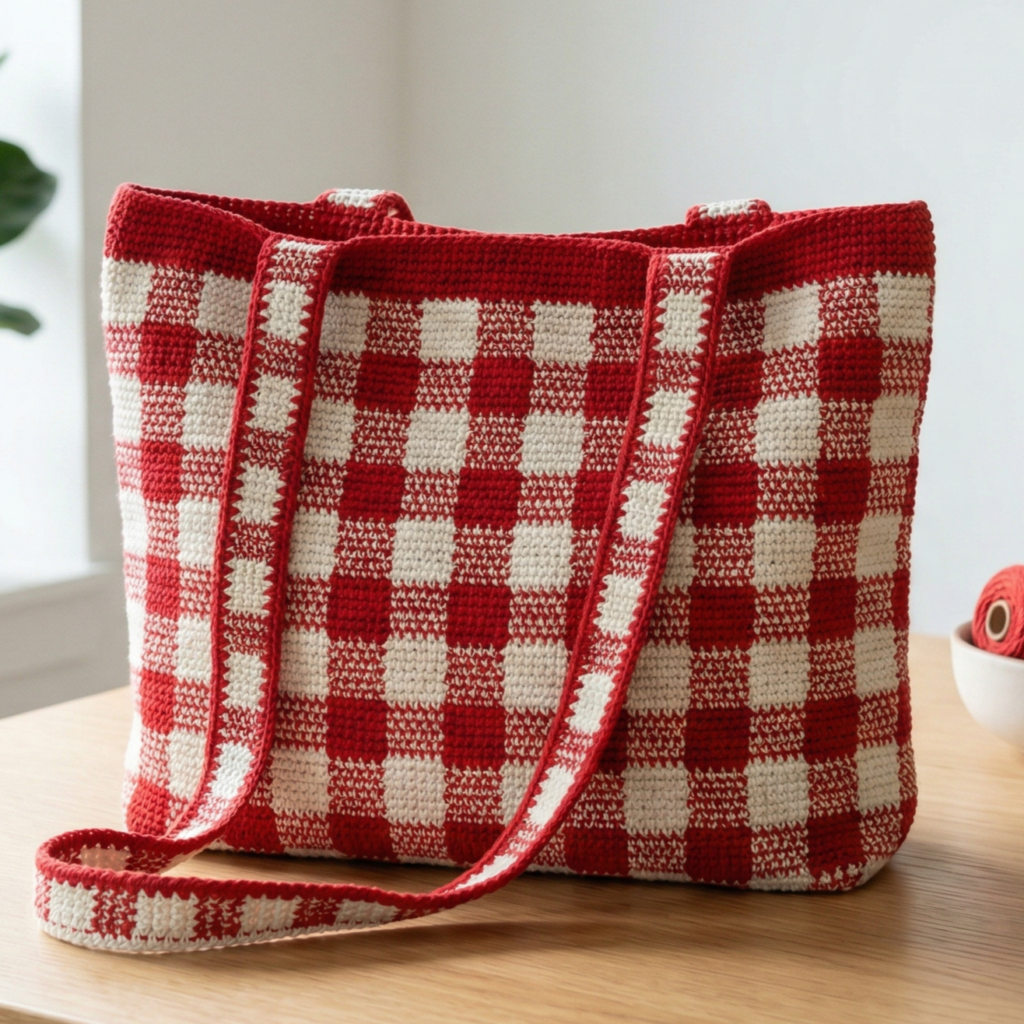
A gingham print tote bag has a timeless, fresh look that feels neat and stylish. Gingham is a pattern that instantly brings to mind classic summer clothing, picnics, and easy everyday charm. In crochet, it can be achieved with color changes and structured stitch placement that create a checked look. The result is a tote bag that feels clean, organized, and very wearable.
Quick Notes
Skill level: Intermediate
Finished size: Medium tote, usually structured
Style: Classic, clean, preppy, fresh
Best colors: Red and white, blue and white, black and white, pastel combinations
Materials
- Cotton yarn in two or three colors
- Crochet hook suited to yarn weight
- Yarn needle
- Scissors
- Measuring tape
- Stitch markers
- Optional lining and handles
Step-by-Step Guide
Step 1: Choose the gingham color palette
Pick two main colors that contrast clearly. Traditional gingham often uses one strong color and one white or cream base. If you want a softer or more modern look, pastel combinations also work well. The contrast is what creates the check pattern.
Clear contrast makes the gingham effect easier to read.
Step 2: Plan the square size
Gingham works best when the checks are evenly sized. Decide how large you want each square or block to appear before you start. Smaller checks create a more delicate look, while larger checks make the bag feel bold and graphic.
A planned repeat helps the pattern stay tidy.
Step 3: Crochet the base fabric
Work the bag body using color changes that create the check pattern. This may involve tapestry-style techniques or structured alternating blocks of color. Keep the stitches tight enough that the colors do not show through unevenly.
The fabric should feel neat and smooth.
Step 4: Keep the color changes organized
Because gingham depends on clean color blocks, it is important to carry yarn neatly and switch colors in the same places each row. If the transitions are messy, the checks will lose their crisp look. Use stitch markers if needed to keep track.
Organization is key to a tidy gingham print.
Step 5: Shape the bag panels
Work the front and back panels evenly so the checks line up as closely as possible. If you want a more polished finish, take extra time to match the rows before seaming. That helps the bag look more intentional and finished.
Matching the panels improves the overall appearance.
Step 6: Seam and reinforce
Join the panels firmly and reinforce the bottom and sides. Gingham bags often look best when they have a slightly structured shape, so a sturdy seam or lining can really help. This also makes the bag more practical for carrying heavier items.
Step 7: Add handles and a clean finish
Attach matching handles and finish the top edge with a tidy border. A clean border helps the checks remain the center of attention. If desired, line the bag with fabric to make the interior look just as neat as the outside.
Helpful Tips
Gingham prints always look fresh, but the colors you choose can completely change the mood. Red and white feels classic, blue and white feels crisp, and soft pink and cream feels sweet and modern. If you want a bag that works with many outfits, a neutral gingham palette is a great option.
4. Crochet Floral Printed Tote Bag Pattern
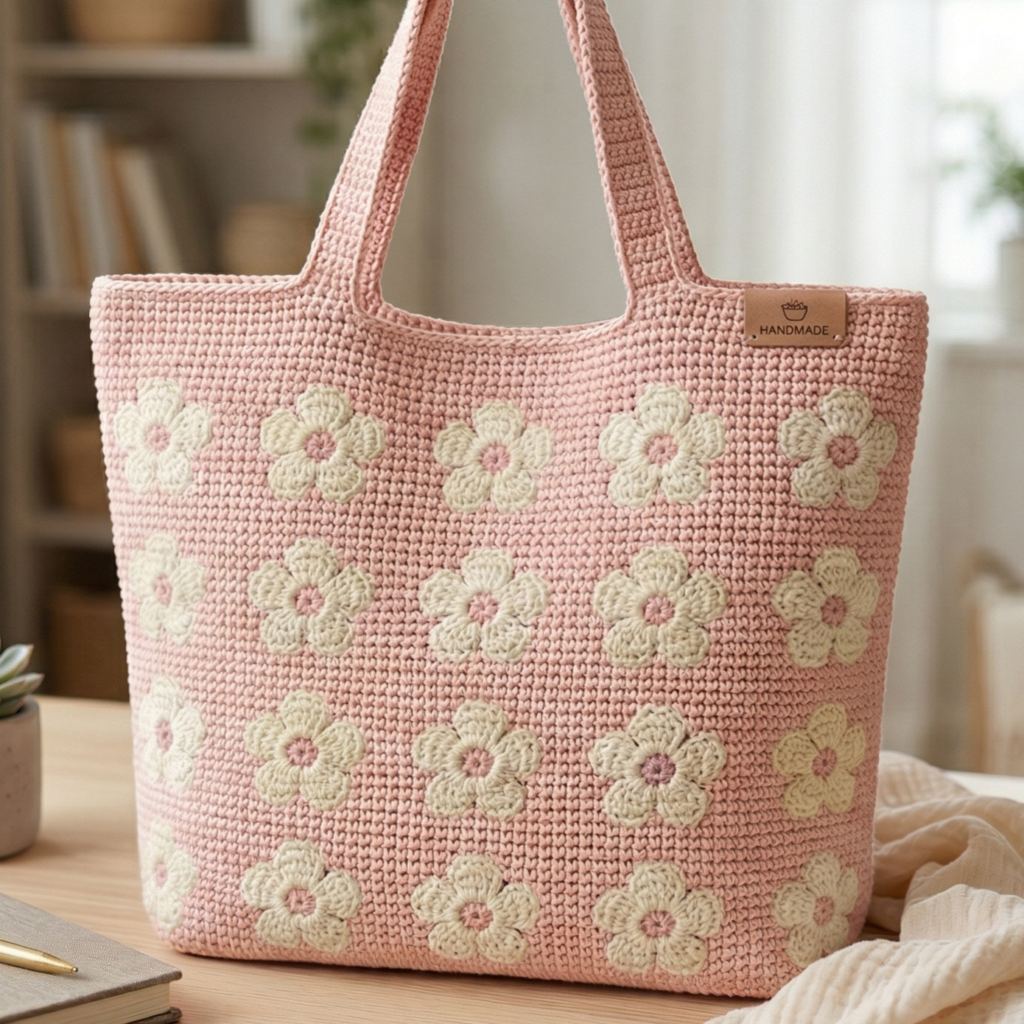
A floral printed tote bag brings softness and charm to a practical everyday accessory. This style is ideal if you love feminine details, botanical themes, or handmade bags with a gentle, decorative feel. Crochet floral print can be created with floral motifs, colorwork, or appliqué, depending on the look you want. It is a lovely way to add personality to a tote without making it feel too heavy or formal.
Quick Notes
Skill level: Intermediate
Finished size: Medium to large tote
Style: Feminine, fresh, decorative, spring-like
Best colors: Cream, blush, sage, lavender, soft yellow, rose, and green accents
Materials
- Cotton yarn in floral and background colors
- Crochet hook suited to yarn weight
- Yarn needle
- Scissors
- Measuring tape
- Optional lining and handles
Step-by-Step Guide
Step 1: Choose the floral style
Decide whether you want small repeated flowers, large motif flowers, or a printed-look pattern made from colorwork. Small flowers create a soft, scattered effect, while larger motifs make a bold statement. The choice will determine how busy or delicate the bag feels.
The floral style sets the tone of the bag.
Step 2: Make the bag base
Begin with a simple and sturdy base. A plain background often works best for floral designs because it lets the flowers stand out. Crochet the main bag shape first, leaving space for the floral pattern to be added or incorporated.
A neat base helps the floral design look organized.
Step 3: Add the floral motifs or print effect
If you are using appliqué flowers, crochet them separately and sew them onto the bag. If you prefer a printed look, work the flowers into the fabric using color changes or surface stitching. Keep the motifs evenly spaced so the bag does not feel too crowded.
Balanced placement gives the floral design a more refined look.
Step 4: Add leaves or small accents
Tiny green leaves or stem details can make the flowers feel more complete. You do not need too many details—just enough to suggest a botanical theme. The floral elements should feel decorative, not overwhelming.
A little greenery helps the design feel natural.
Step 5: Shape the tote panels
Make sure the front and back pieces match in size and style. If the flowers are placed on only one panel, keep the back simple for balance. If flowers are all over the bag, maintain consistent spacing and size so the print looks intentional.
Consistency is what makes floral patterns look polished.
Step 6: Seam and reinforce
Join the panels carefully, making sure the floral details do not get caught in the seams. Reinforce the bottom and sides if needed. A floral tote often looks especially pretty when it keeps a soft but structured shape.
Step 7: Finish with handles and edging
Add a clean border at the top and attach comfortable handles. If you want extra durability, line the tote with fabric so the floral details stay protected and the bag holds up to daily use.
Helpful Tips
A floral tote can be made soft and romantic or bright and cheerful depending on the colors you choose. Pastel flowers give it a sweet spring feel, while bold blossoms create a lively statement bag. For everyday use, a neutral base with soft floral accents is often the easiest to style.
5. Crochet Origami Style Tote Bag Pattern
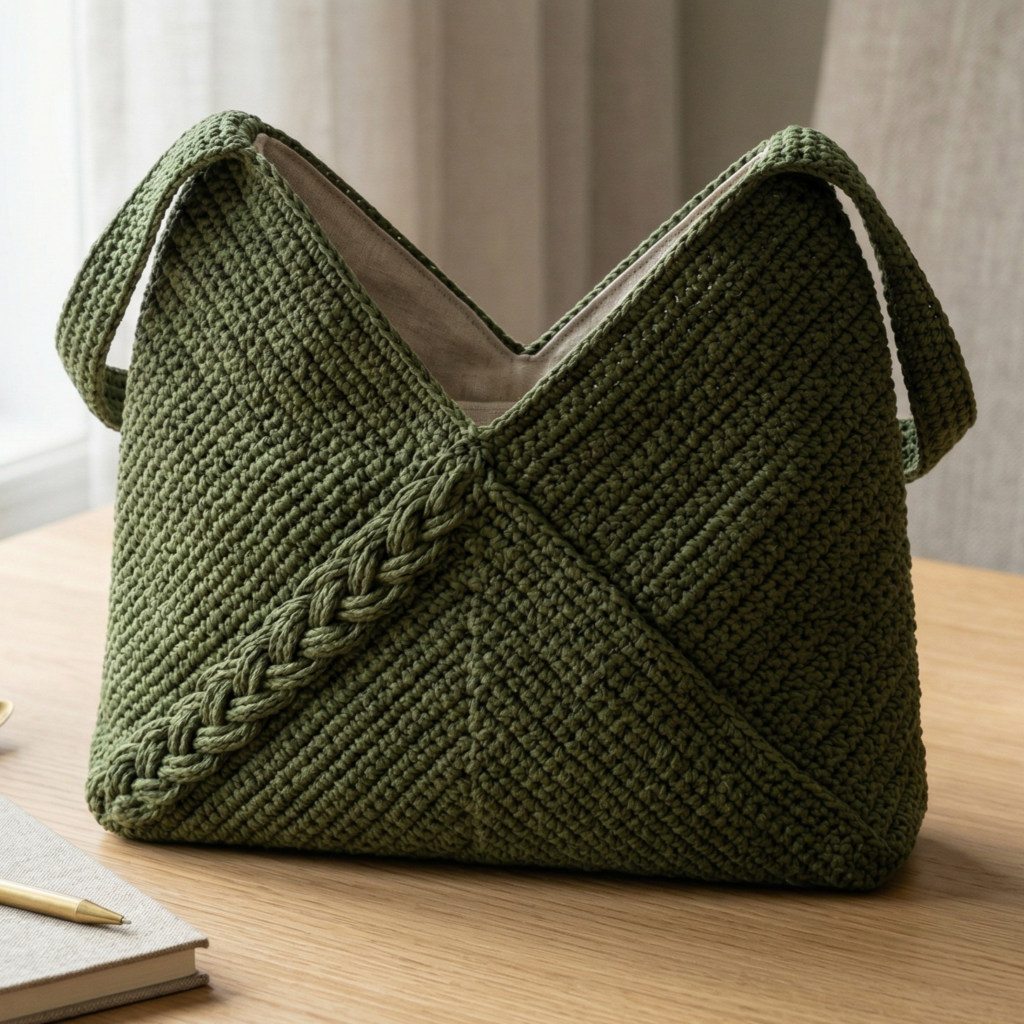
An origami style tote bag is structured, modern, and elegant. The name gives it a clean, folded feel that makes the bag look a little more architectural than a soft casual tote. This style is perfect if you want a bag that feels minimal, polished, and contemporary while still being handmade and practical.
Quick Notes
Skill level: Intermediate
Finished size: Medium structured tote
Style: Minimal, modern, geometric, fashion-forward
Best colors: Black, cream, taupe, olive, navy, or muted monochrome shades
Materials
- Cotton yarn with firm structure
- Crochet hook suited to yarn weight
- Yarn needle
- Scissors
- Measuring tape
- Stitch markers
- Optional fabric stiffener, lining, and handles
Step-by-Step Guide
Step 1: Plan the folded structure
An origami-style tote usually depends on clean folds, sharp lines, and thoughtful shaping. Before you begin, decide where the folds or angles will appear. Some bags use a folded base, while others use a panel construction that creates a geometric silhouette when assembled.
A clear plan helps the bag feel intentional and stylish.
Step 2: Crochet the main body pieces
Work the bag body in flat pieces or structured sections. Keep the fabric firm and even so it can hold the folded look. Simple stitches are often the best choice because the shape itself is the main feature of the design.
A clean stitch base gives the bag a more modern finish.
Step 3: Shape the origami folds
Create the folded sections by seaming or shaping the panels in a way that brings the corners or angles together. This may involve tucks, seams, or overlapping sections. The finished bag should have a sculpted appearance rather than a soft slouch.
The folds are what give the bag its unique identity.
Step 4: Maintain crisp edges
Because this style is inspired by origami, the edges should look neat and defined. Keep the corners sharp and the seams tidy. A small amount of bag stiffener or lining can help the structure hold its shape.
Crisp edges make the bag look polished and contemporary.
Step 5: Assemble the body
Once the folds are in place, join the body securely. Double-check that the shape remains balanced and that both sides mirror each other. A well-assembled origami tote should feel sturdy and slightly sculptural.
The assembly is where the design really comes together.
Step 6: Add the handles
Choose handles that match the minimalist style. Simple crocheted handles, leather straps, or thick cords can all work well. Make sure they are attached securely because a structured tote may be used to carry heavier items.
The handles should complement the clean shape.
Step 7: Finish with a clean lining
A lining can help the origami style stay crisp and functional. It also protects the inside of the bag and makes it easier to carry small items. If you want a very polished result, this step is worth the extra effort.
Helpful Tips
Origami-style bags look best when the design is kept simple and the shape is allowed to shine. Solid colors often work beautifully because they emphasize the geometry. If you want a very chic everyday tote, choose a neutral tone and keep the finishes minimal.
Conclusion
Crochet tote bags are one of the most rewarding projects you can make because they combine style, usefulness, and creativity in one piece. They are practical enough for everyday life, yet they also give you room to explore texture, color, structure, and shaping in a way that feels deeply satisfying. A handmade tote is more than just a bag; it is something you can carry with pride because it reflects your style and your effort in every stitch.
These five tote bag patterns each bring something different to the table. The waves tote feels fresh and energetic. The granny stripes tote has a nostalgic handmade charm. The gingham print tote is crisp and timeless. The floral printed tote feels soft and decorative. The origami-style tote is modern and structured. Together, they show how versatile crochet can be when it comes to everyday accessories.
Whether you are making a tote for yourself, for someone else, or for your handmade shop, these patterns give you a strong starting point for creating bags that are both beautiful and durable. With good yarn, careful shaping, and neat finishing, a crochet tote can become a favorite item that you reach for again and again.