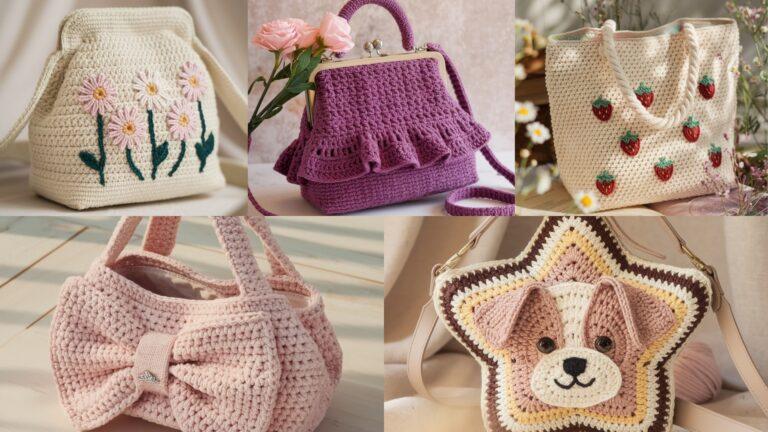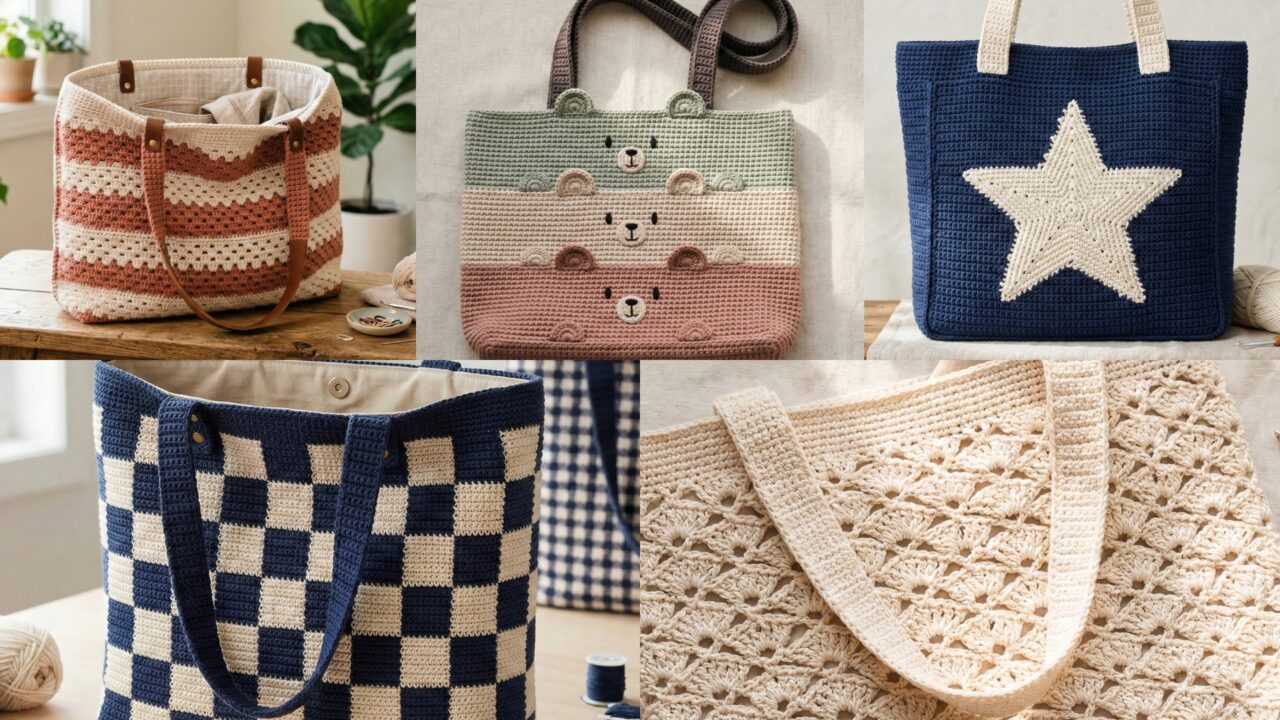
Tote bags are the everyday heroes of handmade accessories — roomy, quick to make, and endlessly customizable. Whether you want a classic granny-stripe shopper, a sharp gingham market bag, a cute “Three Bears” family set, a bold star tote, or an airy lacy shell tote for sunny days, this post gives full, practical, and very detailed patterns so you can make any of them start-to-finish.
Below you’ll find:
- A short introduction with yarn/hook advice, measurements, and general construction tips (important for all five bags).
- Five full patterns (materials, gauge, skill level, step-by-step construction from base to straps to finishing), each with variations and styling ideas.
- A strong conclusion with care and selling/gifting suggestions.
Let’s get stitching!
Quick primer — yarn, hooks, measurements, construction choices
Yarn & hook recommendations
- Everyday cotton (worsted / aran) — best choice for durability, structure and washability. Great for market and tote bags.
- Cotton blends or recycled cotton — softer, good for slouchy totes.
- T-shirt yarn / chunky cotton cord — ideal for rigid, sculptural totes and quick projects.
- Acrylic — workable but may stretch and look less tidy for heavy loads.
- Hook sizes: 4.0–6.5 mm for most patterns (use smaller hook for denser fabric). For t-shirt yarn or cord use 8–12 mm.
Hardware & notions
- Tapestry needle, stitch markers, measuring tape, scissors.
- Optional: magnetic snap, zip closure, cotton fabric for lining, interfacing, rivets or leather tabs to reinforce straps.
Measurements & fit
Decide intended bag size early (sample finished sizes are below). Common tote sizes:
- Small market / lunch tote: 10–12″ wide × 10–11″ high
- Medium everyday tote: 13–15″ wide × 12–14″ high
- Large tote / beach: 16–20″ wide × 14–16″ high
Make a 4″ (10 cm) swatch in the stitch pattern to calculate gauge — that lets you scale stitch counts to any desired width. Use the digit-by-digit method in earlier posts if you want exact math.
Construction approaches used in these five patterns
- Flat panel folded & seamed (classic method) — makes lining straightforward.
- Worked in the round (seamless) — neat, good for circular/oval bases.
- Granny / motif join — decorative, great for scrap-busting.
- Reinforce straps with leather tabs or extra rounds/lining for strength.
Sewing a lining & adding closures
- Use medium-weight cotton or canvas for lining. Add fusible interfacing for structure. Sew interior pockets, then hand-sew or machine-sew the liner into the bag top.
- Rivet or stitch leather tabs where straps meet the bag. If adding a zipper, sew the zipper to the lining first then slip the whole lining into the crocheted shell and stitch in place.
1. Crochet Granny Stripe Tote Bag Pattern
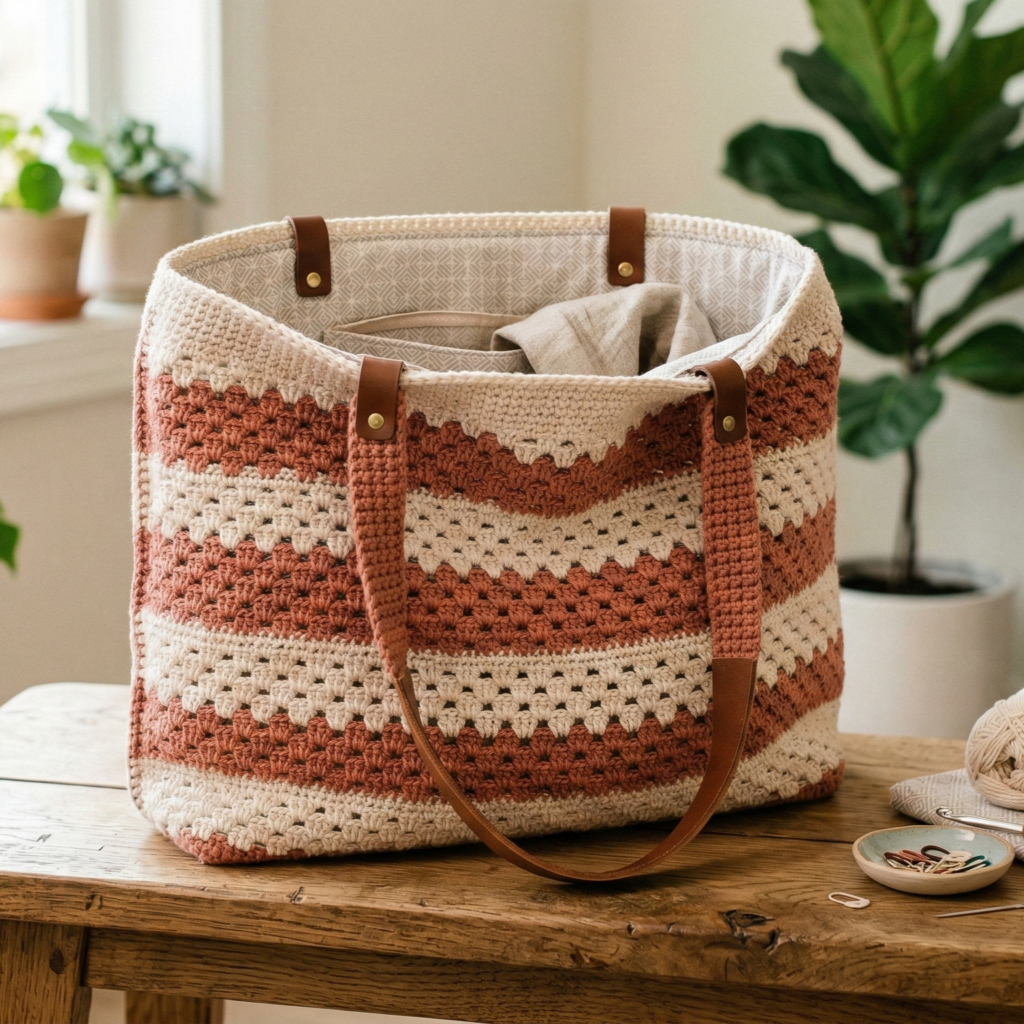
A modern twist on the granny-square aesthetic: horizontal granny stripes build a wide, structured tote — lightweight but roomy.
Skill level: confident beginner
Finished size (sample): 15″ wide × 13″ high (body only) × 4″ base.
Yarn & hook: worsted cotton (2 colors or more), 5.0 mm hook
Stitches used: ch, dc, sl st, sc, granny cluster (3 dc cluster)
Materials (sample)
- Color A (main): 350–450 yd worsted cotton
- Color B (contrast): 150–250 yd worsted cotton
- 5.0 mm hook, tapestry needle, stitch markers, optional lining fabric & interfacing
Gauge (example)
- 14 dc × 8 rows = 4″ in granny cluster band (blocked). Adjust hook for desired density.
Construction overview
Work horizontal granny stripe panels (front and back), crochet a rectangular base or leave flat bottom with extra rounds, join side seams, add a sturdy top band and straps, line and finish.
Step-by-step
Panel foundation (make 2 — front & back)
- Chain a multiple of 12 + 3 (for turning ch) to get desired width. Example: chain 63 (gives ~15″ width for our gauge).
- Row 1 (right side): dc in 4th ch from hook (counts as first dc cluster), ch1, 3 dc in next ch, ch1, skip 3 ch, repeat across ending with 3 dc in last stitch; turn. (You’re making horizontal granny clusters separated by small chains.)
- Row 2: Join Color B if changing. Sl st into center ch-1 space of first cluster, ch3 (counts as dc), work 3 dc in same sp, ch1, 3 dc in next ch-1 sp, repeat across. Repeat rows until panel height reaches 13″ (or desired height). Keep color changes every 2–4 rows for stripe rhythm.
- Make the second identical panel.
Base (optional rectangular base for more depth)
Option A (flat folded bottom): skip separate base; create depth by folding panels together and stitching bottom seam to desired depth (e.g., 4″ base achieved by leaving a box corner).
Option B (sewn-in base): cut a rectangle of interfaced canvas 15″ × 4″ and sew into bottom interior; or crochet a rectangle base: chain length equal to base width (15″ gauge), work rows of sc to desired 4″ depth; stitch base to bottom of panels.
Join panels
- With wrong sides facing and aligned, sc through both layers along side edges and bottom (or use whipstitch with tapestry needle). For a neat finish, use single crochet join: sc through both loops of front+back, spacing even and tight.
Top band & straps
- Join yarn around top edge and work 3–4 rounds of sc in tighter tension to stabilize rim. For straps: decide strap length (20–26″ for shoulder strap). Option 1: Crochet straps — foundation ch to length (~70–90 ch depending on gauge), work 6 rows of sc or hdc for a 1.5–2″ wide strap, fold in half and sc together for thickness and strength. Attach ends to inside top band with many passes; reinforce with leather tab if desired. Option 2: make wider handles by crocheting and then lining with cotton webbing.
Lining (recommended)
- Make a fabric liner 15″ × (13″ + seam + 2″ for top fold). Fuse interfacing to liner’s outer piece for structure. Sew lining, insert into bag, fold top seam over the top band and hand-stitch in place (invisible ladder stitch).
Finishing touches & variations
- Add interior pocket: sew small fabric pocket to liner before inserting.
- Fringe or tassel on sides for boho vibe.
- Use gradient yarn to make striping automatic.
2. Crochet Gingham Tote Bag Pattern
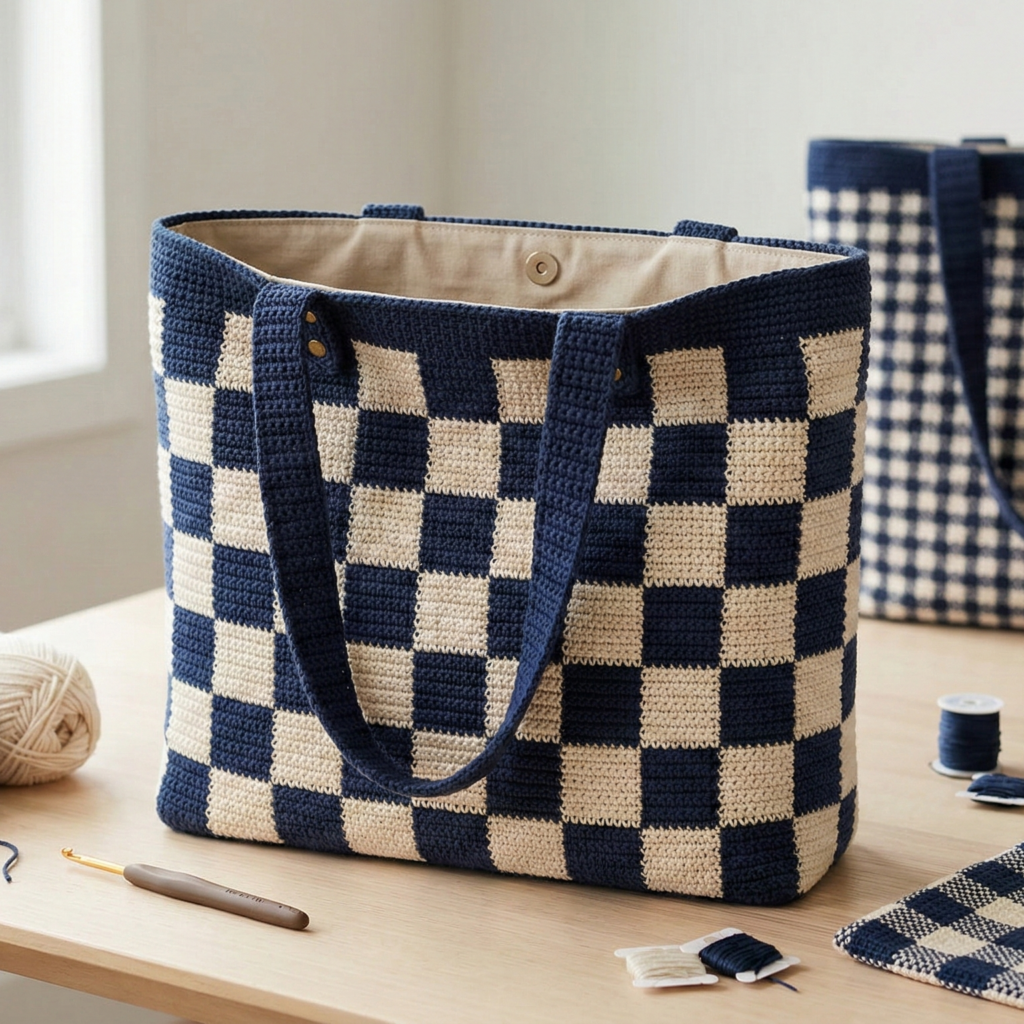
Classic gingham check — neat, slightly retro, and surprisingly simple using color-blocked single crochet (mosaic effect).
Skill level: intermediate (color management)
Finished size (sample): 14″ wide × 13″ high × 4″ base
Yarn & hook: worsted cotton (two colors), 4.5–5.0 mm hook
Stitches used: ch, sc (single crochet), color change techniques (carry or bobbins)
Materials
- Color A (light), Color B (dark), ~500–700 yd total
- 4.5 mm hook, tapestry needle, optional lining material, magnetic snap or zipper
Construction overview
Work a rectangular panel in single crochet with a checkerboard color chart, make second panel, join sides and base, finish with top band and straps. Use a neat color management method for clean back — either carries (short floats) or small bobbins for each block.
Step-by-step
Checkerboard panel (make 2)
- Plan your checkerboard: decide block size in stitches × rows (e.g., 4 sts × 4 rows per square). Using your gauge swatch, calculate how many blocks to reach desired width. Example: 14″ width ÷ (4 sts per sq ÷ sts-per-inch) → chain accordingly. A practical approach is to chain foundation to final stitch count (test swatch to estimate).
- Row 1 (foundation): ch N for desired width + 1. Sc in 2nd ch and across. Turn.
- Row 2 onward: For each block region, sc in color A or B according to checker pattern. Change color at block boundaries: when changing color, pick up new color and sc into the next stitch; carry unused color across at the row’s end (if float length short), or cut and rejoin if floats get long. Keep floats tidy and tension even.
- Work until panel reaches desired height (13″). Make a matching panel.
Base & joining
- You can create a boxed base by joining panels on three sides and leaving top open, then sewing the bottom corners to create a 4″ base, or add a crocheted rectangular base (sc rows) and join to sides.
Top band & straps
- Stabilize top edge with 3 rounds of sc in one color. Add straps (crocheted bands of 1.5–2″ width) and reinforce with sewing or rivets. For gingham, contrast inner straps with solid color.
Lining & closure
- Lining inside with cotton canvas is especially nice for gingham bags; add zipper top or magnetic snap.
Variations
- Mini gingham: smaller checks for a youthful look.
- Ombre gingham: fade outer color to create gradient checks.
3. Crochet Three Bears Tote Bag Pattern
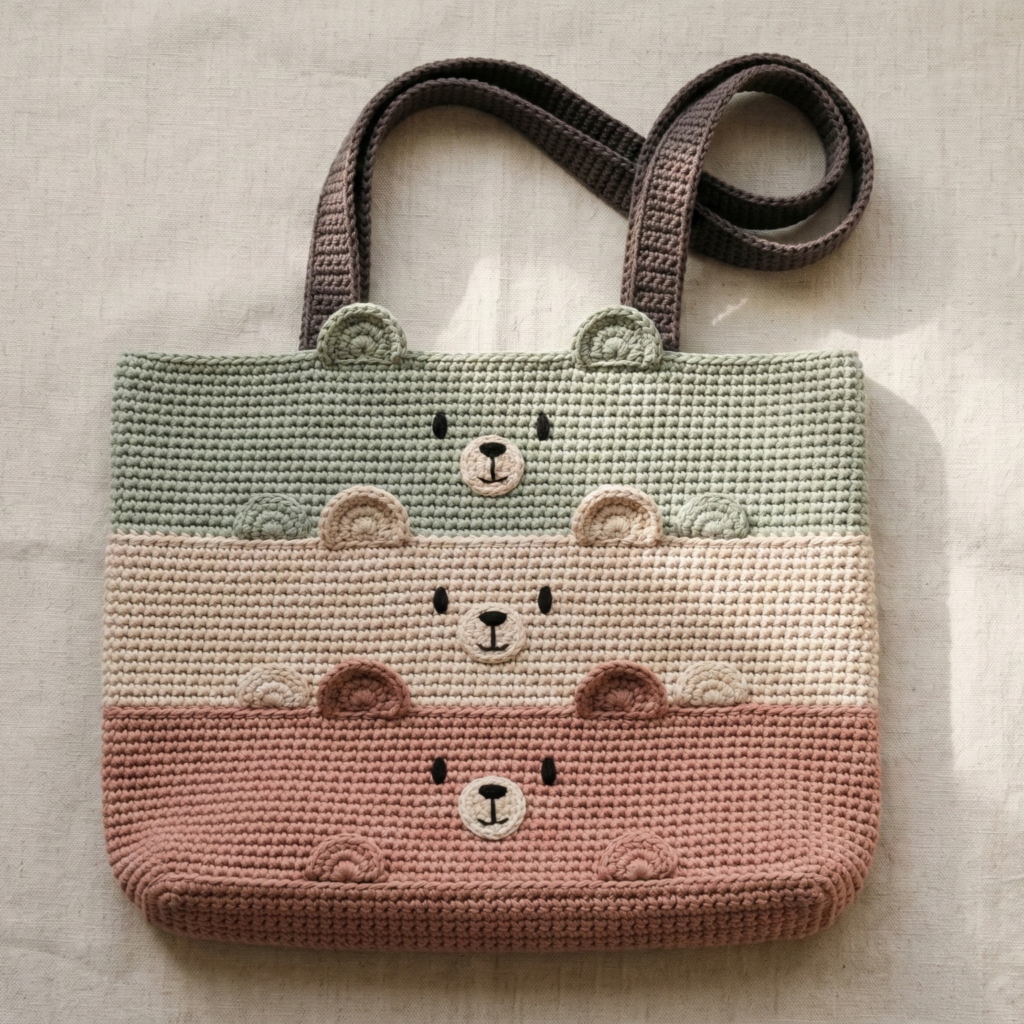
A playful family-themed set idea: a main tote with three small pocket pouches sewn on the front shaped like bear heads (Mama, Papa, Baby) — cute as a grocery or picnic bag for families or as a gift.
Skill level: intermediate (appliqué & assembly)
Finished size (main bag): 16″ wide × 14″ high (tall roomy tote)
Yarn & hook: worsted cotton for bag + small amounts of contrasting colors for bear appliqués, 5.0 mm hook
Stitches used: sc, hdc, dc, magic ring for appliqués
Materials
- Main color: 600–900 yd worsted cotton
- Bear colors: small amounts in 3 sizes (neutral browns, blush, etc.)
- 5.0 mm hook, tapestry needle, felt for embroidering faces (optional), lining fabric
Construction overview
Make a large crochet panel (single crochet or sturdy stitch), create three bear head appliqués in different sizes, sew onto front, add pockets inside/outside for function, add straps, and line.
Step-by-step
Main tote body (worked in the round or flat)
- Option A (worked flat, folded & seamed): chain width for 16″ + 1; Row 1: sc across; work sc rows until piece height = 28″ (will be folded in half to make 14″ high bag). Fold and seam sides leaving top open; reinforce bottom with 3–4 rounds of sc.
- Option B (worked in continuous round): foundation chain joined into loop, sc rounds until panel height 14″; create boxed bottom by crocheting a rectangular base and joining.
Bear appliqués (3 sizes)
Large bear (Mama)
- MR, ch1, 8 sc in MR — (8).
- R2: inc around → 16.
- R3: sc1, inc → 24.
- R4: sc2, inc → 32. (Adjust rounds to desired head size)
- Add small ears: MR, 6 sc, flatten and sew two to top edge. Embroider face or sew felt eyes/nose. Repeat for medium and small bears with fewer rounds (reduce increments).
- Make three heads and place them evenly along the top of the front panel (left to right) and tack in place. Sew around edges with small stitches to secure.
Add pockets
- You can make each bear also function as a pocket: leave bottom ⅔ of each bear opening unsewn, fold and whipstitch bear base to panel leaving top edge open so small items fit inside the bear head pocket.
Straps & lining
- Add sturdy straps — 24–26″ long for shoulder carry. Reinforce strap attachment with cross-stitching and leather or extra rounds. Line with heavy cotton and add interior pockets.
Variations & gifting ideas
- Make a matching small “Baby Bear” pouch as a keychain.
- Embroider names or initials under each bear as personalization for families.
4. Crochet Star Tote Bag Pattern
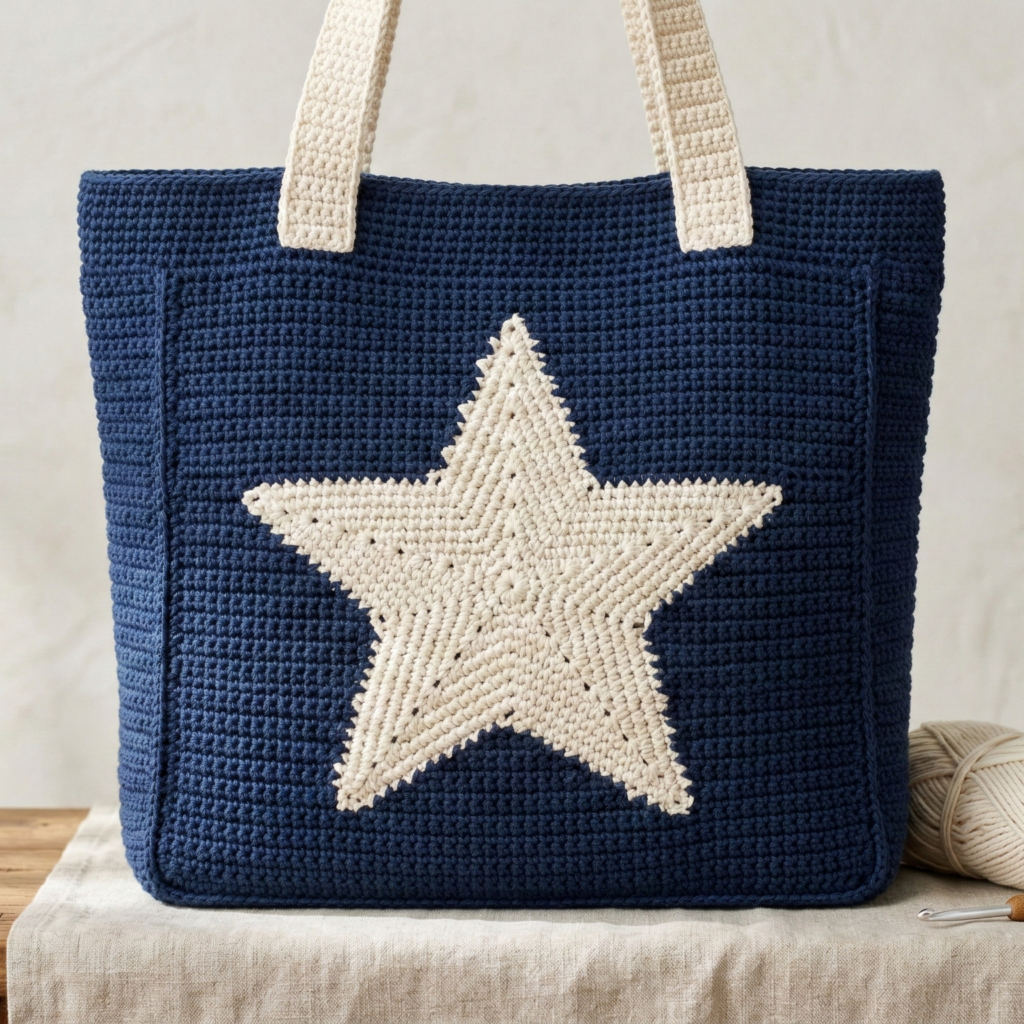
A bold, graphic tote with a large star motif centered on the front — works beautifully in two contrasting colors for dramatic contrast.
Skill level: intermediate (intarsia / applique)
Finished size (sample): 15″ × 13″ × 4″ base
Yarn & hook: worsted cotton, 5.0 mm hook
Stitches used: sc for background, star chart in surface crochet or intarsia
Materials
- Background color: ~400–600 yd
- Star color: ~150–250 yd
- 5.0 mm hook, tapestry needle, optional lining & stiffener
Construction overview
Two main options: 1) Crochet the star separately as an appliqué (recommended for clean edges), 2) Intarsia-style single-crochet panel where you change color blocks as you work to create a pixel star. After panel made, assemble bag as with other panels.
Step-by-step (appliqué method — easiest and cleanest)
Body panel
- Make two solid panels in sc to desired size (15″ × 13″). Single crochet produces a dense, tidy surface.
Star appliqué
- Create a star template on graph paper at the scale of your panel (e.g., 60 sts × 52 rows grid matches panel stitches and rows). Option A: Crochet the star as a separate flat shape: chain and form a star by working triangle wedges: make 5 identical wedge pieces and sew them together into a star. Option B (recommended): cut a star shape from stiff felt, cover by surface single crochet or chain and sew using whipstitch, or use tapestry needle to sew a crocheted star (made by repeated triangular increases) onto the panel.
- Center star on front panel and sew securely with whipstitch, hiding ends.
Assembly & straps
- Join panels as in previous patterns, add top band, straps, and a lining if desired.
Variations
- Make a multi-star panel with smaller stars scattered; use metallic yarn for a night-sky effect.
- Make patchwork stars for a quilted effect.
5. Crochet Lacy Shell Stitch Tote Bag Pattern
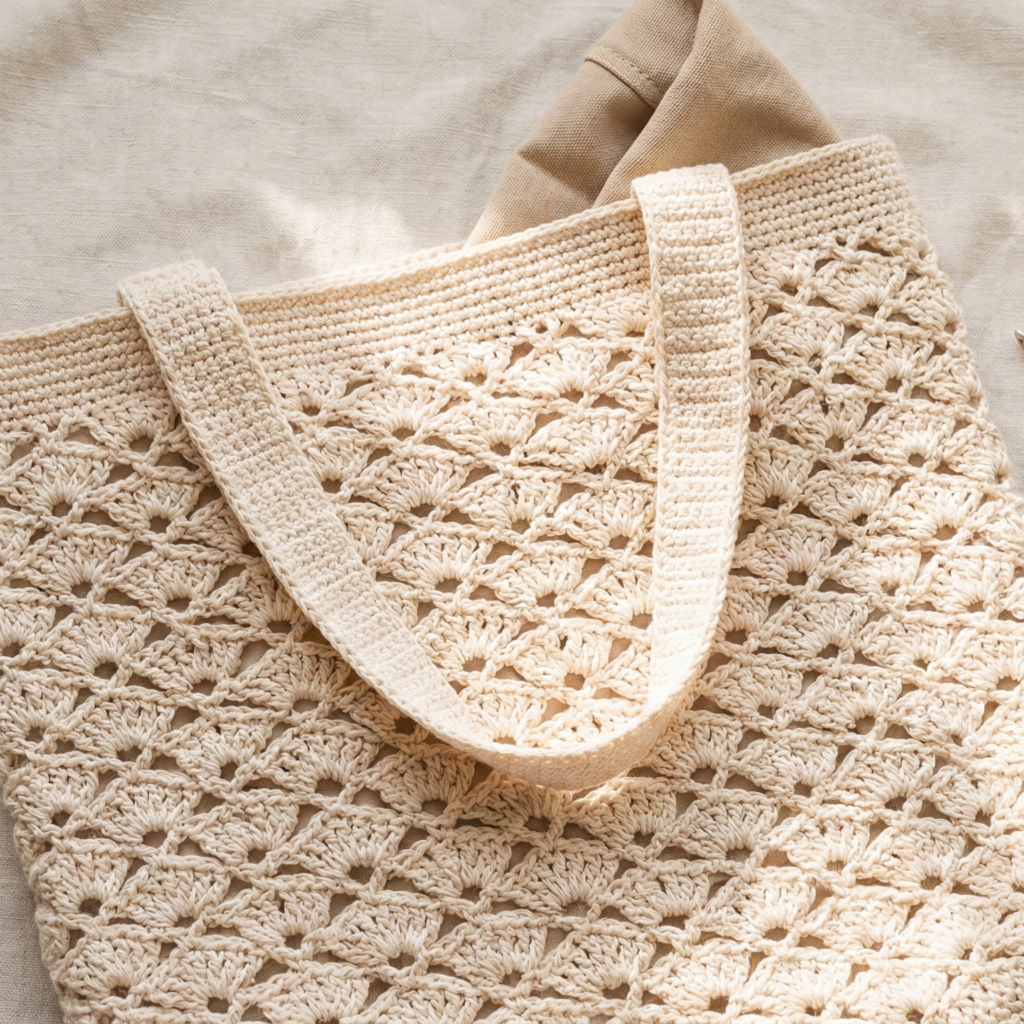
An elegant, airy tote in shell stitch — perfect for summer markets, beach days, or pairing with breezy outfits. Line it if you want to use it for small items.
Skill level: confident beginner → intermediate
Finished sample: 14″ wide × 13″ high × 4″ base
Yarn & hook: DK cotton or cotton blend, 4.5–5.5 mm hook
Stitches used: sc, shell (5 dc in one stitch), v-stitch, ch-spaces
Materials
- ~500–700 yd DK cotton
- 4.5–5.5 mm hook, tapestry needle, optional lining
Construction overview
Work a flat rectangular panel or two panels in shell stitch, make a base or box corners for depth, join panels and work a sturdy top band and straps; add a liner for function.
Step-by-step
Panel (make 2)
- Chain a multiple of 6 + 1 for turning. Example: ch 85 for ~14″ width (test gauge).
- Row 1: sc in 2nd ch from hook and across (creates a stable foundation). Turn.
- Row 2 (shell row): skip 2 ch, [5 dc in next ch], skip 2 ch, sc in next ch repeat across. Turn.
- Row 3: ch3 (counts as dc), dc into center of next shell, sc in next sc, dc in center of next shell repeat across — or follow your chosen shell stitch repeat for a neat openwork. Continue until panel height 13″.
Base & join
- Either box the bottom corners: with right sides together, fold the panel and seam along sides and bottom leaving top open, then stitch a 4″ base by closing corners (measure and stitch across corner triangles), or create a crocheted rectangle base and join.
Topband & straps
- Add 3–4 rounds of sc around top with a slightly smaller hook to stabilize the delicate edge. Work straps in sturdy stitch (6–8 rows of sc width) and sew into top band. Reinforce strap ends with whipstitch and a small leather tab or extra rows.
Lining
- Because shell stitch is open, add a cotton liner with interfacing and sew into top band.
Variations
- Add a drawstring top inside liner for secure closure.
- Make shells denser (7 dc) for a more sculptural look.
Final finishing tips — universal for all five bags
- Strengthen straps: straps are the stress points — either double them, line them with webbing, or sew leather tabs with rivets for longevity.
- Edge neatness: 2–4 rounds of sc around the top rim (in a tighter tension) gives polished look and hides stitch irregularity.
- Seams: mattress stitch (sewing with yarn) or single crochet seam — pick whichever gives the look you want. Seams can be invisible (mattress stitch) or decorative (visible sc seam).
- Lining: always prewash your lining fabric and fuse interfacing for shape. Sew pockets into the lining rather than the crochet shell for cleaner finish.
- Care: cotton totes are generally machine-washable on gentle cycle; remove any hardware/insert before washing if glued. T-shirt yarn may stretch; reshape while damp.
Project ideas, gifting & selling notes
- Make matching sets (Granny Stripe + Lacy Shell small clutch) for markets.
- Offer personalized stars or embroidered initials for commissioned totes.
- Price handmade totes factoring in yarn cost, hours, lining/ hardware — handmade time is valuable, and sturdy reinforced straps are a premium cost.
conclusion
These five tote patterns — Granny Stripe, Gingham, Three Bears, Star, and Lacy Shell — cover a wide spectrum of styles: utilitarian and sturdy for shopping, playful and cute for gifts, and elegant and airy for summer days. Each pattern was written with practical construction steps (base → body → rim → straps → lining) and clear options for reinforcement and personalization so you can make a tote that’s both beautiful and built to last.