A crochet sweater is one of those pieces that feels extra special the moment you put it on. It is warm, handmade, expressive, and completely different from anything mass-produced. That is what makes crochet sweaters such a favorite project for makers who love fashion as much as fiber art. They are wearable, practical, and beautiful, but they also carry that personal touch that turns a simple outfit into something memorable.
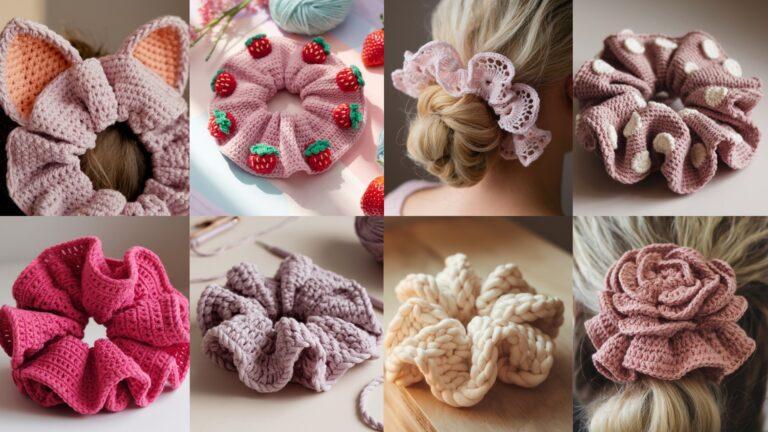
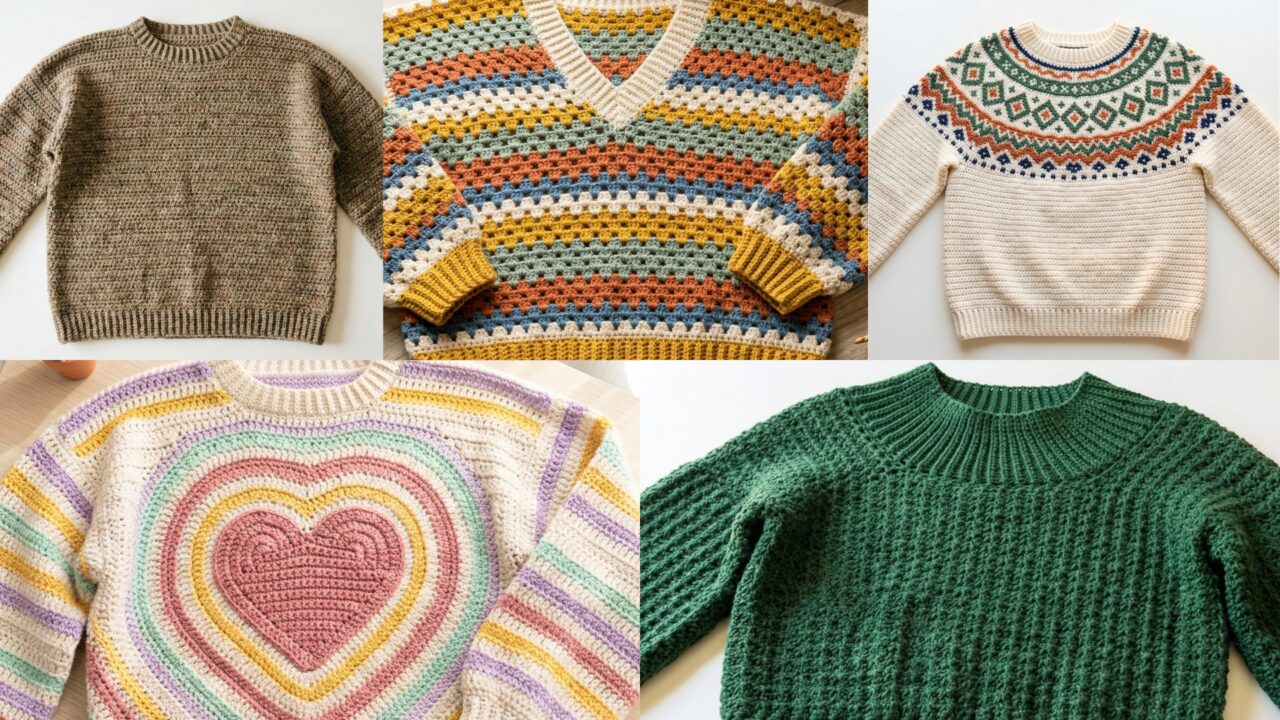
What makes crochet sweaters especially exciting is the variety you can create with just a few stitch choices and color changes. A striped heart sweater can feel playful and sweet. A granny striped V-neck sweater brings retro charm. A Fair Isle sweater adds timeless patternwork. A heritage lounging sweater gives off relaxed, cozy energy. A wide collar Trinity stitch sweater adds structure and elegance with a modern twist. Each design has its own personality, and each one can be adapted to fit your style, your yarn stash, and your comfort level.
This post walks through five stylish crochet sweater ideas in a clear, easy-to-follow way. You will find quick notes, common materials, skill level, finished size guidance, and detailed step-by-step instructions for each pattern. Whether you are crocheting for yourself, a friend, or your blog audience, these sweater ideas are designed to inspire and help you create pieces that feel polished, wearable, and worth the effort.
Quick Notes
Project type: Crochet sweaters for everyday wear
Best for: Personal wardrobe, handmade gifts, seasonal outfits, and pattern inspiration
Skill level: Beginner to advanced beginner for some styles, intermediate for colorwork and shaping
Hook size: Usually 4 mm to 6 mm, depending on yarn weight and fabric drape
Yarn weight: DK, worsted, or light bulky depending on the look you want
Best yarn choice: Soft acrylic, cotton blends, wool blends, or merino blends
Finished size: Typically from cropped to oversized, depending on the design
Time to complete: Several hours to several days, depending on size and detail
Helpful stitches: Chain, slip stitch, single crochet, half double crochet, double crochet, treble crochet, increases, decreases, color changes, post stitches, stitch pattern repeats
Common Materials
You can use the same basic supplies for all five sweater styles, though some designs may need extra colors or stitch markers.
- Yarn in the required colors
- Crochet hook suited to your yarn
- Stitch markers
- Yarn needle
- Scissors
- Measuring tape
- Optional blocking mats and pins
- Optional row counter
For sweaters, yarn choice matters more than almost anything else. Soft yarn that holds shape without feeling stiff will make the garment much more comfortable to wear. If you want structure, choose a yarn with good stitch definition. If you want drape, choose something a little softer and lighter.
1. Crochet Striped Heart Sweater Pattern
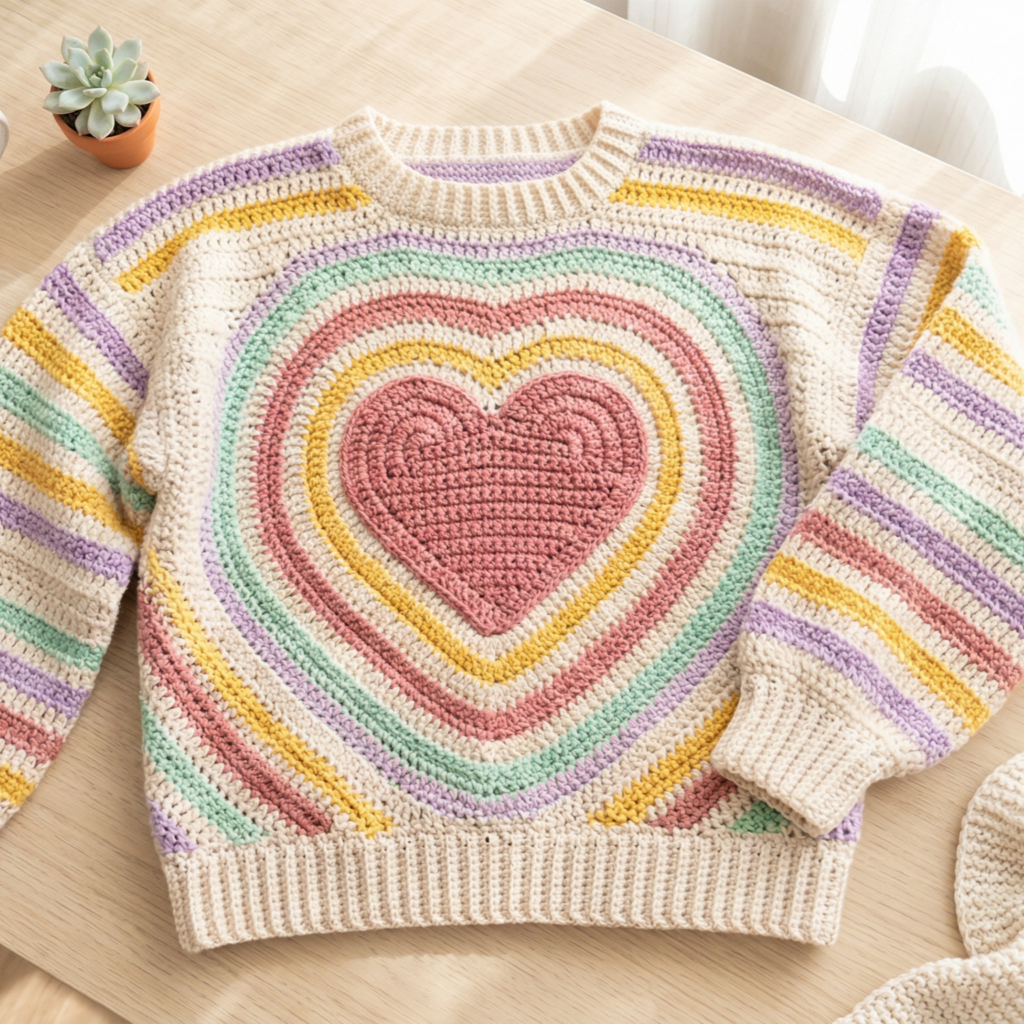
A striped heart sweater is playful, cozy, and instantly eye-catching. It blends simple stripes with a heart motif so the final piece feels sweet without being too complicated. This sweater is a great option if you want something youthful, cheerful, and easy to personalize with your favorite color combinations.
Quick Notes
Skill level: Beginner to intermediate
Finished size: Usually relaxed fit, depending on measurements
Style: Cute, casual, romantic, playful
Best colors: Neutral base with bold heart color, or pastel color blocking
Materials
- Main sweater yarn in one base color
- Contrast yarn for heart motif and stripes
- Crochet hook recommended for your yarn weight
- Stitch markers
- Yarn needle
- Measuring tape
Step-by-Step Guide
Step 1: Choose the sweater shape
Before you start, decide whether you want a loose oversized fit or a more fitted silhouette. A striped heart sweater often looks best with a relaxed body because the heart motif stands out more clearly and the stripes feel modern rather than tight or boxy.
A top-down raglan construction works especially well for this style because it allows you to place the heart motif on the front panel once the body is established.
Step 2: Make a gauge swatch
This step is important for sweaters. Even if your pattern is casual, the fit depends on tension. Work a small swatch in the main stitch pattern and measure it carefully. Adjust your hook size if the fabric feels too stiff or too loose.
A sweater should feel comfortable, not tight, and the fabric should drape without becoming floppy.
Step 3: Build the yoke or upper body
Start with the yoke, working increases evenly at the raglan points or in whatever construction method you prefer. Keep your rows or rounds neat so the upper body lays flat. Once the yoke is large enough, separate the sleeves and body.
This is the foundation of the sweater, so take your time and keep counts consistent.
Step 4: Add the striped section
Once the body is separated, begin alternating colors to create your stripes. You can use wide stripes for a bold statement or thin stripes for a more delicate look. Keep the stripes even so the sweater feels balanced from top to bottom.
If you want a softer style, use muted colors. If you want a fun statement piece, use high contrast shades.
Step 5: Add the heart motif
The heart can be made with tapestry crochet, surface crochet, or an appliqué piece sewn onto the front. For a beginner-friendly option, an appliqué heart is easiest. Crochet a flat heart separately and sew it to the front panel after the body is complete.
Place it high enough to be visible but not so high that it interrupts the neckline.
Step 6: Work the sleeves
Crochet the sleeves in the same stripe pattern or keep them solid for a cleaner look. A slightly roomy sleeve complements the playful heart design nicely. You can finish with ribbed cuffs or simple fitted edges.
Step 7: Finish the neckline and hem
Add a comfortable neckline, then finish the hem and cuffs. Ribbed edges give the sweater a more polished, store-bought feel. Weave in all ends securely, especially around the heart and stripe changes.
Helpful Tips
The heart motif looks best when it is slightly simplified. A clean, block-style heart often reads better in crochet than a highly detailed one. If you want the sweater to feel more elevated, keep the stripe spacing even and choose one dominant heart color rather than mixing too many bright tones.
This style is especially cute for Valentine-inspired outfits, casual everyday wear, or handmade gifts.
2. Crochet Granny Striped V-Neck Sweater Pattern

A granny striped V-neck sweater has a lovely retro feel while still looking wearable and fresh. The granny stripe texture gives it movement and visual interest, while the V-neck adds shape and elegance. This is the kind of sweater that looks relaxed but still styled, making it a great everyday piece.
Quick Notes
Skill level: Beginner to intermediate
Finished size: Relaxed, slightly oversized or classic fit
Style: Retro, textured, casual, flattering
Best colors: Earth tones, rainbow stripes, or soft vintage shades
Materials
- Multiple yarn colors or tonal shades
- Crochet hook matched to yarn
- Yarn needle
- Stitch markers
- Measuring tape
Step-by-Step Guide
Step 1: Understand the granny stripe texture
Granny stripes are created by clusters of stitches separated by chain spaces. This gives the fabric a lacy, airy, and classic look. For a sweater, the stitch pattern should be dense enough to provide warmth but open enough to keep the garment flexible.
If you want a more wearable sweater, use smaller stitch spaces and keep the yarn weight moderate.
Step 2: Start the front and back panels
A granny striped sweater can be made from separate panels sewn together, which makes the shaping easier. Start by crocheting the front panel and back panel in rectangle form, increasing or shaping slightly at the neckline if needed.
This method is especially helpful if you want a straightforward construction.
Step 3: Build the V-neck shaping
To create the V-neck, reduce stitches gradually along the center front of the sweater. The neckline should slope naturally without becoming too deep or too sharp. Consistent shaping is key here.
Work both sides evenly so the V looks balanced.
Step 4: Add the granny stripe rows
Continue the granny stripe pattern across the body. Change colors in a planned sequence so the stripes feel intentional. You can keep the same color order throughout the sweater or vary the sequence slightly for a more handmade, artisanal look.
The granny stitch texture naturally adds charm, so even simple color choices look beautiful.
Step 5: Shape the sleeves
Sleeves can be crocheted separately or worked directly from the armholes. A slightly loose sleeve suits the relaxed style of a granny stripe sweater. Keep the stripes aligned if you want a neat, cohesive finish, or let them shift for a more casual feel.
Step 6: Join the pieces
Sew the shoulders, attach the sleeves, and join the side seams. Use a yarn needle and a sturdy mattress-style seam if possible. A clean join makes the sweater feel much more professional.
Step 7: Add the neckline finish
Finish the V-neck with a simple border, ribbing, or single crochet edging. This helps prevent stretching and gives the sweater a crisp neckline. A neat border is especially important because the V shape draws attention to the top of the garment.
Helpful Tips
The granny striped sweater is beautiful when the stripe sequence feels harmonious. A soft neutral palette gives it a modern vintage look, while brighter color combinations make it feel fun and artistic. If you want an especially flattering silhouette, keep the V-neck moderate rather than too low.
This sweater is ideal for layering over tanks, tees, or long sleeves during cooler months.
3. Crochet Fair Isle Sweater Pattern
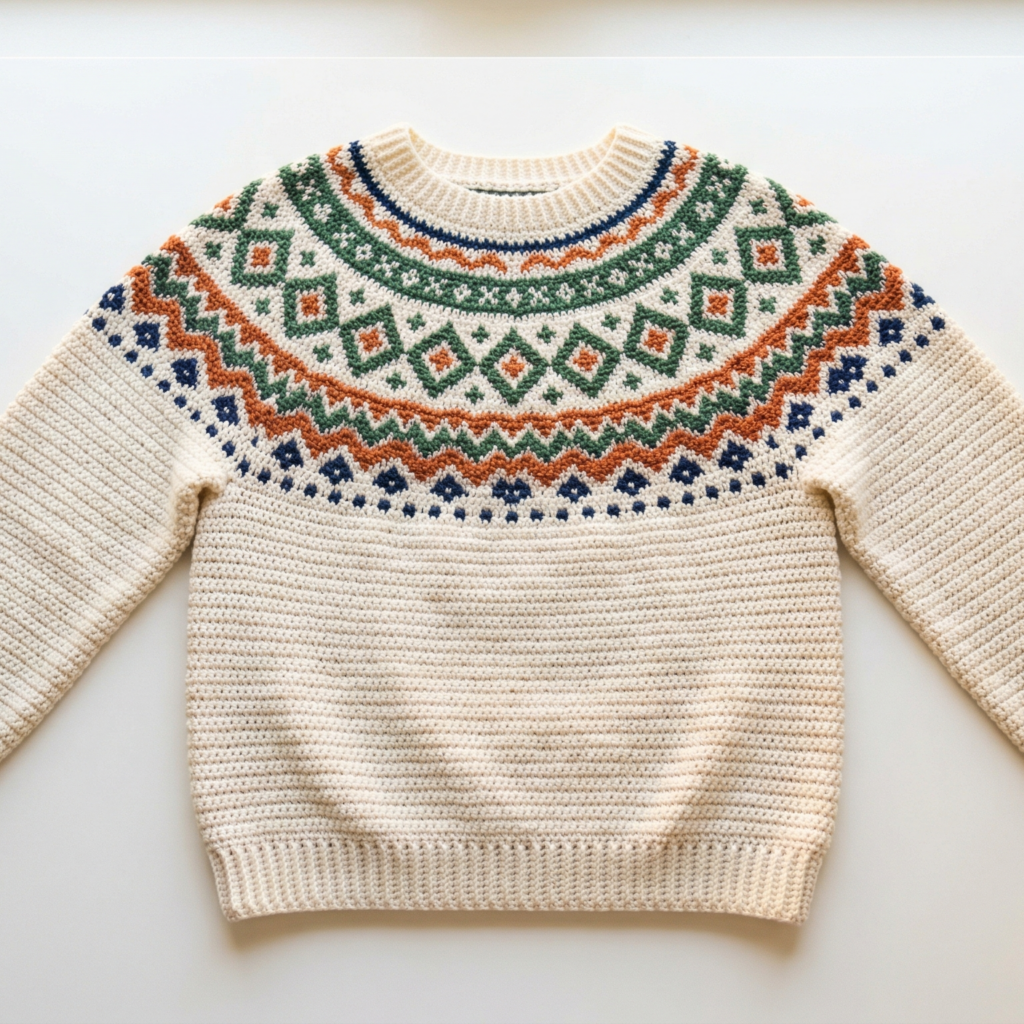
A Fair Isle sweater is a classic choice for anyone who loves pattern, color, and texture working together. Crochet Fair Isle-style colorwork has a timeless charm that feels polished and cozy at the same time. It is one of the best options if you want a sweater that looks detailed and skillful without depending on complicated shaping alone.
Quick Notes
Skill level: Intermediate
Finished size: Usually classic fit or slightly fitted
Style: Traditional, elegant, cozy, patterned
Best colors: One main base color with two or more contrast colors
Materials
- Main color yarn
- Two or more contrast yarns
- Crochet hook suited to yarn weight
- Stitch markers
- Yarn needle
- Measuring tape
- Small bobbins or yarn organizers for colorwork
Step-by-Step Guide
Step 1: Select a simple colorwork motif
Fair Isle-style sweaters often use repeating motifs such as diamonds, geometric rows, stars, or small floral-inspired shapes. Choose a design that repeats cleanly and fits the width of the sweater sections you are making.
For your first colorwork sweater, a simple motif is easier to manage and usually looks more refined.
Step 2: Plan the color layout
Decide where the motif will appear. Many crochet sweaters place Fair Isle patterns across the yoke, chest, or lower body. Keeping the pattern in one area can make the sweater easier to wear and easier to crochet.
Make sure the colors contrast enough that the design is visible, but not so harsh that it feels busy.
Step 3: Make the base fabric
Before adding colorwork, crochet the sweater base in the main color. Keep your tension consistent because colorwork can tighten the fabric. If your stitches become too firm, the sweater may lose drape.
A soft but structured base gives the best result.
Step 4: Work the colorwork rounds or rows
Introduce the contrast colors according to your chart or motif. Carry yarn neatly behind the stitches if needed, but do not pull too tightly. The fabric should remain flexible and comfortable.
Color changes are the heart of this design, so go slowly and check your stitch counts often.
Step 5: Continue the motif consistently
Repeat the pattern evenly across the chosen area. Fair Isle looks best when the repeat is clean and symmetrical. If you are using multiple colors, keep them organized so the transitions stay smooth.
Step 6: Finish the sleeves and body
Depending on your construction, the sleeves can either echo the same motif or stay solid for balance. A patterned yoke with plain sleeves can look especially elegant. Complete the hem and cuffs with a tidy edge.
Step 7: Block the sweater
Blocking is especially useful for colorwork. It helps the fabric relax and the motif settle into its best shape. This can make a big difference in the final appearance of the sweater.
Helpful Tips
A successful Fair Isle sweater depends on balanced tension and thoughtful color choices. If the colors are too similar, the motif may disappear. If they are too bright against one another, the sweater may feel less versatile. A mix of one grounding neutral and a few accent shades usually works beautifully.
This design is perfect for cold-weather wardrobes and makes a beautiful handmade statement piece.
4. Crochet Heritage Lounging Sweater Pattern
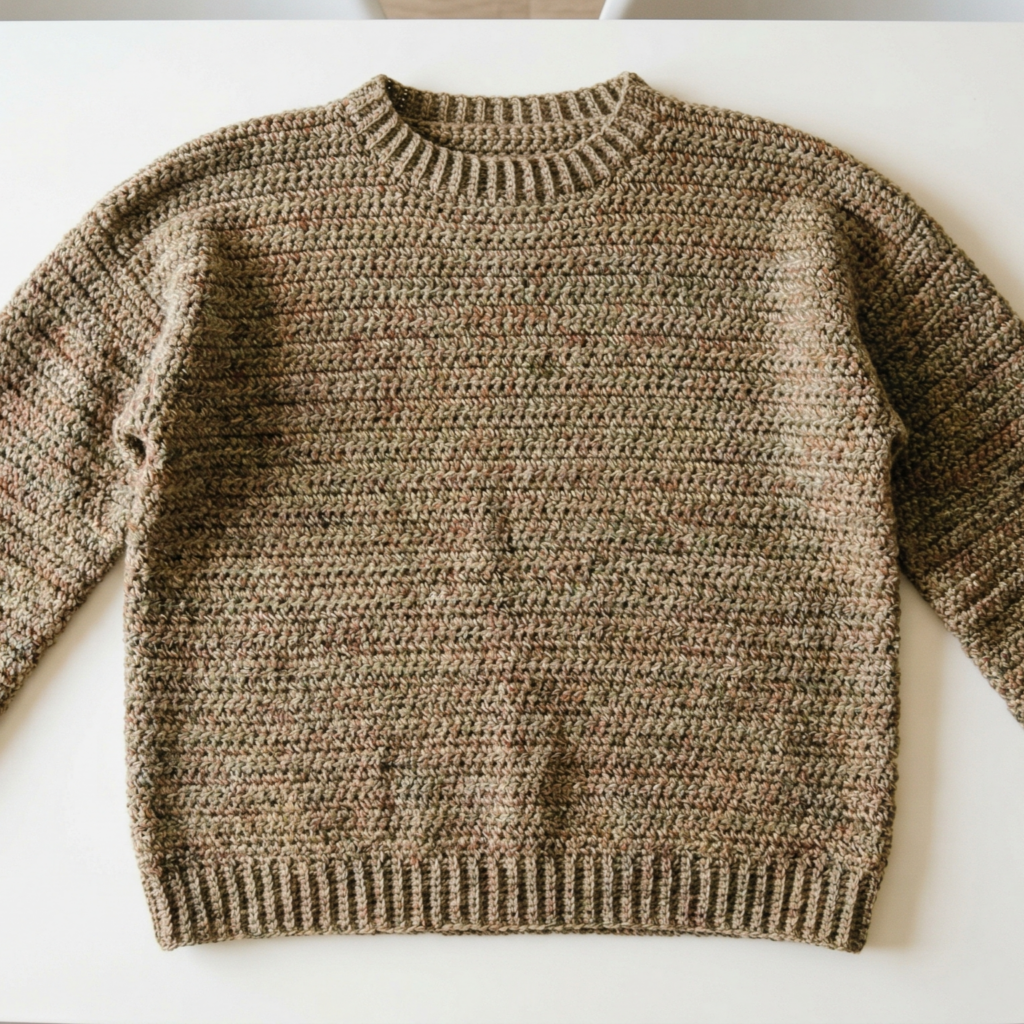
A heritage lounging sweater is all about comfort, warmth, and that lived-in handmade feel. It has a relaxed, traditional energy that makes it ideal for cozy days at home, casual outings, and layering in cooler weather. This sweater style prioritizes softness and ease, making it one of the most wearable designs in the collection.
Quick Notes
Skill level: Beginner to intermediate
Finished size: Relaxed and roomy
Style: Cozy, rustic, timeless, lounge-friendly
Best colors: Cream, oatmeal, brown, olive, rust, navy, or heathered shades
Materials
- Soft wool blend, cotton blend, or acrylic blend yarn
- Crochet hook recommended for your yarn
- Yarn needle
- Stitch markers
- Measuring tape
Step-by-Step Guide
Step 1: Choose a relaxed silhouette
The heritage lounging sweater should feel easy and comfortable. Choose a boxy, slightly oversized shape with soft shoulders and a roomy body. This style is meant to feel effortless, so there is no need for overly complicated shaping.
A loose silhouette works especially well with rustic or natural yarn tones.
Step 2: Start with the body panels or top-down base
You can begin with panels or a top-down construction depending on your preference. If you are a beginner, simple front and back panels are often easiest. Work the panels in a stitch pattern that has enough texture to feel cozy but not so much that the fabric becomes stiff.
Half double crochet or a gentle textured stitch works very well here.
Step 3: Keep the fabric warm and flexible
As you crochet, focus on maintaining a fabric that is warm but breathable. This kind of sweater should not feel heavy or dense. Slightly loose stitches often give the best lounging feel.
The goal is softness with enough structure to hold the shape.
Step 4: Add subtle texture
Heritage-style sweaters often look best with small, understated texture rather than bold patternwork. Ribbing, alternating stitch rows, or a subtle stitch repeat can add character without distracting from the cozy feel.
Keep the details quiet and timeless.
Step 5: Shape the sleeves
Sleeves should feel easy and comfortable, not tight. You can make them long and slightly loose for extra coziness, then finish with soft cuffs. If you prefer a more polished look, taper the sleeves gently toward the wrist.
Step 6: Finish the neckline and edges
A simple neckline, perhaps with a gentle ribbed border, keeps the sweater feeling classic. The hem and cuffs can also be ribbed for a touch of structure. These finishing touches help the sweater look intentional while still relaxed.
Step 7: Wash and block gently
Because the design is meant for comfort, the final texture matters. Gently wash or steam block the sweater so it softens and settles into its natural shape. This step can make the finished piece feel even more wearable.
Helpful Tips
Heritage lounging sweaters look especially beautiful in earthy or weathered tones. Think of colors that feel natural, warm, and slightly muted. This style is perfect for everyday wear, reading days, cabin-style outfits, and cozy layering.
If you want a sweater that feels less trendy and more timeless, this is one of the best designs to make.
5. Crochet Wide Collar Trinity Stitch ¾ Sleeve Sweater Pattern
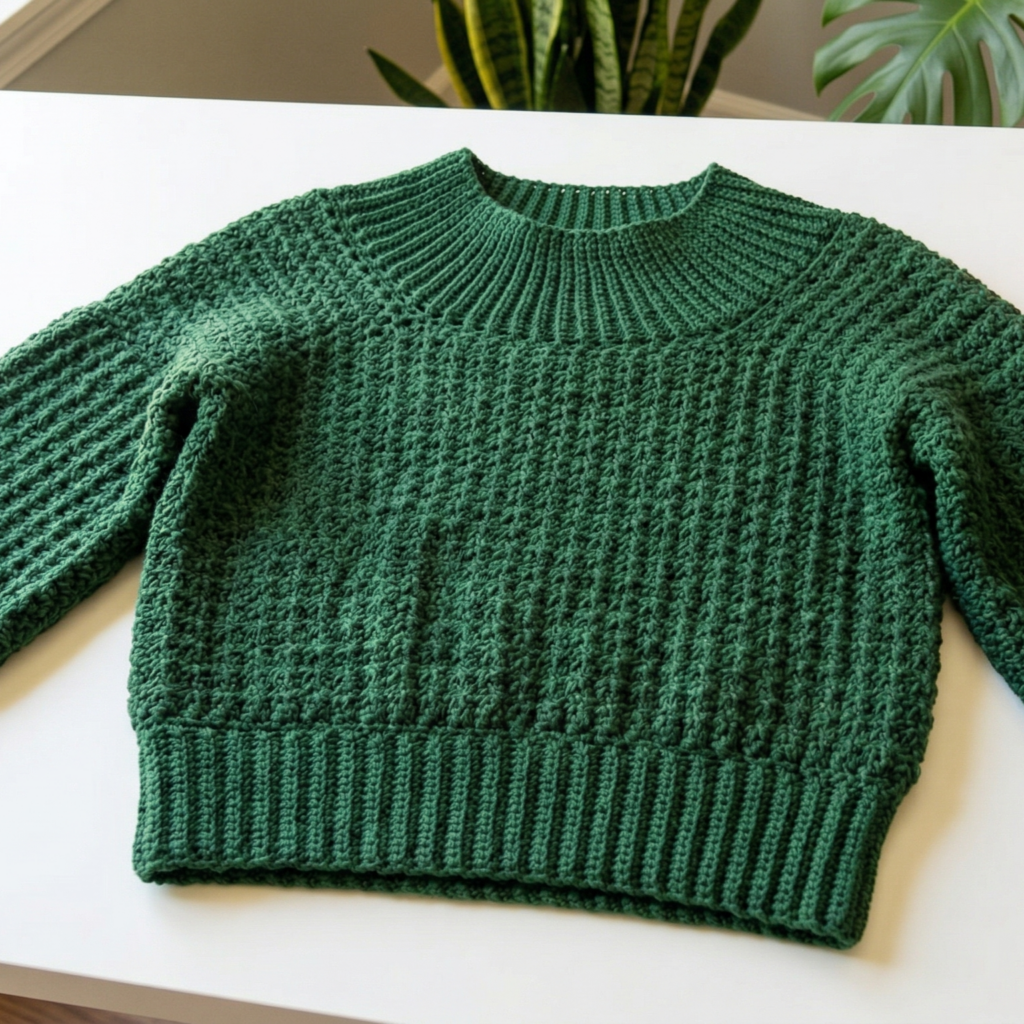
A wide collar Trinity stitch ¾ sleeve sweater feels elegant, modern, and slightly dressy. The wide collar adds visual interest near the neckline, while the Trinity stitch brings texture and sophistication. The ¾ sleeves make it practical for layering and give it a more tailored fashion-forward look.
Quick Notes
Skill level: Intermediate
Finished size: Usually fitted or gently shaped
Style: Elegant, polished, modern, textured
Best colors: Cream, charcoal, soft blush, deep green, navy, or camel
Materials
- Yarn with good stitch definition
- Crochet hook suited to your yarn
- Stitch markers
- Yarn needle
- Measuring tape
Step-by-Step Guide
Step 1: Learn the Trinity stitch texture
The Trinity stitch creates a dense, textured surface that looks refined and slightly structured. Because it has a distinctive visual pattern, it works beautifully in a sweater where texture is meant to be noticed. Before starting the full garment, practice the stitch on a swatch so you understand how it behaves.
A consistent Trinity stitch repeat will make the final sweater look much more polished.
Step 2: Plan the wide collar
The wide collar is one of the main style features of this sweater. It should feel soft, open, and flattering without overwhelming the neckline. You can make it fold over slightly or sit flat as a statement neckline.
The collar should frame the face and make the sweater feel elevated.
Step 3: Build the body with the Trinity stitch
Work the sweater body in even rows or rounds using the Trinity stitch pattern. Pay close attention to stitch placement because this pattern relies on consistency. The fabric should feel textured but not overly bulky.
The texture does a lot of the visual work here, so keep the silhouette clean.
Step 4: Shape the sweater gently
A wide collar and ¾ sleeves usually look best with a semi-fitted or softly shaped body. Add subtle shaping at the waist or under the bust if desired, but do not overcomplicate the silhouette. This sweater should feel structured, not tight.
Step 5: Crochet the ¾ sleeves
The shorter sleeves are part of what makes this sweater feel modern and versatile. Work the sleeves to a length that falls between the elbow and wrist. Finish them with a clean edge or a small cuff depending on the style you want.
Three-quarter sleeves pair beautifully with bracelets and layered accessories.
Step 6: Finish the collar carefully
Because the collar is a statement feature, spend extra time on the edging. A neat border or ribbed finish will help it hold shape and maintain its elegant drape. Make sure it lies comfortably around the neck and does not curl awkwardly.
Step 7: Block for structure
Blocking is especially helpful here because it opens up the stitch pattern and helps the collar settle. This can make the sweater look much more refined, almost like a boutique garment.
Helpful Tips
This sweater looks best when the yarn and stitch definition work together. A smooth, medium-weight yarn will show off the Trinity stitch clearly. If you want a more delicate aesthetic, use lighter yarn and a softer shade. If you want it to feel more dramatic, choose a rich dark tone and let the collar stand out.
This is an excellent sweater for transitional seasons, smart-casual outfits, and elevated handmade wardrobes.
Conclusion
Crochet sweaters are one of the most rewarding projects you can make because they combine creativity, comfort, and style in one piece. Unlike many fast fashion garments, a handmade sweater carries your choices in every stitch, from the yarn color to the texture to the final fit. That makes each one feel personal and special.
These five sweater patterns offer a range of moods and styles, from playful and sweet to classic, cozy, vintage, and elegant. Whether you are drawn to a striped heart design, a granny stripe V-neck, a patterned Fair Isle look, a heritage lounging fit, or a polished Trinity stitch sweater with a wide collar, each project gives you a chance to build something beautiful and wearable.
A great crochet sweater does not need to be complicated to make an impact. With the right materials, consistent tension, and careful finishing, even a simple design can become a wardrobe favorite. These patterns are a reminder that handmade clothing can be both practical and stylish, and that the pieces you make by hand often become the ones you treasure most.