Crochet socks are one of those projects that feel incredibly rewarding because they combine comfort, creativity, and practicality in a single handmade item. Unlike store-bought socks, crochet socks let you choose your perfect texture, thickness, color palette, and style details—so every pair becomes completely personal. Whether you want something soft and cozy for lounging at home, decorative socks that peek out from boots, or stylish statement pieces for slow mornings, crochet socks give you endless possibilities.
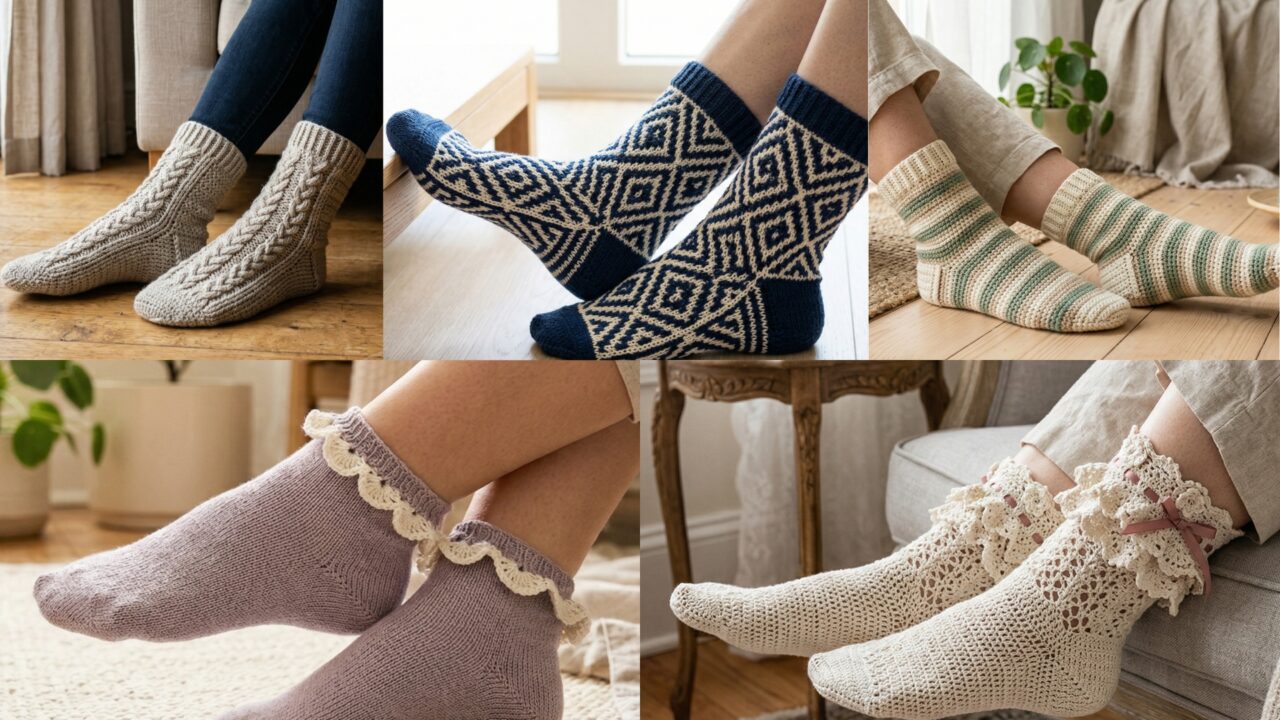
What makes crochet socks especially interesting is how much variety you can achieve with simple stitches. A small change in texture can turn a basic sock into something frilly and feminine, structured and elegant, or bold and modern. In this guide, you’ll explore five stylish crochet sock patterns that are not only beautiful but also practical and wearable.
Each pattern includes a clear step-by-step breakdown to help you understand the construction process—from cuff to toe—so you can confidently create socks that fit well and feel amazing.
Quick Notes
Project type: Crochet socks
Best for: Home wear, gifting, cozy outfits, winter layering
Skill level: Beginner to intermediate (depending on stitch complexity)
Hook size: 2.0 mm – 4.0 mm depending on yarn thickness
Yarn weight: Fingering, sock yarn, or lightweight cotton-wool blends
Best yarn choice: Sock yarn with elasticity (cotton blends or wool blends)
Finished size: Fully customizable to foot length and width
Time to complete: 2–6 hours per sock depending on detail
Helpful stitches: Single crochet, half double crochet, double crochet, slip stitch, ribbing stitches, post stitches, increases, decreases, mosaic colorwork, cables, heel shaping, toe shaping
Common Materials
- Sock or lightweight yarn
- Small crochet hook (for tighter stitch structure)
- Yarn needle
- Stitch markers
- Scissors
- Measuring tape
- Elastic thread (optional for better fit)
- Blocking mat (optional but helpful)
For socks, yarn choice is extremely important. You want something soft enough for comfort but structured enough to hold shape. Wool blends are ideal for warmth, while cotton blends work well for breathable indoor socks.
1. Crochet Ruffle Ankle Sock Pattern
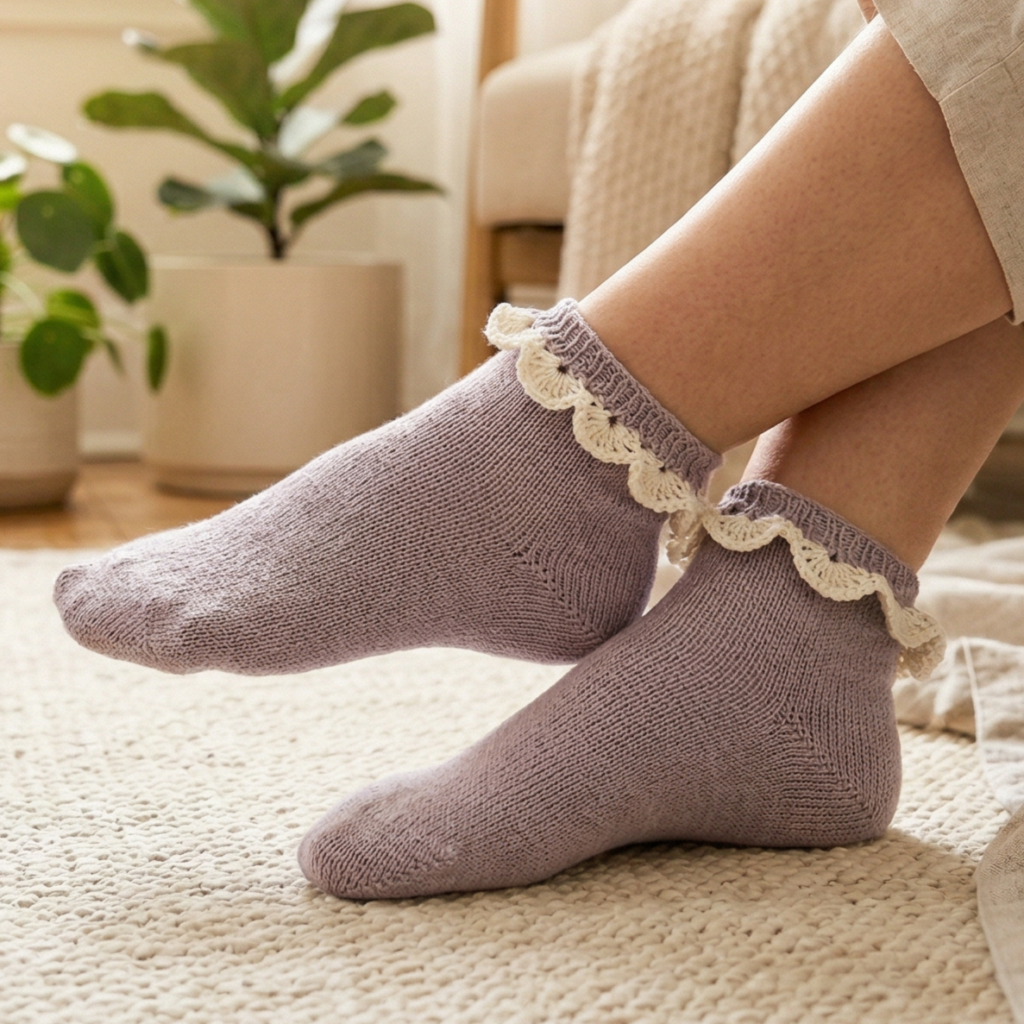
Ruffle ankle socks are playful, soft, and feminine. The ruffled edge adds a decorative touch that makes them feel more like cozy loungewear than basic socks. They are perfect for beginners who want something stylish without overly complex shaping.
Step-by-step guide
Step 1: Measure your foot
Start by measuring your foot length, ankle circumference, and heel height. Socks need to fit snugly, so accurate measurement is important. Keep in mind that crochet stretches slightly over time.
Good measurements ensure a comfortable fit.
Step 2: Crochet the ankle cuff
Begin with a ribbed or elastic cuff using front and back post stitches or simple rows. This section should sit comfortably around the ankle without slipping. Keep it slightly snug so the sock stays in place.
The cuff forms the foundation of the sock.
Step 3: Create the ruffle edge
Once the cuff is complete, add a ruffle by working multiple stitches into each space along the top edge. This can be done using double crochet or shell stitches to create a soft frilled effect.
The ruffle is the signature feature of the design.
Step 4: Build the sock body
Continue crocheting downward from the cuff to form the leg portion of the sock. Keep stitches even and slightly tighter so the sock maintains structure.
A smooth body keeps the sock comfortable.
Step 5: Shape the heel
Work heel shaping using short rows or decreases. This helps the sock contour naturally to your foot. Take your time here, as heel shaping determines overall comfort.
Proper heel shaping improves fit.
Step 6: Form the foot section
Continue working in rounds until you reach the toe area. Keep the fabric snug but not tight so the sock fits well inside shoes or around the foot for lounging.
Step 7: Close the toe
Finish by decreasing stitches gradually and closing the toe with a yarn needle. Make sure the seam is flat so it does not feel uncomfortable.
Step 8: Finish and adjust ruffle
Fluff and adjust the ruffle edge so it sits evenly. Lightly block if needed for a polished finish.
Helpful tips
Soft pastel colors make ruffle socks feel dreamy and cozy. Neutral tones give a minimalist aesthetic, while bold colors make them playful and fun.
2. Crochet Stripes Sock Pattern
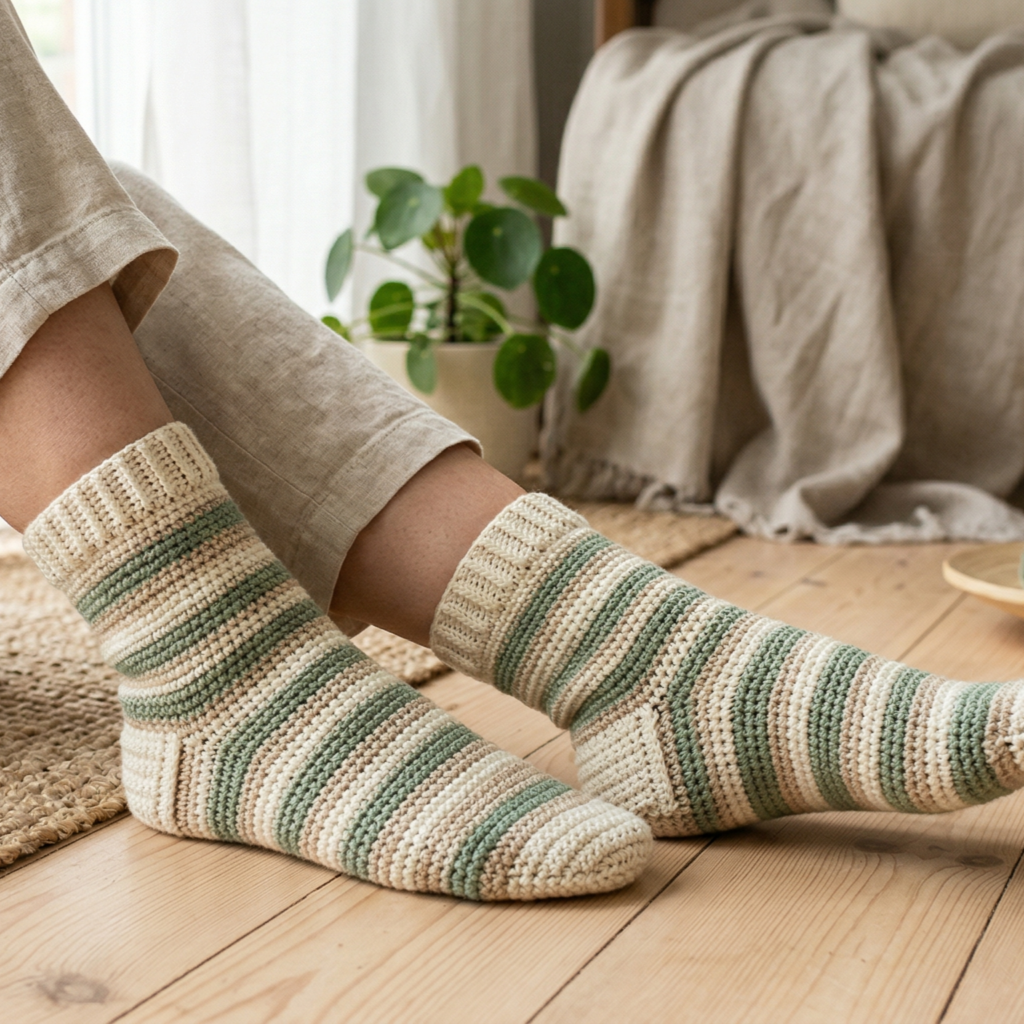
Striped socks are classic, versatile, and perfect for using leftover yarn. They can be bold or subtle depending on your color choices, making them a great beginner-friendly project with lots of personality.
Step-by-step guide
Step 1: Choose your stripe colors
Pick two or more colors that complement each other. High contrast creates a bold look, while tonal shades give a soft gradient effect.
Color choice defines the final style.
Step 2: Start the cuff
Crochet a ribbed cuff using alternating post stitches or simple rows. Keep it snug so the sock stays in place.
The cuff provides structure.
Step 3: Begin stripe pattern
Switch colors at regular intervals—every few rows or rounds. Keep transitions neat by carrying yarn along the inside or cutting and weaving ends.
Clean color changes are essential.
Step 4: Build the leg section
Continue stripe repeats while maintaining even tension. Make sure stripes align consistently across both socks if making a pair.
Consistency creates a polished look.
Step 5: Shape the heel
Use decreases or short-row shaping to form the heel pocket. Keep stripe alignment in mind so the pattern flows smoothly.
Step 6: Work the foot section
Continue stripes along the foot. You can adjust stripe width here or keep them uniform for a cleaner design.
Step 7: Shape the toe
Gradually decrease stitches and close the toe neatly with a yarn needle.
Step 8: Weave in ends
Secure all color changes carefully so the sock feels smooth inside.
Helpful tips
Thin stripes look elegant and subtle, while wide stripes feel bold and playful. This pattern is great for customizing your sock collection.
3. Crochet Marie Antoinette Socks Pattern
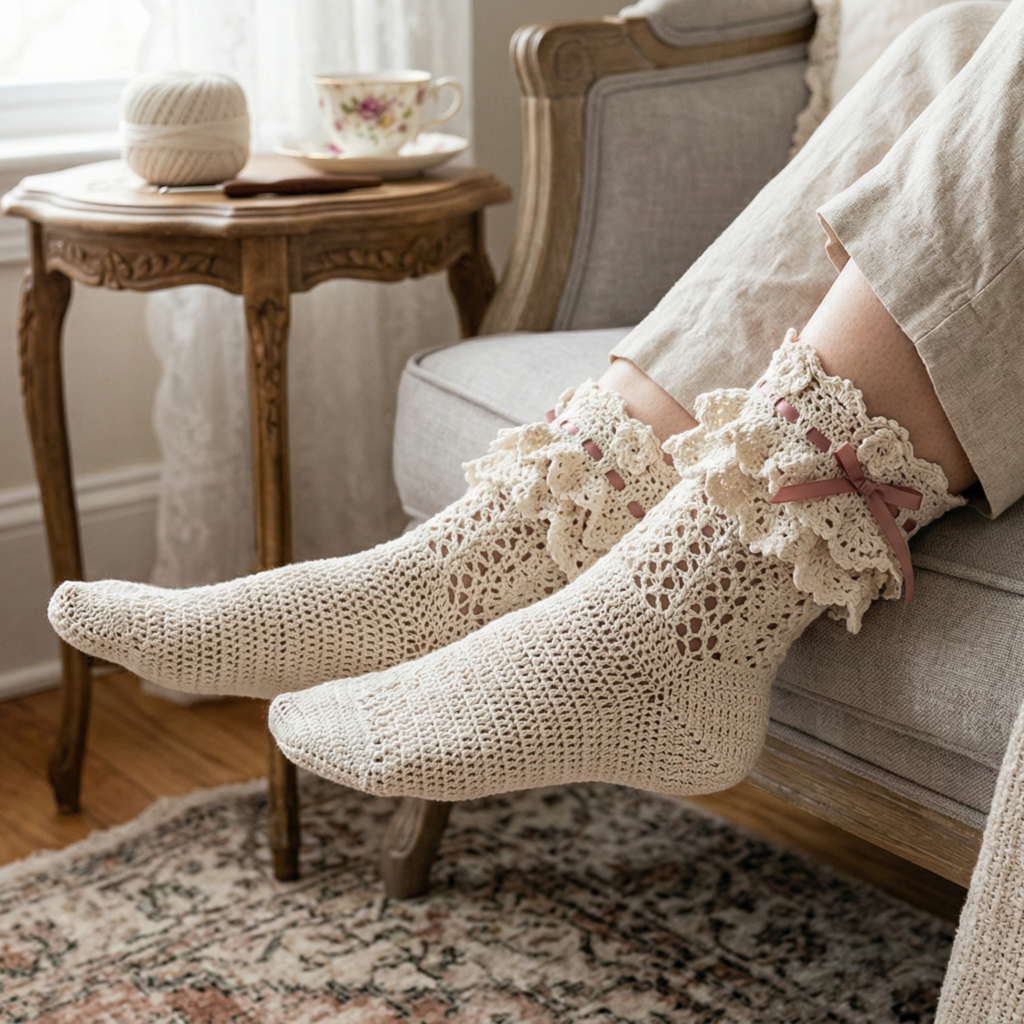
Marie Antoinette socks are elegant, decorative, and inspired by vintage lace fashion. They feature delicate textures, ruffles, and soft feminine details that make them feel luxurious and unique.
Step-by-step guide
Step 1: Choose a vintage color palette
Soft cream, blush pink, ivory, and pale gold work beautifully. These colors enhance the romantic feel of the design.
Color sets the vintage mood.
Step 2: Crochet lace cuff
Begin with a lace-style cuff using chain spaces, picots, or shell stitches. This creates a delicate, decorative edge.
The lace cuff is the focal point.
Step 3: Add decorative ruffles
Layer soft ruffles beneath or above the cuff for a regal look. Keep them light and balanced so they don’t overwhelm the sock.
Ruffles add elegance and volume.
Step 4: Build a fitted leg section
Transition into a tighter stitch pattern to balance the lace. This creates contrast between structured and decorative sections.
Step 5: Shape heel carefully
Because this sock is decorative, maintain stitch consistency during heel shaping to preserve the elegant look.
Step 6: Add subtle lace details
Optional lace rows or small motifs can be added along the leg or ankle area.
Step 7: Finish toe neatly
Keep the toe simple and smooth to balance the ornate top.
Step 8: Block gently
Blocking helps lace details open and look refined.
Helpful tips
This pattern works best for indoor wear or special occasions where comfort meets elegance.
4. Crochet Mosaic Socks Pattern
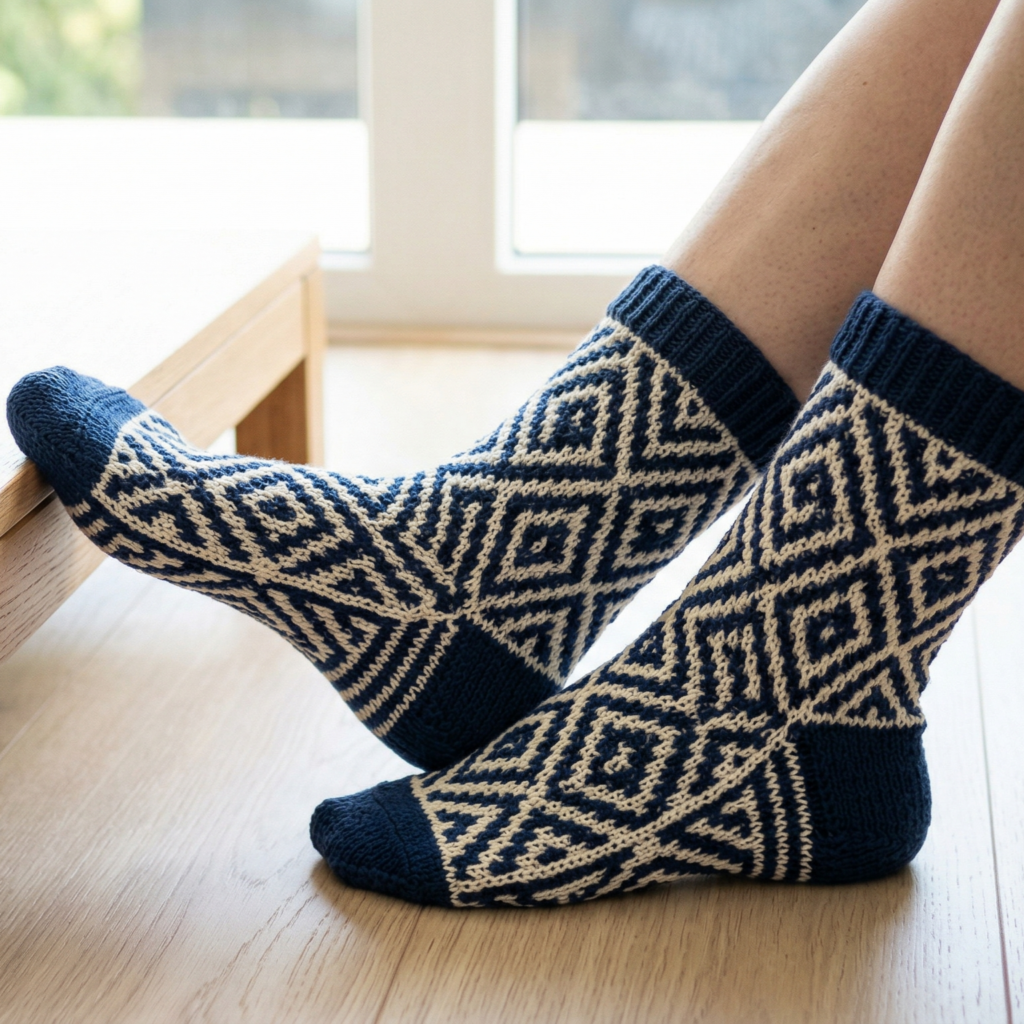
Mosaic socks are bold, geometric, and visually striking. They use colorwork techniques to create intricate-looking designs without carrying multiple strands at once.
Step-by-step guide
Step 1: Choose two contrasting colors
High contrast works best—such as black and white, navy and cream, or jewel tones.
Strong contrast highlights the mosaic effect.
Step 2: Start a structured cuff
Use ribbing or simple rows to keep the top snug.
Step 3: Begin mosaic pattern
Work the mosaic stitch chart row by row, alternating colors based on the pattern. Only one color is active per row.
The mosaic design builds gradually.
Step 4: Maintain even tension
Consistency is key so the geometric pattern stays aligned.
Step 5: Shape heel carefully
Keep colorwork aligned while forming the heel section.
Step 6: Continue mosaic onto foot
Extend the pattern down the sock if desired.
Step 7: Shape toe
Close with decreases while maintaining stitch structure.
Step 8: Secure color changes
Weave ends neatly for a clean interior finish.
Helpful tips
Mosaic socks look stunning even in simple patterns because the colorwork does all the visual work.
5. Crochet Cabled Socks Pattern
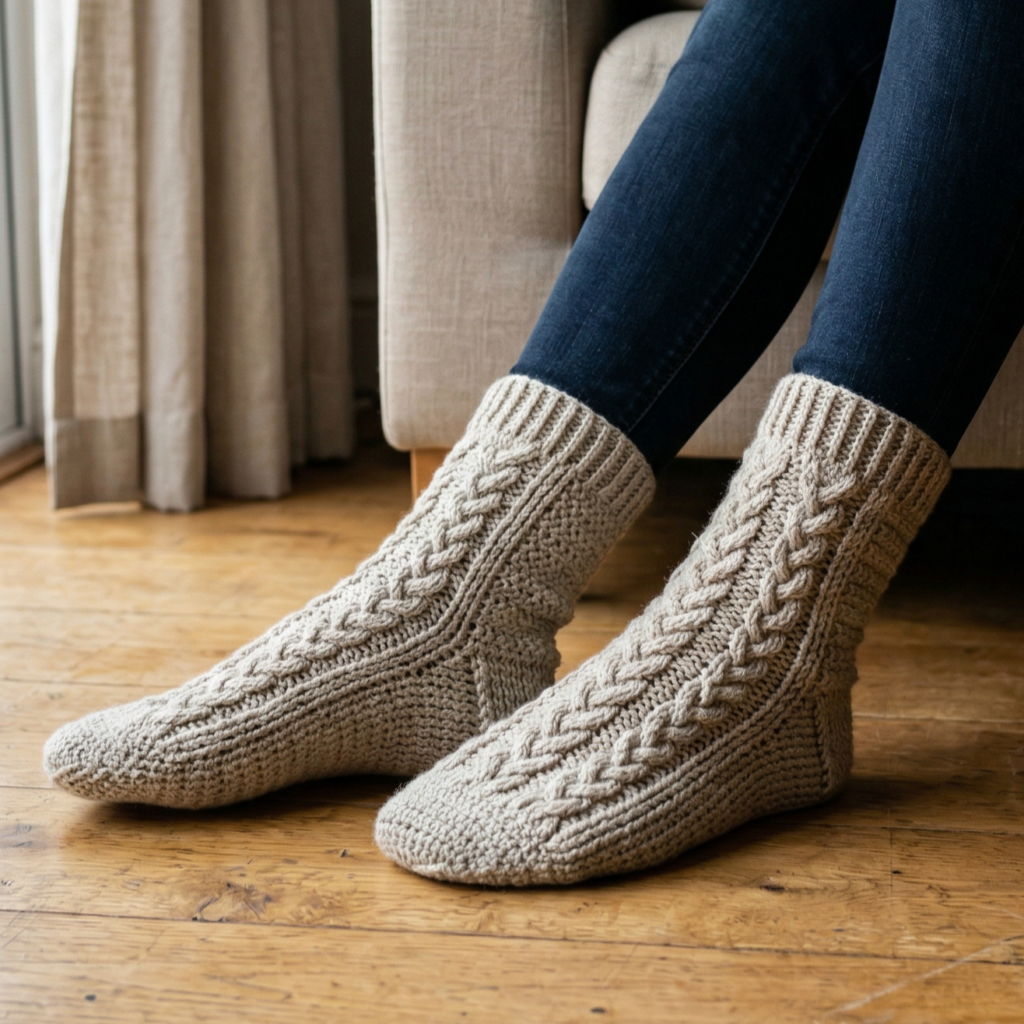
Cabled socks are cozy, textured, and warm. They mimic knitted cables using front post stitches, creating a rich, braided effect that feels luxurious and winter-ready.
Step-by-step guide
Step 1: Choose warm yarn
Wool or wool blends work best for structure and warmth.
Step 2: Start ribbed cuff
Create a snug cuff using post stitches for elasticity.
Step 3: Begin cable pattern
Work front post stitches in crossing sequences to create cable twists.
Cables build texture row by row.
Step 4: Maintain pattern alignment
Keep cables consistent so they stack neatly.
Step 5: Shape heel
Use structured decreases to maintain cable integrity.
Step 6: Continue cables on leg
Extend pattern for a dramatic textured look.
Step 7: Work foot section
You can simplify cables near the foot for comfort.
Step 8: Finish toe
Close cleanly and secure ends.
Helpful tips
Cabled socks feel extra warm and make perfect winter loungewear.
Conclusion
Crochet socks are one of the most satisfying wearable projects you can make because they blend comfort, creativity, and practicality in every stitch. Once you understand basic sock construction—cuff, leg, heel, foot, and toe—you can customize endless designs using texture, color, and decorative stitches.
These five patterns each bring something different to your crochet practice. Ruffle socks feel playful and soft. Striped socks are classic and flexible. Marie Antoinette socks bring vintage elegance. Mosaic socks create bold geometric beauty. Cabled socks offer cozy, textured warmth.
Whether you are making them for yourself, as gifts, or for cozy home wear, crochet socks are a beautiful way to add handmade comfort to everyday life.