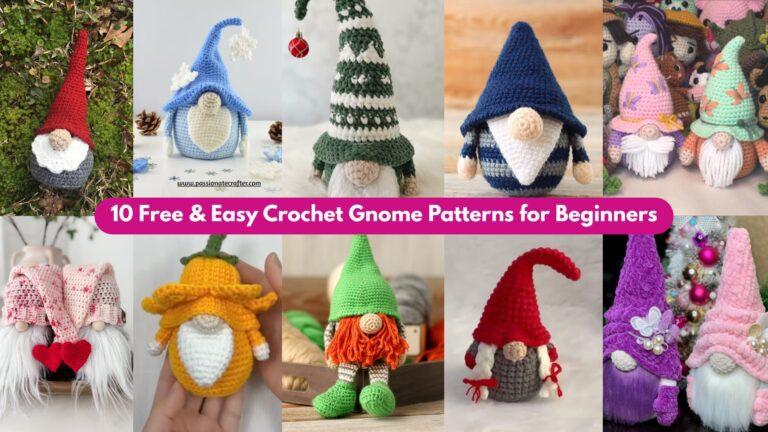
A handmade rug can completely change a room — it anchors furniture, adds color and texture, and gives your home a handmade signature. This post contains five detailed crochet rug patterns you can make at home: Puffy Flower Rug, Fascinating Spiral Round Rug, Faux Heart Shaped Rug, Giant Doily Floor Rug, and Little Waves Crochet Rug. Each pattern includes: skill level, finished size, materials and yardage, stitch abbreviations, a very detailed step-by-step pattern (construction and shaping), finishing and backing options, care instructions, and helpful tips so you get professional-looking results.
Before you start: rugs require more yarn, more time, and sometimes sturdier tools than small projects. Choose yarn suitable for floor use (chunky cotton, recycled cotton T-shirt yarn, bulky acrylic blends or rope) and a hook that produces a firm fabric. Always test a swatch to check feel and drape. For safety and durability, consider adding a non-slip backing (rubber rug pad or sewn-in felt/cork) and make sure edges lie flat to avoid tripping.
Quick reference abbreviations (US terms used in patterns)
- ch = chain
- sc = single crochet
- hdc = half double crochet
- dc = double crochet
- tr = treble (UK tr = US dc — these patterns use US terms)
- fp = front post (e.g., fpdc = front post double crochet)
- bp = back post
- sl st = slip stitch
- st(s) = stitch(es)
- rep = repeat
- MR = magic ring
- inc = increase (work 2 sts into same stitch)
- dec = decrease (sc2tog or dc2tog as noted)
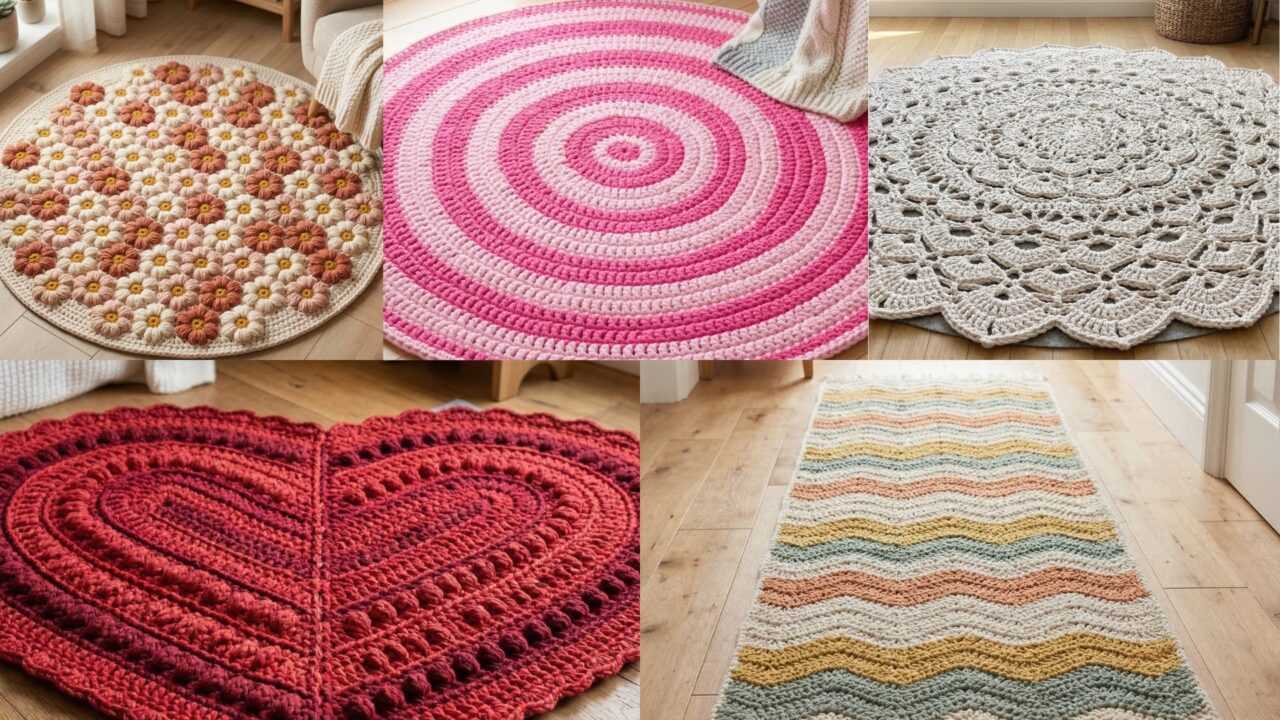
1. Crochet Puffy Flower Rug Pattern
Skill level: Intermediate (texture/puff stitches + working in rounds and joining panels)
Finished size: ~36″ (90 cm) diameter for a 9-petal layout (scale by number of petals or size of petal motifs)
Recommended yarn & hook: Super bulky cotton or T-shirt yarn (or two strands of bulky held together) — about 1200–1800 yards (varies with yarn thickness). Hook: 10–15 mm (depending on yarn).
Why this works: This rug is built from large puffy flower motifs joined into a circular or oval arrangement. Puffy (cluster/puff) stitches make a soft, squishy surface — great in bedrooms or reading nooks.
Materials
- Super bulky cotton yarn (main petals color) — ~800–1200 yds
- Contrast color for centers and joining — ~200–400 yds
- Heavy-duty 10–15 mm crochet hook (choose size to get firm but cushy fabric)
- Tapestry needle, stitch markers, scissors
- Non-slip rug pad or rubber backing (optional)
- Sewing needle + upholstery thread if sewing backing
Stitches & special notes
- Puff stitch: yarn over, insert hook, pull up loop (repeat 3–4 times to get 4–5 loops on hook), yarn over and pull through all loops, ch1 to secure puff. Adjust number of repeats for different puff heights.
- Make large motifs so joining is quick — each motif here makes a single petal with a round center.
Pattern overview
- Work large flower motifs (petal + center) in rounds. Each flower is approximately 12–14″ diameter (for bulky yarn). Arrange motifs in a flower ring (one center motif + petals) or tessellate many flowers to make a larger rug. Join motifs with a firm joining round (sc in both loops) so seams are hidden and sturdy.
Flower motif (one large flower — make 9 for a 36″ rug)
Center disk
- MR, ch1, 8 sc in MR. Pull tight. (8)
- inc around (2 sc in each st) → 16.
- sc in next st, inc around → 24. Fasten off center color or continue to petal rounds with same yarn.
Petal foundation (round 1)
4. Join petal color to any sc, ch3 (counts as first dc), work dc in next st, ch1, skip one st, dc in next 2 sts, ch1, skip 1 around to create 12 ch-spaces around outer edge. Join.
Petal puff rows
5. Into each ch-1 space work a large puff petal: (puff stitch made of 5 pulls on hook), ch2, sl st into same ch-1 space to anchor — repeat into every ch-1 space to create 12 petals. The puff should be tall and full. After all petals, work one round of sc around the petal bases to stabilize. Fasten off and weave ends.
Optional second petal tier
6. If you want extra fluff, add a second tier of smaller puff petals worked between the first-tier bases: create ch-3 loops between petals and work smaller 3-loop puff stitches into them.
Finish
- Block each motif lightly by pinning petal shapes flat (wet or steam as yarn allows).
Joining motifs into rug layout
- Lay motifs flat in desired arrangement (e.g., one flower at center surrounded by 8 petals, or grid of flowers for larger rug).
- Use a join-as-you-go method: on the final round of a motif, when you come to the position where motifs meet, replace the sl st with sl st through the neighbor motif’s corresponding stitch. This joins neatly and avoids visible yarn tails.
- If joining after all motifs made: align edges and whipstitch with contrasting yarn or join using sc through both loops for a decorative ridge. Use a firm join to prevent motifs separating under foot.
Backing & finishing
- For floor use: sew or glue non-slip rug pad to underside with a strong spray adhesive or fabric glue. If you want a soft underside, cut a circle/squares of felt and hand-stitch around edge with upholstery thread.
- Edge: add a single round of sc around entire rug in a sturdy contrast color for a neat bound edge.
Care, placement & tips
- Use in low-traffic areas (bedside, nursery) unless you choose extremely durable cotton rope yarn.
- Spot clean or gentle machine wash if yarn allows — check yarn label. Thick rugs can be heavy when wet; dry flat outdoors.
- Tip: use two strands of yarn held together for more structure and interesting color blends.
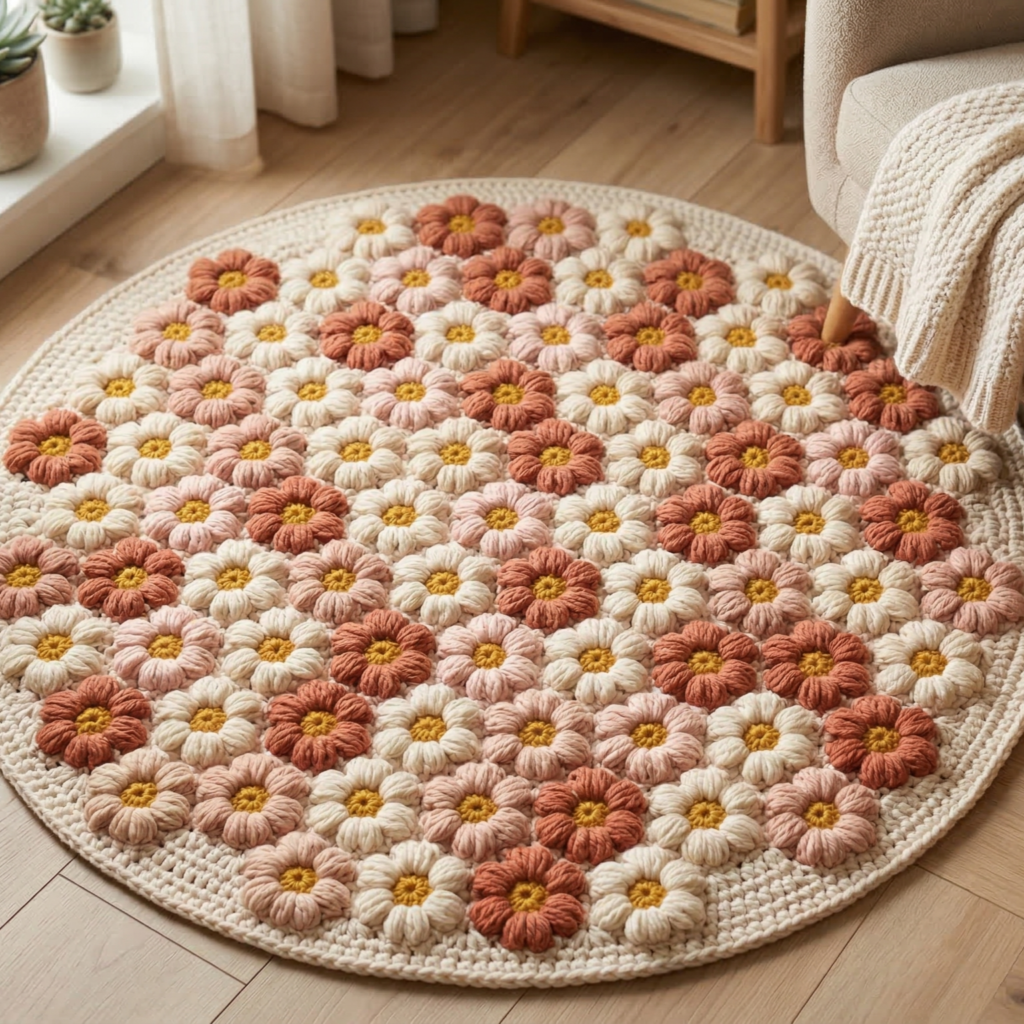
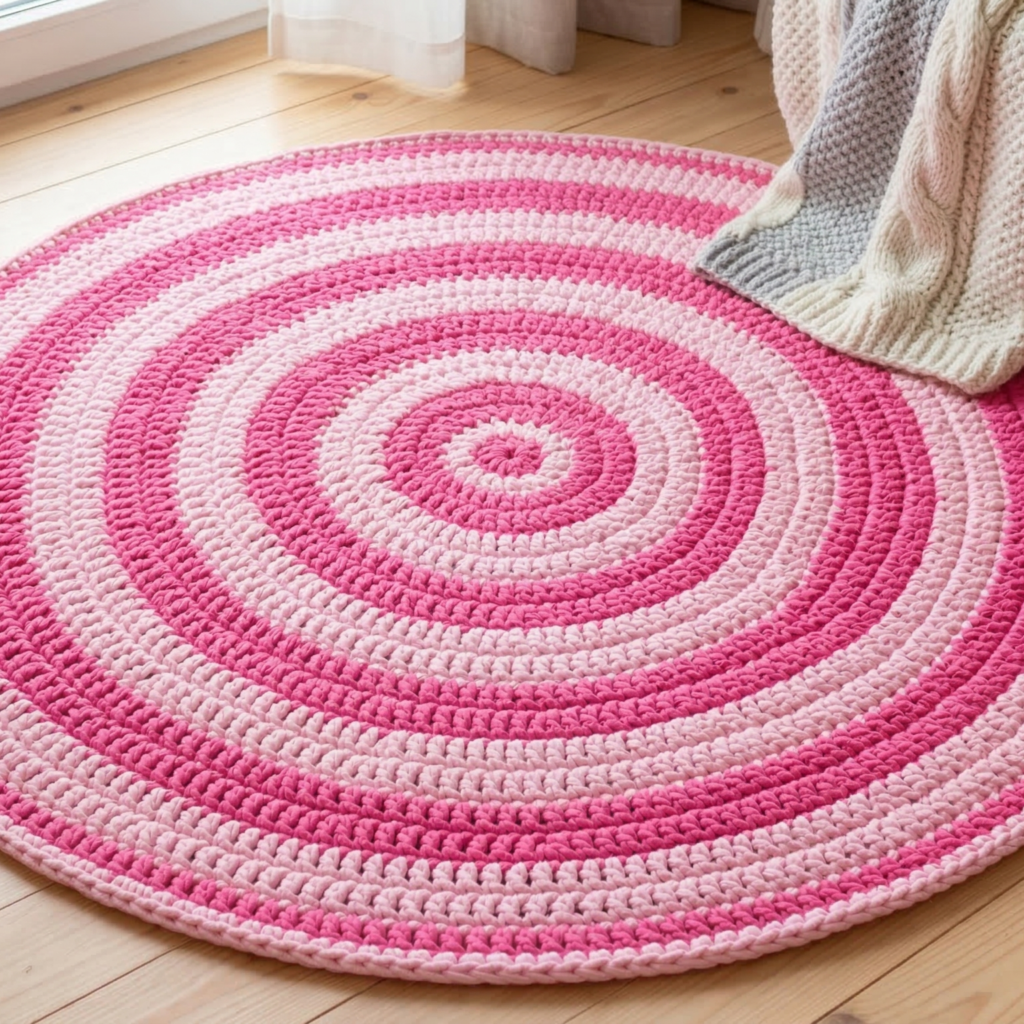
2. Crochet Fascinating Spiral Round Rug Pattern
Skill level: Intermediate (continuous spiral increases + color changes)
Finished size: variable — sample ~48″ (120 cm) diameter for a generous round rug.
Recommended yarn & hook: Bulky/ super bulky cotton or chunky acrylic/ cotton blend; ~1500–3000 yards depending on size. Hook: 10–15 mm.
Materials
- 2–3 colors for spiral effect (long gradient skeins work great)
- Large hook 10–15 mm, large tapestry needle, stitch markers, scissors
- Rug pad (optional), upholstery thread for attaching backing
Concept
This rug is made in a continuous spiral from the center outward, using textured stitches (e.g., alternating rounds of dc and fpdc/bpdc to create ridges) to create a bold spiral that reads in color changes. Because you work in one continuous spiral (no join per round), the visual swirl is seamless.
Stitches & techniques used
- Spiral in continuous rounds: do not join at end of rounds; use a stitch marker at start of round or just continue increasing pattern with careful counting.
- Texture options: front-post double crochet (fpdc) creates ridges; basketweave rows or alternating hdc/dc create visual bands.
Pattern (center to edge)
Center & increase strategy
- MR, ch2, work 12 dc into MR. Pull tight. (12) — do not join; place a marker at first st to know where you began.
- Round 2: inc in every stitch → 24. Continue working in spiral without joining. Increase round patterns: add increases spaced evenly (for example, on successive rounds increase in groups to maintain flatness: 24 → 36 → 48 etc.). Use the rule of thumb: add ~12 increases every other round for even expansion (but check flatness).
Spiral texture
3. After establishing base diameter (about 12–18″), start alternating textured sequences across the spiral:
- Example sequence: 6 rounds dc (color A), 4 rounds fpdc (color B), 8 rounds dc, 4 rounds fpdc, etc. Because you work in continuous spiral, color changes create long swirling bands.
- To change color seamlessly while spiraling: finish a stitch with new color by pulling new color through last yarn over, or change at a marked point and weave in tail.
Maintaining a flat mat
4. If mat begins to ruffle, reduce increases; if it cupped, add increases. The spiral approach means you must watch the edge and tweak increases to keep it flat.
Edge finish
5. Finish with 2–3 rounds of sc or a crab-stitch (reverse sc) for a neat, slightly raised edge that resists curling.
Pattern variations & ideas
- Use a single gradient skein for one-skein dramatic spiral (works beautifully with super bulky gradient yarn).
- Make a two-tone spiral by alternating every row between two colors — results in optical effect.
- Add a non-slip backing for high traffic.
Care & use
- Heavier rugs may need a rug pad to prevent slipping. For bathroom use, choose quick-drying cotton or synthetic blends.
- Rotate rug occasionally to even wear.
3. Crochet Faux Heart Shaped Rug Pattern
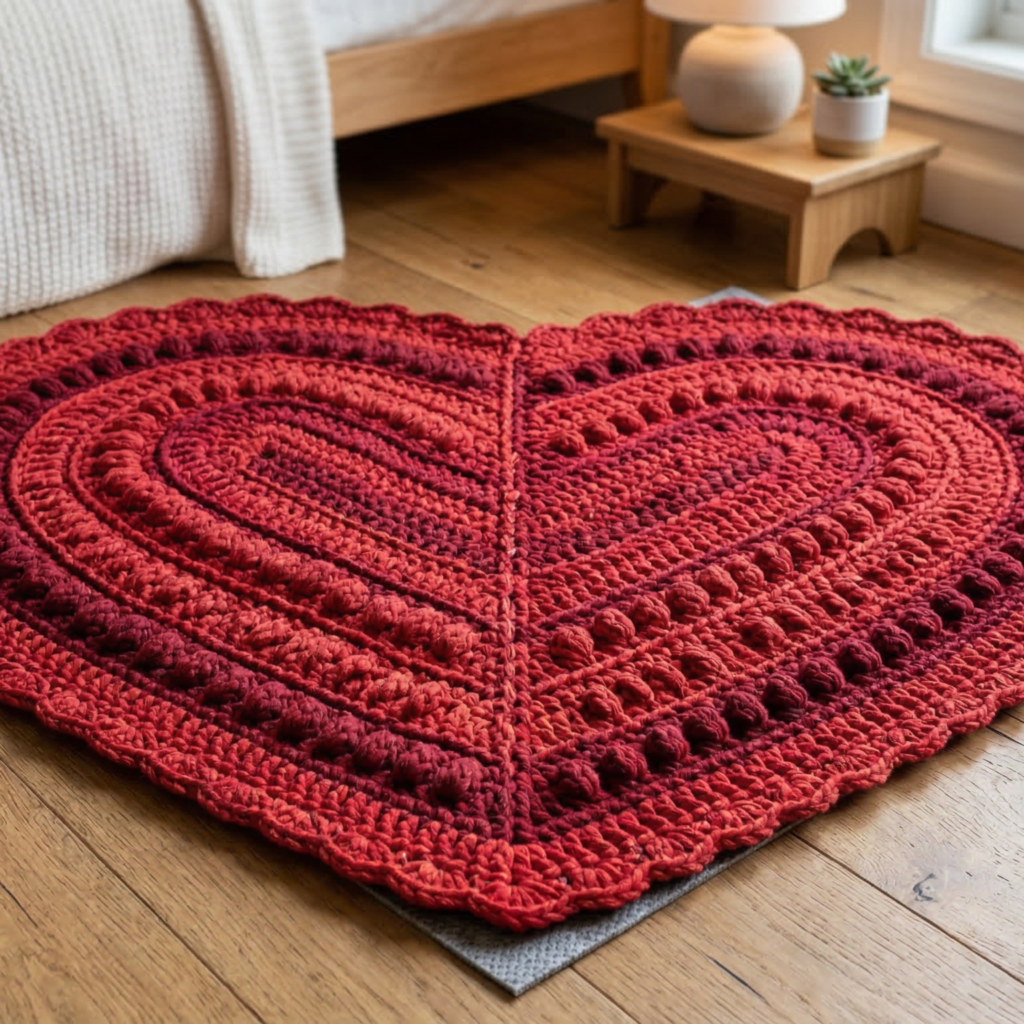
Skill level: Intermediate (shaping for hearts + join rounds)
Finished size: ~36″ × 30″ (90 × 75 cm) — generous area rug shape; scale smaller for bedside heart mat.
Recommended yarn & hook: Super bulky cotton or t-shirt yarn; ~1000–2000 yds. Hook 12–15 mm.
Materials
- Thick yarn in one or two colors (e.g., romantic reds or neutral creams)
- Hook 12–15 mm, tapestry needle, blocking pins (if needed)
- Rug pad/ non-slip backing
Construction overview
- This rug is worked in two mirror halves (left and right lobes) or from one central seam outward. Each half is built as a teardrop/oval and then joined at the center to form a heart. Working halves allows comfortable shaping for the lobes and clean seams.
Shaping each half lobe (worked flat)
Half-lobe (make 2)
- Chain foundation to form the base width of a half heart: ch 40 (adjust for size). Work even rows of sc or hdc for a short strip (this gives the bottom point width).
- Begin increasing gradually in the center rows to form semicircular lobes: on each side of the center, add a sc increase at start and end of every other row to widen; then slow increases to round out top. A practical method:
- Row 1: sc across.
- Row 2: sc across.
- Row 3: ch1, sc in next 5, inc, sc across to last 6, inc, sc 5 — repeat increasing until half-lobe reaches desired radius (~12–15″ high).
- Shape top curve by adding more increases toward outer edge, then work several even rows across top edge to flatten. Fasten off.
Join halves
4. Place two mirror halves RS together along straight side (the bottom center), sew with mattress stitch up the center seam leaving the top curved lobes joined at a single seam. After joining bottom and sides, turn right side out.
Alternate method: Work a single heart from a large oval and decrease at center to form the point — this requires careful counting and is less intuitive than halves.
Adding thickness & texture
- Work 2–3 rounds of bobble or puff stitch across surface in concentric rows for tactile interest. Add a border of shells or reverse sc to tidy the outline.
Backing & finishing
- Add a non-slip rug pad cut to heart shape and either glue lightly or stitch to underside. For heavy use, stitch a layer of canvas or strong felt to underside then topstitch to crochet edges with upholstery thread.
Placement tips
- A heart rug is a statement piece — use as bedside accent, nursery focal, or in front of a vanity. For high-traffic areas use thicker, more durable cotton rope or recycled cotton yarn.
4. Crochet Giant Doily Floor Rug Pattern
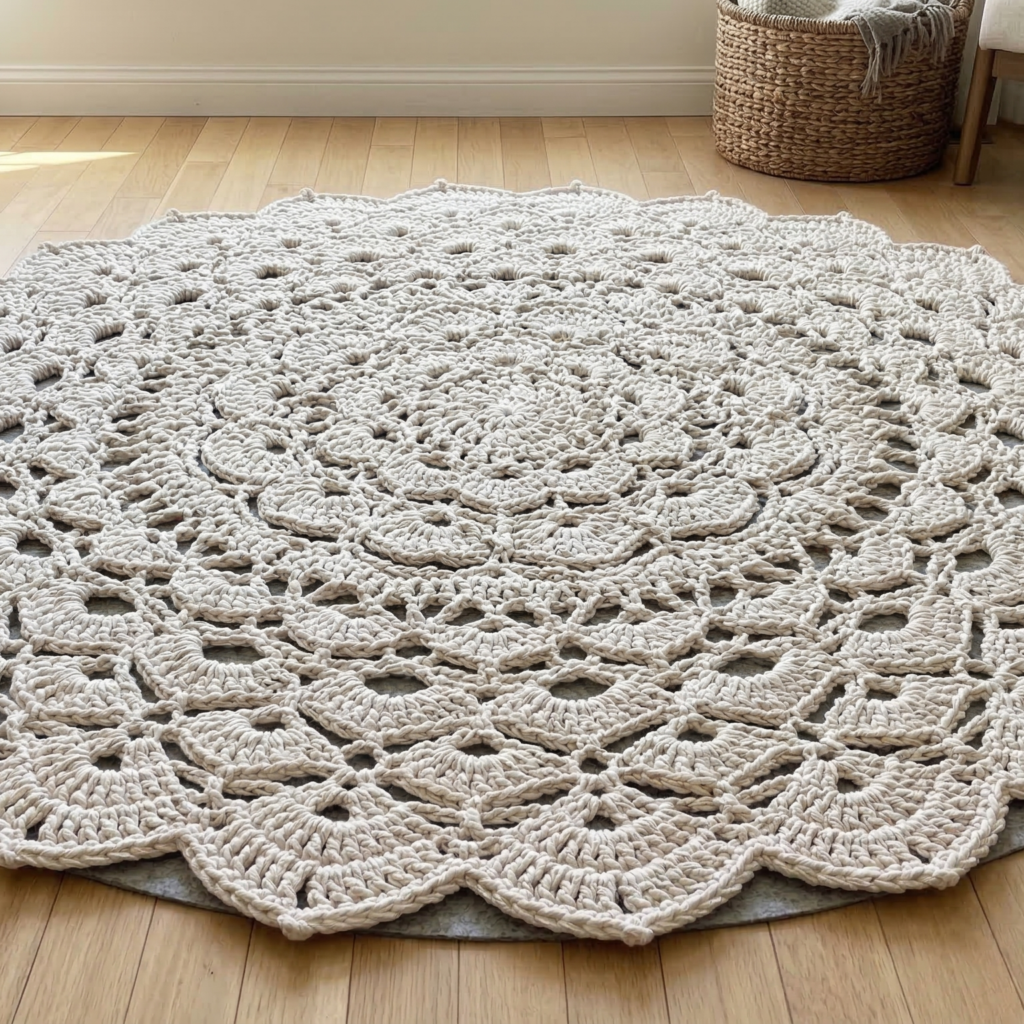
Skill level: Advanced (large fine-stitch doily repeats scaled up + careful blocking)
Finished size: 48–72″ diameter possible — choose size by number of rounds.
Recommended yarn & hook: Use chunky yarn with a relatively small hook for tightly worked fine motifs, or t-shirt yarn with a large hook for bold look. Yarn yardage will be substantial (2000–4000+ yds for very large rugs).
Materials
- Yarn choice depends on style: cotton thread (very labor intensive) vs bulky cotton for scale.
- Hook sized to yarn: 3.5 mm (for thread, but then use multiple strands) or 10–15 mm for rope/t-shirt yarn
- Blocking surface large enough (garage floor, tarp) and many rust-resistant pins; rug pad for underside.
Concept
Work a classic doily pattern but scale it up by substituting thicker yarn and/or working multiple strands held together. The lace pattern blooms into a striking floor rug after careful blocking.
Pattern strategy (doily to rug)
Choose a doily chart (or follow this radial design):
- Start MR, build center medallion with dc and cluster rounds.
- Alternate rounds of open lace (chains and picots) with denser rounds (shells/clusters) to provide structure.
- Every 4–6 rounds add a stabilization round (sc or hdc) to hold the lace steady as you enlarge.
Key considerations
- Increase cadence: doily patterns typically increase every round to stay flat. When scaling, maintain a ratio of increases so piece remains flat.
- Hold multiple strands: holding 2–4 strands of thinner yarn together creates scale without changing stitch count. Practice tension so lace opens but the rug is sturdy.
Example core repeat (simplified)
- Round A (center): MR, 12 dc.
- Round B: ch3 loops around forming chain-spaces.
- Round C: shells in chain spaces (5 dc shells).
- Round D: join shells with picot connectors.
- Repeat cycles, alternating shell sizes and connectors to create well-proportioned lace.
Blocking & finishing
- Blocking is critical: pin every scallop and point to full size and steam/wet block thoroughly; leave pinned until fully dry (24–48 hours). This makes lace crisp and rug flat.
- Backing: for high traffic, stitch a cotton canvas backing to underside or apply a non-slip backing. Because lace is delicate, backing protects both rug and floor.
Use & styling ideas
- A giant doily rug is an elegant focal point under a round coffee table or in a sitting area. Use soft neutral yarns for vintage look or bright colors for eclectic décor.
5. Crochet Little Waves Rug Pattern
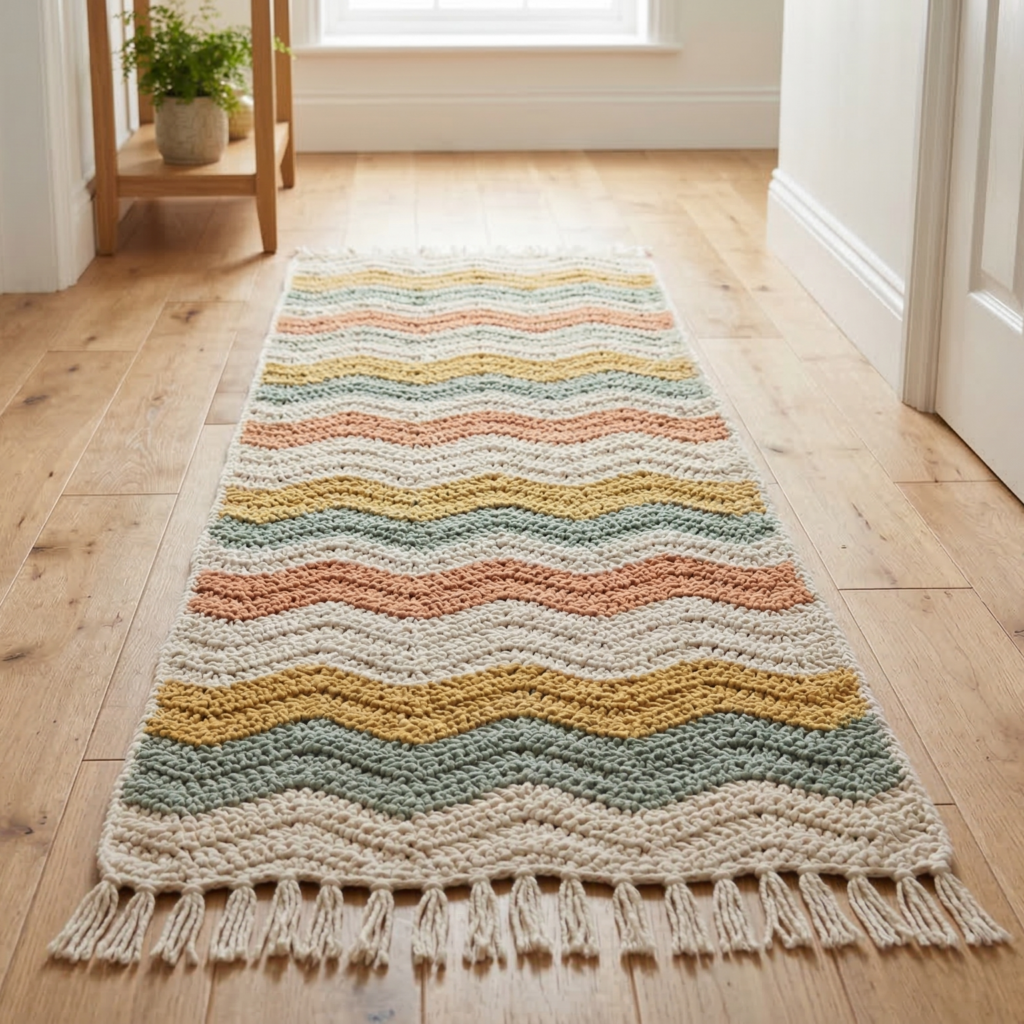
Skill level: Beginner–Intermediate (repeating ripple/ chevron in rounds or rows)
Finished size: sample 30″ × 50″ runner for hallway; scale by length of foundation chain.
Recommended yarn & hook: chunky cotton rope or bulky yarn for sturdy flat surface; 10–12 mm hook; ~1500–2500 yds depending on runner size.
Materials
- Bulky cotton/rope yarn in 2–4 colors for stripes
- Large hook 10–12 mm, tapestry needle, rug pad (important for runners)
Why ripple/wave works for rugs
Ripple (chevron) creates a forgiving, flat fabric that drains well and resists curling. Color banding enhances the wave visual.
Stitch pattern (classic wide ripple)
Foundation chain
- Chain length multiple of 14 + 1 (for wide waves). Example for 30″ width: ch 120 + 1. Turn.
Row 1 (setup — dc ripple)
2. Dc in 4th ch from hook (counts as first dc), dc in next 5 ch, 2 dc in next ch, skip 2 ch (creates valley), 2 dc in next ch, dc in next 5 ch, dc2tog over next 2 ch — this is one 14-st ripple repeat. Repeat across. Turn.
Row 2 onwards
3. Ch3, dc across in pattern aligning increases and decreases; maintain ripple by working dc until you reach peak or valley positions; use stitch markers to mark increases/decreases for accuracy. Continue until runner reaches desired length.
Color changes
4. Change color every N rows (e.g., every 6 rows) to create broad stripes that follow the wave shape. Carry color up side or weave in tails if stripes short.
Edge finishing
5. Work 2 rounds of sc at ends to square off runner and tidy edges. Option: add fringe tassels along short sides for boho look.
Laying & backing
- For hallway or high-traffic, attach a non-slip runner pad underneath and secure edges with rug tape. If rug used on hardwood, place felt strips under corners to avoid scratches.
Care & maintenance
- Cotton runners can usually be washed professionally or by gentle machine washing in sections if allowed. Large T-shirt rugs might be washable in a large washer; check yarn care. Dry flat; avoid tumble dry for oversized rugs.
Final tips & professional finishing
Yarn choices & sustainability
- Recycled cotton T-shirt yarn or fabric rope makes sturdy, eco-friendly rugs. Large-format rugs use a lot of material — consider yarn economy and sourcing bulk skeins.
- For outdoor accents, choose weather-resistant synthetic blends.
Get a flat rug
- Keep tension consistent; test a wedge of increases early to confirm flatness. Blocking is your best friend; pin to final dimensions and reshape stitches evenly.
Backing & slip prevention
- Non-slip rug pad is recommended for all rugs (prevents sliding and protects floor). For ornate rugs (doily rugs), consider sewn canvas backing for longevity. For bathroom rugs, attach silicone or rubber dots or a full rubber backing.
Safety
- Ensure edges lie flat; curled edges are tripping hazards. Test with daily use before placing in busiest areas.
Conclusion
A handmade rug — whether puffy floral, hypnotic spiral, cute heart, giant lace doily, or wavy runner — brings warmth, texture, and a personal touch to any space. These five patterns are written so you can scale, color, and adapt them to your home: choose sturdy cotton for kitchen and hallway rugs, ultra-plush bulky yarns for bedroom comfort, or fine thread scaled up for a dramatic doily under a coffee table. With correct yarn choice, careful increases, and thorough blocking plus a non-slip backing, your finished rug will be beautiful and practical.