Crochet pillows are one of the easiest ways to add warmth, texture, and personality to a room. They do not take up the time or yarn of a full blanket, but they still make a big visual impact on a sofa, chair, bed, or reading nook. A handmade pillow can soften a space instantly, bring in new colors, and make your home feel more inviting in a way that store-bought decor often cannot match.
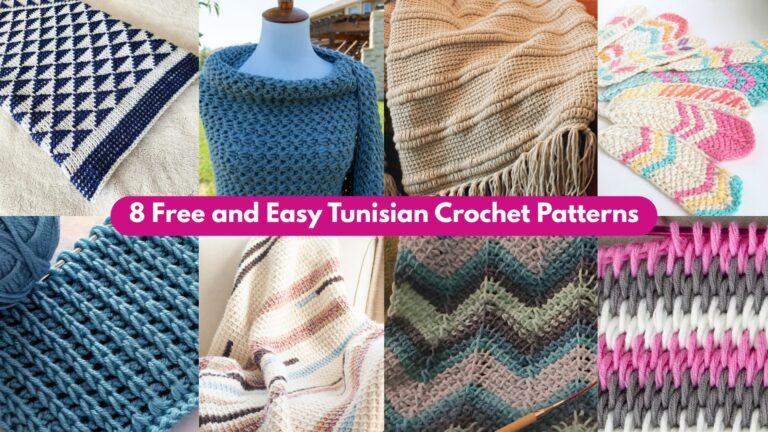
What makes crochet pillows so appealing is how much style you can build into a relatively small project. A pill-shaped amigurumi pillow can feel cute and modern. A double-sided pillow gives you versatility and balance. A picot pillow adds delicate detail. A waffle stitch pillow brings rich texture and coziness. A plaid throw pillow creates a timeless seasonal look. Each design has its own mood, but all of them can refresh a space beautifully and give your home a handmade touch.
In this post, you will find five stylish crochet pillow patterns with detailed step-by-step guidance, helpful quick notes, and practical finishing tips. Each section is written to be clear, approachable, and useful whether you are making your first pillow or adding a few fresh pieces to your home decor collection. If you love cozy projects that are both decorative and functional, these pillow ideas are a perfect place to begin.
Quick Notes
Project type: Crochet pillows and pillow covers
Best for: Sofas, beds, chairs, nurseries, reading corners, and gifts
Skill level: Beginner to intermediate, depending on shaping and stitch detail
Hook size: Usually 3.5 mm to 5.5 mm, depending on yarn weight and desired firmness
Yarn weight: DK, worsted, or bulky yarn depending on the look you want
Best yarn choice: Cotton, cotton blends, acrylic, or wool blends with good stitch definition
Finished size: Usually 12 to 18 inches, but can be adjusted to any pillow form
Time to complete: Several hours to a few days depending on size and detail
Helpful stitches: Chain, slip stitch, single crochet, half double crochet, double crochet, increase, decrease, picot, waffle stitch, color changes, surface crochet, seaming
Common Materials
Most crochet pillow patterns use a similar set of supplies.
- Yarn in your chosen colors
- Crochet hook matched to your yarn
- Pillow form or stuffing
- Yarn needle
- Scissors
- Measuring tape
- Stitch markers
- Optional zipper, buttons, or envelope closure supplies
- Optional fabric lining if needed
For pillows, yarn choice matters because the finished piece needs to be soft enough for comfort but sturdy enough to hold its shape. Cotton and acrylic blends are popular because they are easy to care for and show texture clearly. If you want a very cozy or rustic result, wool blends can also work beautifully.
1. Crochet Amigurumi Pill-O Pattern
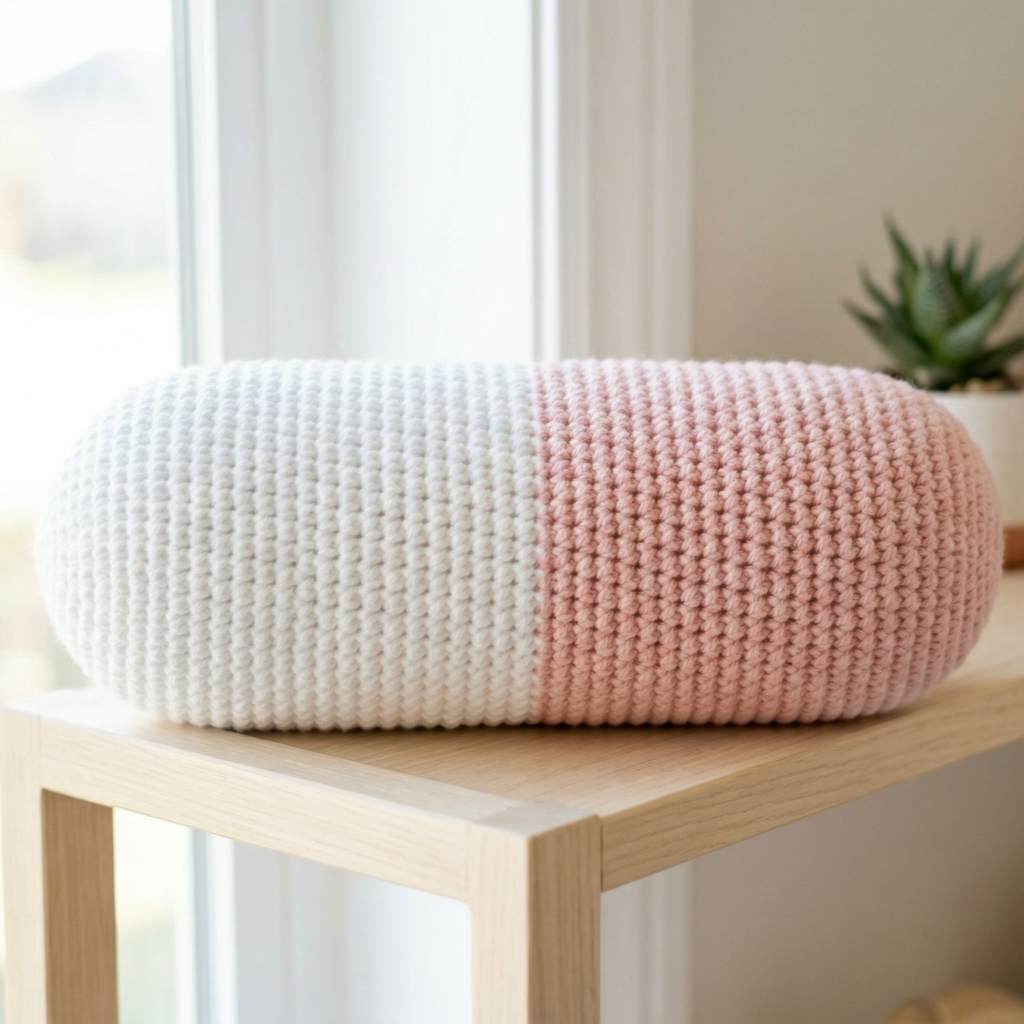
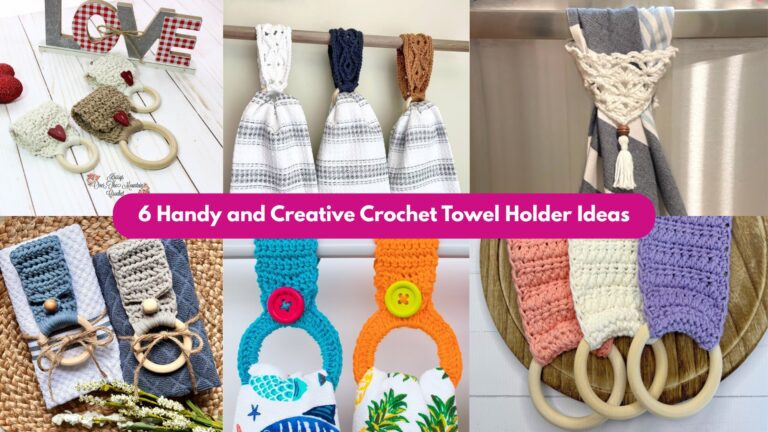
The pill-shaped amigurumi pillow is playful, modern, and surprisingly versatile. Its rounded cylindrical shape makes it different from the usual square cushion, which gives it a fun decorative feel. It is a great choice if you want something soft and whimsical that can sit on a bed, couch, or nursery shelf and still make a statement.
Quick Notes
Skill level: Beginner to intermediate
Finished size: Small to medium cylindrical pillow
Style: Cute, modern, playful, soft
Best colors: Pastels, neutrals, bright accent colors, or two-tone combinations
Materials
- Bulky or worsted yarn
- Crochet hook suited to your yarn
- Stuffing or pillow filling
- Yarn needle
- Scissors
- Stitch markers
- Optional safety details or embroidery for decoration
Step-by-Step Guide
Step 1: Decide the size of the pillow
Before starting, choose how long and wide you want the pill-shaped pillow to be. A small version works well as a decorative accent, while a medium version can be used more comfortably as a throw pillow. Because the shape is cylindrical, the length and circumference should feel balanced.
A clear size goal makes the shaping much easier.
Step 2: Crochet the first end cap
Start with a circular or oval end section. This will form one rounded end of the pill shape. Work increases evenly so the piece stays flat and symmetrical. This first cap determines the overall width of the pillow.
A neat end cap helps the pillow look polished and even.
Step 3: Build the cylinder body
Once the first end is ready, continue crocheting in the round without increasing to form the long body of the pillow. This section should remain even in width so the pillow keeps its smooth pill shape. Keep your stitches consistent to avoid unwanted bulging.
The cylinder section gives the pillow its signature shape.
Step 4: Make the second end cap
When the body reaches the desired length, work the second rounded end in the same way as the first. Try to match the size carefully so the pillow remains balanced. The shape should be soft and rounded on both ends.
Matching the ends keeps the pillow symmetrical.
Step 5: Stuff the pillow
Before closing the final opening, stuff the pillow firmly but not too tightly. It should feel full and rounded without becoming stiff. The stuffing should fill the shape evenly so there are no flat spots or lumps.
Even stuffing is key to a nice finish.
Step 6: Close the opening
Use a yarn needle and a whip stitch or invisible seam to close the last section neatly. Make sure the seam is strong and hidden as much as possible so the pillow looks clean from the outside.
A tidy closure makes the shape look more professional.
Step 7: Add optional details
You can keep the pillow plain for a modern look or add tiny embroidery details, color stripes, or playful facial features. A simple smile or blush marks can make the pillow feel more whimsical, especially for a nursery or cozy reading corner.
Helpful Tips
This pillow looks especially nice in solid colors or gentle color-blocking. If you want a softer home decor style, try cream, beige, or pastel tones. If you want a bold accent piece, choose a bright color that contrasts with your furniture.
2. Crochet Double Sided Pillow Pattern
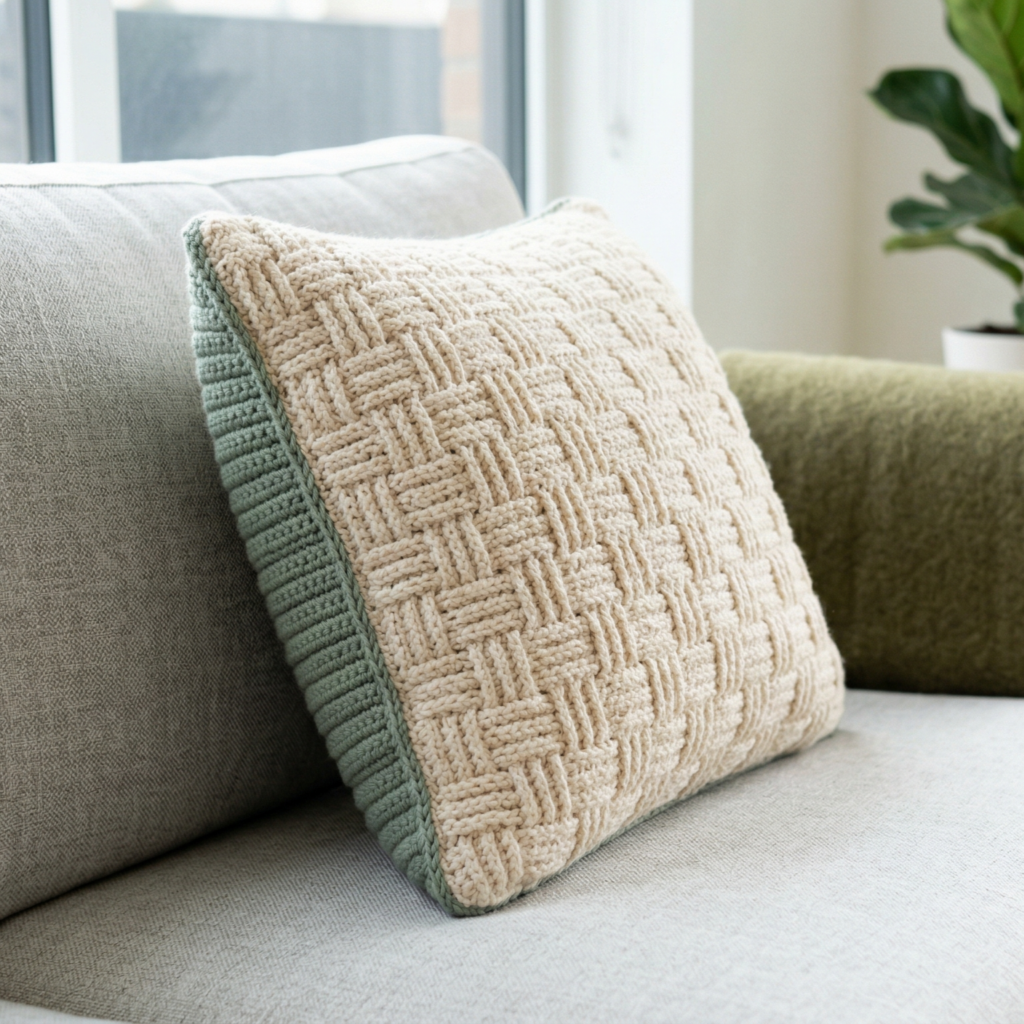
A double-sided pillow is practical and stylish because both sides can be designed differently or kept coordinated for a clean, finished look. This makes it a great project if you want variety without making a completely different pillow each time. It is especially useful for people who like to change their decor seasonally.
Quick Notes
Skill level: Beginner to intermediate
Finished size: Fits standard pillow form size
Style: Versatile, modern, practical, balanced
Best colors: Neutrals, seasonal tones, monochrome palettes, or contrasting pairs
Materials
- Yarn in one or two colors
- Crochet hook suited to your yarn
- Pillow form
- Yarn needle
- Scissors
- Measuring tape
- Optional buttons, zipper, or envelope back closure
Step-by-Step Guide
Step 1: Choose your pillow size
Measure the pillow form you want to use. The crochet cover should match it closely so it fits snugly without sagging. If you plan to use different designs on the front and back, decide that now so you can plan the yarn amounts and stitch patterns.
A well-fitted cover always looks more polished.
Step 2: Crochet the front panel
Begin the front panel in your chosen stitch pattern. This could be textured, colorful, lacy, or simple depending on the look you want. Keep the edges even so the front panel matches the back panel in size.
The front panel is your main design space.
Step 3: Crochet the back panel
Make a second panel the same size as the first. You can keep it plain for a simple finish, or use a different stitch pattern or color to give the pillow a reversible style. This is one of the best parts of a double-sided pillow because it gives you flexibility.
Matching sizing is more important than matching texture exactly.
Step 4: Join three sides
Place the panels together with the right sides facing out if you want the seam to sit inside. Join three sides using slip stitch, whip stitch, or another seaming method. Keep the seam even and secure so the pillow cover holds its shape.
A neat seam helps the cover stay durable.
Step 5: Insert the pillow form
Slip the pillow form inside the cover once three sides are attached. Make sure the corners are filled out evenly and that the pillow sits flat. If the cover is slightly loose, adjust the seam placement or add a row of tighter stitches next time.
The form should fit comfortably without stretching the cover too much.
Step 6: Close the final side
Finish the last seam carefully. You can sew it closed permanently or add a closure such as buttons, a zipper, or an envelope flap if you want the cover to be removable. Removable covers are convenient for washing.
Step 7: Add edging if needed
A clean border around the edges can make the pillow look more finished. A simple round of single crochet or a decorative border can frame the design beautifully.
Helpful Tips
This pillow is a wonderful option if you want to experiment with different looks. You could make one side plain and the other textured, or choose different colors for each side to match changing decor. It is a very flexible project and great for seasonal styling.
3. Crochet Picot Pillow Pattern
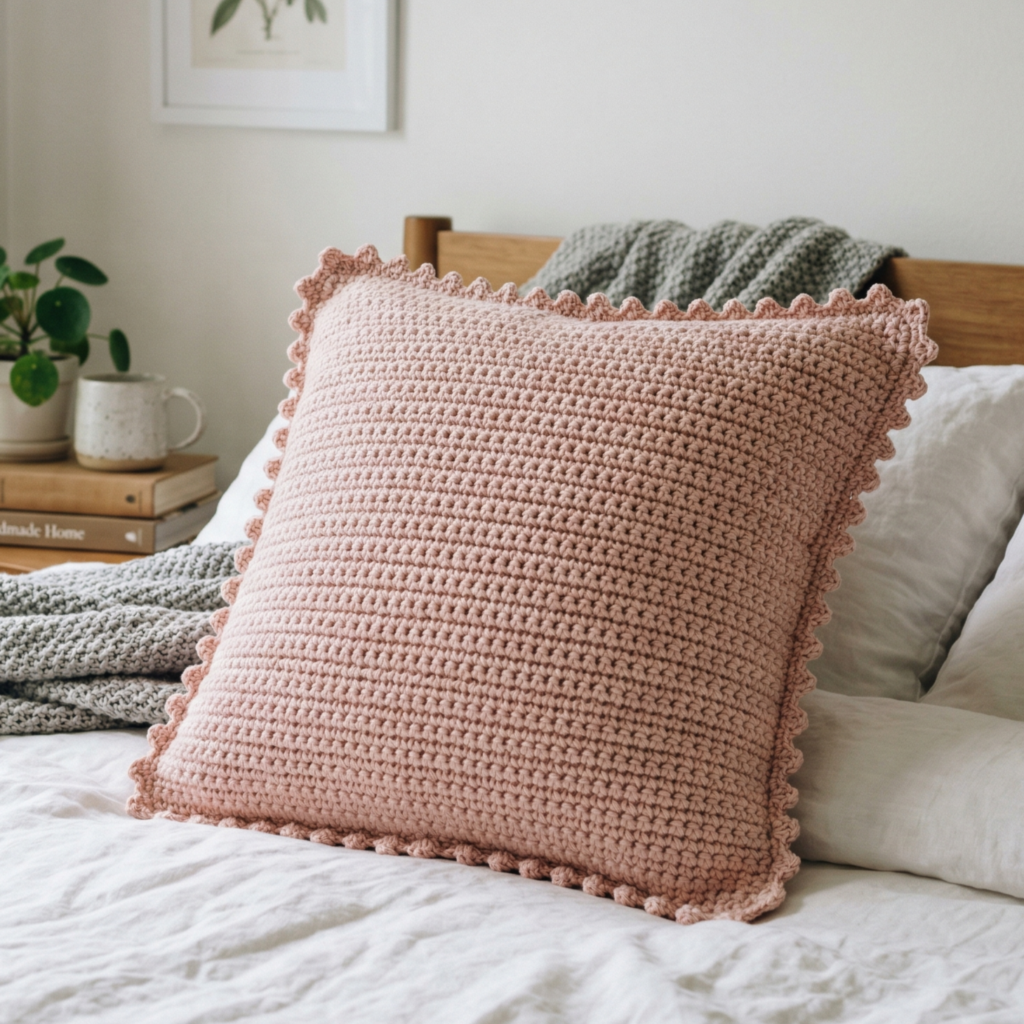
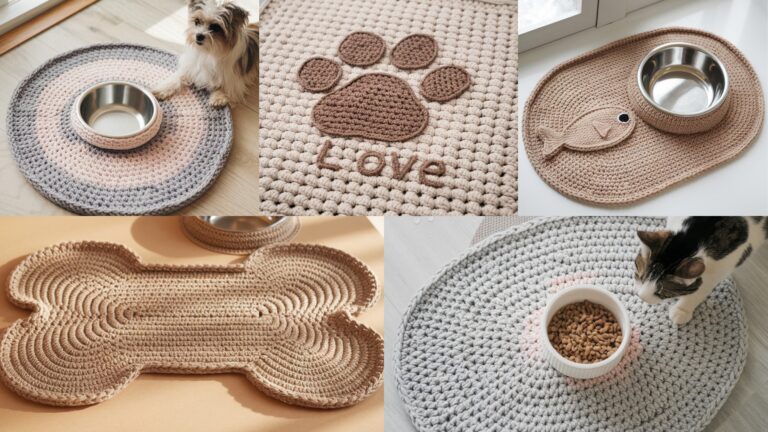
A picot pillow is delicate, charming, and full of tiny decorative detail. Picot edging creates a pretty little scalloped effect that feels refined and feminine, making it perfect for bedrooms, nurseries, or soft living room accents. This pattern is ideal if you want something subtle but beautiful.
Quick Notes
Skill level: Beginner to intermediate
Finished size: Standard square or rectangular pillow cover
Style: Delicate, elegant, pretty, soft
Best colors: White, ivory, blush, dusty blue, pale gray, lavender
Materials
- Cotton or soft acrylic yarn
- Crochet hook suited to your yarn
- Pillow form
- Yarn needle
- Scissors
- Measuring tape
Step-by-Step Guide
Step 1: Choose the pillow shape
Decide whether you want a square, rectangle, or slightly rounded cushion. Picot edging works especially well on clean shapes because the tiny decorative points frame the edges so nicely. A simple base helps the edging stand out.
The shape should be simple enough to let the trim shine.
Step 2: Crochet the main panel
Work the main body of the pillow using your chosen stitch pattern. This could be single crochet, half double crochet, or a light texture that stays flat. Keep the fabric even so the edging sits smoothly around it.
A neat base makes the picot border look more refined.
Step 3: Add the picot edging
Once the main panel is complete, work a border with picot stitches. A picot is usually created by chaining a few stitches and slip stitching back into the same point or a nearby stitch to form a tiny point. Repeat this around the edge to create a delicate, ornamental frame.
The picot edge is the signature detail of the pillow.
Step 4: Keep the spacing even
Make sure the picot points are evenly spaced so the border looks balanced. Uneven picots can make the pillow look lopsided, so take your time and count carefully as you go.
Even spacing gives the border a clean finish.
Step 5: Make the second panel
If you are making a cover rather than an appliqué pillow, crochet a second panel that matches the first. The back can also include picot edging if you want both sides to feel decorative.
Step 6: Join and stuff
Join the panels together on three sides, place the pillow form inside, and close the final seam. If you are adding a closure, do that before fully finishing the last side.
Step 7: Shape the edges
Once the pillow is complete, gently shape the picot border with your fingers so the points stand out clearly. A light block can also help the edging settle into a neat line.
Helpful Tips
Picot pillows look especially beautiful in soft, elegant colors. If you want a romantic look, try blush or ivory. If you want a more modern look, use gray or cream and keep the base fabric simple. The picot border gives just enough detail to feel special without becoming too busy.
4. Crochet Waffle Stitch Pillow Pattern
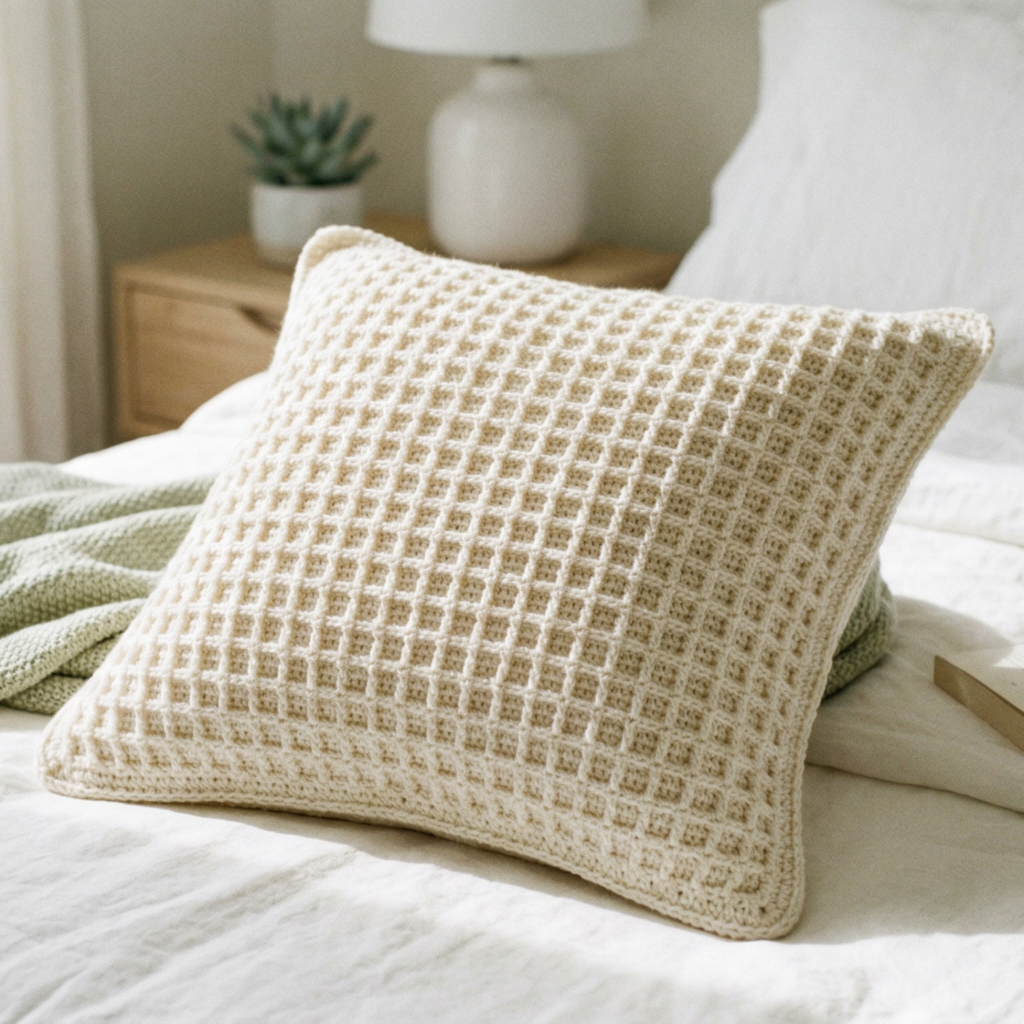
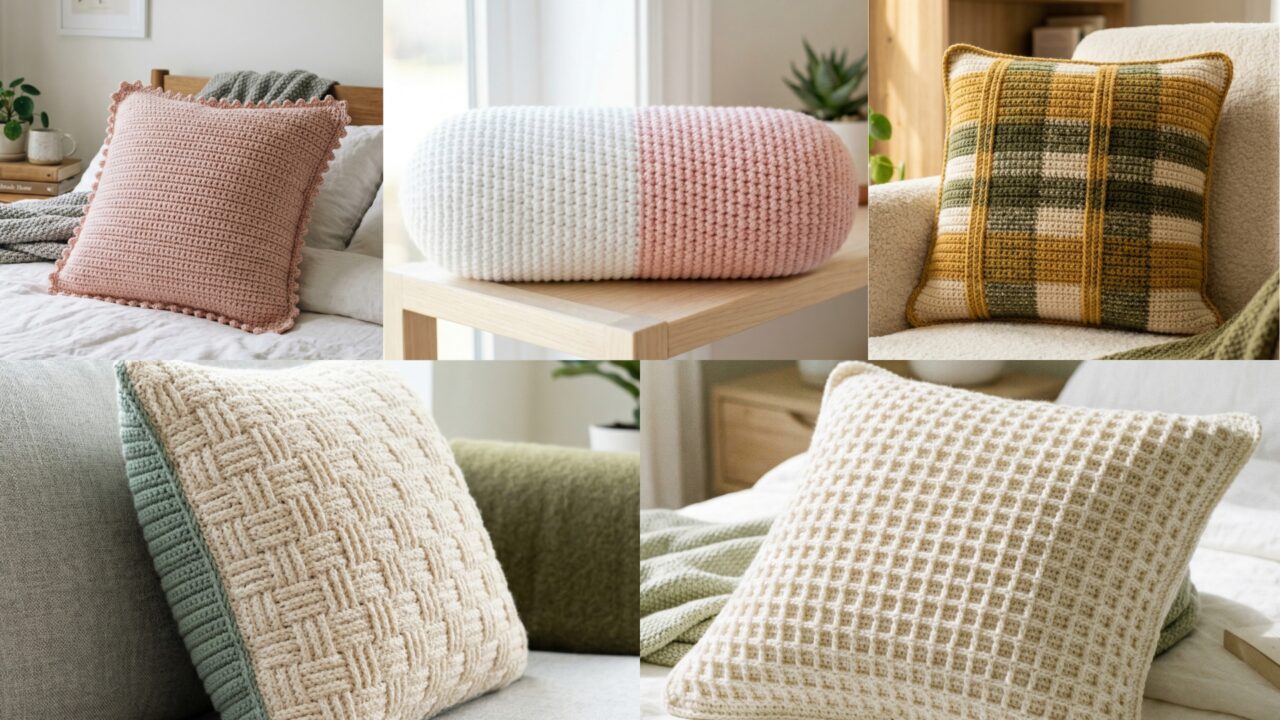
A waffle stitch pillow is cozy, textured, and wonderfully plush. The stitch creates a thick, cushioned surface that feels warm and inviting, making it perfect for sofas, beds, or reading chairs. It is a great option if you want a pillow that feels substantial and visually rich.
Quick Notes
Skill level: Beginner to intermediate
Finished size: Standard pillow cover size
Style: Cozy, textured, soft, homey
Best colors: Cream, tan, rust, olive, gray, navy, burgundy
Materials
- Worsted or bulky yarn
- Crochet hook suited to yarn
- Pillow form
- Yarn needle
- Scissors
- Measuring tape
Step-by-Step Guide
Step 1: Learn the waffle stitch rhythm
The waffle stitch creates raised square sections that resemble a waffle pattern. Before making the full pillow, practice a small swatch so you understand how the stitch behaves. This is helpful because waffle stitch can be a little denser than a basic stitch.
A good swatch will help you with sizing and texture.
Step 2: Make the pillow panel
Crochet a rectangular or square panel using the waffle stitch. Keep your stitch count even so the texture lines remain balanced across the fabric. Since waffle stitch naturally has a lot of depth, it makes a very attractive pillow front.
The texture is the main feature of the design.
Step 3: Keep the edges straight
Because textured stitches can sometimes pull inward, check the edges regularly as you work. Straight edges are important so the pillow cover fits neatly around the pillow form. If the sides start to shrink, adjust your tension or use a slightly larger hook.
Clean edges make the pillow look more finished.
Step 4: Crochet the back panel
For a cover, make a second panel in a simpler stitch to balance the texture, or use waffle stitch again if you want a fully textured pillow. A plain back can also make construction easier while still giving a beautiful front.
Step 5: Join the panels
Sew or crochet the panels together on three sides. Insert the pillow form before closing the final seam. A sturdy join is especially important for waffle stitch because the fabric tends to be thicker and more substantial.
Step 6: Add a closure if desired
Buttons, ties, or an envelope back can make the cover removable. This is helpful if you want to wash the pillow cover later. Choose a closure that does not interfere with the texture of the front.
Step 7: Shape and fluff
Once complete, fluff the pillow so the waffle texture stands out. A gentle block can help the piece settle into its shape, but avoid flattening the texture too much.
Helpful Tips
Waffle stitch pillows look especially warm and inviting in solid colors. A single rich tone can make the texture really shine. If you want a more rustic or cozy look, use earthy shades. If you want a modern style, try a clean neutral like ivory or soft gray.
5. Crochet Plaid Throw Pillow Pattern
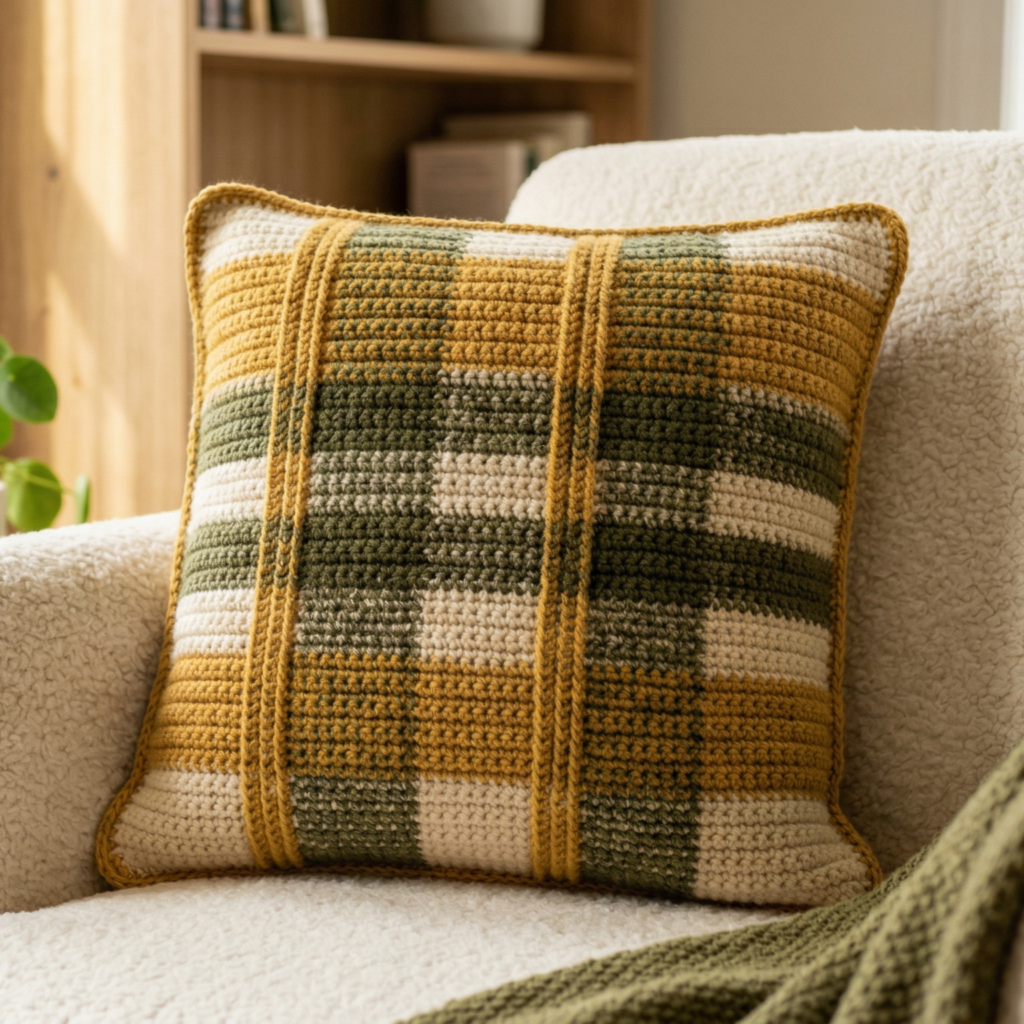
A plaid throw pillow is timeless, cozy, and perfect for adding a classic seasonal touch to your home. The plaid look can feel rustic, modern, or festive depending on the colors you choose. This pattern is ideal if you want a pillow that works beautifully in fall, winter, or any space that needs a little pattern and warmth.
Quick Notes
Skill level: Intermediate
Finished size: Standard throw pillow size
Style: Classic, cozy, patterned, seasonal
Best colors: Red, black, cream, green, navy, brown, mustard, gray
Materials
- Yarn in multiple colors
- Crochet hook suited to yarn
- Pillow form
- Yarn needle
- Scissors
- Measuring tape
- Stitch markers
Step-by-Step Guide
Step 1: Plan the plaid colors
Choose two or three main colors for the plaid pattern. Traditional plaid often uses a darker base with lighter crossing lines. Decide whether you want a bold seasonal plaid, a soft neutral plaid, or a more modern color combination.
Color planning is very important for plaid.
Step 2: Crochet the base panel
Start by crocheting a square or rectangle that will serve as the pillow front. The fabric should be sturdy and even. Depending on the pattern you choose, this base may be worked in rows of color changes or in a tapestry-style repeat.
A solid base supports the plaid design.
Step 3: Work the plaid stripes
Create the plaid effect by working vertical and horizontal color changes in a planned sequence. This may require carrying yarn or switching colors in a structured way. Keep the stripes consistent so the pattern appears clean and intentional.
Plaid is all about neat repetition.
Step 4: Keep the lines aligned
Check your stripes as you work so they line up properly. If the colors drift or the row count changes, the plaid can lose its structure. Taking your time here makes the final pillow look much more polished.
Alignment is the key to a good plaid design.
Step 5: Crochet the back panel
You can keep the back plain or continue the plaid pattern on the other side. A plain back is simpler, but a plaid back makes the pillow reversible and more decorative from every angle.
Step 6: Join and stuff
Sew three sides together, add the pillow form, and close the final seam. The structure should feel firm enough to keep the plaid design looking crisp. If needed, line the cover for extra strength.
Step 7: Block lightly
Plaid designs often benefit from a light block to help the lines sit straight. This can make the pillow look much cleaner and more professional, especially if you used several color changes.
Helpful Tips
Plaid pillows are especially nice for fall and winter decor, but they can also work year-round in softer color combinations. A red, cream, and green palette feels seasonal, while beige, navy, and white can feel more modern and versatile.
Conclusion
Crochet pillows are one of the easiest ways to refresh a room without taking on a huge project. They bring in texture, color, and softness, and they let you make a space feel more personal with very little yarn compared to larger home decor items. That makes them ideal for both beginners and experienced crocheters who want a satisfying project with a visible impact.
These five pillow patterns each offer something different. The pill-shaped amigurumi pillow is playful and modern. The double-sided pillow gives you versatility. The picot pillow adds delicate detail. The waffle stitch pillow brings cozy depth and texture. The plaid throw pillow feels classic and seasonal. Together, they show how much variety you can create with a simple pillow pattern.
A handmade pillow does more than fill a chair or sofa. It changes the feel of a room in a soft and thoughtful way. With the right yarn, a good pillow form, and careful finishing, even a small crochet pillow can become a standout decor piece that feels both beautiful and practical.