Crochet leg warmers are one of those accessory projects that feel both fashionable and practical at the same time. They add warmth, texture, and personality to an outfit without requiring the commitment of a full garment, which makes them a fun and rewarding crochet project for all skill levels. Whether you wear them over tights, with boots, around the house, or as part of a layered fall-and-winter look, leg warmers bring a cozy handmade touch that is easy to style and easy to love.
What makes crochet leg warmers especially appealing is how much variety you can create from a simple shape. A pair can be flared and dramatic, soft and lacy, ruffled and romantic, textured and playful, or colorful and bold depending on the stitch pattern and finishing details you choose. Because they are worked in a relatively small size, they also make excellent stash-busting projects and are perfect for experimenting with stitch textures, ties, and decorative edges.
In this post, you will find five stylish crochet leg warmer patterns with detailed step-by-step guidance, practical notes, and helpful finishing tips. Each design is written to be easy to follow while still giving you enough detail to create leg warmers that fit comfortably, look polished, and work beautifully with layered outfits. If you enjoy accessories that are cozy, wearable, and a little bit playful, these patterns are a lovely place to start.
Quick Notes
Project type: Crochet leg warmers
Best for: Layered outfits, winter wear, dancewear, gifts, and handmade fashion
Skill level: Beginner to intermediate
Hook size: Usually 3.5 mm to 5.5 mm, depending on yarn weight and stretch
Yarn weight: DK, worsted, or light bulky yarn
Best yarn choice: Soft wool blends, acrylic blends, or cotton blends with good stretch and recovery
Finished size: Adjustable by calf circumference and length
Time to complete: A few hours to a few days depending on detail
Helpful stitches: Chain, slip stitch, single crochet, half double crochet, double crochet, ribbing, shell stitch, lace stitches, increases, decreases, ties, ruffles, bobbles
Common Materials
Most crochet leg warmers can be made with the same basic supplies.
- Yarn in your chosen colors
- Crochet hook suited to the yarn
- Yarn needle
- Scissors
- Measuring tape
- Stitch markers
- Optional buttons, ties, ribbons, or elastic
- Optional blocking tools
For leg warmers, yarn choice matters because the piece needs to be warm, comfortable, and stretchy enough to move with the leg. A yarn with some softness and a little structure usually works best. If you want a snug fit, ribbing and close stitches are very helpful. If you want a slouchier or more decorative style, lace and ruffles can make the design feel lighter and more fashionable.
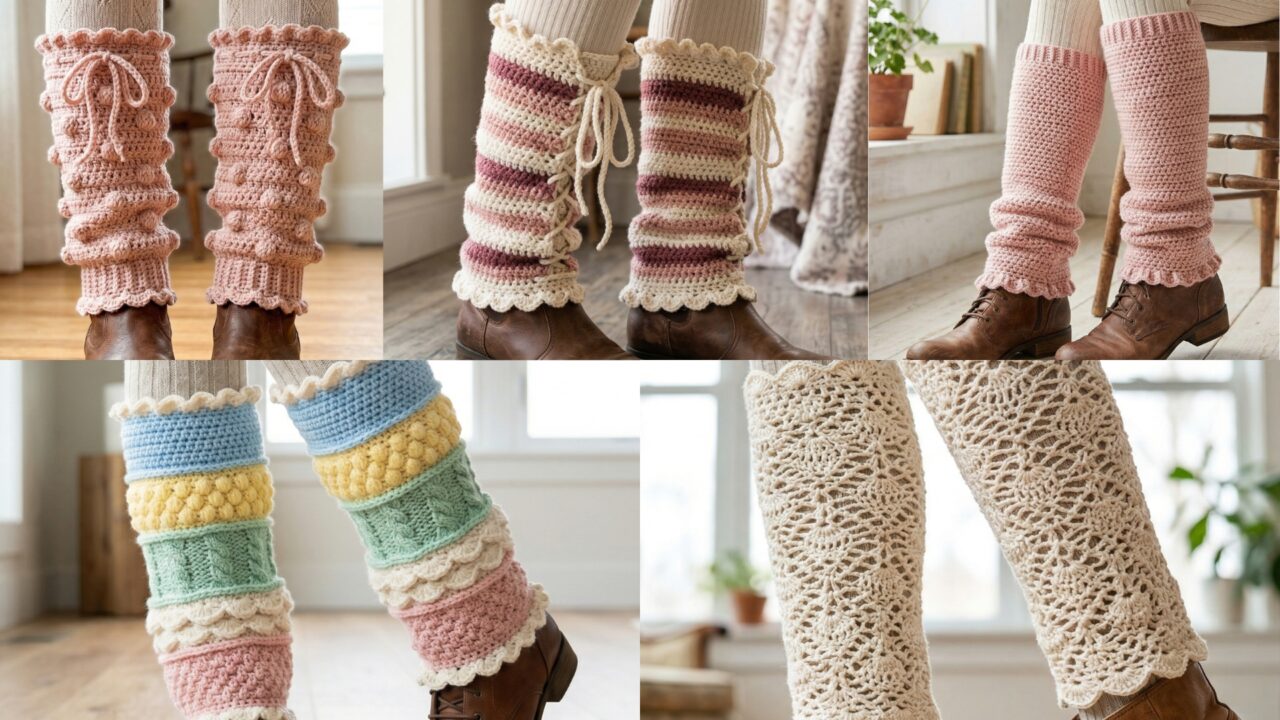
1. Crochet Flared Ruffles Leg Warmers Pattern
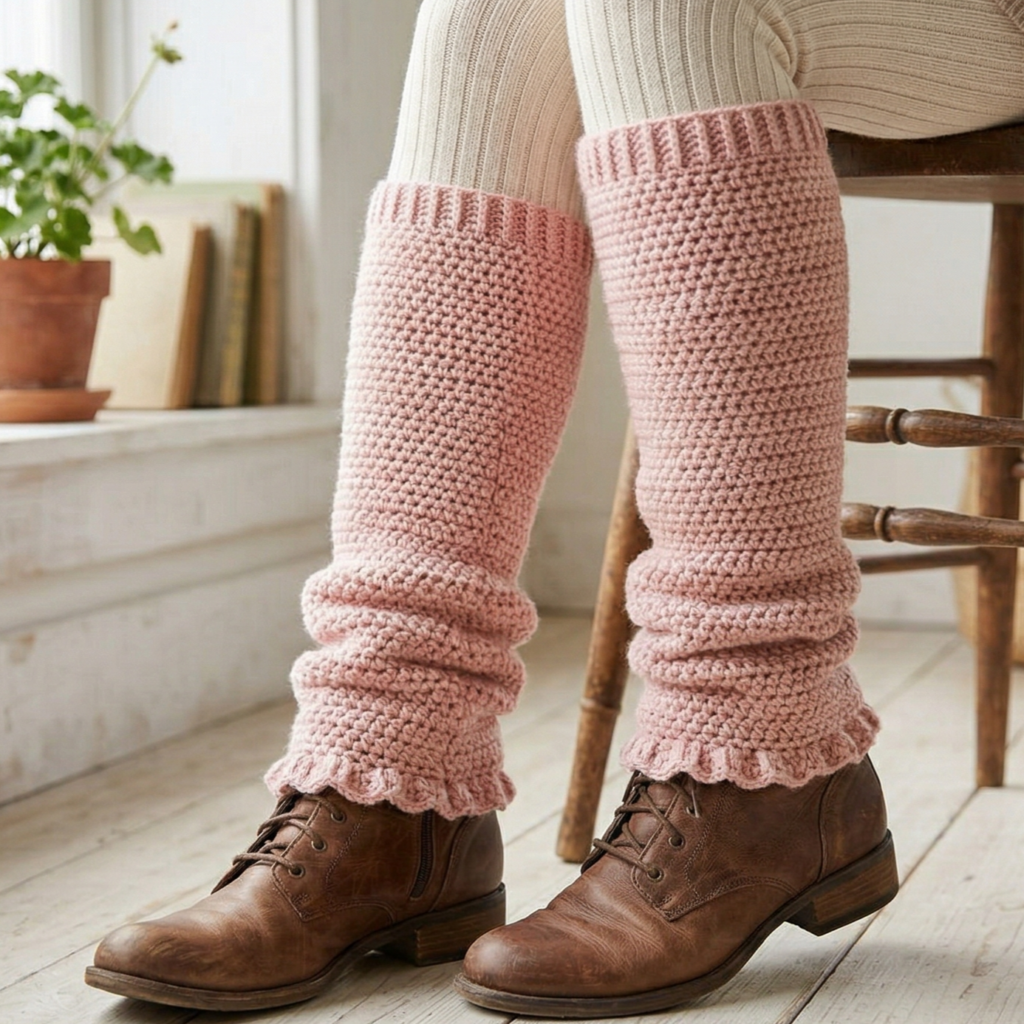
Flared ruffles leg warmers feel playful, feminine, and full of movement. The flared shape gives them a little drama, while the ruffled finish adds softness and texture. These are especially lovely if you want a pair that feels stylish with boots, skirts, or layered winter outfits.
Step-by-step guide
Step 1: Measure the calf and ankle
Before starting, measure around the ankle, calf, and the length from ankle to just below the knee. This will help you decide how fitted the leg warmers should be and how much flare you want at the top or bottom. A good fit matters because the leg warmers need to stay in place while still feeling comfortable.
A careful fit creates a better finished shape.
Step 2: Create the base band
Begin with a ribbed or stretchy foundation band that will sit around the calf or ankle depending on your design. This band should feel secure but not too tight. It is the part that helps the leg warmers stay up while worn.
The base band gives the leg warmer structure.
Step 3: Build the main leg section
Work upward from the band using a simple stitch pattern or a lightly textured repeat. Keep the rows even so the leg warmer forms a smooth tube around the leg. If you want the flare to start gradually, make the body slightly wider as you move upward.
The main section sets the shape.
Step 4: Add the flare
To create the flared look, increase stitches evenly as you approach the top or bottom section of the leg warmer. This allows the fabric to open out gently. The flare should feel soft and stylish rather than overly dramatic unless you want a bold silhouette.
The flare gives the leg warmers their fashion-forward feel.
Step 5: Work the ruffle edge
Once the flare is the right width, add a ruffle border using shells, fan stitches, or a row with extra increases. The edge should look soft and flowing. Keep the ruffle even all the way around so it frames the opening neatly.
The ruffle is the signature decorative detail.
Step 6: Make the second leg warmer
Crochet the second piece to match the first. Compare them as you go so the flare and ruffle size stay consistent. Matching the pair carefully helps the finished set look polished and intentional.
Step 7: Finish and block lightly
Weave in all ends and lightly block the leg warmers if needed. Blocking helps the flare open up and the ruffle sit more neatly. This step is especially helpful if the fabric feels a little curled.
Helpful Tips
Flared ruffle leg warmers look especially lovely in soft pinks, creams, lilacs, or warm neutrals. If you want a more dramatic style, use a bold color and let the ruffles stand out. They pair beautifully with skirts, tights, or boots for a cozy layered outfit.
2. Crochet Scalloped Edge Lacy Leg Warmers Pattern
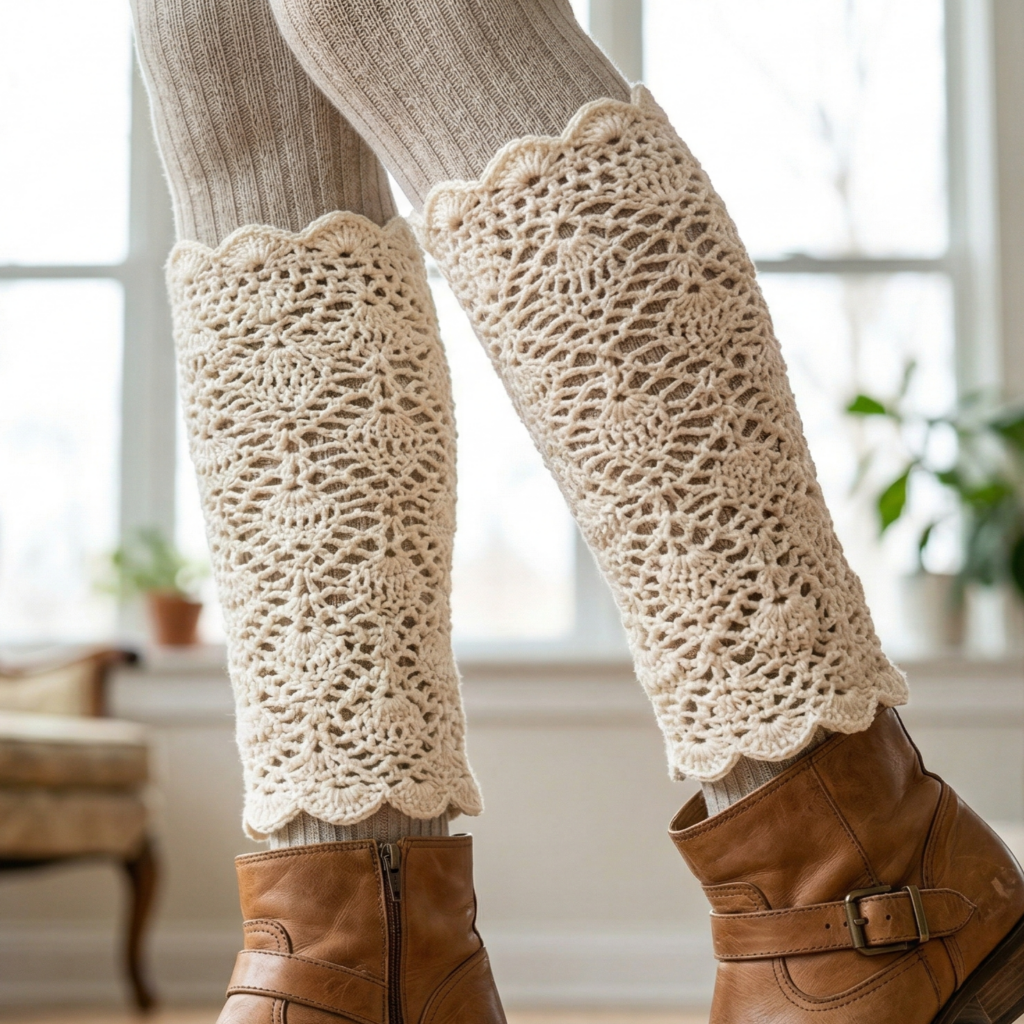
Scalloped edge lacy leg warmers feel elegant, delicate, and airy. They are a beautiful choice if you want a more feminine accessory that still provides warmth and style. The lace texture keeps them light, while the scalloped edge adds a graceful finish.
Step-by-step guide
Step 1: Choose a light, soft yarn
Select a yarn that shows lace stitches clearly while remaining comfortable against the skin. Cotton blends or soft acrylics work well if you want a wearable piece that feels delicate but still practical.
The yarn should support both drape and shape.
Step 2: Start with a fitted base
Make a foundation that fits comfortably around the calf or ankle. Since lace stretches more than dense stitches, the base should be snug enough to stay in place. A ribbed section at the top or bottom can help keep the leg warmers secure.
A snug base helps lace stay wearable.
Step 3: Work the lace body
Begin crocheting the lace pattern using shells, chain spaces, or open stitch repeats. Keep the pattern even so the design looks graceful and balanced. The lace should feel decorative without becoming too loose.
The lace body is the main visual feature.
Step 4: Keep the edges straight
Because openwork can sometimes stretch unevenly, watch the edges as you go. The leg warmers should keep a smooth vertical line. If the lace starts to lean or become too loose, adjust your tension or reduce the size of the hook next time.
Step 5: Add the scalloped edge
Once the body is complete, crochet a scalloped border at the opening. The scallops can be small and subtle or larger and more decorative depending on the style you want. Keep them evenly spaced so the edge looks polished.
The scallops make the design feel soft and pretty.
Step 6: Make the second leg warmer
Repeat the same pattern for the second piece. Try to match the lace repeat and scallop size as closely as possible. This makes the pair look symmetrical and well-finished.
Step 7: Block the leg warmers
Blocking is especially useful for lace designs because it helps the pattern open up and the scalloped edge sit beautifully. Shape the pieces gently and let them dry flat.
Helpful Tips
Scalloped lace leg warmers look lovely in cream, ivory, blush, or dusty blue. They are especially beautiful as part of layered autumn or winter outfits because they add detail without feeling heavy. If you want a more romantic look, choose soft pastel yarn and keep the lace open but neat.
3. Crochet Lace-up Ruffled Leg Warmers Pattern

Lace-up ruffled leg warmers are bold, charming, and full of personality. The lace-up detail gives them an adjustable fit and a fun decorative accent, while the ruffles add softness and movement. These are perfect if you want leg warmers that feel unique and a little theatrical in the best way.
Step-by-step guide
Step 1: Measure the leg carefully
Take measurements around the calf, ankle, and desired length. Since lace-up leg warmers are designed to adjust, you still need a good base size so they fit comfortably. Decide whether the lace-up section will sit at the side, front, or back.
Fit planning is especially important for lace-up designs.
Step 2: Crochet the main tube
Begin with a fitted tube or panel that will wrap around the leg. The body should be snug enough to stay in place but leave enough space for the lace-up opening. Keep the stitches even and comfortable against the skin.
The body is the base structure.
Step 3: Create the lace-up opening
Leave a row or section open where the lacing will go. You can create chain spaces or small eyelet holes along the opening. Make sure the holes are evenly spaced so the lace can thread through smoothly.
The opening is what makes the design adjustable.
Step 4: Add the ruffle edge
Crochet a ruffled border around the top or bottom opening. The ruffle adds softness and creates a contrast with the more structured lace-up detail. Keep the ruffles full but balanced so they do not become too bulky.
The ruffles soften the look.
Step 5: Thread the lace tie
Use a ribbon, crocheted cord, or yarn tie to lace up the opening. Thread it evenly through the holes and tighten it just enough for the fit you want. The lace-up detail should feel secure but easy to loosen if needed.
The lace tie is both decorative and functional.
Step 6: Make the second leg warmer
Repeat the same shaping and detail placement on the other leg warmer. Matching the lace-up opening and ruffle size is important so the pair looks balanced when worn.
Step 7: Finish the edges and secure ties
Weave in all yarn ends and make sure the tie is secured properly. If the lace feels too long or too short, adjust the length so it sits comfortably. A tidy finish will help the piece look polished and wearable.
Helpful Tips
Lace-up ruffled leg warmers look especially good in soft pink, cream, burgundy, or black depending on the style you want. A contrast ribbon can make the lace-up section feel more visible and fun. They are a wonderful choice for outfits that need a little extra personality.
4. Crochet Pink Bobble Stitch Tie Up Leg Warmers Pattern
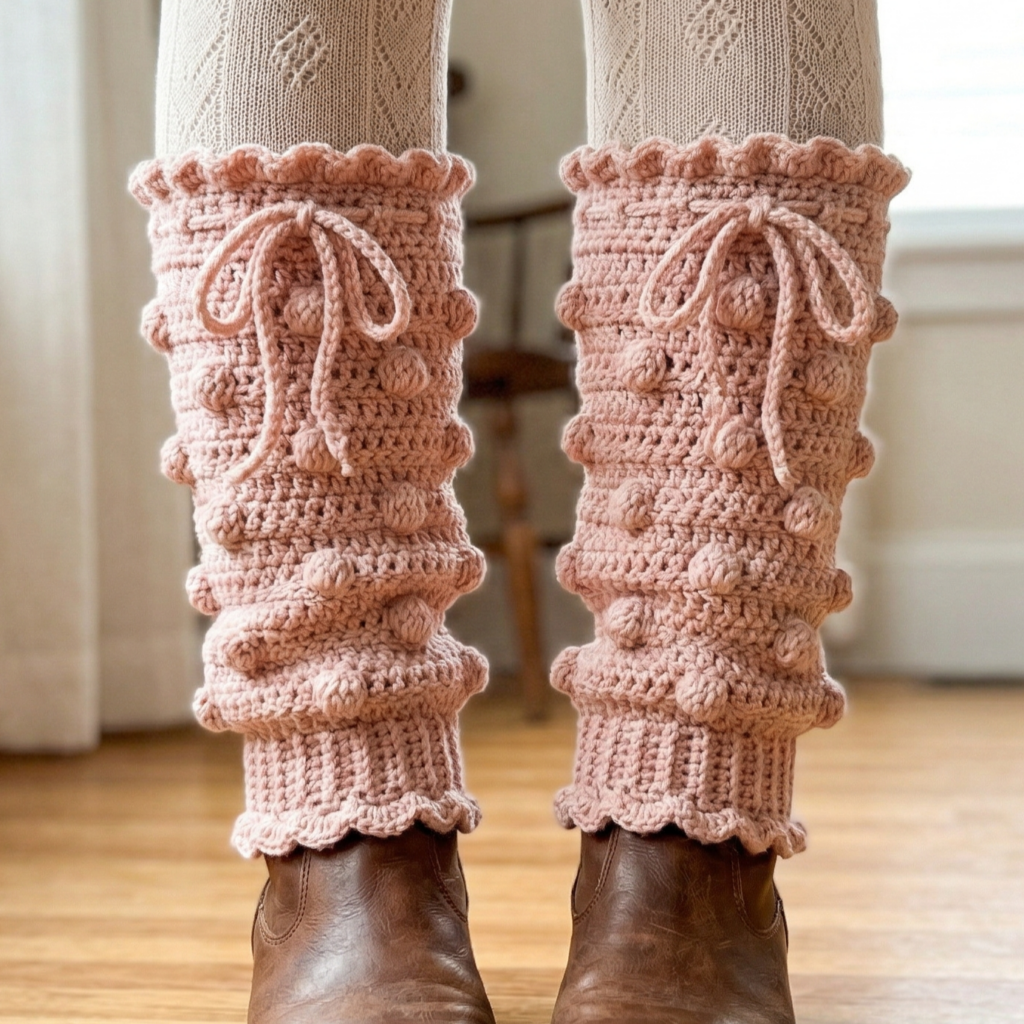
Pink bobble stitch tie up leg warmers are playful, cozy, and full of texture. The bobble stitch creates a bumpy surface that feels cheerful and handmade, while the tie-up detail adds adjustability and charm. This style is perfect if you want something sweet, stylish, and easy to wear with layered outfits.
Step-by-step guide
Step 1: Choose the pink shade
Pick a pink tone that suits the style you want. Soft blush gives a gentle romantic feel, while brighter pink feels fun and bold. Since the bobble texture is already eye-catching, the color can be subtle or vivid depending on your preference.
The color choice shapes the whole mood of the leg warmers.
Step 2: Measure for fit
Measure the calf, ankle, and desired length. Because this design includes tie-up sections, it can be a little more flexible than a fitted pair, but the main body should still fit comfortably. Plan the placement of the ties before you begin.
A clear fit plan makes the design easier to wear.
Step 3: Crochet the base section
Start with a ribbed or simple band that will hold the leg warmer in place. Then continue upward into the main body. The base should feel secure so the bobble texture has a stable foundation.
The base gives the leg warmer structure.
Step 4: Work the bobble stitch rows
Add the bobble stitch pattern across the body of the leg warmer. Keep the bobbles evenly spaced so the texture looks balanced and not too crowded. The bobbles should feel playful and soft, creating a fun surface with lots of dimension.
The bobbles are the star of the design.
Step 5: Shape the tie-up opening
Near the top or side of the leg warmer, create a section where the tie will go. This may be a row of eyelets or chain spaces. Make sure the opening is even so the tie can slide through smoothly.
The tie-up feature adds adjustability.
Step 6: Add the ties
Crochet simple cords or use ribbon ties to thread through the opening. Tie them loosely at first so you can adjust the fit. The ties should be long enough to fasten comfortably and should match the softness of the rest of the design.
The tie adds both charm and function.
Step 7: Finish the pair
Make the second leg warmer to match, then weave in all ends securely. Check the bobble placement and tie length on both sides so the pair feels symmetrical. A neat finish will make the set look more polished.
Helpful Tips
Pink bobble stitch leg warmers are especially cute with boots, skirts, or cozy tights. If you want a softer look, choose blush and cream. If you want more of a statement piece, use a brighter pink and let the bobbles stand out. This pattern is great for adding texture without complicated shaping.
5. Crochet Layer Cake Inspired Leg Warmers Pattern

Layer cake inspired leg warmers feel colorful, playful, and full of personality. They often use stacked color sections, gentle layers, or tiered stitch patterns that give the piece a sweet, decorative look. This style is perfect if you want leg warmers that feel more whimsical and fashion-forward.
Step-by-step guide
Step 1: Plan the layered color palette
Choose colors that work well together in a layered sequence. You can use soft pastels, warm neutrals, or bright contrasting shades depending on the look you want. A thoughtful palette makes the layered effect feel intentional and stylish.
The colors give the design its layered personality.
Step 2: Measure the leg
Take measurements around the calf and ankle and decide how long you want the leg warmers to be. Since the layered effect will add visual depth, it helps to know exactly how much space you have to work with. A good fit will keep the layers looking balanced.
Step 3: Crochet the base band
Start with a fitted band that will hold the leg warmers in place. A ribbed or slightly stretchy band works best because it helps the piece stay secure while the rest of the layers flow outward. This base should feel comfortable and snug.
The band keeps the leg warmer anchored.
Step 4: Build the first layer
Crochet the first section of the leg warmer in your chosen stitch or color. This layer should feel like the foundation of the design. Keep it even and smooth so the layers above it can build naturally.
The first layer sets the structure.
Step 5: Add the next layer or color band
Continue by adding a second color or textured section above the first. This could be a row of shells, a decorative stitch repeat, or a slightly flared band. The idea is to create the feeling of stacked layers, similar to a cake with different tiers.
The layers are what make the design playful.
Step 6: Repeat for a tiered look
If your pattern calls for more than two layers, continue adding bands in the same balanced way. Keep the transitions neat so the leg warmer feels cohesive rather than busy. Each layer should complement the one below it.
Layering gives the design its whimsical style.
Step 7: Finish the top edge
Once the leg warmer reaches the desired height, finish with a clean top border. A simple ribbed edge or decorative trim can help frame the layers and keep the top from stretching. Make sure the finished edge is comfortable against the skin.
Step 8: Make the matching pair
Crochet the second leg warmer to match the first. Keep the color order and layer spacing consistent so the pair looks intentional and stylish when worn together.
Helpful Tips
Layer cake inspired leg warmers look especially fun in pastel combinations or warm autumn tones. If you want a softer look, use cream, blush, and lavender. If you want a more playful look, use multiple bright colors stacked in neat bands. This pattern is perfect if you enjoy creative colorwork.
Conclusion
Crochet leg warmers are a wonderful way to combine warmth and style in one handmade accessory. They are practical enough to wear on chilly days, but creative enough to become a statement piece in a layered outfit. Because they are smaller than full garments, they are also a satisfying project for crocheters who want something manageable and fun to complete.
These five leg warmer patterns each bring something different to the table. The flared ruffles leg warmers feel playful and feminine. The scalloped edge lacy leg warmers are delicate and elegant. The lace-up ruffled leg warmers add adjustable charm. The pink bobble stitch tie-up leg warmers are textured and sweet. The layer cake inspired leg warmers are colorful and whimsical. Together, they show how much variety you can create with a simple pair of leg warmers.
A handmade pair of leg warmers can do more than keep your legs warm. They can brighten an outfit, add texture to layered styling, and give you a cozy accessory that feels truly personal. With the right yarn, a comfortable fit, and a neat finish, these leg warmer patterns can become favorite pieces in any handmade wardrobe.