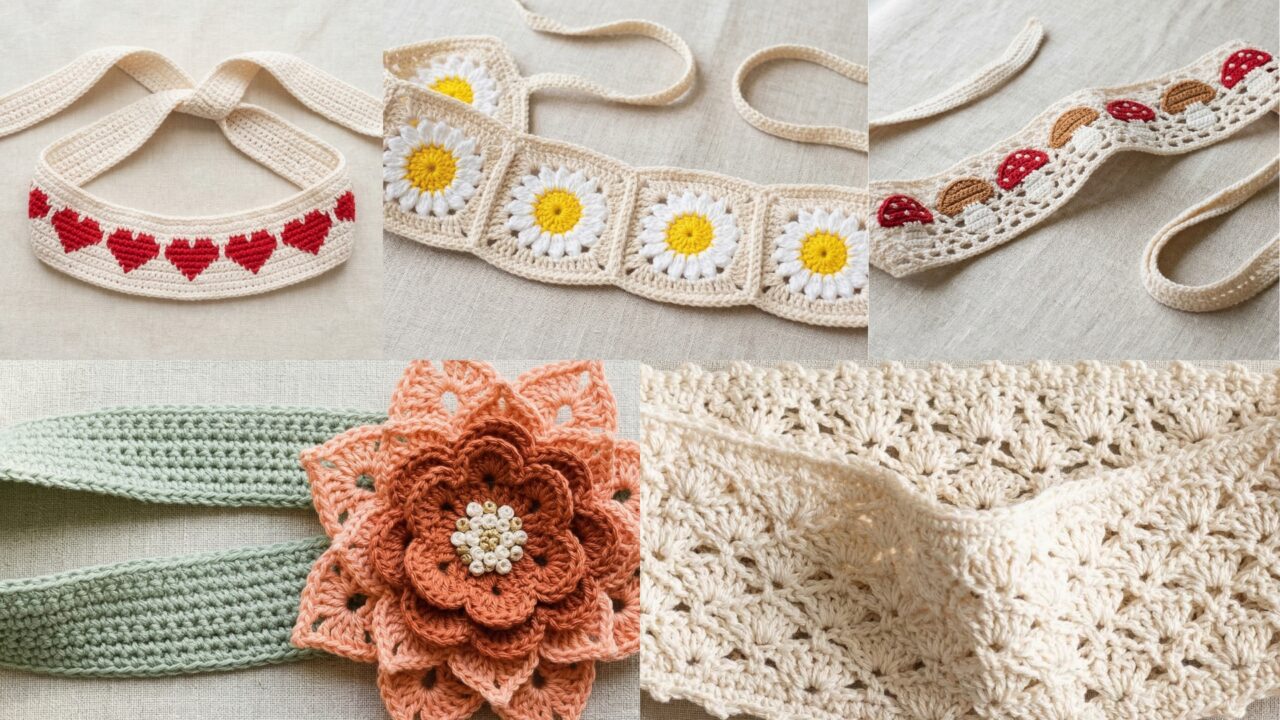
A handmade headband is one of the quickest accessories you can whip up that instantly upgrades an outfit. These five patterns balance style and comfort — from tapestry hearts for Valentine’s vibes to lacy giant flowers for statement looks. Each pattern below includes: skill level, finished size and how to change it, exact materials, gauge, stitch abbreviations, a very detailed step-by-step pattern (foundation, body repeat, finishing), construction/closure options, blocking/finishing tips, and variations so you — and your readers — can personalize every headband for everyday wear or gifting.
Quick universal notes (applies to all patterns)
- Sizing: Adult medium head circumference ≈ 21–22 in (53–56 cm). These patterns give an adult medium fit by default. To size down/up, measure head and subtract 0.5–1 in (1.3–2.5 cm) for a slightly snug fit; reduce/increase starting chains accordingly (I’ll note where to change counts).
- Yarn choice matters: Soft cotton/cotton-blend or acrylic/cotton blends are great for everyday headbands — they’re washable and comfortable. For winter headbands choose worsted or bulky merino/acrylic for warmth.
- Hook choice: Use a hook that creates a firm fabric for headbands (usually 0.5 mm smaller than yarn label).
- Seams & closures: Invisible mattress stitch is best for a flat seam; sc-join creates a subtle ridge. For adjustable fit use a button + loop or a small elastic insert.
- Abbreviations (US terms): ch = chain; sc = single crochet; hdc = half double crochet; dc = double crochet; tr = treble; sl st = slip stitch; sk = skip; rep = repeat; st(s) = stitch(es); BLO / FLO = back/front loop only.
1. Crochet Tapestry Hearts Valentine Headband Pattern
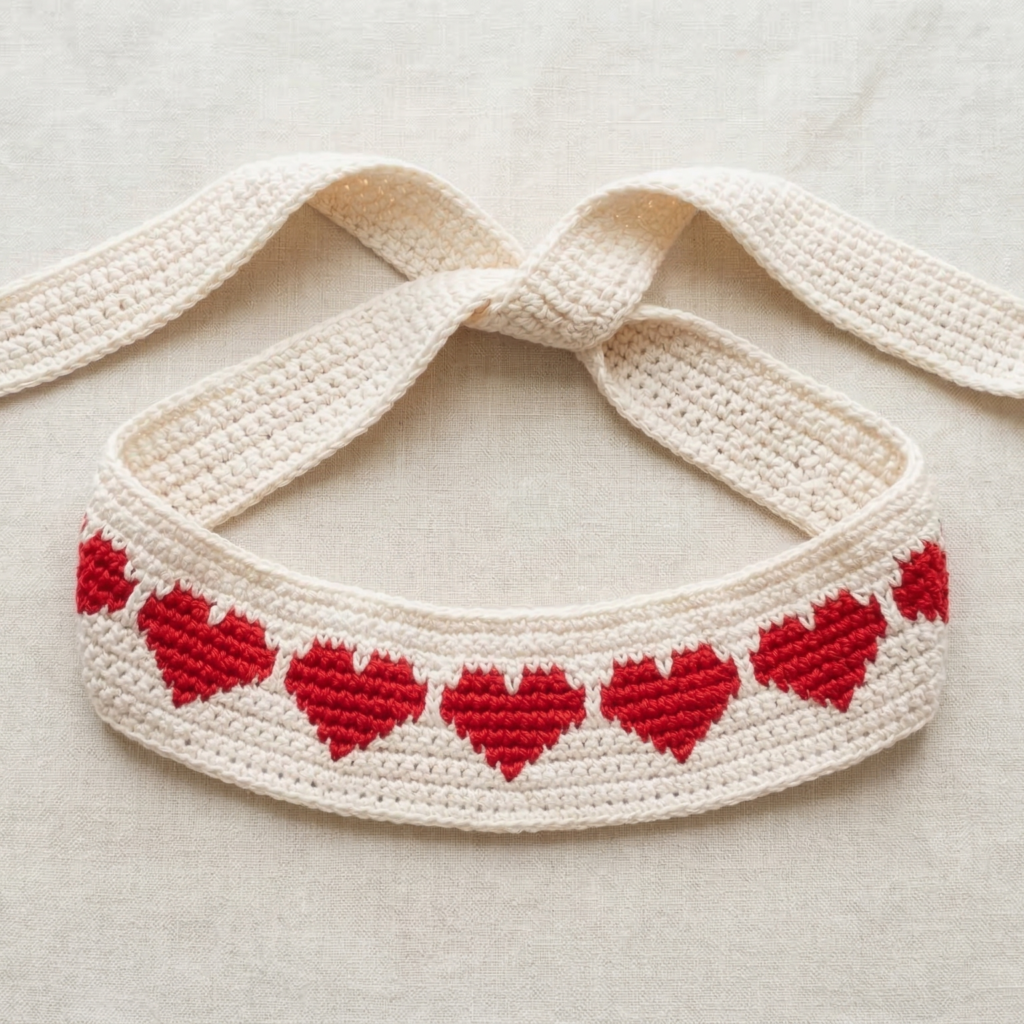
Skill level: Intermediate (tapestry/colorwork)
Finished size: adult medium ≈ 21–22 in circumference; band width ≈ 2–2.5 in.
Materials
- Fingering / sport weight cotton in two colors (Color A = background, Color B = hearts) — ~50–75 yds total.
- Hook: 3.0–3.5 mm (use tighter tension for tapestry)
- Tapestry needle, scissors, small button (optional), measuring tape.
Gauge (informal)
- ~20 sc × 24 rows = 4″ in tapestry sc. Make a small sample to confirm width.
Technique & notes
Tapestry crochet carries the unused color across the WS; keep floats short (catch every 3–4 sts). The headband is worked flat in sc with the heart chart embedded, then joined at the ends. I give a 3-repeat heart chart mapping you can scale.
Chart & stitch counts (text version)
- Use a multiple of 30 stitches plus 1 turning chain for a band ≈ 21–22 in, depending on gauge. (If you test gauge and the 30-st repeat gives different width, adapt repeats.) Example foundation: ch 91 (90 + 1).
Step-by-step
1) Foundation
- Ch 91 (or adjusted count). Turn.
2) Row 1 (setup)
- Sc in 2nd ch from hook and in each ch across (90 sc). Turn.
3) Tapestry heart body (colorwork rows)
- Work tapestry sc following the heart chart row-by-row. Each sc is worked with the yarn color that the chart indicates; carry the unused color across the WS and trap floats by crocheting over them every 3–4 sts. Keep your tension even so the band doesn’t pucker.
- Work about 18–20 rows of tapestry for a band width ≈ 2–2.5 in. End on WS.
Tip: Keep the heart motifs centered by marking the center stitch before starting the chart. Work symmetrical repeats outward.
4) Neaten edges
- With Color A, work 1 round sc around the long sides: join yarn at one short end and sc evenly along the top long edge, make 3 sc in corner, sc along bottom long edge, 3 sc in other corner; join and fasten off. This creates a tidy frame.
5) Join ends
Options:
- Invisible mattress stitch (flat seam): Fold band so RS faces out and mattress stitch WS edges together for a nearly invisible seam.
- Button loop: On one short end, make a button loop: ch6, sl st to base, fasten off leaving tail to sew loop to underside. Sew a small decorative button to opposite end (on RS) so the band can be opened.
6) Finishing
Weave in all tails. Lightly block (steam or wet block depending on fiber) to even rows and help motif sit flat.
Variations & style tips
- Make a double-width band by working more rows (36–40) and fold/ twist into a turban knot before seaming for a chic knotted front.
- Use three colors (background + two heart colors for ombré hearts).
- For kids, embroider smaller hearts across a narrower band.
2. Crochet Mushroom Motif Lacy Headband Pattern

Skill level: Intermediate (lace + appliqué motifs)
Finished size: medium ≈ 21 in circumference; band width ≈ 2.5–3 in plus small mushroom appliqués.
Materials
- DK cotton for band, lighter DK or fingering for mushroom caps (contrasting colors)
- Hook: 3.5–4.0 mm for band; 2.75–3.25 mm for fine appliqués
- Tapestry needle, small amount of polyfill for mushroom cap (optional), measuring tape.
Gauge
- ~14 dc × 8 rows = 4″ for lacy dc/chain patterns (adjust).
Pattern concept
Make a lacy openwork band that’s lightweight and airy, then attach small 3-D mushroom appliqués along one side as decorative accents.
Step-by-step — lacy band
1) Foundation
- Chain a multiple of 8 + 2 to fit head circumference. Example chain 66 for adult medium. Turn.
2) Row 1 (base)
- Dc in 4th ch from hook (counts as dc), ch2, sk2, dc in next 3 sts, ch2, sk2, dc — repeat across; end with dc in last st. Turn.
3) Row 2 (lace repeat)
- Ch3 (counts as dc), dc in next dc, ch2, dc in next dc, sk ch-sp and next dc, dc in next dc — this creates an airy mesh. Turn.
4) Repeat & build height
- Repeat Row 2 until headband is about 2.5–3 in tall (approx 6–8 rows, depending on gauge).
5) Edge finishing
- Work a neat round of sc around the entire rectangle to firm edges (1 sc in each row end and along short sides). Fasten off but leave yarn for seaming.
Mushroom appliqué (make 3–5)
Cap
- MR, ch1, 6 sc in ring. (6)
- inc ×6 → 12
- (sc, inc) ×6 → 18 — switch to smaller hook for finer cap if desired.
- sc around 1 round; then work a decorative scallop round: sl st, ch3, sl st in same st spaced evenly — fasten off leaving tail. Lightly stuff cap center with tiny bit of polyfill if you want puffiness.
Stem
- MR, 5 sc, sc around 4 rounds to make a short tube; fasten off leaving tail.
Assembly
- Sew stem to underside of cap; attach mushrooms to band by stitching the underside of stem to the band at regular intervals (secure strongly). For a movable look, only sew base of cap leaving sides free.
Join ends & finishing
- Join band ends with mattress stitch; for comfort, add a short inner strip of soft elastic when joining so it stays snug on hair.
- Optionally add a felt backing behind each mushroom to close any holes and keep the underside tidy.
Variations & tips
- Make mushrooms seasonal: autumn browns and cream, or pastel for spring.
- Add tiny embroidered spots on caps for contrast (white French knots).
- For a non-3D look, flat mosaic mushrooms can be tapestry-crocheted into the band instead of appliqués.
3. Crochet Daisy Granny Square Headband Pattern
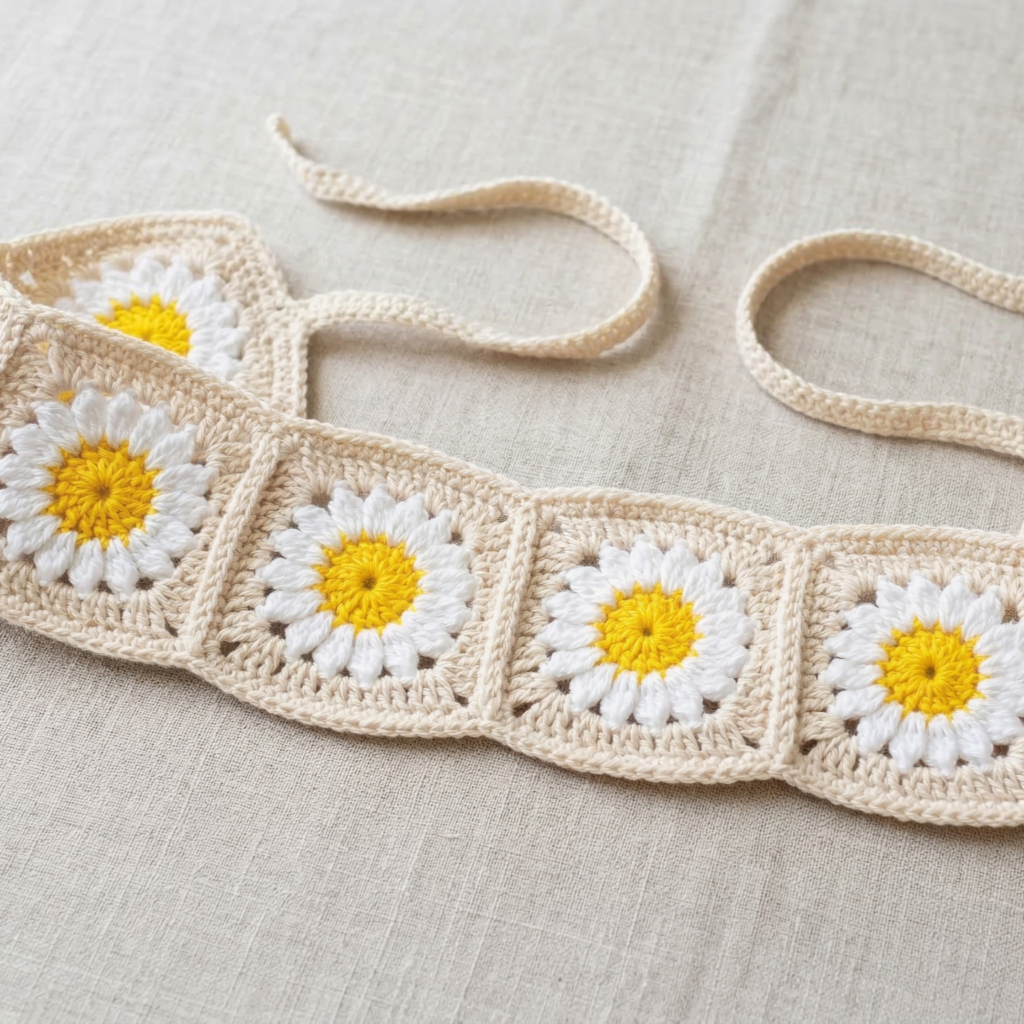
Skill level: Beginner–Intermediate (granny and join techniques)
Finished size: Each daisy granny ≈ 2.5–3 in square; use 6–8 squares to make a 21–22 in band. Band width equals granny size (~2.5–3 in).
Materials
- Sport/fingering cotton in 3 colors: center, petals, background — tiny amounts of each
- Hook: 3.0–3.5 mm
- Tapestry needle, scissors.
Why this works
Granny squares are forgiving, quick, and look great repeated. Using daisy centers in a row makes a pretty floral strip that can be edged or seamed.
Daisy granny (one square) — step-by-step
Round 1 (center)
- MR, ch1, 8 sc in MR; pull tight. Join. (8)
Round 2 (petal loops)
- ch5, sl st into next sc — repeat 8 times to make 8 ch-loops. Join.
Round 3 (petals)
- Into each ch5 loop work (sc, hdc, dc, tr, dc, hdc, sc) — a big petal. Join. Change to background color.
Round 4 (classic granny expansion)
- Sl st to a corner ch-space. (3 dc, ch2, 3 dc) in corner ch-2 space, ch1, 3 dc in next ch-1 side space — repeat for all four sides. (This frames petals as a square.) Join. Work one more round of 3-dc clusters in each side space until square measures ≈ 2.5–3 in. Fasten off.
Make multiples & join
- Make enough daisy grannies to reach head circumference (measure as you go). For adult medium, 7–8 small squares usually fit (7 × 2.75 ≈ 19.25 in + seam allowances; add more to reach 21–22 in).
- Join squares using whipstitch or sc-join across long sides to make a continuous strip. For a flatter join, mattress stitch works well.
Edge & finishes
- Add 1 round sc all around the joined strip for a neat border.
- For closure, add a small elastic segment at the join or sew a button + loop. If you’d like a removable headband, attach a short ribbon tie instead of seaming.
Variations & style tips
- Make every-other-square petal color different for ombré daisies.
- For a boho touch, add short tassels at seam points or a crocheted leaf accent.
4. Crochet Giant Flower Lacy Headband Pattern

Skill level: Intermediate (large motif + joining; shaping lacy petals)
Finished size: headband base width ≈ 2 in; large flower diameter ≈ 4–6 in (statement piece)
Materials
- Two yarn weights: DK for base band; lighter fingering or same DK for giant flower depending on look.
- Hook: 3.5–4.5 mm (band) and 2.75–3.5 mm (flower if you want delicate petals)
- Tapestry needle, small snap or hair elastic for securement.
Concept
A relatively simple narrow band with a dramatic layered flower attached to one side — perfect for special occasions and gifts.
Narrow base band (worked flat)
- Chain a multiple of 6 + 1 to reach desired width; example ch 64 for adult medium width about 2 in at certain gauge.
- Row 1: sc across. Turn.
- Rows 2–6: ch1, sc across (6 rows total = ~2 in). Fasten off leaving yarn for seam.
Giant layered flower (one large motif)
Petal layer 1 (big petals)
- MR, ch3, 12 dc in MR; join. (12)
- ch4, sl st in next dc around to make loops. Join.
- Into each ch4 loop: (sc, hdc, dc, tr, dc, hdc, sc) — large pointed petals. Join.
Petal layer 2 (smaller inner petals)
- With contrasting color, make a smaller ring: MR, ch1, 8 sc; join. Into each st: ch3, 5 dc in loop or make small scalloped petals (sc, hdc, dc, hdc, sc). Join and attach.
Center & assembly
- Sew inner layer centered atop outer layer. Add a decorative center: a crocheted bobble, a cluster of French knot embroidered yarn, or a small button (avoid small parts for toddlers).
- Slightly block petals to shape; you can stiffen lightly with diluted fabric glue if you want firm petals.
Attach flower to band
- Position flower on the band offset to one side (so it sits above ear or slightly off-center). Stitch through both layers thoroughly with strong yarn. Add a small felt circle to cover the back and secure stitches; this gives a smooth finish against hair.
Closure options
- For adjustable wear, sew a small snap on the underside of the band ends so the band can open for larger heads and then snap closed.
- Or seam the band into a loop with an invisible mattress stitch for a clean finish.
Styling tips
- Make two smaller flowers for a twin-flower look.
- For wedding or party headbands, use metallic thread for center or pearl bead (sewn on) for elegant shimmer.
5. Crochet The Open Shell Stitch Headband Pattern
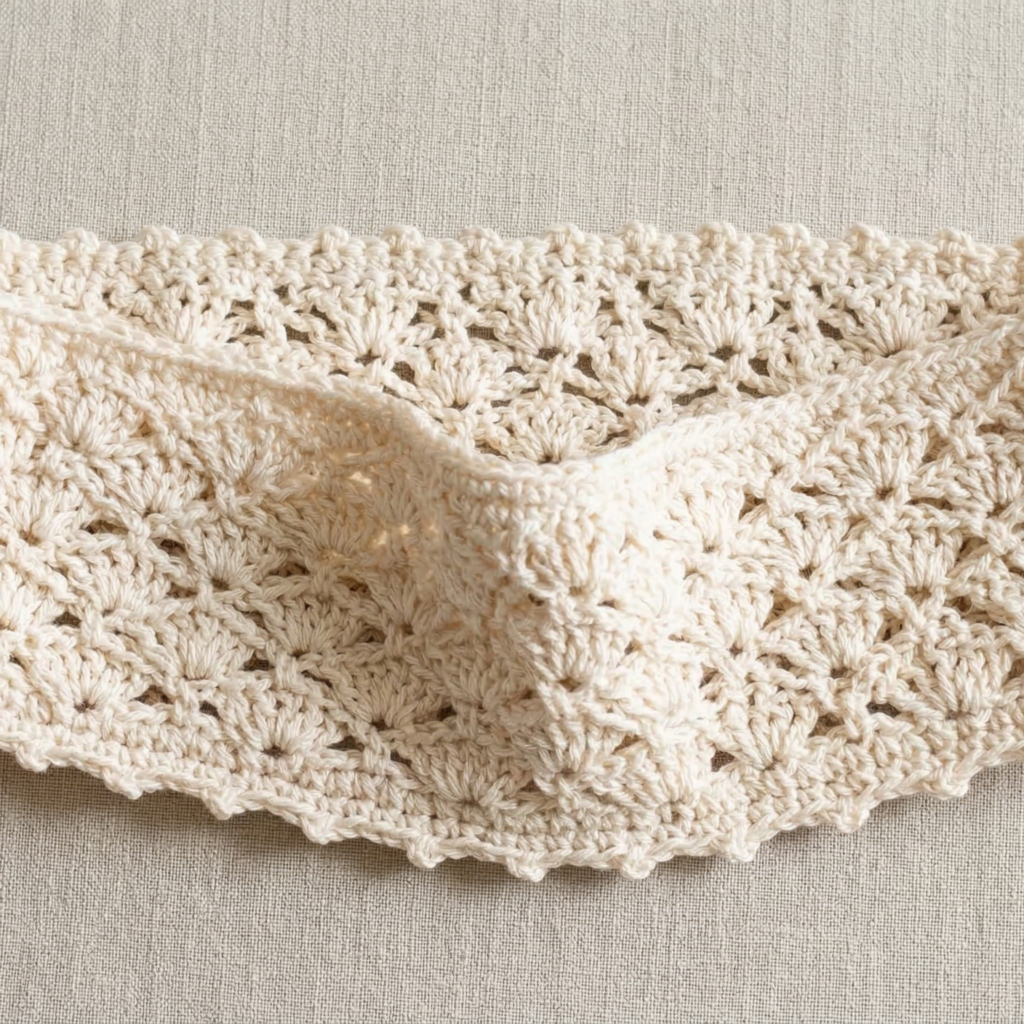
Skill level: Beginner (repeating shell stitch, airy but structured)
Finished size: band width ≈ 2–3 in depending on rows; circumference adult medium ~21–22 in.
Materials
- DK cotton or cotton blend (soft yet structured) — ~60–80 yds.
- Hook: 3.5–4.0 mm.
- Tapestry needle, optional elastic strip for hidden ease.
Pattern concept
Shell stitch gives a lacy scallop texture that’s comfortable and breathable — great for summer looks. The pattern here produces a soft openwork band that still lies flat when blocked.
Stitch key — shell = (5 dc in same st) or smaller 3 dc shell for subtler look
Step-by-step
1) Foundation
- Chain a multiple of 6 + 1. Example ch 79 (78 + 1) for a medium circumference—adjust by gauge.
2) Row 1 (base)
- Sc in 2nd ch from hook and in each ch across. (78 sc). Turn.
3) Row 2 (shell row)
- skip next 2 sc, (5 dc) in next sc (shell), skip next 2 sc, sc in next sc — repeat across, ending with sc. Turn.
4) Row 3 (anchor row)
- Ch2, sc across shell peaks: work sc into the center dc of each shell and sc in each sc between shells. This anchors shells evenly. Turn.
5) Repeat
- Repeat Rows 2–3 until band height ≈ 2–3 in (usually 3–6 shell rows). End on an anchor row.
6) Edge finishing
- Work 1 round of sc along long edges and 3 sc in each short corner to avoid puckering. Optionally add a picot edge for a fine scalloped finish: sc 3, picot (ch3 sl st in first ch) across ends.
7) Join & closure
- Fold and seam ends with mattress stitch. For stretch, sew a short piece of 1″ elastic into the seam across the inside about 1/2″ (1 cm) back from edge — this adds discreet grip so the headband stays in place. Alternatively, use a button loop instead of a permanent seam for adjustable opening.
Variations & care
- Use a 3-dc shell instead of 5-dc for finer lace.
- Add a contrast color border for a modern finish. Machine wash cold if yarn allows; lay flat to dry to preserve shell shape.
Final finishing & practical tips for all headbands
- Non-slip lining: To keep headbands from slipping on smooth hair, stitch a thin strip of velvet ribbon or sew a 1/4″ silicone hair-grip strip to the inner band. This is invisible from the outside and very effective.
- Blocking: Lace and textured stitches look best after blocking. Pin to shape on a blocking mat and mist with water or steam (follow yarn care) and let dry fully.
- Seam methods: Invisible mattress stitch for flat seams; sc-join if you want a slightly raised ridge that adds structure.
- Buttons & elastic: Button + loop closure gives adjustability; a small elastic insert hidden in the seam improves fit for multiple head sizes.
- Care label for readers: Encourage readers to include fiber content and care instructions when gifting (e.g., hand wash cold for cotton, lay flat to dry).
- Gift packaging idea: Present a headband with a small scrunchie or matching hat as a set in a Kraft box with tissue paper.
Conclusion
These five headband patterns span playful tapestry hearts, woodland mushroom charm, floral granny prettiness, dramatic giant flowers, and breezy shell stitch lace — each designed so you can make comfortable, flattering headbands for everyday wear or gifting. They’re easy to personalize: change yarn weight for winter or summer looks, vary colors for seasonal style, add a tiny button or ribbon accent for personality, and use non-slip linings for active wear.