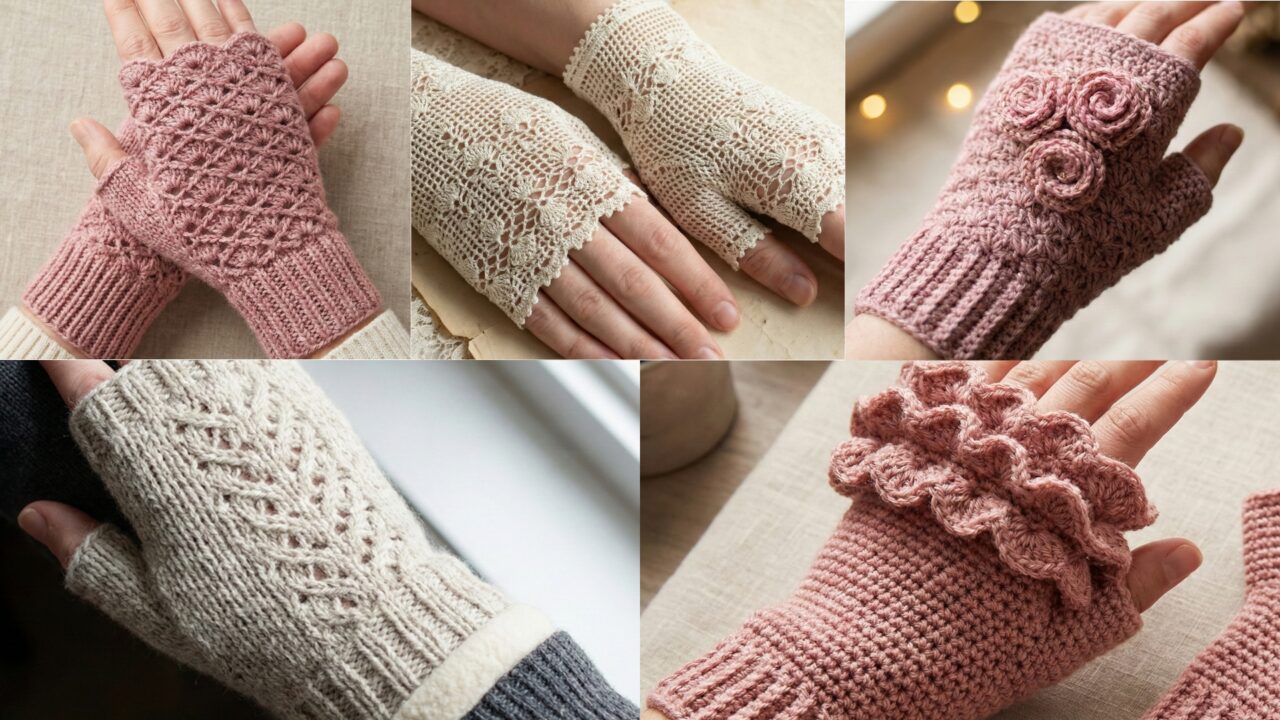
Crochet fingerless gloves are the perfect blend of function and style: they keep your hands warm while leaving fingers free for typing, crafting, or using a phone. Below you’ll find a single clear introduction followed by five very detailed, step-by-step patterns — Shell Stitch, Winter Lacy, Rose, Ruffle, and Victorian Lace — each written with materials, gauge, exact stitch-repeat notes, sample S / M / L stitch counts (with digit-by-digit arithmetic so you can scale to your own gauge), full construction (cuff → hand → thumbhole shaping → finishing), variations, and care. All patterns use US terms.
Read the sizing & gauge primer first — it’s short and lets you adapt every pattern precisely to your hands and yarn.
Sizing & gauge primer (use this for all five patterns)
- Measure two things on the wearer’s hand:
- Hand circumference (HC) around the widest part of the palm (excluding thumb). Typical adult ranges: Small ≈ 6.5–7.0″ (16.5–17.8 cm), Medium ≈ 7.5–8.0″ (19–20.3 cm), Large ≈ 8.5–9.0″ (21.6–22.9 cm).
- Hand length (HL) from wrist bone to where you want the glove to end (usually base of fingers or mid-knuckle). Typical fingerless glove length ≈ 6.0–7.5″.
- Make a 4″ × 4″ swatch in the stitch you plan to use, blocked as you will wear it. Measure stitches per inch (spi) across and rows per inch (rpi) vertically.
- Convert circumference to stitches:
- Stitches needed (S) = HC × spi.
- Show example arithmetic (digit-by-digit): Suppose HC = 7 inches and spi = 5 sts/in. Multiply: 7 × 5 = (7 × 5) = 35 stitches. If your stitch pattern needs a repeat (e.g., multiple of 4 or 6), round to the nearest repeat. Example: if repeat is 4, 35 → nearest multiple of 4 is 36 (4 × 9 = 36). Use 36 as foundation.
- Convert length to rows:
- Rows needed (R) = HL × rpi.
- Example: HL = 6.5 inches, rpi = 6 rows/in → Multiply: 6.5 × 6 = (6 × 6) + (0.5 × 6) = 36 + 3 = 39 rows.
- Thumbhole placement:
- Typical thumbhole sits at about 2–2.5″ from wrist for most adults; convert to rows with R = inches × rpi. Example 2.25″ × 6 rpi = (2 × 6) + (0.25 × 6) = 12 + 1.5 = 13.5 → round to 13 or 14 rows.
Use these conversions per pattern; I’ll show worked examples for S / M / L with a common baseline gauge for clarity.
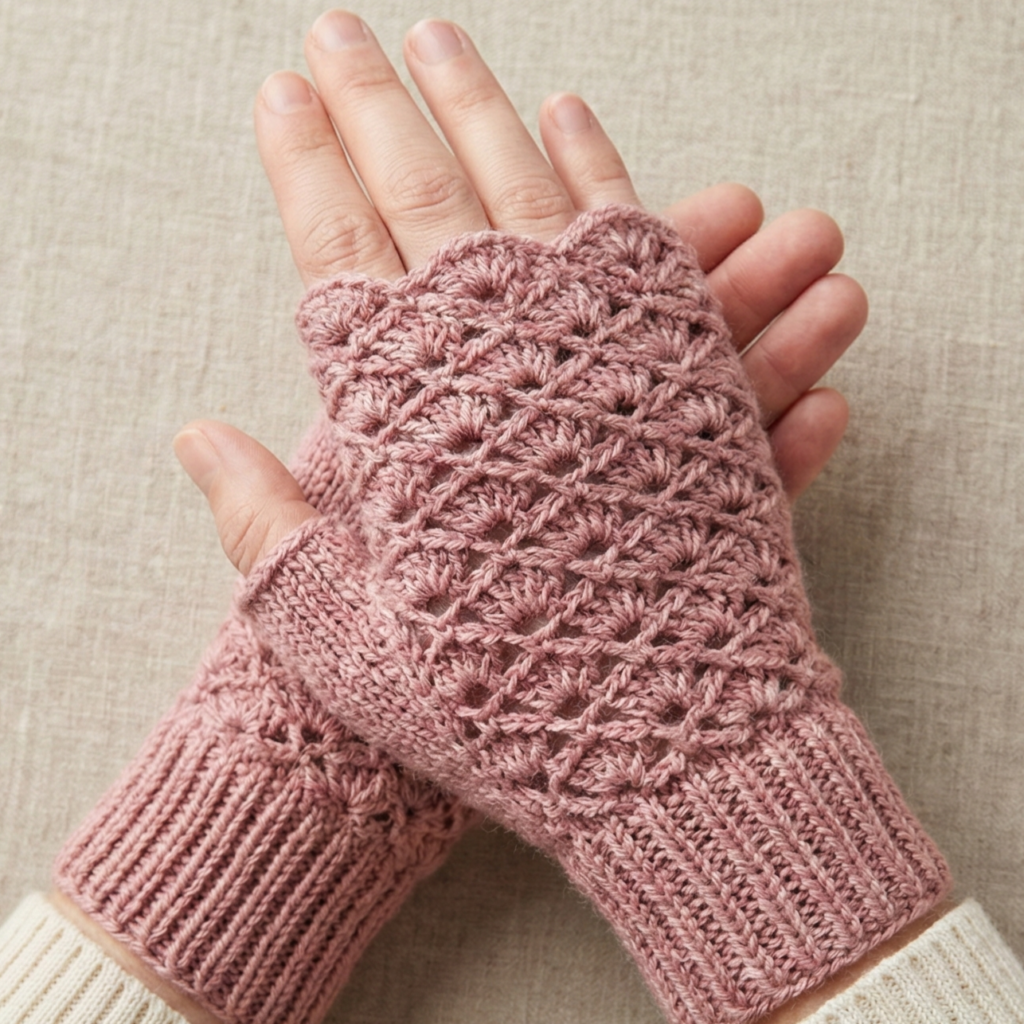
1. Crochet Shell Stitch Fingerless Gloves Pattern
Skill level: Confident beginner
Vibe: Feminine texture with scalloped shell fabric — great for layered looks.
Materials (pair, sample adult M)
- Yarn: Fingering or light sport (approx 150–200 yards per pair). For warmer gloves use DK (~120–160 yd).
- Hook: 3.25 mm (for fingering) or 4.0 mm (for DK) — use the hook that gets your gauge.
- Notions: stitch marker, tapestry needle, scissors.
Sample gauge (shell stitch, blocked): 5 sts = 1 inch when working the shell pattern (spi = 5). Rows per inch (rpi) = 6 rows/in in this stitch.
Stitch multiple: shell pattern repeat = multiple of 6 + 2 (e.g., 6a + 2).
Sizing examples (digit-by-digit) — convert HC to stitches
- Small HC = 6.5″, with spi = 5 → 6.5 × 5 = (6 × 5) + (0.5 × 5) = 30 + 2.5 = 32.5 → round to 32 or 34. Must fit multiple 6 + 2: try 32 → 32 − 2 = 30 → 30 ÷ 6 = 5 → good (6×5 + 2 = 32).
- Medium HC = 7.5″, 7.5 × 5 = (7 ×5) + (0.5 ×5) = 35 + 2.5 = 37.5 → round to 38. Check multiple: 38 − 2 = 36 → 36 ÷ 6 = 6 → good (6×6 + 2 = 38).
- Large HC = 8.5″, 8.5 × 5 = (8 ×5) + (0.5 ×5) = 40 + 2.5 = 42.5 → round to 42 or 44. Choose 44 to be comfortable. 44 − 2 = 42 → 42 ÷ 6 = 7 → good (6×7 + 2 = 44).
Convert length to rows for HL = 6.5″ and rpi = 6: 6.5 × 6 = (6 × 6) + (0.5 × 6) = 36 + 3 = 39 rows.
Step-by-step — cuff → body → thumbhole → finish
A. Cuff (ribbed, 1.5″ tall)
- Foundation: chain number of stitches from sizing above. Example M = 38 ch. Join into ring (be careful not to twist). Place marker.
- Round 1–6 (ribbing): ch1, sc in BLO around (or hdc in BLO if you prefer taller ribs). Repeat for 6 rounds to create ~1.25–1.5″ cuff. Join each round with sl st.
B. Shell stitch body (main fabric)
3. Round 7 (establish shell pattern): Switch to main shell round. Pattern (worked in rounds): [skip 1, 5 dc in next, skip 1, sc in next] — but because our repeat is multiple of 6 + 2, use this practical shell in-the-round recipe:
- Round: sc in next 2 sts, shell (5 dc) in next st, sc in next 2 sts repeat to end. Join.
- This yields a shell every 6 stitches with 2 extra starting sc for balance.
- Repeat shell round and an anchor round (sc round) if needed to stabilize. Work alternating: 1 round shell, 1 round sc around for texture. Continue until you’ve worked thumbhole start row — for our example, if thumb placement ≈ 2.25″ from cuff and rpi = 6 rows/in, compute number of rounds from cuff to thumbhole: 2.25 × 6 = (2 × 6) + (0.25 × 6) = 12 + 1.5 = 13.5 → choose 14 rounds after cuff. So work 14 rounds total (shell & sc combined count as 2 rounds per repeat — adjust so 14 rows total). Count rows precisely: you did 6 rib rounds already; then start shells and count.
C. Thumbhole shaping (simple gap method)
5. On the round where you reach thumb location (after completing the row count), create thumb opening:
- Option 1 (chain-gap): When you reach the side where thumb will be, chain 6–8 (depending on thumb width — typical thumb width ≈ 1.5–2.0″, convert to stitches: 1.75″ × 5 spi = 8.75 → use chain 8) and skip same number of stitches, then continue shell pattern. Example: chain 8, skip 8 sts, continue shell repeats. Place marker at beginning/ending of chain gap.
- Option 2 (short-row thumb slit): work back-and-forth for a couple rows to create an inset opening — more fiddly; chain-gap is simpler.
D. Continue hand length
6. After creating the chain gap and rejoining pattern, work extra rounds above thumbhole to reach desired HL (total rows = 39 in example minus rows already worked). If you already did 6 cuff rows + 14 to thumb = 20 rows, remaining rows = 39 − 20 = 19 rows; continue accordingly. Maintain shell/sc rhythm; when pattern placement meets shell repeats, adjust so shells align symmetrically above thumbhole.
E. Finish top edge
7. Work 1–2 rounds sc around top for tidy finish. Optionally add a picot or scallop: sc 2, picot (ch3, sl st to base) across every other stitch to create an ornamental border.
F. Thumbhole finishing
8. Crochet around the chained gap with sc: pick up loops along chain edge and sc into each chain and into the skipped stitch edge on the opposite side so the opening is bound. Work 1–2 rounds of sc around the thumbhole to stabilize and prevent stretching.
G. Weave in ends and block lightly. Repeat for second glove, mirror thumb placement.
Variations & notes
- Make shell clusters larger (7 dc) for chunkier shells; adjust gauge accordingly.
- Use beads in every shell center by pre-stringing beads and sliding them up as you work the shell dc.
- For warmer gloves, use DK and larger hook — recalc gauge.
Care
- Fingering/cotton: hand wash and lay flat. Acrylic: machine wash gentle.
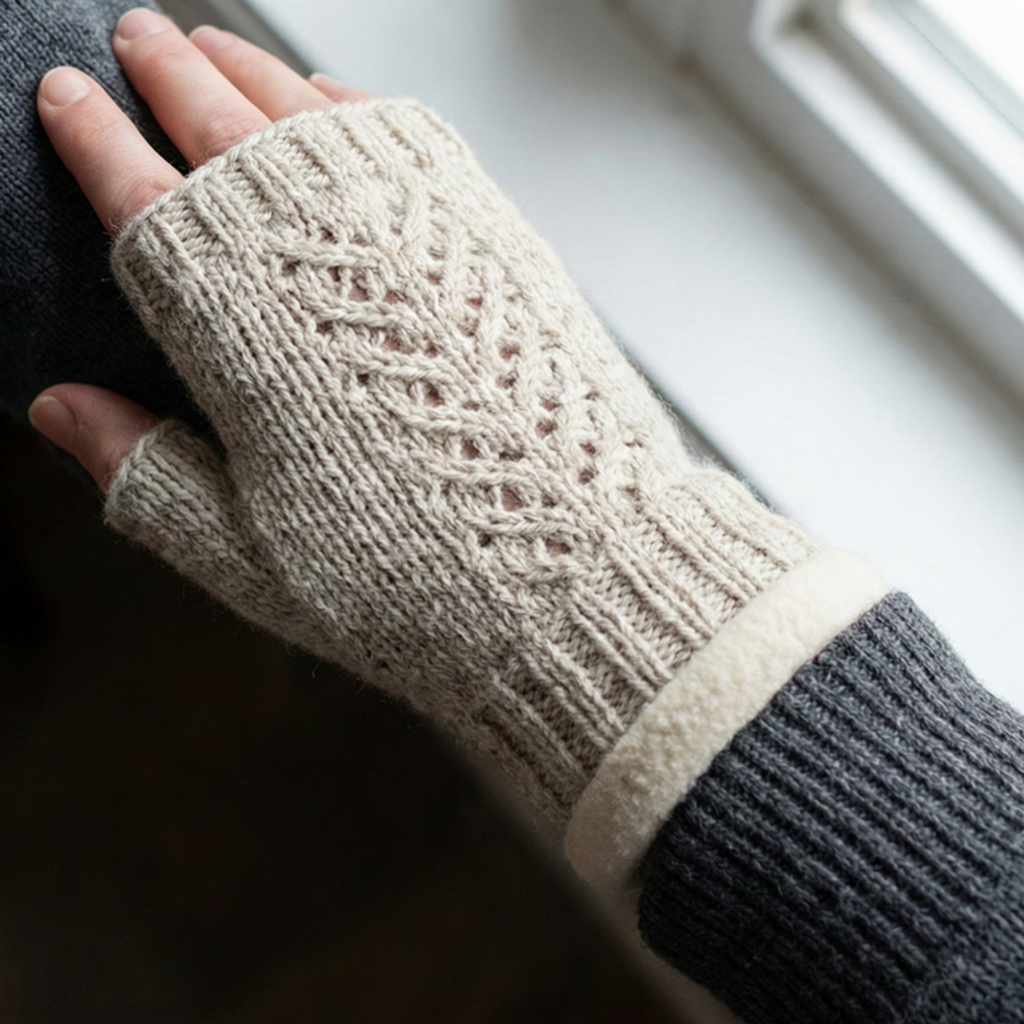
2. Crochet Winter Lacy Fingerless Hand Gloves Pattern
Skill level: Intermediate (lace stitch repeats & delicate shaping)
Vibe: Openwork lace with a warm lining option — ideal for cold but stylish layering.
Materials (pair, sample M)
- Yarn: DK wool-blend or worsted for warmth (approx 180–240 yards per pair). For very warm gloves add a cotton or fleece lining.
- Hook: 4.0 mm (for DK) or 4.5 mm (for worsted if you like looser lace).
- Notions: stitch markers, tapestry needle, small fabric for lining if desired.
Sample gauge (lace V-stitch): 4 V-stitches = 1 inch (spi equivalent ≈ 4). Rows per inch rpi = 5.
Stitch multiple: V-stitch repeat = multiple of 4 (for balance).
Sizing examples (convert HC to stitches using V-stitch)
- Small HC = 6.5″, spi = 4 → 6.5 × 4 = (6 × 4) + (0.5 × 4) = 24 + 2 = 26 V-stitches → but V-stitch repeat multiple of 4: nearest multiple = 28 (4×7 = 28). Use 28 units (note each V-stitch is 2 dc + ch1 + 2 dc? We’ll treat each repeat as 1 V unit; translate to actual stitch counts in foundation below).
- Medium HC = 7.5″, 7.5 × 4 = (7 × 4) + (0.5 × 4) = 28 + 2 = 30 → nearest multiple 32.
- Large HC = 8.5″, 8.5 × 4 = 34 + 2 = 36 → nearest multiple 36 is divisible by 4? 36 ÷4 =9 → yes.
Converting units to foundation chain: Each V-stitch block typically occupies 3 chains (2 ch for starting plus 1 for V). Practical foundation method: chain (multiple × 3) + 1 turning chain — I’ll show numbers.
Example for Medium (32 V repeats): foundation ch = 32 × 3 + 1 = 96 + 1 = 97 ch. But to avoid an overly long chain, better to work a narrow foundation and then pick up live stitches — alternative: work a round in the round: join and work V-stitches into a base round of sc. Simpler method: foundation single crochet (fsc) 96 + 1? To keep it user-friendly, I give direct in-the-round recipe below.
Step-by-step — cuff → lace body → thumbhole → lined option
A. Cuff (elastic rib, 1.5″–2″)
- Determine cuff stitch count using stitch gauge: using sc in BLO method with spi for cuff ~6 sc = 1 inch. If wrist 7″, 7 × 6 = 42 sc. For medium choose 42 foundation stitches. Chain 42 and join to ring.
- Work 8–10 rounds sc in BLO to form firm ribbing (or use front-post/back-post hdc for elastic rib). This forms snug cuff.
B. Lace V-stitch body
3. On next round, switch to lace pattern:
- Round pattern (V-stitch in round): [dc, ch1, dc] in next stitch, skip 1 st, sc in next st — adjust per actual stitch architecture.
- Practically: Round: sc in next st, (dc, ch1, dc) in next st repeat around. This gives airy V-stitch mesh. Because cuff used sc counts, treat each sc as a V-anchor.
- Work alternating rounds: 1 round V-stitch, 1 round sc to anchor. Repeat until you reach thumbhole row position (calculate rows by thumb placement: e.g., 2.25″ × rpi 5 → 2.25 × 5 = (2 ×5) + (0.25×5) =10 + 1.25 = 11.25 → use 11 rounds).
C. Thumbhole shaping (vertical slit method)
5. On the row where the thumb should be, create a vertical slit by working half of the round, then chain 6 (or more for thumb width) and skip same number of stitches, then continue around. Or work a short-row opening: work back-and-forth for 2–3 rows and then rejoin — the chain gap method is easiest for lace because it doesn’t disturb pattern much.
- Example: chain 6 for thumbhole gap and skip 6 stitches.
D. Continue up hand
6. Continue lace rounds above the gap until the total rows (include cuff) equals the desired HL rows (e.g., HL 6.5″ × 5 rpi = 32.5 → 33 total rows; subtract rows already used to compute remaining).
E. Thumbhole finishing & optional lining
7. Crochet a tidy edging around the chain gap: sc in each chain and sc into the stitch opposite the gap; then add one round of scallop or picot if desired.
8. For a warm glove, cut cotton or fleece lining shaped like glove interior, hand-sew into glove before finishing. To make lining: use felted wool or fleece, cut to glove interior shape, baste and stitch with small stitches to the inner fabric.
F. Finish with one round of sc around top and weave ends.
Variations & notes
- For warmth, use worsted wool and a tighter hook; for delicate look use lighter yarn.
- Make lace more open by increasing hook size one step.
Care
- Wool: hand wash cool and dry flat; wool-blend may be machine washable per label.
3. Crochet Rose Fingerless Gloves Pattern

Skill level: Intermediate — includes 3D rose appliqués and set-in thumb detailing
Vibe: Romantic vintage with textured rose motif along the back of the hand.
Materials (pair, M)
- Yarn: Sport or DK acrylic/wool blend — ~200–260 yd per pair.
- Hook: 3.5–4.0 mm.
- Notions: small scrap of felt for stabilizing rose base optional, tapestry needle.
Gauge (seed stitch / shell background): 5 sts = 1 inch, rpi = 6.
Sizing & sample counts
- Use the same HC × spi math as before. Example Medium HC = 7.5″, spi = 5 → 7.5 × 5 = 37.5 → round to 38 stitches (and ensure pattern repeat consistent; this shell-based glove accepts many counts).
Pattern overview
- Construct cuff rib, work a textured background (seed stitch or alternating sc/hdc) on the palm/back panels, create a gap for thumb, and attach 3D rose appliqués to the back of hand by sewing on as you go or later.
Step-by-step — cuff → palm/back → thumb → rose applique
A. Cuff
- Chain foundation using HC conversion — example M = 38 ch. Join into ring. Work 8 rounds of sc in BLO to make cuff.
B. Back/palm body
2. Switch to textured background: Round pattern: [sc in next st, hdc in next] repeat around. This gives a subtle two-row texture reminiscent of seed stitch.
3. Work alternating texture rounds until thumb placement row (convert inches to rows as earlier).
C. Thumbhole shaping
4. For this pattern use a horizontal slit created by leaving a short chain gap on a round: chain 8 and skip 8 sts (8 chains ~ 1.6″ thumb width at spi = 5). Continue body pattern and center the gap at the side seam where thumb is desired. Later bind thumb gap with sc.
D. Continue hand length
5. Work upwards to knuckle line: total rows = HL × rpi (e.g., HL = 6.5 × 6 = 39 rows). Subtract rows already made to determine remaining.
E. 3D Rose appliqué (make 1 or 2 per glove)
6. Rose strip method (rolled rose):
- Make a narrow long strip: ch 25; Row 1: sc across; Row 2: sc across; Row 3: optional picot trim.
- Roll the strip from one end tightly, sewing as you roll with a tapestry needle to form petals. Secure base.
- Attach rose on back of glove using small stiches through base into glove back; reinforce with a small felt disc inside glove to protect stitching.
Alternate petal method:
- Make petals individually: MR, ch2, 6 sc in ring, sl st. Form 5–7 petals and stitch together into a rosette.
F. Thumb finishing
7. Work 1–2 rounds of sc around chained gap; pick up stitches if you used short-row gap. Ensure thumb opening edges are neat.
G. Top edge and finishing
8. Optional scalloped edge on top: sc in next 2, 5 dc shell in next, sc next 2 repeat. Weave ends.
Variations & notes
- Make three small roses in descending size for a cuff cluster.
- Use a metallic thread held with main yarn for petal shimmer.
Care
- Hand wash and reshape; avoid hot water if using wool.
4. Crochet Ruffle Fingerless Hand Gloves Pattern

Skill level: Confident beginner → intermediate (ruffles require repeated increases)
Vibe: Playful, feminine ruffle at wrist or top edge — great for dressy or playful looks.
Materials (pair)
- Yarn: DK or worsted depending on ruffle fullness (~180–240 yd).
- Hook: 4.0 mm for body, 5.0–6.0 mm for dramatic ruffle (work ruffle in larger hook).
- Notions: tapestry needle, stitch markers.
Gauge (sc body): 5 sc = 1 inch, rpi = 6.
Sizing math
- Use HC × spi as before. Example M = 7.5″ × 5 = 37.5 → round to 38 foundation.
Construction overview
- Make a simple cuff and body in sc or hdc, create thumbhole, then add ruffle(s) either at wrist (lower cuff ruffle) or at top edge (finger cuff ruffle) by working several increase rounds.
Step-by-step — cuff → body → ruffle
A. Cuff (wide band)
- Chain foundation = 38 ch join. Work 6–8 rounds sc in BLO for rib.
- Continue 6–8 additional rounds in sc (BLO or both loops) until desired wrist-to-thumb height.
B. Body and thumbhole
3. Create thumbhole using chain gap method on appropriate row (use 8 chains as thumb width). Continue body rounds to desired HL (e.g., 6.5″).
C. Ruffle construction (classic flounce)
4. To add ruffle at the top edge (near knuckle) or bottom (wrist), do this:
- Join yarn at chosen edge.
- Ruffle round 1: Work 2 dc in each stitch around (this doubles stitch count).
- Ruffle round 2: Work 3 dc in each stitch around to multiply again for a fuller ruffle. Alternatively use shell rounds: 5 dc in next st, skip 1 around for scalloped ruffle.
- Work until ruffle depth desired (usually 2–4 rounds of increases).
- For a more delicate ruffle, work picot rounds: sc in next st, picot (ch3 sl st to base), sc next.
D. Finish
6. Fasten off and weave in ends. Block slightly to allow ruffle to bloom.
Variations & notes
- Combine ruffle at wrist and top for double frill.
- Use lighter yarn for ruffle than for body so it cascades softly.
Care
- Machine wash gentle for acrylic; hand wash for natural fibers.
5. Crochet Victorian Lace Hand Gloves Pattern

Skill level: Advanced — intricate lace repeats, picot edges, refined shaping
Vibe: Elegant, vintage-inspired lacework with narrow silhouette — perfect for special occasions or costume.
Materials (pair)
- Crochet thread size 10 or lace-weight yarn (mercerized cotton for crisp lace) — ~250–320 yd per pair.
- Hook: 1.75–2.25 mm (thread) or 2.5–3.0 mm (lace yarn).
- Notions: blocking pins, small buttons if you add decorative closures.
Sample gauge (dense lace filet or small shell): 8 sts = 1 inch (spi ≈ 8). Rows per inch rpi = 12 (fine lace).
Sizing & conversion (with fine gauge)
- Example Medium HC = 7.5″, spi = 8 → 7.5 × 8 = (7 × 8) + (0.5 × 8) = 56 + 4 = 60 sts. Lace repeats often require even counts; 60 is good.
Pattern architecture
- Make slender wrist cuff, then small-scale repeating lace panels worked in rounds or short rows, create thumbhole with fine picot binding, top edge finished with scallop/picot.
Step-by-step — cuff → delicate lace body → thumb → edging
A. Cuff (delicate rib)
- Foundation: ch 60 join (for M). R1–R8: sc in BLO or work small rib rows to make elastic cuff (for thread, 8 rounds is about 1/2–3/4″ so increase if you want more).
- Alternatively use a 2-row filet motif to form a wrist cuff that is elegant.
B. Lace panel body (filet or chain-shell)
3. Example filet lace round pattern in-the-round:
- Round pattern: dc, ch2, skip 2, dc in next to make airy mesh. To give texture, intersperse small shells: every 8th stitch do (ch1, 3 dc in same st, ch1).
- Work repeat rounds until reaching thumb placement: because rpi = 12, if thumb placement is 2.25″ from wrist, compute rows: 2.25 × 12 = (2 × 12) + (0.25 × 12) = 24 + 3 = 27 rows.
C. Thumbhole, refined
5. For Victorian style make a small bound thumbhole:
- On designated round, work half round, then chain 6, skip 6 sts, continue. Rework next round to bind chain gap with slip-stitch decorative edge and small picots. Or make vertical slit and bind with reverse sc.
D. Top shaping
6. Work narrower final section with smaller shells so top edges lie flat. Work last round: sc, picot (ch3 sl st in base) to produce tiny decorative points.
E. Optional decorations
7. Sew tiny mother-of-pearl or pearl buttons near wrist as accents (non-functional). Add embroidered vines on back of hand with fine thread for Victorian flourish.
F. Blocking
8. Block extensively to open lace. Pin picots and scallops precisely; steam gently if thread allows.
Variations & notes
- Make long glove reaching mid-forearm by extending rows; add buttoned cuff at wrist for Victorian closure.
- Use mercerized cotton for crisp definition, or silk blend for sheen.
Care
- Hand wash and lay flat; gentle handling to preserve fine threads.
Conclusion
These five fingerless glove patterns — Shell Stitch, Winter Lacy, Rose Appliqué, Ruffle, and Victorian Lace — cover a wide range of styles from practical warmth to delicate, statement-making pieces. Each pattern has been written with clear sizing math (digit-by-digit), detailed stitch sequences, and precise thumbhole shaping options so you can adapt them to your hand measurements and preferred yarn weight.
Quick finishing checklist for every pair:
- Try gloves on before final finishing to confirm thumb placement and length.
- Securely weave in ends and reinforce thumb edges with 1–2 rounds of single crochet to prevent stretching.
- Block lace and stitch patterns as appropriate to open and set stitches.
- If you plan to sell or gift, include care instructions and a recommended yarn content note.