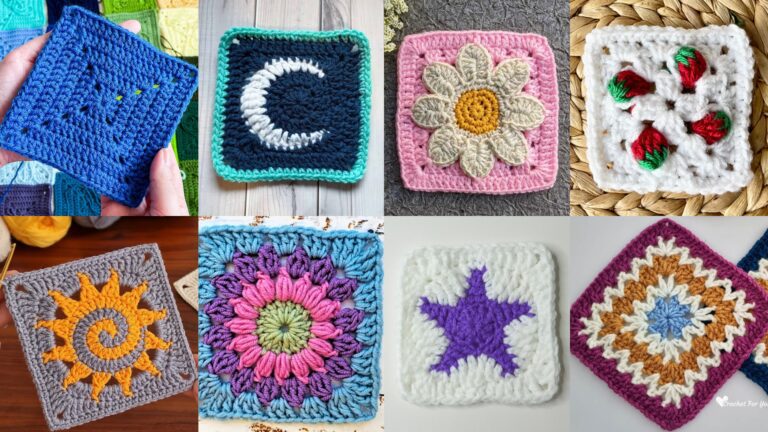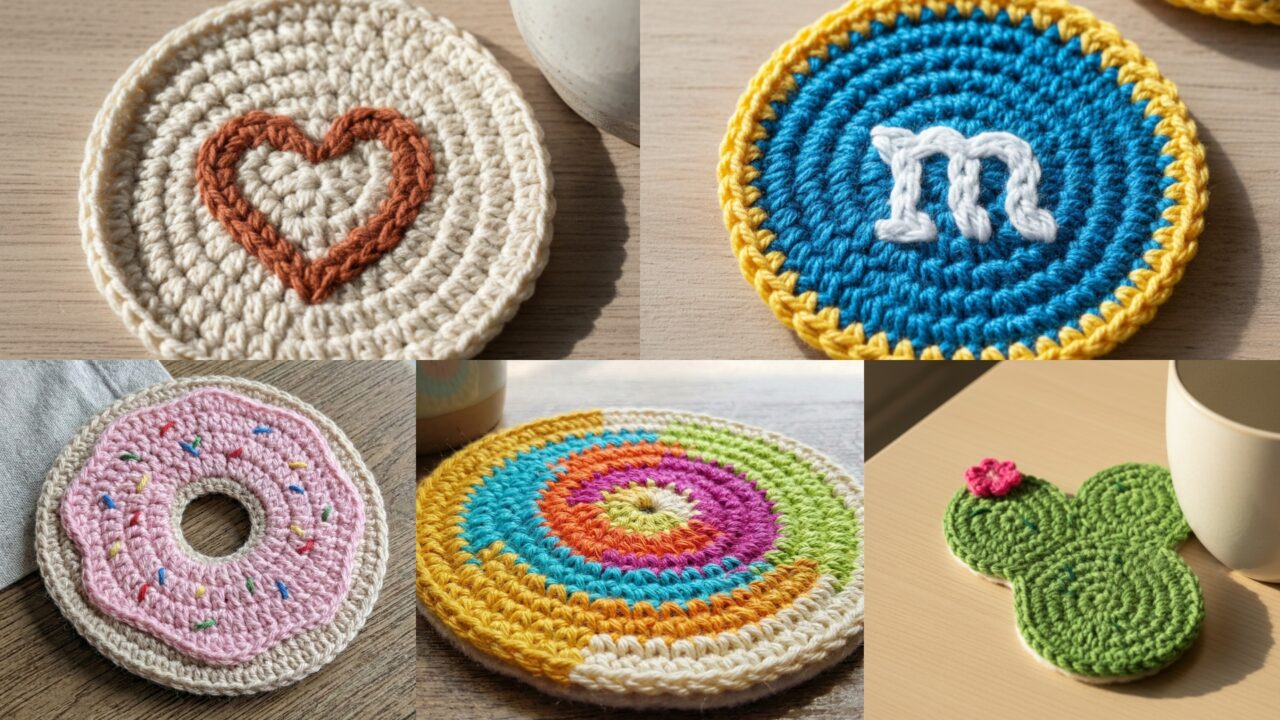
Coasters are the perfect small project: quick to make, endlessly customizable, and they protect surfaces while adding a personal touch to your home. Below are five full, ready-to-use coaster patterns with clear step-by-step instructions, materials, sizing tips, stitch notes, and variations so you can make sets that match any decor: Boho Heart, M&M, Prickly Pear Cactus, Color Burst, and Donut. Each pattern targets a finished coaster of about 3.25–4 in (8–10 cm) diameter unless noted — adjust by changing hook size or adding rounds.
Quick essentials: tools, yarn, sizing & care
- Best yarn: 100% cotton (worsted or sport weight) is ideal — absorbent, washable, and heat-resistant. For very firm coasters use worsted; for delicate lacy coasters use sport/fingering.
- Hook: typically 3.5–4.5 mm for worsted cotton. Use a smaller hook for a denser fabric and a larger for a looser drape.
- Notions: tapestry needle, scissors, stitch marker (optional), small piece of cork/felt for backing (optional).
- Finished size guide: standard coaster = 3.25–3.75 in diameter. To change size: alter hook or add/subtract increase rounds.
- Gauge check (recommendation): make a small 4 in (10 cm) circle in sc to estimate stitches per inch. Example: 32 sc = 4 in → 8 sc/in. For a 3.5 in coaster you’d aim for ≈ 28 sc circumference in a round (but coaster shaping uses increases — measure diameter rather than stitch count).
- Care: machine wash gentle, tumble low or lay flat to dry. If you add cork/felt backing, spot clean or hand wash.
- Assembly tip: weave in ends neatly on the underside. Glue felt backing with fabric glue or stitch into place for machine-washable coasters skip gluing.
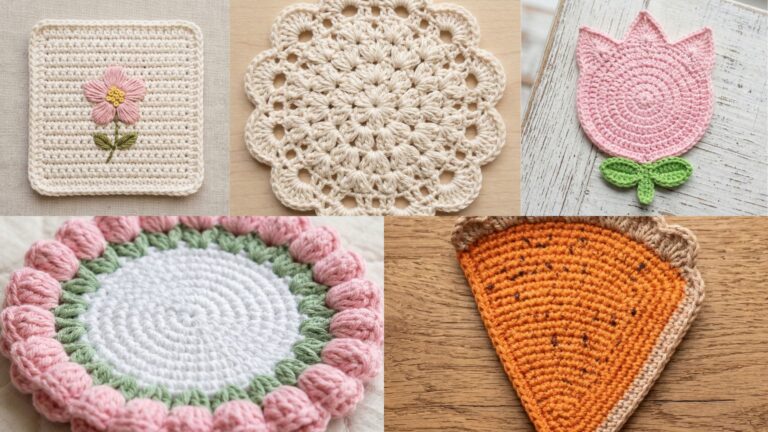
1. Crochet Boho Heart Coaster Pattern
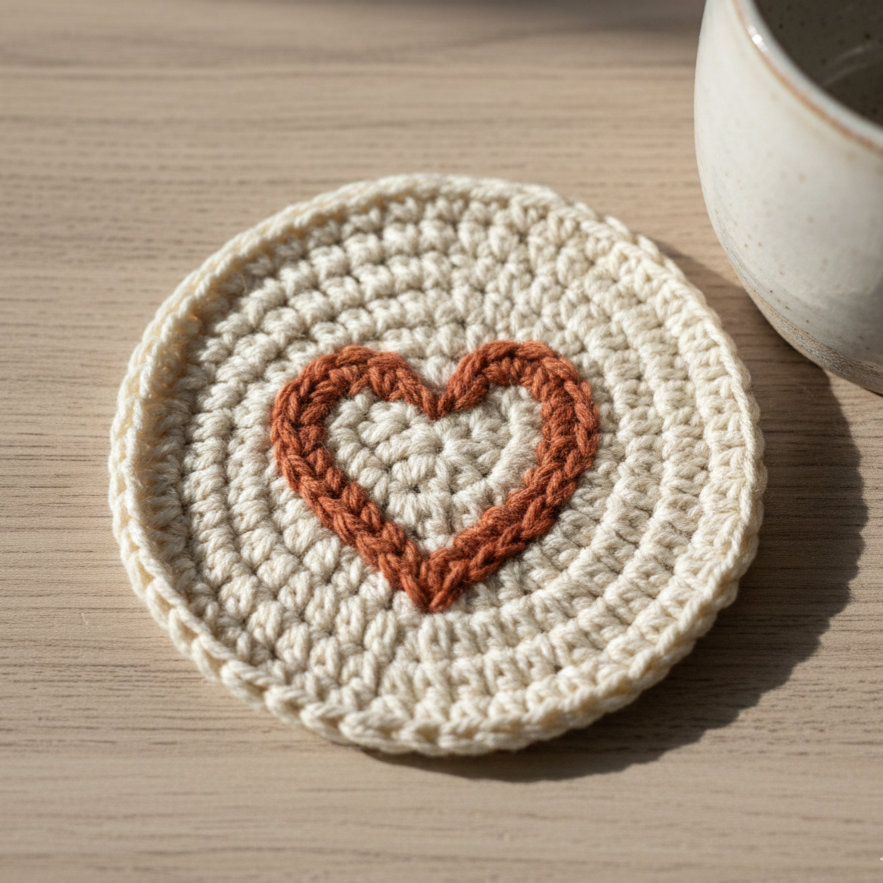
A sweet, slightly textured coaster with a centered boho heart motif — perfect for gifts.
Skill level: confident beginner
Materials
- Worsted-weight cotton in two colors (A = background, B = heart) — small amounts (10–15 yd each).
- Hook: 4.0 mm.
- Tapestry needle; optional felt/cork circle for backing.
Finished size: ≈ 3.5 in (9 cm) diameter.
Stitch notes
- Worked in joined rounds (flat circle), with a small surface-embroidery heart added on top. You can also work the heart into the top rounds with tapestry crochet for a colorwork version.
Step-by-step (flat base + surface heart)
- Base — flat circle (A):
- MR, ch 1, 6 sc in ring. (6)
- R2: 2 sc in each st around. (12)
- R3: sc 1, inc around. (18)
- R4: sc 2, inc around. (24)
- R5: sc 3, inc around. (30) — this typically gives ~3.5 in depending on gauge. Measure diameter and add another increase round sc 4, inc → 36 only if you need a larger coaster.
- Finish with a slip stitch and fasten off A.
- Surface heart (B):
- Option A — Embroidery heart: With a blunt tapestry needle and B yarn, embroider a small centered heart: bring yarn up at center, stitch a small V shape for the heart bottom, then create two small lobes by satin-stitching short arcs.
- Option B — Appliqué heart (quick): MR, ch 3, 3 dc in ring, ch 3, sl st; repeat to make small heart and sew center onto coaster. Make one small heart about 1.25 in wide.
- Edge (optional): Join color A (or B) and work 1 round sc evenly around the edge; put 3 sc in each corner area formed by increases to maintain flatness.
- Backing & finishing: Glue or hand-stitch a cork/felt circle (cut ~1/8 in smaller than coaster) for non-slip and protection. Weave in tails.
Variations & styling
- Make three coasters in gradient boho shades (terracotta, cream, mustard).
- For a more graphic look, tapestry crochet the heart during the last round: carry B inside and work sc/color-change as you go.
2. Crochet M&M Coaster Pattern
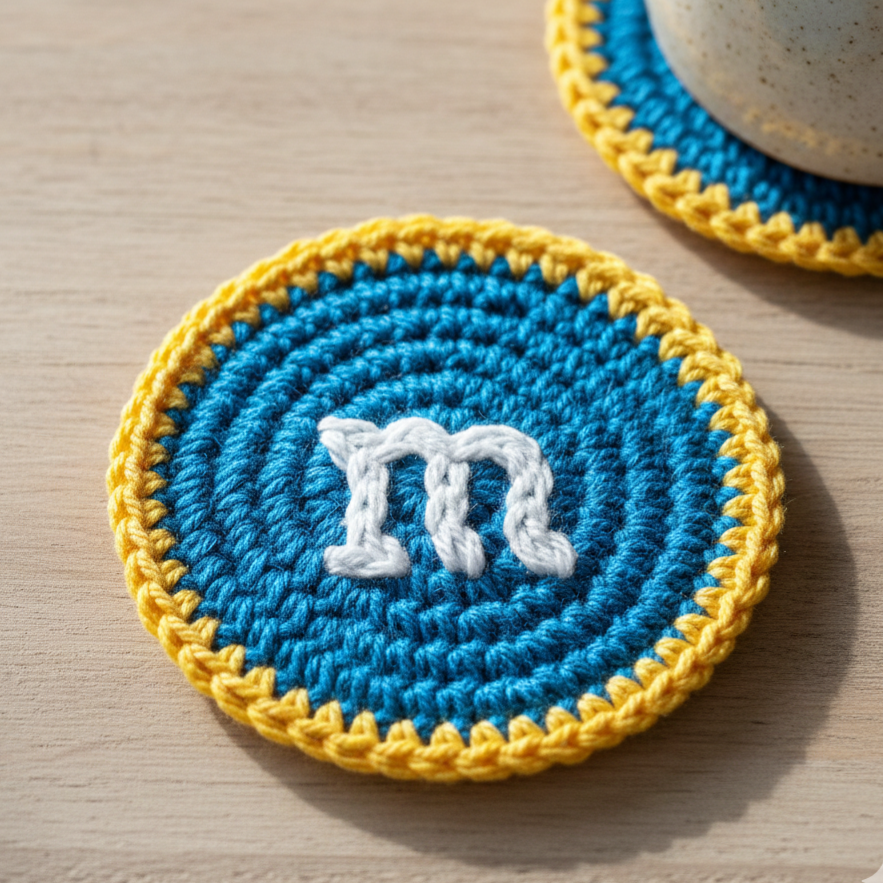
Bright, circular coasters inspired by M&M candies — bold center “M” or circular color spot.
Skill level: beginner → confident beginner
Materials
- Worsted cotton in three colors: main (A) for rim, candy color (B), and white (C) for the “M” — small amounts.
- Hook: 4.0 mm.
Finished size: ≈ 3.25–3.5 in (8–9 cm) diameter.
Stitch notes
- Work a small circular base in B, then add a white applique “M” or tiny round center to mimic the candy marking, then finish with A rim.
Step-by-step (circle + applique)
- Candy center (B):
- MR, ch 1, 6 sc in ring. (6)
- R2: 2 sc in each st around. (12)
- R3: sc 1, inc → 18. Stop — this small center looks like a candy top.
- Outer donut rim (A):
- Join A into next stitch and continue increasing to reach full coaster diameter: R4 sc 2, inc → 24; R5 sc 3, inc → 30. Stop at 30 sc for approx 3.25 in; add another round if you want 3.5–4 in.
- Candy “M” (C) — surface applique:
- Option A — embroider M: With tapestry needle and white yarn, embroider a small stylized M centered on the candy top using backstitch or satin stitch. Keep it small and bold.
- Option B — tiny vertical oval: MR 6 sc in C, flatten and sew a narrow oval directly at center.
- Edge: 1 round sc in A to tidy. Weave ends.
Variations
- Use variegated yarn for candy color for fun speckles.
- Omit the M and make solid-color “button” coasters for a clean table.
3. Crochet Prickly Pear Cactus Coaster Pattern
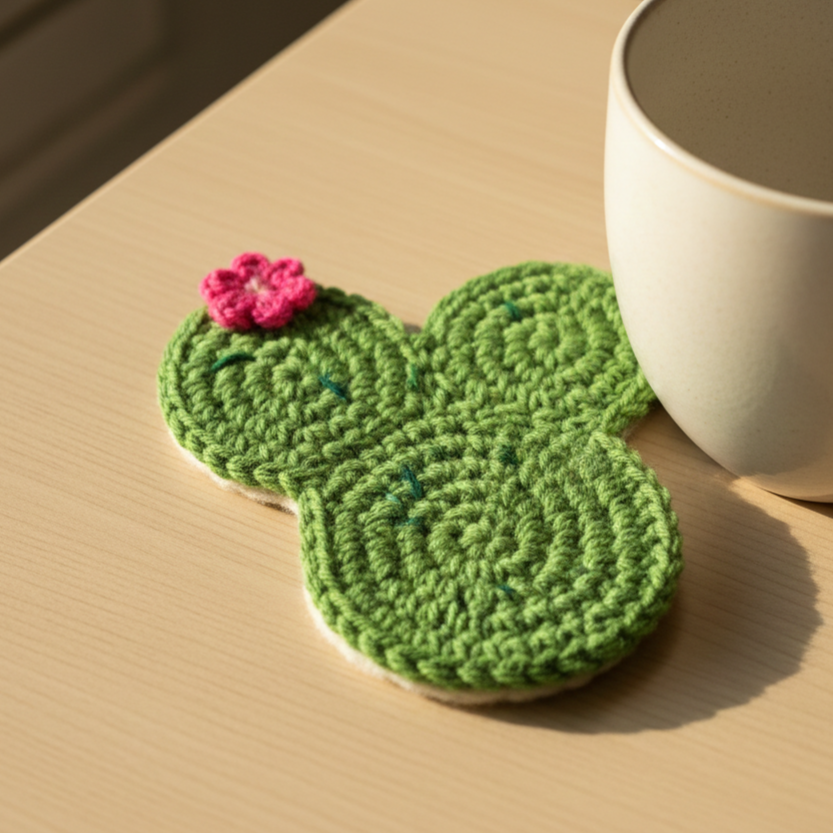
Cute cactus-shaped coaster with small “spine” embroidery — great for plant lovers.
Skill level: confident beginner → intermediate
Materials
- Worsted cotton: green (A) for cactus, dark green or black (B) for spines, neutral for base (C) if desired.
- Hook: 4.0 mm.
Finished size: approx 3.25–3.75 in across the widest part.
Stitch notes
- Coaster is an oval/rounded shape with small bumps to suggest pads; spines embroidered after finishing.
Step-by-step (rounded cactus pad)
- Start oval base (A):
- Ch 10. R1: 2 sc in 2nd ch from hook, sc across (7), 3 sc in last ch; now work along opposite side of foundation chain: sc across (7), 2 sc in last ch — join with sl st. You’ve made an oval base.
- R2: ch 1, sc in each st around, placing incs at curve zones (where you made 3 sc) to keep shape. Turn only if working rows; to keep neat, work joined rounds and slip stitch to start of round.
- R3–R5: work even sc rounds until oval is thick and about 3–3.25 in. Alternatively, continue increases evenly in the curve zones until desired diameter for a wider pad.
- Add second small pad (optional): Work a small MR mini-oval (MR 6 sc → 12 sc → flatten) and sew partially overlapping the main oval to create a two-pad cactus shape.
- Spine embroidery (B): Using a fine yarn or embroidery thread, stitch short straight stitches radiating outward (3–6 per pad) to simulate spines. Keep stitches short (< ¼ in). Optionally sew tiny French-knots as spine dots.
- Edge & finish: Work 1 round sc in A or C for tidy edge; weave ends. Add felt backing for protection.
Variations
- Make a set of three different cactus shapes (tall, round, double-pad).
- Stitch a tiny flower using a picot or 5-dc petal at a pad tip.
4. Crochet Color Burst Coaster Pattern
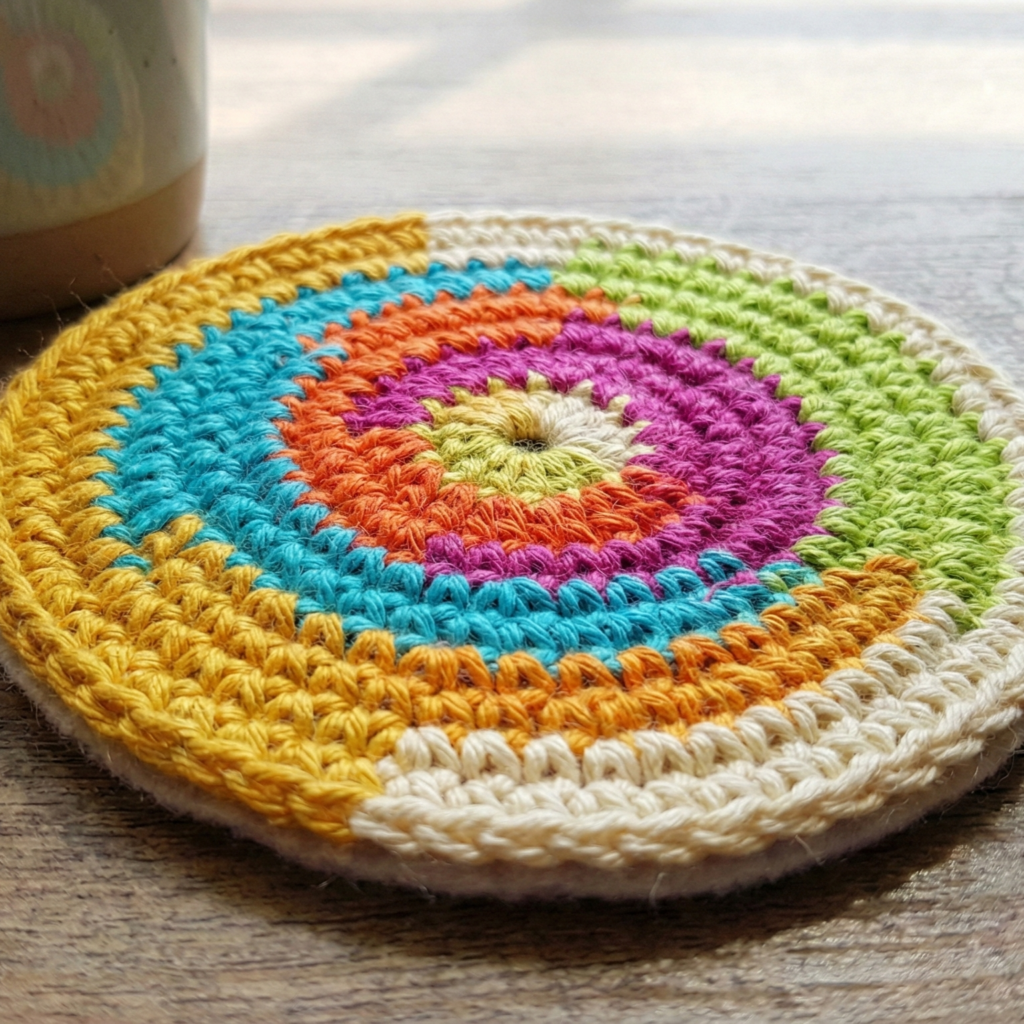
A bright multi-color spiral that’s modern and eye-catching — makes a lively set.
Skill level: beginner → confident beginner
Materials
- Sport or worsted cotton in 4–6 colors (leftovers work well).
- Hook: 3.5–4.0 mm.
Finished size: 3.5–4 in diameter.
Stitch notes
- Worked as a flat spiral using joined rounds and frequent color changes to create a burst. Use sc or hdc for a dense coaster.
Step-by-step (spiral color joins)
- Center (color A): MR, ch1, 6 sc in MR — do not join (work continuous spiral) OR join and continue in joined rounds — either works. Pull tail tight.
- Round 2 (start burst): With color B, join by sl st into any stitch, ch 1, 2 sc in that st, then change color after 2–4 sc to create a pie-slice stripe. A practical method: work 2–3 sc in color B then switch to color C by finishing last step of sc with new color (invisible join technique) so the color changes are seamless.
- Continue in spiral: Keep changing colors every 2–6 stitches to form radial burst stripes. Increase gradually as you go to keep the circle flat: for each increase round use the pattern sc n, inc where n increases each round (same as flat circle increases). Example sequence: after reaching 18 sc (3rd round), work sc 2, inc next round → 24 sc, and continue until ~36–40 sc to reach 3.5–4 in. Make color changes often for a burst effect.
- Edge: Work one round sc in a single color to frame the burst. If your outer round looks wavy, add a final round of sc in smaller hook or sc in back loop only to tidy and slightly stiffen the edge.
- Finish & backing: Weave ends; press lightly or block flat. Add felt backing if desired.
Variations
- Make a gradient by using colors from light → dark.
- Try alternating sc and hdc for a mixed texture burst.
5. Crochet Donut Coaster Pattern
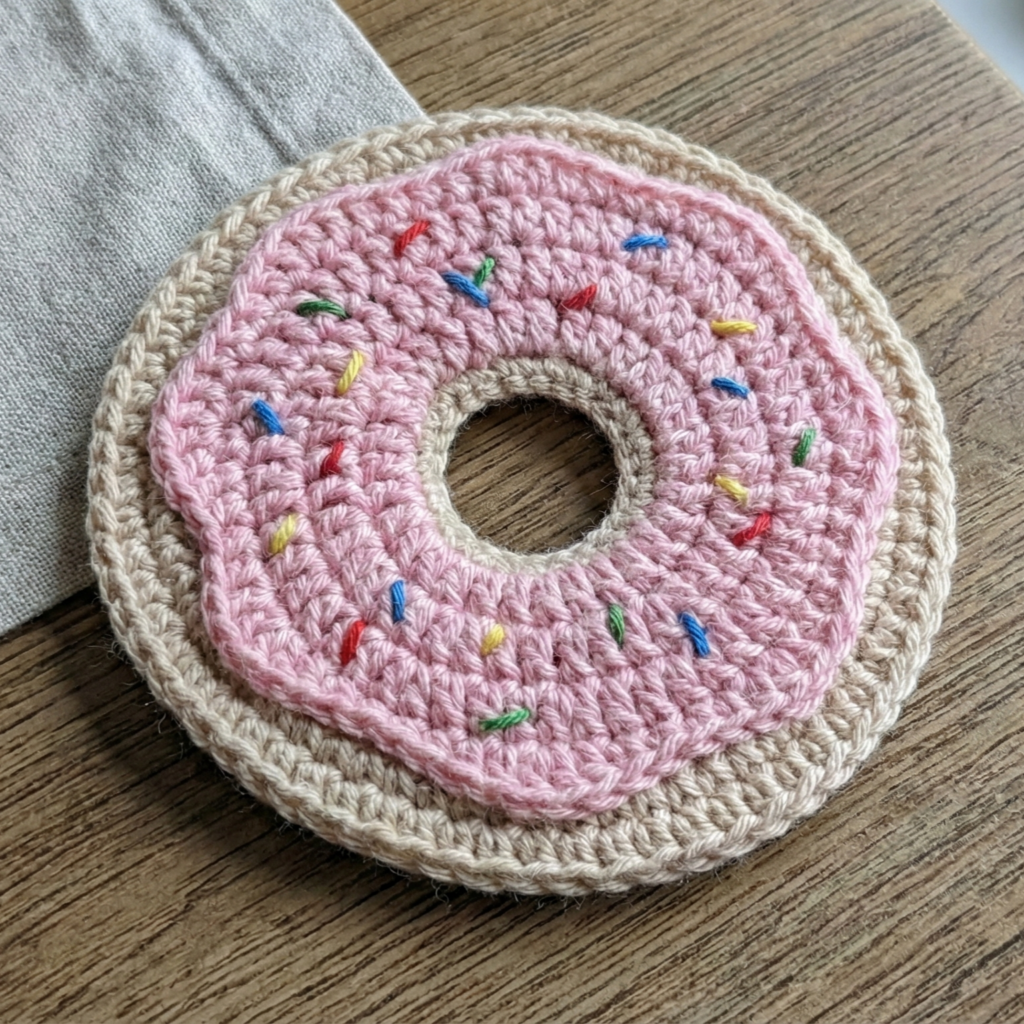
A playful donut coaster with “frosting” and tiny sprinkle embroidery — fun for café tables and kids.
Skill level: confident beginner → intermediate
Materials
- Worsted cotton: base (A) for donut, frosting (B), tiny bits for sprinkles (various colors).
- Hook: 4.0 mm.
- Tapestry needle.
Finished size: ≈ 3.5–4 in diameter.
Stitch notes
- Worked as a flat circle with a center hole, then color-change for the frosting round and sprinkles embroidered on top.
Step-by-step (donut ring + frosting)
- Base donut ring (A):
- MR, ch 1, 6 sc in ring. (6)
- R2: inc in each st → 12.
- R3: sc 1, inc → 18.
- R4: sc 2, inc → 24. Stop here if you want a hole in the center. Instead of closing completely, create a small ring opening: on R4 do not continue to completely fill the center but keep inner hole of MR visible (this is natural with MR when you don’t go too many rounds). If you want a larger hole, make a small additional round with increases focused on outer zone only.
- Frosting rounds (B):
- Join B at about 2/3 of the way across the surface to resemble icing that covers half the donut: work a few rounds (2–3 rounds) of sc or shell stitches on one half only, leaving the other half as plain. A quick technique: work full rounds but slip-stitch over the “bare” arcs so advanced crocheting covers only targeted area. Alternatively crochet entire round in B and then remove half of frosting with a scallop edge to look dripped — cut yarn and fasten off on the underside of sections you don’t want frosted, then continue frosting on top half.
- Embroidered sprinkles: With small bits of yarn or embroidery floss, whipstitch tiny straight stitches randomly over the frosting to look like sprinkles. Use many colors for a realistic effect.
- Edge: work 1 round sc in A to tidy with 3 sc in corners to keep flat. Weave ends.
- Optional: Add a felt cork backing for heat protection and non-slip.
Variations
- Make “glazed” coaster by using subtly shiny cotton-blend for frosting.
- Create a mini set of donuts with different frosting colors for a playful tray.
Finishing & practical tips (applies to all coasters)
- Make a set: coasters look best as a coordinated set of 4–6. Use the same base color with different motifs or vice versa.
- Cork/felt backing: cut cork/felt 1–2 mm smaller than coaster and glue with fabric glue or sew on with a whipstitch; the backing prevents sliding and protects surfaces from condensation. If you want machine-washable coasters, stitch felt on by hand and remove before washing.
- Blocking: lightly wet-block cotton coasters on a flat surface to even rounds; pin gently then air dry.
- Stitch density: if your coaster is floppy, rework with a smaller hook for denser fabric. If too stiff or small, go up a hook size.
- Care labels: if you’ll gift coaster sets, include care notes: “Machine wash warm, tumble low or lay flat to dry. Remove cork backing before washing.”
conclusion
These five coaster designs give you a broad toolkit to set any table style: the romantic Boho Heart, the bold and playful M&M, the nature-loving Prickly Pear Cactus, the modern Color Burst, and the whimsical Donut. Each pattern is small, fast, and very satisfying to make — perfect for using up scrap yarn or creating a colorful set to gift. Crochet a matching set, mix-and-match motifs, or scale patterns up into placemats by adding extra rounds. Your table will be protected and styled at the same time.
Happy crocheting — pick a shape, choose colors you love, and make a cozy stack of coasters that’ll brighten every cup of coffee.