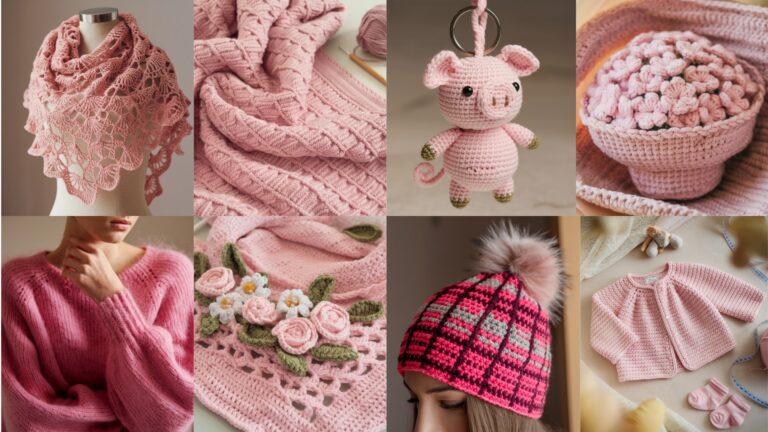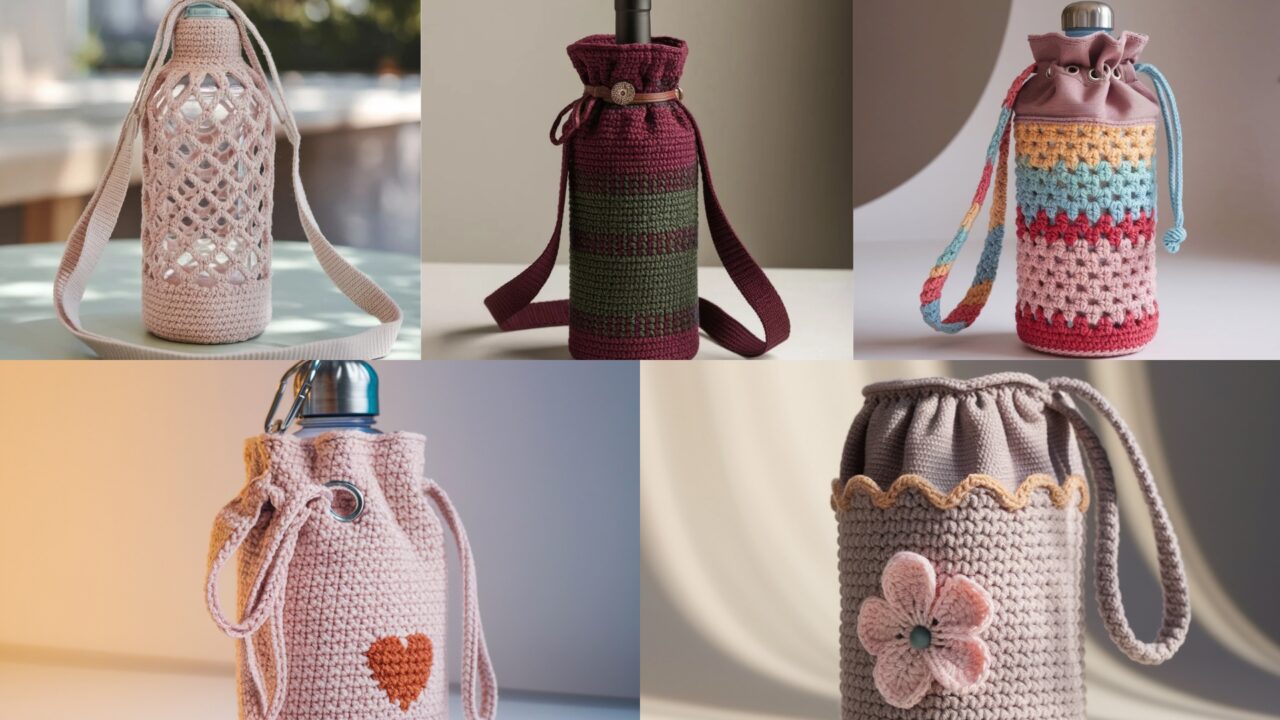
A crochet bottle holder is the best kind of practical craft: small project time, instant gratification, and you get to carry something useful that isn’t screaming “I have disposable plastic bottles inside me.” These patterns cover different looks and functions: sturdy granny texture, floral embellishments, a cute heart motif, a wine-ready carrier, and an airy mesh for summer. Each pattern is written for three common target sizes (mini / standard 500 ml / tall water bottle or wine), uses easy-to-find yarn and hooks, and includes exact increase rounds and strap instructions. If you change yarn weight, use the formulas I give to recalc counts — swatching is not optional.
Universal starter notes (read this; I’m not repeating it later)
- Target bottles / sizes used in samples (finished circumference target):
- Mini — base diameter ≈ 2.75–3.0″ → circumference ≈ 9.42 in → sample stitches ≈ 38 (at 4 sts/in).
- Standard (500 ml) — base diameter ≈ 3.25″ → circumference ≈ 10.21 in → sample stitches ≈ 41 (≈40).
- Tall / Wine — base diameter ≈ 3.5″ → circumference ≈ 10.996 in → sample stitches ≈ 44.
- I used π ≈ 3.1416 and multiplied by diameter to get circumference, then multiplied circumference × stitches-per-inch to get a recommended stitch count. Example calculation: for 3.0″ diameter → 3.1416×3.0 = 9.4248″ circumference; at 4 sts/in → 9.4248×4 = 37.6992 → round to 38 sts.
- Gauge used for sample patterns: worsted weight (cotton/ cotton-blend recommended) and 4 sts per inch in single crochet worked in the round using a 4.0–4.5 mm hook. Your tension will probably differ — swatch a 4″ tube in sc and measure stitches/inch and rows/inch.
- General construction logic: Most patterns are: make a round flat base (increase in rounds), then work even rounds up the side to desired height, then add top edge, eyelets or casing for drawstring, and strap/handle details. I give the math and typical increase sequences so you can scale.
- Abbreviations: ch, sc, hdc, dc, tr, sl st, st(s), inc = 2 sc in same st, dec = sc2tog, BLO/FLO = back/front loop only, RS/WS.
- Work in joined rounds (sl st to join each round) unless I say “continuous spiral.” Use a stitch marker to mark round starts.
- Blocking: Cotton holds shape after a short blocking wet-block. Acrylic will relax a little after first wash. Always reshape damp and dry flat.
1. Crochet Granny Stitch Water Bottle Holder Pattern
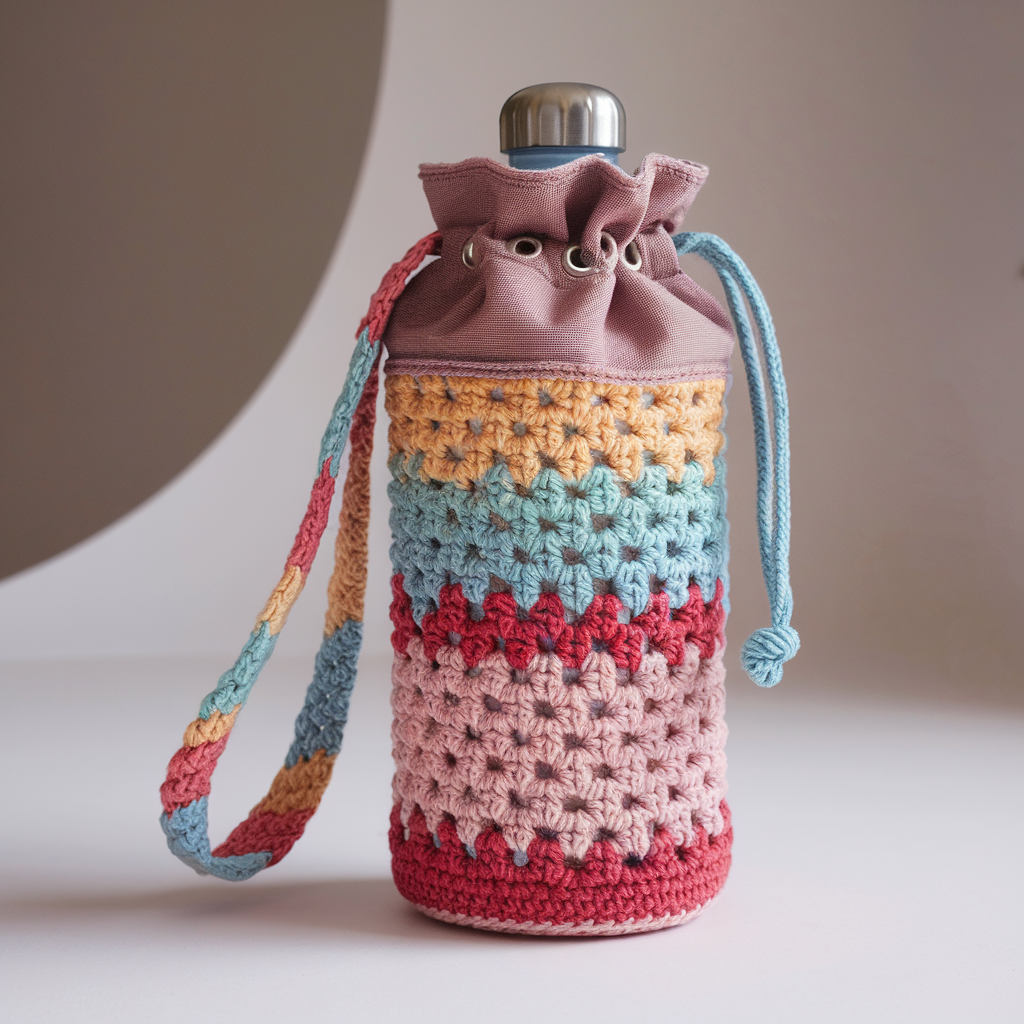
Textured, forgiving, and stash-friendly. Uses simple granny clusters to make a sturdy tube that breathes and looks pretty with color changes.
Skill level: Confident Beginner
Yarn & hook: Worsted cotton (Category 4) — 150 (200, 250) yds for Mini (Standard, Tall/Wine). 4.0 mm hook.
Finished height (sample): Mini 6″, Standard 7″, Tall/Wine 12″ (adjustable).
Why this works
Granny cluster fabric is flexible, a little stretchy, and easy to adjust for different circumferences — good for bottles that vary by brand and for quick colorwork.
Stitch idea
Granny cluster row: ch1, (3 dc) in same space, ch1, skip next space, sc in next sc — simplified so clusters line up vertically. We’ll build base in sc and switch to granny cluster for walls.
Step-by-step (exact rounds for sample gauge)
Base (flat circle) — aim for ~38 (40, 44) sts circumference. Use this increase progression to reach ~36–44 stitches depending on target; adjust if your gauge differs.
- R1: Magic ring, ch1, 6 sc into ring. Pull tight. (6)
- R2: inc around (2 sc in each) → 12.
- R3: sc, inc around → 18.
- R4: 2 sc, inc around → 24.
- R5: 3 sc, inc around → 30.
- R6: 4 sc, inc around → 36. (Stop at 36 for snug small base.)
- R7: 5 sc, inc around → 42. (Use 42 if you need the larger 44-ish circumference; you can skip R7 to hit ~36 or R6 for ~36)
Choose the round to stop based on your measured circumference target (see universal notes). Example: for ~38 sample, you could stop at 36 or add one extra inc pattern in a few places to reach 38.
Join a marker at start of next round.
Wall (granny cluster rounds)
- Round 1 (setup): ch3 (counts as dc), 2 dc in same st (complete a cluster), ch1, sk 1 (or sk the corresponding sc), sc in next st repeat around. Sl st to join.
- Round 2: Move into ch-1 spaces and make clusters: ch3, (3 dc) in ch-1 sp, ch1, sc in next sc repeat. Join.
- Repeat Round 2 until the holder measures these heights from base: Mini 6″, Standard 7″, Tall 12″. (Measure on your bottle as you go.)
Top finishing & drawstring options
- Option A (eyelets): After desired height, work 1 round sc to stabilize, then round: sc 4, ch2, sk 2 repeat for evenly spaced eyelets. Work 2 rounds sc above eyelet row and finish with 1 round rev sc for a neat rope edge. Thread cord or braided yarn.
- Option B (folded casing): Work 2–3 rounds sc, then fold top inward 3/4″ and sl st through both layers to make a casing; thread thicker cord.
Strap
- Short carry strap: ch 60 (or measure for wrist length), sc back along chain, attach to both sides with sl st; reinforce by sewing a small rectangle of stitches and using a few rows of hdc for strength.
- Crossbody strap: make an adjustable strap using an i-cord tube or chain-and sc strap about 48–54″ long with a sliding knot or metal slider. Sew securely into side seam area.
Variations & colorwork
- Do multi-color stripes — granny looks great with 2–3 row bands.
- Add a small granny square pocket on the outside for keys.
Finishing & care
- Weave ends; block gently to set shape. Hand wash cotton or machine wash on gentle with cool water; reshape and dry flat.
2. Crochet Water Bottle Holder with a Flower Pattern
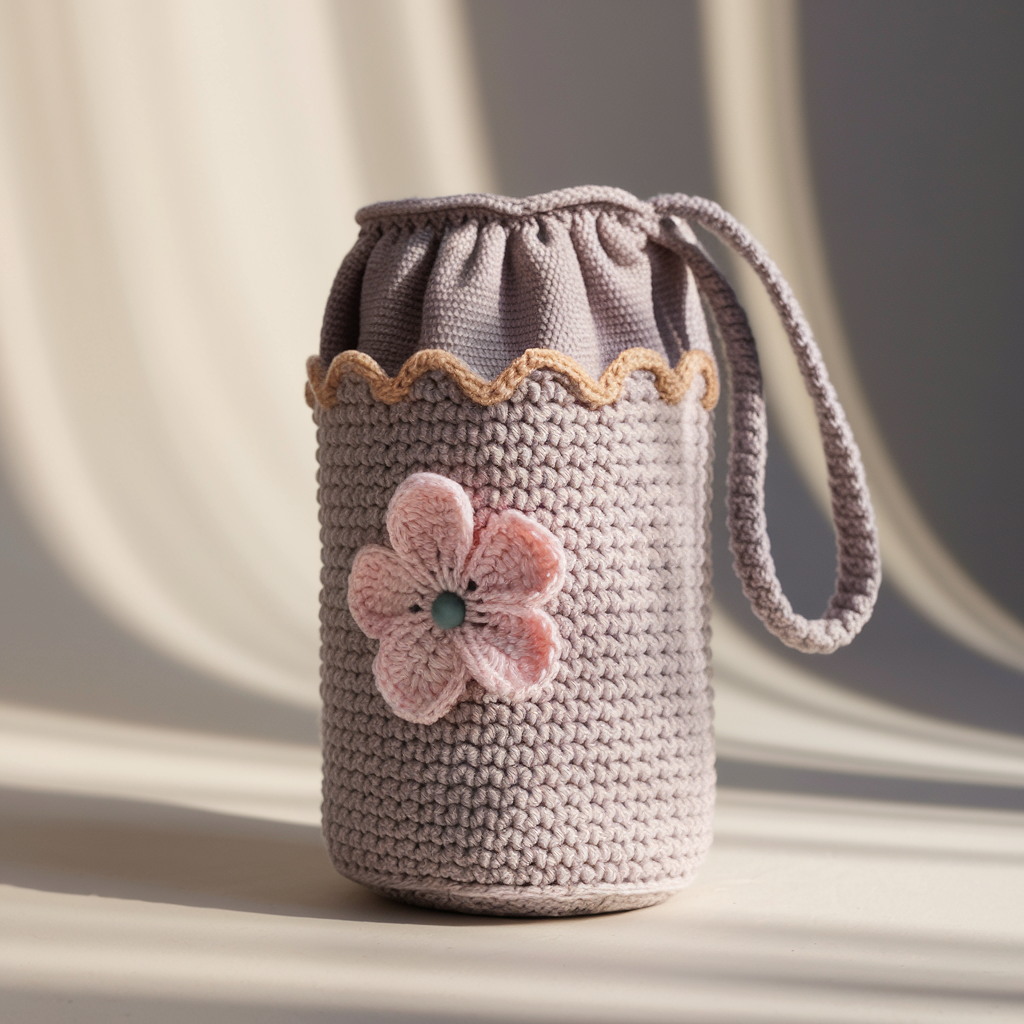
A tidy sc tube with a 3D crocheted flower applied to the side. Practical carry + decorative focal point.
Skill level: Advanced Beginner
Yarn & hook: Worsted cotton — 150 (200, 250) yds for Mini (Standard, Tall). Hook 4.0 mm for base; 4.5–5.0 mm for puffier flower.
Finished height (sample): mini 6″, standard 8″, tall 12″.
Design choices
Work a firm sc tube for structure; add a sewn-on layered flower (rose or layered petals) centered on the side. Eyelets or folded casing for drawstring.
Step-by-step
Base (flat circle) — use same increase sequence as Granny pattern
- R1 6 sc, R2 inc→12, R3 sc,inc→18, R4 2 sc,inc→24, R5 3 sc,inc→30, R6 4 sc,inc→36 (or stop at R7 to reach 42). Pick the count to match your circumference.
Wall — sc tube
- Join marker. Work sc in each st around for the body. Work until Desired height: Mini 6″, Standard 8″, Tall 12″. Example standard 8″ × 4.5 rows/inch ≈ 36 rounds.
Flower (make 2 layered petals for a small rosette)
- Layer 1 (petal base): ch 6, sl st to join forming a ring, R1: ch2, work 12 dc in ring, sl st. Fasten but leave tail for sewing.
- Layer 2 (petals): Join contrast yarn to ring center, ch3, (3 tr in next st), ch3, sl st in next st around to create petals (6 petals). Stuff slightly or block petals to shape. Sew layered petals together and then sew to side of holder about 2–3″ below top edge. Add a small bead or button in center if desired (sew closed from inside for no loose parts).
Top & drawstring
- Eyelet row (recommended): sc 3, ch2, sk 2 around — space depends on circumference. Work 2 rounds sc above eyelets and finish with a decorative picot or reverse sc. Thread cord through eyelets. Add tassel or bead to cord ends.
Handle
- Make a short strap (ch to measured length, sc back) or a macramé braided cord. For a wider shoulder strap, work sc in rows then attach to sides.
Finishing & care
- Secure flower by stitching through base of flower and into tube to prevent wobble when bag is tugged. Cotton + decorative bead: hand wash and dry flat.
3. Crochet Heart Water Bottle Holder Pattern
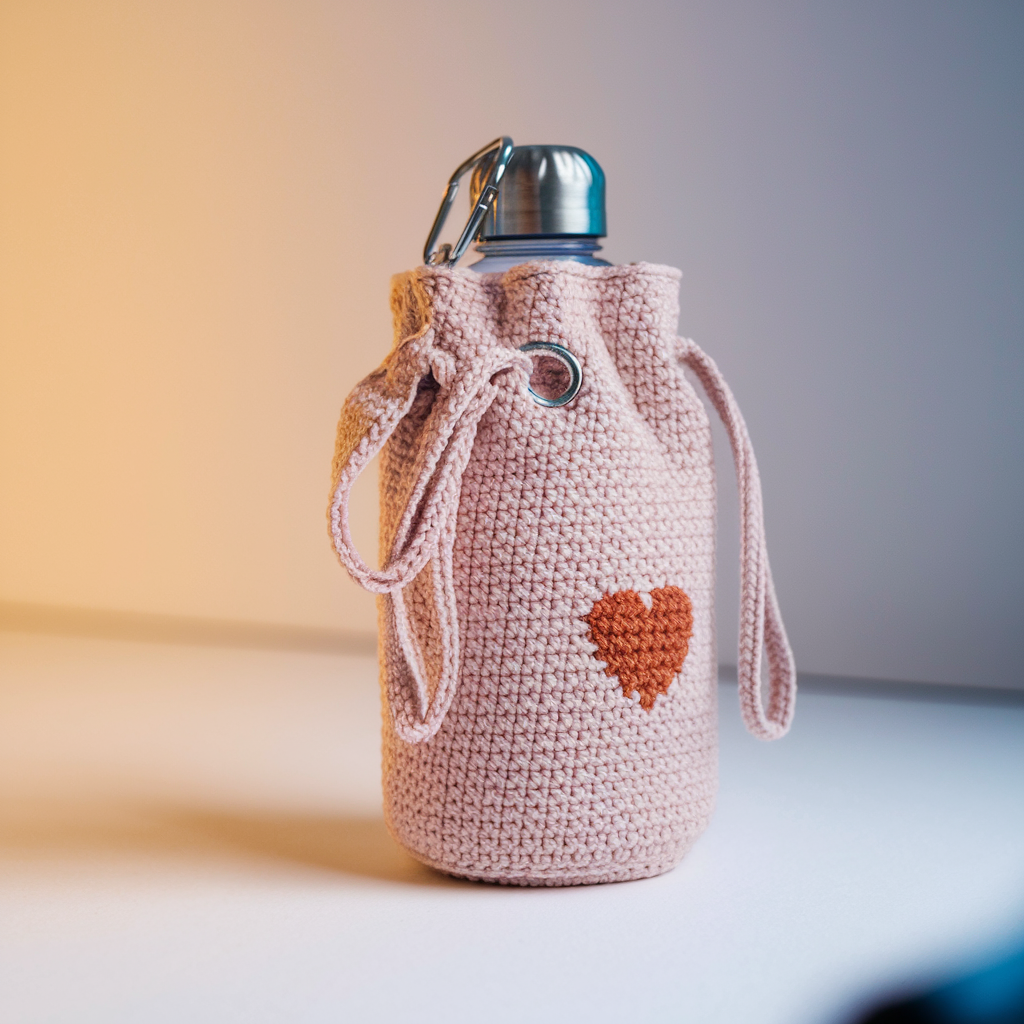
A snug sc tube with surface crochet heart (or filet heart) on the side — simple, very giftable.
Skill level: Confident Beginner
Yarn & hook: Worsted cotton — 150 (200, 250) yds. Hook 4.0 mm.
Sample finished heights: mini 6″, standard 7″, tall 12″.
Two ways to do the heart motif
- Method A (surface crochet): Work sc tube then surface-crochet a heart shape using contrast yarn and sl sts or reverse sc. Best for small and medium size works.
- Method B (filet panel): Work a flat filet rectangle with a heart motif then seam into a tube. More chart-work, but gives crisp pixel-heart.
I’ll give the faster surface crochet method here.
Step-by-step
Base & wall — same increase base sequence and work sc rounds to desired height.
Mark the heart placement
- On the right side, with rounds counted from base, find the center round where you want the heart (e.g., 2–3″ below top). Mark the stitch that will be the heart center horizontally (use stitch marker).
Surface-heart template
- Use a simple heart grid 7 stitches wide by 7 rows tall (works on most tubes). The heart pixel pattern (fill the following blocks):
- Row 1 (top): _ X X _ X X _
- Row 2: X X X X X X X
- Row 3: X X X X X X X
- Row 4: _ X X X X X _
- Row 5: _ _ X X X _ _
- Row 6: _ _ _ X _ _ _
- Row 7: _ _ _ _ _ _ _
(Where X = filled pixel; _ = empty)
Surface crochet execution
- Using contrasting yarn and a tapestry needle or small hook, use duplicate stitch to fill each X on the rounds by following stitch columns. Duplicate stitch on single crochet fabric will look neat and stay put. Alternatively, use sl st surface crochet to outline the heart and then fill with satin stitch embroidery.
Eyelet & top finishing
- Work an eyelet row 2 rounds above the top of the heart to allow the cord to sit above motif, then do 2 rounds sc and finish with rev sc.
Strap
- For a cute look, add two short straps at opposing eyelets and snap on a metal carabiner to clip to bags. For crossbody, attach longer strap.
Finishing & care
- Weave in ends for the surface crochet securely. If heart is embroidered, line the pouch to avoid abrasion on yarn.
4. Crochet Wine Bottle Holder Pattern
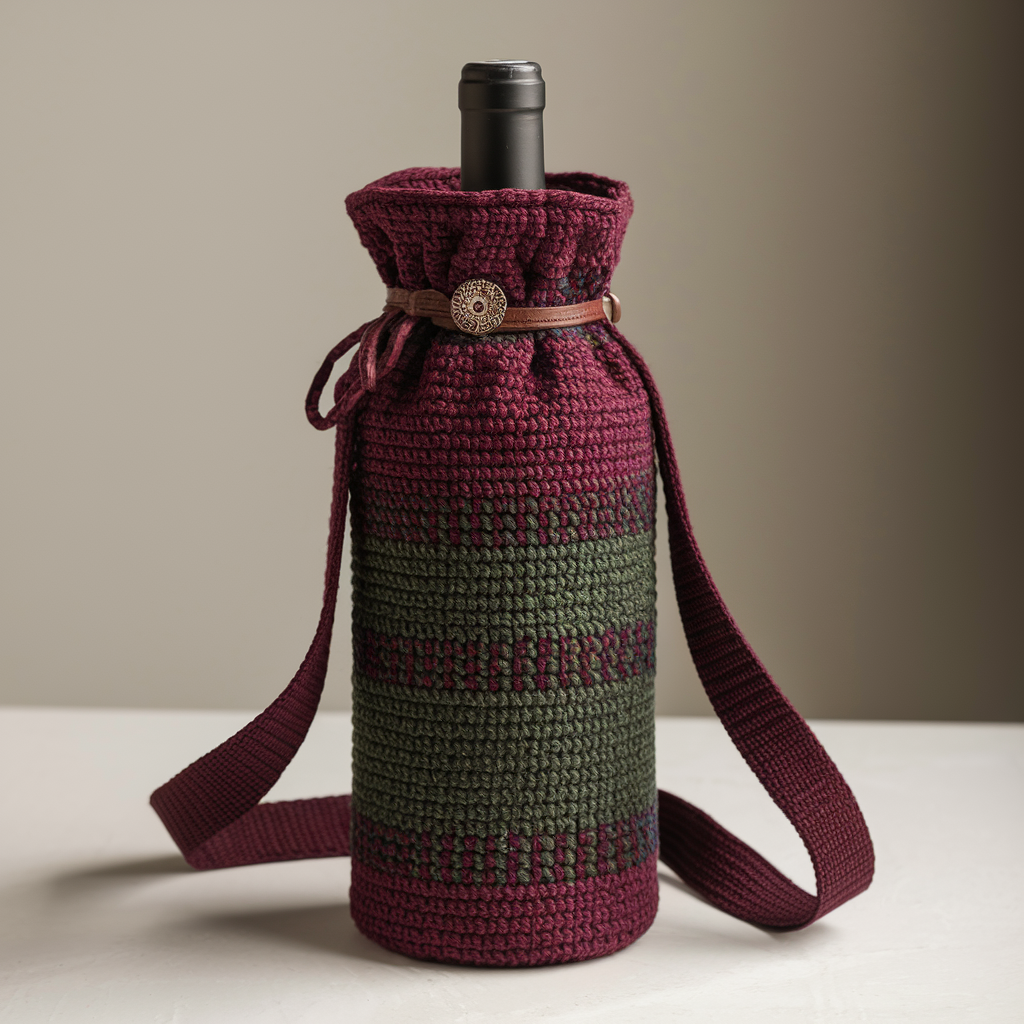
Long, protective, and elegant — this is for wine bottles, sparkling water bottles, or tall thermoses. Includes a base that fits a standard wine bottle and a neck strap that cinches or buttons.
Skill level: Intermediate (long tube shaping + strap construction)
Yarn & hook: Worsted or aran weight (cotton-blend for durability) — 250–350 yds. 4.5 mm hook for a firm fabric.
Finished height: ~13–14″ body + optional neck closure; base diameter target ~3.25–3.5″ (choose 40–44 sts circumference target).
Design notes
Wine bottle holders must support a heavy vertical load, so reinforcement in strap attachment points and a denser stitch are good. Use hdc in spiral or sc rounds for stable fabric. Add a strap that buttons or buckles, or a top drawstring hidden under a decorative collar.
Step-by-step
Base (flat circle)
- R1: 6 sc in MR. (6)
- R2: inc around →12.
- R3: sc, inc →18.
- R4: 2 sc, inc →24.
- R5: 3 sc, inc →30.
- R6: 4 sc, inc →36.
- R7: 5 sc, inc →42. (Use R6 or R7 depending on desired final base circumference; for wine aim for 42 if your sts/inch=4 to get ~10.5″ circumference → diameter ≈ 10.5/π ≈ 3.34″.)
Body (hdc rounds for heft)
- Join and work hdc in each st around (or sc for tighter fabric). Work straight rounds until height reaches about 11″ from base for the bottle body (measure on bottle). Example: 11″ × 4.5 rows/in ≈ 49–50 rounds if using the same rows/inch. Stop when bottle shoulder begins.
Neck & collar
- For a neat collar: work 4–6 rounds of BLO hdc to give a neat casing effect; fold down and topstitch (sl st) a folded band for a decorative collar.
- For a strap closure: attach a strap near the collar (see strap below). Optionally create a drawstring in the collar by leaving an eyelet round hdc 3, ch 2, sk 2 then working 3-4 rounds sc above and finishing with a narrow cord.
Strap options (choose one)
- Simple handle (for carrying horizontally): Make a strip 1.5″ wide by 12–14″ long in sc (ch 6, sc back and forth), fold lengthwise and sl st closed or whip-stitch, attach ends to opposite sides near the upper seam. Reinforce by stitching through several layers and adding a small woven patch of fabric under strap if you want industrial strength.
- Crossbody strap: Make a long strap (48–54″) using sc in rows and fasten securely into side seams. Add sliding buckle if you want adjustability.
- Buttoned neck strap: Make a narrow strap ~6–8″ long and attach one end to one side near top; on the other side leave a loop to button. This makes the holder secure and looks elegant.
Optional pocket / wine cork pocket
- Add a small pocket (2″ × 3″) sewn to the outside near the base for a cork or small opener — handy and cute.
Finishing & care
- Reinforce strap stitches with a second pass using lighter-color yarn for a decorative ladder. Cotton-blend can be machine-washed gentle; reshape and air dry.
5. Crochet Mesh Water Bottle Holder Pattern
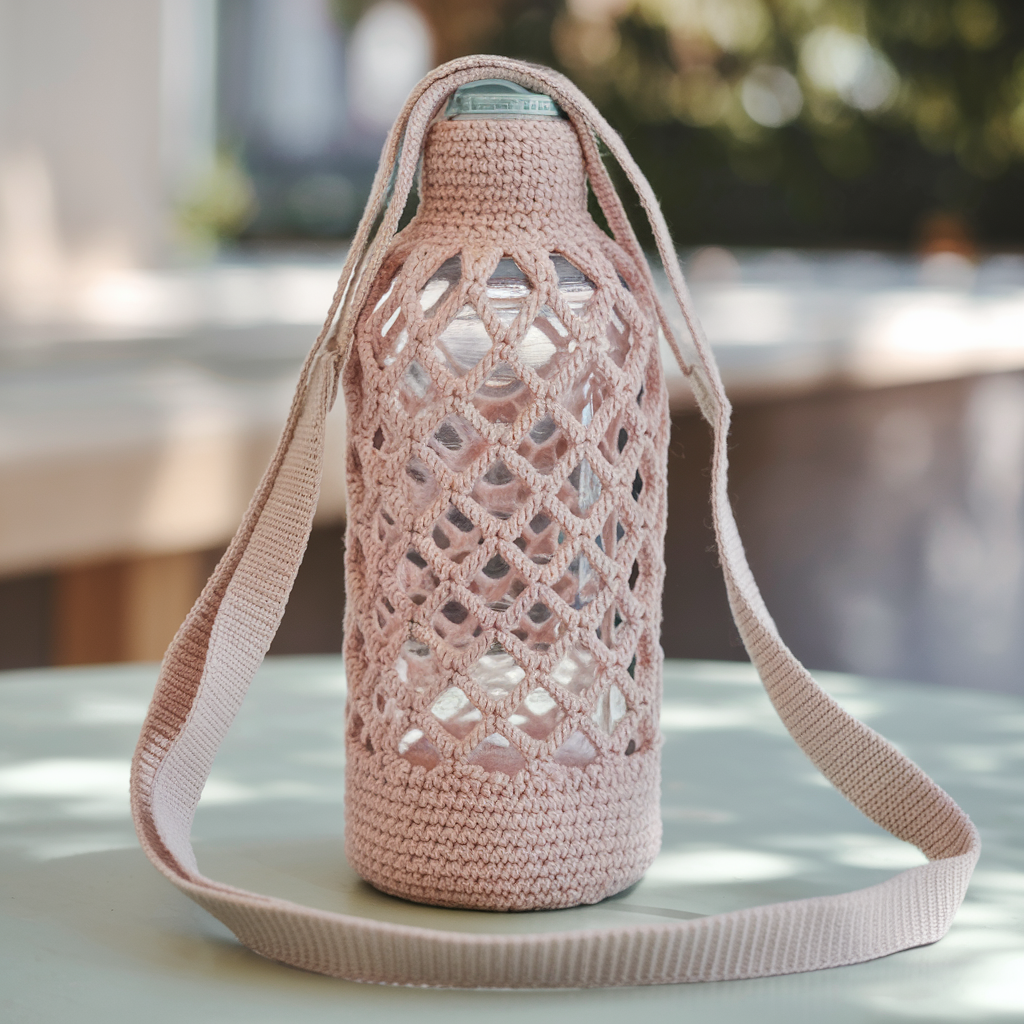
Airy, lightweight, quick-to-make; great for beach days and summer markets where you want breathability and quick drying.
Skill level: Beginner to Confident Beginner
Yarn & hook: Cotton or cotton-blend (sport to worsted depending on desired openness). 4.0–5.0 mm hook. 150–200 (200–300) yds for Mini (Standard, Tall).
Finished height: mini 7″, standard 9″, tall 12″.
Why this works
Open mesh uses less yarn, dries fast, and stretches enough to slip a bottle in while staying secure when corded.
Stitch idea (open chain mesh)
Pattern repeat in rounds: (dc, ch 2, sk 2) or dc in dc, ch 2 depending on desired openness. For stronger structure, do dc in each st with ch-2 mesh chain above.
Step-by-step
Base
- Base still needs a firm flat circle. Use the same base increase sequence to reach ~36–44 stitches depending on target circumference and then change to mesh.
Transition round
- After last increase round, work 1 round sc to tidy and set base, then start mesh.
Mesh body — method A (net-like)
- Round 1: ch3 (counts as dc), sk next st, dc in next st, ch 2, sk next st, dc in next st repeat. This creates vertical loops and diamond mesh as you stack rounds.
- Round 2: Align dc into dc below and ch 2 in the open spaces to build consistent mesh. Repeat until desired height is reached.
Strap & top
- For top stability, work 2–3 rounds sc in last row to prevent large stretch at opening. Then do an eyelet round sc 3, ch 2, sk 2 and thread cord.
- Make a long shoulder strap: chain to length, sc back along chain, attach to opposing sides and reinforce. For a market bag vibe, make two long straps and use them as backpack-style.
Optional lining
- Mesh is fine for holding bottles but for small items add a fabric pouch liner or a sewn-in cotton bottom disc to prevent small things falling through holes.
Finishing & care
- Cotton mesh dries fast; machine wash gentle if label allows, otherwise hand wash. Avoid long-term storage with damp bottle inside to prevent mildew.
Final finishing tips that actually matter
- Test fit early. Try the bottle into your tube before adding eyelets, collars, or straps. If it’s snug or too loose, rip back a few rounds and adjust.
- Reinforce strap joins. Sew straps through multiple stitches and, for heavy loads, stitch a small reinforcement rectangle inside the top seam.
- Stitch density for durability. If you carry glass, use tighter stitches (sc or hdc) and cotton blends — they resist abrasion and hold shape.
- Cord choices. For drawstrings use braided cotton, leather thong, or macramé cord — something with a little friction so it doesn’t slip out easily.
- Lining. If you’ll carry delicate items inside with the bottle (sunglasses, phone) sew in a soft liner or make a removable fabric insert.
Care summary
- Cotton: machine-wash gentle or hand wash; reshape and air dry.
- Cotton-blend / acrylic: machine-wash gentle; avoid high heat.
- Beads/embellishments: hand-wash to protect details.
- Straps & metal hardware: remove or hand-wash to keep hardware rust-free.
conclusion
Five functional, stylish, and tweakable bottle-holder patterns: granny-cluster texture, a tidy floral applique design, a surface-crochet heart variant, a reinforced wine-bottle carrier, and an airy mesh for summer. All build from the same reliable logic: flat base → stitched tube → top finishing → strap/closure. Swatch first, measure your actual bottle, pick the base round that matches your circumference target, and reinforce strap joins if you plan to hang a full bottle from it. Make one for yourself, then make five more because summer requires options and yarn is persuasive.Think