A crochet beret has a way of making even the simplest outfit feel more intentional. It is soft, artistic, a little romantic, and always stylish in that effortless, timeless way. Whether you imagine a classic Parisian look, a playful statement piece, or something textured and cozy for everyday wear, a beret is one of the most beautiful crochet accessories you can make.
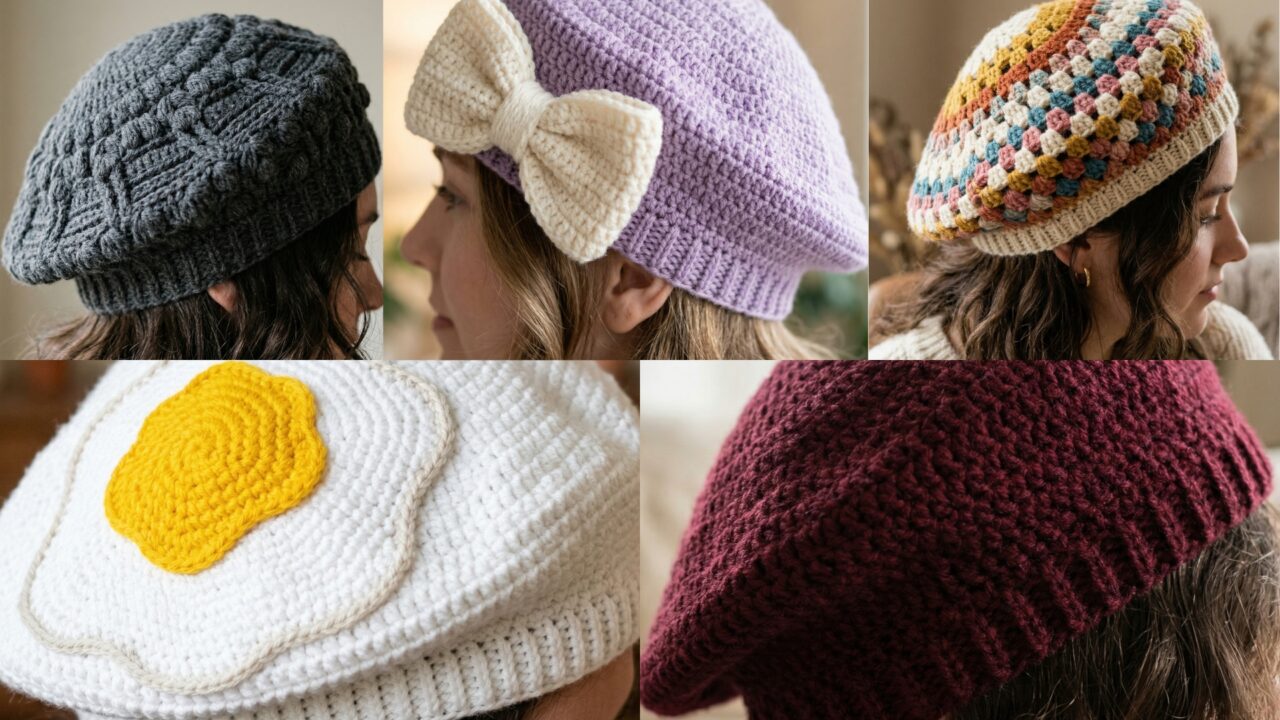
What makes crochet berets especially enjoyable is how much personality you can build into such a small project. A simple circular shape can become elegant and refined with neat shaping, dramatic and feminine with a big bow, vintage-inspired with granny stitch texture, chic and dimensional with rich stitch detail, or quirky and fun with a fried egg design. That means every beret can feel like its own little fashion moment.
In this post, you will find five stylish crochet beret hat patterns with clear, step-by-step guidance, practical notes, and helpful finishing tips. Each section is written to be easy to follow while still giving you enough detail to create a polished, wearable result. If you love handmade accessories that feel both fashionable and personal, these beret ideas are a wonderful place to begin.
Quick Notes
Project type: Crochet beret hats
Best for: Fashion accessories, handmade gifts, seasonal styling, and statement outfits
Skill level: Beginner to intermediate
Hook size: Usually 3.0 mm to 5.0 mm, depending on yarn weight and drape
Yarn weight: DK, light worsted, or worsted weight yarn
Best yarn choice: Cotton blends, soft acrylic, wool blends, or merino blends
Finished size: Usually one-size-fits-most or customizable by crown diameter and band length
Time to complete: A few hours to one day depending on detail
Helpful stitches: Chain, slip stitch, single crochet, half double crochet, double crochet, increase, decrease, puff stitch, front post stitch, back post stitch, granny clusters, color change
Common Materials
Most beret patterns use the same basic supplies.
- Yarn in your chosen colors
- Crochet hook suited to the yarn
- Yarn needle
- Scissors
- Stitch marker
- Measuring tape
- Optional blocking tools
- Optional decorative buttons, bows, or appliqués
For berets, yarn choice matters a lot because the hat needs both structure and drape. A yarn that is too stiff may make the beret feel flat, while a yarn that is too soft may prevent the shape from holding properly. A balanced yarn with some body and a little flexibility often gives the best result.
1. Crochet Classic Beret Hat Pattern
A classic beret is timeless, elegant, and incredibly wearable. It is the kind of hat that works with casual outfits, dressy coats, and everything in between. This style usually has a smooth rounded crown, a gentle slouch, and a neat band that keeps the hat comfortably in place.
Quick Notes
Skill level: Beginner to intermediate
Finished size: Typically 9 to 11 inches in diameter, depending on fit
Style: Timeless, chic, simple, elegant
Best colors: Black, cream, burgundy, navy, taupe, or soft neutrals
Materials
- Medium-weight yarn with good drape
- 4.0 mm to 5.0 mm crochet hook
- Stitch marker
- Yarn needle
- Scissors
- Measuring tape
Step-by-Step Guide
Step 1: Start the crown
A classic beret begins with a flat circular crown. Start with a magic ring or chain loop, then work increases evenly in each round. The goal is to create a smooth, flat circle that gradually expands outward.
The crown size determines how full the beret will look, so take your time here and keep the rounds even.
Step 2: Keep the circle flat
As you work, check that the circle stays flat instead of cupping or curling. If it begins to ripple, you may have too many increases. If it starts to curl inward, you may need more increases. A balanced crown is the foundation of the whole hat.
This step matters because the crown gives the beret its clean silhouette.
Step 3: Create the slouch section
Once the crown reaches the desired size, stop increasing and work several rounds in the same stitch count. This creates the gentle side slope that gives the beret its shape. The fabric will begin to curve naturally as you continue.
This part gives the hat its soft, fashionable slouch.
Step 4: Add the band
After the slouch section, begin the hat band. The band should be slightly firmer so it fits securely on the head. You can use single crochet, half double crochet, or a ribbed stitch for this part.
A snug but comfortable band helps the beret stay in place.
Step 5: Shape the crown slightly
When the hat is finished, gently shape the crown with your hands. Some makers like to flatten the top a little for a more authentic beret look. If needed, block the hat lightly so the crown settles into a smooth curve.
Step 6: Finish and secure
Weave in all ends carefully and try the hat on to check the fit. If the band feels too loose, you can add a few more rounds or a small elastic thread inside the edge.
Helpful Tips
The classic beret looks especially elegant in solid colors. If you want a French-inspired feel, keep the design minimal and let the shape do the work. A soft wool blend or smooth acrylic yarn usually gives the best drape for this style.
2. Crochet Big Bow Beret Hat Pattern
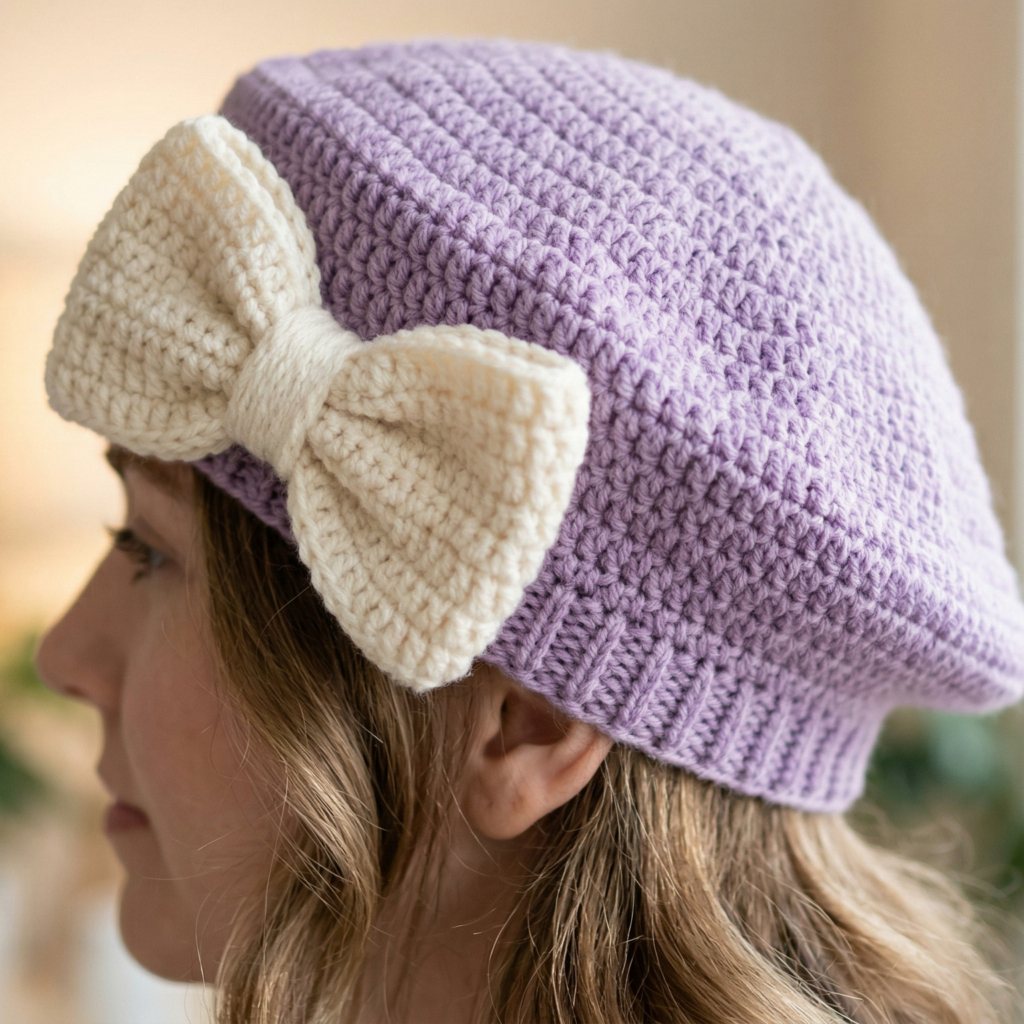
A big bow beret is charming, feminine, and full of personality. It takes the graceful shape of a beret and adds a bold decorative bow that makes the hat feel playful and eye-catching. This design is perfect if you want something that feels cute and fashion-forward at the same time.
Quick Notes
Skill level: Beginner to intermediate
Finished size: Similar to a classic beret, with added bow detail
Style: Sweet, dramatic, feminine, statement-making
Best colors: Pink, cream, red, soft lavender, black, or pastel shades
Materials
- Yarn for the beret body
- Matching or contrast yarn for the bow
- Crochet hook suited to the yarn
- Yarn needle
- Scissors
- Stitch marker
- Optional stiffener for the bow
Step-by-Step Guide
Step 1: Make the beret base
Begin by crocheting the beret body just like a classic beret. Start with a circular crown, then work the slouch section and band. Keep the base simple so the bow remains the focal point.
A clean, smooth beret body gives the decoration more impact.
Step 2: Decide bow placement
Choose where you want the bow to sit. Most often, it is placed on the side or front of the beret. A side bow feels playful and chic, while a front bow creates a bold statement.
The placement changes the whole personality of the hat.
Step 3: Crochet the bow pieces
Make two rectangular strips for the bow loops and one smaller strip for the center knot. Use tight, neat stitches so the bow holds its shape. If you want a fuller look, make the loops slightly wider and longer.
The bow should feel structured enough to stand out but still soft enough to match the beret.
Step 4: Assemble the bow
Fold the loop pieces into bow shapes and sew them together in the center. Wrap the small center strip around the middle to create the knot. Take a few extra stitches to secure everything tightly so the bow does not lose its shape with wear.
A well-secured bow makes the hat feel polished.
Step 5: Attach the bow to the beret
Sew the completed bow firmly onto the beret. Make sure it sits flat and does not pull the hat out of shape. If needed, use a few hidden stitches through the base to anchor it more securely.
This is the moment where the hat really becomes a statement piece.
Step 6: Check balance and shape
Try on the beret and check that the bow sits evenly. If the bow feels too heavy, you can simplify the loops or make the yarn a little lighter next time. The goal is a hat that stays comfortable while still looking dramatic.
Helpful Tips
A big bow beret works beautifully in a soft solid color, but it can also look gorgeous in a two-tone design. If you want a more elegant feel, use a bow in the same color family as the hat. If you want a more playful style, choose a contrast color that stands out.
3. Crochet Granny Stitch Beret Hat Pattern
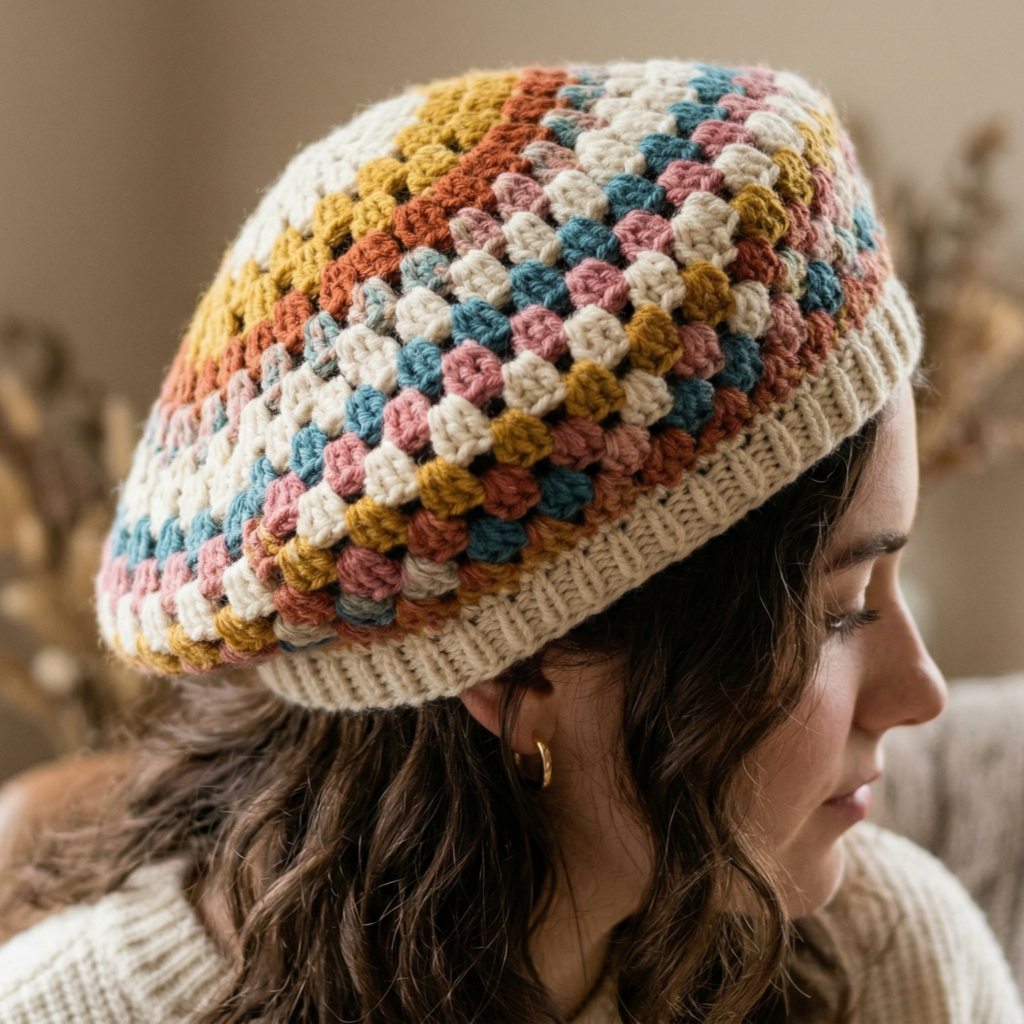
A granny stitch beret blends classic crochet texture with a playful vintage feel. It is a great choice if you love the look of granny squares and want something wearable that still feels artistic. The open texture and repeating clusters make the hat feel light, cozy, and full of character.
Quick Notes
Skill level: Beginner to intermediate
Finished size: Adjustable, usually relaxed and slightly slouchy
Style: Retro, textured, handmade, cheerful
Best colors: Cream, mustard, rose, teal, rust, or multi-color combinations
Materials
- One or more yarn colors
- Crochet hook suited to your yarn
- Yarn needle
- Scissors
- Stitch marker
- Measuring tape
Step-by-Step Guide
Step 1: Start the crown
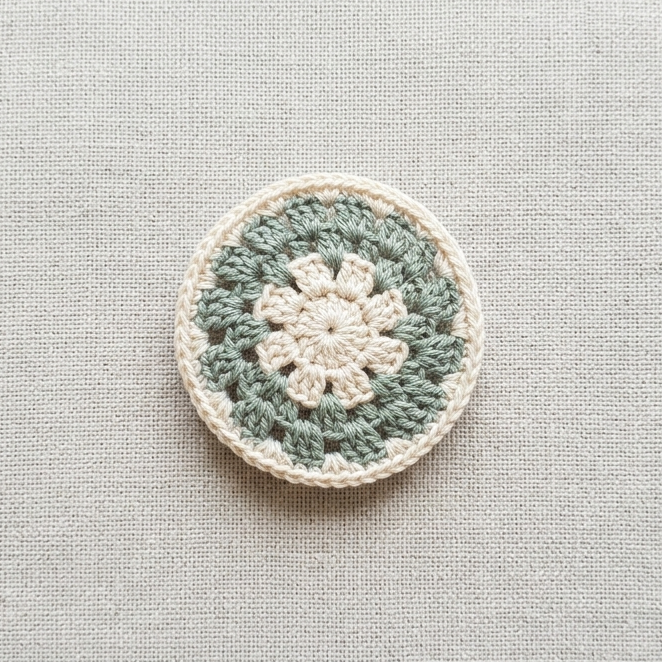
Make a flat circular crown using granny clusters or a similar group stitch pattern. Begin with a small center ring and expand in rounds. The clusters should be spaced evenly so the circle stays balanced.
This is the base that determines how wide the beret will be.
Step 2: Build the granny texture
Continue working granny stitch rounds until the crown reaches the desired width. The repeating cluster pattern creates the signature vintage look. Keep your stitches consistent so the shape remains smooth.
This section gives the beret its airy, decorative quality.
Step 3: Transition into the side slope
Once the crown is complete, stop increasing and continue in the granny stitch pattern without adding extra space. This allows the fabric to start curving downward into the classic beret slope.
The change from flat circle to gentle slouch is what gives the hat its shape.
Step 4: Add color changes if desired
Granny stitch berets are especially fun in multiple colors. You can change colors each round for a bold rainbow look or use a muted palette for a softer vintage feel. Keep the transitions neat so the color changes look intentional.
Color can completely change the mood of the hat.
Step 5: Create a clean band
Once the beret is the right depth, finish with a tighter band. This can be done in single crochet or a ribbed stitch. The band should feel secure without being tight.
A neat band helps the hat sit properly on the head.
Step 6: Shape and finish
Block the beret lightly if needed. This can help open the stitches and improve the round shape. Weave in ends carefully, especially if you used several colors.
Helpful Tips
A granny stitch beret looks lovely in earthy tones for a boho feel, or in bright colors for a cheerful retro look. If you want a very wearable everyday piece, try one main color with a single contrast accent.
4. Crochet Textured French Beret Hat Pattern
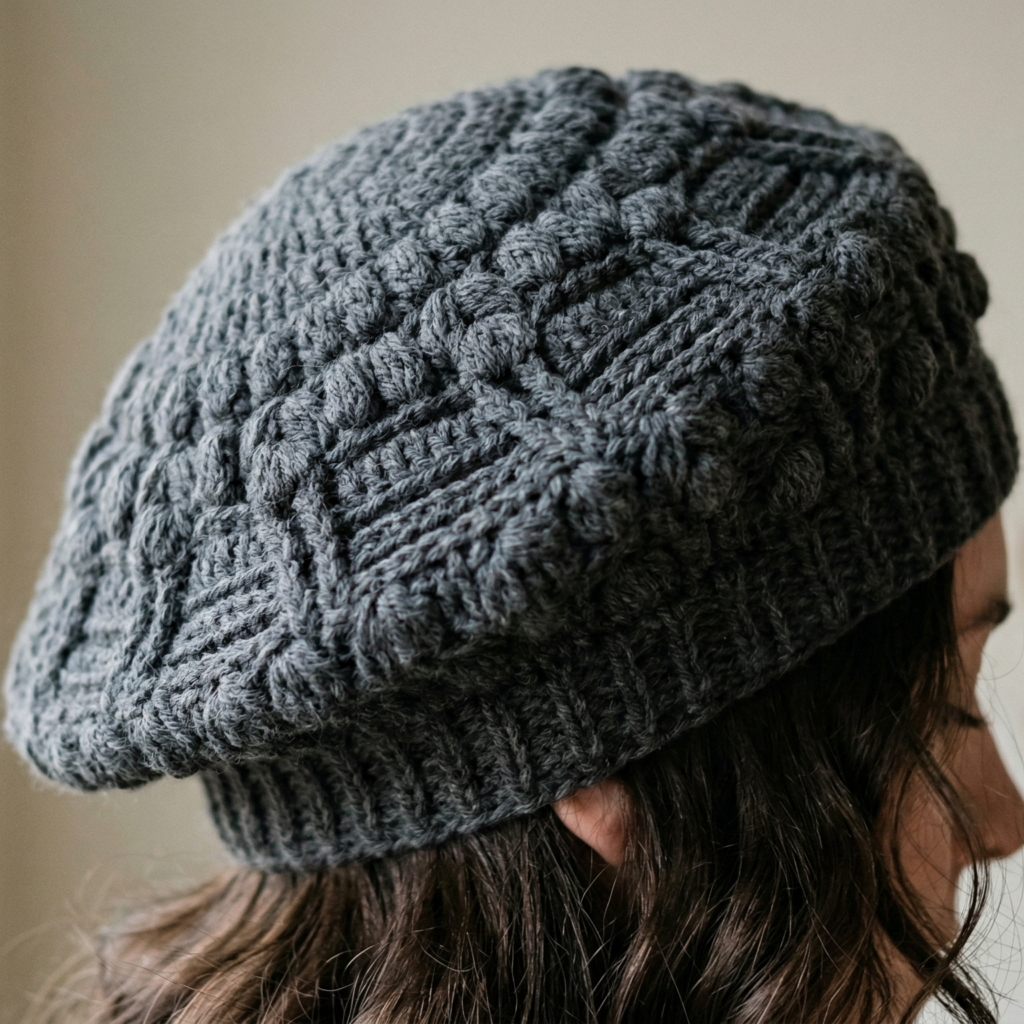
A textured French beret feels refined, stylish, and beautifully dimensional. Instead of relying only on shape, this design uses stitch texture to create interest and depth. It is perfect if you want a hat that looks elegant and handcrafted without being overly decorative.
Quick Notes
Skill level: Intermediate
Finished size: Classic beret shape with textured surface
Style: Chic, refined, dimensional, timeless
Best colors: Navy, charcoal, camel, cream, forest green, wine
Materials
- Yarn with clear stitch definition
- Crochet hook matched to yarn
- Stitch marker
- Yarn needle
- Scissors
- Measuring tape
Step-by-Step Guide
Step 1: Choose a textured stitch pattern
A textured French beret works best with stitches such as front post double crochet, back post double crochet, puff stitches, or a combination of raised stitches. Pick one texture and keep it consistent so the hat feels elegant rather than busy.
A single strong texture often looks more sophisticated than too many mixed stitches.
Step 2: Shape the crown
Start with a circular crown using your chosen stitch pattern. Keep the increases evenly spaced so the texture does not distort the shape. This part should stay relatively flat before the curve begins.
A balanced crown helps the texture sit evenly.
Step 3: Build the raised body
Once the crown is complete, continue without increases. The stitches will begin to form a gentle slope while the texture adds richness to the surface. This is where the hat gains its elegant French-inspired look.
The raised stitches create shadow and depth.
Step 4: Add controlled slouch
To keep the beret flattering, allow the body to drape softly. If the fabric feels too stiff, switch to slightly larger stitches or a softer yarn. The hat should hold shape while still looking relaxed.
The slouch should feel graceful, not stiff.
Step 5: Finish the band
Work a firmer band in tighter stitches. Ribbing can be a lovely choice because it adds contrast and helps the hat fit more securely. The textured body and smooth band create a polished finish.
Step 6: Block lightly
Because texture can be a little dense, light blocking helps the hat settle and improves the overall drape. Shape the top gently with your hands after blocking so it keeps the classic beret profile.
Helpful Tips
This style looks best in solid colors because the stitch texture is the main design element. Neutral shades and deep jewel tones work especially well. If you want a very elegant hat, choose a yarn that has a soft sheen or a smooth finish.
5. Crochet Fried Egg Inspired Beret Hat Pattern

A fried egg inspired beret is fun, quirky, and full of personality. It is the kind of accessory that makes people smile instantly. This design is ideal if you want a playful handmade piece that feels unexpected, cute, and creative. It takes the classic beret shape and turns it into a novelty statement item.
Quick Notes
Skill level: Beginner to intermediate
Finished size: Standard beret size with decorative appliqué
Style: Cute, playful, novelty, bold
Best colors: White, yellow, cream, soft beige, and optional accent colors
Materials
- White or cream yarn for the “egg white”
- Yellow yarn for the yolk
- Crochet hook suited to yarn
- Yarn needle
- Scissors
- Stitch marker
- Optional felt backing for yolk or decoration
Step-by-Step Guide
Step 1: Crochet the beret base
Begin with a standard beret shape in white, cream, or a pale neutral color. The body of the hat represents the egg white, so a soft light color works best. Follow the usual crown, slouch, and band construction.
A clean light base makes the yolk stand out clearly.
Step 2: Make the yolk appliqué
Crochet a small round circle in bright yellow yarn to represent the egg yolk. Keep it slightly raised or stuffed very lightly if you want it to stand out more. The yolk should be bold and clearly visible.
The yolk is the main focal point, so make it smooth and neat.
Step 3: Shape the yolk gently
If you want a more realistic fried egg effect, make the yolk slightly irregular rather than perfectly round. A tiny uneven edge can make it look more organic and whimsical.
This small detail adds charm and personality.
Step 4: Attach the yolk to the beret
Sew the yellow circle onto the side or front of the beret. Side placement gives the hat a playful fashion feel, while front placement makes the design more obvious and fun. Use small hidden stitches so the attachment is secure.
The yolk should sit flat enough to wear comfortably.
Step 5: Add optional egg white shaping
If you want a more literal fried egg look, you can add small wavy edges or tiny scallops in a slightly different shade of white around the beret crown. This can create the visual effect of a lightly cooked egg white without making the hat too busy.
Keep the details simple so the design remains wearable.
Step 6: Finish and balance
Try the beret on and check how the yolk sits. Make sure the piece feels balanced and does not weigh one side down too much. Weave in ends carefully so the novelty design still looks clean and intentional.
Helpful Tips
This beret is especially fun for themed outfits, gifts, or playful fashion content. If you want a more subtle version, use cream and soft yellow. If you want maximum impact, use a bright yolk and a crisp white base for a bold cartoon-like effect.
Conclusion
Crochet berets are one of those projects that combine fashion, creativity, and practicality in the best way. They are stylish enough to elevate an outfit, simple enough to customize, and enjoyable enough to make more than once. Whether you love the elegance of a classic beret, the drama of a big bow, the texture of granny stitch, the sophistication of a French-inspired design, or the humor of a fried egg motif, each pattern gives you a chance to express your style in a handmade way.
The beauty of a beret is that it can be subtle or bold, traditional or playful, minimalist or decorative. That makes it a perfect accessory for experimenting with color, texture, and shaping without committing to a large garment. With the right yarn, careful increases, and a little finishing attention, even a simple crochet beret can become a favorite piece in your wardrobe.
These five beret patterns show just how versatile crochet can be. A small project can still make a big style impact, and a handmade hat can feel like a signature accessory rather than just something practical to wear. If you are looking for a project that is fun to make and beautiful to wear, these beret ideas are a wonderful place to begin.