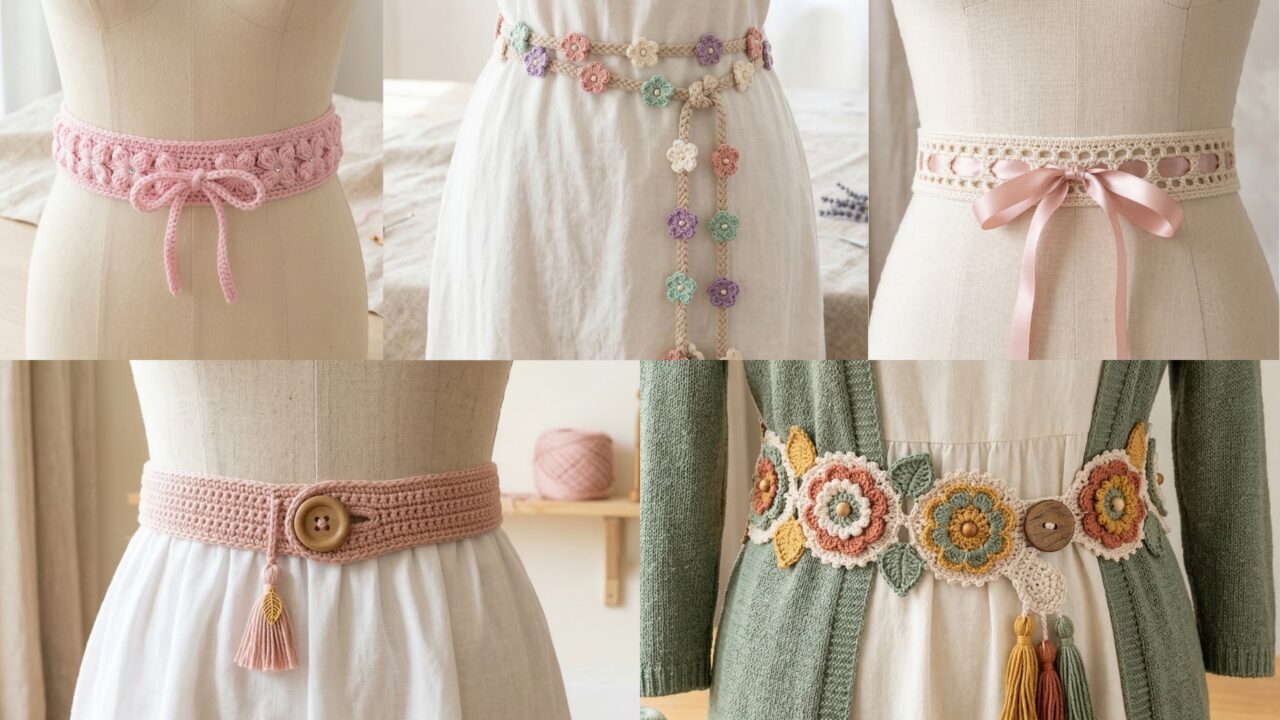
A handmade crochet belt is a tiny runway for your creativity — it’s fast, useful, and one of the easiest accessories to personalize for a gift. Below are five full belt patterns (button belt, lacy ribbon belt, butterfly-stitch baby-pink belt, flower lariat, and boho floral) with everything your readers need: skill level, finished size and how to adjust it, exact materials, stitch abbreviations, step-by-step construction, finishing/closures, variations, and care tips. Each belt is designed so you can finish one in an evening or over a weekend.
Quick planning note before you begin: measure the waist/hip where the belt will sit (belt style depends on placement). For an adult medium, aim for finished belt lengths around:
- waist belt (at natural waist): 28–34 in (71–86 cm)
- hip belt (low-slung): 32–40 in (81–102 cm)
- sash/lariat: 50–70 in (127–178 cm) or longer.
Adjust chain counts or number of repeats to hit your target length — I include formulas below.
Abbreviations (US terms)
- ch = chain
- sl st = slip stitch
- sc = single crochet
- hdc = half double crochet
- dc = double crochet
- tr = treble crochet
- sk = skip
- rep = repeat
- st(s) = stitch(es)
- BLO / FLO = back/front loop only
1. Crochet Button Belt Pattern
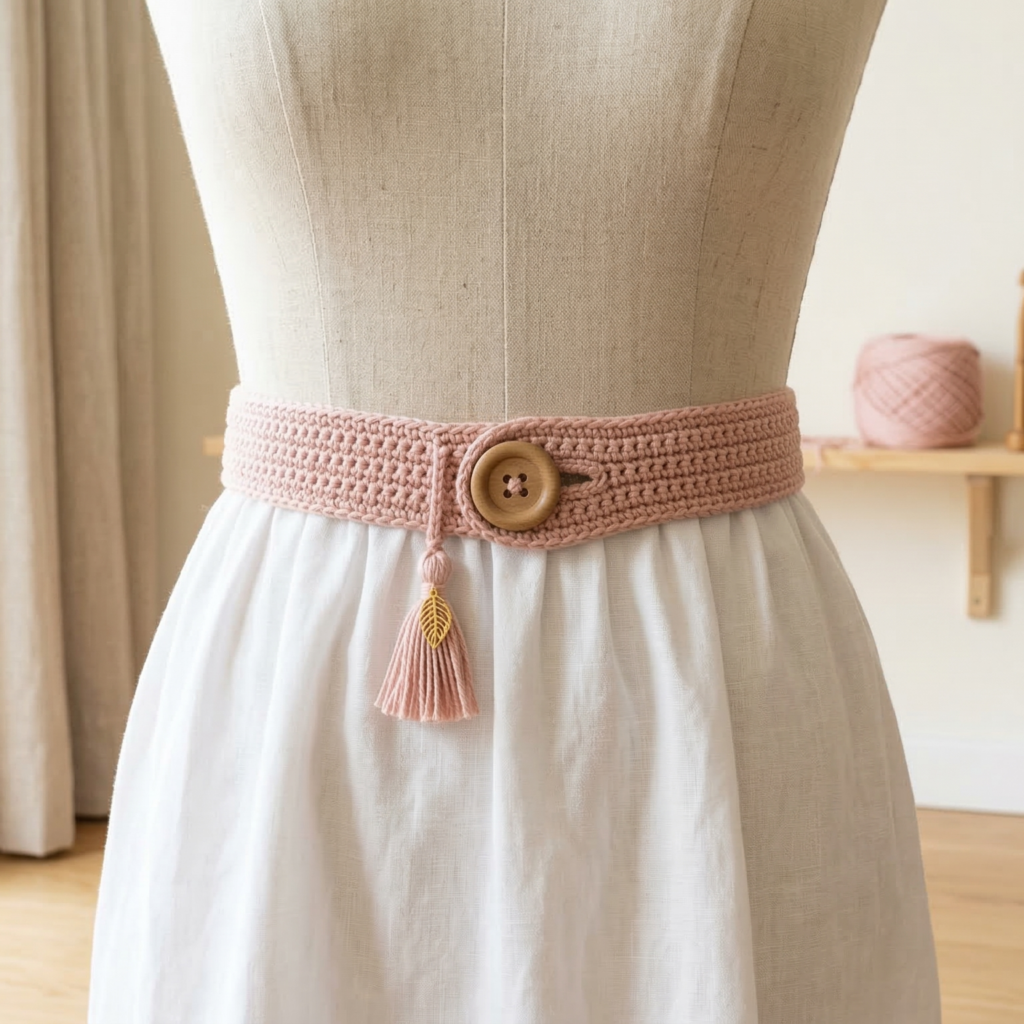
A clean, wearable belt with a tidy band and button closure — classic and beginner-friendly.
Skill level: Beginner
Finished size: customizable — sample adult medium finished length 34 in / 86 cm including overlap for button. Band width about 1 in / 2.5 cm (can be wider).
Yarn & hook: Sport/DK cotton or cotton-blend for low stretch (approx 100–150 yds / 90–140 m). Hook 3.5–4.0 mm. Use a sturdy yarn so buttonholes hold shape.
Materials & tools
- DK cotton yarn (~100–150 yds)
- Crochet hook 3.5–4.0 mm
- 1 sturdy button (¾–1 in / 18–25 mm)
- Tapestry needle, measuring tape, scissors, small amount of interfacing or fusible tape (optional, for reinforcing buttonhole area)
How it works (overview)
You crochet a long narrow strap in sc or hdc for a firm band, add a neat edging, and add a reinforced buttonhole at one end plus the button at the other. Optionally line or add interfacing at the ends for durability.
Pattern (adult medium example)
- Measure and chain: To make a 34 in finished belt with a 1 in overlap for button, chain to a length slightly longer than waist — chain length in sc will shorten slightly after finishing. As a starting point: ch 120 (this is a sample; measure your chain against the wearer — you can add/subtract chains). Add 1 for turning.
- Tip: chain 80–140 depending on gauge and target length; always measure.
- Row 1 (base): Sc in 2nd ch from hook and in each ch across. Turn. (This creates a firm band.)
- Rows 2–4 (build width): Ch1, sc across. Repeat until band is about 1 in / 2.5 cm wide (3–4 rows). For a wider belt, do 6–8 rows.
- Edge round (optional): Work 1 round of hdc or crab stitch (reverse sc) around the entire strap to give a polished edge. Fasten off leaving a long tail if you’ll sew a button.
- Buttonhole end: At one narrow end, create a buttonhole: On last row, work sc across leaving a gap where the button will fasten — for a ¾ in button, sc in next 8 sts, ch4, sk 4 sts, sc in remaining sts — when you fold and sew, the ch4 loop will form a buttonhole. Adjust ch count to fit your button snugly. Reinforce by working a round of sc around the hole on both sides.
- Button end: At the opposite end, sew on button through both thicknesses of the strap (or sew on after folding and backing for strength).
- Reinforce (recommended): Cut a small felt or interfacing patch to glue or sew inside each end where button/buttonhole sits for strength and to reduce stretch.
- Finishing: Weave in ends. Block lightly if cotton; test the buttonhole and adjust if too tight or loose.
Variations & styling
- Use a textured stitch (waffle or herringbone) for a chunkier belt.
- Make it reversible by using reversible stitches and sewing button through the seam.
- Add a small tassel or charm next to the button for personalization.
Care
- Cotton belts: machine wash gentle, reshape flat; hang to dry. Remove buttoned belt before washing if you glued interfacing.
2. Crochet Lacy Ribbon Belt Pattern
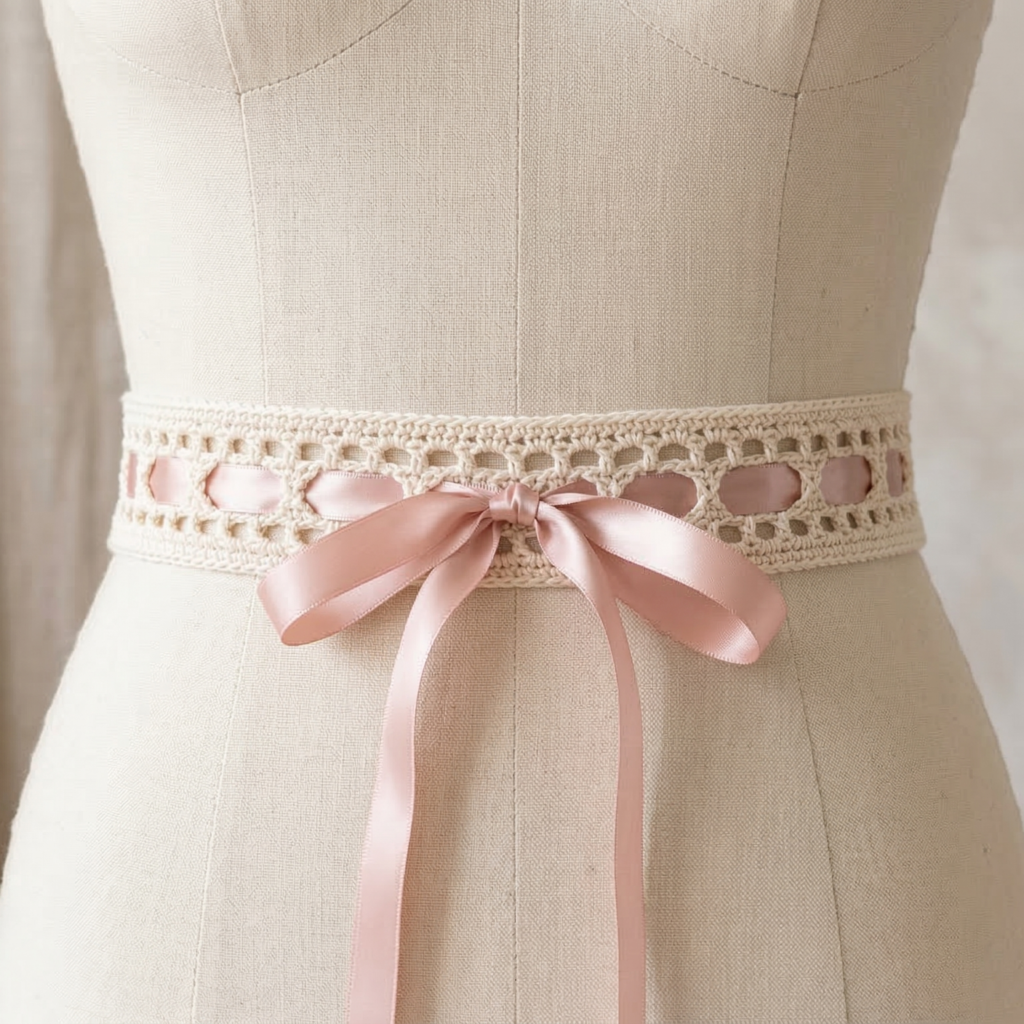
A romantic ribbon-through-lace belt that looks like a store-bought accessory — lace bands with a satin ribbon threaded through the eyelets.
Skill level: Beginner–Intermediate
Finished size: Band length 34–40 in (86–102 cm) to thread ribbon and tie; width about 1.5–2 in.
Yarn & hook: Sport/DK mercerized cotton for sheen and drape (150–200 yds). Hook 3.5 mm. Ribbon: 1/2–1 in wide satin ribbon.
Materials & tools
- DK mercerized cotton yarn (~150–200 yds)
- 1/2–1 in wide satin ribbon (same length as belt + extra for ties)
- Hook 3.5 mm, tapestry needle, scissors, measuring tape
Overview
Work a repeating lace panel in DC/chain-sapce stitches that produce evenly spaced holes; finish edges in sc then thread ribbon through holes.
Stitch pattern (repeat block)
A simple, effective lace repeat: dc, ch2, sk2, dc with a return anchor row.
Pattern (sample)
- Chain foundation: Chain a multiple of 6 + 3. Example ch 120 (measure to width). Turn.
- Row 1: Dc in 3rd ch from hook and across. Turn.
- Row 2 (lace): Ch3 (counts as dc), ch2, sk 2 sts, dc in next st — repeat across. Turn.
- Row 3 (anchor): Ch1, sc across, working sc into the middle of ch-2 spaces to anchor holes; this is the row the ribbon will thread through. Turn.
- Repeat Rows 2–3 until band height is 1.5–2 in (usually 6–8 rows total).
- Edge finishing: Work 1 row of sc around the rectangle to tidy edges.
- Cut & finish: Fold short ends ½ in and sc to make tidy ends. Weave in ends.
- Thread ribbon: Using a safety pin on ribbon end, thread the ribbon through the ch-2 holes along the anchor row. Tie in a bow at front or back.
Tips & variations
- For a boho-chic look, use a leather thong instead of satin ribbon and tie at side.
- Make the ribbon removable: sew two small button-loop closures at ends so the ribbon can be swapped by season.
Care
- Remove ribbon before washing; wash belt gently and dry flat. Ribbon may be hand-washed separately.
3. Crochet Baby Pink Butterfly Stitch Belt Pattern
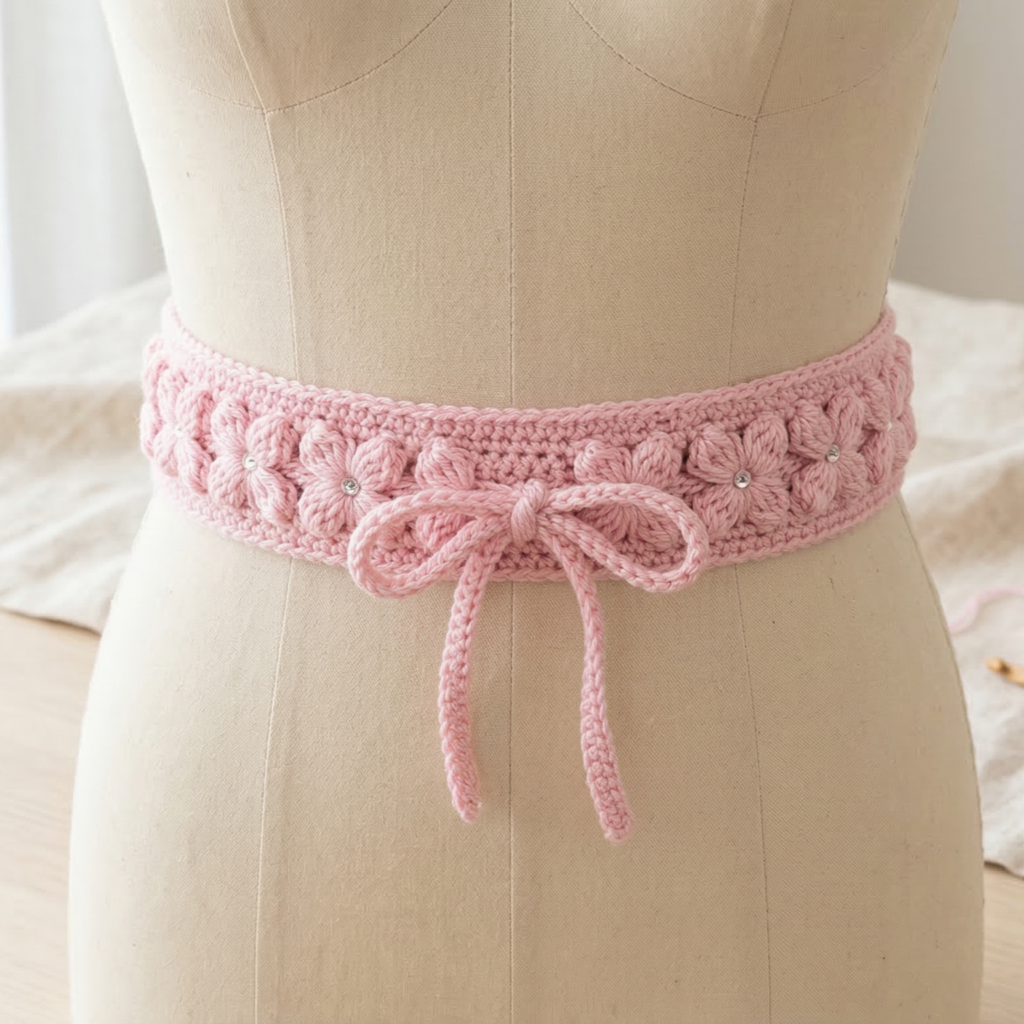
A sweet, textured belt built from repeated butterfly stitch clusters — super cute as a gift for teens or as an accent piece.
Skill level: Intermediate (butterfly / cluster stitches)
Finished size: Adult medium 36 in long (wrap style) and 1.5 in wide (after 4 rows of repeats).
Yarn & hook: Soft DK or light worsted acrylic/cotton-blend in baby pink (~150 yds). Hook 4.0 mm.
Materials & tools
- DK yarn (~150 yds) in pink
- Crochet hook 4.0 mm
- Tapestry needle, measuring tape, optional small snap or button for closure
What is the butterfly stitch?
Butterfly stitch is a decorative cluster formed by working a group of dc/puff stitches in sequence and anchoring them with scs so the motif resembles a little butterfly or bow.
Sample stitch (one butterfly)
- Work (dc in next st, yo pull up loop 5 times across successive sts, yo and pull through all loops, ch1, sc in next st) — that cluster becomes one butterfly. Exact technique can vary; I give a robust and forgiving version below.
Pattern (strip belt method)
- Chain foundation: Chain to desired length: ch 140 (sample for adult medium wrap; measure and adjust). Turn.
- Row 1 (base): Sc in 2nd ch from hook and across. Turn.
- Row 2 (butterfly row): sc in next 3, butterfly cluster over next 4 sts (see cluster instructions), sc in next 3 — repeat across. End with scs to balance. Turn.
Butterfly cluster (detailed):
- Insert hook into next stitch, yo and pull up loop (repeat in same st and next 2–3 sts until you have 6 loops on hook), yo and pull through all loops, ch1 to secure; sc in following sc to anchor. (Practice on scrap to get the cluster height right.)
- Row 3: Ch1, sc across to flatten and anchor clusters. Turn.
- Repeat Rows 2–3 until belt height is ~1.5 in (3–4 butterfly rows).
- Edge finish: 1 row sc around for tidy finish.
Closure options
- Button loop: Create a loop on one end (ch6, sl st to base) and sew a button on opposite end.
- Tie ends: Make each end slightly longer and finish with 2–3 in fringe to tie.
- Hidden elastic: Sew a short elastic segment into seam to hold in place when wrapping.
Styling & variations
- Make in two colors: soft pink butterflies on a neutral base.
- Add tiny sequin centers to butterflies (sewed on) for a sparkly birthday-gift belt (avoid if the recipient is very young due to choking hazard).
Care
- Machine-wash gentle (yarn-dependent) or hand wash; reshape flat.
4. Crochet Flower Lariat Belt Pattern

A lariat-style belt made from a braided/cord base with clustered flowers at intervals — this one is great as a long sash you can loop and tie.
Skill level: Beginner–Intermediate
Finished size: Typical lariat length 60–72 in (152–183 cm) — long enough to wrap and knot; flowers spaced every 6–12 in.
Yarn & hook: Worsted weight cotton or cotton-bamboo blend (~200–300 yds) for cord; contrast thread for flowers. Hook 4.5 mm for flowers (smaller for denser flowers).
Materials & tools
- Worst ed cotton yarn for cord (~200–300 yds)
- Contrasting yarn for flowers (small amounts)
- Crochet hook 4.5 mm (cord) & 3.0–3.5 mm (flowers)
- Tapestry needle, measuring tape, optional small beads for flower centers
Construction overview
Make a long crocheted cord (i-cord or chained tube), then crochet small flowers and attach them spaced along the cord. The ends can be frayed into tassels or finished with a flower cluster.
Option A — Crocheted tubular cord (stable & neat)
- Make cord by working: ch 3, sc in 2nd ch from hook and across, sl st to form tube? Simpler: use a foundation chain and work sc into the back loop only while folding to make a tube, or use a 3-stitch i-cord method with a small hook: ch 4, sc in 2nd ch and following 2 ch, then slip-stitch into base, repeat to form a tube lengthwise. Practice and choose method you like.
- Length: Work cord until you reach 60–72 in. Keep tension even so cord lays flat.
Flowers (make many)
Simple 5-petal flower
- MR, ch1, 10 sc into ring, pull tight. (10)
- ch4, sl st into next sc around to make 10 loops. Join.
- Into each loop: (sc, hdc, dc, hdc, sc). Fasten off leaving tail to sew to cord.
- Make 8–12 flowers depending on length and spacing.
Assembly
- Lay cord flat and space flowers evenly (every 6–12 in). Use tapestry needle and the flower’s tail to sew flowers to cord through both layers of cord so they’re secure. Use small reinforcing stitches on underside.
- Finish ends: either leave both ends as tassels (fold many short lengths of yarn and knot through ends), or attach a cluster of 3 flowers at each end.
Variations & styling
- Add tiny bead centers (sewn securely) or a French-knot center.
- Make the cord multi-strand (3 cords braided) for a chunky boho look.
Care
- Cotton lariat can be machine washed on gentle; hang to dry to preserve shape.
5. Crochet Boho Floral Belt Pattern
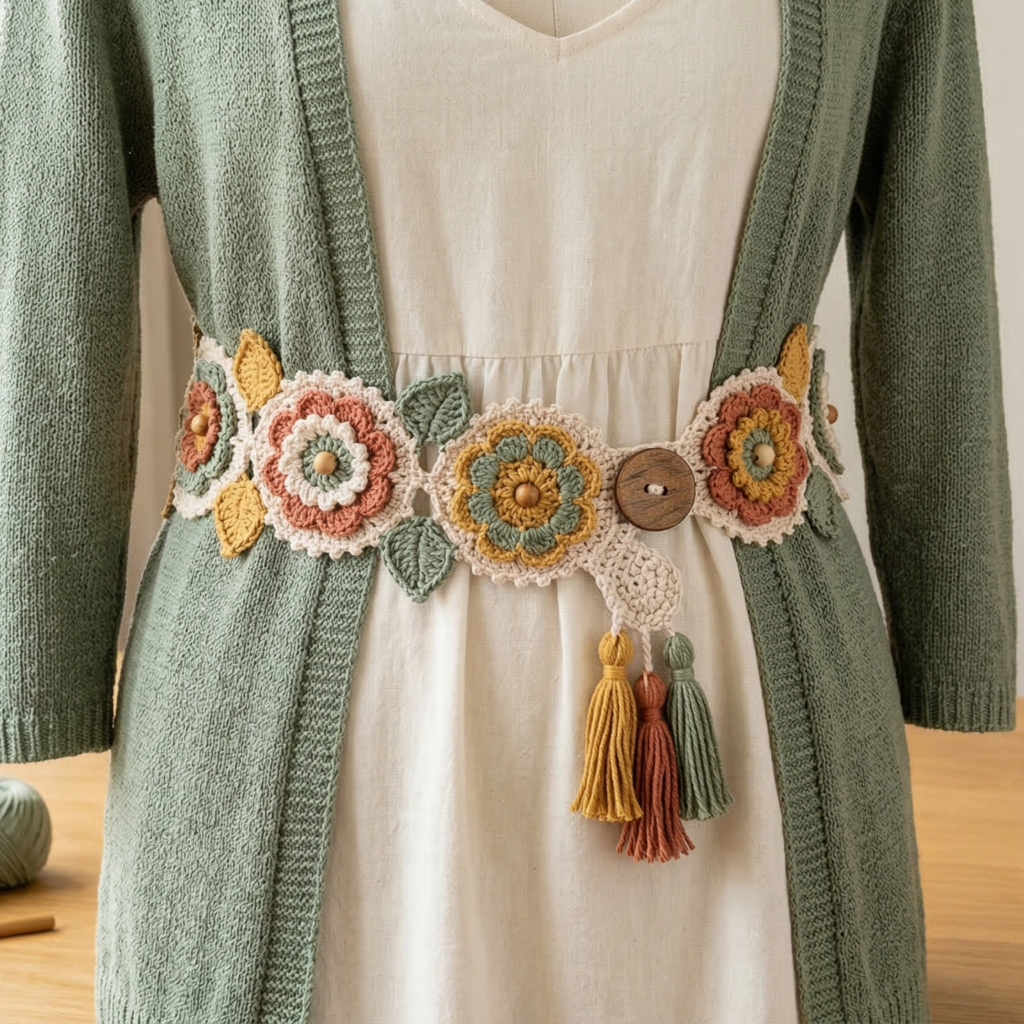
A wider boho belt made from joined floral medallions and leaves — great for dresses or over cardigans.
Skill level: Intermediate (motifs + joining)
Finished size: Belt width 3–4 in (7.5–10 cm) using 3 rows of motifs; finished length adult medium 34–36 in (86–91 cm) after joining.
Yarn & hook: Worsted weight cotton or cotton blend (bulky look works too) — ~300–400 yds total. Hook 4.5–5.0 mm.
Materials & tools
- Worsted yarn in 3–4 coordinating colors
- Hook 4.5–5.0 mm, tapestry needle, measuring tape, optional button or metal ring for closure
Motif plan
- Make a small floral medallion motif (~2.5 in across) and small leaf motifs (~1.5 in), then join motifs in staggered rows to make a wide band. This creates a boho gallery of flowers and leaves.
Flower motif (simple layered medallion)
- Round 1 (center): MR, ch1, 8 sc in MR. Join.
- Round 2 (petals): ch5, sl st in next sc around. Join.
- Round 3 (petals filled): Into each ch-5 loop (sc, hdc, dc, hdc, sc). Join.
- Round 4 (outer ring): sc around petals and make a few picots for texture. Fasten off.
Make approx 12–16 flower motifs depending on desired width & length.
Leaf motif
- Ch 8, sc in 2nd ch, hdc, dc2, hdc, sc, sl st — form a small leaf. Make many and attach between flowers in joins.
Joining motifs
- Block motifs to size. Join-as-you-go while working the final round of flowers, slip-stitching or whipstitching to neighbor motifs where edges meet, forming a tapestry-like belt. Work 3 rows of motifs to build a 3–4 in wide band: row1, row2 offset so flowers nest between ones below, row3 mirrors row1.
- Add leaves between flower gaps by sewing them into the joins.
Closure
- Sew a sturdy button to one end and create a loop at the other end (ch20–25 and sc across to make a decorative loop that slips over the button).
- Or attach a metal slider buckle and weave one end through and fold back for a more modern look.
Finishing touches
- Add short tassels at the ends (3–5 tassels) for boho flair.
- Add small wooden beads in centers for contrast (sew securely).
Variations
- Make a single-row narrow version with larger medallions for a sash.
- Use a subtle neutral palette for an earthy boho vibe or vivid colors for festival-ready style.
Care
- Hand wash recommended for motif belts to preserve shape; reshape and dry flat.
Final tips for all belt patterns
- Sizing: always measure your chain/band against the actual body and account for overlap or knotting. Yarn stretches — reduce length slightly if you want a snug fit.
- Stability: for button/buttonhole belts, reinforce the ends with felt/interfacing. For woven ribs/cords, back ends with extra stitches to prevent fraying.
- Seams: mattress stitch gives an invisible join; sc-join provides a tidy ridge. For lariats leave ends loose for knotting.
- Non-slip option: stitch a short velvet ribbon strip along the inside to prevent slippage on fine hair.
- Gifting: include a care tag with fiber content and washing instructions. Present in a small reusable box with a ribbon and a matching mini accessory (scrunchie or hairpin).
conclusion
Whether you want a neat everyday button belt, a romantic lacy ribbon belt, a cute baby-pink butterfly stitch for a sweet outfit, a long flower lariat to wrap and knot, or a wide boho floral belt for festival or layered looks — there’s a pattern above you can make in an evening or weekend and personalize for a perfect gift. Pick yarn that suits the belt’s purpose (cotton for structure and washability, cotton blends for drape, wool/acrylic for winter warmth), measure as you go, and don’t forget little reinforcements at closures.