Bandanas are delightfully fast projects that add instant personality to an outfit. They sit nicely on the head, around the neck, or tied to a bag — and they’re a perfect way to show off decorative stitches, granny motifs, and small appliqués. Below you’ll find a friendly, thorough introduction (yarn, hooks, measuring, closures, and care), then five full bandana patterns with materials, stitch notes, clear step-by-step instructions, fit tips, and finish/variation ideas: Cottagecore, Mini Dragonfly Stitches, Lacy, Colorful Granny, and Sunflower Granny Squares.
Quick Introduction — yarn, hooks, sizing, measurements & finishing basics
Yarn & fiber choices
- Cotton / cotton blends (sport or DK) — best all-around: breathable, holds shape, and washes easily. Great for head/neck bandanas and summer wear.
- Fingering / light DK — yields a delicate, drapey bandana good for lace patterns.
- Acrylic / acrylic blends — washable and inexpensive; good for bold colorwork or kids’ bandanas.
- Linen or bamboo blends — lovely drape, slightly slubby rustic look for cottagecore bandanas.
Pick a yarn appropriate for the look and season. If you want a crisp, structured bandana (granny or graphic), use cotton DK; for lacy romantic bandanas use fingering or thread.
Hooks & notions
- Hook sizes will be suggested per pattern (commonly 2.5–4.5 mm). Use a hook that gives you the fabric you prefer — a smaller hook for denser stitch definition, a larger hook for looser drape.
- Notions: tapestry needle, stitch markers, measuring tape, small buttons (optional), and blocking pins (for lace).
Sizing & how to measure
Most bandanas are triangular and sized by the long edge (the side that sits across the forehead or around the neck). Common finished long-edge widths:
- Small (kid / petite): 16–18 in (41–46 cm)
- Medium (teen / small adult): 18–20 in (46–51 cm)
- Large (adult): 20–24 in (51–61 cm)
To measure: decide where the bandana will sit (forehead, neck tie, or bag). Wrap a tape measure across the intended placement and note the measurement. If you aren’t sure, 20 in (about 51 cm) long edge and about 10–11 in (25–28 cm) from center point to top edge makes a versatile medium bandana.
Basic bandana construction approaches
- Triangle worked top-down (center point → long edge) — start at the center point and increase until long edge matches target. Great for lacy patterns and even shaping.
- Triangle worked bottom-up (long edge → point) — start with a foundation chain equal to long edge and decrease to a point. Good when you want a specific long-edge stitch count or to place stripes.
- Made from motifs (granny squares / triangles) — join motifs into a triangular shape. Best for colorful or granny-based looks.
I’ll give the recommended method per pattern.
Closures & styling
- Most bandanas are tied (two ends) or folded & knotted. You can add a small button + loop if you prefer. For headbands, use ties or small snap closures.
- To wear as a neck bandana: fold into a triangle and tie at the back or front.
- To wear as a headband: fold point to back and tie or tuck under hair.
Gauge & quick math example
Make a small gauge swatch in the pattern stitch and measure stitches-per-inch (spi) and rows-per-inch (rpi). Example: swatch shows 5 stitches = 1 inch. If you want a long edge of 20 in: 5 × 20 = 100 stitches across the long edge. If your stitch repeat requires a multiple (e.g., repeat of 6), round to nearest multiple (for 100 → nearest multiple of 6 is swatches might make you choose 96 or 102). Always swatch and adapt.
Blocking & care
- Lace and motif bandanas benefit from wet-blocking to open stitches and even edges. Pin to measurements and let dry.
- Cotton bandanas: machine wash gentle; reshape and air dry. Lace or delicate yarn: hand wash and block.
1. Crochet Cottagecore Bandana Pattern
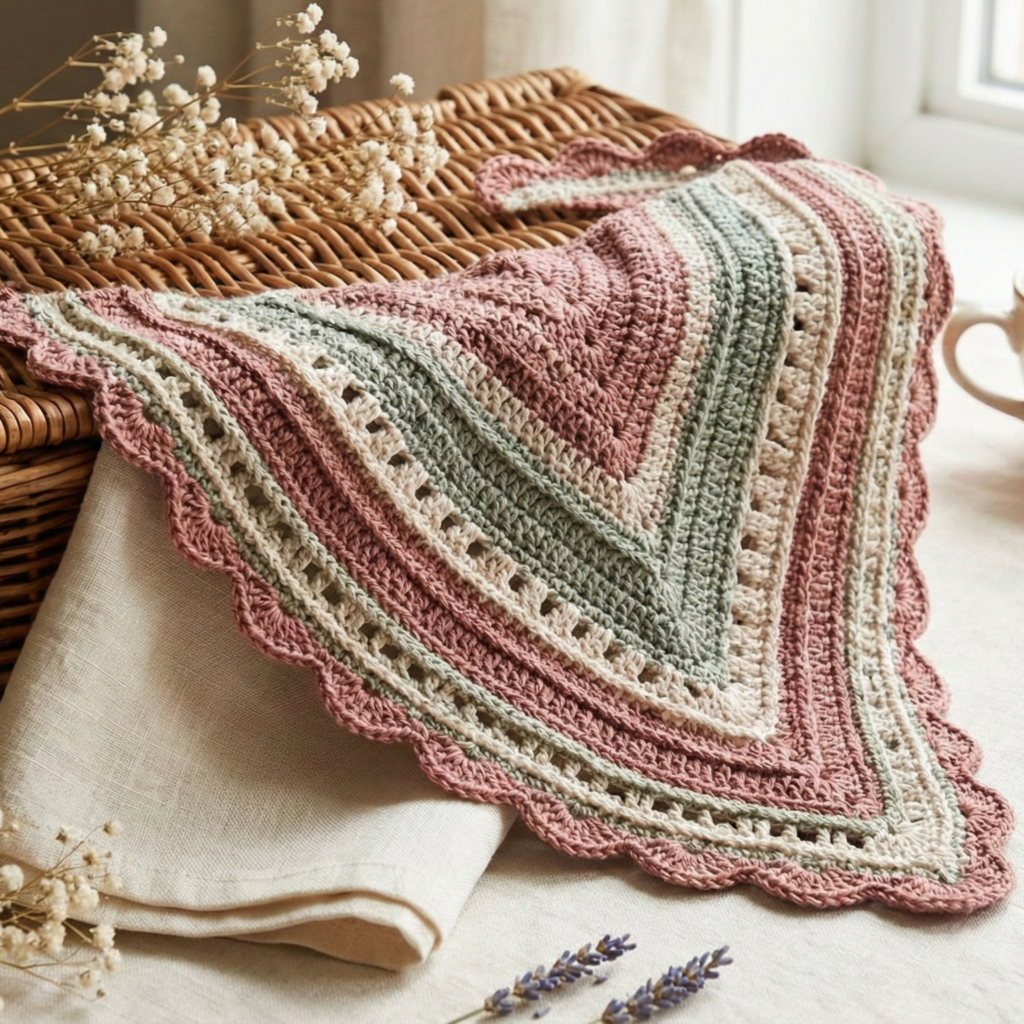
A soft, vintage-inspired triangular bandana with a textured center and a dainty scalloped edge — perfect for cottage walks.
Vibe & style
Soft, rustic, slightly vintage. Uses texture and a scalloped scallop border; works well in a muted pink, cream, sage, or dusty rose.
Skill level
Confident beginner → intermediate (texture + shaping).
Materials
- DK cotton (approx. 100–150 yd)
- Hook: 4.0 mm (adjust to yarn and personal drape)
- Tapestry needle, blocking pins
Measurements (target medium)
- Long edge: 20 in (51 cm)
- Depth (center point to long edge): ~10–11 in (25–28 cm)
Stitch abbreviations (US)
- ch, sc, hdc, dc, tr, sk (skip), sl st, picot (ch3 sl st in 1st ch), rep
Construction overview
Top-down triangle: start at center point and increase on both ends of a center spine stitch to build triangle. Work textured bands and finish with a scalloped picot edge.
Step-by-step
- Start (center point)
Ch 4; join with sl st to make a ring (or use MR). Round 1: ch 3 (counts as dc), dc 2 into ring, ch 1, dc 3 into ring — leave a visible center spine gap. Place marker at the center. - Row/round structure
For triangle worked in rows (easier to shape): You’ll work rows where you increase at the ends and at the center. The basic top-down formula per row: ch 3 (counts as dc), dc into first stitch, then work pattern across to center, dc, ch1, dc in center ch-1 space, continue pattern to end, dc in last stitch, turn. Increase occurs at the ch-1 space (work the center increase by dc, ch1, dc) and at ends by working dc into turning ch or making extra dc at ends. This produces symmetrical increases every row. - Textured bands
After an initial 6–8 rows of dc base to make a small triangle, begin textured bands:- Row A (textured): ch 3, fpdc around next stitch, bpdc around next stitch repeat across to create rib-like texture.
- Row B (open row): ch 3, (ch1, sk1, dc in next) across to create small eyelets.
Alternate 4–6 rounds of texture bands with open rows to create cottagecore stripes.
- Shaping tip
If working in rows, each row will add roughly 2 dc to the long edge (one increase each side). Count rows as needed: if you need 100 stitches across and you currently have 68, continue until you reach the desired width. - Scalloped picot edge
Once triangle reaches target size, work one round of sc to tidy edge. Then work scalloped border: skip 1 st, 5 dc in next st, skip 1 st, sc in next around; finish with a round of picots placed in the top of each shell for a romantic edging: (sc, ch 3, sl st in 1st ch). - Finishing
Fasten off, weave ends, block into triangle measuring 20 × 10.5 in.
Variations
- Make the texture band wider or add tiny embroidered flowers with French knots for cottage details.
- Use two-tone yarn for subtle stripes.
2. Crochet Mini Dragonfly Stitches Bandana Pattern

Vintage-inspired tiny dragonfly (or seed) stitch motif repeated across the triangle for a whimsical, nature-y look.
Vibe
Delicate, slightly whimsical; dragonfly stitches look like tiny V motifs along the body of the bandana.
Skill level
Intermediate (read patterns and maintain motif alignment).
Materials
- Fingering or light DK cotton (approx. 120–150 yd)
- Hook: 3.0–3.5 mm
- Tapestry needle, blocking supplies
Measurements (medium)
- Long edge: 18–20 in
- Depth: 9–10 in
Stitch note — “dragonfly” motif
A small V-shaped motif can be created with a cluster: (dc, picot, dc) into single stitch or ch-space to form tiny dragonfly bodies; wings are formed by working into side loops. I’ll provide a simple repeat that evokes dragonflies without complicated shaping.
Construction overview
Bottom-up approach — start with a foundation chain equal to the long edge and decrease to the point, placing the dragonfly motif on rows to read across.
Step-by-step
- Foundation
Chain to desired long-edge stitch count. Using fingering and 4 stitches/inch as an example, for 20 in × 4 = 80 chains. Chain 81 (for turning) — exact chain count depends on your gauge. - Row 1 — base
Row 1: sc across (80 sc); turn. - Dragonfly repeat (Row 2 onward)
Row 2 (pattern row): ch 2 (counts as hdc), hdc 2, chain 3, sl st in base of chain to create tiny picot wing center (this acts like the dragonfly body), hdc 2 repeat across; this creates small ch-3 loops spaced regularly. - Form wings
Row 3: working into ch-3 loops from previous row: (sc, hdc, 2 dc, hdc, sc) in each loop to make tiny wing petal. The effect across many rows looks like rows of tiny dragonflies. - Decrease to point
After establishing pattern across enough rows (about 6–8 rows repeating motif), begin decreasing to form the triangle point. To decrease bottom-up: at beginning and end of each row, sc2tog (or dec one stitch every 8–10 stitches) so over many rows the piece naturally tapers to a point. Work decreases evenly across rows until you reach center point (~9–10 rows of decreases), or until the piece measures desired depth. - Edge
Work one round of sc around the triangle when finished, then a neat picot or small scalloped edge: sc, ch3, sl st in first ch every few stitches. - Blocking
Block to open the tiny wings so the dragonfly motifs read clearly.
Variation & style notes
- Place the dragonflies in offset rows for movement.
- Add a small embroidered body in darker yarn to accent the dragonflies.
3. Crochet Lacy Bandana Pattern
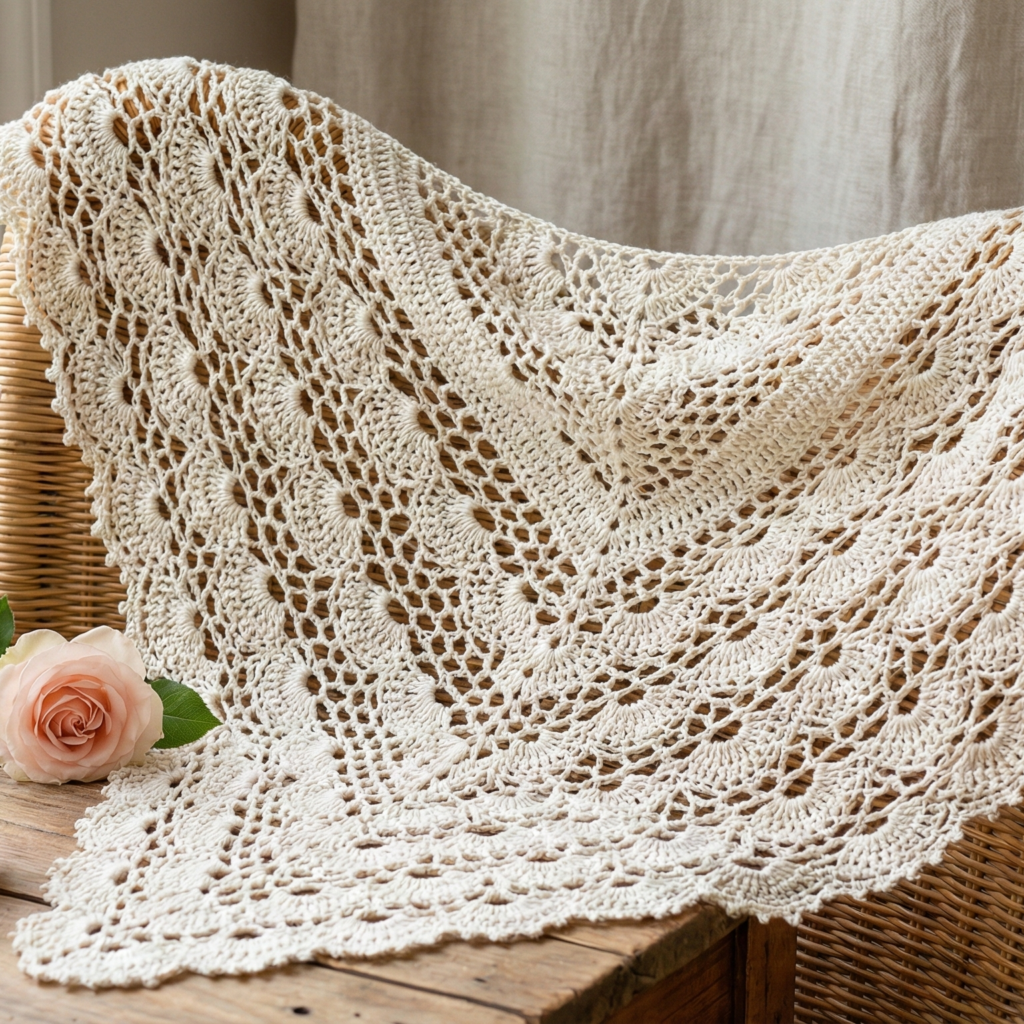
An elegant, openwork triangle for airy summer styling — dramatic when pin-blocked.
Vibe
Delicate and romantic; wearable as a scarf or headband and lovely for bridal or summer looks.
Skill level
Intermediate (lace repeats + blocking).
Materials
- Fingering cotton or linen blend (approx. 150–200 yd)
- Hook: 2.5–3.25 mm
- Blocking pins & mat
Measurements (medium)
- Long edge: 20 in
- Depth: 10–11 in
Lace pattern idea
Use a simple repeating lace motif like ch-3 arch + shell to create airy openness. Repeat of 8–10 stitches is common.
Construction (top-down)
- Start center
Ch 6, sl st to form a loop. R1: ch 3 (counts as dc), 2 dc in loop, ch 1, 3 dc in loop (creates small triangle start). - Lace repeat rows
Each row increase at center: work shell into side; ch-space at center — example row: ch 3, dc across shell stitches, in central ch-1 work (dc, ch 3, dc) to increase center, continue pattern across. - Example stitch repeat
Row pattern (simplified): ch 4, sk 2, (3 dc in next), ch 2, sc in next ch-space — then return and in next row work shells into ch-2 spaces. This alternating of shell rows and chain-arch rows generates lace. - Continue until target width
Because lace expands quickly, keep measuring. Stop when long edge is ~20 in. - Edging
A fine picot scallop or small shell round looks lovely on lace: (sc, ch 3, sl st in first ch) or small shells. - Blocking
Wet-block aggressively to open lace; pin to target measurements and let dry.
Styling & tips
- Wear as a triangular scarf, folded with point out, or tie at the back of the neck.
- Use finer thread for very bridal looks and larger hooks for casual airy looks.
4. Crochet Colorful Granny Bandana Pattern
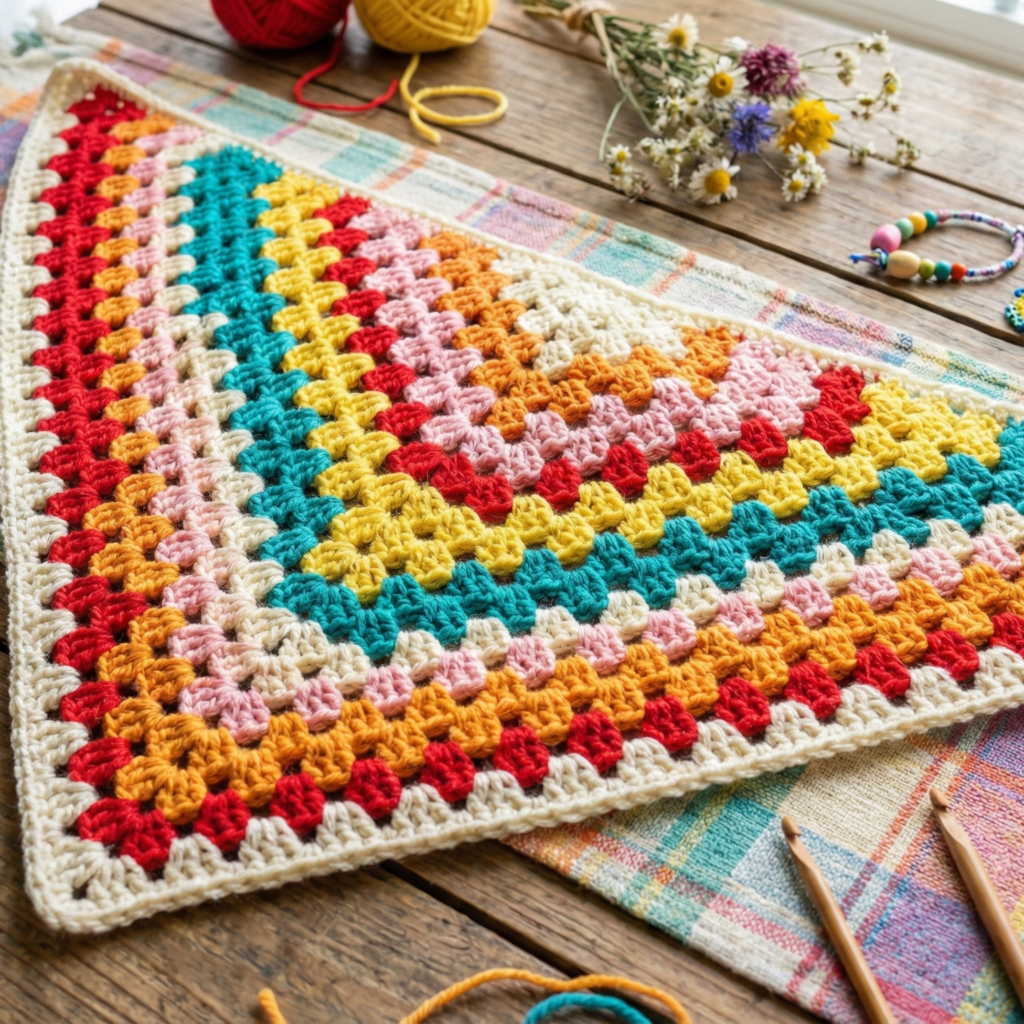
A bold, retro-chic bandana made from joined granny motifs in cheerful colorways.
Vibe
Playful, colorful, great for scrap-busting, festival wear, or a bold accessory.
Skill level
Confident beginner — granny squares are easy; joining requires consistency.
Materials
- Multiple DK or worsted scraps in happy colors (approx. 200–300 yd total depending on size and yarn weight)
- Hook: 4.0 mm (or what matches your yarn)
- Tapestry needle, blocking mat
Measurements (medium)
- Long edge aim: 20–22 in
- Depth: 10–12 in (depends on motif sizes)
Construction overview
Make granny squares (or granny triangle motifs) and join into a triangular bandana with the straight edge across the long side. Two layout approaches:
- Make a 3 × 6 rectangle and fold diagonally into triangle (fast), OR
- Make triangular granny motifs and join into a big triangle.
I’ll describe a 3-row granny motif layout that joins into a triangle when folded.
Step-by-step (make squares then join)
- Granny square pattern (classic small granny)
- MR, ch 3 (counts as dc), 2 dc into ring, ch 2 (corner), 3 dc, ch 2 repeat 4 times → join to make round 1 (you have 4 corner clusters).
- Round 2: in each corner space work (3 dc, ch 2, 3 dc); on sides add ch 1, 3 dc in side space to grow square. Make squares 3–4 rounds to reach about 3–3.5 in per square.
- Make squares & block
Make an even number of squares (for a 20 in long edge and 3–3.5 in squares per motif, plan 6–7 squares along the long edge). Example: if each motif is 3.5 in and you need 21 in long edge → 21 / 3.5 = 6 squares across. For a triangular layout, you’ll need rows 1 (6), 2 (5), 3 (4), 4 (3), 5 (2), 6 (1) if making a true triangle — but you can simplify by making a rectangle and folding. - Join squares
Use join-as-you-go or mattress stitch to join squares into rows and then join rows so that you have a right triangle shape (if you plan to make a triangle directly). Alternatively join into a rectangle and fold diagonally. - Edge & ties
Finish with a round of sc around the long straight edge and extend two short chains at corners to make ties (or attach small strings for tying). - Finishing
Block joined piece for neat edges. For a neat look, add a single-color border around whole triangle (2 rounds sc in border color).
Variation ideas
- Use a tonal palette (all pinks) for soft look, or rainbow for festival look.
- Make motifs larger for a chunkier retro vibe.
5. Crochet Sunflower Granny Squares Bandana Pattern
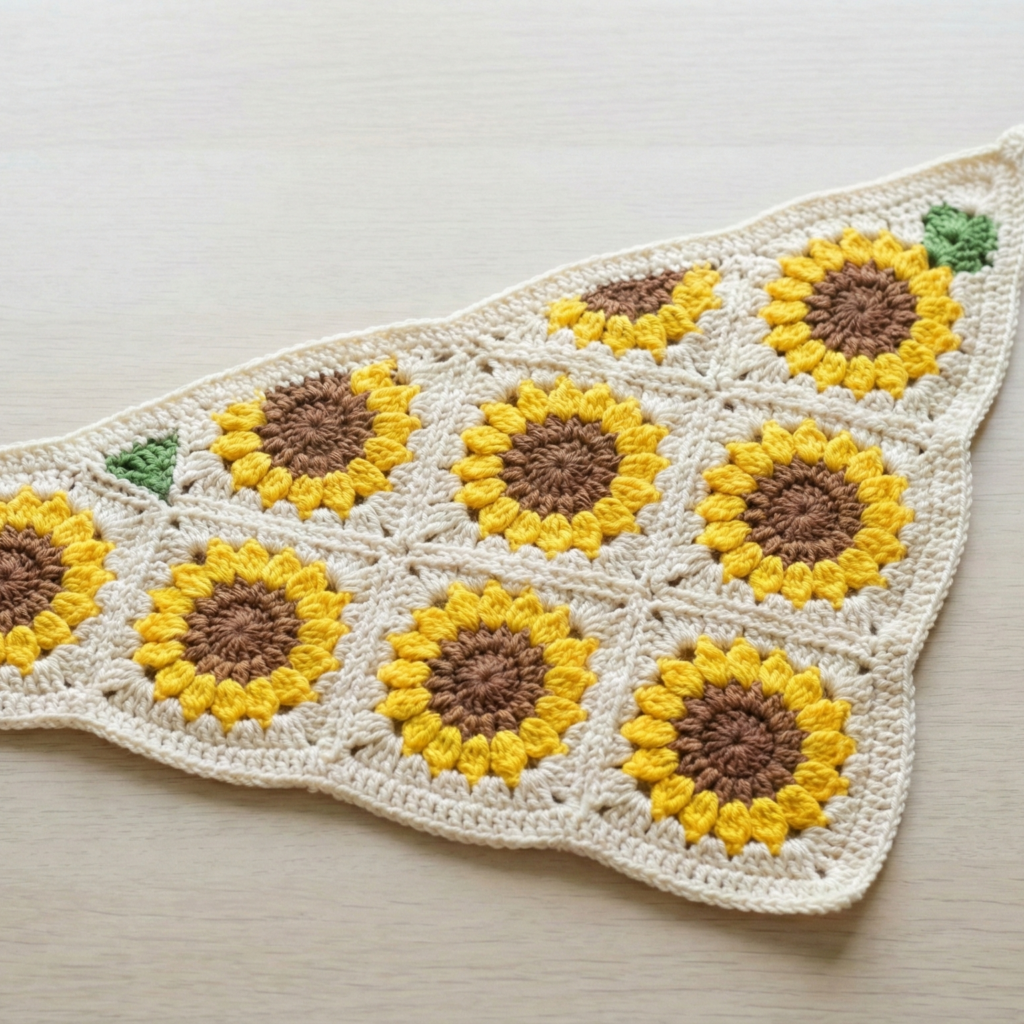
A charming bandana where each granny square is a tiny sunflower — perfect for sunny spring/summer styling.
Vibe
Whimsical, florist-chic. Sunflowers around the bandana create an eye-catching triangular shawl.
Skill level
Intermediate (granny with flower centers + joining)
Materials
- DK cotton in yellow (petals), brown (centers), green (leaves), and neutral background — ~250–350 yd
- Hook: 3.5–4.0 mm
- Tapestry needle, blocking supplies
Measurements (medium)
- Long edge: 20–22 in
- Depth: 9–11 in
Sunflower granny motif (one square)
- Center (seed disk)
- Start with MR, make 8 sc in ring (8). R2: change to brown and sc around 8 to create a seed disk.
- Petal round
- Switch to yellow. In each sc around, create a petal by working ch 3, 3 dc in same st, ch 3, sl st in next sc (or work 5 dc cluster to make fuller petals). You’ll get one petal per seed stitch; adjust density by making more petals if desired.
- Square rounds (make into granny)
- Change to background color and work standard granny rounds to square off: In each ch space between petals work 3 dc cluster, ch 2, 3 dc cluster for corners and 3 dc clusters separated by ch 1 along sides until square reaches ~3.5–4 in.
- Make enough motifs
- For a triangular bandana, make a number of motifs equal to rows of triangle (e.g., for rows 6+5+4+3+2+1 = 21 motifs for a large triangle). Alternatively, make fewer bigger squares and join as rectangle to fold diagonally.
- Join & border
- Join motifs with join-as-you-go or mattress stitch, forming a triangle shape. Add a round of sc in background or green to frame. Optionally add small leaves crocheted and sewn between some squares for extra green.
- Ties & finishing
- Add chain ties or a simple border that extends into ties. Block flat to set sunflower petals and square edges.
Style & gifting
- Use as a hair bandana or wrapped at the neck. Makes a sweet gift for spring birthdays.
conclusion
Those five bandana patterns cover a wide range of styles: Cottagecore for gentle vintage vibes, Dragonfly Stitches for whimsical textural interest, Lacy for romantic elegance, Colorful Granny for retro boldness, and Sunflower Granny for floral sunny fun. Pick the construction method that fits your comfort (top-down for lace, bottom-up for motif placement, motif-join for colorful scrappy projects).
Quick checklist before you start:
- Choose yarn and hook; make a small swatch in your chosen stitch.
- Decide how you’ll wear the bandana (head, neck, bag) to choose size.
- Block and finish edges carefully — blocked lace and petals make a huge difference.