Crochet wall hangings are one of the easiest ways to bring warmth, texture, and personality into a space. Even a small or medium-sized piece can completely change the feel of a room by adding softness to a blank wall and making the decor feel more handmade and intentional. Unlike large wall art, crochet wall hangings have a gentle presence. They do not overwhelm the room, but they still stand out in a beautiful way.
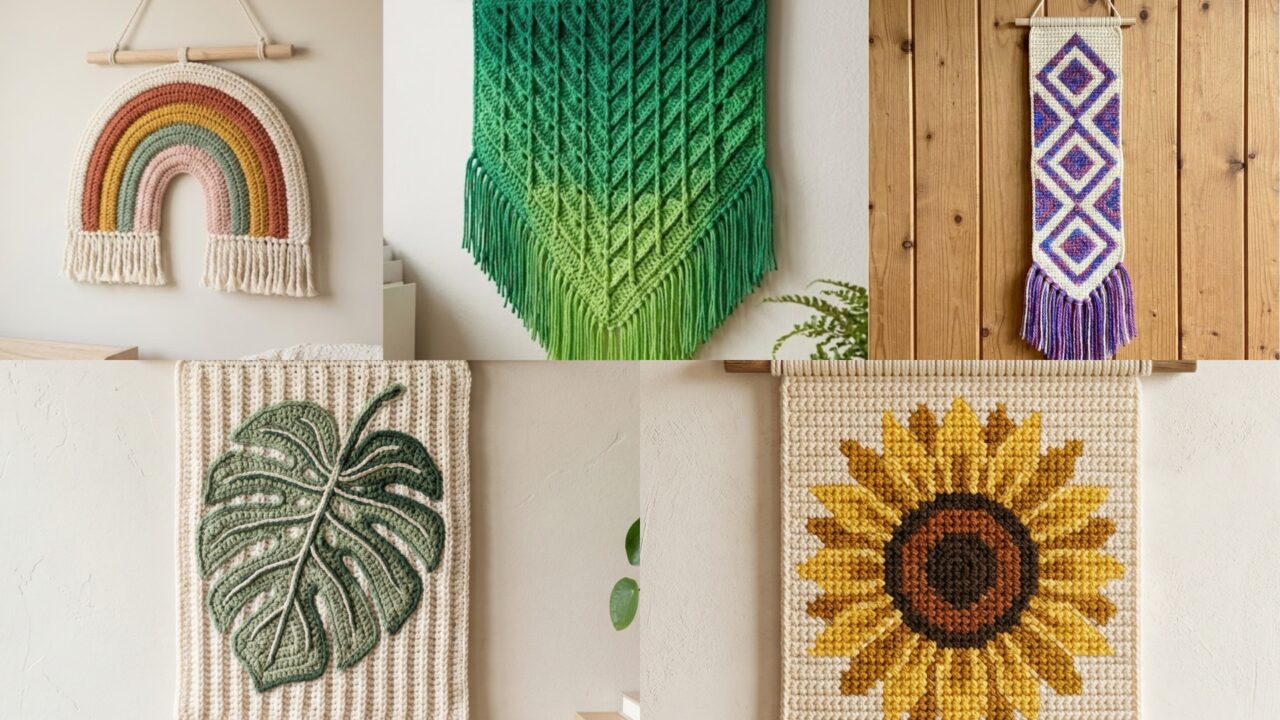
What makes crochet wall hangings so appealing is how much style you can create with just a small amount of yarn and a few thoughtful stitch choices. A box stitch hanging can feel modern and textured. A boho rainbow adds a playful, cozy touch. A diamond design brings a clean geometric look. A sunflower tapestry mini hanging feels bright and cheerful. A ribbed leaf tapestry hanging brings in a natural, earthy mood. Each one has its own personality, but all of them are perfect for mid or small wall decor pieces that fit beautifully in bedrooms, nurseries, hallways, craft spaces, or cozy corners.
In this post, you will find five stunning crochet wall hanging patterns designed to stay small or medium in size, so they feel manageable to make and easy to display. Each section includes clear step-by-step guidance, helpful quick notes, and practical tips to help you create a finished piece that looks polished and intentional. If you love handmade home decor that feels stylish without being too large or complicated, these wall hanging ideas are a wonderful place to start.
Quick Notes
Project type: Small to medium crochet wall hangings
Best for: Bedroom decor, nursery decor, cozy corners, entryways, gifts, and handmade home accents
Skill level: Beginner to intermediate
Hook size: Usually 3.5 mm to 5.0 mm, depending on yarn and desired texture
Yarn weight: DK, worsted, or light bulky yarn
Best yarn choice: Cotton, cotton blends, or acrylic blends with good stitch definition
Finished size: Usually about 8 to 14 inches wide, depending on the design
Time to complete: A few hours to one day depending on stitch detail and finishing
Helpful stitches: Chain, slip stitch, single crochet, half double crochet, double crochet, front post/back post stitches, tapestry crochet, color changes, surface crochet, fringe, shaping stitches
Common Materials
Most crochet wall hangings can be made with the same basic supplies.
- Yarn in your chosen colors
- Crochet hook suited to your yarn
- Yarn needle
- Scissors
- Measuring tape
- Wooden dowel, branch, or small hanging rod
- Stitch markers, if needed
- Blocking tools, optional
- Optional fringe comb or brush for fringe designs
For wall hangings, stitch definition matters a lot. Yarn with a clean texture helps the pattern show up clearly, especially if the design uses shapes or colorwork. Cotton yarn is often a great choice because it gives structure and keeps the hanging looking neat. If you want something softer or more relaxed, a light acrylic or blend can also work very well.
1. Crochet Box Stitch Wall Hanging Pattern
A box stitch wall hanging is a great choice if you want a clean, modern look with just enough texture to feel interesting. The box stitch creates a simple grid-like pattern that feels structured and graphic, making it ideal for small wall art pieces. Because the stitch pattern is easy to repeat, this is also a wonderful project if you want something that looks polished without being too difficult to make.
Quick Notes
Skill level: Beginner to intermediate
Finished size: Small to medium, usually around 8 to 12 inches wide
Style: Modern, textured, simple, minimal
Best colors: Cream, beige, sage, charcoal, rust, dusty blue, muted tones
Materials
- Medium-weight yarn
- 4.0 mm to 5.0 mm crochet hook
- Small wooden dowel or branch
- Yarn needle
- Scissors
- Measuring tape
Step-by-Step Guide
Step 1: Choose the size of the hanging
Before starting, decide how wide and tall you want the wall hanging to be. A box stitch design usually looks beautiful in a small square or narrow rectangle. Since this is meant to be a mid or small piece, keep the shape compact so it feels balanced on the wall.
A smaller size often makes the box texture look even more refined.
Step 2: Make a foundation chain
Chain the width you want for the hanging. Make sure the number of stitches works with the box stitch repeat, since this stitch pattern usually needs a multiple of stitches to stay balanced. Keep the chain loose enough that the first row does not feel tight.
A flexible foundation helps the hanging drape better.
Step 3: Work the box stitch rows
Begin the box stitch pattern row by row. The stitch creates neat square-like blocks, which gives the fabric a structured and woven appearance. Keep your tension consistent so the boxes stay even across the piece.
This texture is what gives the wall hanging its clean, geometric look.
Step 4: Continue until the piece is long enough
Work the rows until the hanging reaches the length you want. Since this style is meant to stay small or medium, avoid making it too long. The goal is a piece that feels decorative and intentional rather than oversized.
A compact length works beautifully on narrow walls or small spaces.
Step 5: Add a border if desired
A simple border can help frame the box stitch and make the edges look tidier. Single crochet is often enough, but you can also use a slightly decorative edge if you want a softer finish. Keep the border subtle so the stitch pattern stays the focus.
Step 6: Attach the hanging rod
Fold the top edge around a small wooden dowel or branch and sew it securely in place. This gives the wall hanging its display structure. Make sure the stitches hold the rod firmly so the piece hangs evenly.
Step 7: Add fringe or leave it clean
You can add a small fringe at the bottom if you want a more boho feel, or leave the hanging clean for a modern look. Since this design already has texture, a minimal finish often works beautifully.
Helpful Tips
This wall hanging looks especially elegant in solid neutral shades because the box stitch itself creates all the visual interest. If you want a more contemporary look, use a single soft tone like beige, sage, or gray. If you want the texture to stand out more, choose a yarn with strong stitch definition.
2. Crochet Boho Rainbow Wall Hanging Pattern
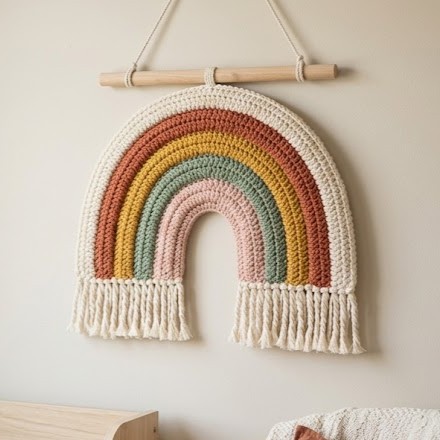
A boho rainbow wall hanging is cheerful, soft, and full of charm. Even when kept small or medium, it adds warmth and personality to a room. This design is especially lovely for nurseries, bedrooms, or cozy reading corners because the rainbow shape feels uplifting without being too bold or oversized.
Quick Notes
Skill level: Beginner
Finished size: Small to medium, usually around 8 to 12 inches wide
Style: Soft, boho, playful, cheerful
Best colors: Earthy rainbow tones, pastels, cream, terracotta, mustard, sage, blush
Materials
- Yarn in several coordinating colors
- Crochet hook suited to yarn weight
- Yarn needle
- Scissors
- Small wooden dowel or branch
- Measuring tape
- Optional stuffing for arch shape
Step-by-Step Guide
Step 1: Plan your rainbow palette
Choose your color story before starting. A boho rainbow looks beautiful in earthy tones, dusty pastels, or muted sunset shades. The color order matters because it determines the mood of the piece. Soft transitions usually look more stylish than very harsh contrasts.
A balanced palette makes the rainbow feel cohesive.
Step 2: Crochet the rainbow arcs
Make each arch separately using short rows, crocheted cords, or shaped strips. The arches should curve gently so they stack neatly on top of each other. If you want a puffy look, add a small amount of stuffing or use a thicker yarn.
Each arch should feel soft and rounded rather than stiff.
Step 3: Shape the arches evenly
Keep the arcs consistent in size so the rainbow looks balanced. The outer arch should be the largest, with each inner arch slightly smaller. This layered shape is what gives the rainbow its classic look.
A neat curve helps the design feel polished.
Step 4: Assemble the rainbow
Attach the arches together carefully, making sure they sit snugly and hold their shape. You can sew them side by side or layer them slightly depending on the look you want. Take your time with alignment so the rainbow feels centered and intentional.
Step 5: Add the cloud base or bottom edge
Some boho rainbows include a small cloud-like base or a soft bottom edge. You can add a simple cream section or a tiny fringe to make the design feel complete. This helps ground the rainbow and gives it a finished shape.
Step 6: Attach the hanging support
Sew or tie the rainbow to a small wooden rod or branch. Make sure it hangs evenly from the middle so it does not tilt. A clean attachment makes the piece easier to display.
Step 7: Fluff and refine
Once assembled, gently shape the arches with your hands. If needed, adjust the curves so the rainbow looks smooth and symmetrical. A little shaping at the end makes a big difference.
Helpful Tips
A small boho rainbow works beautifully in nurseries or cozy home nooks because it adds a soft cheerful touch without taking over the wall. Muted rainbow shades usually look more refined and modern than very bright tones, but either style can be lovely depending on the room.
3. Crochet Diamond Daze Wall Hanging Pattern
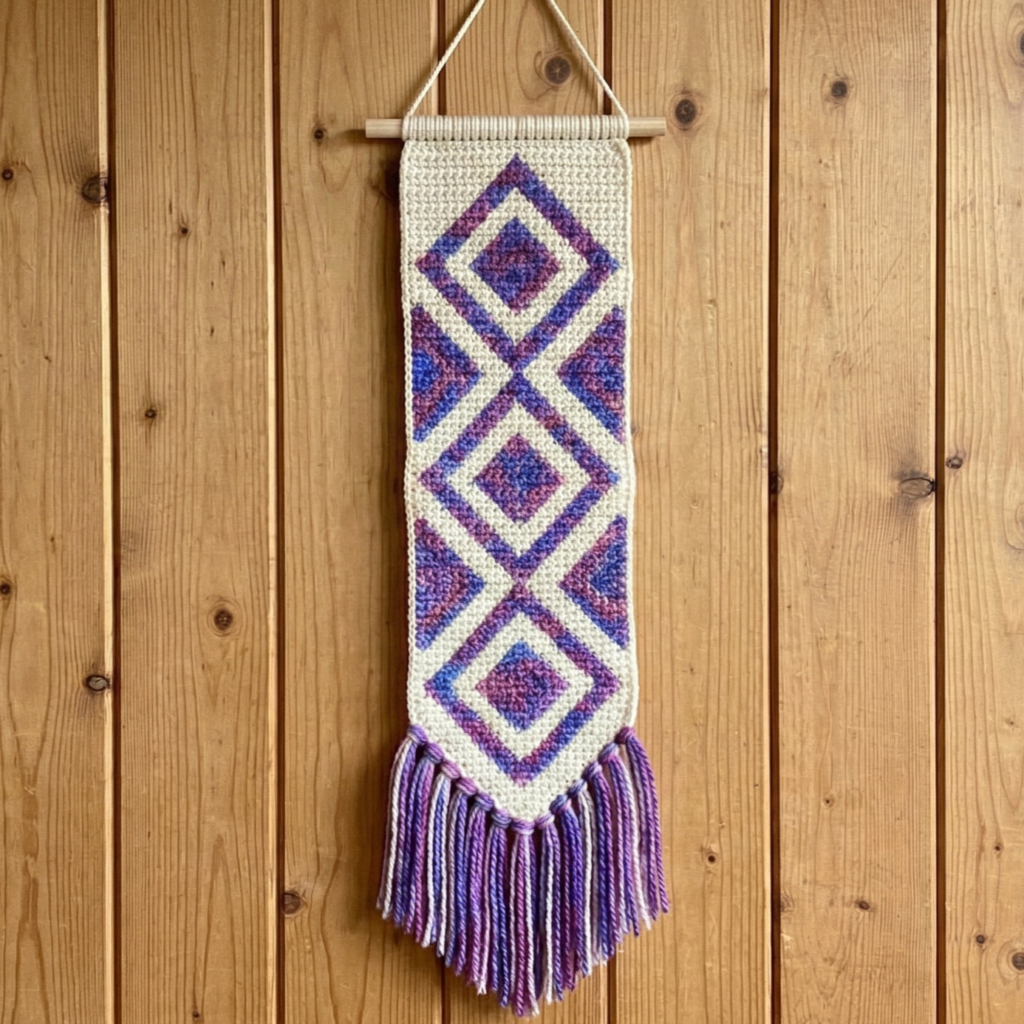
A diamond daze wall hanging is clean, geometric, and visually striking. The diamond shapes create movement and structure, making it a perfect choice if you want a wall hanging that feels modern but still handmade. Since the piece stays small or medium, the repeating diamond motifs can shine without overwhelming the wall.
Quick Notes
Skill level: Intermediate
Finished size: Small to medium, usually around 9 to 13 inches wide
Style: Geometric, modern, balanced, artistic
Best colors: Cream, black, tan, navy, rust, olive, muted jewel tones
Materials
- Yarn in one or more colors
- Crochet hook suited to yarn weight
- Yarn needle
- Scissors
- Small dowel or branch
- Measuring tape
- Optional blocking tools
Step-by-Step Guide
Step 1: Choose a centered layout
A diamond wall hanging looks best when the design is centered and symmetrical. Decide whether you want one large central diamond or a row of smaller diamonds. For a small wall hanging, a single focal diamond or a vertical stack often works best.
A clear layout makes the design feel more polished.
Step 2: Crochet the base fabric
Start with a rectangular or narrow panel that will hold the diamond motif. This gives you a stable backdrop for the shapes. Keep the stitches even so the surface stays neat and the diamond lines remain crisp.
A clean base helps the geometry stand out.
Step 3: Form the diamond shapes
Use increases, decreases, or colorwork to create the diamond pattern. Depending on your chosen method, the diamond may appear as a raised stitch motif or as a color-blocked design. Keep the corners sharp and even so the shape reads clearly.
The diamond is the focal point of the hanging.
Step 4: Repeat the motif carefully
If you are making multiple diamonds, make sure each one matches in size and spacing. Repeating geometric shapes work best when they are consistent. This creates a calm, organized visual effect that feels elegant on the wall.
Precision is what makes this style shine.
Step 5: Add a border if needed
A simple border can frame the diamond pattern and help the hanging look complete. Choose a border color that complements the main design without distracting from it. A narrow edge works especially well for geometric pieces.
Step 6: Attach the rod
Fold the top edge over a small rod or stick and sew it securely. Make sure the hanging line is centered so the diamond pattern sits straight. This is especially important in geometric designs because symmetry matters.
Step 7: Block for sharp lines
Blocking is especially helpful here because it sharpens the corners and straightens the edges. If your diamond pattern has any curl or wave, a light block can make the whole piece look much cleaner.
Helpful Tips
This wall hanging looks especially strong in two-color combinations like cream and black, rust and beige, or sage and ivory. If you want a more subtle look, use tonal shades. If you want the shape to stand out more, use high contrast colors.
4. Crochet Sunflower Tapestry Mini Wall Hanging Pattern
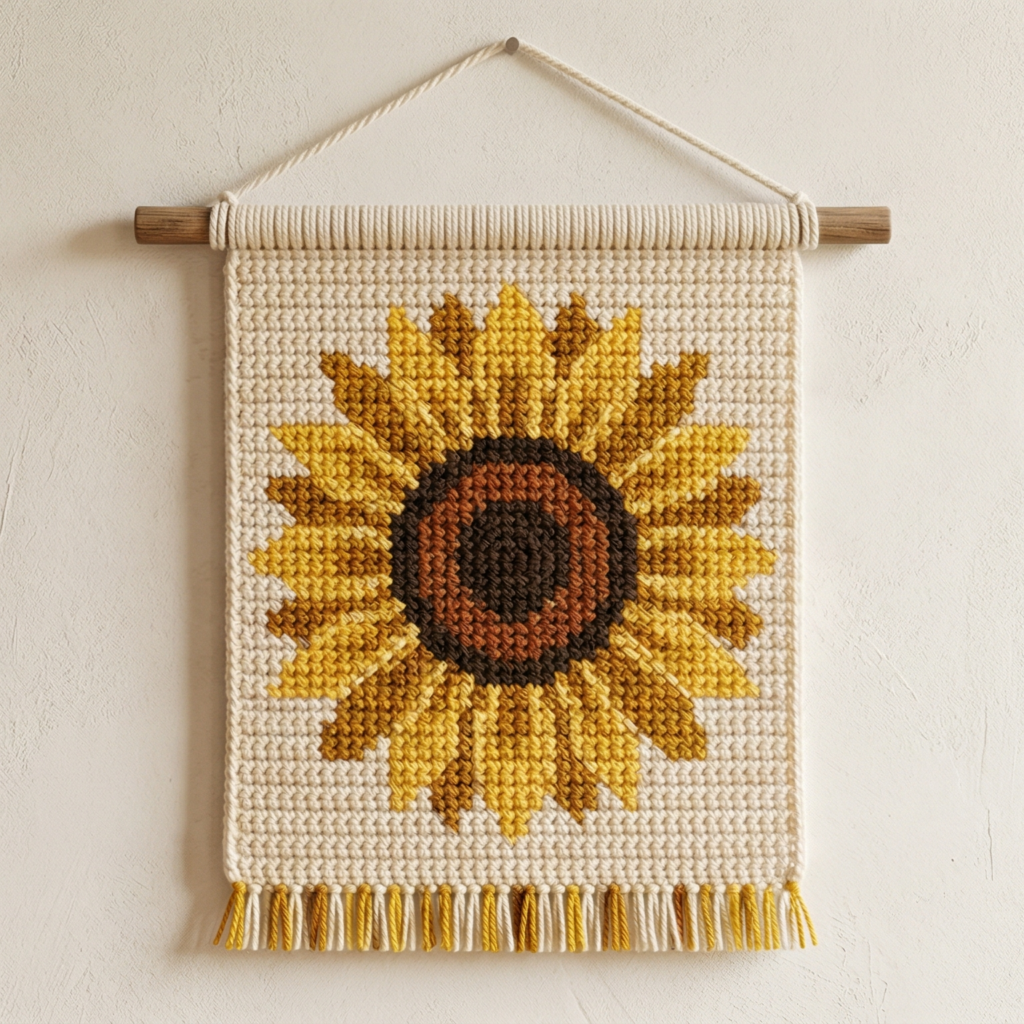
A sunflower tapestry mini wall hanging is bright, cheerful, and perfect for adding a warm handmade accent to a room. Even in a small size, the sunflower motif feels welcoming and full of life. This is a wonderful design for kitchens, craft spaces, hallways, or any corner that needs a little sunshine.
Quick Notes
Skill level: Beginner to intermediate
Finished size: Small, usually around 7 to 11 inches wide
Style: Cheerful, warm, rustic, botanical
Best colors: Yellow, brown, cream, green, mustard, gold, warm neutrals
Materials
- Yarn in sunflower colors
- Crochet hook suited to yarn weight
- Yarn needle
- Scissors
- Small rod or branch
- Measuring tape
- Optional blocking tools
Step-by-Step Guide
Step 1: Plan the sunflower placement
Decide whether the sunflower will be centered as a single large motif or repeated in a mini tapestry style. For a small wall hanging, one main sunflower usually works best because it creates a strong focal point without becoming too busy.
A centered sunflower brings the whole piece to life.
Step 2: Create the background panel
Crochet a simple panel that will serve as the background for the sunflower. Keep it smooth and even so the tapestry design stands out clearly. Neutral or soft green backgrounds often look especially lovely with sunflower motifs.
A calm background lets the flower shine.
Step 3: Work the sunflower motif
Use tapestry crochet, appliqué, or surface crochet to create the sunflower petals and center. The petals should radiate outward in a circular pattern, while the center should stay dark and grounded. Keep the motif clean and readable so it remains beautiful even at a small size.
The flower shape should be clear and balanced.
Step 4: Add leaf accents if desired
A few small green leaves can complete the floral look. These accents do not need to be large. Even tiny leaves can add a botanical touch and help the piece feel more natural.
Small details often make the design feel more complete.
Step 5: Keep the hanging compact
Since this wall hanging should stay small or medium, avoid making the flower too large or too many rows too tall. The sunflower should feel like a mini accent piece rather than a giant tapestry.
A compact size keeps it easy to display.
Step 6: Add a top rod casing
Create a simple top casing or seam the top edge around a small rod. This helps the wall hanging keep its shape and makes it easy to display. Keep the casing neat so it does not distract from the flower.
Step 7: Shape and block
A light block can help the sunflower motif lie flatter and make the petals more defined. If you used appliqué pieces, smooth them gently so the flower looks tidy and centered.
Helpful Tips
This design is especially pretty in a rustic palette with warm golds and earthy browns. It can brighten a room in a very natural way without feeling overly bold. If you want a softer version, try cream petals with a muted mustard center.
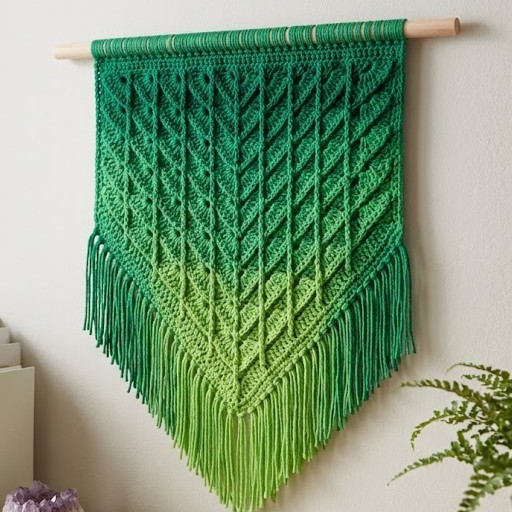
5. Crochet Ribbed Leaf Tapestry Wall Hanging Pattern
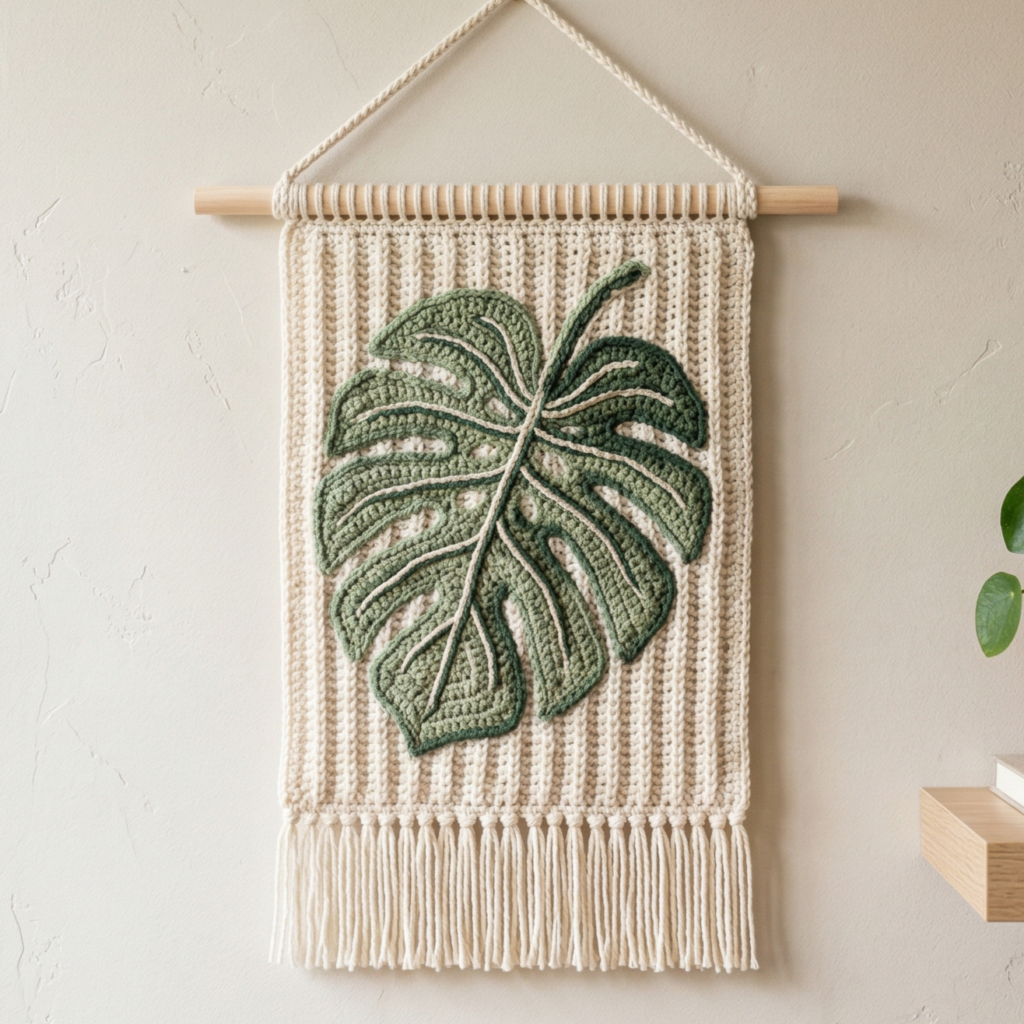
A ribbed leaf tapestry wall hanging has a soft natural feel that works beautifully in cozy, earthy spaces. The ribbed texture adds depth, while the leaf motif brings a calm botanical touch. This design is ideal if you want a small or medium hanging that feels elegant, organic, and easy to style.
Quick Notes
Skill level: Beginner to intermediate
Finished size: Small to medium, usually around 8 to 12 inches wide
Style: Natural, earthy, textured, botanical
Best colors: Olive, sage, forest green, cream, taupe, brown, soft gold
Materials
- Yarn in leafy and background colors
- Crochet hook suited to yarn weight
- Yarn needle
- Scissors
- Small hanging rod or branch
- Measuring tape
Step-by-Step Guide
Step 1: Choose a leafy color palette
Select colors that feel natural and earthy. Greens work beautifully for the leaf, while cream, beige, or taupe make a calm background. The contrast should be gentle but clear enough for the leaf shape to stand out.
A natural palette makes the design feel serene.
Step 2: Crochet the base panel
Start with a rectangular panel that will serve as the background. Keep the surface even and tidy, since the leaf motif will be the main decorative feature. This base should not be too wide or too long because the design is meant to stay compact.
A smaller base keeps the wall hanging elegant.
Step 3: Build the ribbed texture
Use front post and back post stitches or another ribbing method to create the base texture. The ribbing adds visual interest and gives the wall hanging a cozy, dimensional feel. This texture works especially well with leaf motifs because it echoes natural lines.
The ribbing adds depth without needing extra decoration.
Step 4: Form the leaf shape
Create the leaf in the center using colorwork, appliqué, or surface crochet. The leaf should have a gentle pointed shape with a central vein line and curved sides. Keep it simple and smooth so the shape feels elegant rather than too busy.
A single bold leaf often looks best in a small hanging.
Step 5: Add vein details if desired
A thin central vein or a few small side veins can make the leaf feel more realistic. Keep these details subtle so they enhance the design without crowding it. The leaf should remain the focal point, not the lines.
Step 6: Finish the edges neatly
Add a simple border if needed and check that the panel lies flat. Since ribbed textures can sometimes curl slightly, a tidy edge helps the piece look more finished.
Step 7: Attach the rod and shape the hanging
Fold the top edge around a small rod or branch and sew it into place. Then shape the hanging gently so the leaf sits centered. If the piece feels uneven, a light block can help settle it.
Helpful Tips
This wall hanging looks especially lovely in muted green tones with a soft cream or beige background. It is perfect for spaces that need a calm, nature-inspired accent. If you want a more modern style, use a single dark leaf on a light background for a bold clean look.
Conclusion
Crochet wall hangings are a beautiful way to add texture and warmth to a room without needing a large or complicated project. Small and medium wall hangings are especially practical because they fit well in almost any space and are easier to complete, display, and gift. That makes them perfect for makers who want a stylish decor piece that feels manageable from start to finish.
These five wall hanging patterns each offer a different mood. The box stitch hanging feels modern and structured. The boho rainbow is soft and playful. The diamond daze hanging brings in clean geometry. The sunflower tapestry mini hanging adds cheerful botanical charm. The ribbed leaf tapestry hanging gives you a cozy earthy look. Each one can elevate a room in its own way while still staying small enough to feel simple and approachable.
The best part about crochet wall decor is that it makes a space feel more personal. A handmade hanging brings texture, color, and a sense of care that store-bought decor often cannot match. With the right yarn, a thoughtful design, and a clean finish, even a small wall hanging can become a lovely focal point in your home.