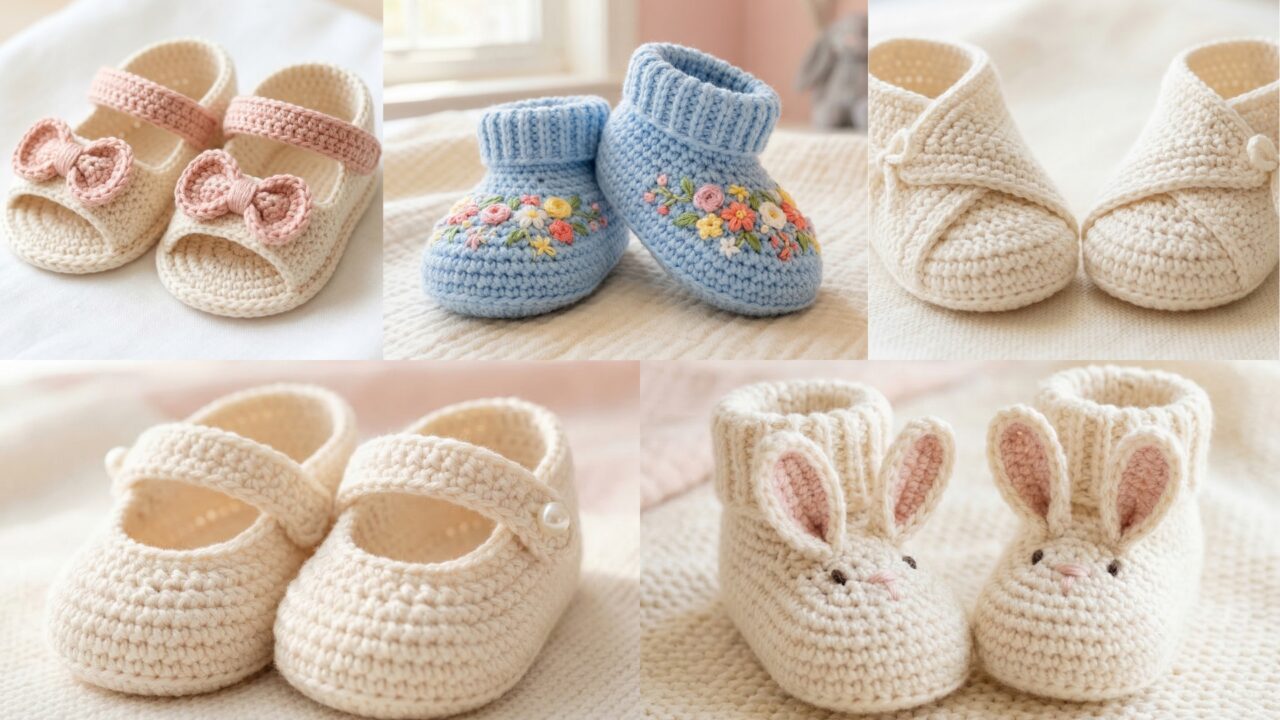
Crochet baby shoes are one of the sweetest little projects you can make. They are small, quick, and full of charm, which makes them ideal for gifts, baby showers, keepsakes, and photo props. Best of all, they let you combine comfort and style in a tiny handmade item that feels extra special.
In this post, you will find five soft and beautiful baby shoe patterns: Bow Front Baby Sandals, Bunny Baby Booties, Baby Kimono Slippers, Mary Jane Pearl Baby Shoes, and Flower Embroidered Baby Shoes. Each pattern is written to be easy to follow, with step-by-step instructions, materials, finishing tips, and fit notes so you can make a pair that looks lovely and feels soft for little feet.
A few quick notes before starting:
- Use soft baby-friendly yarn such as cotton, bamboo, or baby acrylic.
- Keep stitches a little firm so the shoes hold their shape.
- If the shoes are for a baby who may put them in their mouth, avoid loose beads, buttons, or small decorations.
- Always check the fit, because baby feet grow quickly and shoe size can vary a lot by age.
Quick shared abbreviations
- ch = chain
- sc = single crochet
- hdc = half double crochet
- dc = double crochet
- sl st = slip stitch
- inc = increase
- dec = decrease
- MR = magic ring
- st(s) = stitch(es)
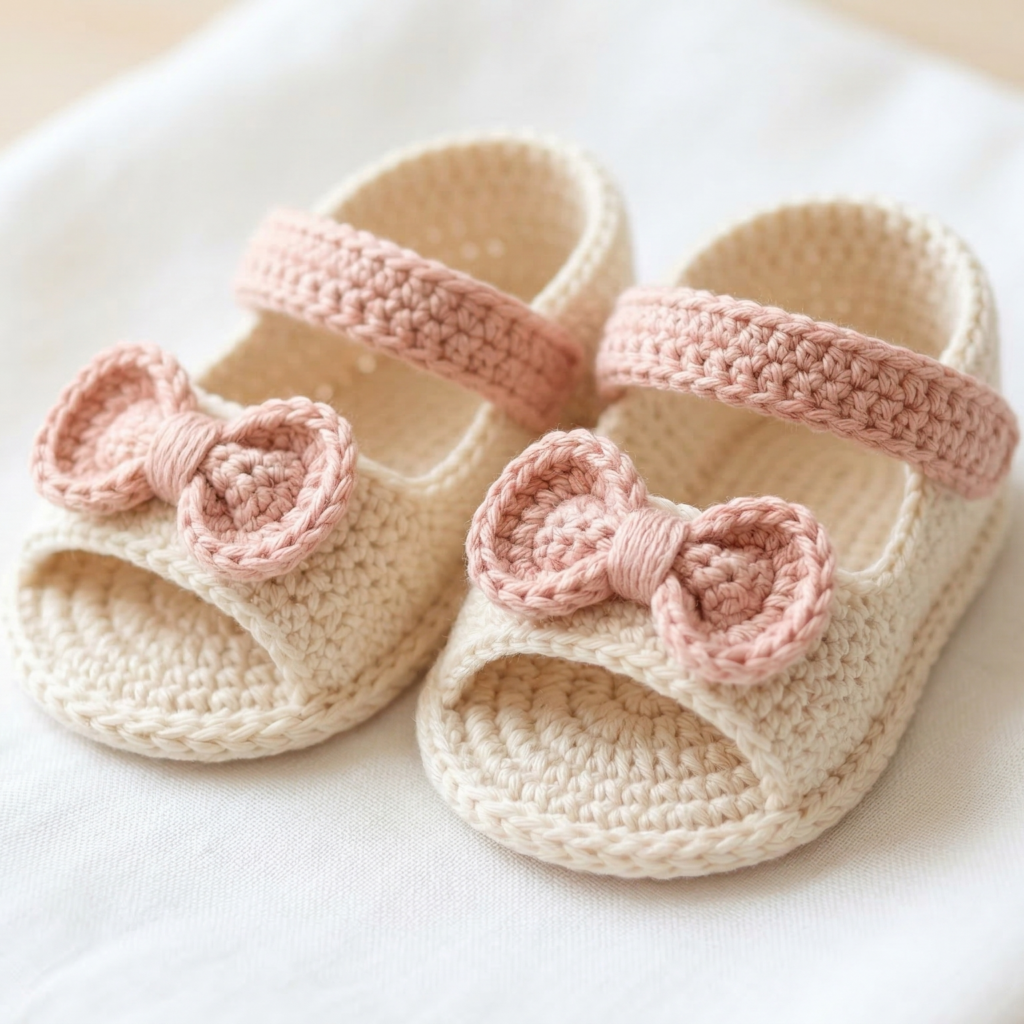
1. Crochet Bow Front Baby Sandals Pattern
Skill level: Beginner
Style: Open summer sandal with a sweet bow
Best for: Warm-weather outfits, photo props, baby gifts
These baby sandals are light, airy, and adorable. The bow on the front gives them a delicate finish, while the strap helps them stay on little feet.
Materials
- Soft cotton or baby acrylic yarn
- Crochet hook, usually 3.0 mm to 4.0 mm
- Tapestry needle
- Scissors
- Optional: small snap button or soft tie for strap closure
Finished size
This pattern can be adjusted for newborn to 12 months by making the sole longer or shorter.
Step-by-step guide
Step 1: Make the sole
- Start with a chain that matches the length of the baby’s foot.
- Work sc around the chain to shape an oval sole.
- At each end, make several stitches in the same chain to create rounded toes and heels.
- Continue working around in rounds until the sole is the right thickness and size.
Step 2: Build the sides
- Work one round in the back loops only to create a neat edge.
- Then work a few rounds of sc or hdc around the outer edge.
- This begins to form the sides of the sandal.
Step 3: Shape the front opening
- Leave the toe area more open.
- Work a short section at the front so the shoe sits comfortably on the foot.
- Stop increasing at the front so the shoe keeps a sandal shape.
Step 4: Make the strap
- Attach yarn near the side of the shoe.
- Chain enough stitches to go over the top of the foot and reach the opposite side.
- Work one or two rows of sc or hdc along the chain for a stronger strap.
- Sew the strap securely to the other side of the shoe.
Step 5: Add the bow
- Chain a short rectangle for the bow center.
- Make a small strip by working several rows of sc.
- Fold the strip into a bow shape and wrap yarn around the center.
- Sew the bow firmly to the front of the sandal.
Step 6: Finish the pair
- Repeat the same steps for the second shoe.
- Make sure both shoes are the same size and shape.
- Weave in all ends neatly.
Fit tips
- Make the sole a little longer than the baby’s foot if you want room to grow.
- Use a softer yarn if you want a more flexible sandal.
- For extra security, add a heel strap.
Style ideas
- Use white and pastel pink for a classic baby look.
- Try cream and soft beige for a neutral gift.
- Add a tiny flower instead of a bow for a different finish.
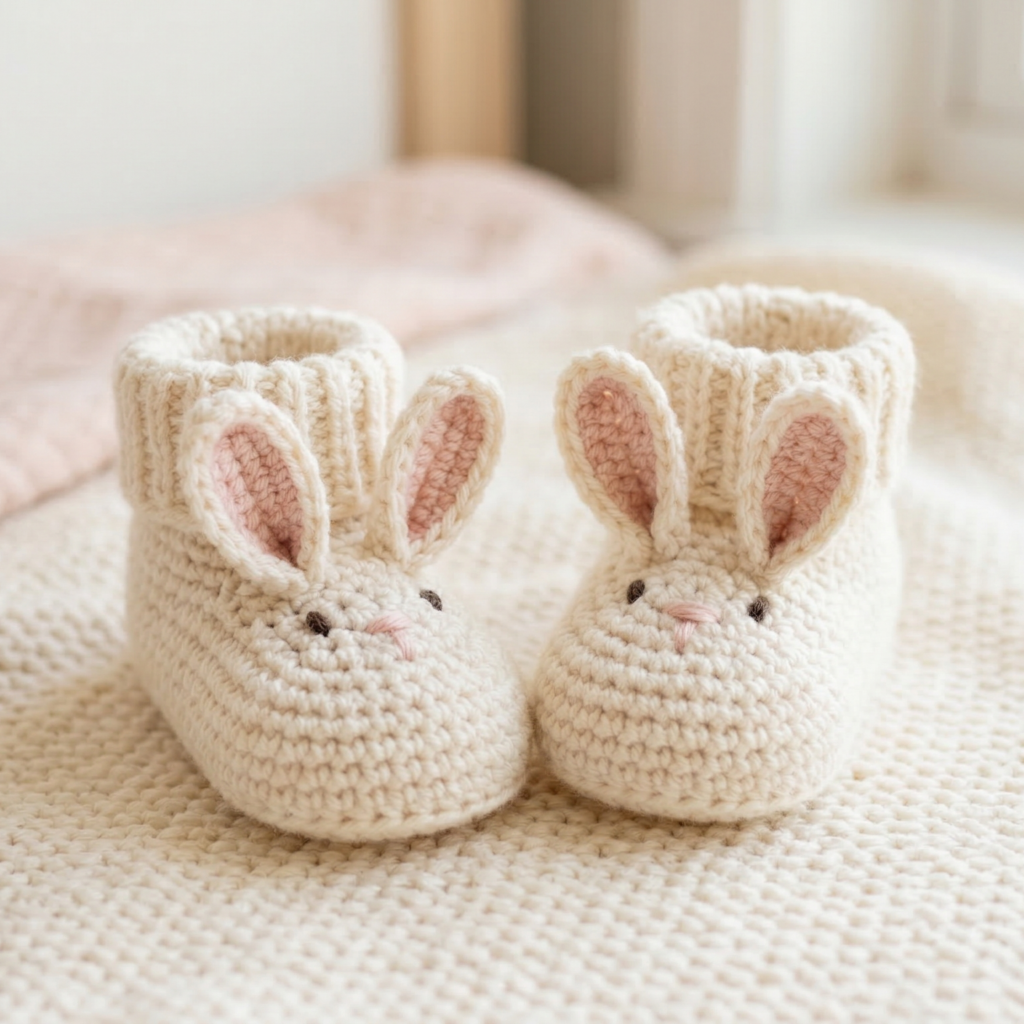
2. Crochet Bunny Baby Booties Pattern
Skill level: Beginner to intermediate
Style: Cute closed booties with bunny ears
Best for: Easter gifts, baby showers, keepsakes
These bunny booties are soft, cozy, and irresistibly cute. The little bunny ears make them playful while keeping the shoe practical and warm.
Materials
- Baby yarn in white, cream, gray, or pastel shades
- Crochet hook, 3.0 mm to 3.5 mm
- Tapestry needle
- Scissors
- Optional: embroidery thread for face details
Finished size
Works well for newborn through 6 months, depending on yarn and hook.
Step-by-step guide
Step 1: Make the sole
- Chain the length of the baby’s foot.
- Work around the chain with sc to form an oval.
- Increase at both ends so the sole lies flat and rounded.
- Continue until the sole measures the right width for the foot.
Step 2: Build the foot body
- Work around the edge of the sole in sc or hdc.
- Repeat for a few rounds to raise the sides.
- Keep the front slightly rounded and the heel snug.
Step 3: Shape the toe
- At the front, work several decreases in a row to create a soft rounded toe shape.
- This helps the bootie fit closely and stay on better.
Step 4: Close the top
- Continue working until the opening is large enough for the ankle.
- If needed, make one extra round for the cuff.
- You can leave the top open for a fold-over cuff or close it more for a snug bootie look.
Step 5: Make the bunny ears
- Chain about 8 to 10 stitches.
- Work sc, hdc, dc, hdc, sc back down the chain to make a teardrop ear.
- Make 2 ears per shoe.
- Sew the ears to the front or side of the bootie.
Step 6: Add face details
- Embroider tiny eyes and a nose if desired.
- Use simple stitch details only.
- Keep it soft and secure.
Finishing tips
- Sew the ears very firmly so they stay in place.
- Avoid beads for baby safety.
- A tiny folded cuff looks especially sweet on bunny booties.
Style ideas
- Make the booties in soft gray with pink ears.
- Use cream with beige ears for a neutral nursery look.
- Add a tiny embroidered bunny tail on the back if you want extra charm.
3. Crochet Baby Kimono Slippers Pattern

Skill level: Beginner to intermediate
Style: Wrap-style slipper with a kimono-inspired fold
Best for: Cozy indoor wear, unique gifts, soft newborn sets
These kimono slippers are soft, snug, and simple. They wrap gently around the foot and give a polished handmade look without too much shaping.
Materials
- Soft baby yarn or cotton blend
- Crochet hook, 3.0 mm to 4.0 mm
- Tapestry needle
- Scissors
- Optional: button or tie for closure
Finished size
Adjustable for newborn to 12 months.
Step-by-step guide
Step 1: Make the sole
- Chain the length of the foot.
- Work around the chain to form an oval sole.
- Increase evenly at each end until the sole lies flat.
- Stop when the sole is the right size.
Step 2: Build the slipper body
- Work sc around the edge of the sole.
- Continue in rounds or rows for 2 to 4 rounds.
- Shape the front so the slipper curves gently over the toes.
Step 3: Make the wrap sections
- Instead of building a closed top, make two overlapping side flaps.
- Work one flap from one side of the slipper opening by chaining and then working rows of sc or hdc.
- Make the second flap from the opposite side.
- The flaps should cross over each other like a kimono wrap.
Step 4: Add closure
- If you want a button closure, make a small loop on one flap and sew a button to the other side.
- If you prefer ties, crochet two short cords and sew them to the inner edges.
- Make sure the closure is soft and not bulky.
Step 5: Finish the slipper
- Repeat all steps for the second slipper.
- Check that both slippers match in size and shape.
- Weave in all ends neatly.
Fit tips
- Wrap slippers are forgiving, so they work well for gifts.
- Make the closure slightly loose so the slipper is easy to put on.
- For a more secure fit, add a small heel band.
Style ideas
- Use blush pink, ivory, or dusty blue for a soft gift set.
- Add a tiny bow at the side of the wrap.
- Try a striped yarn for a playful look.
4. Crochet Mary Jane Pearl Baby Shoes Pattern

Skill level: Beginner to intermediate
Style: Classic baby shoe with strap and pearl detail
Best for: Dressy outfits, baby showers, keepsake gifts
Mary Jane baby shoes are timeless. They look polished and sweet, and the strap gives them a classic finish. Pearls add elegance, but for babies, you should use them only if they are sewn on very securely or make a no-bead version.
Materials
- Soft baby yarn
- Crochet hook, 3.0 mm to 4.0 mm
- Tapestry needle
- Scissors
- Small faux pearl button or embroidered pearl-style detail
- Optional: snap button for strap closure
Finished size
Suitable for newborn to 6 months with adjustments.
Step-by-step guide
Step 1: Make the sole
- Chain the foot length.
- Crochet around the chain to create an oval sole.
- Increase at both ends so the sole stays flat.
- Work until the sole is a comfortable baby shoe size.
Step 2: Build the shoe body
- Work sc or hdc around the sole edge.
- Continue in rounds for several rows.
- Shape the front area slightly narrower than the heel.
Step 3: Shape the toe opening
- Leave the top front open like a real Mary Jane.
- Do not close the shoe fully over the toes.
- This keeps the style sweet and wearable.
Step 4: Make the strap
- Attach yarn on one side of the shoe opening.
- Chain enough stitches to cross over the top of the foot.
- Work a row of sc back across the chain.
- Sew the strap to the opposite side.
Step 5: Add the pearl detail
- Sew a faux pearl securely to the strap center or front edge.
- If you do not want a bead, embroider a pearl-like knot using white thread.
- Make sure any embellishment is attached very tightly.
Step 6: Finish the pair
- Repeat for the second shoe.
- Check that the straps align properly.
- Weave in ends carefully.
Fit tips
- Make the shoe snug but not tight.
- Use a softer yarn if the shoes will be worn for a long time.
- For newborns, keep the design simple and light.
Style ideas
- White shoes with pearl detail look formal and sweet.
- Soft pink with a cream strap makes a lovely baby shower gift.
- Add a tiny scalloped edge around the opening for a more delicate finish.
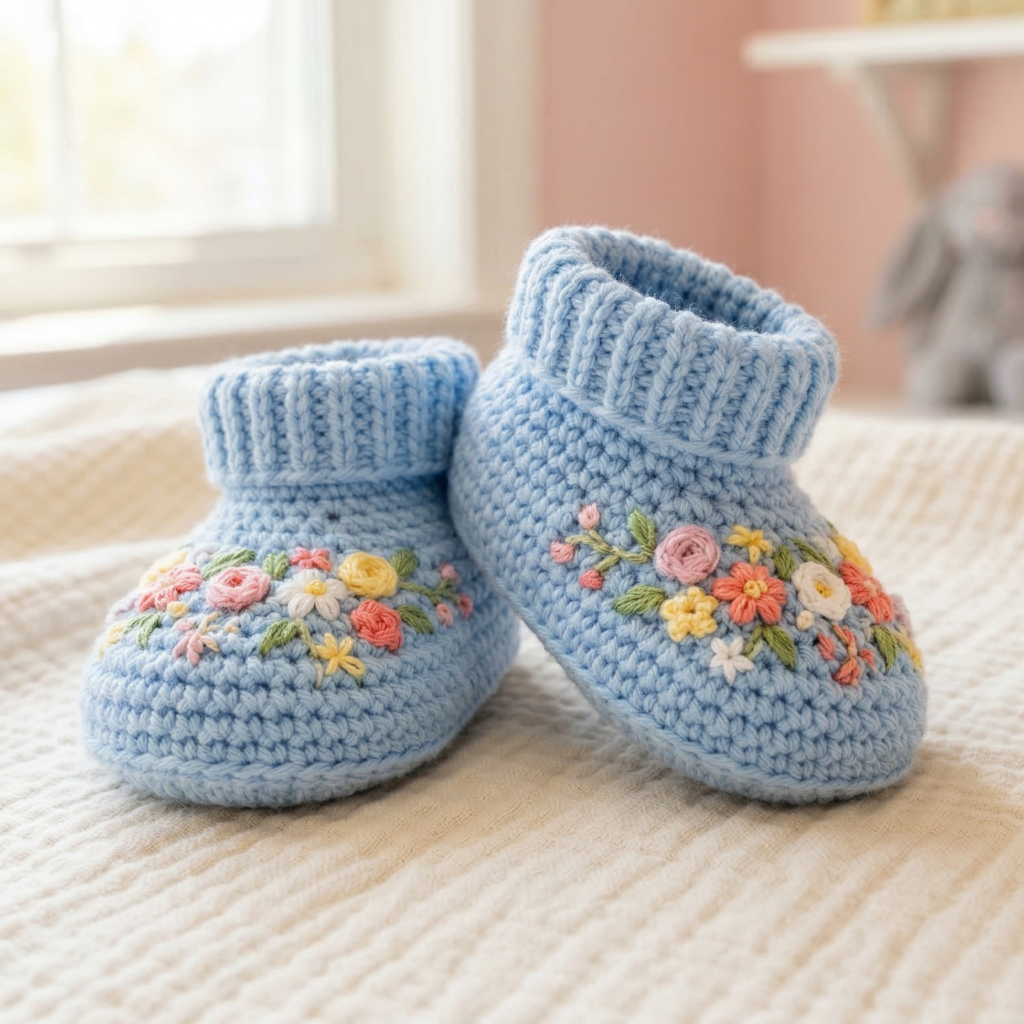
5. Crochet Flower Embroidered Baby Shoes Pattern
Skill level: Beginner to intermediate
Style: Soft baby shoes with embroidered floral detail
Best for: Everyday wear, gifts, matching sets
These baby shoes are pretty, practical, and easy to customize with tiny flower embroidery. They feel gentle and can be made in almost any color.
Materials
- Soft baby yarn
- Crochet hook, 3.0 mm to 4.0 mm
- Tapestry needle
- Embroidery thread or thin yarn in flower colors
- Scissors
Finished size
Works well for newborn to 12 months, depending on your sole size.
Step-by-step guide
Step 1: Make the sole
- Chain the foot length.
- Work around the chain to form an oval sole.
- Increase at the ends until flat and rounded.
- Stop when the sole is the right size for the baby’s foot.
Step 2: Build the shoe
- Work sc or hdc around the sole edge.
- Continue for a few rows to build the upper part.
- Shape the toe area gently so the shoe feels soft and rounded.
Step 3: Make the opening
- Leave the top open enough for the foot to slip in easily.
- If you want a cuff, work one extra row at the ankle.
- Keep the shoe soft and comfortable.
Step 4: Embroider the flowers
- Use embroidery thread or a thin strand of yarn.
- Stitch small flowers onto the front or side of each shoe.
- A simple flower can be made with tiny looped petals and a center stitch.
- Add 2 or 3 flowers to each shoe if you want a fuller look.
Step 5: Finish the pair
- Make the second shoe to match.
- Place the flowers in similar positions on both shoes.
- Weave in all ends carefully.
Fit tips
- Keep the flowers flat so they are comfortable for baby feet.
- Use soft embroidery thread so the decoration does not feel scratchy.
- Make the flower placement balanced and simple.
Style ideas
- White shoes with pink flowers look classic and sweet.
- Cream shoes with tiny yellow flowers feel soft and sunny.
- Add a leaf stitch for a garden-inspired design.
Conclusion
Crochet baby shoes are such a lovely way to make something handmade that feels special and personal. Whether you prefer the sweet look of bow front sandals, the playful charm of bunny booties, the cozy wrap style of kimono slippers, the classic elegance of Mary Jane shoes, or the gentle beauty of flower embroidered booties, each pattern offers something unique.
The best part about baby shoes is that they work up quickly, use only a small amount of yarn, and make beautiful gifts. They are perfect for baby showers, newborn photos, keepsake boxes, or just adding a handmade touch to a tiny wardrobe. With soft yarn, careful finishing, and secure details, you can create a pair of shoes that is as comfortable as it is adorable.