Crochet baby booties are one of the sweetest projects you can make by hand. They are small, practical, and full of charm, which makes them perfect for baby gifts, keepsakes, baby showers, or simply making something soft and special for a little one. Because baby booties are so tiny, they work up quickly, but they still give you plenty of room to play with texture, shaping, and adorable details.
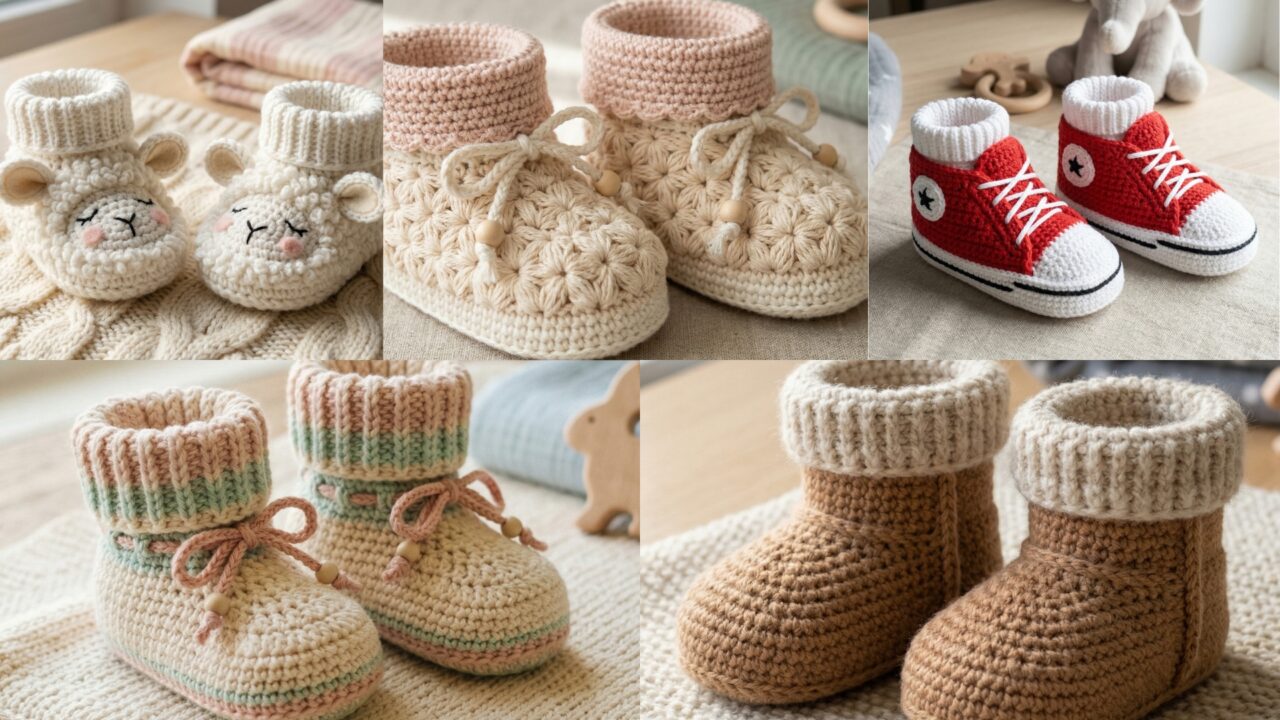
What makes crochet baby booties especially lovely is how much personality you can fit into such a small project. A ribbed bootie feels classic and stretchy. A Jasmine stitch bootie has beautiful texture and a soft handmade feel. A lamb bootie turns into something whimsical and cuddly. A mini Ugg-style bootie looks cozy and modern. A Converse-inspired bootie adds a playful, trendy touch. Each design has its own style, but all of them are meant to keep tiny feet warm while looking absolutely adorable.
In this post, you will find five soft and cozy crochet baby bootie patterns with clear step-by-step guidance, helpful notes, and practical finishing tips. Each design is written to be beginner-friendly where possible and detailed enough to help you create a polished result. Whether you are making your first pair of baby booties or adding to your handmade baby gift collection, these ideas are a wonderful place to begin.
Quick Notes
Project type: Crochet baby booties
Best for: Baby gifts, showers, newborn photos, keepsakes, and handmade sets
Skill level: Beginner to intermediate, depending on stitch and shaping
Hook size: Usually 2.5 mm to 4.0 mm, depending on yarn weight
Yarn weight: Lightweight baby yarn, sport weight, DK, or soft worsted depending on pattern
Best yarn choice: Soft baby acrylic, cotton blend, or wool blend with gentle stretch
Finished size: Newborn to baby sizes, adjustable by sole length
Time to complete: About 1 to 3 hours per pair depending on detail
Helpful stitches: Chain, slip stitch, single crochet, half double crochet, double crochet, increase, decrease, front post stitch, back post stitch, shell stitch, texture stitches, sewing joins
Common Materials
Most baby booties can be made with the same basic supplies.
- Soft baby yarn
- Crochet hook matched to yarn weight
- Yarn needle
- Scissors
- Stitch markers
- Measuring tape
- Optional buttons, ribbons, or ties
- Optional felt soles or non-slip backing, if desired
For baby items, softness and comfort matter most. Choose yarn that feels gentle on delicate skin and avoid anything scratchy. It is also a good idea to make sure any decorative elements are securely attached and not too large or heavy.
1. Crochet Ribbed Baby Booties Pattern
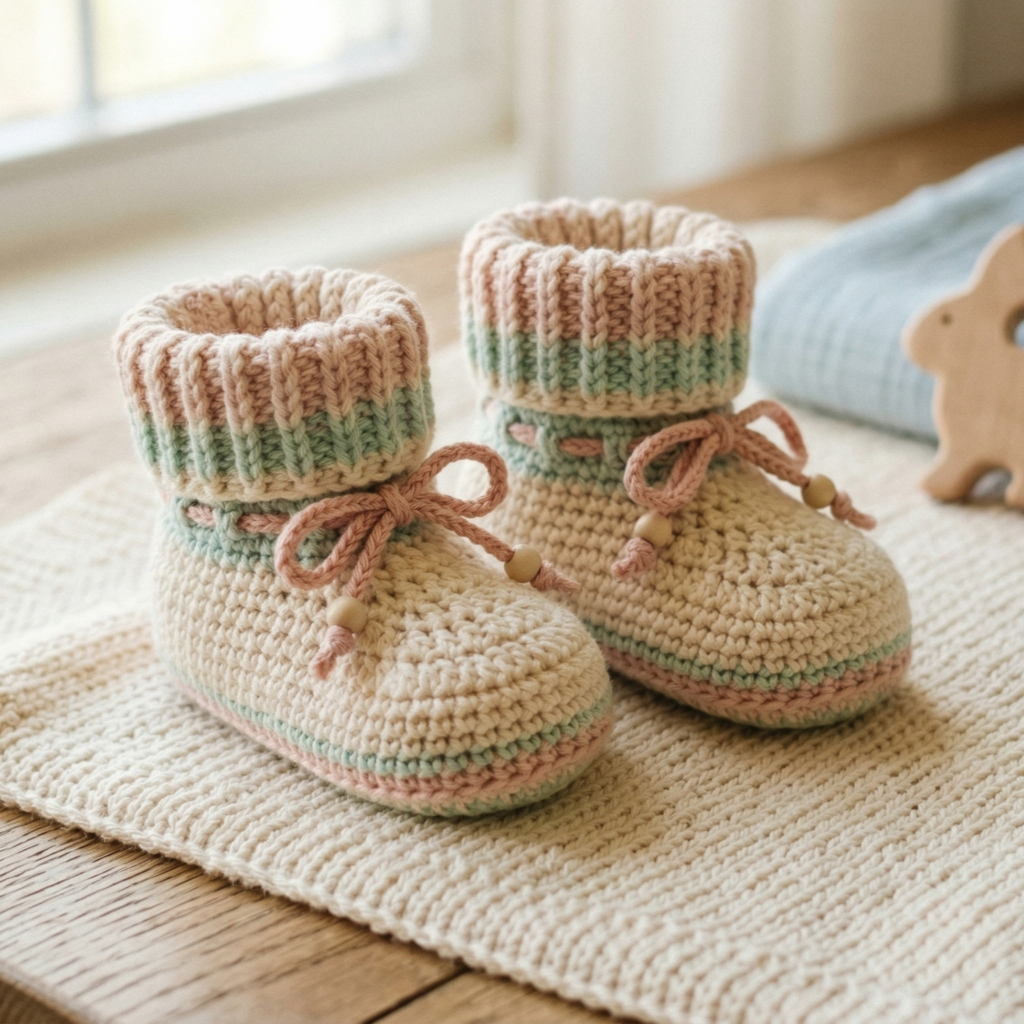
Ribbed baby booties are one of the most practical and timeless baby projects you can make. The ribbing gives the booties stretch, texture, and a snug fit, which makes them ideal for keeping tiny feet warm. They are simple, classic, and easy to adapt in different colors for boys, girls, or neutral baby gifts.
Quick Notes
Skill level: Beginner
Finished size: Newborn to 6 months, depending on sole size
Style: Classic, stretchy, cozy, simple
Best colors: Cream, white, soft gray, beige, pastel blue, blush, mint
Materials
- Soft baby yarn
- 3.0 mm to 4.0 mm crochet hook
- Yarn needle
- Scissors
- Stitch marker
- Optional ribbon or small button
Step-by-Step Guide
Step 1: Start with the sole
Begin by crocheting a small oval sole. This is the foundation of the bootie and should be wide enough to fit the baby’s foot comfortably. Use simple increases around the toe and heel areas so the sole stays flat and evenly shaped.
A neat sole gives the bootie a clean and comfortable base.
Step 2: Build the sides
Once the sole is finished, work rows or rounds upward along the edge to form the sides of the bootie. Keep the stitches snug but not too tight, since baby booties need to be soft and easy to put on.
This part begins to create the shape around the foot.
Step 3: Add the ribbed texture
Use front post and back post stitches or a ribbing repeat to create the stretchy cuff. The ribbing helps the bootie fit securely around the ankle while giving it a cozy, finished look. This is one of the most important parts of the design because it keeps the bootie from slipping off too easily.
Ribbing also adds a lovely handmade texture.
Step 4: Shape the toe
If needed, work a few shaping rows near the front of the bootie to round out the toe section. The bootie should look soft and slightly rounded rather than boxy. Keep the shaping subtle so the overall pattern stays classic.
A gentle toe shape makes the bootie more comfortable.
Step 5: Finish the cuff
Continue the ribbing until the cuff is tall enough to fold over or stay upright. A folded cuff gives the bootie a sweeter look and adds a little extra warmth around the ankle. You can keep it short for a simpler style or make it taller for more coverage.
Step 6: Seam and secure
If your bootie is worked flat, seam the back neatly. If it is worked in the round, make sure all edges are closed securely. Weave in the ends carefully so the booties are safe and tidy.
Step 7: Add a simple closure if desired
You can add a small button or ribbon tie if you want the booties to stay more secure on tiny feet. If you choose a button, make sure it is sewn on very firmly and positioned comfortably.
Helpful Tips
Ribbed booties are a great beginner project because the stitch repeat is easy to follow and the stretchy texture makes them forgiving in fit. Soft neutral colors give them a timeless look, but pastel shades also make them feel sweet and baby-ready.
2. Crochet Jasmine Stitch Baby Booties Pattern
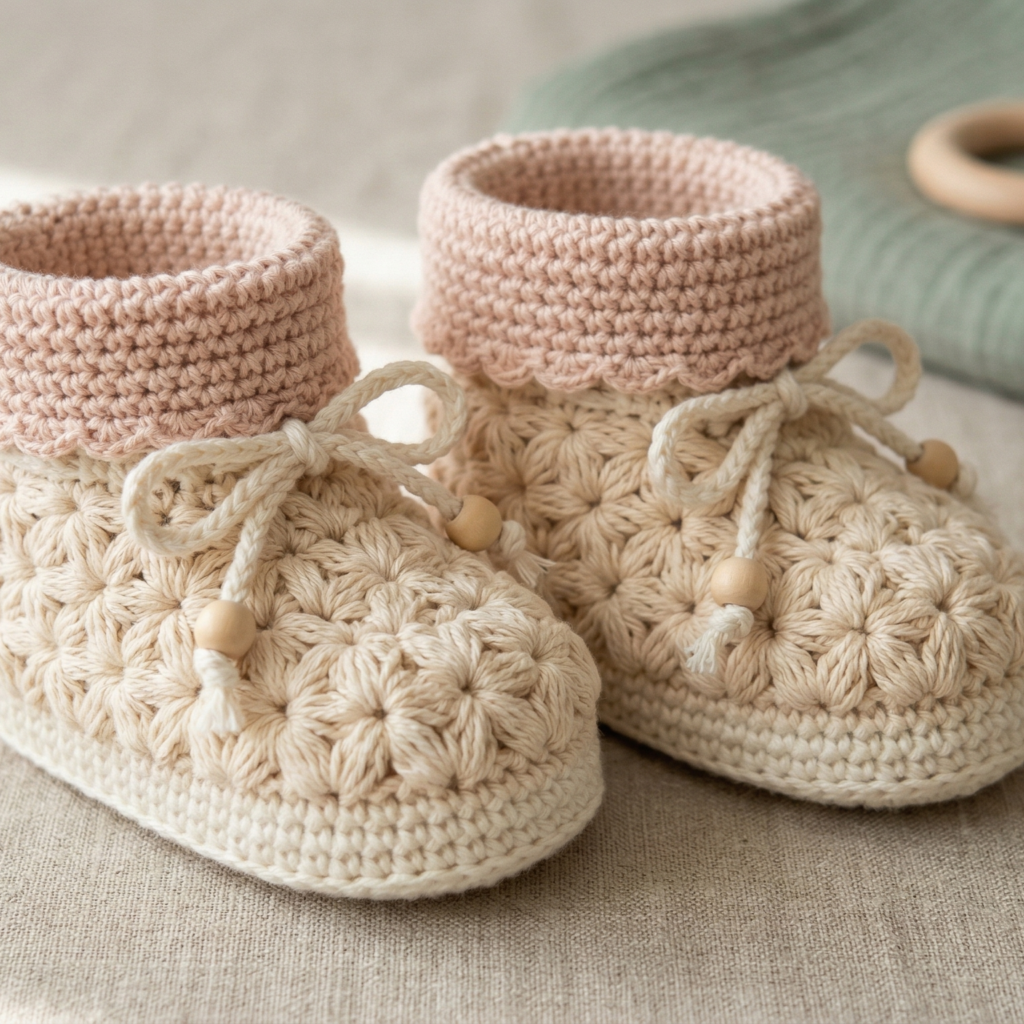
Jasmine stitch baby booties are beautiful, textured, and a little more delicate-looking than a plain bootie. The jasmine stitch gives a floral, petal-like surface that feels soft and special. This design is perfect if you want baby booties that look elegant and handmade in a memorable way.
Quick Notes
Skill level: Intermediate
Finished size: Newborn to baby sizes
Style: Textured, elegant, soft, decorative
Best colors: Ivory, blush, baby blue, soft lavender, cream, peach
Materials
- Soft baby yarn with good stitch definition
- 2.5 mm to 3.5 mm crochet hook
- Yarn needle
- Scissors
- Stitch markers
- Optional ribbon or button closure
Step-by-Step Guide
Step 1: Make the sole base
Begin with a small oval sole. This should be slightly firm so it supports the textured upper part of the bootie. Keep the shape smooth and even, because the jasmine stitch will be the main decorative feature of the upper body.
A balanced sole gives the bootie structure.
Step 2: Build the lower foot section
Crochet the sides up from the sole using a simple stitch pattern at first. This gives you a stable base before the jasmine texture begins. Keep the fit snug so the bootie stays secure on the foot.
The lower section should be soft and supportive.
Step 3: Begin the jasmine stitch
The jasmine stitch is made by drawing up multiple loops and closing them together to form a star-like or flower-like texture. Before starting the whole bootie, practice a small swatch so you can get used to the motion. Once you feel comfortable, work the stitch around the upper body of the bootie.
This is the signature texture of the design.
Step 4: Keep the stitch tension even
Jasmine stitch can become bulky if the tension is too tight. Keep your loops even and smooth so the bootie stays soft rather than stiff. Since the pattern is for baby feet, comfort should always come first.
A balanced tension helps the stitch look beautiful.
Step 5: Shape the front and sides
As you work upward, shape the bootie so it hugs the foot gently. You may need to decrease slightly toward the front opening or adjust the stitch count depending on the size. The bootie should have a rounded, cozy shape rather than a wide opening.
The fit should feel secure but not restrictive.
Step 6: Finish the cuff or opening
You can finish the top with a simple edge, ribbed cuff, or tiny scalloped border. A ribbed edge will help the bootie stay in place, while a decorative border makes the design feel extra special. Choose the finish that matches the look you want.
Step 7: Add ties or closure if needed
A small ribbon tie or button closure can help the bootie stay on baby’s foot. If you use a closure, make sure it is soft, secure, and safely attached.
Helpful Tips
Jasmine stitch booties look especially lovely in pastel shades because the stitch pattern shows up softly and beautifully. They are ideal for gifting when you want something a little more special than a plain bootie but still gentle and baby-friendly.
3. Crochet Lamb Baby Booties Pattern
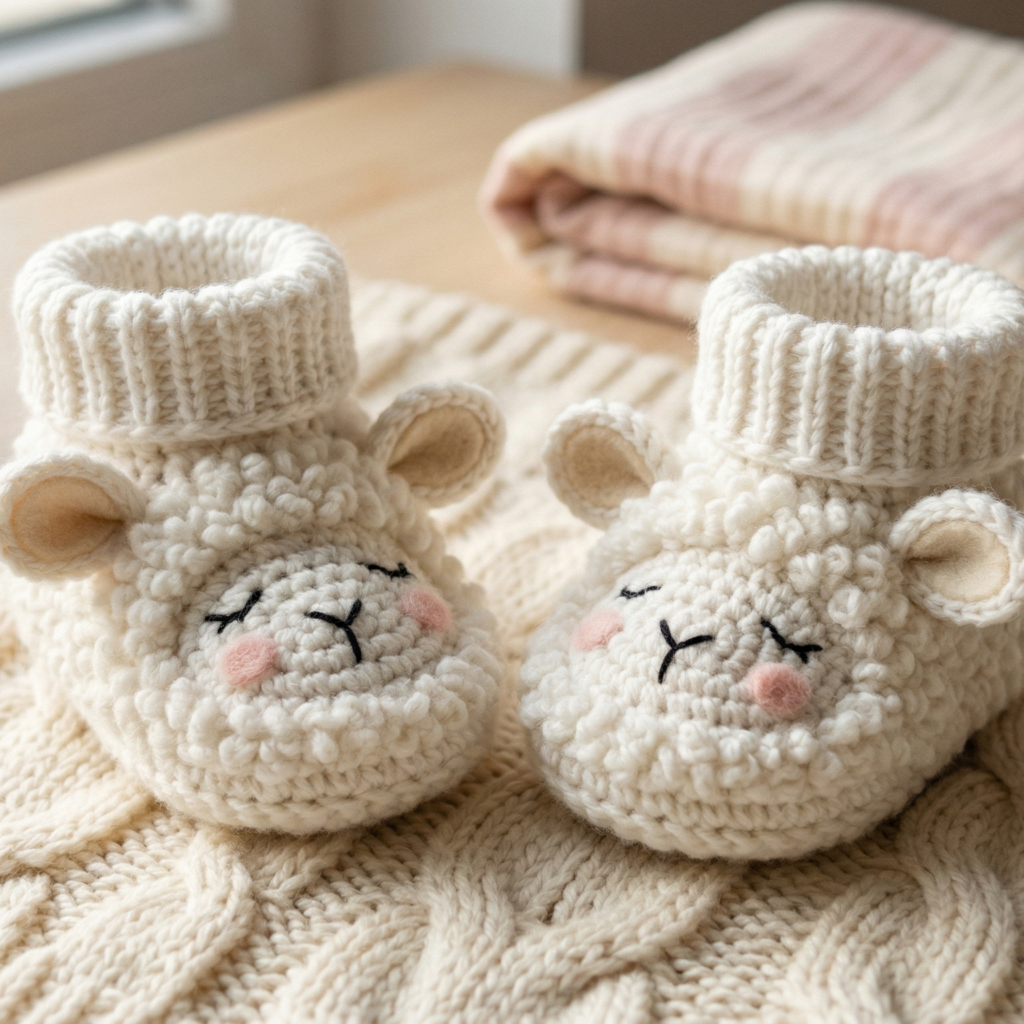
Crochet lamb baby booties are adorable, playful, and perfect for baby photos or baby shower gifts. They turn a simple bootie into a sweet animal-themed design that feels cozy and whimsical. With soft texture and small lamb-like details, these booties are as cute as they are practical.
Quick Notes
Skill level: Beginner to intermediate
Finished size: Newborn to 6 months
Style: Cute, whimsical, soft, animal-inspired
Best colors: White, cream, soft gray, beige, pale pink, light brown
Materials
- Soft white or cream yarn for the bootie body
- Small amount of contrasting yarn for facial details if desired
- 3.0 mm to 4.0 mm crochet hook
- Yarn needle
- Scissors
- Stitch marker
- Optional safety eyes, embroidery thread, or felt details
Step-by-Step Guide
Step 1: Crochet the base bootie
Start with a simple baby bootie base, usually an oval sole with sides worked upward. Keep the shape soft and rounded. The bootie itself should remain comfortable and wearable, while the lamb details add the decorative charm.
The base should feel like a normal baby bootie first.
Step 2: Add the fluffy lamb texture
Use a fluffy stitch pattern, puff stitch, bobble stitch, or soft textured yarn to make the bootie look like lamb fleece. This texture is what gives the booties their animal-inspired character. Keep the texture gentle so it stays cozy rather than too thick.
The fluffy surface makes the lamb theme come to life.
Step 3: Shape the lamb face detail
You can add a small face section near the toe or front of the bootie using embroidery or a separate appliqué. A tiny rounded face with simple ears makes the design instantly recognizable. Keep the features minimal so the bootie stays soft and sweet.
Simple details usually work best for baby items.
Step 4: Crochet the ears
Make two tiny ears using a small amount of yarn. They can be slightly floppy or rounded for a gentle lamb feel. Attach them securely near the top or front of the bootie. The ears should be small enough not to interfere with comfort.
Ears are the detail that makes the bootie feel playful.
Step 5: Add the facial features
Use embroidery thread to make tiny eyes and a nose, or choose safe alternative embellishments if appropriate. Keep all facial details soft, flat, and securely attached. The face should be sweet and simple rather than overly detailed.
A minimal face keeps the design charming and safe.
Step 6: Finish the ankle or cuff
You can add a simple cuff, ribbed edge, or soft fold-over section to keep the booties snug. The cuff should match the fluffy body while still holding the bootie in place.
Step 7: Check the finish carefully
Make sure all appliqués are sewn on securely and trim any loose ends. Since baby booties are worn on tiny feet, every detail should be firmly attached and smooth to the touch.
Helpful Tips
Lamb booties are especially adorable in off-white or cream yarn. They are perfect for baby gifts because they feel soft, sweet, and full of personality. If you want a more gender-neutral version, stick to white and gray with simple stitching.
4. Crochet Mini Ugg Style Baby Booties Pattern
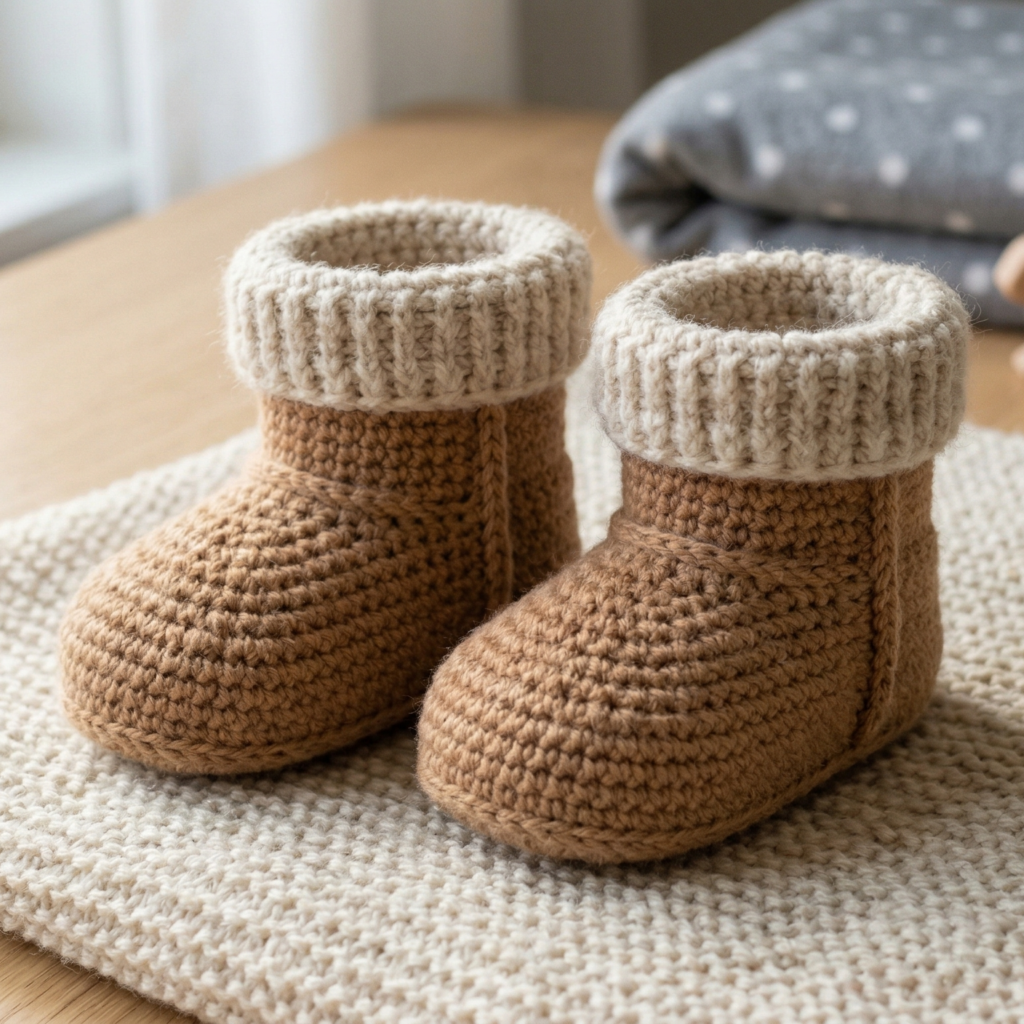
Mini Ugg style baby booties are cozy, trendy, and wonderfully warm-looking. They mimic the plush feel of winter boots in a soft baby-friendly way. This pattern is perfect for colder months or for anyone who wants booties that feel extra snug and stylish.
Quick Notes
Skill level: Beginner to intermediate
Finished size: Newborn to baby sizes
Style: Cozy, modern, winter-inspired, practical
Best colors: Tan, beige, taupe, chestnut, cream, gray, dusty pink
Materials
- Soft yarn with a plush or wool-like feel
- 3.5 mm to 4.5 mm crochet hook
- Yarn needle
- Scissors
- Stitch marker
- Optional faux shearling trim or ribbon
Step-by-Step Guide
Step 1: Start with a firm sole
Begin with a baby sole worked in an oval or slightly rounded shape. The sole should feel sturdy enough to support the bootie but still remain soft and flexible. Since Ugg-style booties are meant to look warm and snug, a good base helps the whole design feel more authentic.
A neat sole is the base of the boot shape.
Step 2: Work the body upward
Crochet around the edges of the sole to build the main body of the bootie. Keep the sides a little taller than a regular baby shoe style so the bootie feels more like a little boot. The shape should rise enough to suggest warmth and coverage.
This gives the bootie its winter-inspired silhouette.
Step 3: Add a plush texture or trim
If you want the mini Ugg look, use a soft textured yarn or add a fuzzy edging around the top cuff. This gives the bootie that cozy boot-like feel. You can also use a simple ribbed section to imitate the shape of winter boot cuffs.
The texture is what makes the design feel warm and stylish.
Step 4: Shape the front opening
The front opening should be soft and rounded. Keep it low enough to be easy to slip on but tall enough to look like a little boot. A good opening shape makes the booties more wearable and visually balanced.
Step 5: Finish the cuff
The cuff is a very important part of the mini Ugg style. Make it slightly taller and softer than the rest of the bootie. You can fold it over for extra coziness or leave it upright for a more boot-like look.
The cuff gives the bootie its signature style.
Step 6: Add optional decorative details
A tiny button, side tie, or faux seam line can make the booties look even more like mini winter boots. Keep the decorations subtle so they remain baby-friendly and comfortable.
Step 7: Secure all seams and ends
Make sure the bootie is firmly sewn and all ends are tucked away neatly. Since this design has a layered look, good finishing is especially important.
Helpful Tips
Mini Ugg booties look especially sweet in warm neutral colors. They are great for winter baby outfits and make lovely gifts because they feel modern while still being soft and cozy. A plush or slightly fuzzy yarn can really enhance the look.
5. Crochet Converse Baby Booties Pattern
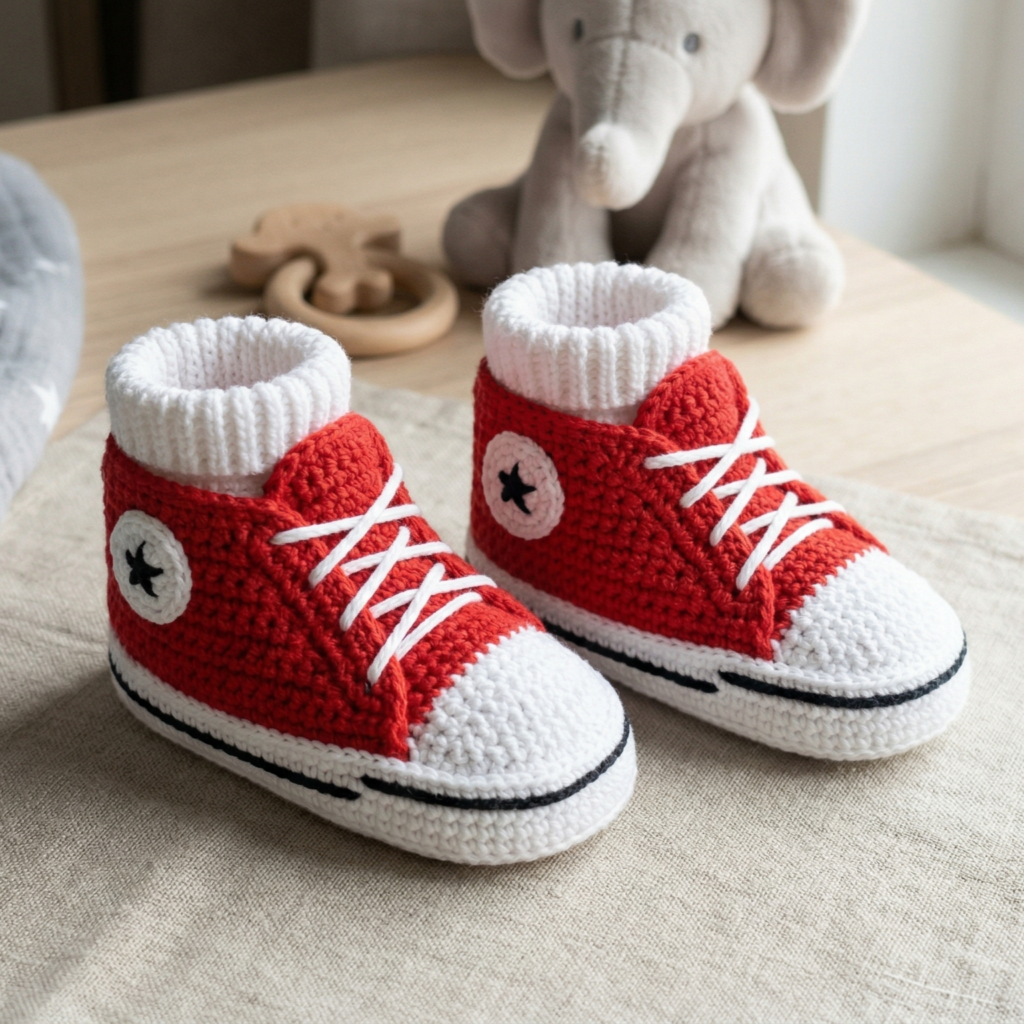
Crochet Converse baby booties are fun, trendy, and perfect for parents who love playful baby accessories. They mimic the look of little sneakers while still being soft and cozy enough for tiny feet. This design is a favorite for baby showers because it feels cute, recognizable, and stylish all at once.
Quick Notes
Skill level: Intermediate
Finished size: Newborn to baby sizes
Style: Playful, sporty, modern, cute
Best colors: White, black, red, navy, gray, pastel pink, baby blue
Materials
- Baby yarn in sneaker colors
- 3.0 mm to 4.0 mm crochet hook
- Yarn needle
- Scissors
- Stitch marker
- Optional small buttons or embroidered details
Step-by-Step Guide
Step 1: Crochet the sole
Start with an oval sole that resembles a little sneaker base. The sole should be smooth, even, and slightly firm. This forms the bottom of the shoe and gives the bootie its sneaker-like shape.
A clean sole is essential for the Converse look.
Step 2: Build the shoe body
Work upward from the sole to create the body of the bootie. Keep the shape a little higher on the sides so it feels like a small sneaker rather than a slipper. The body should fit comfortably around the baby’s foot.
This part gives the bootie its classic shoe silhouette.
Step 3: Add the toe cap
One of the most recognizable Converse details is the toe cap. You can create this with a separate color block or by using a contrasting yarn section across the front. Keep the cap neat and rounded so it looks like the front of a sneaker.
The toe cap makes the bootie instantly recognizable.
Step 4: Add the stripe detail
A small stripe along the side is another signature Converse-style detail. Use a different color to create this line. It does not need to be exact or overly detailed. Even a simple stripe can give the bootie the right sporty look.
A small stripe adds a lot of character.
Step 5: Create the ankle opening
The top opening should be snug enough to stay on but soft enough for easy wear. You can make it slightly higher like a mini sneaker cuff or keep it low for a softer baby style. A ribbed edge helps the bootie stay on securely.
Step 6: Add lace detail or eyelets
You can crochet tiny eyelets or stitch on lace-like details to mimic sneaker laces. For baby safety and comfort, keep these details soft and flat. You can also simply embroider lace lines instead of making raised parts.
The lace detail makes the shoe theme stronger.
Step 7: Finish securely
Weave in all yarn ends and check that every decorative piece is firmly attached. The bootie should feel soft inside and out, with no rough edges.
Helpful Tips
Converse-style booties are fun in classic black and white, but they also look adorable in pastel baby shades. If you want a softer everyday version, choose cream and blush or baby blue and white. They make lovely keepsake gifts and photograph beautifully.
Conclusion
Crochet baby booties are one of those projects that feel both rewarding and meaningful. They are small enough to make quickly, yet special enough to become treasured gifts or keepsakes. Because baby booties are so tiny, every detail matters, from the softness of the yarn to the shape of the sole to the final finishing touches. That is what makes them such a joyful project to create.
These five patterns each offer a different style. Ribbed booties are classic and stretchy. Jasmine stitch booties feel elegant and textured. Lamb booties are sweet and whimsical. Mini Ugg style booties are cozy and modern. Converse baby booties bring a playful, trendy look. Together, they show how flexible and creative baby crochet can be.
Whether you are making a pair for a newborn gift, a baby shower, or simply for the joy of creating something tiny and precious, these booties are a lovely place to begin. With soft yarn, careful shaping, and neat finishing, you can make baby footwear that is not only adorable but also comfortable and practical for little feet.