Crochet coasters are one of those wonderfully satisfying projects that look small, finish fast, and still make a huge visual difference. They are the kind of handmade detail that instantly makes a table feel warmer, more personal, and more thoughtful. Whether you are decorating your own home, making a gift set, or creating content for your blog, coaster patterns are a perfect way to show how a tiny project can still feel creative and memorable.
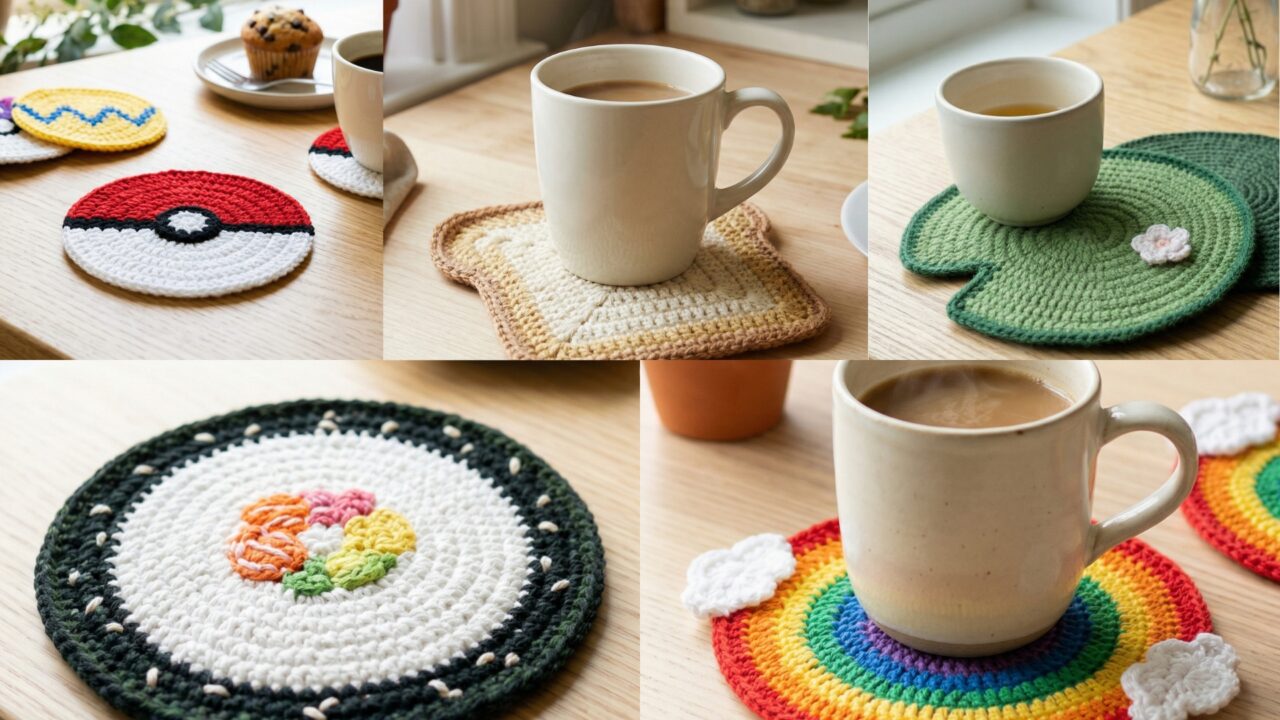
What makes crochet coasters especially fun is the freedom to play with shape, color, and theme. A simple round coaster can become a toast slice, a lily pad, a sushi roll, a Pokémon-inspired design, or a bright rainbow accent with just a few changes in stitch choice and color placement. That means each one can have its own personality while still being practical enough to protect your surfaces.
In this post, you will find five cute and stylish coaster ideas with clear step-by-step guidance, helpful quick notes, material lists, skill levels, and finished size details. These patterns are written to be beginner-friendly, easy to adapt, and enjoyable to make. If you love quick crochet projects that look impressive without requiring a huge time commitment, these coaster ideas are a perfect place to start.
Quick Notes
Project type: Crochet coaster set
Best for: Home decor, gifts, craft fair items, blog content, and quick makes
Skill level: Beginner to easy intermediate
Hook size: Usually 3.5 mm to 4.5 mm, depending on yarn weight
Yarn weight: Light worsted, DK, or cotton worsted works best
Best yarn choice: Cotton yarn for absorbency and structure
Finished size: Usually 4 to 6 inches wide, depending on the design
Time to complete: About 30 to 90 minutes per coaster
Helpful stitches: Chain, slip stitch, single crochet, half double crochet, double crochet, increase, color change, surface stitch
Common Materials
You can use the same basic supplies for all five coaster designs.
- Cotton yarn in different colors
- Crochet hook suitable for your yarn
- Yarn needle
- Scissors
- Stitch marker, if needed
- Optional stuffing or stiffener for shaped details
- Measuring tape
Cotton yarn is usually the best choice for coasters because it holds its shape well and absorbs moisture better than acrylic. If you want crisp edges and a polished finish, choose a tight tension and a hook size on the smaller side of the yarn label recommendation.
1. Crochet Toast Inspired Coaster Pattern
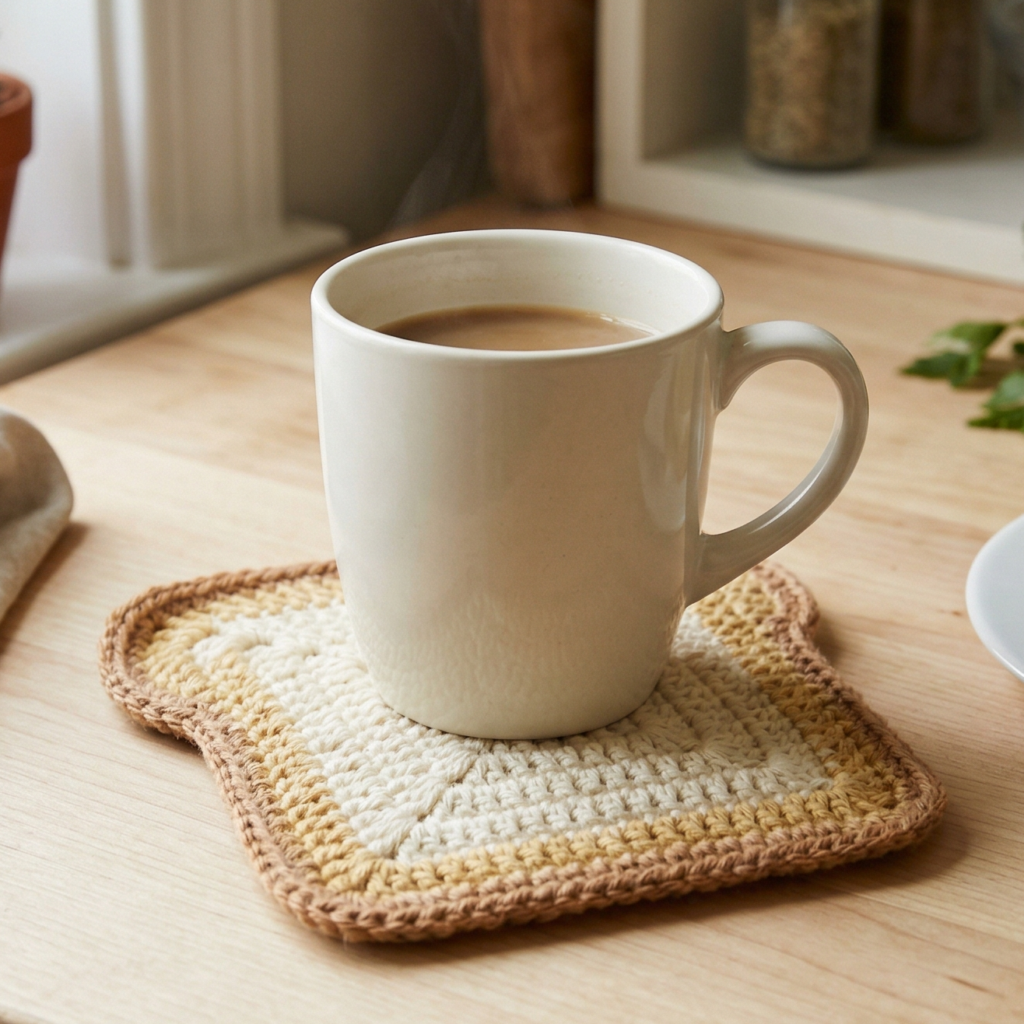
A toast-inspired coaster is playful, cozy, and instantly charming. It is perfect for a breakfast lover, a kitchen-themed gift, or anyone who enjoys novelty crochet items. This design usually works as a square or slightly rounded square with a golden crust edge and a lighter center to resemble a slice of toast.
Quick Notes
Skill level: Easy
Finished size: About 4.5 to 5 inches
Main colors: Beige, cream, light brown, and darker brown
Style: Cute, novelty, kitchen-friendly
Materials
- Cream or off-white yarn for the toast center
- Light brown yarn for the toast body
- Dark brown yarn for crust details
- 4 mm crochet hook
- Yarn needle and scissors
Step-by-Step Guide
Step 1: Create the toast base
Start with a foundation chain that gives you a square or slightly rounded square shape. A simple square base is the easiest option. Crochet a small square using single crochet stitches, increasing evenly at the corners if you want a neater shape.
If you prefer a softer toast look, work a rectangle and then lightly round the corners in the edging round.
Step 2: Build the crust border
Once the center is complete, switch to light brown yarn and work a border around the entire square. This outer edge represents the crust. Keep your stitches neat and even so the crust frame looks clean and polished.
Step 3: Add depth with a second crust round
For extra realism, add a second border round in a slightly darker brown. This small color change gives the coaster more dimension and makes the toast shape easier to recognize at a glance.
Step 4: Shape the corners
Toast slices usually look nicest when the corners are gently rounded. You can achieve this by using fewer stitches in the corner spaces or by adding one extra stitch at each corner rather than a sharp increase. The goal is a soft, friendly shape rather than a rigid square.
Step 5: Optional toast face details
If you want a more whimsical version, you can embroider tiny eyes, a smile, or blush marks in the center. Keep it minimal so the coaster still feels functional and not too busy.
Step 6: Finish and block
Weave in all ends carefully and lightly block the coaster if needed. Blocking helps the square lay flat and gives the toast shape a neater finish.
Helpful Tips
A toast coaster looks best when the center is slightly lighter than the border. If your yarn colors are too close together, the design may lose definition. Cotton yarn with a matte texture usually gives the most realistic look.
This project also works beautifully as a set of four with slightly different “toast shades,” from lightly toasted to golden brown.
2. Crochet Lily Pad Coaster Pattern
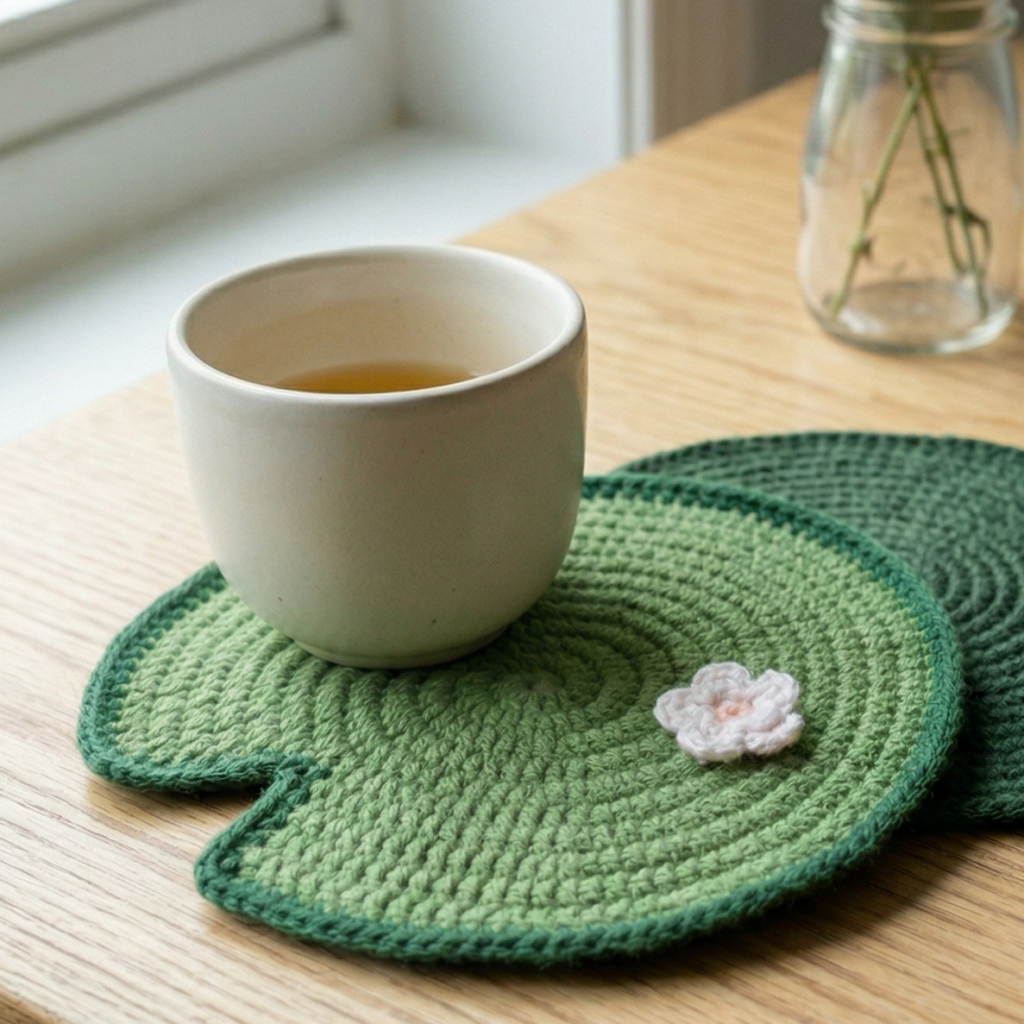
The lily pad coaster is elegant, calming, and a little whimsical. It brings a soft nature-inspired feel to your table while still being practical. This design is usually circular or oval with a small notch or leaf-like cutout to mimic the look of a lily pad floating on water.
Quick Notes
Skill level: Easy to intermediate
Finished size: About 4.5 to 6 inches
Main colors: Green shades, with optional flower accent
Style: Botanical, peaceful, decorative
Materials
- Medium green yarn for the lily pad body
- Dark green yarn for edging
- Optional pink, white, or yellow yarn for a small flower accent
- 4 mm or 4.5 mm crochet hook
- Yarn needle and scissors
Step-by-Step Guide
Step 1: Make a circular base
Begin with a magic ring or chain ring and work in the round to create a flat circle. Increase evenly each round so the circle stays flat rather than curling. This becomes the main body of the lily pad.
Step 2: Shape the pad
A lily pad is not a perfect circle, so after the base is complete, create a gentle notch. You can do this by working a short chain section and then continuing the round on the other side, or by shaping one edge with a small cutout effect.
This notch gives the coaster its signature lily pad look.
Step 3: Add leaf-style texture
To make the coaster more plant-like, use a stitch pattern that creates soft ridges or subtle texture. Half double crochet or front-post stitches can help add a natural leafy feel without making the coaster too thick.
Step 4: Work the border
Use dark green yarn to add a clean outer edge. A single crochet border is usually enough, but you can also use picot stitches or a slightly pointed edge if you want to emphasize the leaf shape.
Step 5: Optional flower detail
For a pretty finish, crochet or embroider a small flower near the center. A tiny white or pink bloom adds charm and makes the design feel complete. Keep it small so it does not interfere with the coaster’s flatness.
Step 6: Flatten and finish
Weave in ends neatly and shape the notch so the lily pad curves naturally. If needed, lightly steam or block the piece to help it lie flat.
Helpful Tips
The key to a great lily pad coaster is balance. The shape should look organic, but not uneven. A slightly asymmetrical finish is actually a good thing here because real lily pads are not perfectly uniform.
If you are making several coasters, try mixing different green shades so the set looks like a little pond collection.
3. Crochet Sushi Inspired Coaster Pattern
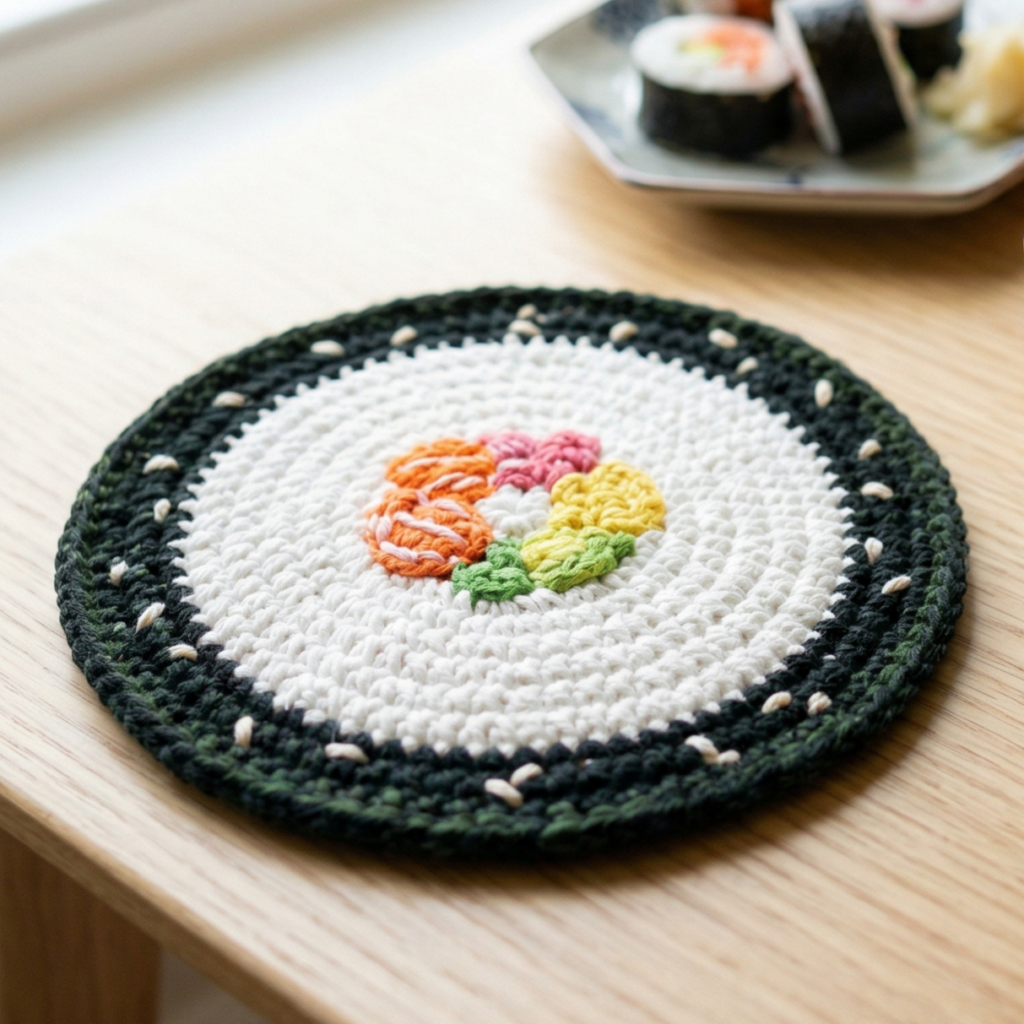
A sushi-inspired coaster is bold, cute, and perfect for food-themed decor. It can be designed to look like a sushi roll slice, with a dark outer ring, a colorful filling center, and a clean round shape. This is a fun novelty pattern that stands out immediately and makes a great conversation piece.
Quick Notes
Skill level: Easy to intermediate
Finished size: About 4 to 5 inches
Main colors: Black or dark green, white, orange, pink, yellow, and green
Style: Fun, modern, playful
Materials
- Black or dark green yarn for the “seaweed” wrap
- White yarn for rice
- Bright accent yarn for filling details
- 4 mm crochet hook
- Yarn needle and scissors
Step-by-Step Guide
Step 1: Make the sushi roll center
Start with a small circular base in white yarn. This will represent the rice section. Work in the round with regular increases so it stays flat and round.
Step 2: Add the filling colors
Once the rice base is established, add small sections of color in the center. These can represent avocado, salmon, cucumber, or other sushi fillings. You can use short rows, embroidery, or color blocks depending on the style you want.
A few bright stitches in the middle make the design look instantly recognizable.
Step 3: Build the outer wrap
Switch to black or dark green yarn and work a border around the entire coaster to imitate the seaweed wrap. This should frame the rice center and make the coaster look like a sliced sushi roll.
Step 4: Keep the shape round and neat
Because this pattern is inspired by food, a smooth round shape works best. Avoid too much texture on the surface. Instead, focus on crisp color changes so the layers are easy to read.
Step 5: Optional sesame detail
If you want a more realistic sushi vibe, add a few tiny white stitches or speckles on the black border to mimic sesame seeds. Keep them sparse so the coaster does not become too busy.
Step 6: Finish securely
Weave in all ends tightly, especially if you used several color changes. Since sushi-inspired designs depend on neat visual lines, tidy finishing makes a big difference.
Helpful Tips
This coaster works especially well as a set of mixed “flavors.” For example, one coaster could feature orange and green filling, another pink and white, and another with a more minimalist design.
If you sell crochet items, this style often attracts people who love unique kitchen decor or cute novelty handmade gifts.
4. Crochet Pokemon Inspired Coaster Pattern
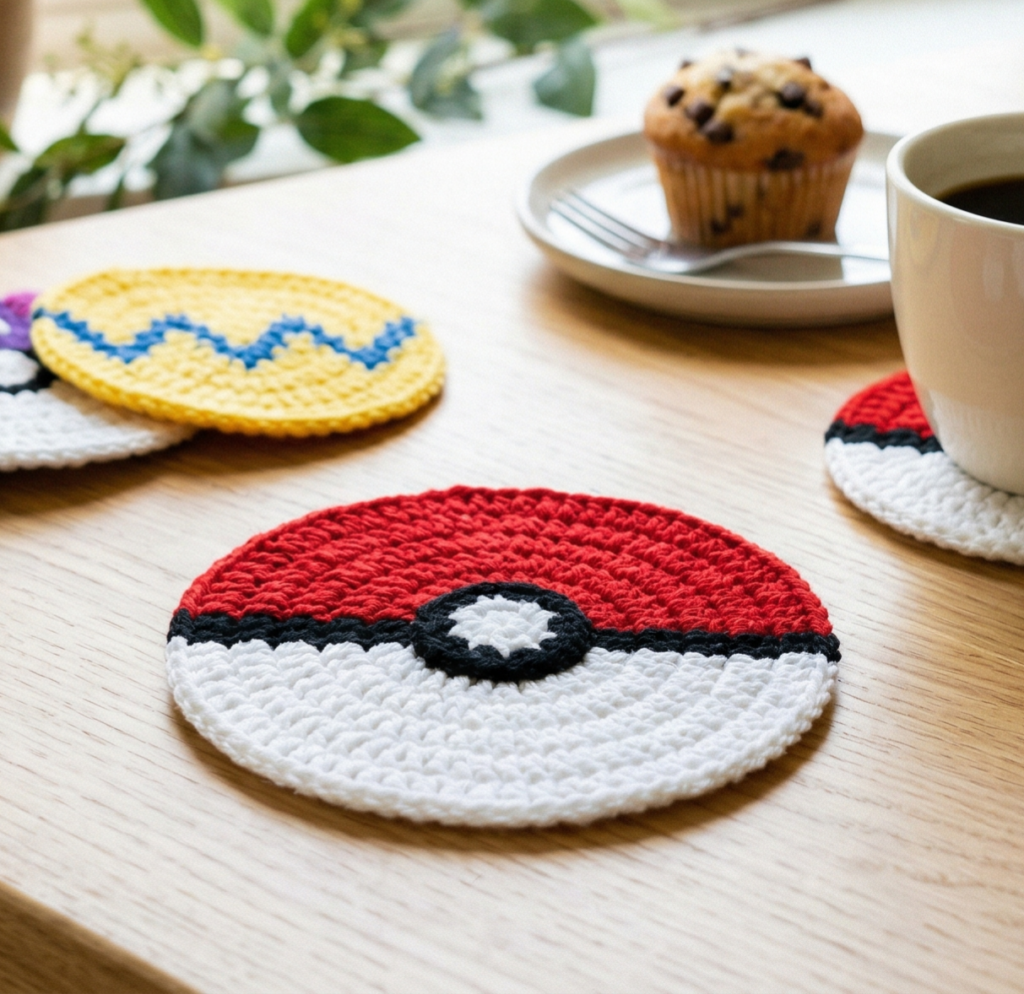
A Pokémon-inspired coaster is cheerful, nostalgic, and full of personality. Since this design is inspired by the general playful look and color energy associated with Pokémon, it works best when it feels bold, circular, and bright. You can make it with strong primary colors and a simple split-color center for a striking effect.
Quick Notes
Skill level: Easy to intermediate
Finished size: About 4.5 to 6 inches
Main colors: Red, white, black, yellow, blue, and optional accent colors
Style: Nostalgic, playful, bold
Materials
- Red yarn
- White yarn
- Black yarn
- Yellow or accent yarn
- 4 mm crochet hook
- Yarn needle and scissors
Step-by-Step Guide
Step 1: Start with the base circle
Make a flat circle in your main color. Red is a great starting point because it gives the coaster a strong, recognizable energy. Use even increases to keep the circle smooth and flat.
Step 2: Add the split design
Use white yarn to create a clean lower half or center section. This gives the coaster a classic “ball” style look that feels instantly iconic and visually balanced. You can work this through rounds or use color changes in a horizontal division.
Step 3: Add the center band
Create a contrasting band across the middle in black. This band helps define the design and makes the two halves look intentional and polished. Keep the stitches tight so the line stays straight.
Step 4: Add the center button
At the midpoint of the black band, crochet or embroider a small circular button detail. This tiny feature adds the finishing touch and makes the coaster more recognizable as a themed novelty piece.
Step 5: Smooth the edges
Because this design relies on color placement, make sure your stitches are even and your color changes are clean. Weave in yarn tails carefully so the back stays neat.
Step 6: Keep it functional
Although this coaster is decorative, it should still lie flat and hold a cup comfortably. If the center looks bulky, reduce extra layering or tighten your stitch tension.
Helpful Tips
For a full set, you can create several variations using the same base layout but changing the accent colors. That makes the collection feel coordinated while still allowing each coaster to look unique.
This is a great project for younger crochet fans, gaming-themed rooms, or anyone who enjoys a pop-culture-inspired handmade accent.
5. Crochet Rainbow Inspired Coaster Pattern
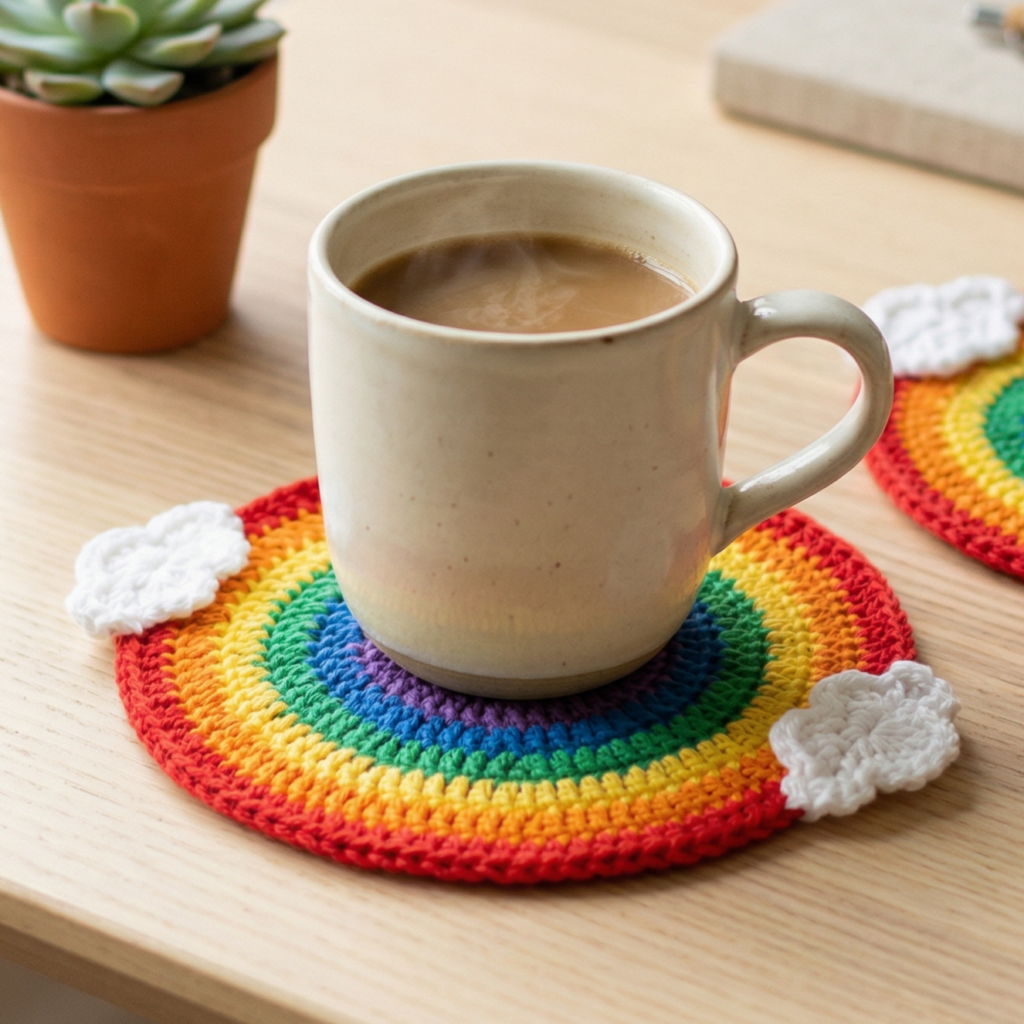
A rainbow-inspired coaster is bright, happy, and easy to customize. It can be made in full rainbow colors or in a softer pastel palette, depending on the mood you want. This design is cheerful enough for a child’s room, a gift basket, or a colorful kitchen set.
Quick Notes
Skill level: Easy
Finished size: About 5 to 6 inches
Main colors: Red, orange, yellow, green, blue, and purple, or pastel alternatives
Style: Bright, joyful, decorative
Materials
- Yarn in rainbow colors or pastel shades
- White yarn for clouds, if desired
- 4 mm crochet hook
- Yarn needle and scissors
Step-by-Step Guide
Step 1: Choose your rainbow style
Decide whether you want a full circular rainbow, a rainbow arch, or a rainbow stripe coaster. A full circle is the easiest for beginners. An arch design takes a little more shaping but looks especially cute.
Step 2: Create the main base
Work a flat base in one color, usually white or light blue. This gives the rainbow a clean background and helps the colors stand out. If you are making a circular rainbow, continue in rounds.
Step 3: Add rainbow stripes
Switch colors in sequence to create visible rainbow bands. Each band can be one or two rounds wide depending on how bold you want the effect to be. Keep your transitions neat so the stripes appear clean and intentional.
Step 4: Add clouds or borders
If you want a softer, more playful finish, add small white cloud shapes at the bottom or edge. A white outer border also works nicely and keeps the rainbow colors framed.
Step 5: Shape and flatten
Because multiple colors can sometimes make the coaster slightly uneven, take time to check the edges as you go. Make sure the stitches remain flat and balanced.
Step 6: Finish with a polished look
Weave in all ends carefully. A rainbow coaster looks best when the color changes are crisp and the back is tidy, so take your time with finishing.
Helpful Tips
A rainbow coaster is a perfect project for leftover yarn. You can use small amounts of different colors and still create something bright and eye-catching.
Pastel rainbow versions are especially popular for soft, aesthetic home decor, while bold rainbow sets are great for cheerful and lively spaces.
Conclusion
Small crochet projects often have the biggest impact because they combine usefulness with personality. A coaster may be simple in size, but when you turn it into something like toast, a lily pad, sushi, a Pokémon-inspired design, or a rainbow, it becomes much more than a household accessory. It becomes a tiny piece of handmade art.
These five crochet coaster patterns are perfect for anyone who wants quick wins, creative variety, and beautiful results without a long project timeline. They are also ideal for blog readers because they are easy to understand, fun to follow, and highly shareable. Whether you are making them for your own home or planning a collection for gifts or sales, these little designs prove that even the smallest crochet project can make a big style statement.