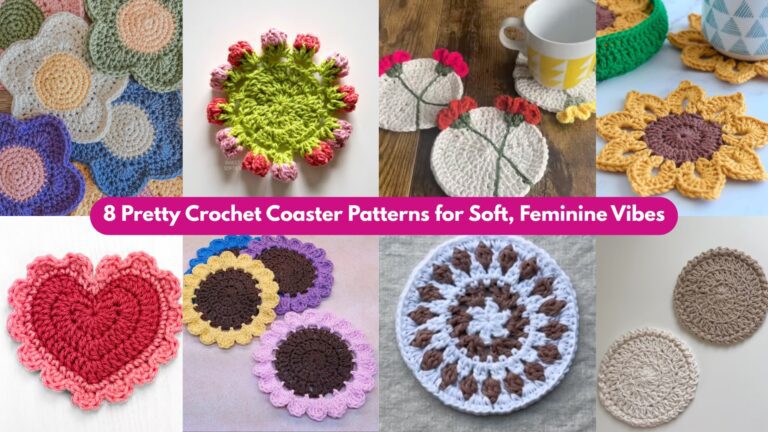
Crochet coasters may be small, but they have a way of making a space feel more finished, thoughtful, and stylish. They are one of the easiest crochet projects to start with, yet they still offer plenty of room for creativity. A coaster can be practical, decorative, seasonal, or playful depending on the yarn colors, stitch choices, and shapes you use. That is what makes them such a satisfying project: they are quick to make, easy to personalize, and useful in everyday life.
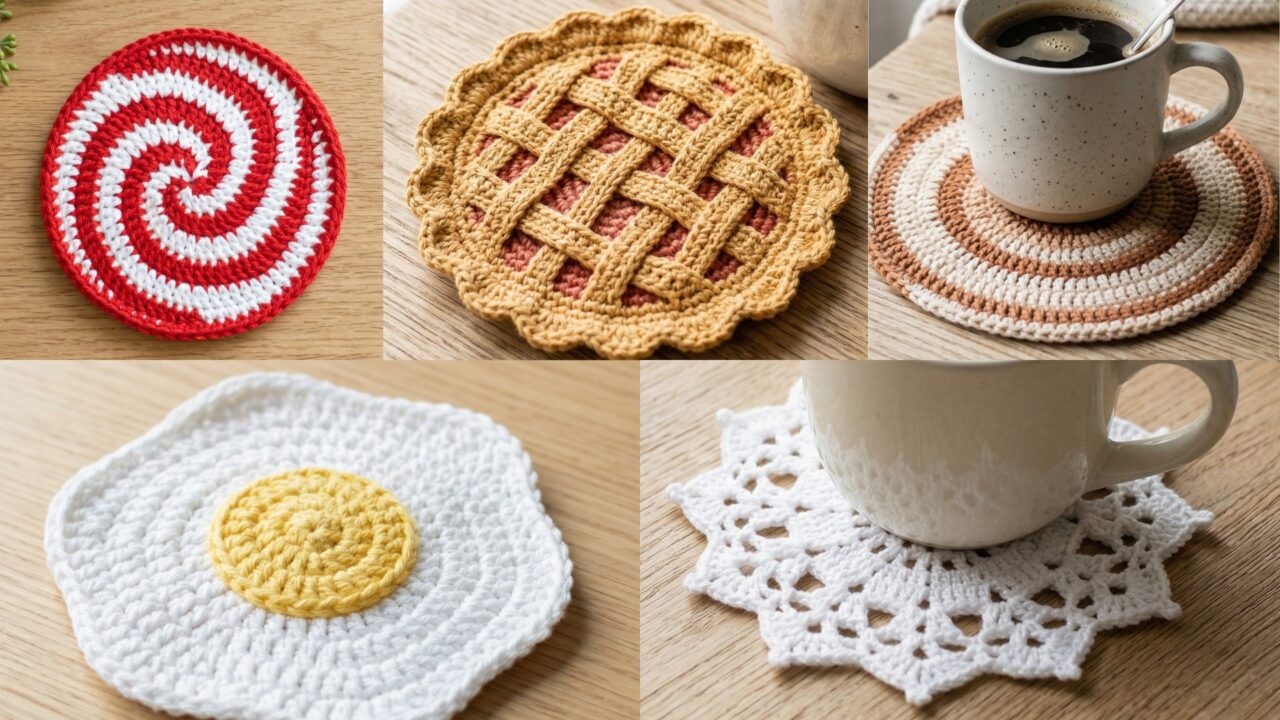
What also makes crochet coasters so appealing is how much personality they can carry in such a tiny size. A snowflake coaster feels crisp and wintery. An apple pie inspired coaster brings cozy homey charm. A swirl coaster adds movement and modern texture. A peppermint coaster feels cheerful and festive. A fried egg coaster is whimsical, fun, and instantly memorable. Each one looks different, but all of them prove that even a small handmade piece can have a big visual impact.
In this post, you will find five small crochet coaster patterns with clear, detailed step-by-step guidance, helpful quick notes, and practical tips for making each design neat and wearable. These ideas are great for gifts, home decor, market items, or just using up yarn scraps in a creative way. If you love quick projects that are fun to make and beautiful to use, these coaster patterns are a perfect place to start.
Quick Notes
Project type: Crochet coasters
Best for: Home decor, gifts, seasonal sets, coffee tables, kitchens, and stash-busting
Skill level: Beginner to intermediate
Hook size: Usually 3.0 mm to 4.5 mm, depending on yarn weight
Yarn weight: Cotton, cotton blends, DK, or light worsted yarn
Best yarn choice: Cotton yarn for absorbency, structure, and easy washing
Finished size: Usually 4 to 6 inches wide, depending on the design
Time to complete: About 20 to 60 minutes per coaster
Helpful stitches: Chain, slip stitch, single crochet, half double crochet, double crochet, increase, decrease, picot, shell stitch, color change, surface crochet
Common Materials
Most crochet coasters can be made with a simple set of supplies.
- Cotton yarn in your chosen colors
- Crochet hook suited to your yarn
- Yarn needle
- Scissors
- Measuring tape
- Stitch marker, if needed
- Optional stiffener for shaped designs
Cotton yarn is usually the best choice for coasters because it is absorbent, durable, and holds its shape well. If you want the coaster to be more decorative than absorbent, you can also experiment with lightweight yarns in different textures. A tighter stitch often helps the coaster lay flat and last longer.
1. Crochet Snowflake Round Coaster Pattern
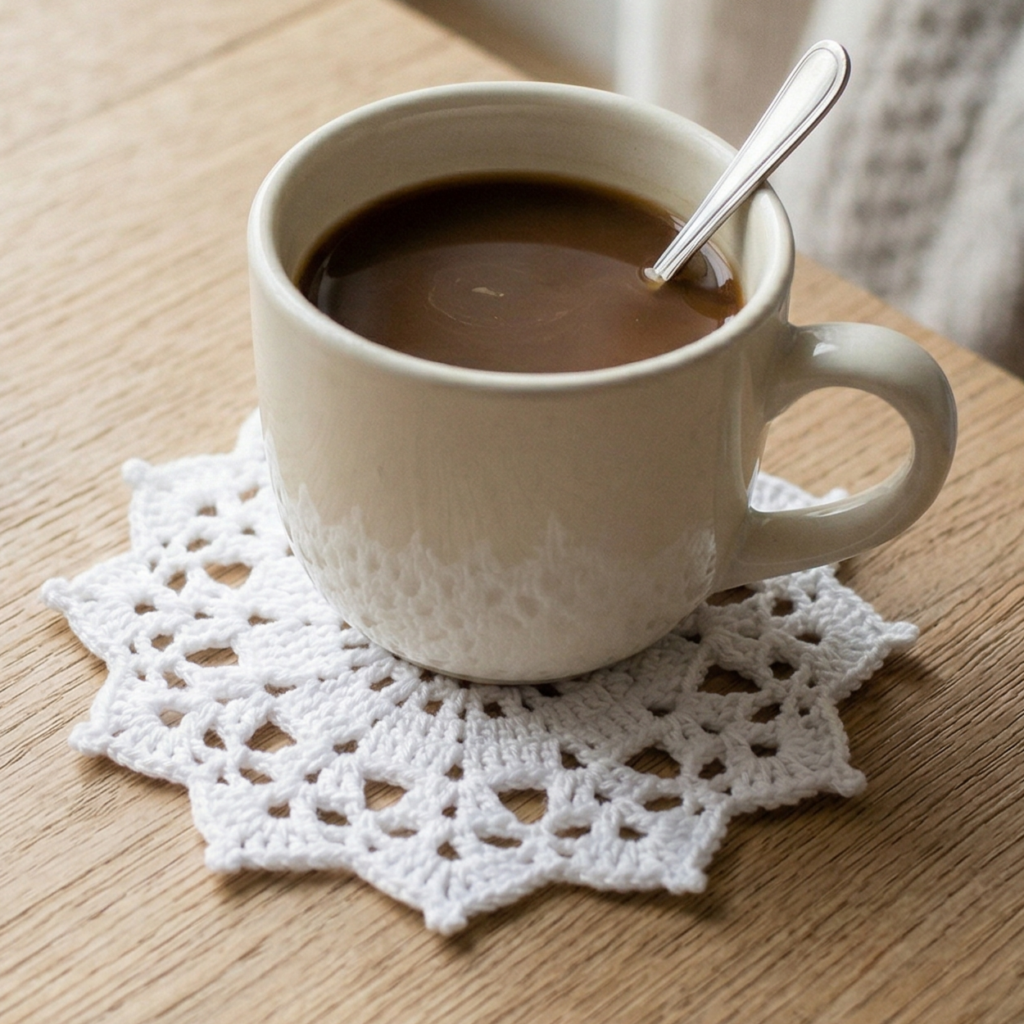
A snowflake round coaster is a beautiful way to bring a winter feeling into your home without making the design overly complicated. It combines a simple circular shape with delicate snowflake-inspired details, which makes it perfect for the holiday season or for anyone who loves winter decor. It is a lovely project if you want something elegant, festive, and easy to customize.
Quick Notes
Skill level: Beginner to intermediate
Finished size: About 4.5 to 5.5 inches
Style: Wintery, delicate, festive, clean
Best colors: White, pale blue, silver, icy gray, soft lavender
Materials
- Cotton yarn in white or icy colors
- 3.0 mm to 4.0 mm crochet hook
- Yarn needle
- Scissors
- Optional light stiffener
Step-by-Step Guide
Step 1: Start with a round base
Begin with a magic ring or small chain loop, then work a flat circle using increases. The round base gives the coaster a smooth foundation and helps the snowflake design sit evenly on top. Keep the circle flat and balanced so it does not curl at the edges.
A neat round base makes the design look polished from the beginning.
Step 2: Build the circle to the right size
Continue increasing in each round until the circle reaches the size you want for your coaster. Since this design will include snowflake details, the round should be big enough to give those details room to stand out. Keep your stitches even so the circle stays flat.
A smooth circle provides the best background for the snowflake effect.
Step 3: Add snowflake-inspired texture
Once the base is complete, create the snowflake effect with small pointed stitches, picots, chain loops, or tiny decorative clusters. These details can form the appearance of snowflake arms radiating out from the center. Keep the texture delicate so the design feels crisp rather than heavy.
The snowflake look comes from these small, repeated points.
Step 4: Work the outer edge carefully
The outer edge should echo the snowflake shape with tiny points or scallops. This makes the coaster feel more like a winter ornament while still staying functional. Keep the points even so the coaster remains balanced and sits flat on the table.
A defined edge helps the snowflake shape read clearly.
Step 5: Keep the coaster flat
Check that the coaster lies flat after every few rounds. If the points begin to curl or the circle ripples, you may need to adjust your stitch count. A flat coaster is important because it needs to hold drinks comfortably.
A balanced finish helps the coaster feel sturdy and usable.
Step 6: Add a light border if desired
If you want a more polished look, you can add a final round of single crochet or slip stitches in a contrast color. This can sharpen the edge and make the snowflake shape feel more complete.
Step 7: Block gently
Light blocking can help the snowflake points open up and the circle settle into shape. This is especially helpful for lace-like winter designs because it makes the details more visible.
Helpful Tips
White or icy blue yarn gives this coaster a true winter feeling, but it also looks beautiful in soft metallic-inspired tones. If you want to make a matching set, try pairing a few slightly different pale shades for a frosty collection that feels elegant and seasonal.
2. Crochet Apple Pie Inspired Coaster Pattern

An apple pie inspired coaster is warm, cozy, and full of homemade charm. It is perfect for kitchens, fall decor, or gift sets that feel comforting and nostalgic. This coaster usually combines warm crust-like tones with a soft center and decorative edge, making it look like a tiny slice of pie. It is a fun novelty project that still works beautifully as a functional coaster.
Quick Notes
Skill level: Beginner to intermediate
Finished size: About 4.5 to 5.5 inches
Style: Cozy, rustic, fall-inspired, playful
Best colors: Tan, caramel, cream, golden brown, apple red, warm beige
Materials
- Cotton yarn in crust and filling colors
- 3.5 mm to 4.5 mm crochet hook
- Yarn needle
- Scissors
- Optional stiffener
Step-by-Step Guide
Step 1: Create the pie base
Start with a small circular or slightly rounded base in a warm neutral color. This represents the pie filling or the center of the coaster. Use flat increase rounds to create a smooth base that will become the main body of the design.
The base should feel soft and neat.
Step 2: Add the apple pie filling look
Switch to a warm apple tone or use a small amount of red, rust, or blush yarn to suggest the fruit filling. You can create this look by working a smaller center section or adding subtle color changes. The goal is to make the coaster feel like a pie slice without making it too literal.
A little color contrast helps the theme stand out.
Step 3: Work the crust border
Use a caramel, tan, or golden brown yarn to create the crust section around the edge. This border gives the coaster its pie-like identity. You can make the crust smooth or slightly textured depending on the look you want.
The crust border is what makes the coaster instantly recognizable.
Step 4: Add decorative pie details
If you want the coaster to look more like a pie top, add small chain openings, crisscross strips, or tiny scallops to suggest a lattice crust. These details do not need to be complicated. Even a few simple lines can create a strong pie impression.
Keep the details small so the coaster remains practical.
Step 5: Shape the edges evenly
Make sure the crust edge sits flat and balanced all the way around. If the edge becomes wavy in a way you do not want, adjust your stitch count or reduce excess shaping. The coaster should feel decorative but still hold a cup securely.
Step 6: Finish with a clean border
A final border in a slightly darker brown can help define the crust and give the coaster more depth. This also helps the whole piece look tidy and finished.
Step 7: Block lightly if needed
If the crust detail looks uneven, a gentle block can help the coaster settle into a more even shape. This is especially helpful if you use a slightly open decorative stitch.
Helpful Tips
This coaster is especially charming in autumn color palettes. You can also make a full set of pie-inspired coasters in apple, pumpkin, or berry tones for a seasonal kitchen collection. A cotton yarn with a matte finish usually works best for the rustic pie look.
3. Crochet Swirl Coaster Pattern
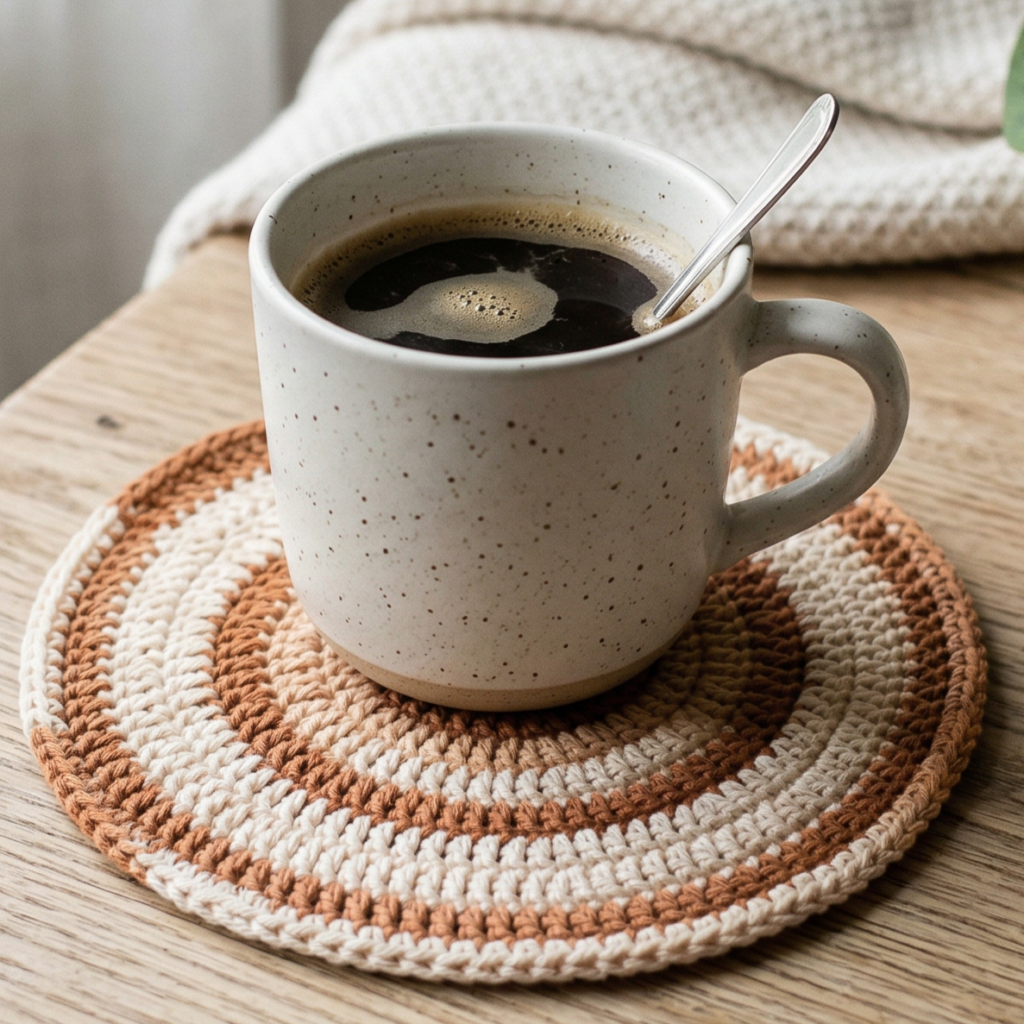
A swirl coaster is modern, playful, and visually interesting. It uses curved lines or spiral-shaped stitch placement to create a sense of movement, which gives the coaster a lively look even though it is a simple project. This design works well in both bold and subtle colors, making it a versatile option for all kinds of home decor.
Quick Notes
Skill level: Beginner to intermediate
Finished size: About 4 to 6 inches
Style: Modern, graphic, playful, artistic
Best colors: Two-tone combinations, ombré shades, bold contrast colors, or soft neutrals
Materials
- Cotton yarn in one or more colors
- 3.0 mm to 4.5 mm crochet hook
- Yarn needle
- Scissors
- Measuring tape
Step-by-Step Guide
Step 1: Decide on the swirl direction
Before you start, choose whether you want a spiral swirl that winds out from the center or a more subtle curved swirl that circles around the coaster. The direction of the swirl changes the personality of the piece, so it is worth deciding early.
A clear direction makes the design more intentional.
Step 2: Begin with a central ring
Start with a magic ring or chain loop. The center will be the anchor for the swirl, so keep it small and neat. Work a few stitches into the center to create a strong base for the curved shape.
A compact center helps the swirl remain defined.
Step 3: Work curved increases
Build the swirl by increasing more in some sections and less in others, or by using a pattern that naturally spirals outward. This creates the visual twist that makes the coaster feel dynamic. Keep the increases smooth so the shape does not become too uneven.
The swirl should feel flowing, not messy.
Step 4: Maintain a flat surface
As the swirl grows, make sure the coaster still lies flat. If it starts to cup, add more increases. If it becomes too wavy, slow down the shaping. The goal is a coaster that looks like a swirl but still functions as a stable surface.
This balance is the key to a good coaster.
Step 5: Add a border to frame the swirl
A simple border can make the design feel more finished and keep the curved lines from visually “falling off” the edge. A single crochet border or a tiny scalloped edge both work well depending on the style you want.
Step 6: Use contrast for stronger impact
Swirl designs look especially nice in two colors, such as cream and rust or blue and white. The contrast emphasizes the movement in the design and makes the swirl more visible from a distance.
Step 7: Finish and shape
Weave in the ends carefully and smooth the coaster with your hands. If needed, lightly block it so the swirl opens up and the edges settle into shape.
Helpful Tips
This is a wonderful project for using color contrast creatively. A gentle ombré swirl looks soft and modern, while a strong color contrast gives the coaster a bold graphic feel. It is a great option if you want something a little more artistic without making the pattern difficult.
4. Crochet Peppermint Coaster Pattern
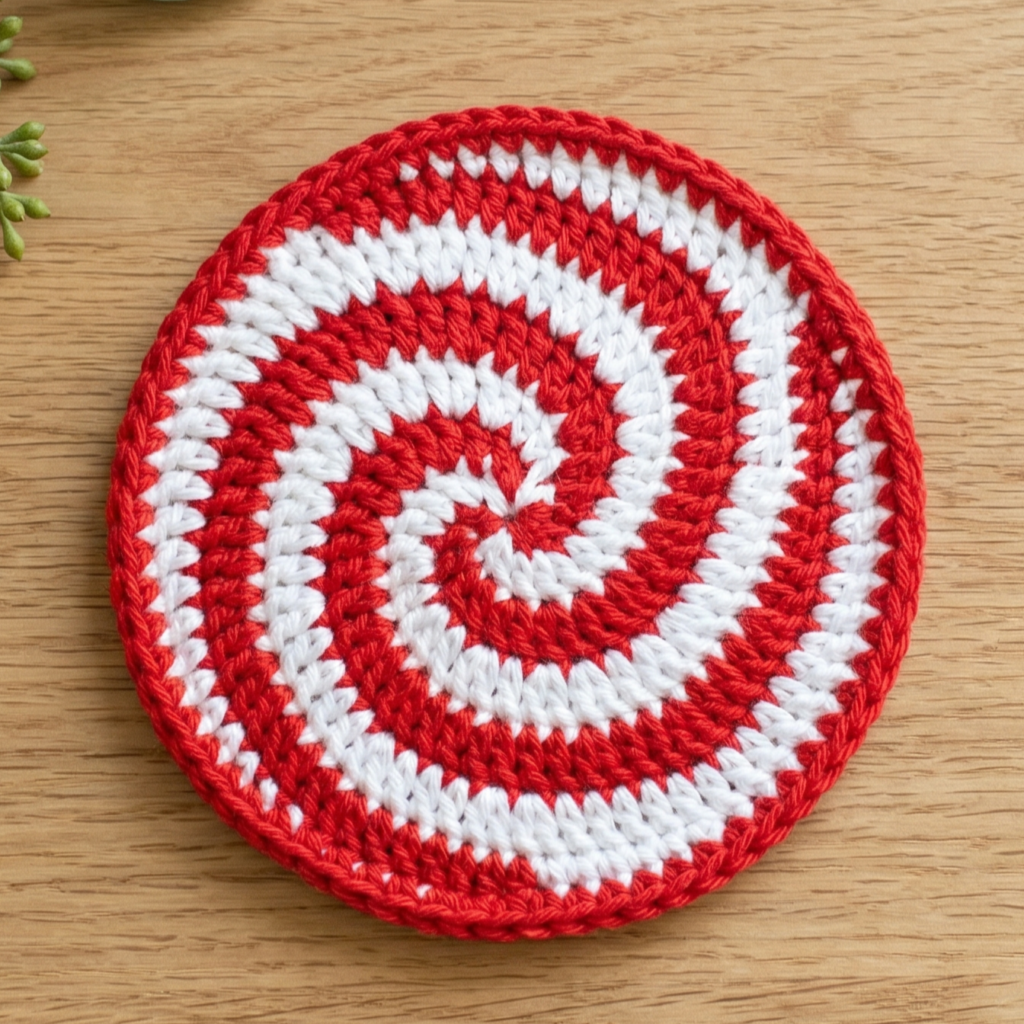
A peppermint coaster is cheerful, festive, and instantly recognizable. It is the perfect project for holiday tables, winter gifts, or even just adding a little brightness to your kitchen throughout the colder months. The spiral or segmented color layout makes it look like a candy mint, which gives it a playful and polished feel.
Quick Notes
Skill level: Beginner
Finished size: About 4.5 to 5.5 inches
Style: Festive, seasonal, bright, playful
Best colors: Red and white, pink and white, green and white, or red and cream
Materials
- Cotton yarn in two colors
- 3.0 mm to 4.0 mm crochet hook
- Yarn needle
- Scissors
- Measuring tape
- Optional stiffener
Step-by-Step Guide
Step 1: Choose your peppermint colors
The classic peppermint look uses red and white, but you can also try pink and white or green and white for a softer or more playful version. Choose colors with clear contrast so the peppermint stripes stand out.
Strong contrast gives the coaster its candy-like appeal.
Step 2: Start from the center
Begin with a magic ring and work your first stitches into the center. The peppermint design often works best as a round base with color changes that radiate outward. Keep the center compact so the spiral feels neat.
A clean center helps the spiral form clearly.
Step 3: Create the striped spiral effect
Switch colors in a planned sequence to create the peppermint swirl. You can do this by alternating short sections of each color while increasing the circle outward. Keep the transitions smooth so the stripes look intentional and balanced.
The spiral is the main decorative feature of the coaster.
Step 4: Keep the circle flat
Make sure the coaster remains flat as you add each round. Too many stitches can cause rippling, while too few can make the coaster curl. Check the shape often so the peppermint design stays neat and usable.
A flat coaster is just as important as a pretty one.
Step 5: Add a crisp outer edge
The outer edge should feel clean and circular. A border in white or red can help frame the peppermint swirl and make the piece look finished. This edge also helps the color pattern feel complete.
Step 6: Repeat the color sequence consistently
If the stripes get too random, the peppermint effect may lose its clarity. Try to keep the color rhythm even so the design looks balanced from all angles. Consistency is what makes the pattern read well.
Step 7: Finish neatly
Weave in all ends and block lightly if needed. If the stripes curl slightly, a gentle block can help the coaster relax and lay more evenly.
Helpful Tips
Peppermint coasters are especially fun as part of a holiday set. You can make several in matching colors or mix red-and-white with pink-and-white for a sweeter look. Cotton yarn works beautifully here because it holds the stripe definition well.
5. Crochet Fried Egg Coaster Pattern

A fried egg coaster is playful, fun, and impossible to ignore. It is one of those designs that instantly brings a smile because it turns an everyday object into a tiny novelty piece. The simple round shape makes it beginner-friendly, while the sunny yellow yolk adds a bright focal point.
Quick Notes
Skill level: Beginner
Finished size: About 4.5 to 6 inches
Style: Whimsical, playful, bright, kitchen-friendly
Best colors: White and yellow, with optional cream or pale beige
Materials
- White cotton yarn for the egg white
- Yellow cotton yarn for the yolk
- 3.0 mm to 4.0 mm crochet hook
- Yarn needle
- Scissors
- Optional light stiffener
Step-by-Step Guide
Step 1: Crochet the egg white base
Start with a white round base. This will be the main body of the coaster and should be slightly irregular in shape if you want a more realistic fried egg look. You can make it perfectly round for a cleaner look or gently wavy for a soft, organic feel.
The white base gives the coaster its recognizable egg shape.
Step 2: Shape the outer edge
Instead of a perfect circle, you can use a slightly wobbly or uneven border to mimic the look of cooked egg white. Small increases and spaced stitches can help create that natural fried egg edge. Keep it soft and playful rather than too dramatic.
A subtle irregular edge makes the design more realistic.
Step 3: Make the yolk circle
Crochet a smaller yellow circle for the yolk. This should be compact and bright so it stands out clearly against the white base. You can make it slightly raised by working extra tightly or layering it with a second small round.
The yolk is the centerpiece of the design.
Step 4: Attach the yolk securely
Sew the yolk onto the white base using small, neat stitches. Place it slightly off-center if you want a more natural fried egg look, or keep it centered if you prefer a cleaner graphic style.
The placement changes the mood of the coaster.
Step 5: Refine the shape
If the white base looks too flat or too even, you can gently adjust the edge with your fingers to give it a more organic fried egg appearance. The design should feel fun and recognizable without being too fussy.
Step 6: Add a border if desired
A tiny border in white or cream can help unify the shape, but it is not always necessary. In many cases, the simple contrast between white and yellow is enough to create the full effect.
Step 7: Block lightly or shape by hand
If the coaster needs smoothing, give it a light block or press it gently into shape after finishing. This helps it lie flat and look more polished.
Helpful Tips
This coaster is especially fun for kitchen decor, brunch gifts, or playful handmade sets. You could even make a few with slightly different yolk placements for a quirky collection. It is one of the easiest ways to create something amusing while still being practical.
Conclusion
Small crochet coasters may seem simple, but they can bring a surprising amount of personality and style into a space. They are quick to make, easy to gift, and perfect for experimenting with color, shape, and texture. That is what makes them such a rewarding project: even the tiniest piece can feel meaningful and decorative.
These five coaster patterns each offer something different. The snowflake round coaster brings winter elegance. The apple pie inspired coaster adds cozy seasonal charm. The swirl coaster creates movement and modern texture. The peppermint coaster feels bright and festive. The fried egg coaster is whimsical and cheerful. Together, they show how much variety you can create with just a few basic stitches and a little imagination.
Whether you are making them for your own table, as gifts, or for a craft fair, these coasters prove that small handmade items can make a big visual impact. With the right yarn and a bit of careful finishing, even a tiny coaster can become a favorite part of your home decor.