Crochet rings are a lovely way to turn a tiny amount of yarn into something charming, personal, and wearable. They are quick to make, easy to customize, and perfect for using leftover yarn in a creative way. Whether you are making handmade gifts, adding a soft feminine touch to an outfit, or creating small items for your shop or blog, crochet rings offer a beautiful mix of simplicity and style.
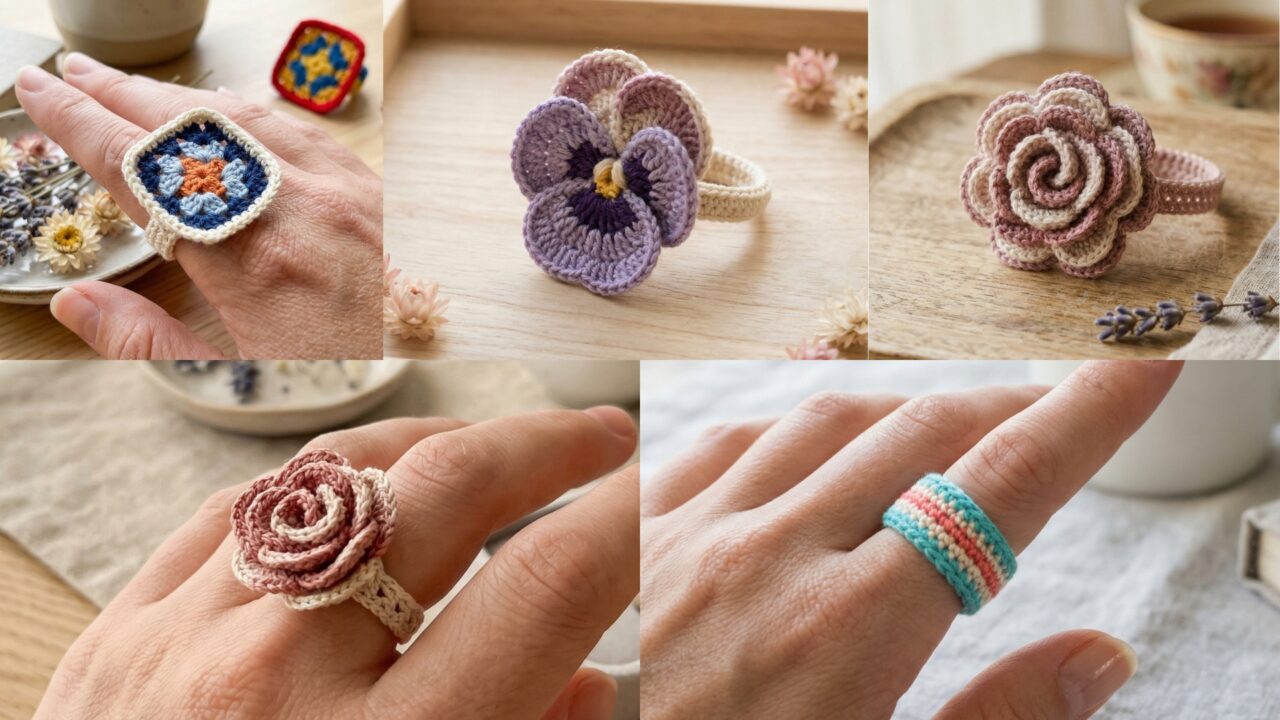
What makes crochet rings so appealing is how versatile they are. A ring can be delicate and romantic with a small rose, bold and vintage with a large flower, playful with stripes, textured with a granny square motif, or soft and elegant with a pansy-inspired bloom. Each design has its own personality, but all of them are beginner-friendly enough to be approachable while still looking impressive.
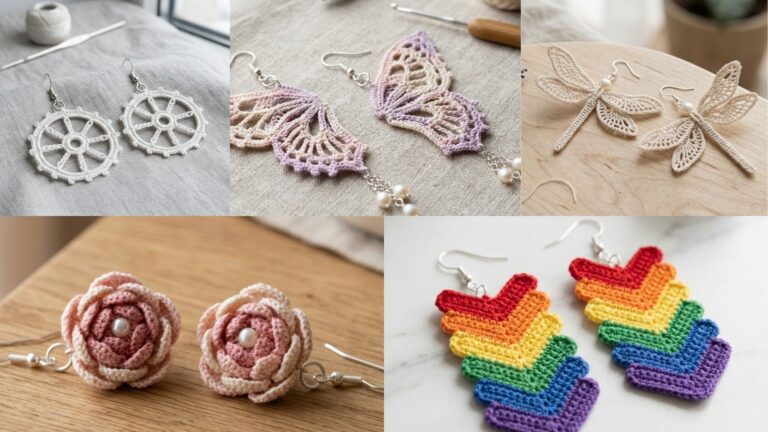
In this post, you will find five crochet ring patterns that are easy to follow, highly giftable, and fun to wear. Each one includes clear step-by-step guidance, useful notes, and practical tips so you can create rings that look polished and feel comfortable. If you enjoy small crochet projects that finish fast but still feel special, these ring ideas are a perfect place to start.
Quick Notes
Project type: Crochet rings and floral accessories
Best for: Gifts, handmade accessories, craft fair items, and small yarn projects
Skill level: Beginner to intermediate
Hook size: Usually 2.0 mm to 3.5 mm, depending on yarn weight
Yarn weight: Lace, fingering, sport, or lightweight cotton works best
Best yarn choice: Cotton or cotton blend for structure and durability
Finished size: Adjustable, usually around standard ring size or slightly larger as a decorative accessory
Time to complete: About 20 to 60 minutes per ring
Helpful stitches: Chain, slip stitch, single crochet, half double crochet, double crochet, increase, decrease, picot, magic ring
Common Materials
You can make all of these ring designs with a few simple supplies.
- Lightweight yarn in your chosen colors
- Small crochet hook suited to your yarn
- Yarn needle
- Scissors
- Optional ring base or adjustable metal ring
- Stitch marker, if needed
- Optional glue or jewelry findings for extra security
If you want your ring to hold its shape well, cotton yarn is usually the best choice. It gives crisp stitch definition and keeps the piece from stretching too much over time. For very delicate rings, thinner yarn or embroidery floss can also work beautifully.
1. Crochet Basic Rose Ring Pattern
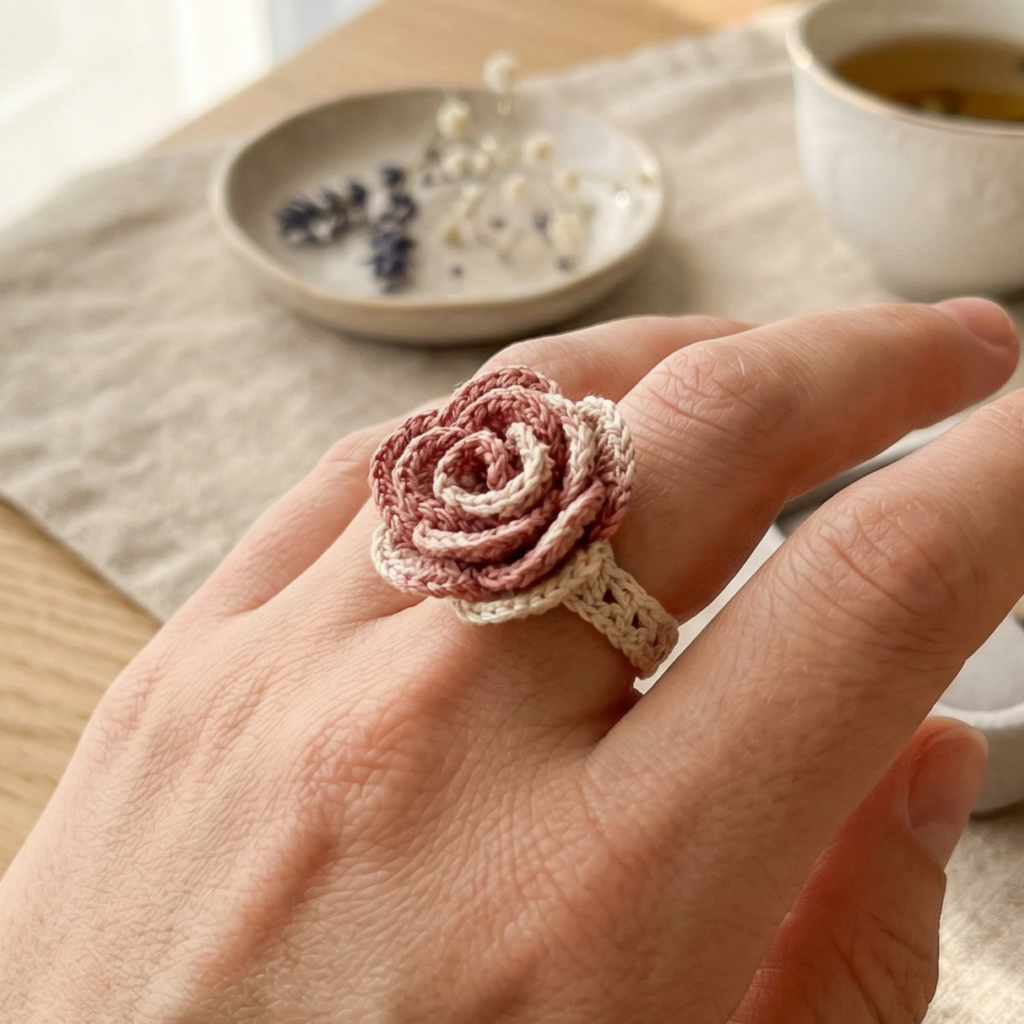
A basic rose ring is one of the sweetest and most timeless crochet accessories you can make. It is small, elegant, and perfect for gifting because it feels thoughtful without being overly complicated. The rose can sit on a simple band or be attached to an adjustable base, making it flexible for different ring sizes.
Quick Notes
Skill level: Easy
Finished size: About 1 to 1.5 inches for the rose, depending on yarn and hook
Style: Feminine, romantic, delicate
Best colors: Red, pink, cream, dusty rose, or soft peach
Materials
- Fine pink, red, or cream yarn
- 2.5 mm to 3.0 mm crochet hook
- Yarn needle
- Scissors
- Optional adjustable ring base
Step-by-Step Guide
Step 1: Make the rose strip
Most crochet roses begin with a small strip made from chains and stitches of varying height. Start by chaining a small number, then work a combination of single crochet, half double crochet, and double crochet stitches into the chain. This creates a ruffled strip that will naturally curl into a flower shape.
The taller stitches help the rose petals form their layered look. If you want a fuller rose, add more stitch height and a slightly longer starting chain.
Step 2: Curl the strip into a flower
Once the strip is complete, gently roll it from one end to the other. The shorter stitches should form the center, while the taller stitches spread outward as petals. Try not to roll it too tightly. A slightly loose curl gives the rose a softer, more natural look.
Step 3: Secure the shape
Use yarn and a yarn needle to sew across the bottom edge of the rolled rose. Take several small stitches through the layers so the flower holds together firmly. This step is important because it prevents the rose from unraveling with wear.
Step 4: Attach the rose to the ring band
If you are using an adjustable ring base, sew or knot the rose securely to the top of the ring. If you are crocheting the band yourself, attach the flower to the center top portion after completing the band.
Make sure the rose sits flat enough to be comfortable on the finger. It should look full but not too bulky.
Step 5: Add a band if needed
If you are making a crocheted band, keep it simple and slim. A narrow band is best for a rose ring because it lets the flower remain the focal point. Use tight single crochet stitches to create a neat base.
Step 6: Finish and shape
Weave in all ends carefully and gently fluff the petals with your fingers. If the rose looks too flat, open the outer petals slightly for more dimension.
Helpful Tips
A rose ring looks best when the flower is slightly asymmetrical. Perfectly even petals can sometimes look less natural, while a lightly layered spiral gives the design charm. If you want a more luxurious feel, use a rich jewel-tone yarn or a soft velvet yarn in a thin weight.
This pattern also works well as a set of matching accessories, like a ring and a tiny rose hair clip or brooch.
2. Crochet Big Vintage Flower Ring Pattern
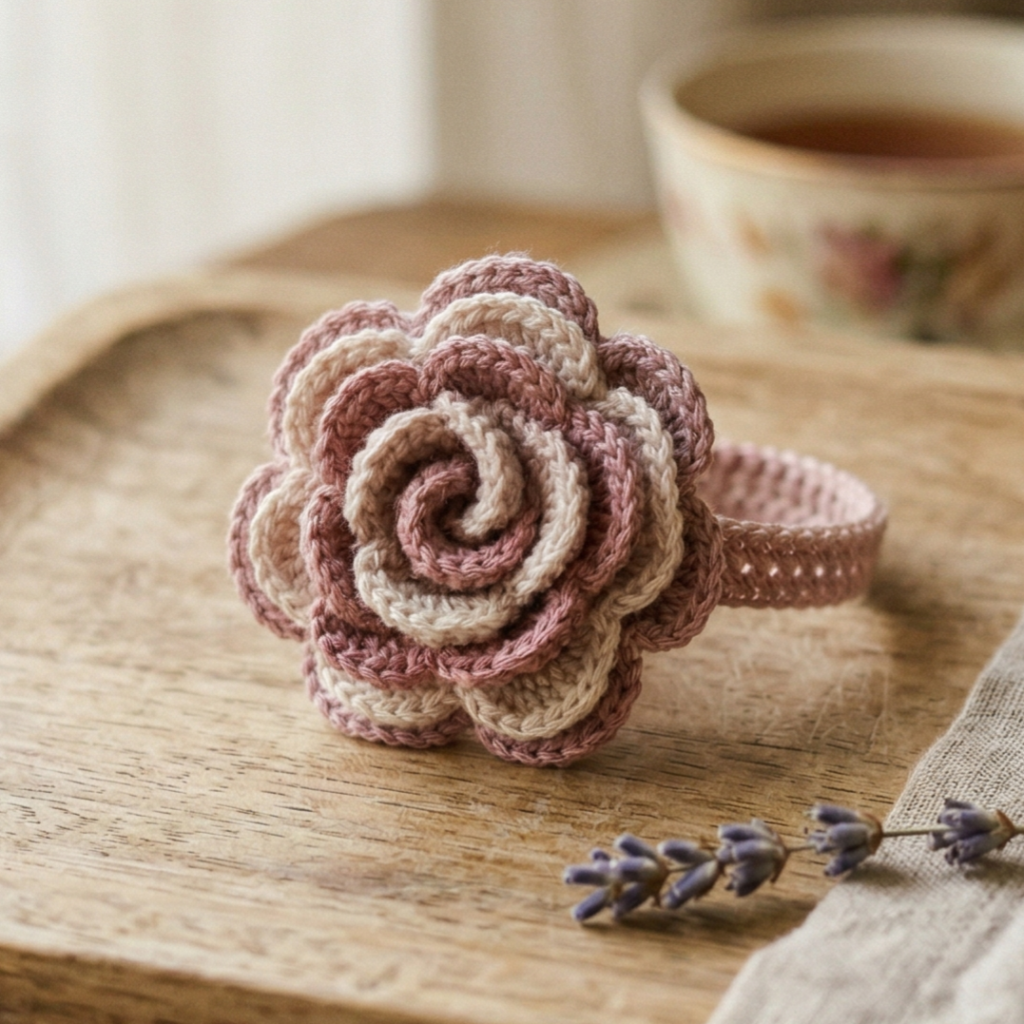
A big vintage flower ring makes a bold statement. It has that old-fashioned, handmade charm that feels both nostalgic and stylish. This kind of ring works especially well when you want the flower to be the star of the design. It is larger than a basic rose ring, with layered petals and a more decorative silhouette.
Quick Notes
Skill level: Easy to intermediate
Finished size: About 2 to 2.5 inches across
Style: Vintage, dramatic, artistic
Best colors: Cream, mustard, burgundy, olive, mauve, or soft brown
Materials
- Lightweight yarn in one or more colors
- 2.5 mm to 3.5 mm crochet hook
- Yarn needle
- Scissors
- Optional ring base or crocheted band
Step-by-Step Guide
Step 1: Start with a flower center
Begin with a magic ring or small circle. Work several stitches into the center to create a firm middle. This center will support the larger petals that follow, so it should be tight and neat.
A compact center helps the flower feel polished rather than floppy.
Step 2: Build the first petal round
Work the first round of petals using chain spaces and taller stitches like double crochet or treble crochet. These stitches create the soft drape that gives the vintage flower its character. The petals should be slightly rounded and fuller than those in a simple rose design.
Step 3: Add a second layer of petals
For a big vintage effect, add another round of petals behind or between the first ones. This gives the flower depth and a more layered appearance. Use a contrasting or slightly darker shade if you want extra dimension.
This second layer is what makes the ring feel bold and decorative.
Step 4: Shape the petals
Once the flower is complete, gently adjust the petals with your fingers so they fan out evenly. If a petal is folding inward, carefully pull it open. The goal is a full, blooming look that still lies comfortably on the finger.
Step 5: Create a stable attachment point
Because this flower is larger, it needs strong support. Sew the center securely and attach it to a sturdy band or ring base. You may also add a small felt circle on the back for extra reinforcement if needed.
Step 6: Finish with a neat band
Use a plain band so the flower remains the focal point. A simple narrow band in matching yarn works well. Keep the stitch count tight so the ring feels secure when worn.
Helpful Tips
A vintage flower ring looks especially beautiful in muted or earthy colors. If you want a romantic antique look, try cream with burgundy or dusty rose with olive green. For a more elegant accessory, use neutral shades and keep the center small and clean.
This design is ideal for special occasions, handmade gift boxes, or styled photo shoots.
3. Crochet Stripes Ring Pattern
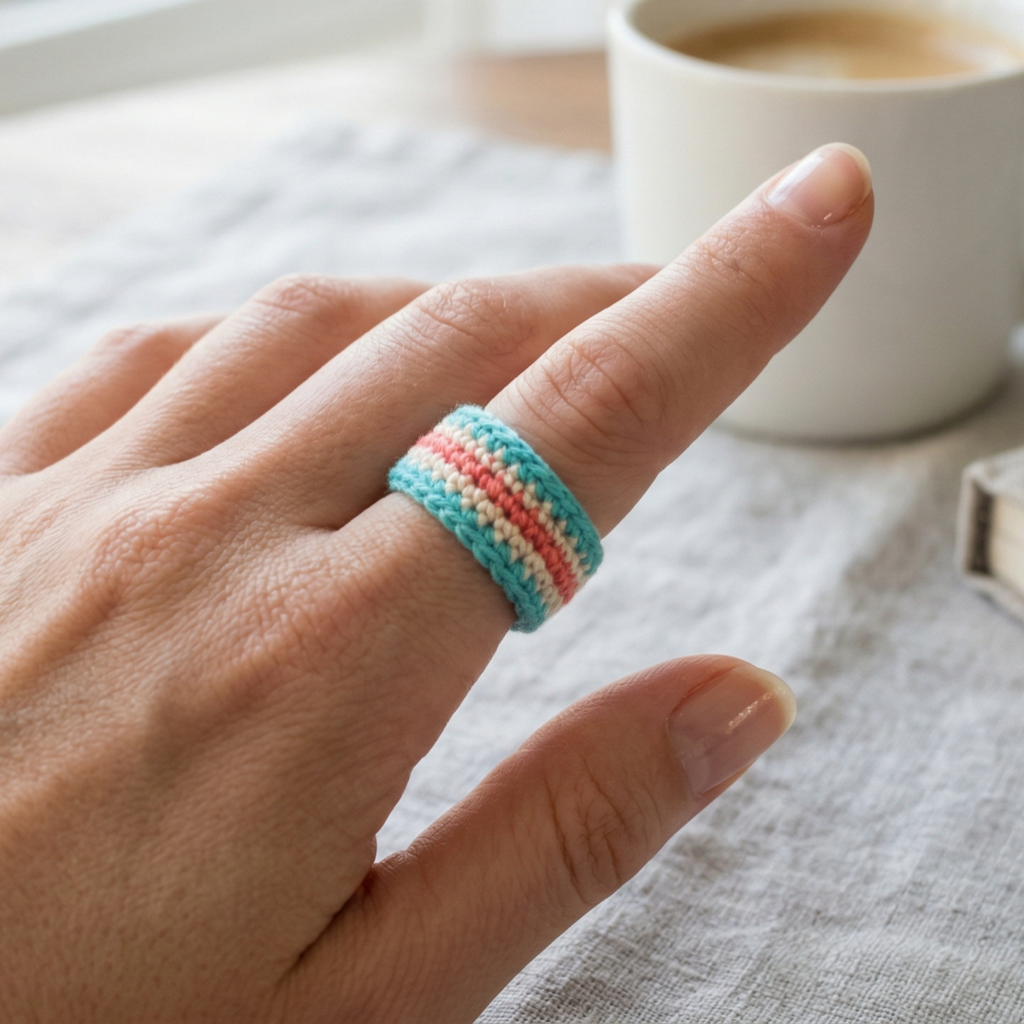
A stripes ring is simple, modern, and easy to customize. It is the perfect project when you want something playful without a floral design. You can keep it bold with bright color blocking or soft with pastel stripes. Because it is based on clean lines, it also works well as a beginner project.
Quick Notes
Skill level: Beginner
Finished size: Adjustable, usually slim and lightweight
Style: Playful, modern, casual
Best colors: Any two or three colors that contrast well
Materials
- Two or more yarn colors
- Small crochet hook
- Yarn needle
- Scissors
- Optional ring form or elastic base
Step-by-Step Guide
Step 1: Decide on stripe direction
You can make stripes that run around the band or across a small decorative top section. A band with horizontal color changes is the easiest option. A top design with striped detail can also be made if you want the ring to have a focal point.
Step 2: Create the base band
Start by crocheting a narrow band that fits comfortably around the finger. Use single crochet stitches for a firm structure. Keep the band even in width so the stripes stand out clearly.
If you want it adjustable, work the band long enough to overlap slightly at the back or attach it to a flexible ring base.
Step 3: Add the first stripe color
Change yarn color after a few rows or rounds. Carry the yarn neatly along the edge if possible, or fasten off and join the next color cleanly. The change should be crisp so the stripe effect looks intentional.
Step 4: Continue alternating colors
Repeat the process with additional colors. Depending on the look you want, the stripes can be wide and bold or thin and subtle. Wider stripes feel modern and graphic, while narrow stripes feel cute and delicate.
Step 5: Smooth the transitions
Make sure your color changes are neat on the back side as well as the front. Loose yarn ends can affect comfort, so weave them in securely.
Step 6: Shape and finish
Try the ring on and check the fit. If the band feels too loose or too tight, adjust before finishing. For decorative rings, a slightly snug fit is better than one that slips around too much.
Helpful Tips
Stripes are a great way to use leftover yarn. You can mix unexpected colors for a cheerful look or stick to a monochrome palette for a more elegant effect. This pattern is especially nice if you want quick, giftable rings that look polished with very little shaping.
A striped ring can also be a good base for adding a tiny charm or flower later.
4. Crochet Granny Square Ring Pattern

A granny square ring turns a classic crochet motif into a tiny wearable accessory. It has a sweet handmade charm and works beautifully if you love traditional crochet textures. Since granny squares are naturally colorful and eye-catching, this pattern is perfect for a small accessory that still feels playful and nostalgic.
Quick Notes
Skill level: Beginner to intermediate
Finished size: Usually about 1.5 to 2 inches across
Style: Retro, cozy, colorful
Best colors: Contrasting colors for the center, middle, and border
Materials
- Three or more yarn colors
- Small crochet hook
- Yarn needle
- Scissors
- Optional ring base or crocheted band
Step-by-Step Guide
Step 1: Make a tiny center square or circle
Begin with a small center using a magic ring or small chain loop. Work a few stitches into the center and prepare to build the square shape from there. The beginning should stay compact so the whole piece remains ring-sized.
Step 2: Form the granny square corners
Use chain spaces and clusters to create the classic granny square effect. Even in a tiny version, the corner spaces help define the shape. Keep the motif small and tidy so it does not become too bulky for a ring.
Step 3: Add color rounds
Change colors between rounds to create the signature granny square look. A traditional combination might use one shade for the center, another for the middle round, and a third for the border. This gives the piece depth and a handmade patchwork feel.
Step 4: Keep the square compact
Because rings are small, the motif must be scaled down carefully. If the square starts getting too large, stop after one or two rounds. The goal is a tiny accent, not a full coaster-sized motif.
Step 5: Attach to a ring base or band
Sew the tiny square to a ring band or adjustable base. Be sure the square sits flat and centered. If one corner sticks out too far, gently shape the piece before securing it.
Step 6: Finish the edges
Weave in all ends neatly. Since granny square motifs use multiple color changes, tidy finishing is especially important. Once complete, check that the ring feels comfortable and that none of the corners scratch the skin.
Helpful Tips
A granny square ring is perfect for mixing colors in a creative way. Pastels give it a soft, vintage look, while bold primary colors make it feel lively and retro. You can even make a matching set with different square color combinations for a playful gift collection.
This design is especially attractive if you enjoy the look of classic crochet motifs in unexpected places.
5. Crochet Aesthetic Pansy Flower Ring Pattern
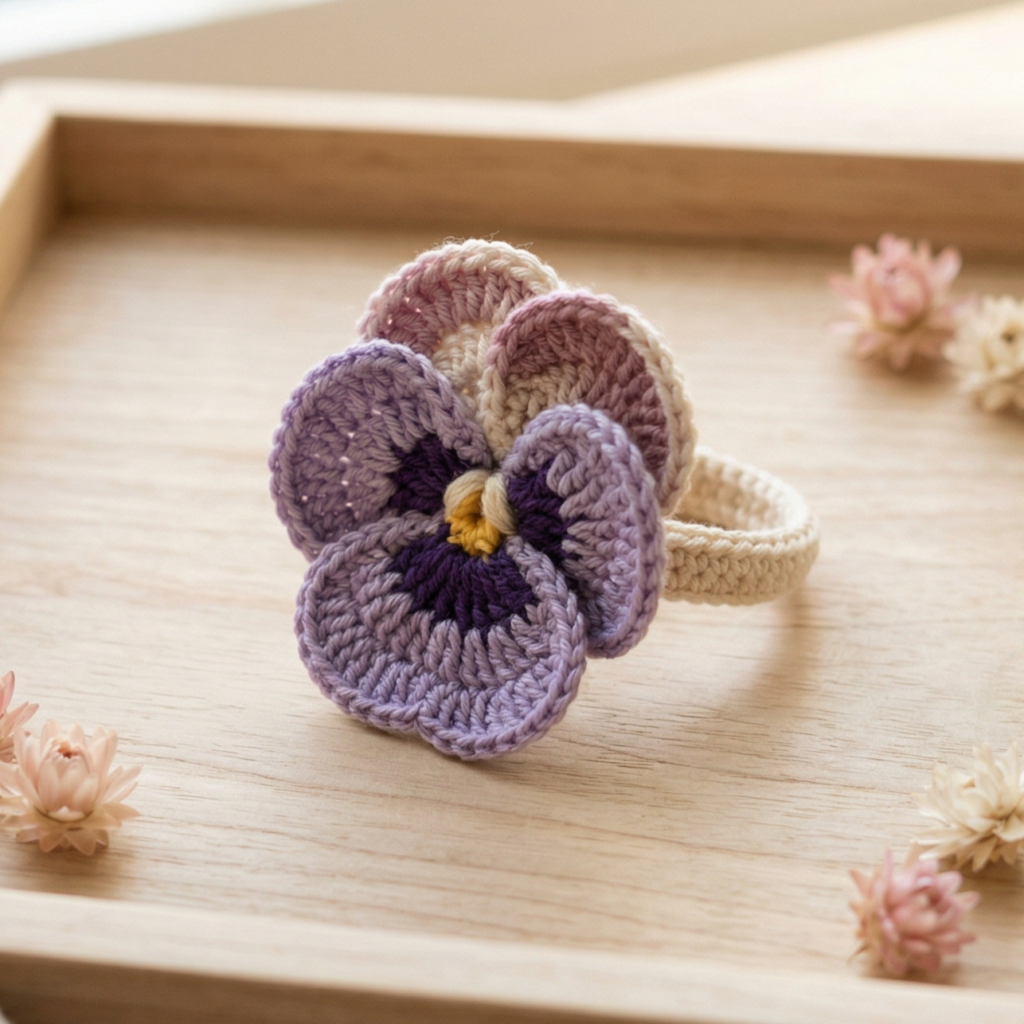
A pansy flower ring feels delicate, artistic, and beautifully feminine. Pansies have a unique petal shape and color combination that make them ideal for small crochet accessories. This pattern is especially appealing if you want something graceful and slightly more refined than a simple flower.
Quick Notes
Skill level: Intermediate
Finished size: About 1.5 to 2 inches across
Style: Soft, elegant, aesthetic, floral
Best colors: Purple, lilac, yellow, cream, navy, or soft pink
Materials
- Two or more yarn colors
- 2.0 mm to 3.0 mm crochet hook
- Yarn needle
- Scissors
- Optional ring base or crocheted band
Step-by-Step Guide
Step 1: Make the flower center
Start with a tight center using a small magic ring. This center should be neat and compact because the pansy petals will radiate outward from it. A small center also helps keep the flower from becoming too bulky for a ring.
Step 2: Crochet the lower petals
Pansies usually have slightly rounded lower petals that are larger than the upper ones. Crochet the first pair of petals in your main color. Use chain spaces and taller stitches to create soft curves.
These petals should look full and graceful, but still small enough to suit the ring size.
Step 3: Add the upper petals
Switch to a second color for the upper petals if you want a realistic pansy look. These petals are often slightly smaller or darker. Using a contrast color helps the flower look layered and visually interesting.
Step 4: Shape the pansy
Pansies have a distinctive face-like look, so arrange the petals carefully. The larger petals should sit lower, while the smaller ones angle slightly upward. Adjust the flower gently until the shape feels balanced.
Step 5: Attach to the ring
Sew the completed flower onto a slim band or ring base. Make sure the back is tidy and flat. If the flower feels too raised, add a small fabric circle or a few hidden stitches to stabilize it.
Step 6: Add finishing details
For an aesthetic touch, you can embroider a tiny center dot or subtle highlight stitches. Keep the details delicate so the flower remains soft and elegant.
Helpful Tips
The pansy ring looks especially beautiful in soft spring shades, but deep purples and golden yellow also make it stand out. If you want a more romantic feel, use two-toned petals with a pale center. If you want it to feel modern and aesthetic, choose muted colors with a matte cotton finish.
This ring makes a beautiful gift for flower lovers, cottagecore fans, or anyone who enjoys delicate handmade accessories.
Conclusion
Crochet rings may be small, but they are full of charm, creativity, and personality. That is what makes them such rewarding projects. You can finish them quickly, use only a small amount of yarn, and still create something that feels thoughtful and special. From a tiny rose to a bold vintage flower, from stripes to granny squares to a soft pansy bloom, each design offers a different style while staying simple enough to enjoy making.
These five crochet ring patterns are wonderful for gifts, accessories, and small handmade collections. They are also perfect for experimenting with colors, textures, and flower shapes without committing to a large project. Whether you are making them for yourself or someone else, these little rings prove that even the smallest crochet pieces can carry a lot of beauty.