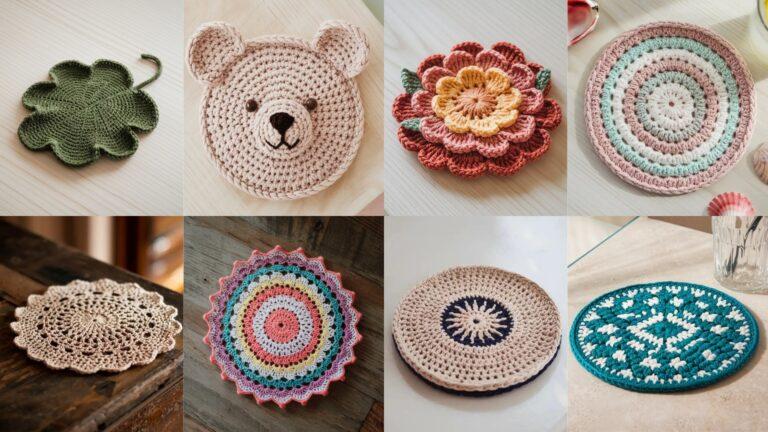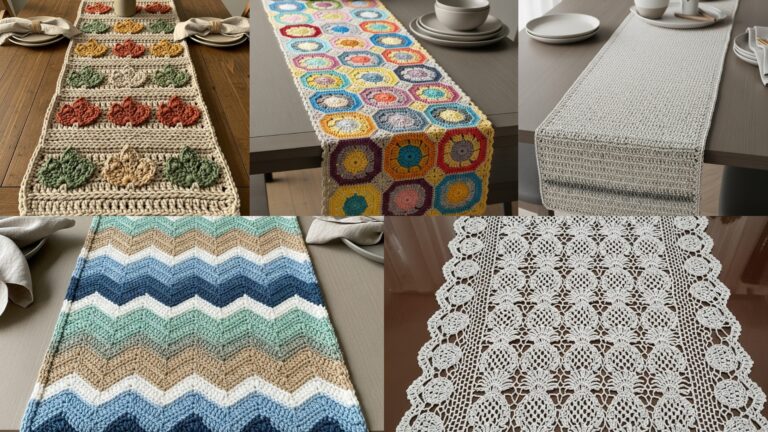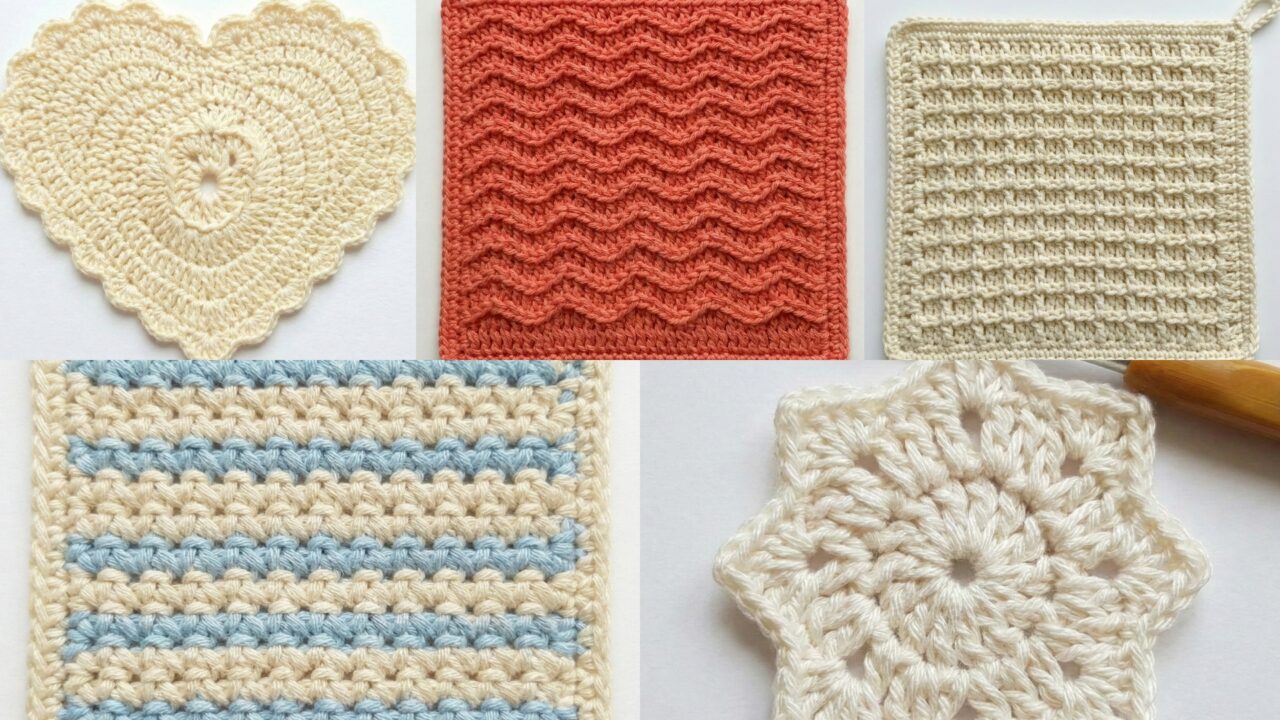
Dishcloths are one of the best small crochet projects: fast to make, useful, and endlessly giftable. They’re also perfect for practicing texture stitches and using up cotton stash. Below you’ll find one practical introduction that covers yarn choice, hooks, sizing, gauge, basic finishing and abbreviations — then five long, detailed dishcloth patterns with step-by-step instructions, variations, finishing tips and care notes. Each pattern is written so a confident beginner can follow it and so you can paste it straight into a blog post.
Quick intro — fibers, hooks, sizing, gauge, tools & abbreviations
Best yarn & fiber
- 100% cotton (sport to worsted weight) is the top choice for dishcloths: absorbent, heat tolerant, and machine washable. Mercerized cotton gives crisper stitch definition; unmercerized cotton is softer and very absorbent.
- Cotton blends (cotton/bamboo, cotton/acrylic) are OK — blends can add drape or softness but may reduce abrasion for scrubbing.
- Avoid novelty yarns (glitter, eyelash) because they shed and are less practical for dish use.
Hook selection
- Use the hook size recommended on the yarn label to start. For a denser cloth that scrubs well, go down one hook size; for a softer, drapier cloth, go up one size. Typical hooks: 3.5 mm–5.5 mm depending on yarn weight.
Finished sizes (typical)
- Tea/side dishcloth: 7–8 in square (18–20 cm)
- Standard dishcloth: 8–9 in square (20–23 cm)
- Large dishcloth/trivet: 9–10 in square (23–25 cm)
You’ll see sample sizes in each pattern and notes on how to grade up/down.
Gauge & swatching (why it matters)
- Make a 4″ × 4″ swatch in the stitch pattern you plan to use, block it if your pattern will be blocked, then count stitches per inch (spi) and rows per inch (rpi). Use these numbers to calculate foundation counts when I suggest “multiply width (in) × spi”.
- For many dishcloth patterns stitch counts are forgiving; but if you want a square finished cloth or need a specific size (gift set), swatching prevents surprises.
Useful tools & finishing supplies
- Tapestry needle (for weaving ends).
- Small blocking mat and rust-proof pins (useful for lacy star or scalloped edges).
- Scissors, stitch markers (useful for counting repeats), measuring tape.
- Optional: a small loop of yarn or a grommet for hanging.
Common abbreviations (US)
- ch — chain
- sc — single crochet
- hdc — half double crochet
- dc — double crochet
- tr — treble crochet
- sl st — slip stitch
- st(s) — stitch(es)
- sk — skip
- inc — increase (2 sts in same st)
- dec — decrease (sc2tog or appropriate stitch decrease)
- BLO / FLO — back loop only / front loop only
- RS / WS — right side / wrong side
- … — repeat between asterisks as directed
1. Crochet Waffle Stitch Dishcloth Pattern
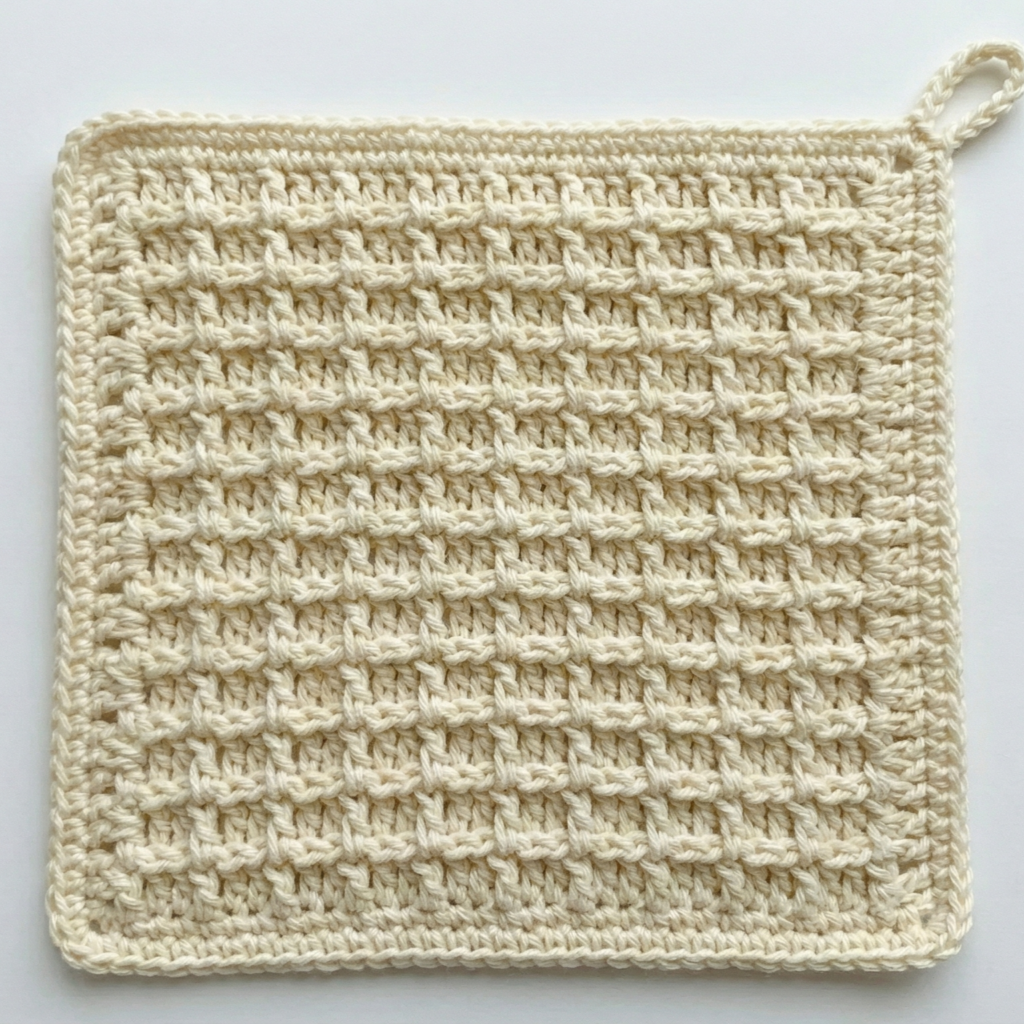
Skill level: Confident beginner — uses post stitches for waffle texture.
Purpose: Dense, textured surface ideal for scrubbing and absorption. Works beautifully in worsted or DK cotton.
Materials (sample cloth ~8.5 in square)
- Worsted-weight 100% cotton — ~80–100 yd (one skein).
- Hook: 5.0 mm (use 4.5 mm for denser texture).
- Tapestry needle, stitch marker, measuring tape.
Finished size: approx 8.5 in × 8.5 in after blocking (depends on gauge).
Gauge example: ~12 sc × 10 rows = 4″ in sc — your swatch will vary.
Stitch concept
Waffle stitch is made by working front post double crochet (fpdc) clusters that create raised squares. We build the fabric in rows: a textured “post” row followed by a base row.
Step-by-step
Foundation
- Chain foundation: ch 33 (or any odd number that gives desired width). If you need a different width, compute: desired width (in inches) × sc spi, round to an odd number.
Row 1 (base row) — RS: sc in 2nd ch from hook and across (32 sc). Turn.
Row 2 (base row): ch 2 (counts as hdc), hdc in each st across. Turn.
Row 3 (post row — start waffle texture): ch 2, fpdc around next st (work around the post of the stitch below), hdc in next st repeat across ending with hdc in last st. Turn.
Row 4: ch 2, hdc in each st across (this provides a flat row that tucks the posts). Turn.
Row 5: Repeat Row 3.
Continue alternating post rows (Row 3) and base rows (Row 4) until cloth measures approx 8.5 in from beginning (or your desired height), ending after a base row for a neat top edge.
Edging (neat finish & hang loop)
- After last row, ch 1 and rotate cloth. Work 1 round of sc evenly around all four sides: work 3 sc in each corner to keep corners flat. For a neat hanging loop, at the center of one side ch 8 (or desired loop length) and sl st back to base, then continue sc around. Fasten off and weave ends.
Variation tips
- Denser waffle: use smaller hook (4.5 mm) or work fpdc pairs (two fpdc in place of one) to get more pronounced ridges.
- Larger waffle grid: use taller stitches for posts (fp tr) for bigger grid squares.
- Colorwork: make stripes by changing color every 4–6 rows — carry yarn inside when possible.
Finishing & care
- Cotton benefits from a quick cold machine wash and tumble dry low. Block while damp if you prefer precise square edges, pin to square, and let dry.
Practical notes
- The waffle stitch makes a thicker cloth — great for cleaning pots and pans but also nice as a textured hot pad if doubled or lined with felt.
2. Crochet Textured Dishcloth Pattern
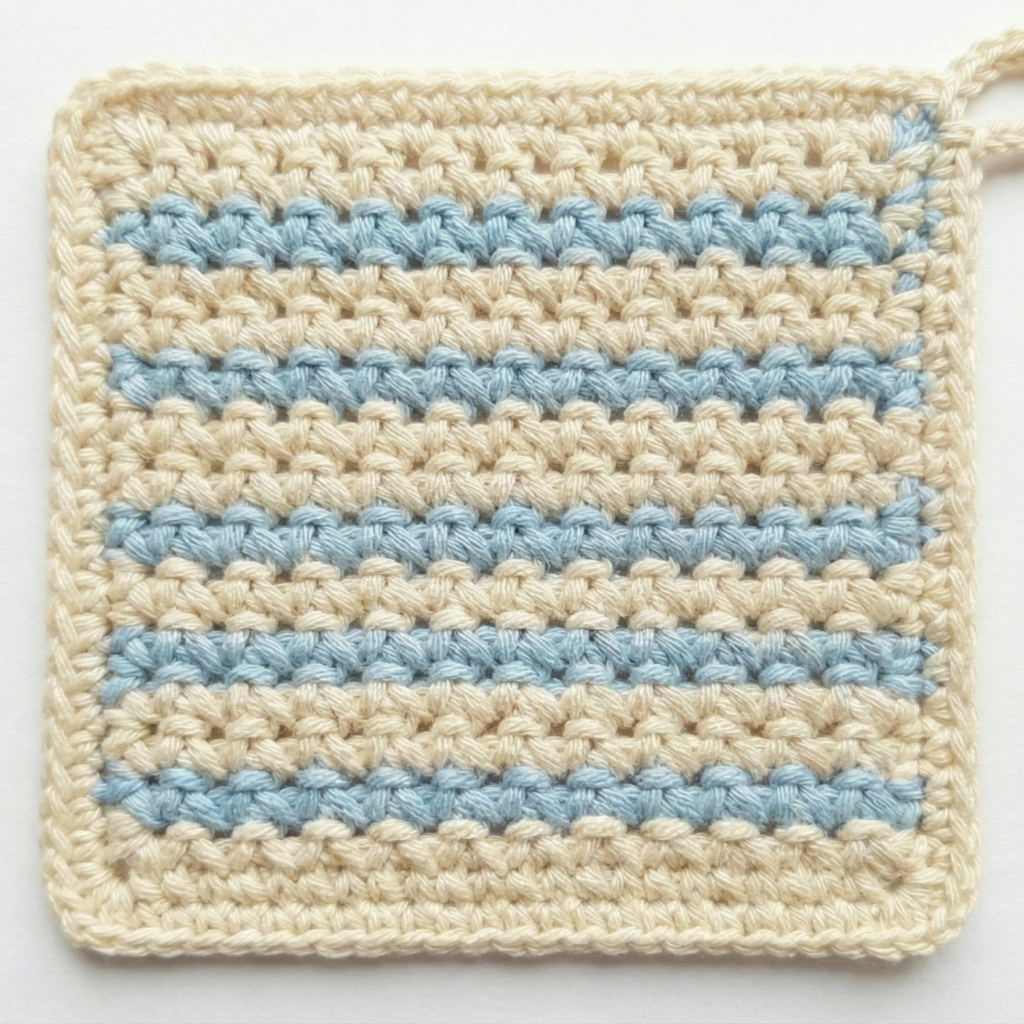
Skill level: Beginner–confident beginner — mainly alternating sc and ch patterns for linen/moss effect; very scrubby and reversible.
Purpose: A neat, flat, dense cloth with excellent traction — reversible texture looks good both sides.
Materials (sample cloth ~8 in square)
- DK or worsted cotton — ~60–80 yd.
- Hook: 4.0 mm.
- Tapestry needle, measuring tape.
Finished size: ~8 in × 8 in.
Gauge example: example 6 hdc = 2 in in linen stitch — swatch recommended.
Stitch concept
Linen (or moss) stitch is made by alternating single crochets and chain spaces, worked staggered between rows so the fabric looks woven.
Step-by-step (flat rectangle, seam optional)
Foundation
- Ch 31 (or any odd number to reach target width).
Row 1: sc in 2nd ch from hook, ch1, sk 1 ch, sc in next across. Turn. (You are making sc separated by ch1 spaces).
Row 2: ch1, sc in first ch1 space (over the ch1 from previous row), ch1, sc in next ch1 space across to end, sc in top of turning chain. Turn.
Repeat Row 2 until cloth measures desired height (~8 in), ending after a Row 2.
Edge finish
- Work 1 round sc evenly around, placing 3 sc in each corner to prevent cupping. Fasten off and weave ends.
Variation & tips
- Denser version: replace sc with hdc for thicker cloth.
- Double-sided colorwork: work main body in two colors, alternating every two rows for subtle stripe texture.
- Hanging loop: after sc border, add ch 8 loop at corner before finishing final sc to make hanging loop.
Finishing & care
- Machine wash warm; cotton linen stitch dries flat. Press lightly if needed.
Photographic tip
- This stitch is wonderfully photogenic in natural daylight — show both sides in a closeup to highlight reversibility.
3. Crochet Heart Dishcloth Pattern

Skill level: Confident beginner — basic shaping (increases/decreases) in the round or flat to make a heart silhouette.
Purpose: Pretty giftable cloth for Valentine’s Day, mother’s day or bridal baskets.
Materials (sample heart ~8 in wide)
- Sport or DK cotton — ~60 yd main color.
- Hook: 4.0 mm.
- Tapestry needle and blocking pins.
Finished size: approx 8 in across at widest point after blocking.
Two construction options
A. Worked in the round — build a circular base, then shape top lobes and taper to point in same piece.
B. Worked flat — make two half-heart panels and join — easier for beginners who prefer flat shaping.
I’ll provide Option A (single piece, fewer seams).
Step-by-step (single-piece heart)
Center ring
- MR; R1: ch2, 12 dc into MR; sl st to top of ch2. (12 dc)
Form two lobes
2. R2: (ch3, 3 dc in next st, ch3, sl st in same st), sl st into next st repeat — you are making two raised petal arches to become heart lobes. Fasten off yarn tails for shaping or continue.
Expand to disk
3. Switch to regular rounds of dc with increases to form a round base: join new yarn between arches and work a round of dc evenly around, increasing in the round to keep it flat until the circle reaches approx half the desired heart width (work increases every 6–8 stitches as needed).
Shape into heart
4. To form the notch and point: stop increasing and begin shaping rows where one side will have more dc rows and the other side will be decreased to create the tapered bottom. Practically, you’ll work short rows on the top center to define lobes (decrease in the middle using sc2tog or dc2tog as you move toward the point). This is the most pattern-sensitive step; a schematic helps — recommended approach: after you have a broad oval, work decreases across rows on one side to push fabric into a point. (If you want an exact stitch-by-stitch chart for publishing, I can create a printable schematic.)
Simpler alternative: make two circular lobes (each MR expanding to small circles), then make a triangular lower piece (dc taper) and sew them together — this is often easier and more predictable.
Edging
- Once heart shape is formed and blocked to size, add a scalloped border: sc, skip 1 st, (5 dc in next st), skip 1 st, sc around the curved sides for a sweet scallop.
Variation: scrubbing center
- For an extra scrubby heart, sew a small circle of loopy weave (use loop stitch) in the center before finishing seam.
Finishing & care
- Block pinned to heart shape to get a crisp point and even lobes. Machine wash on gentle.
4. Crochet Coral Raised Waves Cotton Dishcloth Pattern

Skill level: Intermediate — uses front post/back post stitches and a wave repeat to create raised ridges reminiscent of coral waves. Very tactile and decorative yet practical.
Purpose: A cloth with three-dimensional raised ridges good for light scrubbing and great texture photos.
Materials (sample ~9 in square)
- Worsted cotton for pronounced ridges — ~80–100 yd.
- Hook: 5.0 mm (or 4.5 mm for denser weave).
- Tapestry needle, blocking mat.
Finished size: approx 9 in square.
Stitch concept
Raised waves are created by alternating rows of post stitches (fpdc/bpdc) with regular rows; to shape the coral wave we stagger post clusters so the raised ridges appear to ripple.
Step-by-step
Foundation
- Chain a multiple of 6 + 2 (for example ch 38 for a cloth approximately 9 in wide — adjust with your gauge).
Row 1 (base): sc in 2nd ch from hook and across. Turn.
Row 2 (set up): ch 2, hdc across. Turn.
Row 3 (wave row A): ch 2, fpdc around next 3 sts, bpdc around next 3 sts repeat to end; finish with hdc in top of turning chain. Turn. (This creates alternating raised and recessed blocks).
Row 4: ch 2, hdc across to lock posts. Turn.
Row 5 (wave row B — offset): ch 2, hdc 3, then fpdc around next 3 sts, bpdc around next 3 sts — note the offset: start with hdc to stagger the post blocks. Turn.
Row 6: ch 2, hdc across.
Repeat Rows 3–6 until the cloth reaches desired length (approx 9 in). The alternating of A and B rows creates a flowing ripple. End after a base hdc row.
Edge finish
- Work a neat round of sc around, placing 3 sc in corners. For extra polish, work a final round of reverse sc (crab stitch) for a rope edge.
Variation ideas
- Deeper waves: replace fpdc/bpdc with fptr/bptr for taller ridges.
- Stripe effect: change color every 2–4 rows for dramatic visual waves.
Finishing & care
- Block lightly, pinning waves open to emphasize 3-D texture. Cotton can be machine washed and dried.
5. Crochet Lacy Star Dishcloth Pattern
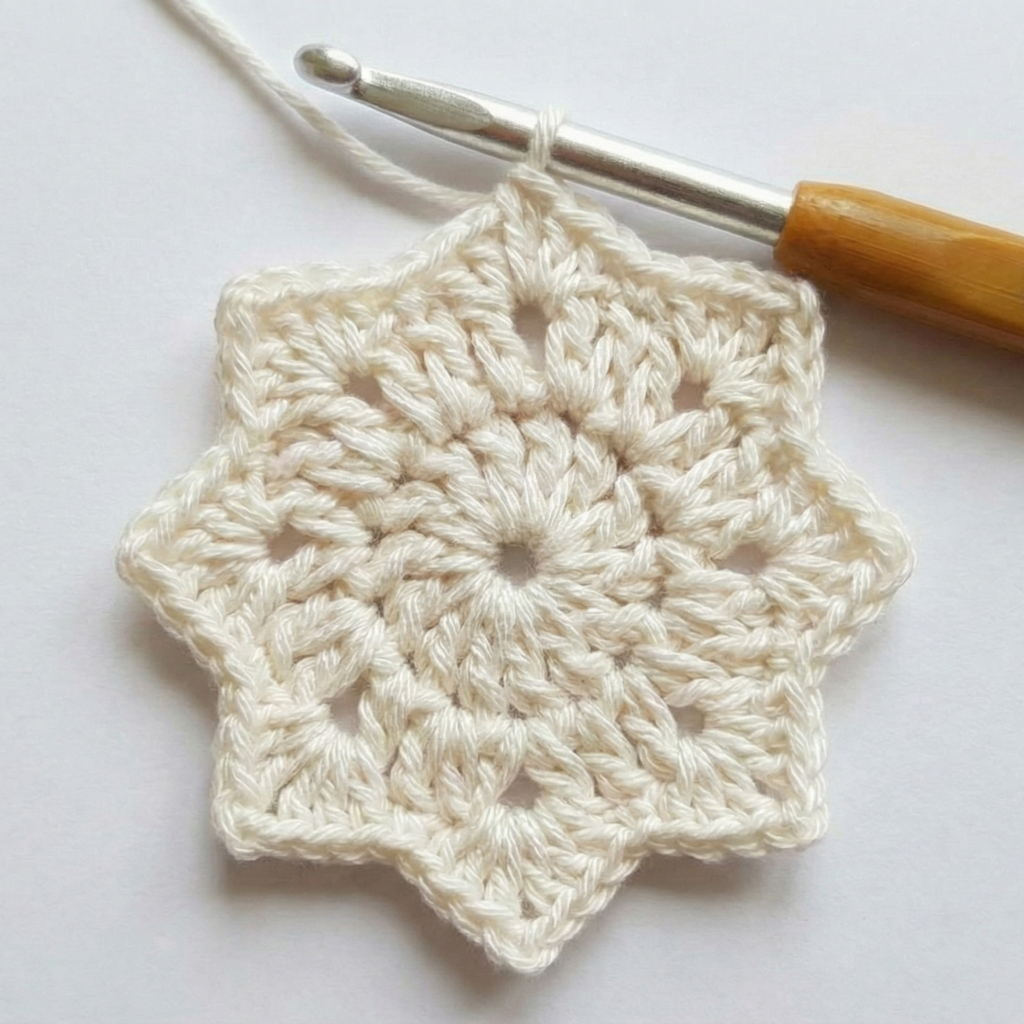
Skill level: Intermediate — uses lace shells and picots, excellent for decorative cloths and gift sets (may be more delicate).
Purpose: A beautiful lacy piece that doubles as a coaster or light dishcloth; best used for drying hands or as decorative layer under a sugar bowl.
Materials (sample ~9 in diameter after blocking)
- Fingering cotton or cake cotton for elegant lace — ~80 yd (thread weight works too).
- Hook: 2.75–3.5 mm depending on yarn weight.
- Blocking mat and many rust-proof pins.
Finished size: approx 8–9 in diameter after careful blocking.
Stitch concept
Star is formed by rounds of shell clusters and chain arches; blocking opens the shells into pronounced star points.
Step-by-step
Round 1 (center): MR; ch 3, 12 dc into MR; sl st to top of ch 3 (12 dc).
Round 2 (petal base): ch 4, sk 1 st, sl st in next, ch 4 repeat around making 6–8 small arches depending on center count. Join.
Round 3 (petals): Into each ch4 arch work (sc, hdc, 3 dc, hdc, sc) to form pointed petals. Join.
Round 4 (expand): ch 3, dc in top of next petal center, ch 3, sl st in petal center between petals — you are creating extended arches that will anchor the star points.
Round 5 (points): Into each ch3 arch work a tall shell: (dc7, ch5, dc7) then sl st to next arch. This makes large, star-shaped points.
Round 6 (stabilize): Work a joining round of sc around, catching the middle of each large shell to stabilize points and create a tidy edge.
Final picot edge: Work sc, ch3, sl st into sc (picot), skip 2 sc, sc around the outer shells to add delicate points.
Blocking
- Blocking is essential: pin each star point flat and evenly spaced on a blocking mat, stretching to exact symmetry. Spray or steam lightly and leave until fully dry (overnight).
Variation & tips
- Stronger scrub: make a double-layer: crochet two stars and sew wrong sides together with a thin layer of cotton batting inside.
- Scale: more rounds of expansions increase star size into a trivet.
Finishing & care
- Because lace opens considerably with blocking, note finished dimensions in pattern text. Hand wash or machine gentle; reshape when damp.
conclusion
You now have five complete, practical, and giftable dishcloth patterns spanning scrubby waffle textures to decorative lacy stars. A few final practical tips to make this post especially useful for readers and buyers:
Gift packaging & presentation
- Sets: group three dishcloths (one scrubby, one textured, one lacy) tied with a natural cotton ribbon — include a small card with yarn content and care instructions.
- Add a bar of natural soap for a classic kitchen gift. Package in a small reusable muslin bag or kraft box.
Photo checklist for your blog
- Flat full shot of each cloth on a neutral background (show entire piece).
- Closeup of texture and stitch detail (macro).
- Scale shot with a mug, bowl or hand to show size.
- Lifestyle shot (cloth next to soap, dish, or in gift packaging). Natural diffuse light and shallow depth of field look best.
Care & labeling to include when gifting or selling
- Provide fiber content and care instructions for each cloth. Example tag: “100% cotton — machine wash warm, tumble dry low or lay flat to dry. Do not bleach.”
- If cloth has felt/cork backing (for trivet use), note: “Hand wash recommended for backed items.”