Crochet gifts are a thoughtful way to celebrate Eid because they feel personal, handmade, and full of care. When time is short, small crochet projects are especially helpful because they can be made quickly without sacrificing charm or meaning. A handmade piece can turn even a simple gift into something memorable, whether it is used for home décor, prayer space decoration, keychains, or festive accessories.
What makes these projects especially practical is that they are small, beginner-friendly, and easy to customize. You can choose traditional colors like gold, green, cream, white, and deep blue, or add your own modern touch with soft pastels and bright festive shades. Some of these patterns are decorative, some are useful, and some are perfect as small add-on gifts that can complete a larger Eid present beautifully.
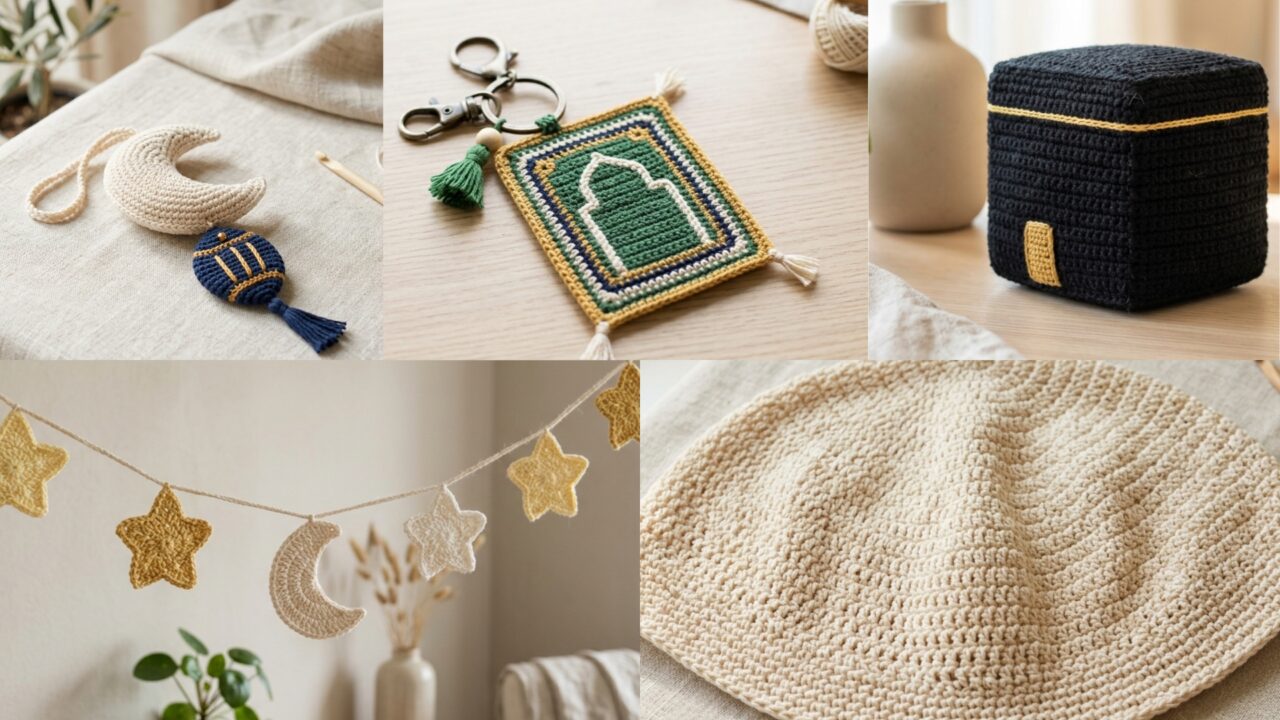
In this guide, you will find five quick and easy crochet patterns that work well as last-minute Eid gifts. Each section includes the skill level, materials, stitches, step-by-step instructions, finishing tips, and useful ideas to help you create neat and meaningful handmade pieces.
Quick Notes
- Use cotton or smooth acrylic yarn for clean stitch definition.
- Keep your tension even so small details stay neat.
- Choose festive colors that match the Eid theme you want.
- Make a sample piece first if you are trying a new stitch or shape.
- Add small finishing touches like tassels, beads, or embroidery if you want a more polished look.
- For gift items, always make sure the final piece is secure, durable, and visually balanced.
Common Materials
- Crochet thread, cotton yarn, or light acrylic yarn
- Crochet hook matched to yarn size
- Tapestry needle
- Scissors
- Stitch marker
- Fiberfill stuffing, if needed
- Key rings, hanging loops, or clips
- Optional: beads, embroidery thread, wire, or fabric stiffener
1. Crochet Moon and Stars Garland Pattern
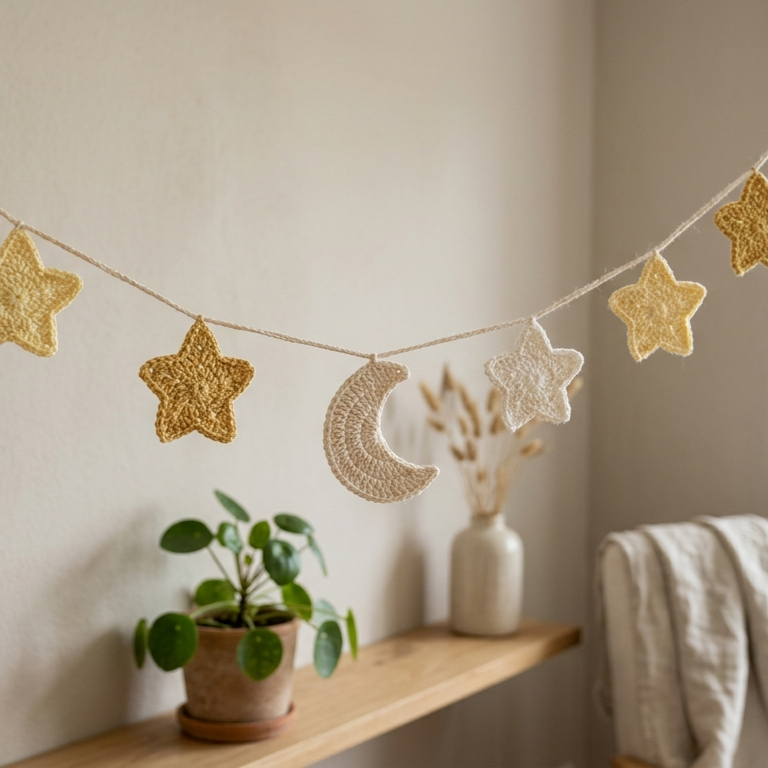
The crochet moon and stars garland is a beautiful decoration for Eid because it feels festive, dreamy, and symbolic. It can be hung across a wall, window, prayer space, mantel, or celebration table. This project is quick to make because each moon and star is small, and the garland can be customized in length to suit any space.
Skill Level
Beginner to Intermediate
Materials
- Cotton yarn or light acrylic yarn in gold, cream, white, yellow, or silver
- Small crochet hook, usually 2 mm to 3.5 mm
- Tapestry needle
- Scissors
- Garland cord, twine, or yarn for joining
- Optional: stuffing for stars or moons
- Optional: beads or small tassels
Stitches Used
- Magic ring
- Chain (ch)
- Single crochet (sc)
- Half double crochet (hdc)
- Double crochet (dc)
- Slip stitch (sl st)
- Increase and decrease
Step-by-Step Guide
Step 1: Crochet the moon shape
Start by making a small crescent moon. You can do this by working a rounded base shape and then shaping the inner curve with decreases. The moon should be slightly thick so it holds its form well.
Keep the stitches tight and neat so the crescent looks clean and smooth.
Step 2: Make the stars
Crochet small stars using a simple five-point pattern. Each star can be made separately, which makes the project easy to manage and quick to complete.
If you want a fuller look, make some stars slightly larger than others to add variety to the garland.
Step 3: Block the shapes lightly
Once the moon and stars are done, gently block them so the points and curves hold better. This step helps the stars look sharper and the moon look more defined.
A little shaping goes a long way for small decorative pieces like these.
Step 4: Join the motifs
Lay the moon and stars in the order you want them to appear on the garland. Use a long strand of yarn, chain stitches, or twine to connect them evenly.
Leave enough space between each motif so the garland looks balanced and not crowded.
Step 5: Add optional decoration
You can add small beads, tassels, or tiny hanging loops if you want the garland to look more festive. These details can make the piece feel more polished and gift-ready.
Step 6: Finish the edges and secure everything
Make sure all ends are woven in securely. Check that each motif is firmly attached before hanging or gifting the garland.
Finishing
- Weave in all ends
- Block moon and star shapes
- Check spacing between motifs
- Attach a hanging loop at both ends if needed
Pro Tips
- Gold and cream yarn give the garland a classic Eid look.
- Metallic thread can add a beautiful festive shine.
- This project works well in both short and long versions.
- If you want a softer style, use pastel colors instead of bright tones.
2. Crochet Mini Kaaba Amigurumi Pattern
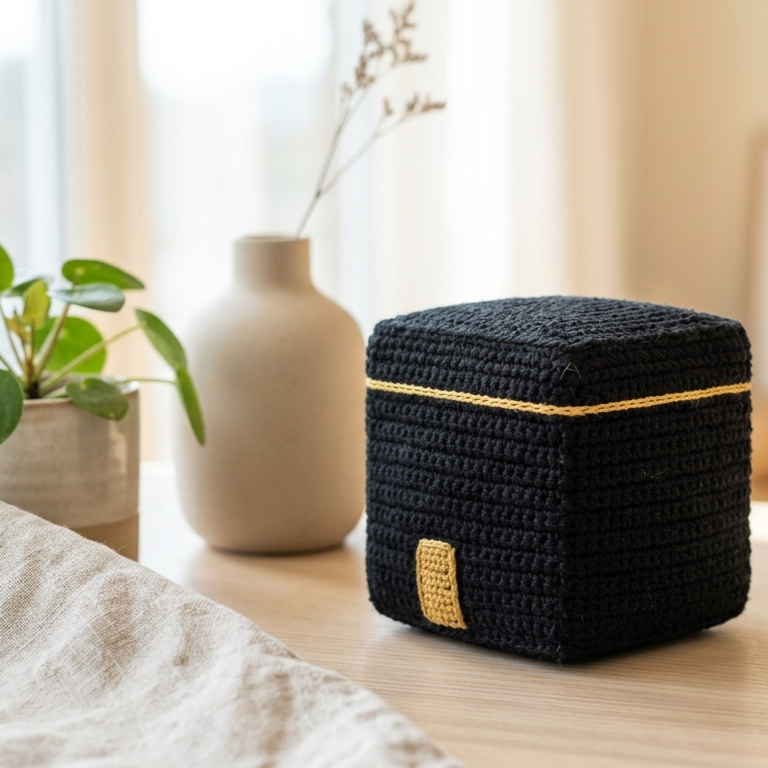
A mini Kaaba amigurumi is a meaningful crochet gift for Eid, especially for those who appreciate symbolic handmade décor. This small cube-shaped project is simple, neat, and very giftable. It can be displayed on a shelf, used as a decorative piece, or included in a festive gift basket.
Skill Level
Beginner to Intermediate
Materials
- Black yarn or black cotton thread
- Gold yarn or embroidery thread for details
- Small amount of white yarn, optional for accents
- Crochet hook suitable for yarn size
- Fiberfill stuffing
- Tapestry needle
- Scissors
- Stitch marker
- Optional: cardboard insert for structure
Stitches Used
- Magic ring
- Chain (ch)
- Single crochet (sc)
- Increase
- Decrease
- Slip stitch (sl st)
- Surface embroidery or surface stitching, optional
Step-by-Step Guide
Step 1: Crochet the base
Begin with a magic ring and work in the round to create a flat square base. This will be one side of the cube. Keep the edges even so the final shape stays neat.
The goal is a firm, balanced square foundation.
Step 2: Build the cube sides
Continue crocheting around the square base to create the height of the cube. Work straight rows or rounds without excessive increases so the shape stays box-like.
This is where the Kaaba form starts to become recognizable.
Step 3: Add light stuffing
Before fully closing the shape, add a small amount of fiberfill. Do not overstuff, because the cube should remain clean and structured rather than round.
A firm shape gives the best finish for this project.
Step 4: Close the top
Finish the cube by decreasing or sewing the final opening closed. Use your tapestry needle to hide the last seam neatly.
Make sure the top edge looks smooth and square.
Step 5: Add gold details
Use gold yarn or embroidery thread to add the decorative band and door details. Keep the design simple and centered so the mini Kaaba looks balanced and respectful.
Stitching the details neatly makes the piece look much more finished.
Step 6: Refine the shape
Adjust the cube with your fingers so all sides sit evenly. If needed, insert a small piece of cardboard inside for extra stability.
This is especially useful if the mini Kaaba will be displayed upright.
Finishing
- Weave in all loose ends
- Check the cube shape from every angle
- Secure the gold details well
- Flatten or adjust the base so it stands neatly
Pro Tips
- Use matte black yarn for a more classic look.
- Gold embroidery works better than bulky yarn for fine details.
- Keep the size small and tidy so it feels like a decorative keepsake.
- This makes a meaningful Eid gift or display piece.
3. Crochet Islamic Prayer Kufi Skull Beanie Pattern
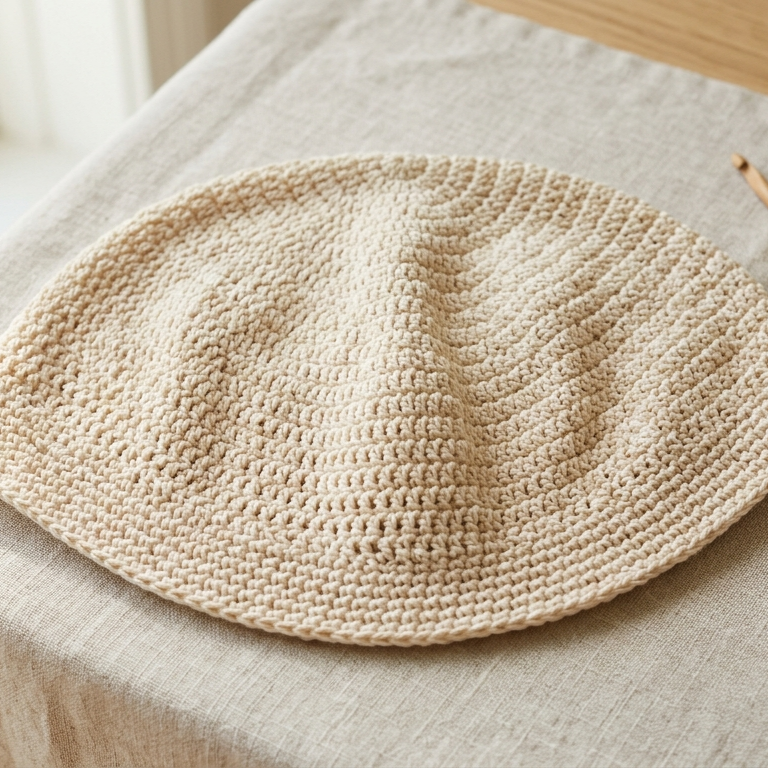
The Islamic prayer kufi skull beanie is a practical and thoughtful crochet gift that can be worn for prayer, everyday use, or as part of traditional dress. It is a useful handmade item that can be made in simple solid colors or with decorative stitch patterns for a more elegant look. Since it is wearable, it makes a very meaningful and personal Eid gift.
Skill Level
Intermediate
Materials
- Cotton yarn or soft acrylic yarn
- Crochet hook matched to yarn weight
- Tapestry needle
- Scissors
- Stitch marker
- Measuring tape
Stitches Used
- Magic ring
- Chain (ch)
- Single crochet (sc)
- Half double crochet (hdc)
- Double crochet (dc)
- Increase
- Slip stitch (sl st)
Step-by-Step Guide
Step 1: Measure the head
Before starting, measure the head circumference of the person who will wear the kufi. This is important because a beanie needs to fit snugly but comfortably.
A well-fitting cap always looks more polished.
Step 2: Begin the crown
Start with a magic ring and crochet increases in the round to form the top crown of the skull cap. The piece should gradually widen as you work.
Keep the rounds even so the crown stays flat and round rather than wavy.
Step 3: Continue increasing until the right width
Work increase rounds until the crown reaches the desired width. Once it is wide enough, stop increasing and begin working straight rounds.
This transition creates the dome shape of the skull beanie.
Step 4: Build the side walls
Continue crocheting without increases to form the sides of the kufi. These rounds should create depth and allow the cap to sit properly on the head.
Keep the tension even for a smooth fit.
Step 5: Add texture or decorative stitch detail
If desired, use a subtle stitch pattern such as alternating front and back loops, small textured rows, or simple geometric stitches. This can make the beanie look more refined without making it too heavy.
A clean texture often works best for prayer wear.
Step 6: Finish the brim
You can make the brim plain or slightly tighter for a secure fit. Some makers like to add a decorative edge, but a simple finish is often the most practical.
Finishing
- Weave in all loose ends securely
- Check the fit before gifting
- Make sure the brim sits comfortably
- Block lightly if needed to even out the shape
Pro Tips
- Cotton yarn is ideal because it is breathable.
- Dark, neutral, or classic colors work well for prayer wear.
- Make the stitches firm enough so the cap keeps its shape.
- This is one of the most useful handmade Eid gifts because it is both practical and personal.
4. Crochet Adorable Prayer Mat Keychain Pattern
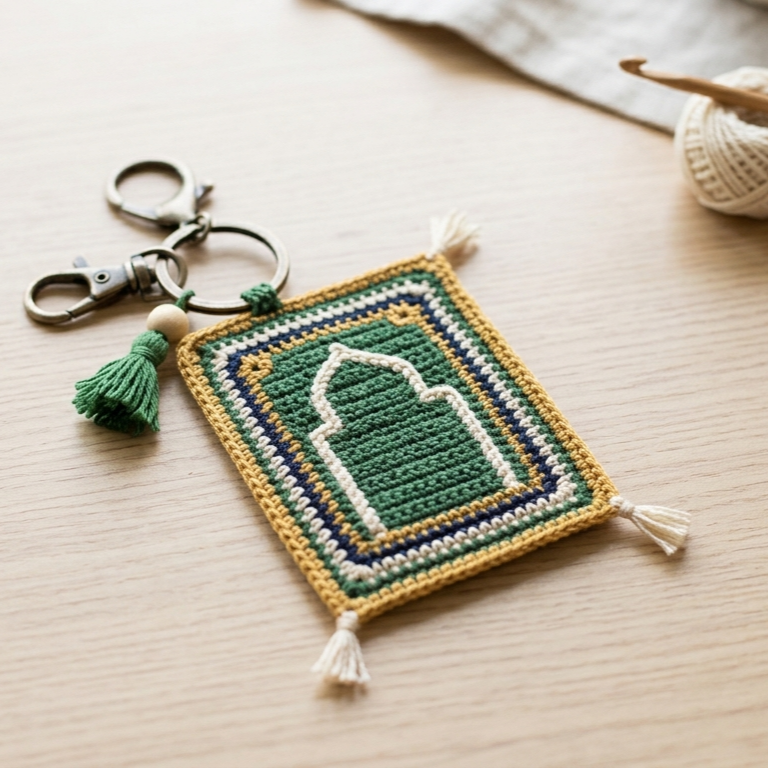
The adorable prayer mat keychain is a sweet and symbolic small gift for Eid. It is quick to make, lightweight, and easy to personalize with colors or tiny details. Since it is small, it works well as an add-on gift, a bag charm, or a thoughtful keepsake for family and friends.
Skill Level
Beginner to Intermediate
Materials
- Fine cotton yarn or embroidery thread
- Small crochet hook, usually 1.25 mm to 2.5 mm
- Tapestry needle
- Scissors
- Key ring or clasp
- Optional: small bead or tassel
- Optional: felt backing for stiffness
Stitches Used
- Chain (ch)
- Single crochet (sc)
- Double crochet (dc)
- Slip stitch (sl st)
- Increase, if shaping is needed
Step-by-Step Guide
Step 1: Create the base rectangle
Begin by crocheting a small rectangle that represents the prayer mat. Use tight, even stitches so the shape stays clean and flat.
The rectangle should be small but still clearly recognizable.
Step 2: Add decorative border detail
Crochet a border around the rectangle using a contrasting color. This border can represent the edge design of a prayer mat and make the piece look more complete.
A neat border instantly improves the look of the keychain.
Step 3: Add a simple design center
You can embroider a tiny mihrab-style arch, geometric line, or small ornamental motif in the center. Keep the design minimal so it remains elegant and easy to read.
This detail gives the keychain its special charm.
Step 4: Reinforce the shape
If the piece feels too soft, add a small felt backing or lightly stiffen it so it does not curl. This helps the keychain maintain its rectangular form.
A firm base is important for a small accessory like this.
Step 5: Add hanging details
You can attach a tiny tassel at one end or add a small loop for the key ring. These details make the piece look even more like a miniature prayer mat.
Step 6: Attach the key ring
Secure the key ring or clasp at the top. Make sure it is centered and strong enough for daily use.
Finishing
- Weave in all ends
- Check that the rectangle lies flat
- Secure the ring firmly
- Trim any uneven yarn tails
Pro Tips
- Green, gold, cream, and navy are beautiful Eid-inspired colors.
- A small tassel adds a charming traditional touch.
- Keep the design minimal for a cleaner and more elegant look.
- This is a perfect quick gift or stocking-style add-on for Eid baskets.
5. Crochet Ramadan Small Moon Lantern Pattern
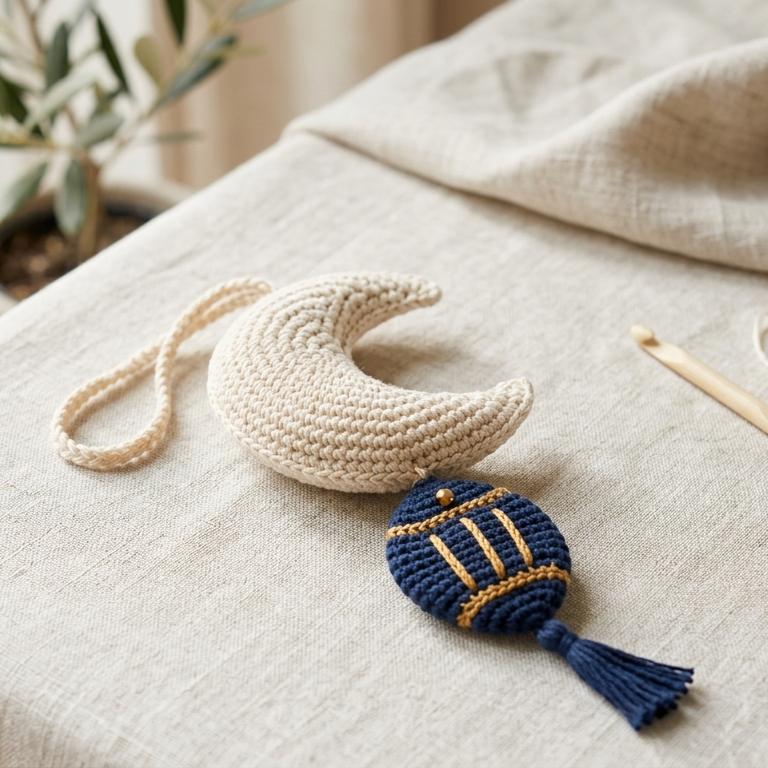
The small moon lantern pattern is a festive and cozy Eid project that brings together two beautiful symbols: the moon and the lantern. It can be used as décor, a hanging ornament, or a thoughtful handmade gift. The shape feels warm, decorative, and perfect for Ramadan and Eid celebrations.
Skill Level
Intermediate
Materials
- Cotton yarn or light acrylic yarn
- Crochet hook appropriate for yarn size
- Tapestry needle
- Scissors
- Fiberfill stuffing, if needed
- Small loop or cord for hanging
- Optional: small bead or gold thread for decoration
- Optional: wire frame or stiffener, if you want a lantern-style shape
Stitches Used
- Magic ring
- Chain (ch)
- Single crochet (sc)
- Half double crochet (hdc)
- Double crochet (dc)
- Increase
- Decrease
- Slip stitch (sl st)
Step-by-Step Guide
Step 1: Crochet the moon base
Start by making a crescent moon or rounded moon shape. This can be done by crocheting a curved base and shaping the inner side with decreases.
The moon should be soft and smooth, with a clear crescent form.
Step 2: Add the lantern body
Create a small lantern-like section either attached beneath the moon or worked as a separate shape joined later. This body can be a small oval or rounded rectangle.
Keep it compact so the final ornament stays lightweight.
Step 3: Shape the lantern outline
Use simple stitches to define the outer edges of the lantern. You can make it look more like a hanging lantern by adding small pointed edges, a top ring, or a decorative base.
This gives the piece its festive character.
Step 4: Add stuffing or stiffness if needed
If you want the ornament to hold its shape, add a little fiberfill or use a small amount of stiffener. Do not overfill, because this is a small decorative item.
A balanced shape works best for hanging décor.
Step 5: Add decorative details
Use gold thread, tiny embroidered lines, or a small bead to add lantern-style decoration. A little sparkle can make the piece feel more festive and suitable for Eid décor.
This is a great place to get creative.
Step 6: Attach the hanging loop
Add a loop at the top so the moon lantern can be hung from a wall, doorknob, gift bag, or festive display. Make sure the loop is securely stitched in place.
Finishing
- Weave in all ends
- Shape the moon and lantern neatly
- Secure any decorative elements
- Attach the loop firmly for hanging
Pro Tips
- Gold, cream, and deep blue create a beautiful Ramadan palette.
- Keep the design small so it works as a quick last-minute gift.
- Add a tiny tassel if you want a more traditional lantern feel.
- This project works especially well as a decoration for Eid gift baskets.
Conclusion
Crochet gifts are a beautiful way to celebrate Eid because they carry both creativity and meaning. Even when time is short, a handmade piece can still feel thoughtful, elegant, and personal. Small projects are especially useful for last-minute gifting because they are easy to finish, easy to customize, and easy to present beautifully.
The moon and stars garland adds festive charm, the mini Kaaba amigurumi offers a symbolic decorative touch, the kufi skull beanie is practical and wearable, the prayer mat keychain is sweet and meaningful, and the small moon lantern brings warmth and celebration into the home. Each of these projects can be made in a short amount of time while still feeling special enough for Eid.
The key to a successful last-minute crochet gift is simple: choose a manageable pattern, use neat stitches, finish carefully, and pick colors that feel festive and intentional. With those small details in place, even a quick project can become a memorable handmade gift.