

Mini crochet baskets are the perfect small project: quick to make, endlessly useful, and excellent practice for learning circular starts, working in the round, and simple shaping. They work as desk tidy cups, gift containers, Easter treats, Halloween candy holders, toy storage for small rooms, or little planters (with a plastic liner). This collection contains five beginner-friendly mini basket patterns that use different materials and simple techniques to create very different looks: rustic jute, seasonal candy corn, sweet Easter, kitty-shaped, and a classic striped toy basket.
Each pattern below includes:
- Skill level and finished dimensions
- Materials and recommended hook sizes
- A detailed step-by-step stitch-by-stitch pattern (US terms) you can work straight through tonight
- Instructions for handles/closures where relevant
- Variations, finishing tips, and care instructions
Make one or make the whole set — these are great to sell as a coordinated collection or gift as a set of nesting baskets.
Abbreviations (US terms used throughout)
- MR = magic ring
- ch = chain
- sc = single crochet
- hdc = half double crochet
- dc = double crochet
- inc = 2 sc in same stitch (increase)
- dec = sc2tog (decrease)
- sl st = slip stitch
- st(s) = stitch(es)
- FLO / BLO = front / back loop only
- RS / WS = right side / wrong side
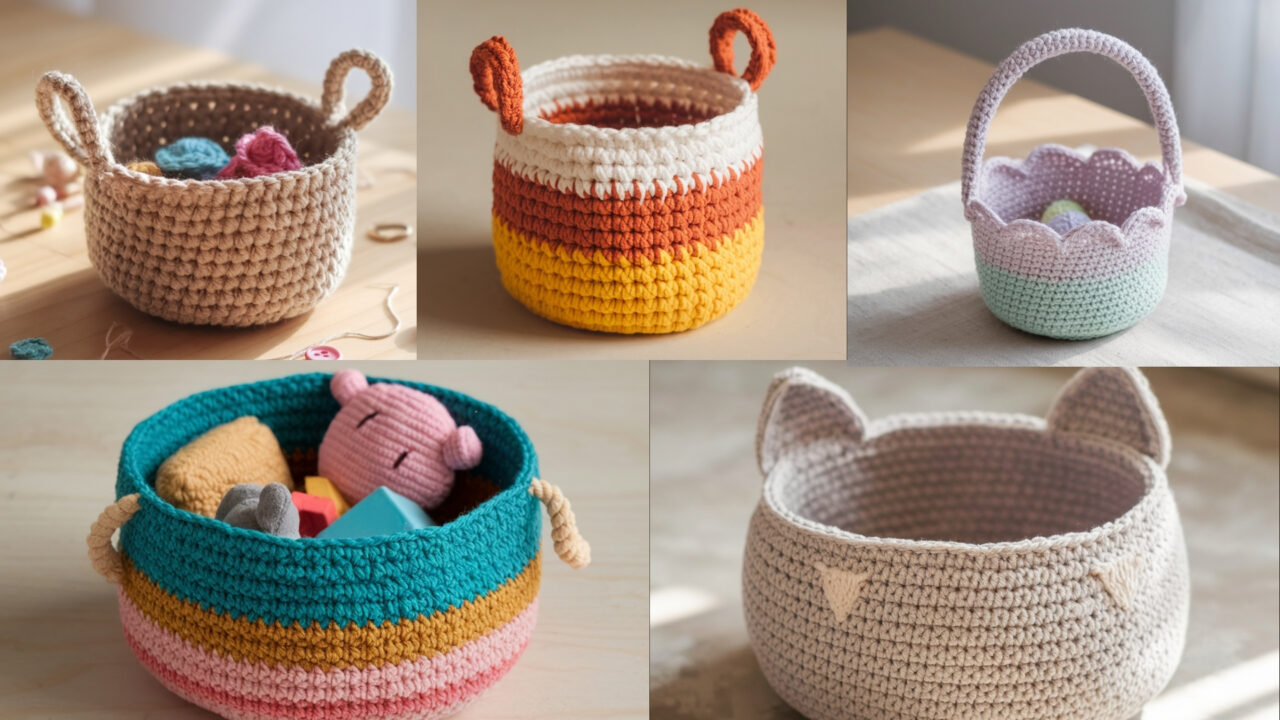
1. Crochet Jute Basket Pattern
Skill level: Beginner
Finished size (sample): base diameter ≈ 4 in (10 cm); height ≈ 3.5 in (9 cm) — easily scaled by adding rounds
Why this basket?
A jute basket has a lovely natural, rustic look and is sturdy for holding keys, yarn scraps, or small planters. Jute (or other natural rope/twine) makes a basket that stands up by itself.
Materials
- Natural jute twine (or cotton cord / macramé cord) — about 40–80 yards depending on size
- 6.0–8.0 mm crochet hook (choose one that works with your cord thickness)
- Tapestry needle for weaving ends
- Optional: matching fabric lining (for delicate items)
Gauge (informal)
- Coarse gauge because of rope; gauge is not critical — the basket is structural.
Construction overview
Work a flat circular base by increasing in the round, then work even rounds to build up the sides. Finish with optional handles (short loops or rope handles sewn on).
Step-by-step (base + sides)
Base (magic ring method):
- MR; R1: 6 sc in ring. (6) Pull ring tight and join with sl st to first sc.
- R2: inc in each st around — 12.
- R3: sc, inc around — 18.
- R4: sc 2, inc around — 24.
- R5: sc 3, inc around — 30.
- R6: sc 4, inc around — 36.
- R7: sc 5, inc around — 42. (At this point you have a sturdy 4–4.5 in base depending on cord thickness. Stop increasing once base reaches desired diameter.)
Sides (build up):
8. R8–R15 (or until desired height): sc around (42 sc each round). Keep tension consistent — don’t pull too tight or the rows will curl. For a 3.5 in height you’ll often work 7–9 rounds; add rounds for taller basket.
9. Optional firming round: Work 1 round of sc but insert hook in BLO for the round to create a small ridge that helps the basket keep shape.
Handles (two short loops):
10. Decide placement: measure opposite sides, about 6–8 sc apart. Attach yarn at beginning point for handle. Ch 8–10 (adjust for desired loop length), sl st to the anchor stitch to form loop. Fasten off and weave ends inside. Repeat for opposite side. For sturdier handles, chain desired length, fold the chain and sc through both chain and basket edge to make a reinforced strap (or sew an extra length of jute rope across inside and stitch to basket).
Finishing & optional lining
- Weave in all ends with a tapestry needle and tuck them inside the last round to hide.
- For a softer inside or to protect surfaces, cut a circular fabric lining the size of the base plus ½ in seam allowance, fold and hand-stitch the lining to the basket top edge. Use a lightweight interfacing if you want a crisp lining.
Variations & tips
- Make a square base by switching to boxy increases (work increases at four corners).
- Add color: wrap a few rounds of colored cotton yarn around the jute every few rows for stripes.
- For extra durability, apply a light coat of matte fabric glue on the inside to lock fibers — test on scrap first.
Care
- Spot clean with a damp cloth. Avoid machine washing jute; if lined, remove lining before cleaning.
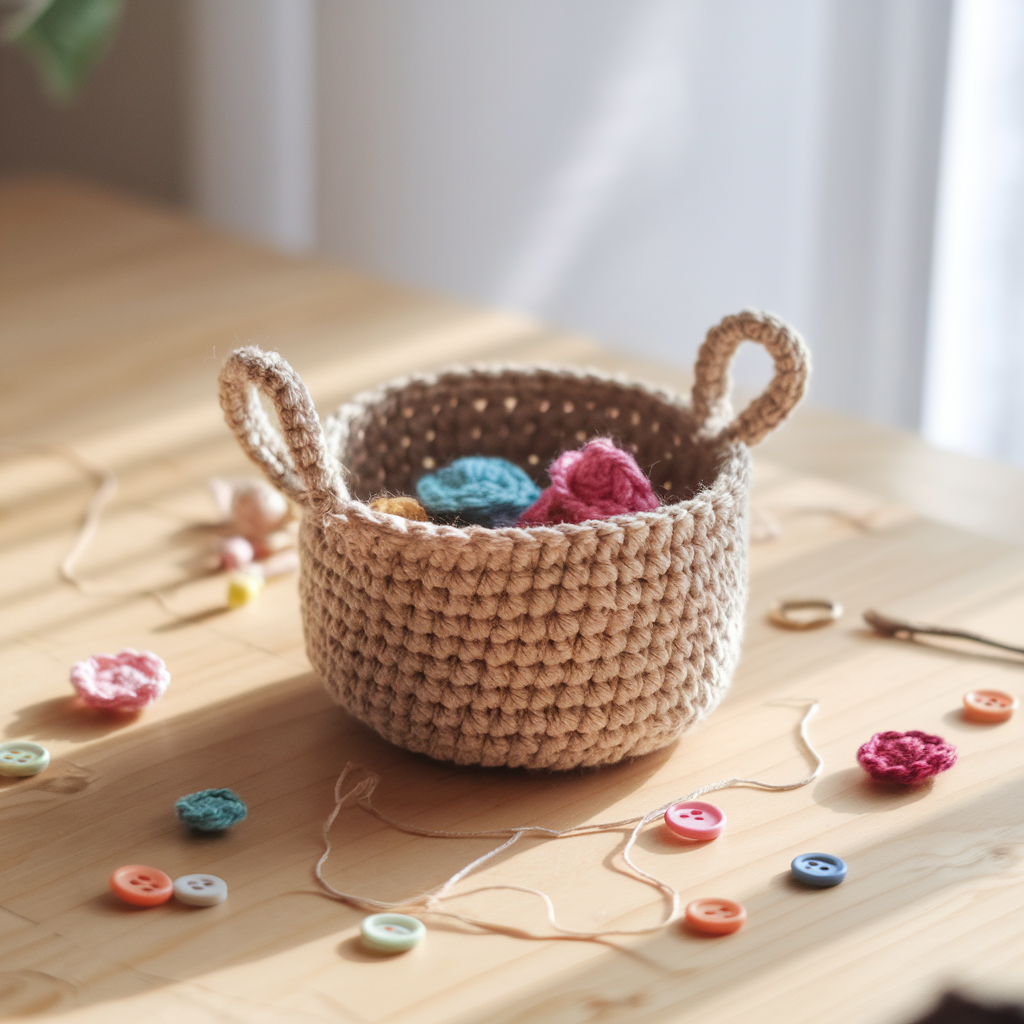
2. Crochet Candy Corn Basket Pattern
Skill level: Beginner
Finished size (sample): base diameter ≈ 3.5–4 in; height ≈ 3 in — perfect for Halloween candy
Why this basket?
Cute seasonal project: candy-corn color blocks (white tip, orange middle, yellow base). Quick to make and very giftable.
Materials
- Worsted-weight cotton or acrylic yarn in white, orange, and yellow — about 50–70 yards total
- 4.0 mm (G) crochet hook
- Tapestry needle
Construction overview
Work the basket in the round from base outwards. Change colors in concentric bands to form the candy-corn stripes. Add a small handle or short loop at the top.
Step-by-step (base + color bands)
Base:
- MR; R1: 6 sc in ring. (6)
- R2: inc each st — 12.
- R3: sc, inc around — 18.
- R4: sc 2, inc around — 24.
- R5: sc 3, inc around — 30. (Stop increases when base ≈ 3.5–4 in; adjust rounds as needed.)
Sides & color bands:
6. Attach yellow (base color) at R6 and work 2–3 rounds of sc in yellow (2–3 rounds gives the yellow base band).
7. Switch to orange: join and work 3–4 rounds sc in orange for the mid band.
8. Switch to white: join and work 2–3 rounds sc in white for the tip band (white may be thinner; 2 rounds is often enough). The top white band should be small to resemble candy corn tip.
Optional flared rim:
9. If you want a flared white rim (a bit wider top), work increase round once in white: e.g., sc 6, inc around to add a slight flare. Alternatively work one round of hdc to soften the edge.
Handle (short loop or little strap):
10. At opposite edges, make short chain loops for handles: attach yarn, ch 6–8, sl st to the anchor stitch to make a loop. Or make a small single-row strap: ch 10, sc back across, fasten off and sew ends to the basket top for a fixed strap.
Finishing & suggestions
- Weave in color change tails neatly inside — use duplicate stitch or whipstitch to tuck them between stitches to prevent unraveling.
- For sturdier structure, add a round or two of sc in BLO near the top to create a ridge that helps the basket hold shape.
Variations
- Make mini sets of 3 sizes for a candy-corn nesting set.
- Add a contrasting edge or polka dots with surface-crochet embroidery for personality.
Care
- Machine wash gentle for acrylic/cotton; air dry to retain shape.
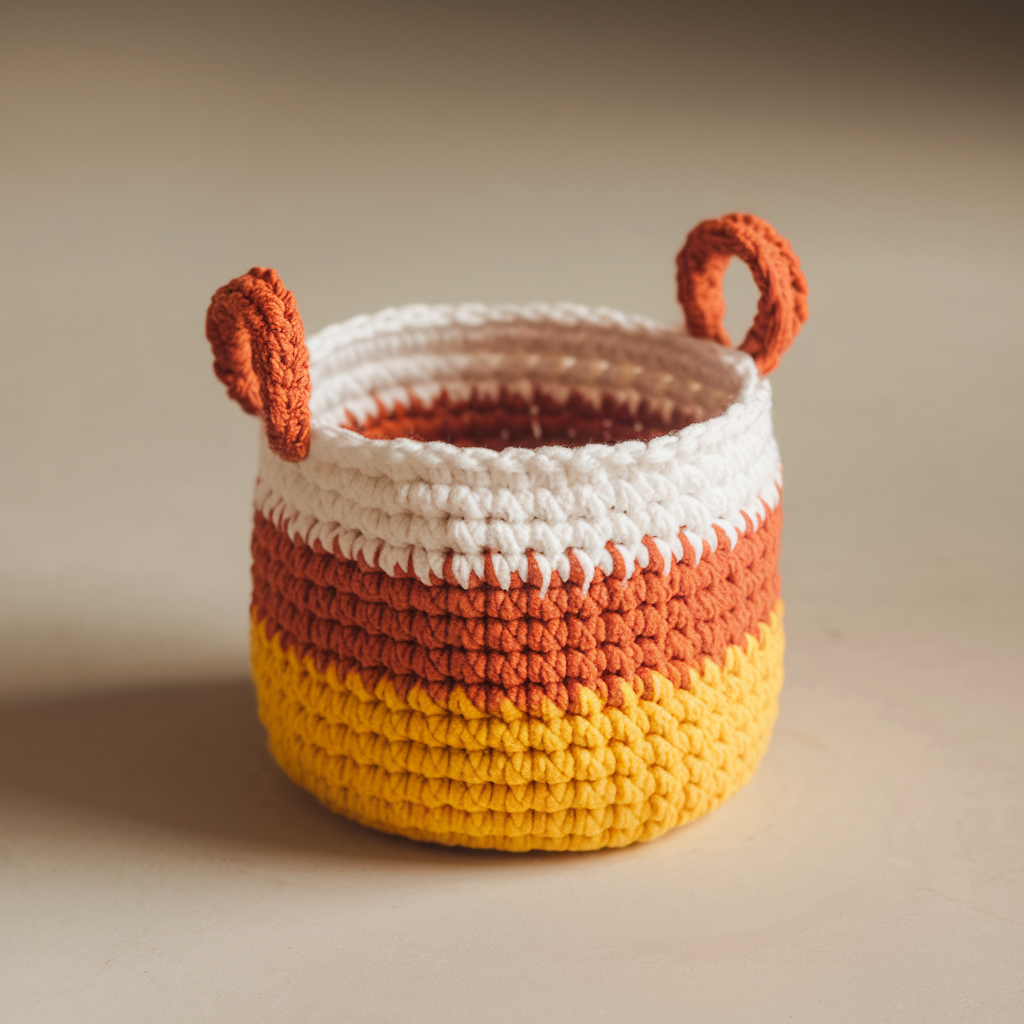
3. Crochet Easter Basket Pattern
Skill level: Beginner → Confident beginner
Finished size (sample): base ≈ 5 in diameter; height ≈ 4 in (with handle) — roomy enough for small eggs
Why this basket?
Classic little Easter basket with a rounded handle — great for gift presentation, egg hunts, or seasonal decor.
Materials
- Worsted weight cotton/acrylic in main color and accent color — ~100–150 yards total for sample size
- 4.5 mm (7) crochet hook
- Tapestry needle
Construction overview
A sturdy rounded base, straight sides, and a centrally attached arched handle. Optionally add a scalloped edge and pom-pom accents.
Step-by-step (base, sides, handle)
Base: (make a slightly larger base than previous patterns for a roomier basket)
- MR; R1: 6 sc. (6)
- R2: 12 sc.
- R3: sc, inc around — 18.
- R4: sc 2, inc — 24.
- R5: sc 3, inc — 30.
- R6: sc 4, inc — 36.
- R7: sc 5, inc — 42. (Stop when base ~5 in across, adjust to yarn/hook.)
Sides:
8. R8–R16: sc around (42 sc) — 8–9 rounds for ~3.5–4 in height. Add more rounds for taller basket. Keep stitches even.
Scalloped rim (optional):
9. Work a decorative scallop: sc in next st, ch 3, skip next st, sl st in next around (or for a fuller scallop: (5 dc in same st, sl st in next sc)). Fasten off and weave ends.
Handle (arched):
10. Attach yarn at center point on one side of rim. Ch 45–60 depending on desired handle height and tension (for a 4–5 in arch length, test with chain). Join chain to opposite side with sl st. For sturdier handle, sc back along the chain (sc across the chain to thicken) and sew ends to rim with extra stitches. You can also crochet a tube around a piece of plastic-coated wire to make a rigid handle — wrap the wire with yarn and crochet a tight sc tube around it, then sew ends into the rim for secure attachment.
Decoration (optional):
11. Add pom-poms, tiny crocheted flowers, or appliqué eggs — sew them to the rim or handle.
Lining (optional)
- For eggs or fragile items, line the inside with fabric: cut a circle and a side rectangle, sew them to form a lining, and hand-stitch into the basket rim.
Variations & tips
- Make a taller version with additional rounds for a mini tote.
- Use variegated yarn for a candy-colored Easter effect.
- Crochet a crisscross lattice overlay in a contrasting color around the upper rounds for a decorative basket weave.
Care
- Machine wash gentle (acrylic/cotton); reshape handle and air dry.
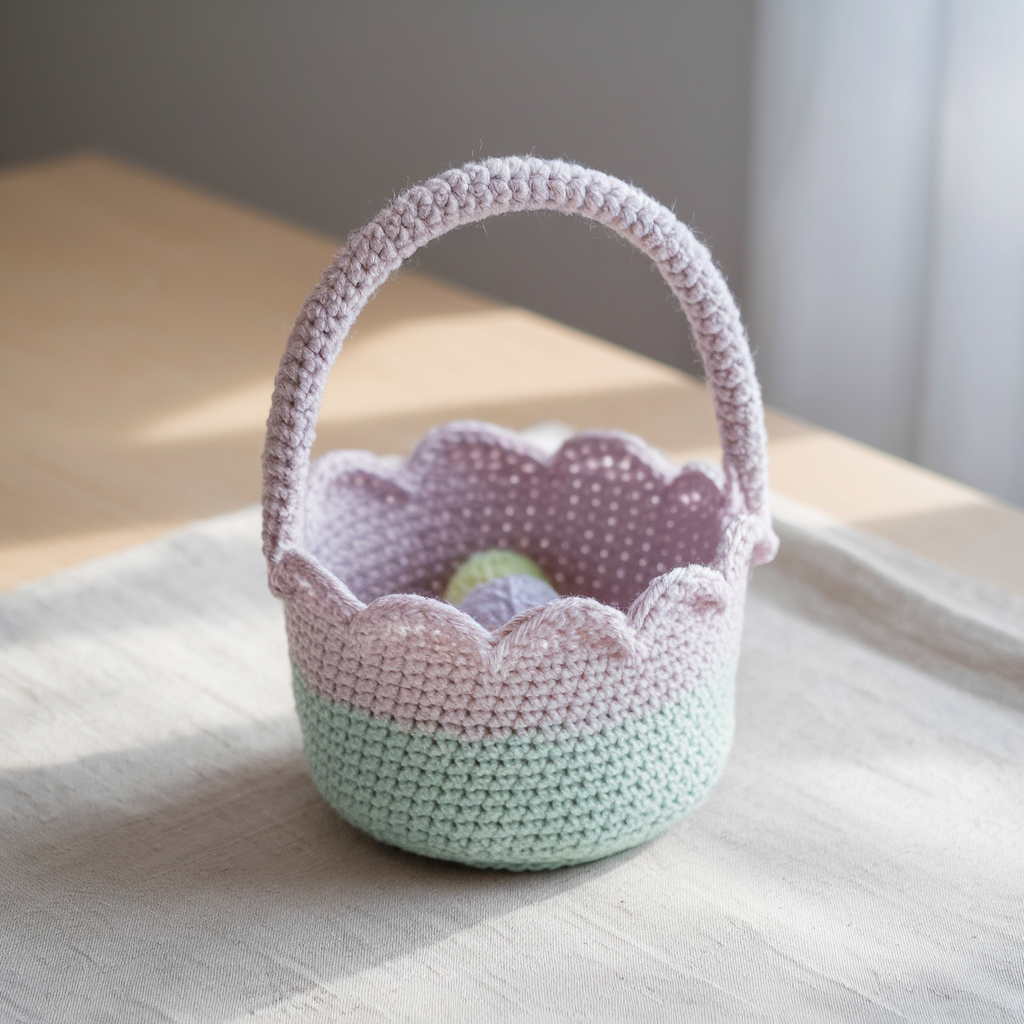
4. Crochet Kitty Basket Pattern

Skill level: Beginner → Intermediate (simple shaping + ears)
Finished size (sample): base ≈ 4 in diameter; height ≈ 4.5 in including ears — adorable desktop storage
Why this basket?
A sweet kitty face and ear ears make this basket irresistible. Great for kids’ rooms, makeup brushes, or small toys.
Materials
- Worsted weight yarn in main color (e.g., gray or cream), contrast (inner ear / nose / whisker accent)
- 4.0 mm crochet hook
- Safety eyes (optional, for purely decorative kitty) OR embroidery floss for stitched eyes — if given to children, embroider features instead of using safety eyes
- Tapestry needle
Construction overview
Work the base and sides as usual, then add two small triangular ears attached to the rim. Embroider eyes, nose, mouth, and whiskers on one side of the basket.
Step-by-step (base, sides, ears, face)
Base & Sides:
Work the circular base as in previous patterns to desired base size (R1 6, R2 12, R3 18, R4 24, R5 30). Then sc around in even rounds to build height (7–9 rounds for sample).
Ears (make 2):
- With main color, ch 6. Row 1: sc in 2nd ch from hook and across (5 sc). Turn.
- Row 2: sc2tog, sc, sc2tog (3 sc). Turn.
- Row 3: sc, sc2tog (2 sc). Turn.
- Row 4: sc2tog (1 sc). Fasten off leaving long tail for sewing. Fold base of triangle slightly and sew to rim with a few stitches to create a pointed ear shape. Repeat for second ear.
Face features (before attaching ears or after — your choice):
- Eyes: embroider two small vertical stitches or French knots for eyes; or attach small safety eyes following manufacturer instructions (do not use safety eyes for items intended for small children).
- Nose: tiny triangle of contrasting yarn embroidered (small triangle satin stitch).
- Whiskers: use embroidery floss or a few strands of thin yarn and stitch three whiskers on each side.
- Mouth: small upside-down Y stitch.
Attach ears:
Position ears symmetrically on the rim and sew securely with multiple passes. Weave in tails.
Optional collar:
Work a small strip (ch 20, sc across for 2 rows) in a contrasting color and sew to the basket below the face as a “collar”; add a tiny bell or button for charm.
Variations & tips
- Make a sleeping cat by embroidering closed eyes and a little blush on cheeks (light pink yarn).
- For a plush look, use chenille-style yarn, but line inside to protect surfaces.
Care
- Spot clean or hand wash; reshape and dry flat. Avoid using safety eyes if gifting to young children.
5. Crochet Striped Toy Basket Pattern
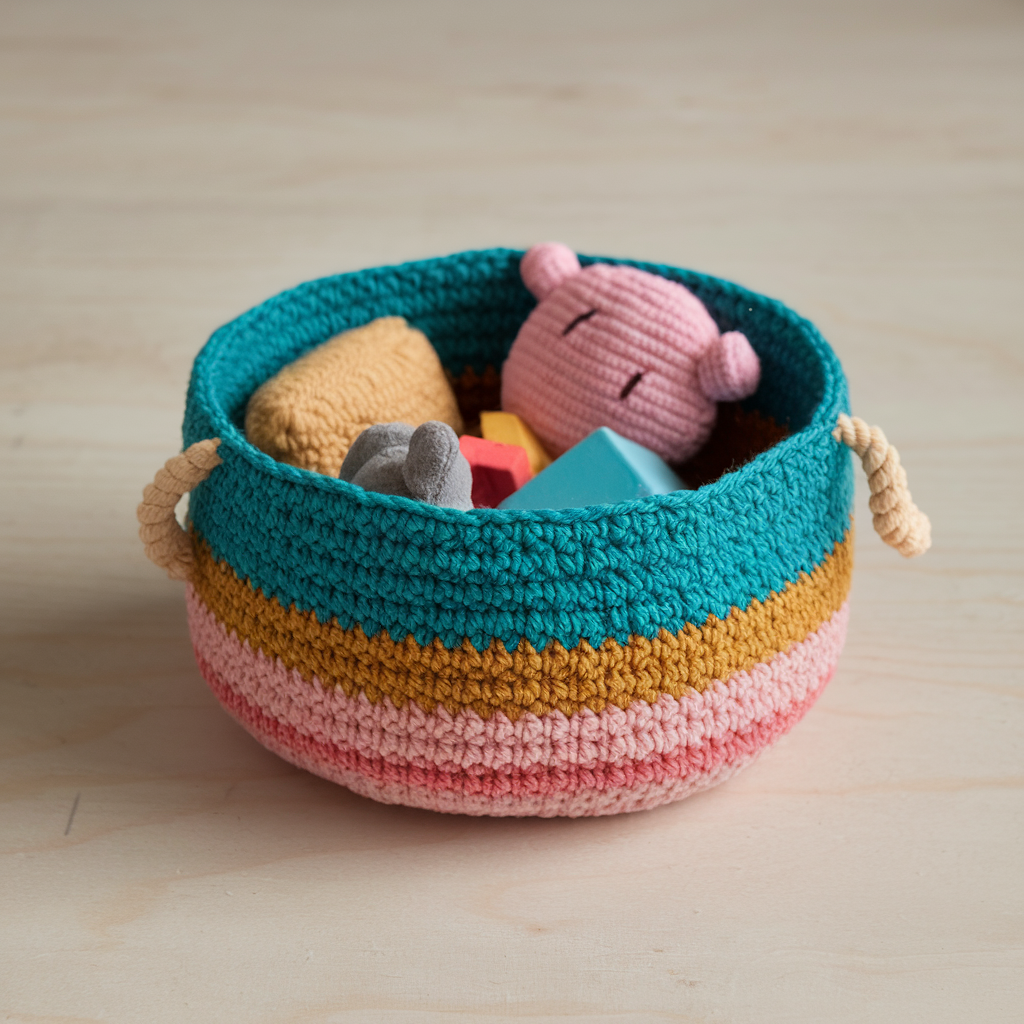
Skill level: Beginner → Confident beginner
Finished size (sample): base ≈ 6–7 in diameter; height ≈ 6–8 in — scalable and great for storing small toys
Why this basket?
A slightly larger project that uses stripes to create a playful toy basket. A wider base and taller sides make it a functional small toy container or nursery organizer.
Materials
- Worsted weight yarn in two or three contrasting colors — about 200–300 yards total depending on size
- 5.0 mm crochet hook (choose larger hook for a looser, drapier basket or smaller to keep structure)
- Tapestry needle
Construction overview
Work a larger flat circular base, then build taller sides with color changes every few rounds for stripes. Add a rope-style handle and an interior reinforcement round to keep the top tidy.
Step-by-step (larger base + tall sides + handle)
Base: (increase until base is 6–7 in)
- MR; R1: 6 sc.
- R2: 12 sc.
- R3: sc, inc → 18.
- R4: sc 2, inc → 24.
- R5: sc 3, inc → 30.
- R6: sc 4, inc → 36.
- R7: sc 5, inc → 42.
- R8: sc 6, inc → 48 (this will produce ~6–7 in base depending on yarn/hook). Stop when base reaches desired diameter.
Sides & stripes:
9. R9–R30 (or until desired height): sc around in rounds. Change colors every 2–4 rounds to create wide stripes. Carry colors up inside and catch floats, or break and rejoin for clean color joins. For a nursery toy basket, use bright playful colors (teal, coral, mustard).
Top reinforcement (BLO ridge):
10. Work 2 rounds of sc in BLO to create a firm top edge, then 2 rounds of SC in both loops to thicken. This creates a folded rim effect if you fold top inward slightly.
Handles (two side straps):
11. Option A — short straps: attach yarn at anchor point, ch 25 (or desired length for strap), sc back across chain and sew strap firmly to basket. Repeat opposite side for second strap. Reinforce with extra whipstitching.
12. Option B — rope handle: create a twisted rope by chaining desired length, slip-stitch around chain to make a tube, fold tube and sew ends firmly to basket interior; or braid 3 strands and sew ends to basket top with extra reinforcement.
Optional interior base reinforcement:
13. For an even flatter bottom, cut a circle of thin cork or plastic (slightly smaller than base) and insert it inside the bottom before adding lining or stuffing. Glue or hand-stitch the lining to hold it in place.
Variations & tips
- Make a collapsible version by using softer yarn and fewer reinforcement rounds at the top.
- Add an appliqué number or initial with surface crochet or embroidery to personalize for children.
- For an heirloom version, use natural cotton in neutral stripes for a modern nursery.
Care
- Machine wash gentle if yarn permits; reshape and air dry. Remove any internal reinforcements before washing if necessary.
Final finishing notes (applies to all baskets)
- Weave ends securely: Baskets will be handled frequently — weave in tails across several stitches and backtrack to lock them.
- Reinforce handles: Use extra stitching or a small inner felt patch to distribute load where handles attach.
- Blocking & shaping: For cotton baskets, lightly wet block or steam to shape rims and ears. Pin to form the exact silhouette you want and let dry.
- Lining: If you place delicate items inside, either line with fabric or add a removable fabric bag that can be washed separately.
- Sizing up or down: Increase or reduce the number of increase rounds in the base to change diameter; add or subtract side rounds to change height. Keep the same stitch pattern to maintain proportions.
Conclusion
These five mini crochet basket patterns give you a versatile, beginner-friendly toolkit for small storage and seasonal decorating. From the sturdy rustic jute basket to the cute kitty and candy-corn baskets, each pattern teaches a repeatable set of skills: working a flat circle, building vertical sides, changing colors cleanly, and adding simple finishing details like handles and ears. Make one quick basket tonight or craft a whole set as a thoughtful handmade gift.


Tham gia giải trí nhất định anh em không nên bỏ qua sảnh chơi cá cược thể thao. game xn88. com đưa tới cho cược thủ hàng trăm các tỷ lệ kèo siêu hấp dẫn trên khắp thế giới, tỷ lệ thưởng đa dạng. Với nhiều giải đấu lớn nhỏ được cập nhật liên tục mỗi ngày như Champions League, Euro, La Liga, Serie A, Premier League, World Cup,…
Your article helped me a lot, is there any more related content? Thanks!
Your point of view caught my eye and was very interesting. Thanks. I have a question for you.
V8 Poker, GPI và KingMaker – 3+ NPH game bài hot hit đang có mặt tại slot365 ios. Bạn có thể lựa chọn chơi với nhiều chế độ: Đánh với máy, tự tạo bàn hoặc tham gia thách đấu với hội viên khác để tranh hạng Top 1, hốt ngay phần thưởng gấp 40 lần tiền cược ban đầu.
Thanks for sharing. I read many of your blog posts, cool, your blog is very good. https://www.binance.info/kz/register?ref=K8NFKJBQ
Thanks for sharing. I read many of your blog posts, cool, your blog is very good. https://accounts.binance.com/pt-PT/register-person?ref=KDN7HDOR
Thank you for your sharing. I am worried that I lack creative ideas. It is your article that makes me full of hope. Thank you. But, I have a question, can you help me?
Thanks for sharing. I read many of your blog posts, cool, your blog is very good. https://www.binance.com/register?ref=IHJUI7TF
Your point of view caught my eye and was very interesting. Thanks. I have a question for you. https://www.binance.info/ar-BH/register?ref=UT2YTZSU
Thanks for sharing. I read many of your blog posts, cool, your blog is very good. https://www.binance.com/ar-BH/register?ref=S5H7X3LP
Your point of view caught my eye and was very interesting. Thanks. I have a question for you.
Your point of view caught my eye and was very interesting. Thanks. I have a question for you.
Your point of view caught my eye and was very interesting. Thanks. I have a question for you. https://accounts.binance.com/uk-UA/register-person?ref=XZNNWTW7
Thanks for sharing. I read many of your blog posts, cool, your blog is very good.