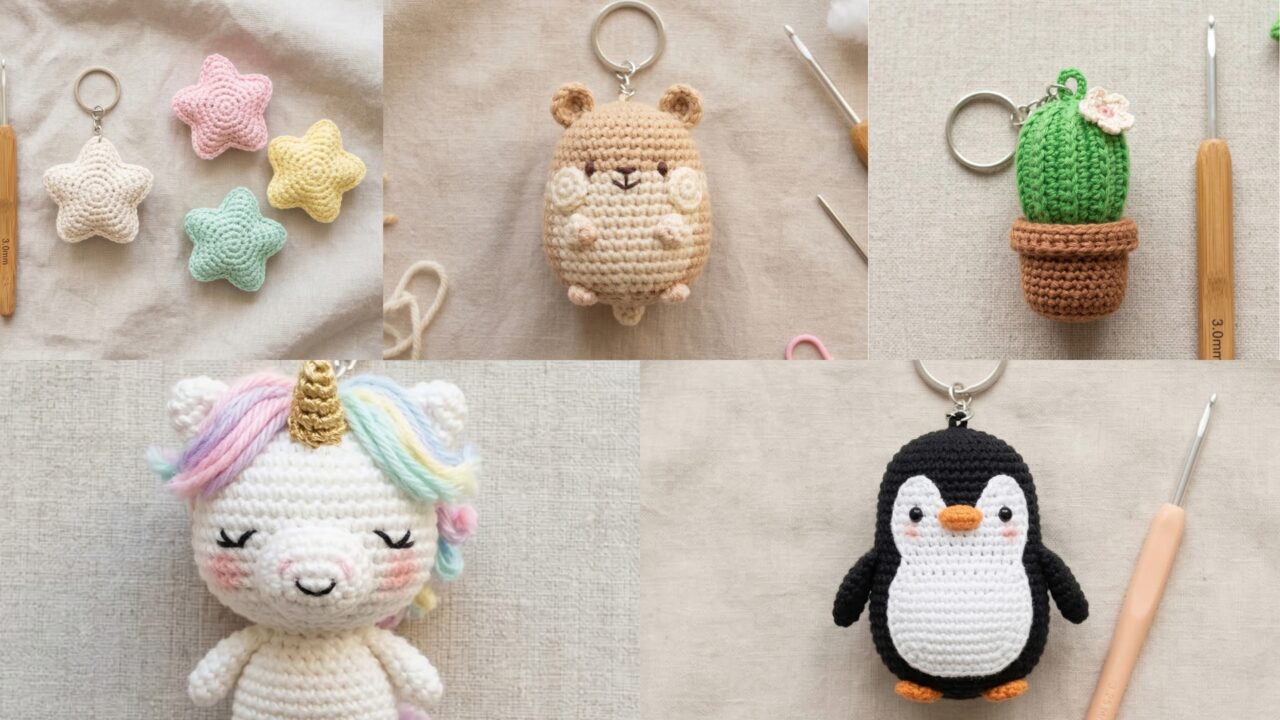
Small, fast, and hugely satisfying — crochet keychains are perfect tiny projects to use up yarn scraps, practice new stitches, or assemble into sweet gift sets. Below are five fully detailed keychain patterns with everything a busy crafter needs: skill level, finished size, exact materials, stitch abbreviations, precise step-by-step construction (including assembly and attaching the keyring), finishing and care, safety notes, and variations so you can personalize every mini. Each pattern is written in US terms.
Quick shared notes (applies to all patterns)
- Finished size estimates assume worsted/DK yarn with the hook indicated. Use smaller yarn/hooks for tinier charms or larger yarn/hooks for chunkier charms.
- For keychains intended for young children, do not use small glued beads or unsecured safety eyes — embroider features instead.
- Tight gauge is important so stuffing does not show through — go down one hook size from recommended if needed.
- Always weave and secure yarn tails well; give any sewn-on bits several passes to make them durable for keys.
- Abbreviations (US):
- ch = chain
- sc = single crochet
- hdc = half double crochet
- dc = double crochet
- inc = increase (2 sc in same stitch)
- dec = decrease (sc2tog)
- sl st = slip stitch
- MR = magic ring
- st(s) = stitch(es)
- RS = right side, WS = wrong side
- Tools needed across patterns: tapestry needle, small stuffing (polyfill), jump ring and split keyring or lobster clasp, small pliers (for opening/closing jump rings), scissors, stitch marker.
1. Crochet Mini Cute Star Keychain Pattern
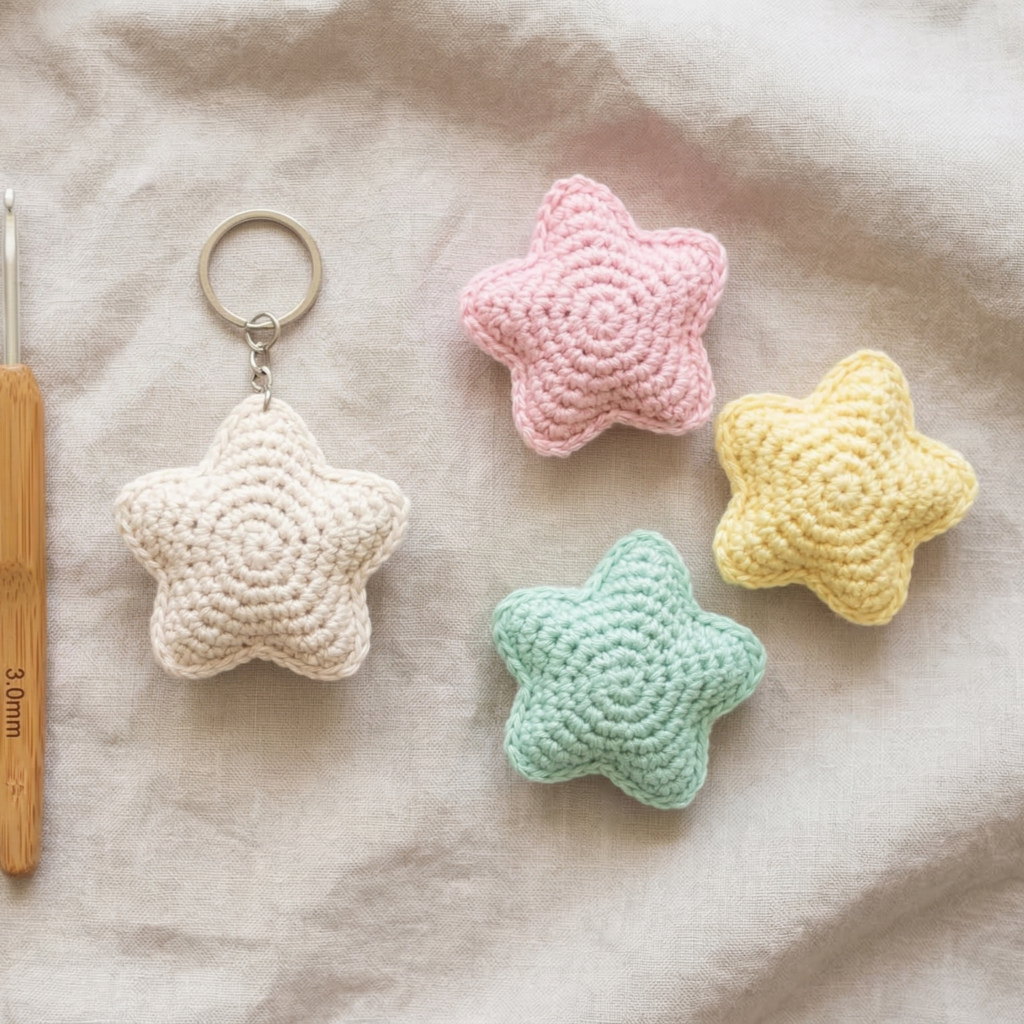
Skill level: Beginner
Finished size: ~1.25–1.5 inches (3–4 cm) across (tiny and quick)
Time: 15–30 minutes
Materials
- Fingering or sport weight yarn (or leftover DK held single) — small amount (5–10 yards).
- Crochet hook 2.5–3.5 mm (adjust to get tight fabric).
- Small amount polyfill, tapestry needle, stitch marker.
- 1 small jump ring + split keyring or lobster clasp.
Abbreviations (specific)
- 5-pt star made by working 5 points around a small central ring.
Pattern — one star (make 1)
Tip: Keep stitches tight (go down 1 hook size if your fabric is loose).
- MR, ch1, 6 sc into MR. Pull tight. (6) — do NOT join; continue working in rounds or join with sl st. I prefer to keep a small circle base to sew points onto.
- Form point 1: ch3, sl st into next sc (this creates a tiny loop as a base for the point). Now into that ch-3 loop work: (sc, hdc, dc, hdc, sc). Sl st into same base sc to anchor the point.
- Move to the next sc of base circle and repeat step 2 to create point 2. Repeat until you have 5 points total around the circle. After the 5th point, sl st to first point’s base to finish. Fasten off leaving a tail for closing.
- Weave tail to close any gap at center, push center a little to puff the star, and use needle to shape points. Lightly stuff center only if desired (just a little — star should remain flat-ish).
Attaching to keyring
- Thread a short length of matching yarn through the top point and tie a tight knot around a small jump ring. For extra durability, loop yarn twice and knot, then wrap the wrapped yarn a few times around the jump ring and stitch ends to star WS, hiding tails inside with a needle. Or sew a small short length of cord to the back, then attach to the jump ring with pliers.
Finishing & gift idea
- Trim and weave ends. Block lightly by shaping points with fingers and pressing with a mist of water if necessary. Present as a set of 3 tiny stars on a small card.
2. Crochet Amigurumi Unicorn Keychain Pattern
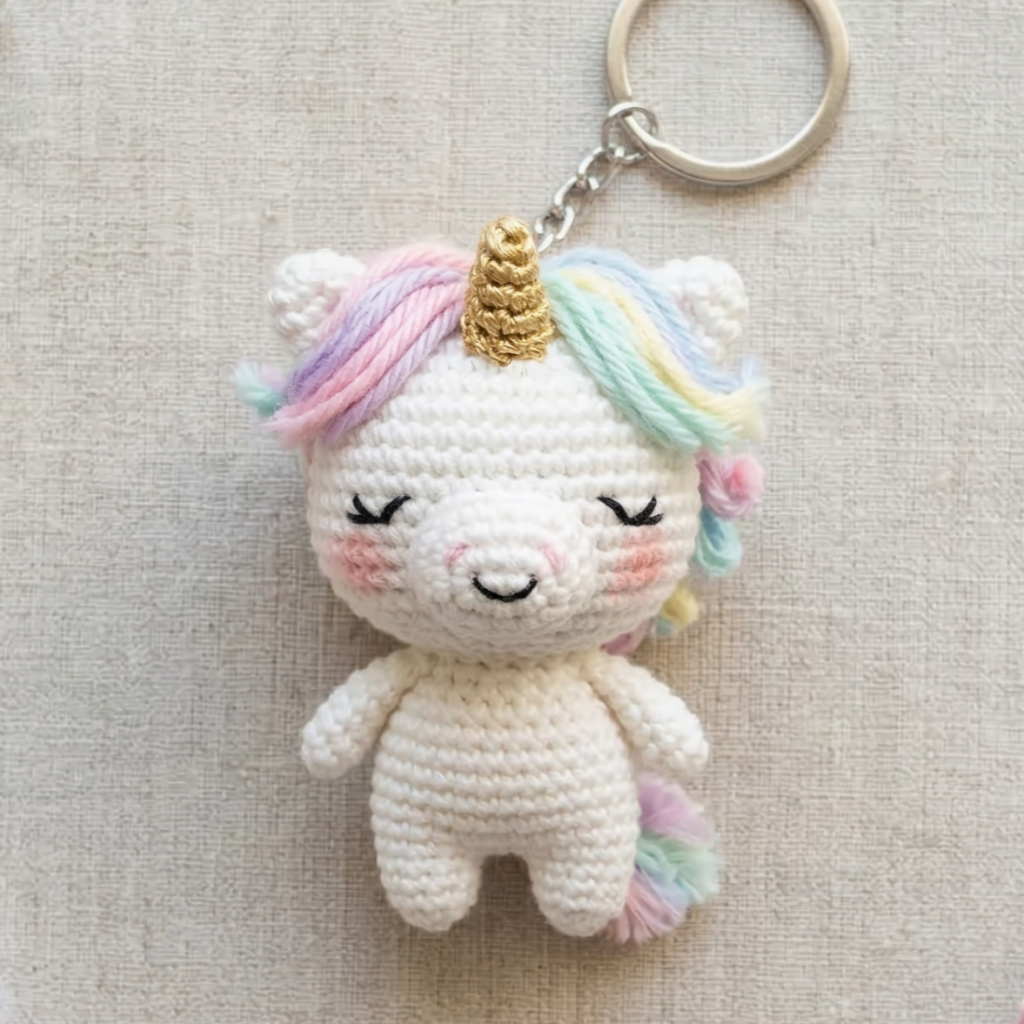
Skill level: Intermediate (small amigurumi shaping + simple mane/embellishment)
Finished size: ~2.5–3.5 inches (6–9 cm) tall including horn and ears
Time: 45–90 minutes
Materials
- DK/fingering yarn for body (white or pastel) — ~20–30 yards
- Contrasting yarn for mane + tail (scraps)
- Hook 2.75–3.5 mm (tight gauge)
- Polyester stuffing (small amount)
- Embroidery thread for eyes/mouth (or very small safety eyes 4 mm if not for small children)
- Short length gold or yellow yarn for horn (or metallic thread)
- Small jump ring + split keyring, tapestry needle, stitch marker
Abbreviations (for amigurumi)
- Work in continuous rounds unless noted. Use stitch marker to mark start.
Pattern — unicorn head & body (one piece, compact)
Head (top-down)
- MR, 6 sc (6)
- inc ×6 → 12
- (sc, inc) ×6 → 18
- (2 sc, inc) ×6 → 24
- sc around 4 rounds — place safety eyes between rounds 6–7 about 6 sts apart or embroider eyes later.
- (2 sc, dec) ×6 → 18 — begin stuffing lightly.
- (sc, dec) ×6 → 12
- dec ×6 → 6 — do not close fully; leave opening to attach horn and ears. Fasten off and leave tail for sewing in.
Horn (make 1)
- With metallic yarn, MR, ch1, 6 sc in MR. (6)
- (sc, inc) ×3 → 9
- sc around 3 rounds, then sc2tog once or twice to taper and fasten off leaving tail. Stuff lightly and sew to top center of head.
Ears (make 2)
- MR, ch1, 6 sc in ring, pull tight. (6)
- sc in next 3 sts, dec, sc in next — shape into a triangle by folding and sewing base across; fasten off.
Mane & tail
- Cut short lengths of contrasting yarn (6–10 strands per tuft, length ~1–2 in). Fold in half and latch-hook or pull through rows along top/back of head for the mane. For tail, attach several groups at base of back of head/body.
Body (tiny)
- From the bottom of head, continue by joining body yarn and work 12 sc around (if closed, re-open slightly by splitting sts) and work 6–8 rounds making a short body tube. Stuff firmly but small — we want a compact charm not a floppy doll. Finish by dec rounds to close and hide tail inside.
Assembly
- Sew ears near top sides of head, sew horn centered. Embroider nostrils and smile with a few backstitches. Attach mane tufts securely — knot and sew ends inside. Add a little blush with a tiny dab of pastel chalk if desired (set lightly).
Keyring attachment
- Make a small loop of yarn at top of head (between horn and mane): thread yarn through top center, form a loop and tie multiple times; hide knot inside stuffing and reinforce with a few hidden stitches. Attach jump ring and keyring.
Safety notes
- For kids under 3, embroider eyes and avoid any small sewn beads.
Variations & gift idea
- Make mini unicorn keychain sets in rainbow mane colors, packaged with a tiny inspirational note.
3. Crochet Adorable Hamster Keychain Pattern

Skill level: Intermediate (amigurumi shaping + colorwork for face)
Finished size: ~2.5 inches (6–7 cm) tall — compact and cuddly
Time: 45–75 minutes
Materials
- DK yarn in main color (beige/tan) and belly/cheek color (cream or white) — tiny amounts.
- Hook 3.0 mm (tight)
- Polyester stuffing, tapestry needle, stitch marker.
- Embroidery thread for eyes/mouth (tiny French knots or straight stitch), small jump ring + keyring.
Abbreviations & tips
- Work in continuous rounds. Keep stuffing small. Use a tiny darning needle for embroidering features.
Pattern — hamster (one)
Body & Head (worked as one short oval)
- MR, 6 sc (6)
- inc ×6 → 12
- (sc, inc) ×6 → 18
- (2 sc, inc) ×6 → 24
- sc around 6 rounds (this forms head height) — place face color/cheek rounds accordingly. Insert tiny stitches for blush cheeks with cream yarn before stuffing if desired.
- (2 sc, dec) ×6 → 18 — stuff slightly.
- (sc, dec) ×6 → 12
- dec ×6 → 6 — leave small opening for stuffing final bits and for attaching tail/feet.
Cheeks (make 2)
- Using cream, MR, ch1, 6 sc into ring, pull tight. Fasten off leaving tail to sew to face slightly below eyes.
Ears (make 2)
- With main color, ch5, sl st back along chain to form tiny loop or MR with 5 sc and fold to form ear. Attach to head sides.
Feet (make 2)
- MR, 5 sc; pull tight and flatten slightly, sew to underside.
Tail (tiny)
- A short knot of yarn looped and sewn to back or a tiny pompom.
Face
- Embroider eyes as two small French knots (or very small safety eyes 3–4 mm if not for kids). For nose, small satin stitch triangle with darker yarn. Sew cheeks on both sides.
Attaching to keyring
- Make a small secure yarn loop at top of head: insert needle up through head, pull yarn through leaving a loop on top, wrap yarn around base of loop several times, knot, and weave tail inside. Attach jump ring.
Finishing
- Test all sewn-on details by giving gentle tugs; strengthen if needed. Package as a mini “gift for a friend” with a note.
4. Crochet Penguin Keychain Pattern
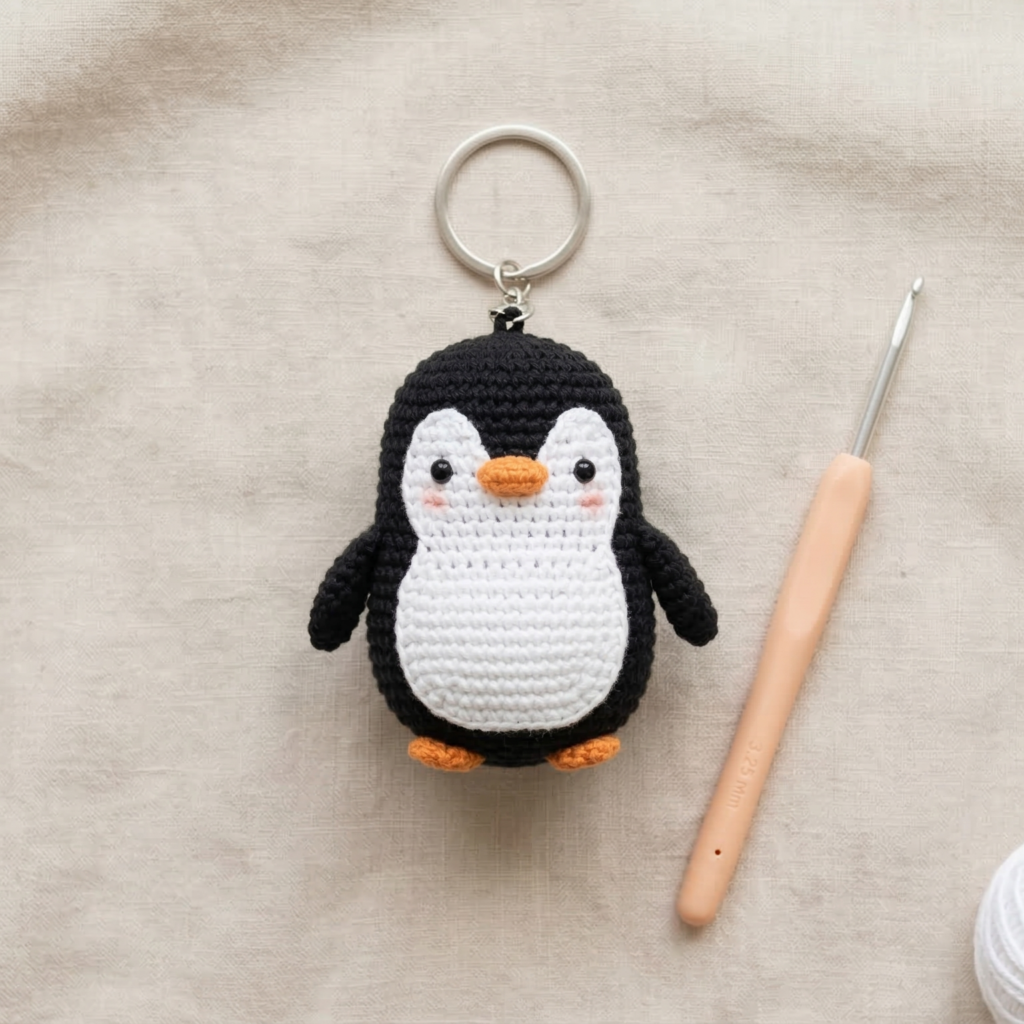
Skill level: Beginner–Intermediate
Finished size: ~2–3 inches (5–8 cm) tall — iconic and quick to make
Time: 30–60 minutes
Materials
- DK yarn: black (main), white (belly/face), orange (beak/feet) — small amounts.
- Hook 3.0–3.5 mm, stuffing, tapestry needle, stitch marker.
- Embroidery thread for eyes (or tiny safety eyes if adult usage).
Pattern — penguin (one)
Body (start with black)
- MR, 6 sc (6)
- inc ×6 → 12
- (sc, inc) ×6 → 18
- (2 sc, inc) ×6 → 24
- sc 2 rounds — place white yarn for belly by surface crochet later or change color now and stitch belly panel in white for about 3–4 rounds (do a few white rounds centered on front).
- (2 sc, dec) ×6 → 18 — begin stuffing.
- (sc, dec) ×6 → 12
- dec ×6 → close. Fasten off and weave in tail.
Wings (make 2)
- With black, ch6, sc in 2nd ch from hook and across (5 sc), turn and sc back across 3 rows to make small oval wing. Sew to body sides.
Beak
- With orange, ch5, sc across; fold and sew base to form small triangular beak and attach to face area.
Feet (make 2)
- With orange, MR, 6 sc, flatten and sew to bottom front.
Eyes
- Embroider two small French knots or straight stitches. If using safety eyes, attach before closing head and secure washers tightly.
Keyring loop
- Use a strong sewn yarn loop at top or crochet a short chain loop (ch6) and whipstitch both ends into top of penguin head — then attach jump ring.
Variations & gift idea
- Make a family set: mama, papa, baby (different sizes) using different color scarves (cut small felt strips) — tie scarf around neck and glue or sew.
5. Crochet Mini Cute Cactus Plant Keychain Pattern
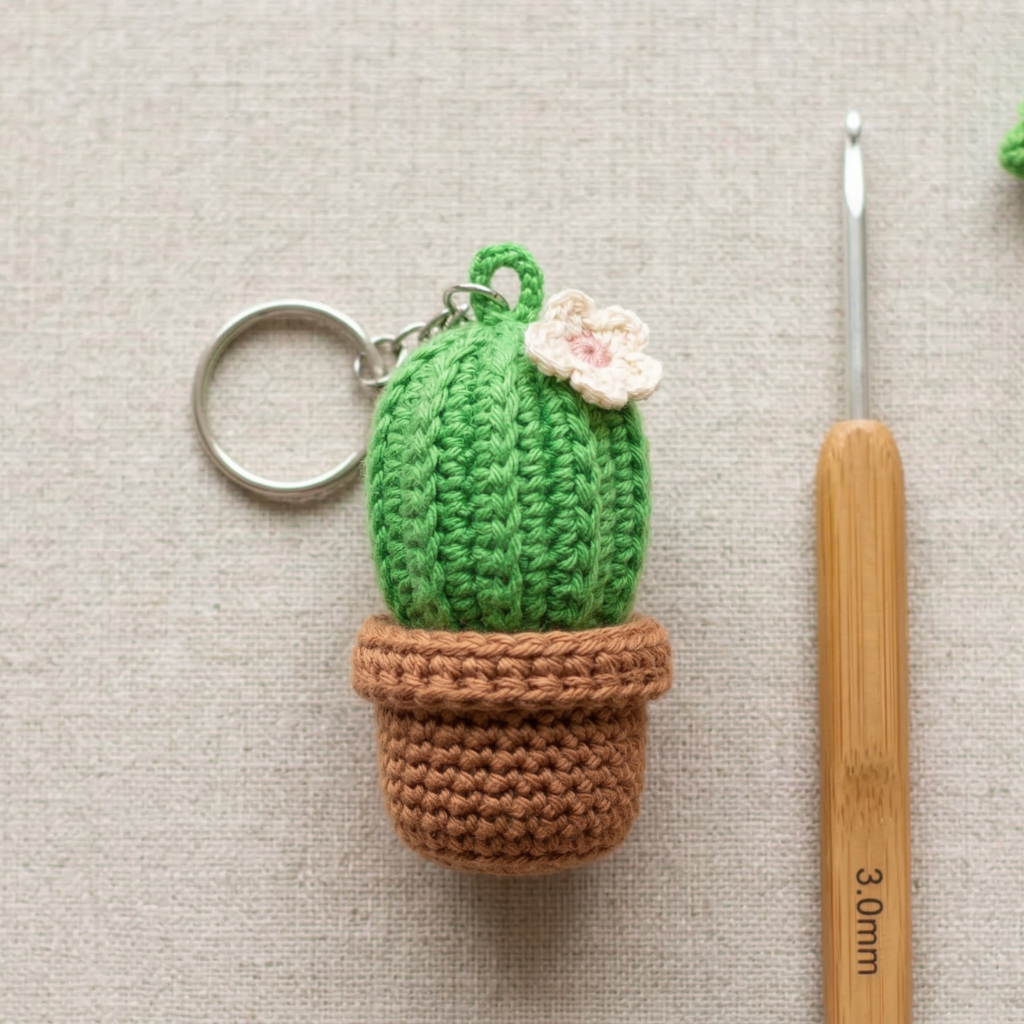
Skill level: Beginner
Finished size: ~2–3 inches (5–8 cm) tall including pot
Time: 30–45 minutes
Materials
- DK yarn green for cactus, brown/terracotta for pot, small amount cream/white for bloom (optional)
- Hook 3.0–3.5 mm, stuffing, tapestry needle, stitch marker
- Small keyring and jump ring
Pattern — cactus in a mini pot (one)
Cactus body
- MR, ch1, 6 sc in MR. (6)
- inc ×6 → 12
- (sc, inc) ×6 → 18
- sc around 6 rounds to build height — you can make a short rib if you like by alternating sc in BLO and sc in FLO rows to mimic ribbed cactus texture.
- (sc, dec) ×6 → 12 — stuff firmly, then dec to close leaving small hole.
Pot (make 1)
- With terracotta/brown, MR, ch1, 6 sc in MR. (6)
- inc ×6 → 12
- (sc, inc) ×6 → 18
- sc 2 rounds to form pot height. Optionally fold pot rim outward and sc around to make a lip. Stuff lightly or leave pot empty but secure cactus inside pot by sewing cactus base into pot interior.
Flower (optional)
- With cream/pink, MR, ch1, 6 sc; next round in each loop make (sc, hdc, dc, hdc, sc) to create a tiny blossom. Sew to cactus top.
Assembly & keyring
- Sew cactus into pot securely: pass needle through cactus base and pot base multiple times to anchor. Attach a small loop to back/top of cactus with yarn, then attach jump ring and keyring. Alternatively attach jump ring to underside of pot rim if preferred.
Care & variations
- Make multi-arm cactus by crocheting a tiny side tube and sewing into side. Add embroidered white stitch “spikes” using long straight stitches. For a plush look, use boucle or textured yarn.
Final finishing, durability & gift packaging tips
- Securing hardware: Use a small dab of clear-drying fabric glue on knots around jump rings for extra security, then weave ends inside the charm. For metal jump rings, open with pliers by twisting, insert yarn loop, then close tightly by twisting the opposite way.
- Sturdiness test: Give each sewn element a gentle tug; if anything moves, strengthen with extra stitches. Keychains see a lot of handling — reinforce seams.
- Washing: Most yarn keychains can be spot-cleaned. For a full wash, put in a mesh laundry bag and hand-wash or machine wash on gentle; reshape and air dry. Avoid washing if using glued metal parts.
- Gift set idea: Make a set of five different keychains on a card labeled with a short sweet message or package three in a small organza bag for a quick handmade gift.
- Safety: Always inform gift recipients about small parts and recommend adult handling for small children.
Conclusion
These five keychain patterns are designed to be fast, portable, and fun — perfect for busy crafters who want quick gifts, market-ready minis, or adorable stash-busting projects. Each pattern is intentionally compact and uses standard techniques so you can mix and match features (swap eyes, change colors, add tiny charms).