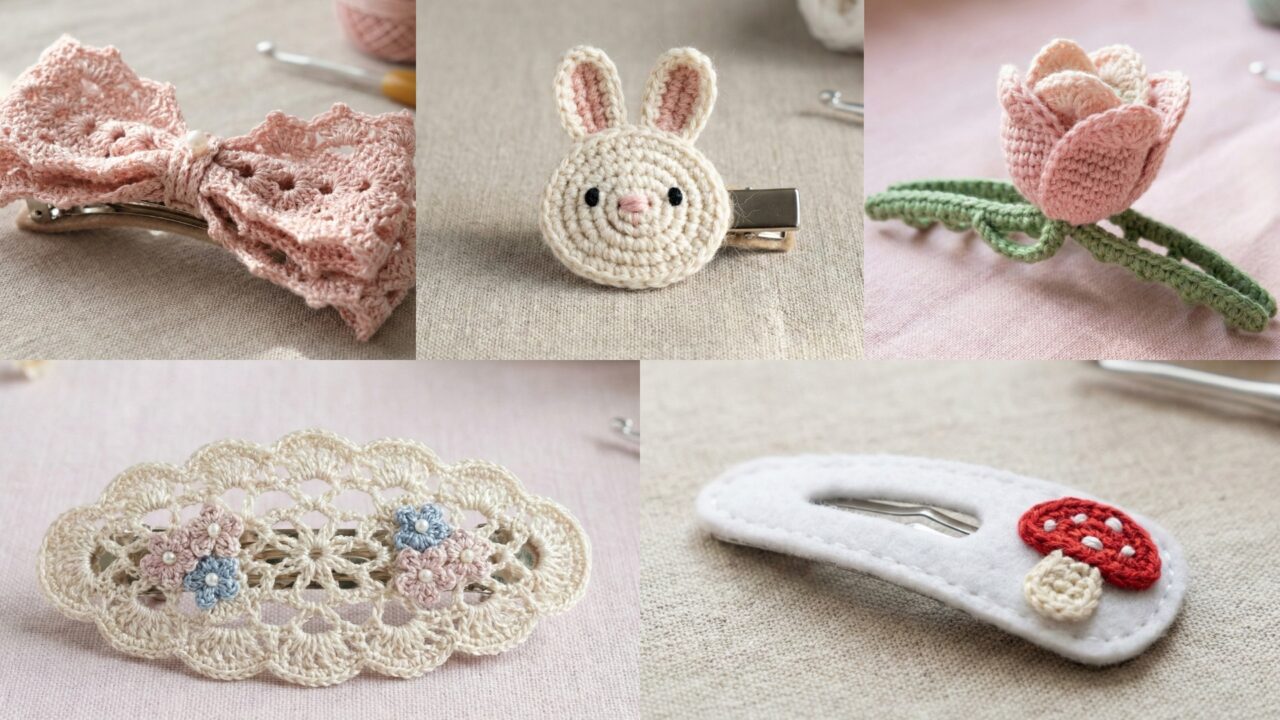
Hair clips are tiny projects that deliver huge style impact — they’re portable, fast to make, and perfect for using scrap yarn. Below you’ll find a friendly introduction (materials, clips, safety, tools and finishing), then five full patterns: Cute Bunny (oval), Mushroom Motif, Lace Bow, Tulip Claw, and Floral Thread (oval). Each pattern includes materials, stitch notes, and a detailed, step-by-step build with tips for attaching the finished motif securely to a hair clip. Ready? Let’s make some cute clips!
Quick intro — yarn, clips, tools, lengths & safety
Why crochet hair clips?
They’re fast (most take 15–45 minutes), use tiny amounts of yarn, and make lovely gifts or shop items. Small motifs let you practice shaping, appliqué and finishing — and every clip can be customized with color, beads or embroidery.
Clips & hardware
Choose clip type based on style and function:
- Alligator clips / metal snap clips (8–10 cm) — great for small motifs; secure and easy to sew through.
- French barrettes (snap barrettes) — flat and stable, perfect for oval motifs.
- Claw clips — need a slightly larger motif or a band that wraps around the claw hinge. (I’ll show a way to attach a tulip to a claw.)
Buy plain clips from craft stores or online. Use metal clips for durability.
Yarn & hook suggestions
- Fingering–DK (cotton or cotton blend) for tidy stitch definition and lightweight clips.
- Acrylic / blends for fluffier, inexpensive clips.
- Plush / velvet looks luxe but hides stitch definition.
- Hooks: 2.0–4.0 mm depending on yarn. Use a hook slightly smaller than the yarn label suggests if you want a compact motif that won’t flop.
Notions
- Tapestry needle (sharp tip for sewing through clip fabric), embroidery thread (for faces/details), small buttons or beads (optional), hot glue (optional — use only after sewing for reinforcement).
- Felt circles (to cover clip back and hide stitches; also protects scalp).
Safety & wearability
- For kids’ clips: avoid small glued beads that can detach. Sew decorations securely and choose clips with smooth edges.
- Always check clip tension before gifting; snaps should close strong enough to hold hair.
How to attach motifs (overview)
- Sew motif to clip directly through the metal (use small stitches and catch the clip’s ridges) and sew onto a felt backing that covers clip underside.
- For claw clips, sew motif to a narrow strip of fabric or crocheted band that loops under the claw hinge and stitches onto both sides; this keeps the motif centered and secure.
- Optional final dot of fabric glue (hot glue) for extra security — apply sparingly and only after stitching.
1. Crochet Cute Bunny Hair Clip Pattern
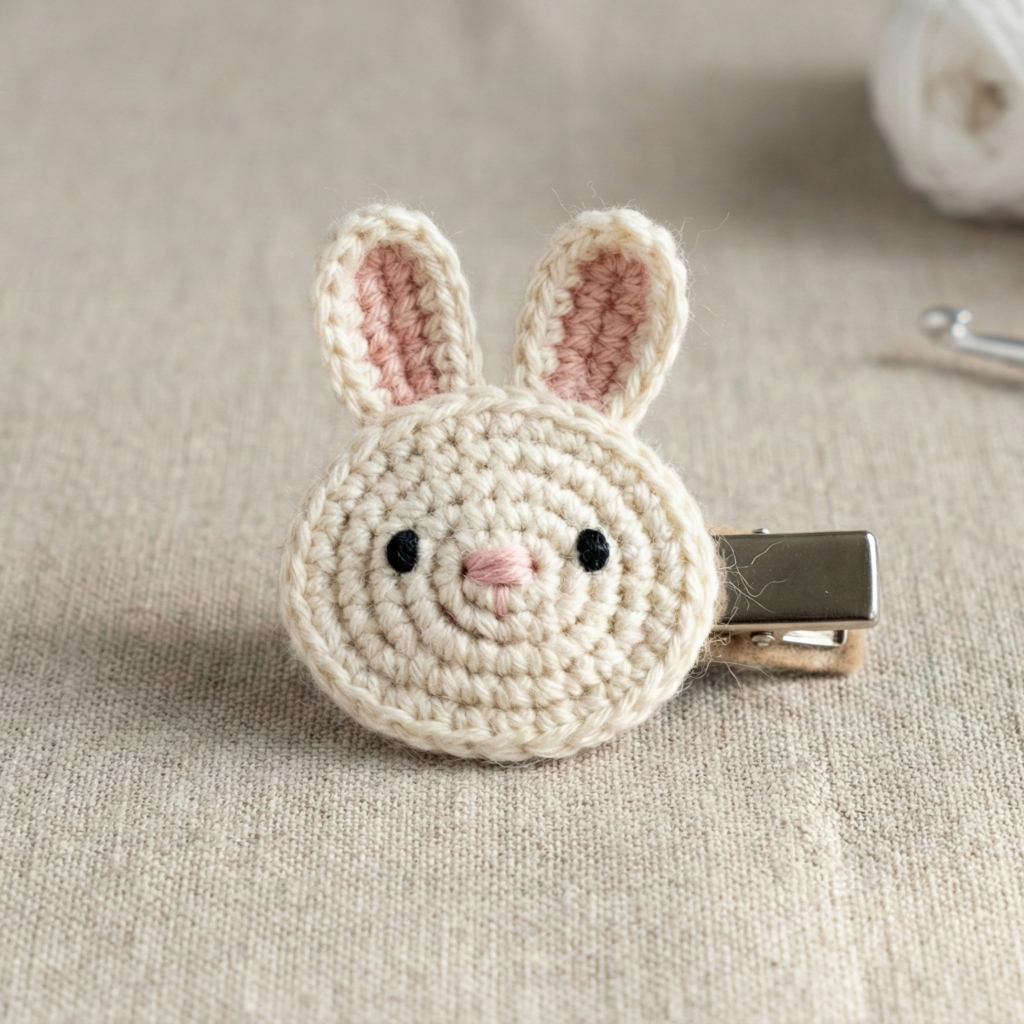
A sweet oval bunny face perfect for barrettes or snap clips. Adorable on kids or for a playful, girlish look.
Skill level: confident beginner
Finished size: oval base ~2.25 × 1.25 in; clip: medium barrette or snap
Materials
- Fingering or sport cotton in: main color (white/cream) ~5–10 yd, ear color (pink) small amount, inner ear highlight optional.
- Hook: 2.5–3.0 mm
- 1 small barrette or snap clip (6 cm / 2.4 in suggested), tapestry needle, stitch marker, small amount of stuffing (optional), embroidery thread for eyes/nose (black/ pink), felt circle same size as barrette.
Stitches used (US)
- MR (magic ring), ch, sc, hdc, dc, sl st, inc (2 sc in st), dec (sc2tog)
Pattern overview
Make an oval base, add two small ears and an optional puffy muzzle or nose, embroider face and sew to barrette. Back with felt.
Step-by-step
A — Oval base (worked flat)
- ch 11. Row 1: sc in 2nd ch from hook and across (10 sc). Turn.
- Row 2: ch1, sc in first 3 sts, inc in next 2 sts, sc in next 2 sts, inc in next 2 sts, sc in last st (14 sc). Turn.
- Row 3: ch1, sc across (14). Repeat Row 3 for a total of 6–8 rows depending on desired oval height.
- Row final shaping: decrease gently at ends to round the oval: sc across then dec at each short end row to taper. Fasten off leaving a long tail for stitching.
B — Ears (make 2)
- ch 5. Row 1: sc in 2nd ch from hook and across (4 sc).
- Row 2: ch1, sc across; Row 3: ch1, sc2tog at center to make tip—fasten off, leaving tail to sew. For slightly larger ears, add a row of hdc before decreasing. Add inner ear: a tiny ch3 loop sewn into ear center.
C — Optional muzzle (tiny puff)
- MR, 6 sc in ring, pull tight. Fasten off leaving tail. Sew to lower center of oval as little muzzle.
D — Assembly & face
- Sew ears to back of oval (slightly behind top edge) so they stick up. Sew the muzzle (if used) to center bottom area.
- Embroider eyes with small vertical stitches or French knots (use black thread). Add a small embroidered nose and smile (pink for nose, simple upside-down “V” + short vertical line).
E — Attach to barrette
- Cut a felt circle to same length as barrette plus 3–4 mm extra around. Center the felt over top of closed barrette.
- Position oval motif on felt where you want it to sit. Using yarn tail, stitch motif to felt with small stitches around base. Then stitch felt down to the barrette — loop through the barrette frame a few times for strength (needle through felt catches metal). Alternatively stitch motif directly onto the barrette (catch the clip seam) and then stitch felt to back to hide knots.
- Weave ends and trim.
F — Finishing
- Optionally use a tiny dab of hot glue under the felt for extra hold (use low temp and sparingly).
- Test the clip by opening and closing, ensuring motif is secure.
Styling ideas
- Make matching bunny pair for siblings. Use blush pink inner ears for a sweet blush look.
2. Crochet Mushroom Motif Hair Clip Pattern
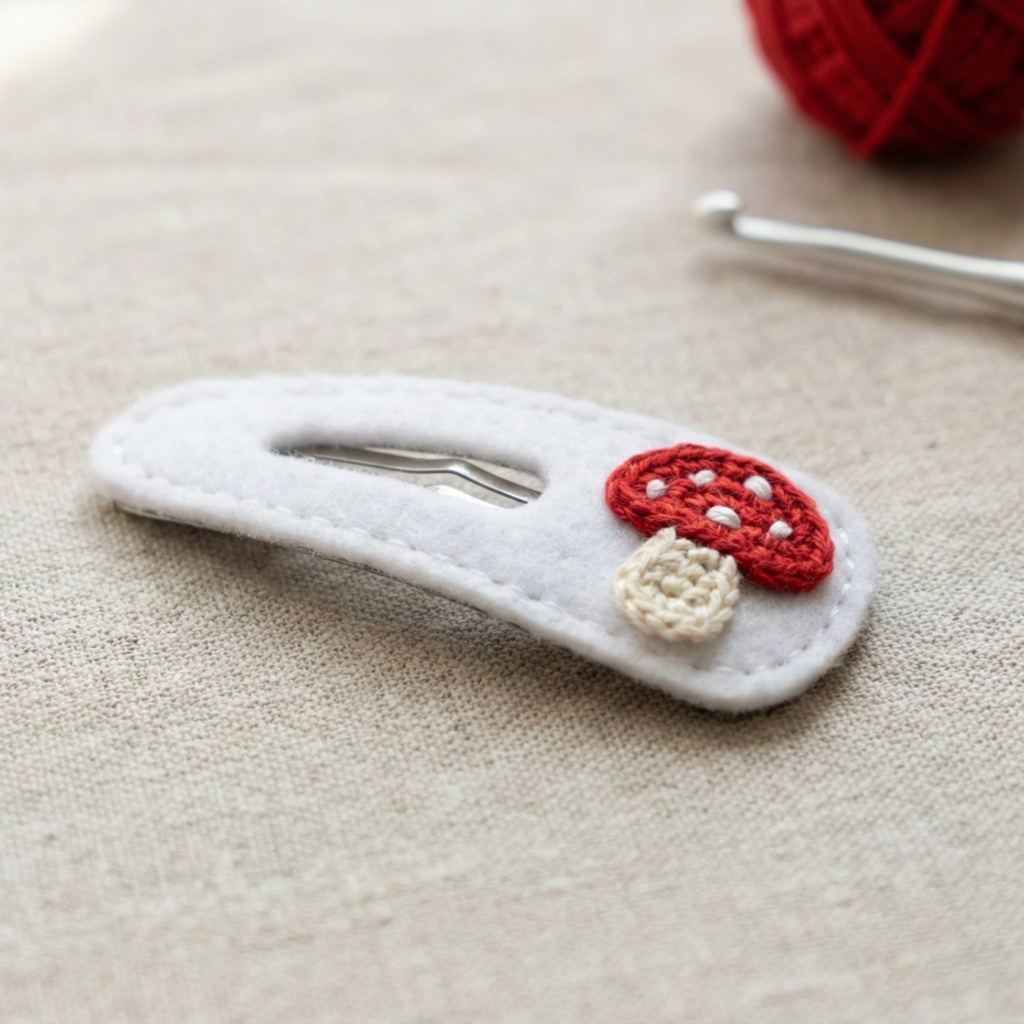
A whimsical mushroom motif — cute on a single clip or clustered across a few.
Skill level: confident beginner
Finished size: cap ~1.25–1.5 in wide; works well on snap clip or small barrette
Materials
- DK cotton in red (cap), cream (stem), white for spots, small amount of green for leaf accent (optional)
- Hook: 2.75–3.25 mm
- Snap clip / small barrette, felt backing, tapestry needle
Stitches used
MR, ch, sc, hdc, dc, inc, sl st
Pattern overview
Work a two-color cap and a small tubular stem, add white spots and sew to clip with felt backing.
Step-by-step
A — Cap (flat semicircle)
- MR, ch1, 6 sc in ring — pull tight and join. (6)
- R2: inc around (12).
- R3: sc1, inc around (18). Continue one more round if you want a wider cap: sc2, inc → 24 (adjust for size).
- Shape cap rim by working one round of dc (or hdc) around to create a slight overhang so it looks like a mushroom cap.
B — Stem (small tube)
- MR, ch1, 6 sc in ring; R2–R4: sc around to make short tube about 0.5–0.75 in tall. Fasten off leaving tail.
C — Spots & decoration
- Small spots: with white yarn embroider tiny French knots/dots across cap (sew in place with embroidery thread) or tack on tiny crocheted picot circles (MR, ch 2, sl st, fasten off).
- Add small leaf if you like: ch6, sc across, sl st to base and sew under cap.
D — Assembly
- Sew stem to underside center of cap; stuff lightly if needed so stem looks slightly rounded.
- Position mushroom on felt rectangle sized to cover barrette. Sew mushroom to felt, then sew felt onto barrette. For stronger hold, tack the cap directly onto barrette at two points then hide stitches with felt.
E — Finishing
- Trim loose ends, check spot security, and avoid any small beads if making for toddlers.
Variation
- Make a cluster of 3 small mushrooms on one long barrette—sew them in a slight arc for a gallery effect.
3. Crochet Lace Bow Hair Clip Pattern
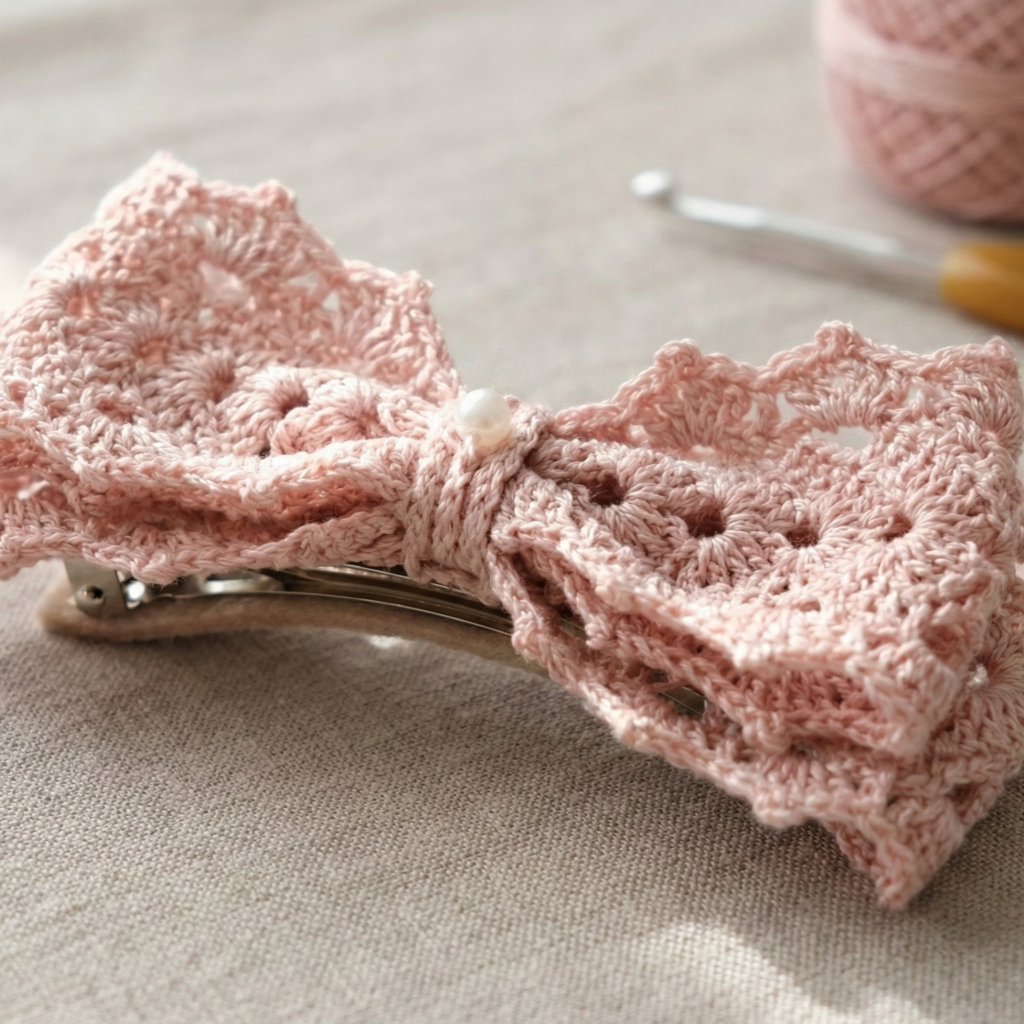
A delicate, lacy bow that looks chic and romantic — great for weddings or vintage-inspired outfits.
Skill level: intermediate (lace & shaping)
Finished size: bow width ~3–3.5 in; ideal for French barrettes
Materials
- Fingering or lace-weight cotton in blush, ivory, or pastel — ~10–20 yd
- Hook: 2.0–2.75 mm
- Small French barrette (4–6 cm), tapestry needle, narrow ribbon (optional)
Stitches used
ch, sc, hdc, dc, picot, shell (5 dc in same st), sl st
Pattern overview
Crochet a lace strip, gather into bow, add central knot and optional pearl, attach to barrette with felt.
Step-by-step
A — Lace strip (flat)
- Chain 40 (adjust for width). Row 1: sc across. Row 2: ch3, skip 2 sts, 5 dc in next st (shell), skip 2 sts, sc in next repeat across. Row 3: ch1, sc across (for stability). Repeat Rows 2–3 for 4–6 pattern repeats to get an elegant lace strip.
B — Form the bow
- Fold strip in half lengthwise and stitch short ends together if desired or leave finished edges exposed for a ruffled bow. Center the piece and wrap tightly with a narrow crocheted cord (ch 6, sc across 6 rows) or with a small ribbon to form a bow center. Sew the wrap in place.
C — Backing & attachment
- Sew the flat bow to a felt backing sized slightly smaller than the barrette. Make several hand stitches through the barrette’s metal plate and the felt/base to secure. For extra hold, stitch through the center knot into the barrette’s metal frame.
- Optionally sew a small pearl or bead in center (for older children/adults only).
D — Finishing
- Block the lace bow lightly for open shell shapes; adjust loops so bow is symmetrical.
Styling
- Great for bridesmaids or a delicate everyday look. Make in silk-blend thread for extra sheen.
4. Crochet Tulip Claw Hair Clip Pattern
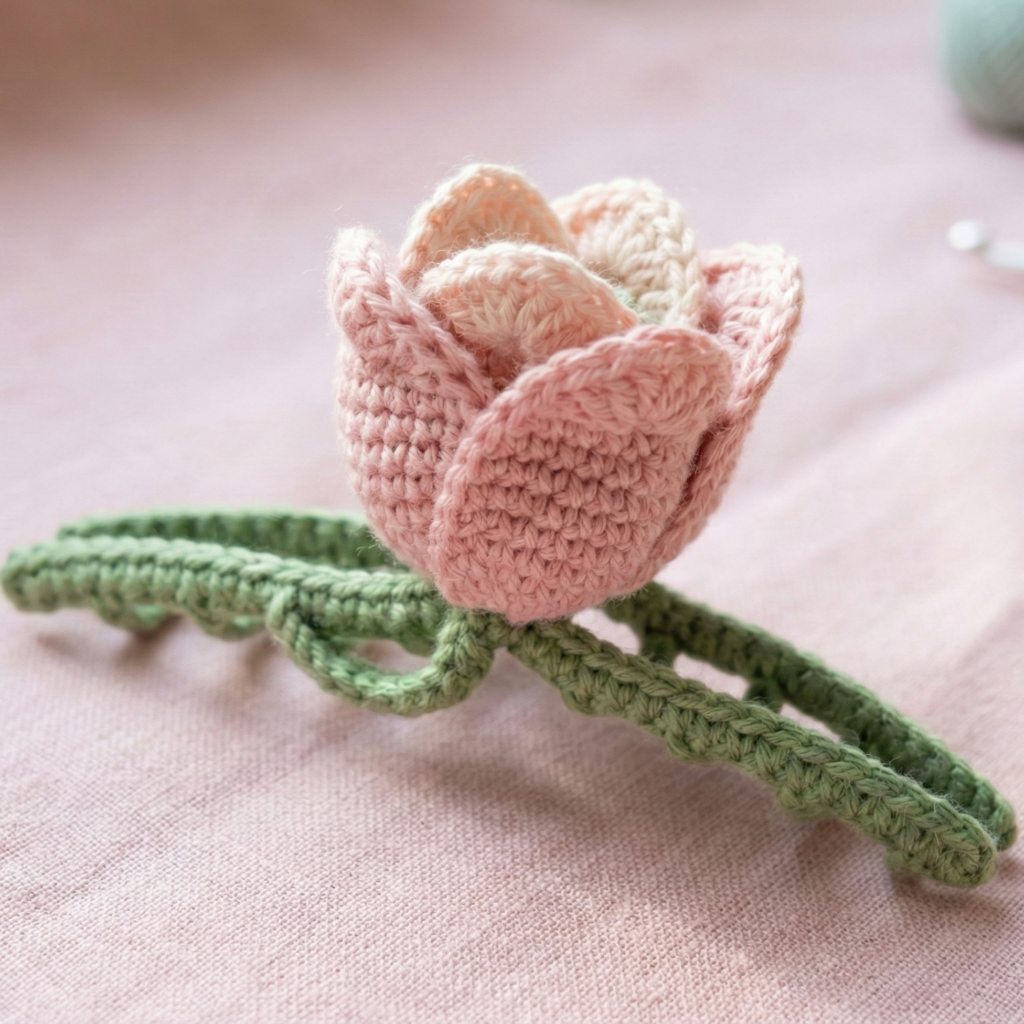
A tulip motif mounted to a claw-style clip — bold and fresh. This uses a secure looping method to attach to the claw hinge.
Skill level: intermediate (attachment method + shaping)
Finished size: tulip ~1.75–2.5 in tall; claw clip medium/large
Materials
- DK cotton (petal color + green)
- Hook: 3.0–3.5 mm
- Medium claw clip (~3–3.5 in across when closed)
- Small rectangle of sturdy fabric or crocheted band ~1–1.5 in wide by claw width to wrap under hinge, tapestry needle
Stitches used
MR, ch, sc, hdc, dc, dec, sl st
Pattern overview & special attachment
Work a tulip cup (3 overlapping petals) and attach it to a crocheted band or fabric strip that loops under the claw hinge and is stitched to both sides. That band distributes stress so the tulip stays centered.
Step-by-step
A — Tulip cup
- MR; R1: 6 sc in MR (6). R2: inc around → 12. R3–R6: sc around to build height (adjust).
- Make 3 petals: join yarn at even intervals near top and work each petal: (sc, hdc, dc, tr, dc, hdc, sc); finish and sew petal bases together to form a closed cup.
B — Fabric/crochet band for claw
- Option 1 (crochet band): ch to match claw width + 2 (e.g., 10–12 ch), work sc across for 8–10 rows to make a sturdy strip. Option 2: cut a fabric strip (canvas/felt) of same size and fold edges. Both should be about 1–1.5 in wide so they can loop under hinge.
- Center the band under the claw: place band behind hinge so it spans from outer side to outer side. Sew each end of the band to the claw’s outer sides using strong thread through metal openings (some claws have tiny holes — stitch through them; otherwise stitch around metal edges tightly). If you used crochet band, stitch directly through the crochet and clamp/secure with needle & thread.
C — Attach tulip
- Sew the tulip base to the band’s center, stitching through band and petal base to secure. Make multiple passes to ensure the tulip will not rotate. To hide underside stitches, glue or sew a small felt circle over the attachment on the band’s underside.
D — Finish & test
- Clip into hair gently to test grip. For added strength, run a couple stitches around the hinge and band.
Styling tips
- Make several tulips spaced along a large claw for a garden look. Use two colors for ombre petals.
5. Crochet Floral Thread Hair Clip Pattern
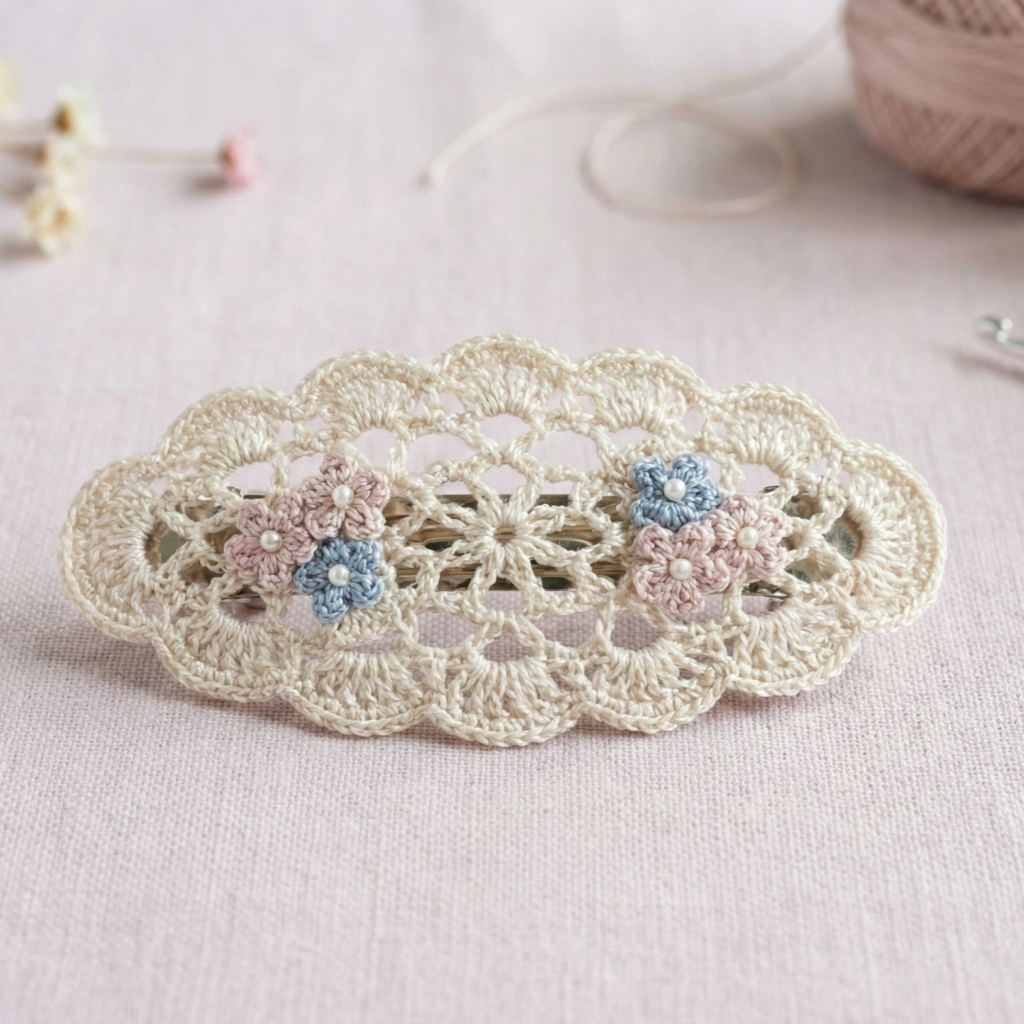
A delicate oval motif made in thread or fine yarn that sits on a barrette — airy and elegant.
Skill level: intermediate (thread work & motif shaping)
Finished size: oval ~2.5 × 1.25 in; sits nicely on a medium French barrette
Materials
- Crochet thread #10 OR fingering cotton for a slightly bolder look (choose one color for base and contrasting for tiny flower centers)
- Hook: 1.75–2.25 mm for thread; 2.5–3.0 mm for fingering
- French barrette, felt backing, embroidery thread for optional detailing
Stitches used
MR, ch, sc, hdc, dc, picot, shell, sl st
Pattern overview
Work a base oval with an open lacy fill (tiny daisies or small rose clusters), attach to barrette and back with felt.
Step-by-step
A — Lacy oval base (flat)
- ch 18 (or adjust to desired length). Join with sl st to form a loop for an oval foundation or work a long flat oval (foundation chain, then short rows to round ends). A practical method: chain 12, sc across, then work 3 sc into last stitch to turn and work back up chain to form flat oval; add a neat sc round to even edge.
- Work a lace fill pattern inside base: ch-arch rows, small shell or daisy stitches: ch 4, sk 2, sc across to make airy arches; next round work small petals in arches: (sc, hdc, 3 dc, hdc, sc).
B — Tiny flower motifs (make 3–4)
- MR; ch1; 6 sc in ring; R2: ch 3, sl st in next around to make loops; R3: in each loop work (sc, hdc, 3 dc, hdc, sc) for petals. Sew flowers to lacy base in pleasing cluster.
C — Assembly
- Sew motif to felt backing and then sew to barrette as previously described. Because thread is delicate, use many small stitches so the motif won’t move.
D — Finishing & embellishment
- Add tiny seed pearls to flower centers (sew them on) for a bridal look (not advised for boy toddlers). Block the motif carefully to shape lace.
Styling
- Wear as a romantic accent with braids or pinned to a low bun.
Final finishing tips & care
- Secure stitching: Use multiple passes and secure knots on the felt underside so children’s toys don’t snag stitches.
- Felt backing: Always cover raw stitches and metal edges with felt — it looks neater and protects hair/scalp.
- Glue caution: If you choose glue (hot glue) as reinforcement, use it sparingly and only after sewing. Avoid glue on parts that touch the scalp directly.
- Washing: Cotton clips: hand wash gently and air dry. Thread/lace: spot clean or hand wash gently, reshape while damp.
conclusion
You now have five full crochet hair clip projects that cover whimsical (bunny & mushroom), romantic (lace bow & floral thread), and fresh botanical (tulip claw) styles. Each pattern is fast, uses small amounts of yarn, and includes secure attachment methods so the clips hold up to wear. Pick one to start — snap a photo, make a pair for a friend, or mix motifs across clips for a statement set.