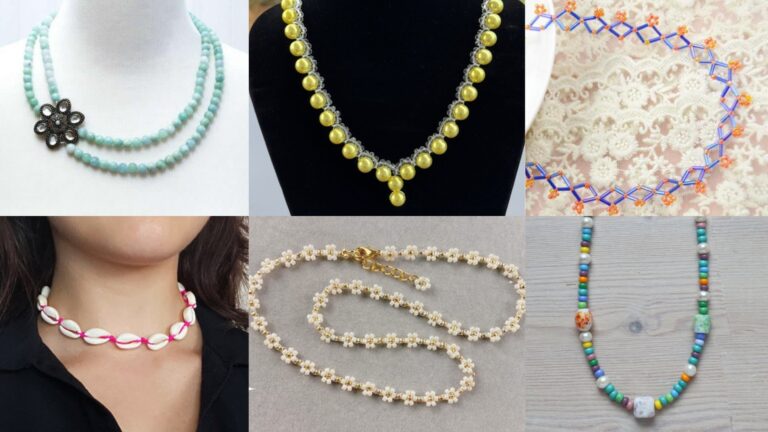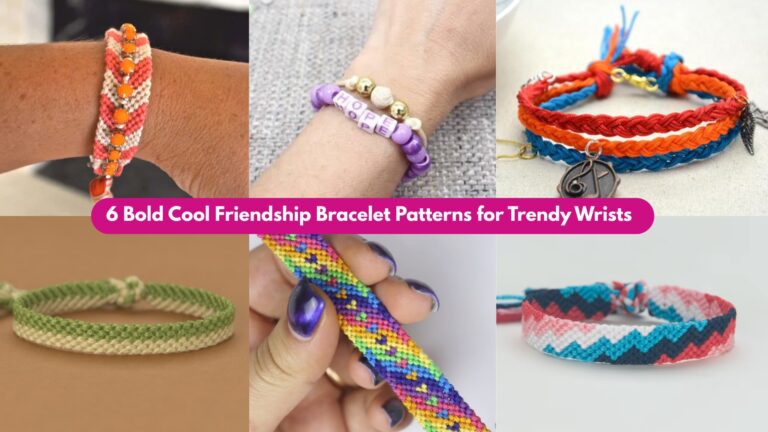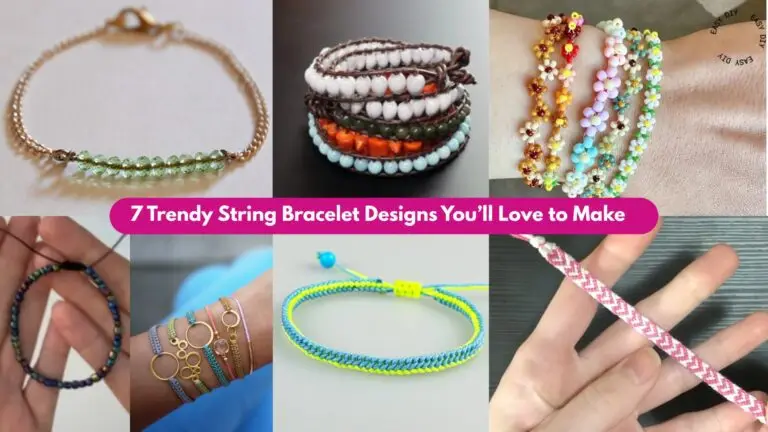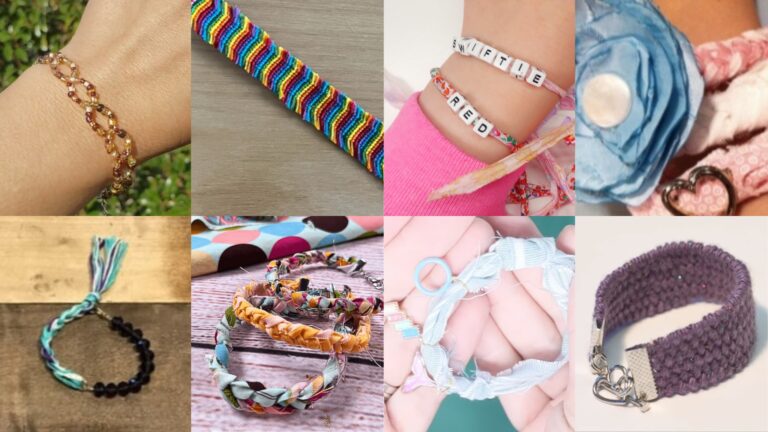
Bracelets are perfect little projects: fast, portable, and hugely satisfying. They’re great for using small yarn scraps, practicing new stitches, or making handmade gifts that look polished. Below you’ll find a friendly introduction (materials, sizing, tools, care) and five full bracelet patterns — Boho Bead, Romanian Cord, Whispering Lace, Bridal Lace Cufflet, and Floral Lace — each with a step-by-step guide, materials list, stitch notes, finishing tips and variations so you can make them today.
Quick essentials — materials, wrist sizing, tools, and abbreviations
Yarn & cords
- Crochet thread / fingering / sport (for delicate lace bracelets).
- DK / light worsted (for chunkier boho pieces).
- Waxed cord or jewelry cord (for Romanian cord technique).
- Beads/pearls: seed beads, small glass beads, or tiny faux pearls.
- Pick yarn appropriate for the bracelet style: soft cotton for summer, mercerized cotton for shine, or waxed cord for stability.
Hardware & findings
- Small lobster clasp + jump ring or small toggle/clasp set.
- Buttons (decorative) or snaps for closure.
- Jewelry glue (optional) and pliers when working with metal findings.
- Stretch cord can be used instead of closures for slip-on bracelets (but knot and glue the knot securely).
Tools
- Crochet hooks sized to yarn/thread: 1.5 mm up to 4.5 mm depending on yarn.
- Tapestry needle, small scissors, beading needle (if stringing tiny beads), pliers for jump rings.
Wrist sizing quick guide
- Child: 5.5–6.5 in (14–16.5 cm)
- Woman small: 6–6.5 in (15–16.5 cm)
- Woman average: 6.5–7.5 in (16.5–19 cm)
- Woman large / men small: 7.5–8.5 in (19–21.5 cm)
Decide desired ease: for snug fit use same as wrist measurement; for comfortable fit add 0.2–0.4 in (5–10 mm). Example: wrist 6.5 in → finished bracelet 6.75–7 in.
Gauge & how to compute length
Make a 1-inch swatch in the chosen stitch (or measure stitches per inch on a sample chain/row). Example: swatch shows 6 sc = 1 in. For a target finished inner circumference of 7 in, you need 6 × 7 = 42 stitches foundation (or the nearest stitch multiple required by the stitch pattern).
Abbreviations (US)
- ch = chain
- sc = single crochet
- hdc = half double crochet
- dc = double crochet
- tr = treble crochet
- sl st = slip stitch
- MR = magic ring
- inc = increase (2 sts in same st)
- dec = decrease (sc2tog)
- BLO / FLO = back loop only / front loop only
- rep = repeat
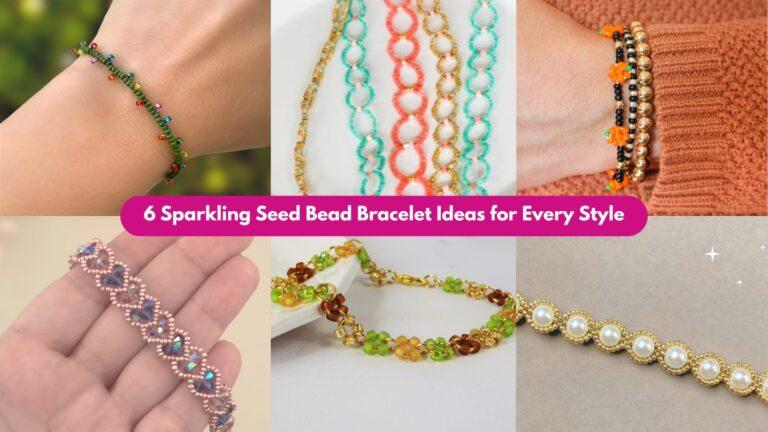
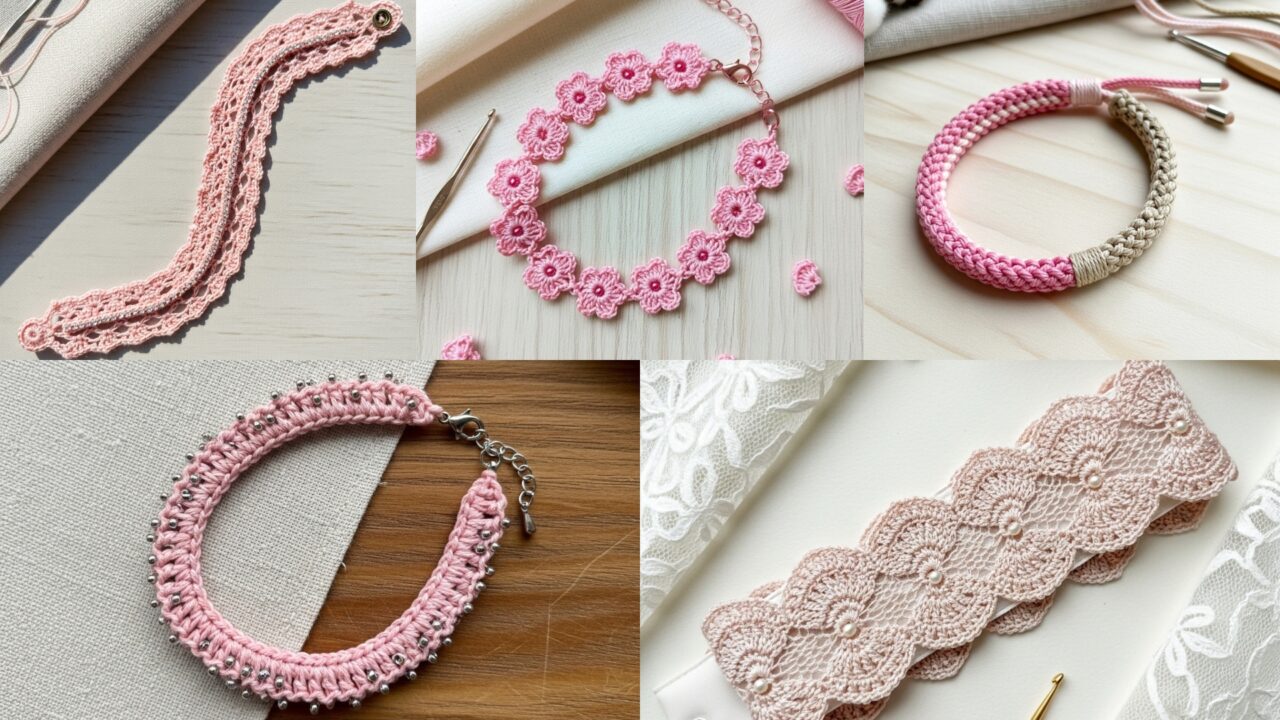
1. Crochet Boho Bead Bracelet Pattern
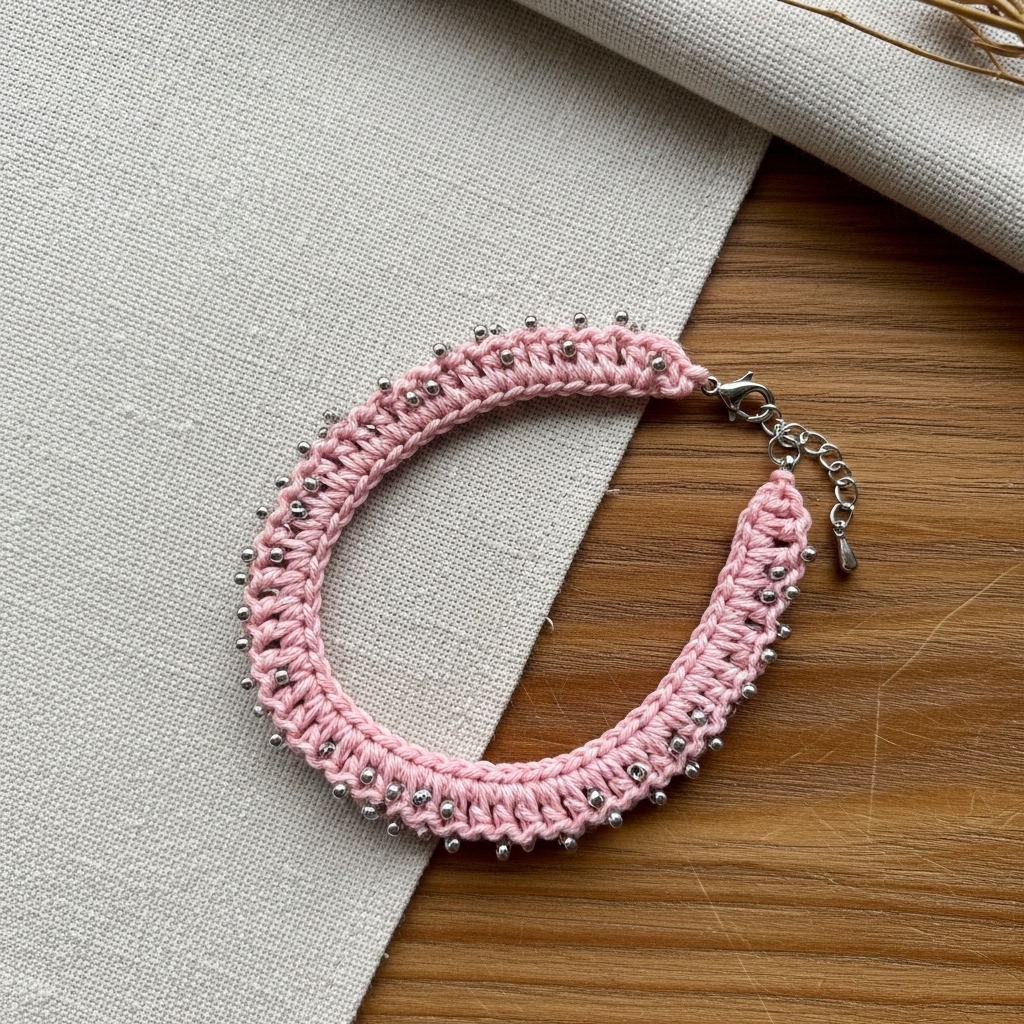
Lightweight, beaded, and perfect for stacking.
Skill level: confident beginner
Finished size (example): 7 in circumference (adjustable)
Materials
- Fingering/ sport cotton (soft pink or neutral) — ~20–25 yd.
- Tiny seed beads (size 6/0–10/0) — about 80–120 depending on spacing.
- Hook: 2.25–2.75 mm (choose tight enough to hold beads).
- 1 small lobster clasp + 2 jump rings (or elastic cord for slip-on).
Notes
You can pre-string beads onto yarn (or a beading needle + thread) and slide them into position as you crochet so the beads sit on top of the stitches.
Step-by-step
A. Prep
- String required number of seed beads onto yarn before starting (easy when using thread/fingering yarn and small beads). If using larger beads, plan bead placement by counting stitches.
B. Compute foundation
2. Make a small swatch in the stitch you’ll use (ex: sc). Suppose gauge = 6 sc = 1 in. For 7 in finished: 6 × 7 = 42 sc. You’ll make 42 foundation sc in the round or a strip to join.
C. Foundation & bead placement
3. Option A — in-the-round seamless:
- Ch 42, join carefully to form a ring (avoid twist). Round 1: sc in each ch around (42 sc).
- Round 2: sl st 1, (slide 1 bead up and sc next st) — the bead is worked into the top of stitch so it sits exposed. Repeat around. If beads are pre-strung, slide bead up before completing sc.
- Option B — flat strip (for closure):
- Ch 42; Row 1: sc in 2nd ch and across; Row 2: pick up bead on first stitch and sc to place bead on RS every N stitches as desired. Fasten off and seam ends.
D. Finishing
5. If worked in the round, sew in ends then attach a jump ring and lobster clasp: sew through last few stitches and secure a jump ring into the seam, then attach clasp. If flat, sew ends to create loop and add clasp.
E. Variations
- Make a triple-row bracelet by crocheting three narrow tubes joined at ends for layered look.
- Use tiny gemstone beads for a more luxe look. For delicate baby’s bracelet, swap metal clasp for button or make slip-on with a slightly overstretched elastic.
2. Crochet Romanian Cord Bracelet Pattern
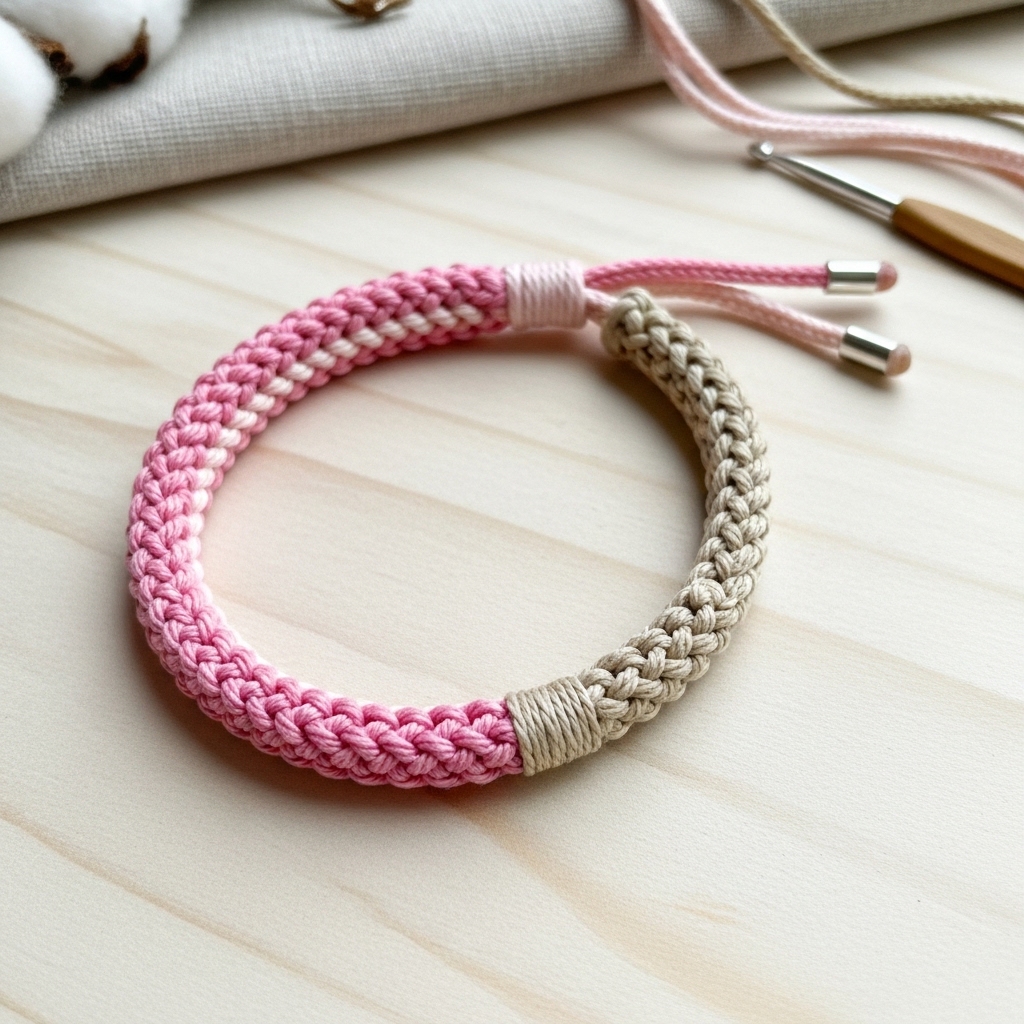
A sturdy cord that looks artisanal and finishes quickly — great for men or women.
Skill level: intermediate (tension + cord technique)
Finished size: 7–8 in (cord circumference) — makes one or multiple strands braided together
Materials
- Waxed cotton cord or hold two strands of fingering together (all pink is possible with cotton waxed cord dyed pink) — ~40–60 in total depending on width and braiding.
- Hook for cord (small) or use Tunisian/chain-based crocheting to make a tight cord.
- 1 clasp + 2 jump rings.
Technique overview
- Romanian cord = tightly crocheted chain with slip-stitch or a special cord stitch (e.g., Russian tatting/cord technique). One simple method: make an i-cord-style crochet rope (crochet chain and work into the back bumps to make round cord), or use freeform braided cords.
Step-by-step (simple crocheted tube cord)
A. Make tube cord
- Ch a multiple until desired length; example: to make 8 in finished when the cord doesn’t stretch, chain ~20 (you will coil to create thickness) — this varies widely so test a small cord first. A reliable method is to make a continuous crocheted tube by working ch 3, sl st into 2nd ch from hook and in back bump repeatedly to create a tight tubular cord.
- A consistent, simple method: crochet i-cord — ch 4, sc in 2nd ch from hook and across (3 sc), then continue: ch 1, turn, sc in back loops only of the 3 stitches (this rolls into a tube). Repeat until length is achieved. This creates a narrow, stable cord.
B. Make multiple strands
3. For a chunky bracelet, make 3 cords and braid or twist them together. Braid ends and whip stitch or bind with a short wrap of yarn (neat) to secure before attaching closures.
C. Attach findings
4. Sew or bind the cord ends into small metal end caps or wrap them with thread and stitch into a jump ring; attach clasp.
D. Finishing & styling
- For an all-pink aesthetic, use three shades of pink cords braided together. Use a sliding knot closure (shoelace style) for adjustable fit.
3. Crochet Whispering Lace Bracelet Pattern
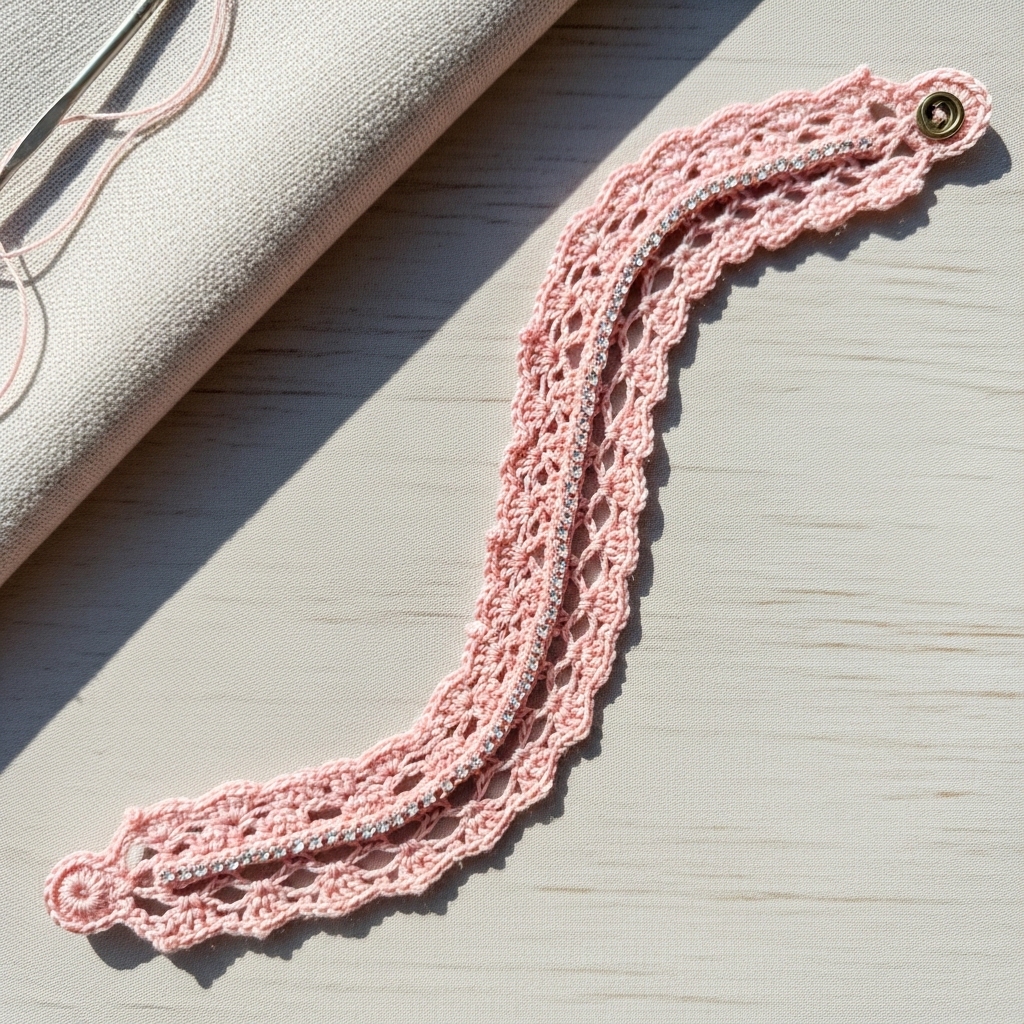
Delicate lacy strip — perfect for a subtle feminine look.
Skill level: intermediate (lace repeats)
Finished size: 6.75–7.25 in typical wrist; width about 0.5–1 in
Materials
- Crochet thread #8 or fingering cotton in blush pink — ~15–20 yd.
- Hook: 1.75–2.5 mm.
- Tiny button (or snap) for closure, or use a small lobster clasp.
Stitch pattern idea
A narrow repeating lacy pattern: ch 3 space shells or a picot edging for romantic finish.
Step-by-step
A. Swatch & multiples
- Make a small lace swatch. Example repeat is multiple of 6 + 2. If your gauge yields 8 repeats across 1 in, calculate needed repeats for wrist circumference.
- Suppose you want a 7 in bracelet and gauge gives 3 repeats per inch (1 repeat = 1/3 in). You need 3 × 7 = 21 repeats. Because repeat = 6 sts, total chain = 21 × 6 + 2 = 126 + 2 = 128 ch.
B. Foundation & first row
3. Ch 128. Row 1: sc in 2nd ch from hook across (128 sc). Turn. Or for a seamless look work in the round by joining at start.
C. Lace rows (example shell/picots)
4. Row 2: ch 4, skip 2 ch, sc in next, ch 4… (creates chain arches).
5. Row 3: into each ch4 space work sc, hdc, 3 dc, hdc, sc for shell petals. Repeat until rectangle reaches desired width (e.g., 6–8 rows to make 3/4 in tall). Add delicate picot scallop: sc across outer edge and picot (ch3, sl st in 1st ch) at every 3rd sc.
D. Make closures
6. If you made flat strip: sew ends together to form a loop and add a small button loop on one end and a button at opposite end for adjustable closure. Alternatively fold ends and attach small jump rings for lobster clasp.
E. Blocking
7. Lightly block to open lace and even stitches; this makes the bracelet behave like jewelry.
F. Variations
- Add a line of tiny beads along a center row (using beading needle when making the shell row) so beads sit into shell centers for a whisper of sparkle.
4. Crochet Bridal Lace Cufflet Bracelet Pattern
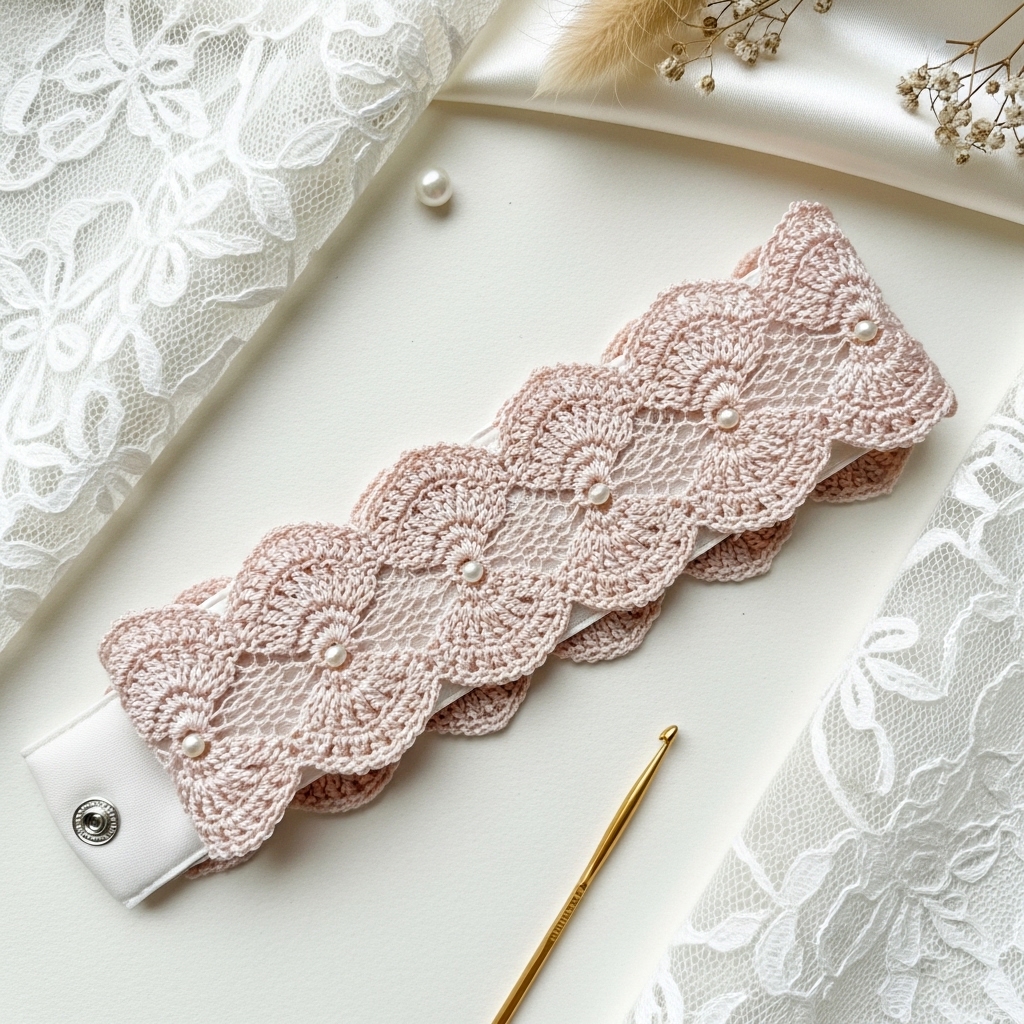
An elegant cufflet for weddings — wider lace with a pearl or crystal accent.
Skill level: intermediate → advanced (wider lace + lining)
Finished size: 7 in circumference; width 1.5–2 in typical
Materials
- Fine cotton or lightweight silk blend in blush/ivory pink — ~30–40 yd.
- Hook: 1.75–2.75 mm.
- Small pearls or tiny rhinestones, sewing needle.
- Soft fabric lining (optional) and snap or button closures.
Design overview
A wide lace cuff worked flat into a long rectangle that is lined for comfort and finished with snaps or button loops. Pearls are sewn onto scalloped edge.
Step-by-step
A. Swatch & pattern
- Swatch a lace motif (a 6–8 row repeat that is wide) and measure stitches per inch. Example motif width 1 in with 12 stitches. For 7 in circumference you need 12 × 7 = 84 sts foundation (round up to pattern multiple).
B. Foundation & lace
2. Ch foundation to match multiple (example 84 + 2 turning ch). Row 1: sc across to stabilize. Row 2–X: work the lace repeat (shells, picots, chain spaces, small clusters) until rectangle reaches about 1.75 in high for cufflet width.
C. Pearl accent
3. Sew small pearls into center of lace motifs or along scallop points: use fine thread and make several passes to secure each pearl.
D. Lining
4. Cut a soft lining strip of silk or cotton sized slightly smaller than lace rectangle. Hand sew lining into lace with small stitches so edges are hidden and lining sits flush. Lining prevents snagging on dress and makes cuff comfortable.
E. Closure
5. Add small sew-in snaps at ends (one male/female snap set). Alternatively sew tiny buttons and make a picot loop for closure.
F. Finishing
6. Weave all tails, press gently, and ensure pearls are securely sewn.
G. Variations
- Make cuff shorter for a slim look, or wider (2.5 in) for a dramatic statement.
- Replace pearls with tiny pearl-faced beads or Swarovski crystals for sparkle.
5. Crochet Floral Lace Bracelet Pattern
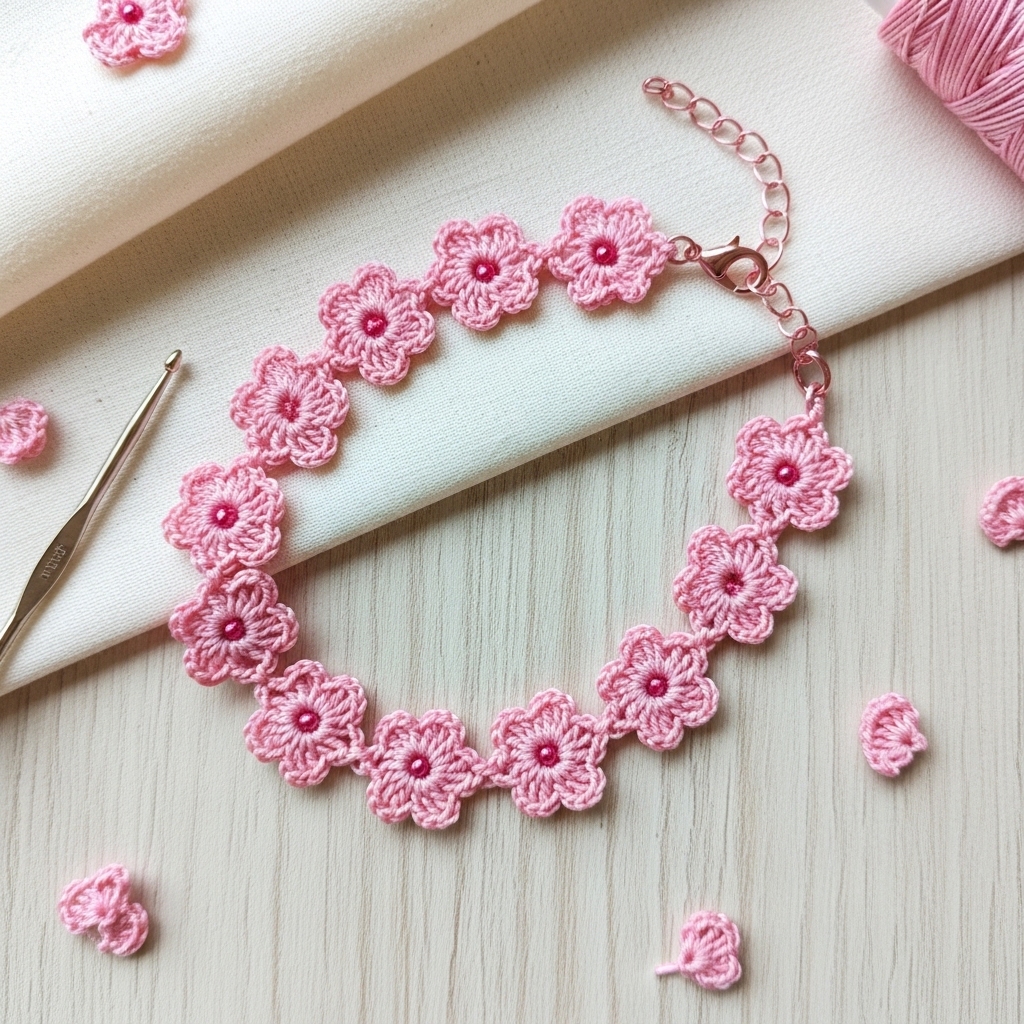
A dainty bracelet made of connected tiny floral motifs — repeat several motifs to wrap a wrist.
Skill level: confident beginner → intermediate (motif join)
Finished size: each motif ~1–1.25 in diameter; 6–8 motifs for a 7 in bracelet
Materials
- Fingering cotton or thread in pink — ~25–40 yd.
- Hook: 1.75–2.5 mm.
- Tiny jump rings (optional), lobster clasp if you want opening.
Motif idea
A five-petal tiny crochet flower motif worked flat and joined as-you-go into a chain.
Step-by-step
A. Tiny flower motif (make many)
- MR, ch1, 6 sc into MR; sl st to join. R2: ch 4, sl st in next st × 6 to form 6 loops. R3: in each loop work (sc, hdc, 3 dc, hdc, sc) to make petal. Fasten off leaving tail. Make 6–8 motifs.
B. Join-as-you-go chain
2. Join motifs in a row by slipstitching through the petal tips of the previous motif when working the last round of the next motif (join-as-you-go). This makes a neat connected chain that sits flat on the wrist.
C. Construct bracelet
3. Make enough motifs to reach wrist circumference when laid flat (test by wrapping motif chain around wrist). For 7 in, if each motif is 1 in wide, make 7 motifs.
D. Closure options
4. Sew a small jump ring to one motif end and attach lobster clasp to other end via stitched loop. For a softer closure, make a short ribbon tie loop with matching ribbon and thread through last motif petal.
E. Finishing
5. Block motifs gently, weave ends, and check joins are secure.
F. Variations
- Add small bead center to each flower; sew contrasting pink in the center for focal points.
- Make alternating sizes of motifs for a textured bracelet.
Final finishing & care tips
- Secure knots & ends: Weave in yarn tails at least 1 in (2.5 cm) into the body and knot inside stitches for extra security, especially for items that will be handled a lot.
- Metal closures: Close jump rings fully with pliers so beads or loops cannot slip off.
- Laundering: Hand wash delicate thread/lace bracelets; machine wash wool/acrylic on gentle in a mesh bag. Air dry flat to keep shape.
- Storage: Store pearls and beaded bracelets flat to avoid stretching; keep metal away from moisture to prevent tarnish.
conclusion
These five bracelets give you wearable variety you can finish in a couple of hours each: the earthy Boho Bead tube for everyday stacking, the sturdy artisanal Romanian Cord, the romantic and airy Whispering Lace, the elegant Bridal Lace Cufflet for special occasions, and the playful Floral Lace motif chain. Start by choosing yarn and clasp that suit the wearer (and the all-important wrist measurement), swatch for gauge, and pick the finishing style you like best (snap, button, lobster clasp or elastic slip-on).