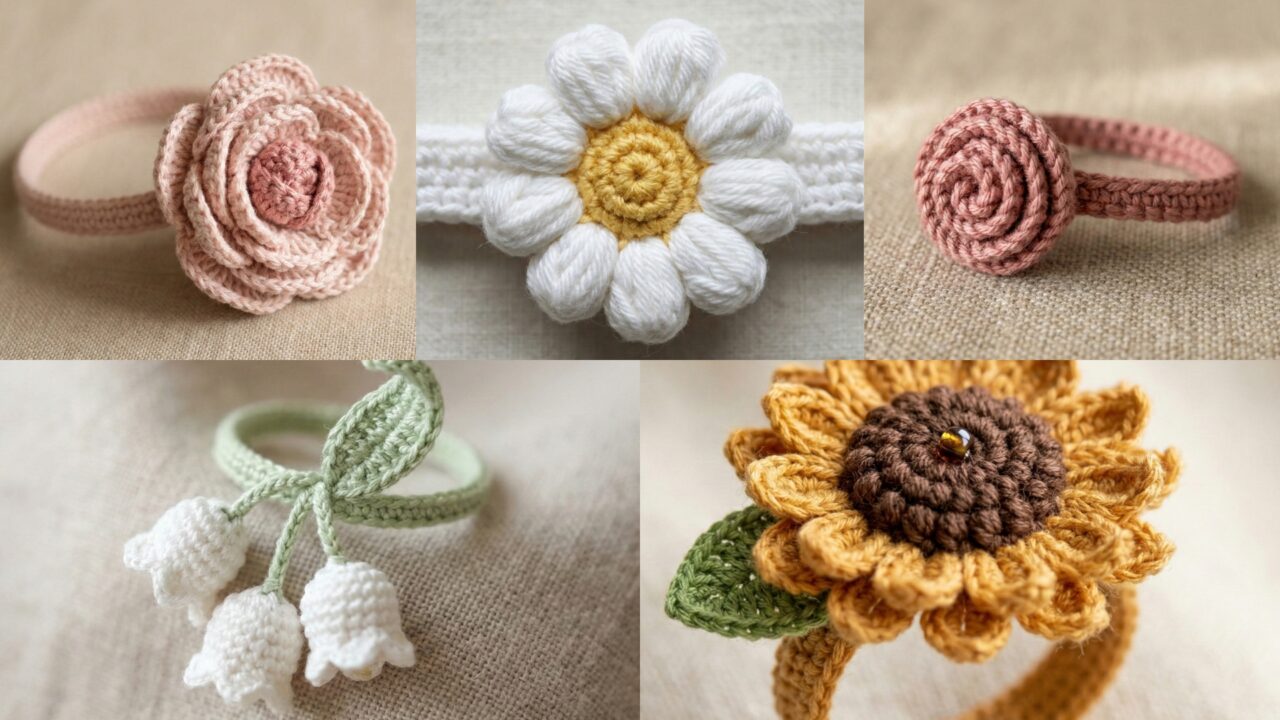
Delicate, handmade crochet rings are a lovely way to add a personal, botanical touch to your everyday look. They’re quick to make, use very little yarn, and translate beautifully to gifts, bridesmaid accessories, or a charming small shop item. Below are five full patterns — Sunflower, Peony, Puffy Daisy, Micro Rose, and Lily of the Valley — each with materials, skill level, exact step-by-step construction, resizing notes, finishing tips, variations, and care instructions. Patterns are written for an average adult ring size as an example; I include clear guidance so you can adjust the band circumference to fit any finger.
Quick essentials for floral rings
Materials (common to many patterns)
- Fine crochet thread or lace-weight yarn for delicate rings: Size 10 cotton thread (or fine sport weight yarn held single) works well. For puffier flowers use sport or DK held with fine cotton.
- Crochet hooks: 0.9–1.75 mm for thread; 2.25–3.5 mm for lightweight yarn. Choose a hook that gives firm, neat stitches.
- Small beads, seed beads, or tiny pearls for centers (optional) — sew on securely.
- Sharp scissors, tapestry needle, small jewelry jump ring (optional if converting to pendant), ring mandrel or tape measure for sizing.
- Optional: thin elastic thread for flexible bands (sewn into band interior).
Stitch abbreviations (US)
- MR = magic ring
- ch = chain
- sl st = slip stitch
- sc = single crochet
- hdc = half double crochet
- dc = double crochet
- tr = treble crochet (UK tr = dc)
- picot = ch 3, sl st in base (or ch 2 sl st depending on size)
- rep = repeat
- BLO / FLO = back/front loop only
Sizing basics
Measure finger circumference: wrap a soft tape around the base of the finger and record inches or millimetres. Example adult sizes (approximate inner circumference):
- Size 6 = 51.5 mm (2.03 in)
- Size 7 = 54.4 mm (2.14 in)
- Size 8 = 57.2 mm (2.25 in)
Because thread and tension vary, always swatch or measure as you work: make the band, then test on your finger or mandrel and adjust stitch count. I provide an example band stitch count for a sample gauge; use it as starting point and scale.
How to adjust band length
- Crochet a small gauge strip in your planned band stitch — measure stitches per mm/inch.
- Multiply your stitches-per-inch by the desired inner circumference (in inches) and round to the nearest multiple required by the band stitch repeat.
- If you need flexibility, make the band slightly smaller and add a tiny elastic loop sewn inside the band to allow stretch.
1. Crochet Sunflower Ring Pattern
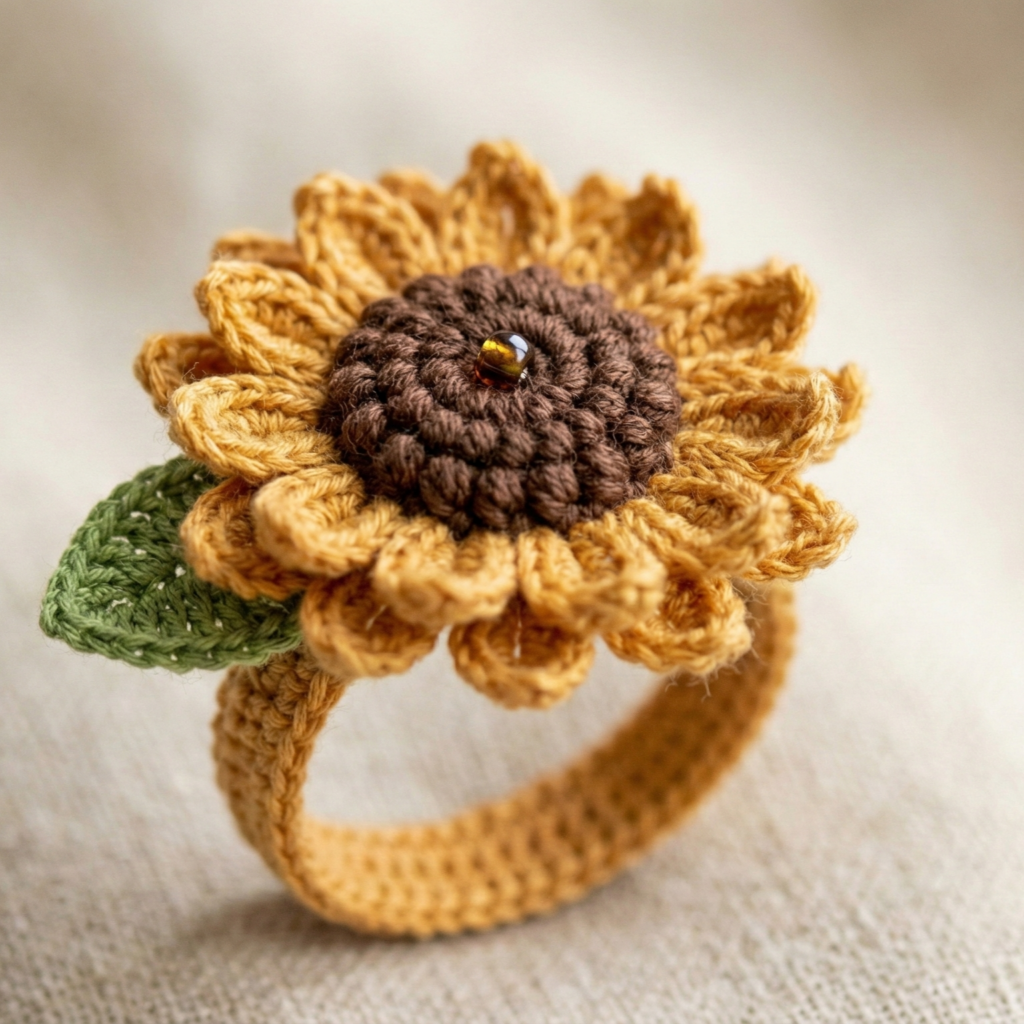
Style: tiny sunflower with raised center and narrow band — cheerful and textured.
Skill level: confident beginner.
Finished size example: flower diameter ≈ 1.25–1.5 in (3–3.8 cm) on a band sized to inner circumference 57 mm (size 8) — adjust band instructions below.
Materials
- Size 10 crochet cotton thread (or sport-weight yarn) — small scraps of gold/amber (petals), dark brown (center), green for tiny leaf if desired.
- Hook: 1.5 mm for thread; 2.5–3.0 mm for sport yarn.
- Small brown seed bead (optional).
- Tapestry needle.
Gauge (example)
- 10 sc = 1 inch in your chosen thread with your chosen hook — measure your own gauge to adjust band stitch counts below.
Pattern
Center (raised textured disc)
- MR. Round 1: ch 1, 8 sc in MR, sl st to join — 8 sc. Pull ring closed.
- Round 2: ch 1, sc in same st, inc (2 sc in next) repeat around — 12 sc. Join.
- Round 3: ch 1, sc in next 2 sts, inc repeat — 16 sc. Join. Fasten off. (This creates a small circular base to sew petals to.)
Petal round (make 14 petals)
- Join petal color to any st on round 3. Ch 5, sl st into same st — this forms loops for petals. Repeat around to form 14 loops (adjust number so petals are nicely spaced; 12–16 loops works depending on desired fullness). Sl st to join and fasten off if you prefer separate petals.
- Form petals: in each ch-5 loop work (sl st, sc, hdc, 3 dc, hdc, sc, sl st). Fasten off and weave tails to back. Press gently, shaping petals outward.
Backing & finishing center
- With brown yarn, embroider a small circle over the center disc using tight sc embroidery (surface sc) or attach a small seed bead by sewing through center to create sunflower seed look. Alternatively, use tiny French knots with brown thread for texture.
Band (example for Size 8, 57.2 mm / 2.25 in)
Calculate stitches: using example gauge 10 sc = 1 in → 2.25 in × 10 = 22.5 → round to 22 or 24 sc. The petal pattern does not require a multiple, so 22 sc is fine for a snug fit; 24 sc for slightly looser.
- Band: ch 23 (or 25); join to form ring, being careful not to twist. Round 1: sc in each ch around — 22 or 24 sc. Join.
- Rounds 2–4: sc in BLO (creates a small ridge) around for 3 rounds — this gives a neat band thickness and a fold line on inside. Fasten off, weave ends.
- Sew sunflower disc onto band top: position the center in the middle of the band so flower sits on top of finger when band is worn. Sew through both the flower base and the band to secure, hiding knots on the inside.
Variations & tips
- Make petals longer (ch 7) for a larger effect.
- Add a tiny leaf appliqué to one side: ch 6, sc in 2nd ch, hdc, dc, hdc, sc; fasten and sew to band.
- Use variegated thread for rustic sunflower tones.
Care
- Hand wash gentle; reshape and dry flat. Avoid snagging petals on jewelry.
2. Crochet Peony Ring Pattern
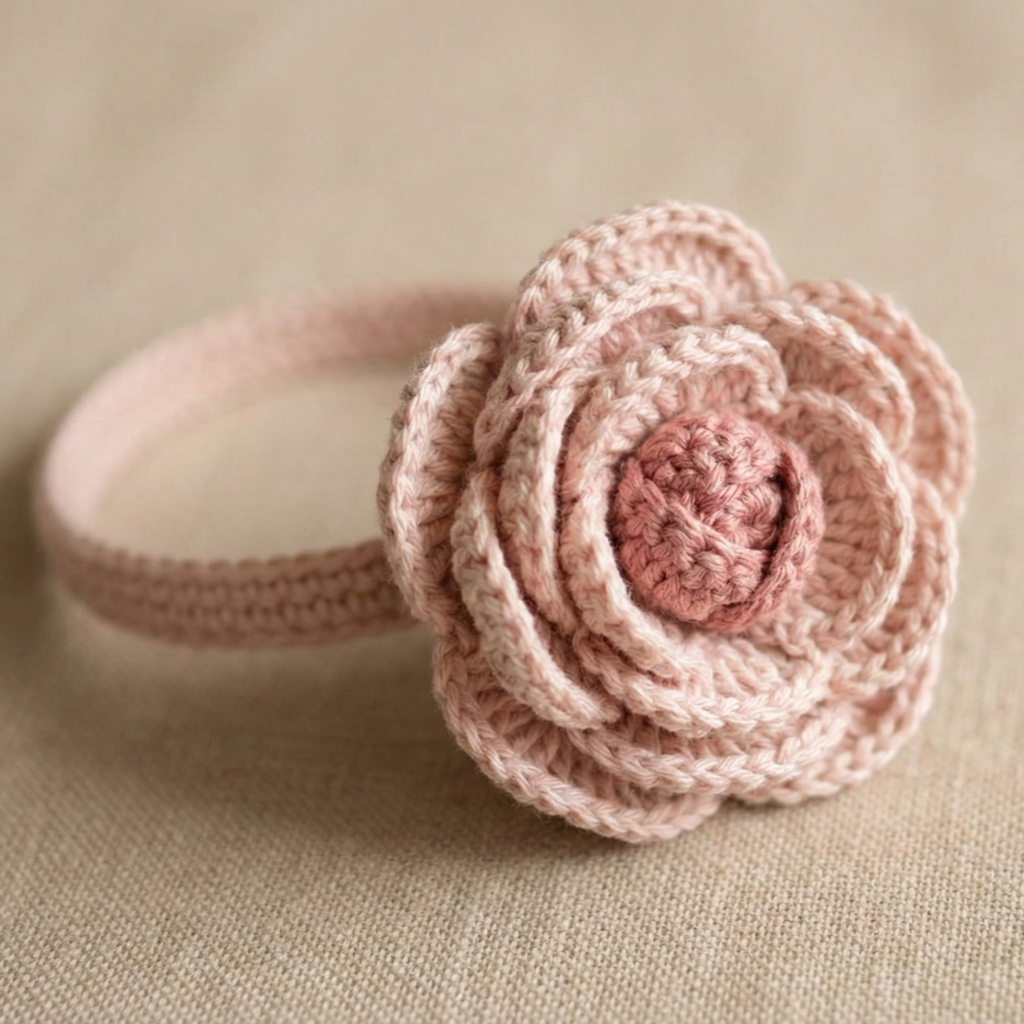
Style: layered, ruffled peony bloom with a soft, voluminous look — romantic and statement-making.
Skill level: intermediate (working layered rounds and creating ruffles).
Finished size example: bloom diameter ≈ 1.5–2.0 in (3.8–5 cm); band sized to 54 mm circumference in example.
Materials
- Fine cotton thread or lightweight yarn in blush/peony color; small amount of pale yellow for center (optional).
- Hook: 1.5–2.25 mm for thread; 2.75–3.5 mm for yarn.
- Tapestry needle.
Pattern
Layer 1 — center small rosebud
- MR. Round 1: ch 1, 6 sc in MR, sl st to join (6 sc).
- Round 2: ch 1, in each st work (sc, ch 2, sc) around to make tiny picot loops — sl st to join. Fasten off small tail for sewing.
Layer 2 — inner ruffle
- Join peony color to the base. Round 3: into each ch-2 loop from Round 2 work (sl st, sc, hdc, 3 dc, hdc, sc, sl st). This forms small petals densely arranged. Sl st to join.
Layer 3 — outer ruffle (wider petals)
- Round 4: ch 4, sl st into base between petals around to create larger loops (adjust count to make ~8–12 loops). Join.
- Round 5: in each ch-4 loop work (sl st, sc, 2 hdc, 5 dc, 2 hdc, sc, sl st) for larger ruffled petals. Fasten off, weave ends to back.
Band (example size 7 — 54.4 mm / 2.14 in)
Gauge and math: if 10 sc = 1 in, 2.14 in × 10 = 21.4 → choose 21 or 22 sc. For lacy peony you may want tighter fit: use 21 sc.
- Band: ch 22 (or 23), join carefully. Round 1: sc around. Rounds 2–4: sc BLO around to create a neat inner ridge. Fasten off.
- Assembly: sew inner layered peony centrally to band by stitching through the flower base and band. For extra volume, add a tiny stuffing dot between inner layers before sewing the outer petal layer down (this is optional and must be small so ring remains wearable).
Variations & tips
- Work petals in two slightly different shades for realistic depth: lighter at tips, darker at base.
- Make a cluster of two mini peonies offset on the band for asymmetry.
Care
- Hand wash and reshape; avoid compressing petals during storage.
3. Crochet Puffy Daisy Ring Pattern
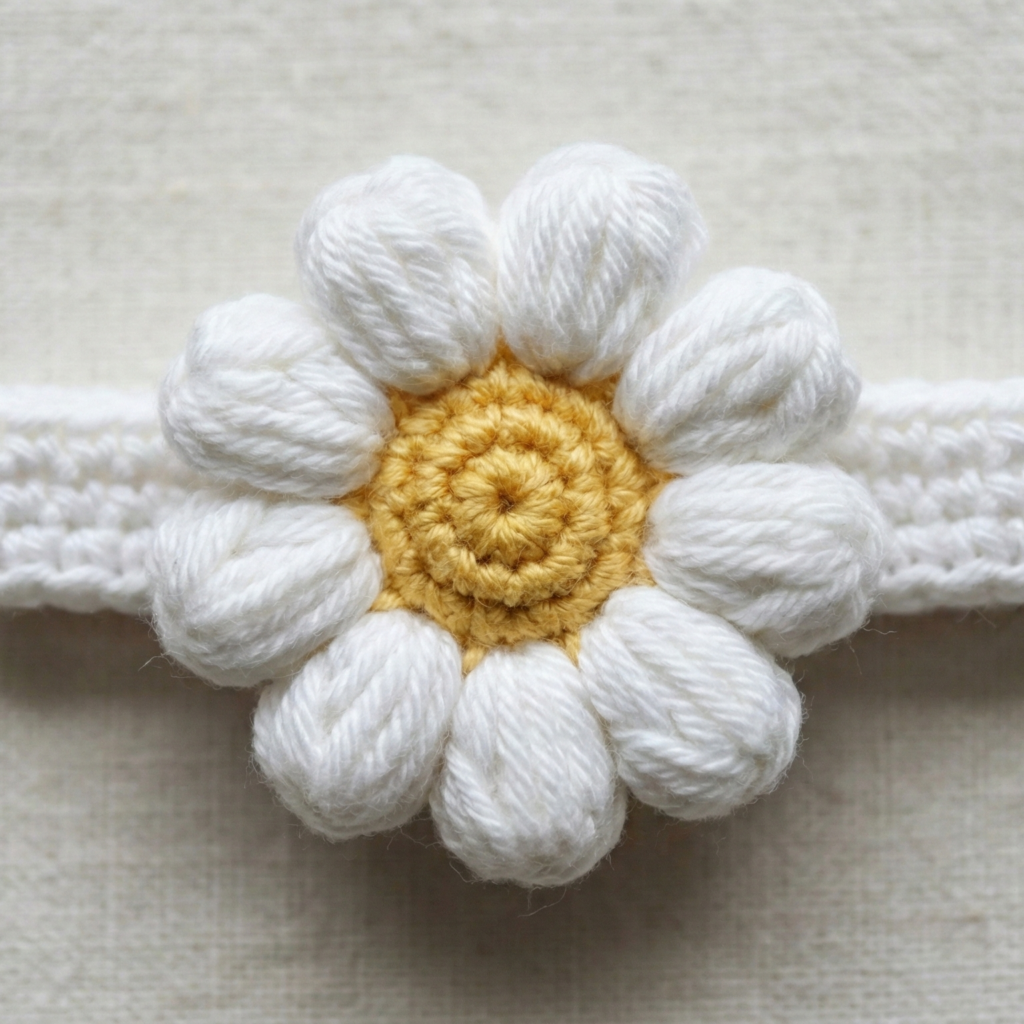
Style: cheerful daisy with puffed petals made using puff or bobble stitches for a textured look.
Skill level: intermediate (puff stitches).
Finished size example: flower diameter ≈ 1–1.25 in (2.5–3 cm); band example for size 6 (51.5 mm).
Materials
- Size 10 cotton thread or sport yarn in white (petals) and yellow (center).
- Hook: 1.5–2.5 mm depending on thread.
- Tapestry needle.
Pattern
Center
- MR. Round 1: ch 1, 8 sc in MR; sl st join. Fasten off center with yellow (or leave as base for attaching a bead).
Puffy petals (8–10 petals)
- Join white to any st on center edge. Ch 3, puff stitch in next st, ch 1, sl st into next st — repeat to create petal loops. (Puff stitch: yo, insert hook into stitch, pull up loop — repeat 3–4 times to create 4–5 loops on hook, yo and pull through all loops, ch 1 to close puff). Work around to make 8–10 puff loops.
- In each puff loop work: sl st into loop, sc, (puff), sc, sl st to shape a voluminous petal. Alternatively work a 3-dc cluster for shorter puffs.
Band (size 6 example)
Calculate: size 6 circumference ≈ 2.03 in; 10 sc per inch → 2.03 × 10 = 20.3 → choose 20 sc.
4. Band: ch 21, join; sc in each ch around for 3 rounds. For puffy daisy you can add 1 round of picot edge inside to grip finger: sc, ch 3, sl st in base around inside of band.
- Sew daisy on top of band, securing puffs evenly. Hide knots inside.
Variations & tips
- Use a tiny seed bead or French knots in yellow for the center for extra texture.
- Make smaller mini daisies and create a ring with three tiny daisies spaced evenly.
Care
- Puff stitches flatten if pressed; keep ring stored flat or in a small jewelry box to protect petals.
4. Crochet Micro Rose Ring Pattern
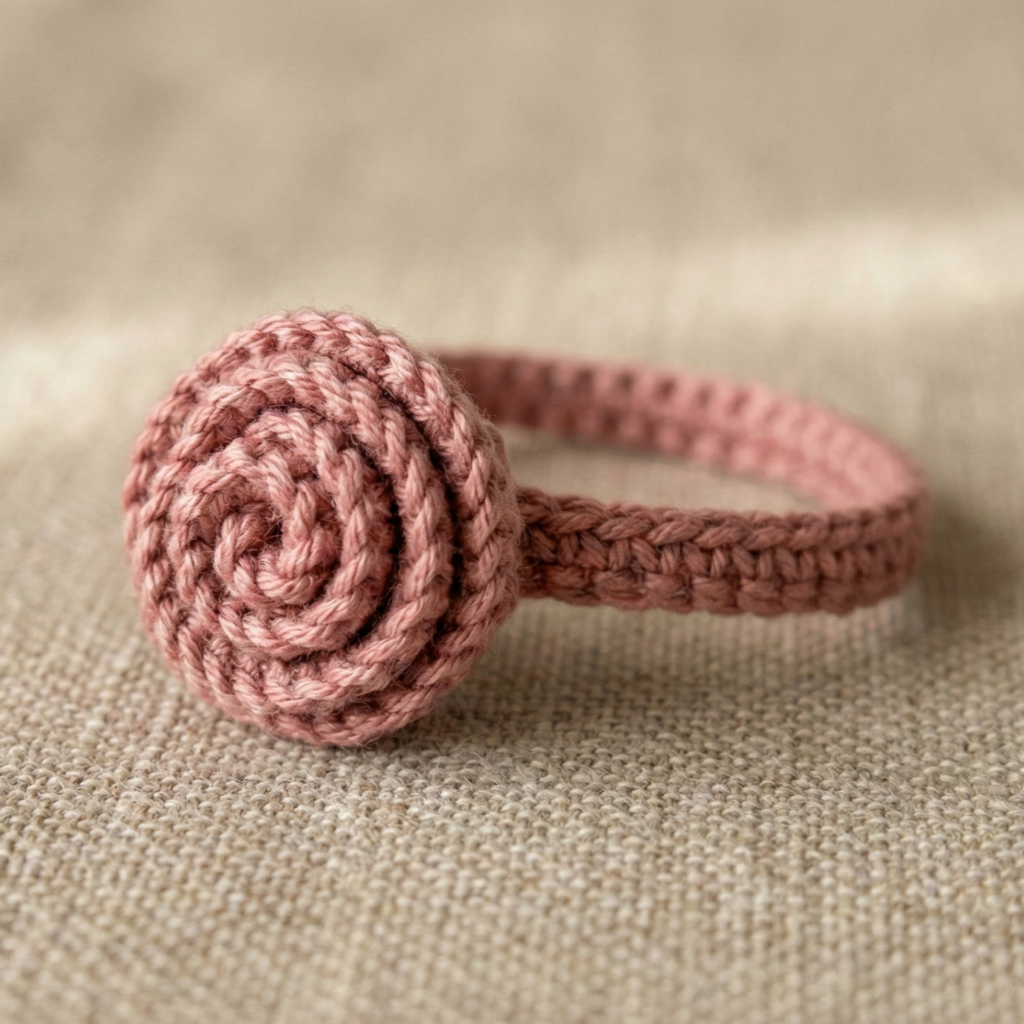
Style: tiny spiraled rose — elegant, minimalist, and ideal for stacking.
Skill level: beginner → confident beginner (working spiral roses).
Finished size example: rose diameter ≈ 0.75–1.0 in (2–2.5 cm); band example for 54 mm (size 7).
Materials
- Fine thread (size 10) or very light sport yarn.
- Hook: 1.25–1.75 mm for thread or 2.5–3.0 mm for sport.
- Tapestry needle.
Pattern
Spiral rose (one-piece)
- Ch 20 (if using thread, fewer chains — ch 12–14 is often enough; test on your yarn). Example uses ch 18 for a medium micro rose.
- Row 1: sc in 2nd ch from hook and across — creates a narrow strip. Fasten off leaving a long tail.
- Roll strip tightly from one short end to the other, spiraling to create a rosebud shape. Secure by sewing along the bottom edge with the long tail using a tapestry needle — stitch through the layers and into the band when attaching. This creates a neat spiraled rose without shaping rounds.
Alternative method (crocheted spiral flower)
- MR, ch 2, work 15 dc into MR and do not join; ch 2, continue in spiral working dc in each stitch while increasing occasionally to form a flat spiral. When spiral reaches desired diameter, fasten off and roll the spiral into a rose shape, sewing base to hold.
Band (example size 7)
- Using your gauge, make the band: ch appropriate count (e.g., 22 sc). Join; sc 2–3 rounds. Optionally pick up stitches around band and work 1 round of sc in BLO so the top edge is smooth.
- Sew rose to band: stitch through base of rose spiral into the top center of band; go through multiple layers to secure. Knot ends and hide tails.
Variations & tips
- Stack two micro roses on one band with small gap for layered look.
- Make matching micro-rose studs or necklace pendants with the same method.
Care
- Micro roses are robust if sewn tightly; machine wash gentle only if thread/yarn allows, otherwise hand wash.
5. Crochet Beautiful Lily of the Valley Ring Pattern
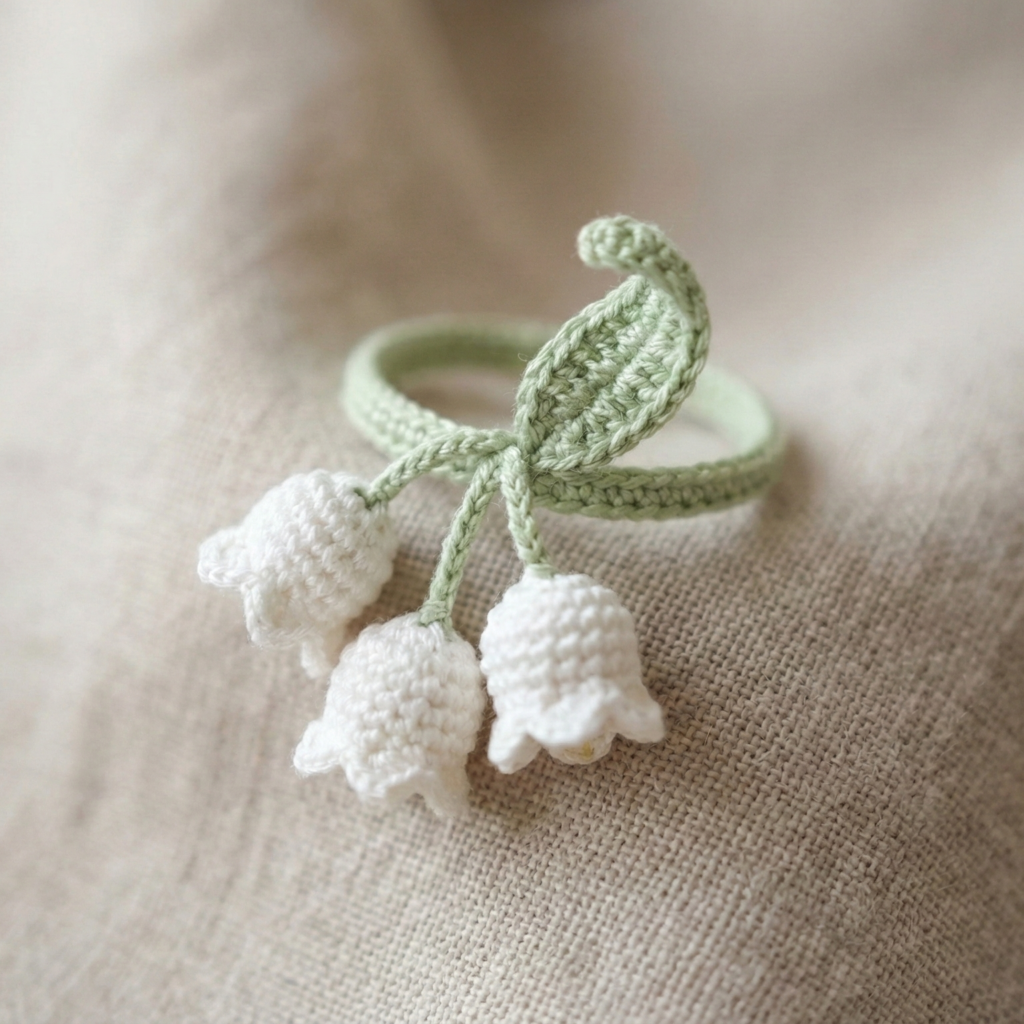
Style: delicate lily-of-the-valley sprays — a dainty chain of tiny bell flowers along a thin band, ideal for a refined everyday look.
Skill level: intermediate (tiny bell motifs and assembling into a cluster).
Finished size example: cluster width ≈ 1 in; band for size 6–7 depending on gauge.
Materials
- Size 10 crochet thread or similar in white (bells) and pale green (tiny leaves).
- Hook: 1.25–1.75 mm.
- Tapestry needle.
Pattern
Tiny bell motif (make 5–7 small bells per ring)
- Start with MR. Round 1: ch 1, 6 sc in MR, sl st to join (6 sc).
- Round 2: ch 1, sc in next st, picot (ch 3, sl st in base) repeat around to create tiny bead-like openings — or do instead: ch 1, sc, hdc in next for slightly open bell. Fasten off leaving short tail. Each bell should be very small ~4–6 mm wide.
Alternative: make micro bell by ch 4, sl st into first ch to form a loop and work (sc, hdc, 2 dc, hdc, sc) into loop then close.
Tiny leaf (optional)
- Ch 6; row: sc in 2nd ch, hdc, dc, hdc, sc across to make 5-st leaf; fasten and leave tail for sewing.
Band
- For a refined look use a 2-chain micro band: ch a length matching circumference minus a small overlap (for a size 7, if your stitch gauge is 10 sc = 1 in, you might do ch 22 and join). Or make a round of 1.5 mm thread: ch 23, join; sl st around to make a thin cord band. Alternatively create a flexible ring by braiding three short crochet cords and sewing ends together.
Assembly
- Arrange 5–7 tiny bells along a short chain (ch 6–8 spacing): attach bells with tiny stitches to a short connecting chain that will be sewn to the band top. Add tiny leaves between bells for realism. Sew the chain of bells to the top center of the band so the spray curves along the finger.
- Secure all tails and hide knots under the band interior.
Variations & tips
- Make one bell for an ultra-minimalist look, or cluster three for a bouquet.
- Add a tiny seed bead inside each bell for a subtle shimmer.
Care
- Because the motifs are small and delicate, hand wash and lay flat to dry. Store flat so bells keep shape.
Final finishing & tips across all floral rings
Securing appliqués
- Always stitch through several layers of flower base and through band fabric. For extra strength, stitch a small circle of felt behind the flower on the inside of the band before sewing — this distributes stress and hides knots.
Stitch tightness
- For rings use a slightly tighter tension than for garments so the band holds shape. If you find rings too tight, use a slightly larger hook or a more open stitch on the band.
Making adjustable bands
- For adjustable fit, make band with a short chain extension and a small button sewn to opposite side so wearer can select snugness. Another option is to weave a thin elastic thread inside the band interior as you work the last round — tie ends securely and bury knot inside.
Stacking & sets
- Floral rings are great stacked — make sets of micro rose, daisy, and sunflower so they complement each other paired on adjacent fingers.
Gifting & presentation
- Present rings on a small ring card or in a tiny padded box. Include care instructions: gentle hand wash in cool water, reshape, lay flat to dry.
Care summary
- Most cotton/thread rings: hand wash with mild detergent, rinse, reshape while damp, dry flat. Avoid tumble drying and long soaking to preserve colorfastness and shape. Store in a small box or ring tray to avoid crushing delicate petals.
Conclusion
These five floral ring patterns — Sunflower, Peony, Puffy Daisy, Micro Rose, and Lily of the Valley — cover a range of styles from bold and textured to tiny and refined. Each design is deliberately compact so it uses only small amounts of yarn or thread, making them ideal for stash-busting, last-minute handmade gifts, or adding a floral accent to your everyday jewelry. Use the resizing notes and band math to match any finger, and experiment with color, beads, and stacked combinations to build a signature set. If you’d like, I can expand any one of these into a printable, size-graded PDF with exact stitch counts for multiple ring sizes and a one-page materials list — tell me which design you want next and I’ll prepare it.